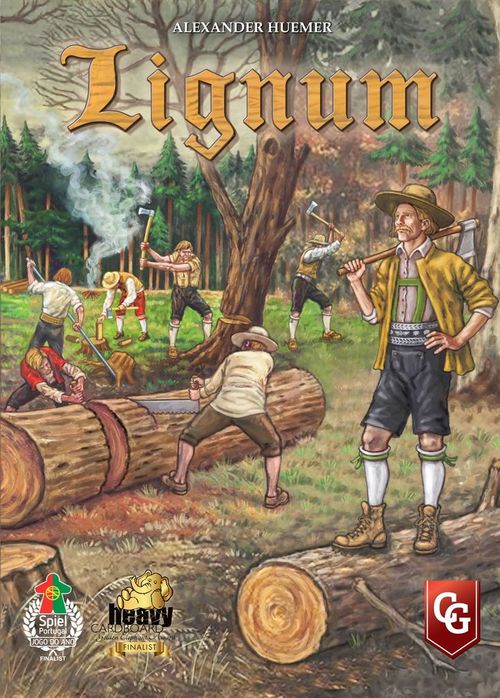
Lignum (Second Edition)
Lignum (Second Edition) Rulebook
Table of Contents
Table of Contents
Components
The Board
- a) Phase track
- b) Turn order track
- c) Forest edge
- d) Locations on the main trail
- e) Yearly event schedule
- f) Porter location
- g) Logging areas
- h) Market
- i) Work planning area
- j) Forage location
- k) Winter card (year 1)
- l) Work planning location
- m) Lumberjack location
- n) Contract location
- o) Sawyer location
- p) Winter card (year 2)
- q) Hut construction reminder
4 Player Boards (Sawmills)
- a) Forage storage
- b) Apprentice's house
- c) Hut area
- d) Food storage
- e) River
- f) Equipment and craft goods storage
- g) Price reminder
- h) Firewood storage (for heating)
- i) Sawing area
- j) Selling area
- k) Drying racks
Other Components
- 4 turn-order markers
- 2 beige octagonal phase/season markers
- 4 loan cards
- 19 resource cards
- 8 winter cards
- 10 work planning cards
- 19 contract cards
- 4 woodpile tiles (in player colors: red, orange, white, and blue)
- 77 equipment tokens, including 18 craft-goods tokens:
- 10 carts
- 2 "X" markers
- 8 "5X" markers
- 18 saws
- 12 rafts
- 6 sleighs
- 2 food
- 1 $1 coin
- 4 boards
- 4 shingles
- 4 stakes
- 4 bundles of reeds
- 2 jokers
- 24 logging-area tokens (6 tokens numbered 1-6 in each of 4 colors)
- 80 coins (totaling $275: 10x $10, 20x $5, 25x $2, 25x $1)
- 24 work-planning tokens (6 tokens per color — two sets numbered 1-3 — in each of 4 colors)
- 16 lumberjack figures (brown)
- 10 porter figures (green)
The rules are written for 4 players. Changes for playing with 2 or 3 players are described in a separate section.
Setup
-
Each player chooses a color and takes:
- 1 player board (sawmill)
- 1 apprentice (placed in the apprentice's house)
- 1 woodpile tile
- 6 work-planning tokens
- 6 logging-area tokens (numbered 1-6 on the back)
- 1 master figure
- $5
-
Place the game board in the center of the table. Place 1 octagonal marker on space 1 of the phase track (the logging phase) at the top of the board, and the second marker on the 1st green space (spring of the first year) on the right side of the board. Place the various game components (food, sawn and unsawn logs, tokens) in a general supply within reach of all players.
-
Sort the equipment tokens by type (food, saws, rafts, sleighs, carts, and coins) and place them face up next to the board. Shuffle the 18 craft-goods tokens and form a face-down stack. Place this stack near the other tokens. Sort the various cards by type. Shuffle each deck separately and place them face down next to the board. Exception: the loan card deck is formed from cards lying with side 4/7 face up.
-
Split and shuffle the winter cards into year-one and year-two decks. Draw 1 card from each deck. Slide the cards under the board in their corresponding spots so that only half of each card is visible. The visible information refers to the winter of year one and year two, respectively.
-
Shuffle the 19 contract cards and place the deck under the contract space on the board. Reveal and lay out n contract cards next to it (where n = number of players). Shuffle the 10 work-planning cards. Reveal n+2 cards from the deck (where n = number of players). Return the unused cards to the box (10 - n).
-
Place 3 birch-log discs on any 4 logging areas. Place 2 birch-log discs on each of the remaining 2 logging areas. Then, each player places 1 logging-area token (the number on the back doesn't matter at this point) on a logging area that has 3 birch-log discs. This way, every player is guaranteed to get 3 logs in the first round.
The player who was most recently in a forest places their turn-order marker on space 1 of the turn order track. Then, going clockwise from that player, the remaining players take spaces 2, 3, and 4 on the track with their markers. Finally, players place their master figures at location 0 on the main trail.
How to Play
Play in each season proceeds the same way (except winter):
- Fill the trail locations.
- Mark trees for logging.
- Reveal food stockpiles (starting from round 2).
- Choose a logging area (starting from round 2).
- Travel the trail.
- Play the wood-work phases (see the "spring/summer/autumn" phase track).
- Determine the player turn order for the next round.
1. Fill the Trail Locations
The trail consists of 20 locations and ends at the forest edge (A-D).
Place worker figures and forage tokens on locations 4, 6, 10, and 16 as shown in the illustration.
Take 13 equipment tokens: 2 carts, 2 saws, 1 sleigh, 1 coin, 2 food, and 3 random craft-goods tokens (without looking at them). Place them face down, shuffle them, and randomly distribute 1 token to each of the 13 remaining locations on the main trail.
Restock the contract-card market.
2. Mark Trees for Logging
Not played in the first round (everything is already set up during setup)!
Starting from round 2 (summer of the first year):
Because of logging in previous rounds, there are fewer trees in the logging areas. At this point, resource cards are revealed and new trees and food stockpiles are added to the board. Draw and reveal 3 resource cards from the deck. Place the items shown on the cards in the corresponding logging areas.
Important: After this, additionally place 1 birch-log disc in any logging areas that have no trees.
3. Choose a Logging Area
Starting from round 2 (summer of the first year):
Players must choose one logging area for themselves. To do this, they use their logging-area tokens of their color (numbered 1-6 on the back).
Each player takes their logging-area tokens and, secretly from the other players, chooses one of them — the number on the token corresponds to the number of the logging area on the board. They place their chosen token face down (master side up) in front of themselves. When all players have made their choice, the tokens are revealed.
Now each player places their chosen token in the corresponding logging area. It's fine if several tokens end up in the same area.
Players who end up alone in a logging area may now take the entire food stockpile in that area and place it on the food storage of their sawmill.
Food stockpiles are always distributed evenly among the players (see illustration). Undistributed stockpiles remain in the logging area. If even distribution isn't possible, then any cubes that can't be evenly distributed remain in the logging area.
4. Travel the Trail
Important: You cannot move backward along the trail.
Here are the rules for movement:
- Once again: you cannot move your master figure backward.
- You must move (you cannot stay in place).
- Only 1 master figure may be at a location at a time. Exceptions: locations 4, 8, 10, 13, 16, and 19 are homes for up to 4 players each; location 6 is a home for up to 2 players.
- A player may only move to a location where they will perform an action.
While traveling the trail, you acquire the equipment and workers you need to carry out your subsequent work as efficiently as possible.
Each player moves their master figure in turn order (as shown on the turn order track), starting from location 0 and continuing along the trail. Each player may move to any location on the trail. This means players may skip locations.
Most acquisitions are free and can simply be taken from the board.
Porters (location 4), forage (location 6), and lumberjacks (location 10) must be paid for immediately (indicated by the coin icon next to the location).
- Location 4: hire porters for $1 each (unlimited number).
- Location 6: buy forage, 1 unit for $1 (1 unit per player).
- Location 10: hire lumberjacks for $1 each (the maximum number of lumberjacks you may hire is equal to the number of trees in your chosen logging area).
Sawyers (location 16) are a special case. Each player gets 1 sawyer for free each round (if they activate this location). When a player arrives here, they take their free sawyer from the "price 0" space. In addition, they may hire 1 sawyer from the "price 1" space, if one is available there. This costs $1, after which no other player has the chance to buy an additional sawyer for the rest of the current round.
At the market (location 19), players may buy saws or food, and also sell craft goods. They may buy and sell as many items as they wish.
- Buying:
- 1 saw = $1 (each sawmill may have a maximum of 4 saws).
- 1 food = $1.
- Selling:
- 2 matching craft-goods tokens = $2.
- 3 matching craft-goods tokens = $4.
- 4 matching craft-goods tokens = $6.
A joker may be used as any craft-goods token.
Contracts may be obtained at location 13. A player may buy one of the face-up cards for $1. They place the card next to their sawmill. Each player may take a maximum of 1 contract per round.
Work planning. At location 8 you may plan one of the available work-plan cards. To do this, you take 2 tokens with matching numbers (for example, two "2"s) and place one of them on a work-planning card of your choice. The player does not immediately get the result of the planned work — they are simply planning it for one of the upcoming seasons (1, 2, or 3 seasons ahead, as indicated by the number on the token). The player places the second token of the pair on the corresponding season on the board (area i).
Important:
- Each player may plan only 1 work per round.
- Several players may plan the same work.
- It is also allowed for one player to plan the same work 2 or 3 times over the course of the game.
- Work can only be carried out in the season for which it was planned. If a player wasn't prepared for it, they simply lose the planned work.
Not every work can be planned for winter! The seasons in which a given work can be carried out are shown in the lower-left corner of the card.
Note: Any placed token stays in place until the end of the game and cannot be removed. Since each player has 3 pairs of tokens, each of which can be used only once, every player can plan up to 3 works over the course of the game.
How much does planning cost?
The cost of planning depends on the number of tokens already placed on the card. Each token increases the cost by $1 (paid to the bank):
- If you choose a work that no one else has chosen yet, you do it for free.
- If you choose a work that 1 player has already chosen, you pay $1.
- 2 players — $2, 3 players — $3.
Where do you place what you acquire while traveling the trail?
Forage — on the sawmill's forage storage, in the space marked "3".
Food — on the sawmill's food storage.
Food tokens are exchanged for food cubes; cubes go to storage, tokens go to the general supply.
Craft-goods tokens are placed face down on the craft-goods storage. You may look at your own tokens at any time.
Coin tokens are exchanged for coins and go to the general supply, while the coins go to your money.
The rest of the equipment is placed on the sawmill's equipment storage. Remember, you may have a maximum of 4 saws; there is no limit on the other types of equipment.
Workers are placed on the sawmill in the apprentice's house.
End of the main trail:
The trail ends after location 20. The first player to reach the forest edge places their master figure on space "A", the second on space "B", and so on. Players wait until all players have arrived at the forest edge. Only then does the wood-work phase begin.
Important: The order in which players stand at the forest edge determines the turn order during the wood-work phase: A, B, C, and then D (this is very important if several players chose the same logging area).
Also, the reverse of this order determines the turn order for the next round: D, C, B, and then A.
5. Wood-Work Phase
The wood-work phase is the part of the round in which players (if they prepared) reap the rewards of their labor, earning money for it. Use the phase track in the upper-right corner of the board to play through these 7 sub-phases.
When a sub-phase is finished, the marker moves to the next one, and so on until all sub-phases have been played.
In each sub-phase, all players take their turn in the order in which their figures stand at the forest edge. This order only matters if several players chose the same logging area, or if someone has a "logging" work planned for this turn. In all other cases, the sub-phases can be played simultaneously.
Very important: You may use your apprentice for all types of work (logging, transport, and sawing). They are versatile, require no payment for their work, and may be used in place of one of the workers each round.
1. Logging
Lumberjacks cut trees in the logging areas and stack the resulting logs on the woodpile tile (not on the sawmill).
Starting with the first player (A), each player places their lumberjacks (which may include their apprentice) in the logging area where their logging-area token is located.
For each placed lumberjack, a player may take 1 log (birch, oak, or wenge) from the logging area and place it on their woodpile.
What if 2 or more player tokens are in the same logging area?
In this case, the order in which the figures stand at the forest edge (A-B-C-D) becomes important. The first player in line performs their logging first, following the rules above. The next player then has a choice:
- Log among the remaining trees under the normal rules, or
- pay $1 and move their marker to an empty logging area and log there under the normal rules.
Note: Any food remaining in the logging areas cannot be collected during this sub-phase. If a player has more lumberjacks than needed, they may simply not use them and return them to the sawmill. At the end of the round they are discarded to the general supply.
When all players have finished the logging sub-phase, the marker moves to the next sub-phase, which is again started by the player at space A at the forest edge.
2. Log Driving (River)
In this phase, players receive the logs that they floated downriver in the previous round and place them on the sawmill. You don't need a worker to receive wood after log driving.
Note: In the first round of the game (spring of year 1) this sub-phase is skipped.
When all players have finished the log-driving sub-phase, the marker moves to the next sub-phase, which is again started by the player at space A at the forest edge.
3. Transport
In this sub-phase you move logs from the woodpile to the sawmill.
There are 4 methods by which this can be done:
- using porter labor.
- using carts.
- using log driving (via the river).
- using a sleigh (winter only).
Players may combine different methods, if they have everything necessary for them (workers and equipment).
Important: After receiving logs, you must place them on the sawmill — there are 2 dedicated areas for this (you can distribute logs between them in any proportion):
- The sawing area (with a gray outline). These logs will stay here until sawn. Sawn wood can be used for heating in winter.
- The selling area (with a brown border). These logs may be sold in the current round in the corresponding sub-phase. They can also be sent to the drying racks to raise their value.
Note: Deciding where to place your logs is very important, since once placed, a log cannot be moved to the other area.
Either area can store an unlimited number of logs. Wenge logs (black) always go to the sawing area, since they cannot be used unsawn for either selling or fulfilling contracts.
Transport by porters
If a player chooses this method, they place their porters (and possibly their apprentice) on the woodpile tile. For each worker used, the player may move 1 log from the woodpile to the sawmill, placing it in one of the two areas.
Transport by cart
A player may use a cart to move 2 or 3 logs at once.
To do this, the player must place one porter (which may be their apprentice) on the woodpile, and must also have forage (for the oxen) and a "cart" equipment token available. The player moves the logs to the sawmill, after which the cart is also returned to the sawmill.
Forage may be used twice: after the first use (transporting 3 logs), the number of logs that can be transported drops from 3 to 2 (the token is stored on the sawmill in a different space), so on the next cart transport you can only move 2 logs. After that, the forage is considered fully used and is returned to the general supply.
Important: As long as a player has forage on the storage space marked "3", they cannot acquire new forage. If a player has forage on the space marked "2" and none on the space marked "3", they may acquire new forage and place it on the space marked "3". A storage space cannot hold "2" forage tokens. Also, players cannot buy 2 forage at once.
Any cart transport must be started using forage from the space marked "2".
Log driving
Log driving is the only delayed delivery method (delayed by 1 round). Log driving is advantageous because it only requires 1 worker to deliver several logs to the sawmill.
The player places one porter (which may be their apprentice) on the woodpile tile. For each raft they have and decide to use, they may float 1 log downriver. The player then moves the logs from the woodpile to the river on their player board. All used raft tokens are returned to the general supply. These logs are unavailable until the corresponding sub-phase of the next round.
Note: Transport by log driving means you won't be able to sell those logs this same round — you'll need to wait until the next round. In addition, log driving doesn't work in winter (the river freezes). So logs sent downriver in the autumn of year 1 will reach you by the spring of year 2. And if you decide to use log driving in the autumn of year 2, those logs will never reach you at all. Players may sell logs of one type from the river during the "final sale" at the end of the game.
Transport by sleigh (winter only)
This method is only available in winter, and it is the only transport method available in winter (no carts, log driving, or porters).
Players may use a sleigh and their apprentice to move 2 logs from the woodpile to the sawmill.
The apprentice is placed on the woodpile tile. The sleigh token is considered used and returned to the general supply. Now 2 logs may be moved from the woodpile to the sawmill. The player may use food stockpiles to increase the number of logs transported: 1 additional log per 1 food, up to 3 logs total. The food used is returned to the general supply.
When all players have finished the transport sub-phase, the marker moves to the next sub-phase, which is again started by the player at space A at the forest edge.
4. Sawing
For each log (disc) to be sawn, a player needs 1 sawyer (or apprentice) and 1 "saw" equipment token. The worker is placed in the sawing area, and the saw token is returned to the general supply.
Each disc (log), when sawn, is exchanged for a certain number of blocks (sawn wood) of the same type (color), at the following rate:
- 1 wenge disc for 1 block of the same type.
- 1 oak disc for 3 blocks of the same type.
- 1 birch disc for 4 blocks of the same type.
Sawn wood has the following advantages:
- It can be used for heating in winter.
- It can be sold for a higher price.
- You can store twice as many blocks as discs in the drying racks, in order to receive the drying bonus.
Important: For each log you need 1 worker and 1 saw. The equipment token is then returned to the general supply. The resulting blocks must be placed immediately in one of two areas:
- Firewood storage, used for heating in winter.
- The selling area. From there, blocks can be sold or sent to drying to increase their value.
Note: Once you have placed the resulting blocks, they can no longer be moved.
When all players have finished the sawing sub-phase, the marker moves to the next sub-phase, which is again started by the player at space A at the forest edge.
5. Contracts
To complete a contract, you must place the required discs and blocks on the contract card. Different contracts require different combinations of wood types, kinds, and drying level. You don't have to complete a contract all at once — you may accumulate the requirements on the card round by round. Once you've placed a disc or block on the card, it can no longer be taken back or sold.
Important: You don't get paid for completed contracts until the end of the game. If you fail to complete a contract by the end of the game, you don't get paid for it and cannot sell what's on the card.
Note: Winter! During the winter round of year one, you cannot place any discs or blocks on contract cards. But in the winter of year two, you may do this after the sawing sub-phase (see the sub-phase track on the board).
When all players have finished the contracts sub-phase, the marker moves to the next sub-phase, which is again started by the player at space A at the forest edge.
6. Selling
In this sub-phase, players may sell all or part of what they have in their selling area and drying racks (only from these areas). Sold items return to the general supply, and the player receives money according to the price list shown on their player board:
- 1 wenge log — cannot be sold.
- 1 sawn wenge block — $5.
- 1 oak log — $4.
- 1 sawn oak block — $2.
- 1 birch log — $3.
- 1 sawn birch block — $1.
Players may receive a drying bonus added to the sale price. The bonus amount is shown at the top and bottom of each drying rack.
Very important: any discs and blocks on the last (third) drying rack must be sold.
When all players have finished the selling sub-phase, the marker moves to the next sub-phase, which is again started by the player at space A at the forest edge.
7. Drying
Drying increases the value of wood. Discs and blocks not sold in the current round may be moved one space to the right, into the neighboring drying rack (from the selling area into drying rack 1, and so on).
You must follow these rules:
- The selling area may hold any number of discs and blocks.
- Each drying rack may hold either 1 disc, or 2 blocks in any combination of wood types.
When all players finish the drying sub-phase, the wood-work phase ends.
6. Determine Turn Order
To determine the turn order for the next round, use the reverse of the order in which players are positioned at the forest edge: the last player becomes first, the second-to-last becomes second, and so on. After this, all master figures are returned to location 0 on the trail.
End of Round
Before the Next Round
Before the start of the next round:
- Place all workers (lumberjacks, sawyers, and porters) back at their spaces on the trail.
- All players take their apprentice back to the sawmill; logging-area tokens are also returned to the sawmill.
- Place all remaining ordinary equipment tokens on the trail back into the general supply. Players keep their unused tokens on their player boards and may use them in later rounds. Craft-goods tokens remaining on the trail are removed from the game.
- Move the phase marker to the first space of the phase track, and the season marker to the next season.
- The new round begins by filling the trail locations: gather the 13 equipment tokens together again, as during setup, shuffle them face down, and lay them out face up on the trail.
Special Action: Hut Construction
A player who has accumulated 3 different craft-goods tokens (stake, board, and shingle) may immediately build a hut at any point during their turn. A bundle of reeds cannot be used for this — it can only be sold at the market.
A "joker" token may be used as any craft-goods token, at the player's choice.
Important: When building a hut, the player flips the craft-goods tokens to their hut side face up. They may then distribute these tokens within their hut area (they may place all 3 tokens in one space, or distribute them however they like). Once a player has placed the tokens, they can no longer be moved.
The hut area shows various bonuses that a player may use at any point during their turn, by removing the corresponding token from the hut area and out of the game.
Bonuses:
-
Drying For each token discarded from this space, you may move 1 disc or block one space to the right into the neighboring drying rack, ignoring the limits on the number of discs and blocks per rack. You may advance several racks at once, or move several discs or blocks to the right, by paying with tokens from this space. You may use this bonus at any point during your turn, whether while traveling the trail or during the wood-work phase.
-
Food For each token discarded from this space, you may take the entire food stockpile from any one unoccupied logging area. You may use this bonus at any point during your turn, whether while traveling the trail or during the wood-work phase.
-
Worker Placement Each token from this space counts as an additional apprentice, which may be used as any type of worker in the game. Replace the used token with a lumberjack, porter, or sawyer. Of course, you still need the appropriate additional equipment to perform the corresponding work. Using this space's bonus, you may also perform various work during winter (logging, sleigh transport, sawing). You may use this bonus at any point when you need a worker during the wood-work phase.
Winter
After autumn comes winter. Winter is a special round (with its own dedicated sub-phase track), before which master figures are not returned to location "0".
Two winter cards show what supplies players must have ready for the first and second winters.
The phase marker is placed on the "winter" space. Then 6 winter sub-phases are played. In each sub-phase, players take their turn in the order in which they arrived at the forest edge the previous autumn (A-B-C-D).
Note: In winter you do not travel the trail, so try to prepare and stockpile the necessary food and firewood in advance. You can use sawn oak and wenge for heating, but since they are more valuable than birch blocks, this isn't very economical.
Bonus: Any player may take 1 log (disc) of their choice from the general supply and place it on their woodpile tile.
Note: Since players cannot acquire workers in winter, they may only use their apprentices (or workers from their hut). Since you only have 1 apprentice, you'll need to choose what to have them do: logging, transport, or sawing.
1. Logging
A player may place their worker on the woodpile and take 2 birch logs (only birch logs are available for logging in winter) from the general supply and place them on the woodpile. For each additional worker used from the hut, the player may get 1 more birch log.
2. Transport (sleigh)
The player places their worker on the woodpile tile and may use sleigh transport to move 2 logs from the woodpile to the sawmill. The player may spend up to 3 food to transport 1 additional log per food spent. The food is returned to the general supply.
3. Sawing
Sawing may be used to saw 1 log, in order to use the result for heating or selling. This requires an apprentice and a saw. Instead of the apprentice, you may use a worker from the hut. For 2 sawing actions, you naturally need 2 saws and 2 workers.
4. Contracts
During the winter round of year one, you cannot place discs and blocks on contract cards. In the second winter, you may do this after the sawing sub-phase.
5. Feeding
All players must now return a certain amount of food to the general supply (as indicated on the current year's winter card). If a player doesn't have enough food, they must pay $3 for each missing food. If the player doesn't have enough money, they must take a loan card (or 2). If that's still not enough, the player must sell discs and blocks from the sawmill (even from the sawing area and firewood storage) to cover the missing amount, at the regular sale price — the player may even build up a small reserve of money for the next round from such a "sale," if they wish.
Note: Any surplus food is not carried over to the next round. This food is returned from storage to the general supply.
6. Heating
All players must return a certain amount of blocks to the general supply (as indicated on the winter card). If a player doesn't have enough blocks for heating, they must pay $3 for each missing block. If the player doesn't have enough money, they must take a loan card (or 2). If that's still not enough, the player must sell discs and blocks from the sawmill (even from the sawing area) to cover the missing amount, at the regular sale price — the player may even build up a small reserve of money for the next round from such a "sale," if they wish.
Note: Any surplus blocks in firewood storage may be kept and used in the following winter.
When the first winter ends, spring of the second year begins. The second winter card is used for the second year. Begin with round setup (p. 13).
End of Game and Final Sale
After the second winter ends, the final sale takes place:
- Players sell all wood from the selling area and the 3 drying racks.
- In addition, they may sell all logs of one type from the river. If there are several types of logs there, players choose for themselves which type to sell.
- Unsawn wenge logs, and any wood that is not in the drying racks or selling area (river, woodpile, firewood storage, etc.), cannot be sold.
- At this point, players receive money for completed contracts.
Loan Cards
Now all loans must be repaid.
Loan cards work like credit: at any point during their turn, a player may take a loan card and receive $4 from the bank. You place the loan card next to your player board, and it stays there until the end of the game.
To repay a loan card, you must pay $7.
If you want to take a second loan card, you flip your existing loan card and take another $4 from the bank. In this case, at the end of the game you will have to repay $16 to the bank.
A player may have a maximum of 2 loan cards.
Winner
The player with the most coins is declared the winner.
Changes for 3 Players
Each round, the trail is stocked with:
- 8 porters (location 4)
- 2 forage (location 6)
- 12 lumberjacks (location 10)
- 3+1 sawyers (location 16)
- 3 at "price 0"
- 1 at "price 1"
Setup for the first round:
- Place 2 birch logs on any 3 logging areas.
- Place 3 birch logs + 1 logging-area token on each of the remaining logging areas.
Important: When playing with 2 players, players draw only 2 resource cards at the "mark trees for logging" step.
Changes for 2 Players
Each round, the trail is stocked with:
- 6 porters (location 4)
- 1 forage (location 6)
- 8 lumberjacks (location 10)
- 2+1 sawyers (location 16)
- 2 at "price 0"
- 1 at "price 1"
- 13 equipment tokens
Preparing and placing the 13 equipment tokens:
Take: 3x craft-goods tokens (without revealing them!), 2x food, 1x $1, 1x saw, 1x cart, 2x raft, 1x sleigh, 2x "X" tokens. Shuffle them face down. Randomly place the tokens in the empty locations on the trail. Locations with an "X" token cannot be used this round.
Setup for the first round:
- Place 2 birch logs on any 4 logging areas.
- Place 3 birch logs + 1 logging-area token on each of the remaining logging areas.
Important: When playing with 2 players, players draw only 1 resource card at the "mark trees for logging" step.
Work Planning Cards
TRADE — Players may sell any number of rafts, sleighs, and carts at the market for $2 per token. Sold tokens go to the general supply.
SAWING — Players may saw 2 logs at a time, using only 1 worker and 1 saw for this. If a player has the necessary number of workers and saws, they may saw 4, 6, or 8 logs from their sawing area.
HEATING SUPPLY — A birch log is exchanged for 6 sawn birch blocks when sawn. If a player has the necessary number of workers, saws, and birch logs in the sawing area, they may saw additional such logs into 6 blocks each as well.
DRYING — The player may place twice the maximum number of discs or blocks in a drying rack during the round in which the work is planned, and of course dry these discs and blocks despite the normal limit. The player may place either 2 discs or 4 blocks in the first drying rack.
LOG DRIVING — During the transport sub-phase of the round in which the work is planned, the player may place up to 3 logs in the river area of their player board. The player needs neither a worker nor a raft token for this. The player may also perform normal log driving alongside this action, if they have everything necessary for it.
CUTTING — During the logging sub-phase, the player may hire up to 2 more lumberjacks than there are logs in their logging area. The player may also move up to 2 of their lumberjacks (or 1 lumberjack and 1 apprentice) to another logging area to take logs from there as well. It is possible to "steal" a log that another player was aiming for. The player who had logs "stolen" from them may choose to: finish their turn with the remaining logs, or pay $1 and move to another, unoccupied logging area. At the new location, they may only take logs, not food.
CRAFTWORK — The player may sell their craft-goods tokens for more:
- 2 matching tokens — $5.
- 3 matching tokens — $8.
- 4 matching tokens — $11.
FOOD SUPPLY — If a player performs log driving during the round in which the work is planned, they immediately receive 2 food from the general supply for each log they send downriver during log driving.
HUT CONSTRUCTION — If a player has 2 of the craft-goods tokens required for hut construction during the round in which the work is planned, they may immediately flip them to their hut side and place them in their hut area.
OVERTIME — When the round with the planned work arrives, the player immediately receives 1 wenge log (black disc) from the general supply and places it on their personal woodpile.
Tactical Variant
In this variant, each player takes only 1 logging-area token of their color (the number on the back doesn't matter). The remaining logging-area tokens are removed from the game.
Before the start of the current round, resource cards for the next round are revealed:
- 4 players — 3 cards
- 3 players — 2 cards
- 2 players — 1 card
Now players know which logging areas will have new trees and food available. That is, it becomes roughly clear what the stockpiles in the logging areas will be next round.
In this variant, the choice of logging area for the next round depends on the players' positions at the forest edge.
Until the master figures reach the forest edge, the reverse of the turn-order track is used. The last player on the track chooses their logging area first, then the second-to-last player chooses, and so on. In subsequent rounds, the player who first reached the forest edge chooses first.
Players must always choose a logging area not occupied by other players. In this variant, 2 or more players can never be in the same logging area.
FAQ
-
What if the supply of food or wood runs out?
Discs, blocks, and food cubes are unlimited. You may substitute anything missing with a substitute of your choice.
-
When planning an action on a card, must we pay a coin for each token, or for each player represented on that card?
$1 for each token. Even if it's your own.
-
When playing with two players, it may happen that wenge never appears in the logging areas. How do you complete contracts in that case?
Yes, that can happen. But since players receive a bonus at the start of winter, they may choose a wenge log as that bonus. And if the "Overtime" work-planning card is in the game, you can get an additional wenge log using it.
-
If you don't have enough food to feed yourself or firewood to heat with, you must take a loan, and if that's still not enough, sell wood from your board. Can you sell wood for this without taking a loan first?
No. You must always take loan cards first. Only after that can you sell wood from your board. Note that you may sell for more than is required to cover the penalty, to build up a small reserve for the next round (this is especially important before the first winter). If you have already taken a second loan card before winter begins, you may go straight to selling wood to pay the penalty, since you cannot have more than 2 loan cards in the game.
Final Tips
- In your first game, we recommend playing through the sub-phases of the wood-work phase separately from one another. This will help you learn the game's features more quickly and avoid accidental mistakes. Once you feel you've gotten the hang of it, you can play the corresponding sub-phases simultaneously.
- In your first 4-player game, we recommend using the simpler winter requirements (winter cards).