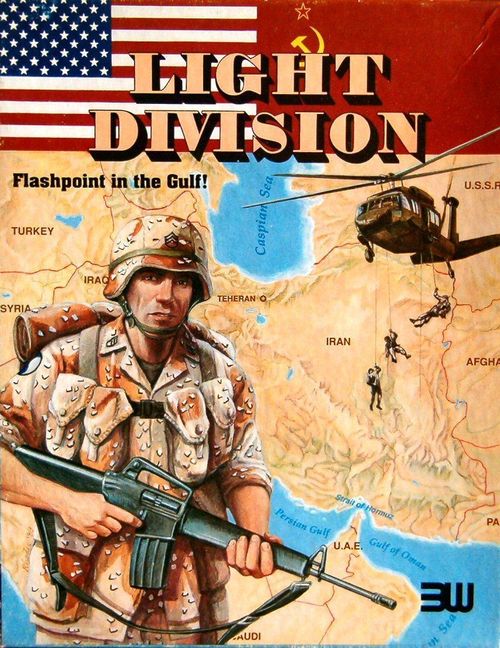
Light Division
Light Division Rulebook
Table of Contents
Table of Contents
- 1.0 Introduction
- 2.0 Game Contents
- 3.0 Game Sequence
- 4.0 Basic Game Concepts
- 5.0 Action Cycle
- 6.0 Operational Actions
- 7.0 Movement
- 8.0 Combat
- 9.0 Fortification
- 10.0 Fatigue
- 11.0 Air Operations
- 12.0 Special Units
- 13.0 Victory Point Hexes
- 14.0 Supply
- 15.0 Reinforcements
- 16.0 Turn 1: Special Rules
- 17.0 Optional Rules
- 18.0 Scenarios
- Charts, Tables, Areas and Records (Index)
- Designer's Notes
- Tactical Hints
1.0 Introduction
The three core tasks ordered for CINCCENT are:
- Ensure the safety of international navigation in the Strait of Hormuz and the Persian Gulf.
- Establish a US base in southern Iran and defeat the Iranian military forces in that area.
- Destroy the Silkworm missile launch sites and other nearby Iranian military targets.
The game officially begins here.
2.0 Game Contents
2.1 Components
Each Light Division set contains: one map; four counter sheets (each containing 100 counters of 12.5 mm); one rulebook / scenario handbook; two reference charts; one ten-sided die; and one box.
2.2 Game Counters
Game counters (算子) represent the military forces of the various nations. The following counter types are used in the game:
Ground Units (GROUND UNITS)
- Infantry (步兵): printed 8-2-0
- Mechanized Infantry: printed 10-4-0
- Coast Defense: printed 2-0-0
- Militia: printed 1-0-0
- Parachute Infantry: printed 8-2-0
- Marine Infantry: printed 8-1-0
- Tank: printed 1-1-0
- Ranger: printed 3-0-0
- Reconnaissance: printed 4-2-0
- Artillery: printed 3-0-0
- Self-Propelled Artillery: printed 3-0-0
- Parachute Artillery: printed 3-0-0
- Rocket Artillery: printed 1-0-0
- Headquarters: printed 1-0-0
Helicopter Units
- Helicopter (直升机单位): printed 4-2-0
Air Units
- Air (空中单位): printed 0-0
Naval Units
- Naval (海军单位): printed 0-0
Sample counter layouts (as labelled on the printed rulebook page) are:
- Tactical side (正面, 战术面) and fatigue side (反面, 疲劳面) of a US motorized unit, labelled: unit identification (单位标识), size (规模), higher formation (上级单位), type (类型), combat value (战斗值), anti-tank value (反坦克值), movement (移动力; "non-motorized" 非摩托化 or fatigue 疲劳).
- US Airborne Infantry Battalion, labelled with size, range (射程, counted in hexes), type, support value (支援值), anti-tank value and movement.
- Soviet Self-Propelled Artillery Battalion, labelled with size, range (counted in hexes), type, combat value, anti-tank value and movement.
- US Headquarters Company, labelled with unit identification, size, higher formation, type, combat value, support value, anti-tank value and movement.
- US Helicopter Battalion, labelled with aircraft type (飞机类型), unit identification, support value and air superiority value (空中优势值).
- Iranian Air Unit, labelled with unit identification, combat value and support value.
- US Heavy Naval Unit, labelled with unit identification, size, higher formation, type, combat value (variable, 变量, for one counter), anti-tank value and movement.
The size symbols used for military units are:
- Ⅰ – Company (连)
- Ⅱ – Battalion (营)
- Ⅲ – Regiment (团)
2.3 Abbreviations
Abbreviations used on the counters and in the rules are:
- A: Iranian A Division or US A Company
- AYGH: Ayatollah's Guard (阿亚图拉卫队)
- B: Iranian B Division or US B Company
- C: Central Command (中央司令部) or Iranian C Division or US C Company
- CRT: Combat Results Table
- F: Fleet (French naval air force, 法国海军航空中队)
- HHC: Headquarters and Headquarters Company
- HQ: Headquarters
- MEU: Marine Expeditionary Unit
- MEF: Middle East Force
- RCR: Royal Canadian Regiment (加拿大皇家团)
- RVGD: Revolutionary Guard (革命卫队)
- RVKI: Soviet Army special forces unit (雷多维基, name as printed)
- S: Special Reinforcement (特殊增援)
- SHAR: Sea Harrier (海鹞)
- SUP: Super Étendard (超级军旗)
- USAF: US Air Force
- USMC: US Marine Corps
- USN: US Navy
- VP: Victory Point
- VYSTNKI: Soviet Army assault unit (维索特尼基, name as printed)
- ZOC: Zone of Control
- 1CP: 1st Parachute Hunter Battalion, French Army (法国陆军第1伞降猎兵团)
- 1LAV: 1st Light Armored Vehicle Battalion, US Marine Corps (美国海军陆战队第1轻型装甲车营)
- 1M: 1st Marine Division
- 1TK: 1st Tank Battalion, US Marine Corps (美国海军陆战队第1坦克营)
2.4 Dice
The game uses one ten-sided die. Unlike in other games, a result of "0" is read as "0", not "10".
3.0 Game Sequence
Each turn is executed in the following strict order:
A. Special Forces Phase (optional; see 17.1). Both players roll and consult the Special Forces Action Table.
B. Reinforcement Phase (not in Turns 1 and 5).
- US Fixed Reinforcement Step: any US fixed reinforcements are placed in the "US Sea Lift box" (see 15.2).
- Variable Reinforcement Step: both players roll and consult the Variable Reinforcement Table (see 15.3).
C. Random Events Phase (not in Turn 1). The US player rolls, and both players consult the Random Events Table (see 17.2).
D. Initial Deployment Phase (not in Turn 1).
- Land Step: the Iranian player deploys land units on the map (see 15.4).
- Airlift Step: both players deploy airlift units (see 15.5).
- Sealift Step: the US player deploys sealift units (see 15.7).
E. Air Action Phase.
- Mission Step: both players assign missions to their air units (see 11.2).
- Air Superiority Step: air units assigned to air superiority missions of opposing sides fight (see 11.3).
- Ground Support Step: the winner of the air superiority combat may attack enemy air units in the "Ground Support Mission" box (see 11.3).
F. Supply Phase (not in Turns 1 and 2). Both players determine the supply status of their units (see 14.1).
G. First Action Cycle. Roll to determine the first player: an even result (including 0) makes the US player first; an odd result makes the Iranian/Soviet player first. (Note: in the first action cycle of Turn 1, the US player is always first.) The first player rolls to determine how many Operational Actions he may execute, then executes them as he chooses. The opponent then rolls to determine his number of Operational Actions and executes them likewise. Cycles alternate in this way until the end condition is met (see 5.2). If a player chooses "Pass", his actions in this cycle end immediately.
H. First Recovery Phase. Both players flip fatigued ground and naval units to their tactical side. In addition, every helicopter unit must return to the hex occupied by its higher (parent) headquarters (see 10.3).
I. Second Deployment Phase (not in Turn 1). The same as the Initial Deployment Phase (step D).
J. Second Action Cycle. The same as the First Action Cycle (step G).
K. Second Recovery Phase. The same as the First Recovery Phase (step H).
L. Control Phase. The US player determines whether he has gained control of any Victory Point hex (see 13.1).
M. End Phase. Both players remove air units from the "Air Action Area". Air units on their fatigue side are flipped to their tactical side. Finally, the turn marker is advanced one space on the Turn Record Track.
4.0 Basic Game Concepts
One player plays the United States; the other plays Iran or the Soviet Union. The rules generally use the term "Iran", although in some scenarios this actually represents the Soviet Union.
4.1 Military Units
Military units are divided into four categories: ground, air, naval and helicopter (see 2.2). Units are distinguished by nationality, type and size (company, battalion or regiment). Every unit has two sides: the tactical side (正面) and the fatigue side (反面).
Ground units are further distinguished by movement type:
- Non-motorized units: the movement value has no parentheses.
- Motorized units: the movement value is shown in parentheses. (On the fatigue side, however, all units' movement values have no parentheses and are fixed at 0.)
4.2 Unit Identification
Ground and helicopter units carry a "higher formation" (上级, 隶属) designation, which normally shows the division to which the unit belongs. For example, a unit whose higher formation is "82" belongs to the 82nd Airborne Division; a unit whose higher formation is "29" belongs to the 29th Infantry Division.
All units also have their own identification, normally listed in the order regiment/battalion. For example, "1/325" reads "1st Battalion, 325th Regiment". A company-sized unit's identification may be preceded by a letter (for example, "A-1/75" reads "A Company, 1st Battalion, 75th Regiment"). Naval and air units also carry their own identification, normally representing a hull number or squadron number.
4.3 Game Turn
Each game turn represents one day of real time.
4.4 Map
The map depicts southern Iran at a scale of 1:100,000. The distance between opposite sides of each hex is approximately 1 mile (1.6 km).
4.41 Main Terrain
There are seven main terrain types, listed here from highest priority to lowest:
- Marsh (沼泽)
- City (城市)
- Peak (山峰)
- Mountain (山地)
- Rough (崎岖地)
- Broken (破碎地)
- Clear (开阔地)
Each hex belongs to only one main terrain type. If two or more main terrain types appear in the same hex, the hex is treated as the highest-priority type. Example: if City, Rough and Broken terrain all appear in one hex, that hex is treated as City terrain only.
4.42 Secondary Terrain
Secondary terrain features within a hex, or along a hex side (such as roads, rivers and villages), do not change the main terrain type of that hex.
4.5 Zone of Control (ZOC)
All units except helicopters, air units and naval units generate a Zone of Control (ZOC). A ZOC consists of the six hexes surrounding the unit. (The printed rulebook shows a diagram of a unit's ZOC, with the six adjacent hexes marked.)
5.0 Action Cycle
Each turn includes one First Action Cycle and one Second Action Cycle.
5.1 Cycle Procedure
The action cycle is executed as follows:
- Either player rolls the die. If the result is even (including 0), the US player is the first player in this cycle; if odd, the Iranian player is the first player. (Exception: in the first action cycle of Turn 1, the US player is automatically the first player.)
- The first player rolls the die; the result is the number of Operational Actions he may execute. He places his action marker on the Operations Track (作战轨道) on the space with that number. If he rolls 0, follow 5.3, 5.4 or 5.5 as applicable, then skip step 3 and go directly to step 4.
- The first player executes Operational Actions. For each action executed, the action marker on the Operations Track is moved one space toward 0 (that is, the remaining number of actions is reduced by 1). If the first player declares "Pass" (see 6.7), or the action marker on the track reaches 0, he must stop executing actions.
- The second player rolls the die; the result is the number of Operational Actions he may execute. He places his action marker on the Operations Track on the space with that number. If he rolls 0, follow 5.3, 5.4 or 5.5 as applicable, then skip step 5 and go directly to step 6.
- The second player executes Operational Actions. For each action executed, the action marker is moved one space toward 0. If the second player declares "Pass" (see 6.7), or the action marker reaches 0, he must stop executing actions.
- If neither player has passed, return to step 2 (not step 1; the first player keeps first-player status for the rest of this cycle) and repeat the above procedure. If the first player has passed, return to step 4 and repeat the procedure (for the rest of this cycle, skip steps 2 and 3). If the second player has passed, return to step 2 and repeat the procedure (for the rest of this cycle, skip steps 4 and 5).
There is no limit on the number of times an action cycle may be repeated; action cycles may be repeated as needed.
Note: unless a player explicitly passes, he must execute all of the Operational Actions he rolled. He may not leave unused actions on the Operations Track. Note also that in the two action cycles of Turn 1, Iranian/Soviet die rolls are subject to unfavourable modifiers (see 16.1).
5.2 End of the Action Cycle
When one player has passed, if the other player also chooses to pass, the action cycle ends immediately.
5.3 US "0" Die Rolls
If any US Operational Action roll results in 0, the US player may not execute that Operational Action. (Exception: if the US player rolls 0 on the first Operational Action roll of the game, he must reroll until a non-zero result is obtained.) In addition, he must immediately choose one ground, ground-support air or naval unit on its tactical side and flip it to its fatigue side.
After obtaining a 0 Operational Action result, the US player immediately rerolls:
- If the reroll is 0 again, he must immediately flip all of his ground, air and naval units on their tactical sides to their fatigue sides. This means that for the rest of the action cycle, the US player may not execute any further Operational Actions (except for Parachute Drop and Amphibious Assault, see 15.0).
- If the reroll is greater than 0, the US player is not subject to any further penalty. However, he still may not execute Operational Actions at this time. His opponent (assuming the opponent has not announced a pass) then rolls to execute Operational Actions.
5.4 Iranian "0" Die Rolls
If any Iranian Operational Action roll results in 0, the Iranian player must immediately flip all of his Coast Defense and Militia battalions on their tactical sides to their fatigue sides. If all of these units are already fatigued, the Iranian player must choose one ground or ground-support air unit on its tactical side and flip it to its fatigue side. This result is triggered only when the original (unmodified) roll is 0. A roll reduced to 0 by the "Iranian Turn 1 modifier" (see 16.1) does not trigger this effect.
After obtaining a 0 Operational Action result, the Iranian player immediately rerolls:
- If the second roll is 0 or 1, he must immediately flip all of his ground and air units on their tactical sides to their fatigue sides. This means that for the rest of the action cycle, the Iranian player may not execute any further Operational Actions.
- If the second roll is greater than 1, the Iranian player is not subject to any further penalty. However, he still may not execute Operational Actions at this time. The US player (assuming he has not announced a pass) then rolls to execute Operational Actions.
5.5 Soviet "0" Die Rolls
If any Soviet Operational Action roll results in 0, the Soviet player must immediately choose one ground or ground-support air unit on its tactical side and flip it to its fatigue side. This result is triggered only when the original (unmodified) roll is 0. A roll reduced to 0 by the "Soviet Turn 1 modifier" (see 16.1) does not trigger this effect.
After obtaining a 0 Operational Action result, the Soviet player immediately rerolls:
- If the reroll is 0 again, he must immediately flip all of his ground and air units on their tactical sides to their fatigue sides. This means that for the rest of the action cycle, the Soviet player may not execute any further Operational Actions.
- If the reroll is greater than 0, the Soviet player is not subject to any further penalty. However, he still may not execute Operational Actions at this time. The US player (assuming he has not announced a pass) then rolls to execute Operational Actions.
6.0 Operational Actions
Operational Actions are of the following eight types:
- Unit Activation
- Task Force Activation
- Helicopter Activation
- Airmobile Movement (US only)
- Fire Support
- Parachute Drop (US only)
- Amphibious Assault (US only)
- Pass
To execute an Operational Action, a player declares the type of action he wishes to execute and selects units that qualify for it. After each declared action, the action marker is moved back one space on the Operations Track. When the marker reaches the "0" space, the player may no longer declare new actions (but may complete an action already in progress).
6.1 Unit Activation
"Unit Activation" is an Operational Action that allows a single ground unit to move and fight. That unit is called the "activated unit".
6.11 When a player declares a Unit Activation action, he must select one friendly ground unit on its tactical (non-fatigue) side as the activated unit. The activated unit then executes "tactical actions" (moving and fighting), and gains up to 3 "Tactical Points". The player places the tactical marker on the "3" space of the Tactical Track to mark this limit.
6.12 There are eight tactical actions (four movement, three attack and one fortification). Each costs 1, 2 or 3 tactical points, as follows:
| Tactical Action | Tactical Point Cost |
|---|---|
| Tactical Move | 1 |
| Operational Move | 2 |
| Strategic Move | 3 |
| Non-combat Move | 3 |
| Hasty Attack | 1 |
| Prepared Attack | 2 |
| Concentrated Attack | 3 |
| Fortify (修筑工事) | 3 |
The player who owns the activated unit declares the tactical action the unit will execute, and then executes it. After each action, the tactical marker is moved down the Tactical Track by that action's cost. When the marker reaches "0", the unit's activation ends and the activated unit is flipped to its fatigue side. The player may end a unit's activation at any time: he is not required to spend all 3 points, and may even spend none. Even so, the activated unit is still flipped to its fatigue side.
6.13 If a tactical action costs more tactical points than remain on the Tactical Track, the activated unit may not select that action.
6.14 If an activated unit takes part in combat, its "Unit Activation" ends automatically, even if tactical points remain (those points are treated as lost).
6.2 Task Force Activation
"Task Force Activation" is an Operational Action that allows a stack of ground units to move and fight together. The units that take part are called "activated units".
6.21 A player declaring a Task Force Activation must select a stack of friendly ground units to activate. The selected units must be non-HQ ground units on their tactical (non-fatigue) side, and all of them must be in the same hex. The stack may include HQ units, helicopter units and fatigued ground units, but these may not be selected to take part in the action. The player may choose any number of qualifying units in the stack to take part. Units that do not take part are not activated units and may not move with the stack.
6.22 Executing a Task Force Activation on an activated stack gives a limit of 3 tactical points. All rules that apply to Unit Activation (see 6.1) apply to Task Force Activation, with the following exceptions:
- During the action, the units of an activated stack may not separate. When a tactical action is executed, all units in the stack must take part in it. (For example, if the stack takes part in combat, not every unit is necessarily allowed to fight; see 8.2.)
- The movement limit of the units in an activated stack is the lowest movement value among the units in the stack. If the activated stack contains both motorized and non-motorized units, the stack's movement points are charged as for motorized units, and the stack is subject to the motorized movement restriction.
- Units executing a Task Force Activation may not execute a "Non-combat Move" tactical action.
6.3 Helicopter Activation
"Helicopter Activation" is an Operational Action that allows a single helicopter unit to move. That unit is called the "activated unit".
6.31 When a player declares a Helicopter Activation, he must select one friendly helicopter unit on its tactical (non-fatigue) side. The helicopter unit must be in the same hex as its higher HQ (that is, the HQ bearing the same higher-formation designation). It is the higher HQ, not the selected helicopter unit itself, that may be on its fatigue side.
6.32 An activated helicopter unit does not execute tactical actions; instead it may move, up to the limit of its own movement allowance (normally 18 movement points), subject to the movement restrictions (see 7.1). It need not move that far. When the activation ends, the helicopter is flipped to its fatigue side.
6.33 An activated helicopter unit may never attack.
6.34 After executing a Helicopter Activation, the helicopter must, in the following Recovery Phase, return to the hex occupied by its higher HQ (see 10.3).
6.4 Airmobile Movement
"Airmobile Movement" is an Operational Action that allows a US HQ unit to increase the movement ability of its subordinate ground units.
6.41 If the US player declares an Airmobile Movement action, he must select a US HQ unit on its tactical (non-fatigue) side that has at least 1 airmobile movement value. (The airmobile movement value of a US HQ is printed directly on the HQ counter itself.) The selected HQ that executes Airmobile Movement does not move. Qualifying subordinate ground units may then move according to the airmobile movement rules (see 7.5).
6.42 After a US ground unit completes airmobile movement, the HQ and all units that actually moved are flipped to their fatigue sides.
6.5 Fire Support
"Fire Support" is an Operational Action that allows artillery, helicopter, air and naval units to support attacks launched by friendly ground units.
6.51 A Fire Support action cannot be declared independently of an attack launched by friendly ground units. Units qualifying to take part in Fire Support may use their support value (printed directly on the counter) to support friendly attacks. Each unit selected provides its support value to the attack, and the owning player moves the action marker one space back on the Operations Track for each such unit. If the action marker is already on the "0" space, Fire Support may not be used in that attack. The full explanation of Fire Support is in section 12.0.
6.52 After a unit provides its support value to an attack, it is flipped to its fatigue side.
6.6 Parachute Drop and Amphibious Assault
Parachute Drop and Amphibious Assault are actions exclusive to the US. Only the US player (and only the US player) may use them to deploy reinforcement units onto the map through the special procedures (see 15.6 and 15.8).
6.7 Pass
If a player declares a "Pass" action, he must stop executing Operational Actions immediately and loses the ability to execute Operational Actions for the rest of the current action cycle. Passing is voluntary; however, if the player has no qualifying units with which to execute an action at that time, he must pass.
Note: if a player has chosen to pass, he may still use qualifying artillery, helicopter and naval units to support friendly defending units (see 12.0).
7.0 Movement
Only ground units and helicopter units may move. Ground units may move as part of one of three operational actions: Unit Activation, Task Force Activation or Airmobile Movement. Helicopter units may move during a "Helicopter Activation" operational action.
7.1 Movement Limits
7.11 Ground and helicopter units have a movement limit expressed in "movement points". When a unit moves between adjacent hexes, it spends movement points equal to the main terrain movement cost of the hex it enters. In some cases a unit must also spend movement points to cross certain hex sides. As long as a unit does not exceed its movement allowance within one tactical action, it may move any number of hexes at the will of its owning player. Unused movement points may not be kept or lent to other units. See the Terrain Effects Chart, which lists the movement point cost of every terrain type in full.
7.12 When a unit enters an enemy ZOC it must stop immediately (even if that ZOC is occupied by a friendly unit). After entering an enemy ZOC, the unit may not continue moving in its activated state, but it may still attack. If a unit begins its activation in an enemy ZOC, it incurs no movement point penalty when it leaves that hex, so long as it does not move directly from one enemy ZOC into another enemy ZOC. Units may never enter a hex occupied by an enemy unit. Except in combat (see 8.67), a unit may never move directly from one enemy ZOC into another enemy ZOC.
7.13 All fatigued units have a movement limit of 0 and may not move, except as a result of combat.
7.14 Ground units executing a non-combat move may never enter an enemy ZOC (see 7.37).
7.15 US units may never enter Staging Area hexes. Only Iranian and Soviet units may enter and occupy these hexes.
7.16 Terrain Effects Chart: see the chart section appended to the printed rulebook.
7.2 Stacking
7.21 After a unit finishes moving (including movement caused by combat), no more than one regiment-level unit, or its equivalent, may occupy the same hex (exception: see 7.22). A battalion-level ground unit counts as 1/3 of a regiment, so after movement there may be at most 3 battalions in the same hex. A company-level ground unit counts as 1/9 of a regiment, so after movement there may be at most 9 companies in the same hex. Ground units of any size may not, after moving, occupy the same hex as a unit of regiment size. However, if the total equivalent strength of the battalion- and company-level units after movement does not exceed 1 regiment, they may stack in the same hex after moving. For example: 2 battalions and 3 companies may stack in the same hex after moving; but 2 battalions and 4 companies may not end movement in the same hex, because their combined equivalent strength exceeds one regiment.
7.22 Helicopter units do not count toward stacking limits. After a unit's movement ends, any number of helicopter units of any size may occupy the same hex at the end of that movement, even if the hex is already occupied by a friendly ground unit. However, helicopters may never end movement in a hex occupied by enemy units.
7.23 Stacking limits do not apply during movement. A unit may always pass through hexes occupied by friendly units, no matter how many units are stacked there.
7.3 Ground Unit Movement
7.31 Ground units fall into two types:
- Motorized: the movement value has no parentheses.
- Non-motorized: the movement value is in parentheses.
Note: section 4.1 of the printed Chinese text says motorized movement values are in parentheses and non-motorized values are not; section 7.31 states the reverse. Both are transcribed as printed. The counter diagrams label the 4-1-3 example "移动力(非摩托化)" (non-motorized) and the airborne and Soviet self-propelled battalion examples "移动力(摩托化)" (motorized).
Movement point costs for entering terrain differ between motorized and non-motorized units. If a motorized and a non-motorized unit move as one stack from a single Unit Activation or Task Force Activation action, the stack's movement is charged at the motorized units' movement point costs. Unless the move crosses a hex side that has a road or trail, such a stack may not enter Rough, Mountain or Marsh hexes.
7.32 When a ground unit crosses a river hex side, it must pay a movement point penalty: a non-motorized unit spends 1 extra movement point; a motorized unit (or a stack that includes motorized units) spends 5 extra movement points.
7.33 When a ground unit enters a hex through a hex side crossed by a road or trail, it ignores the normal movement point cost of that hex (and of the river hex side, if any) and pays only 1 movement point. If a unit executes a non-combat move along a road, its movement point cost is reduced further (see 7.37). Motorized units are normally forbidden to enter Rough or Mountain hexes, but if they move across a hex side crossed by a road or trail, they are allowed to enter such hexes.
7.34 At the start of any Unit Activation or Task Force Activation action involving Iranian or Soviet mechanized infantry units (never American units), the Iranian or Soviet player may convert the activated mechanized infantry units to ordinary infantry. For example, a Soviet mechanized infantry unit whose combat value is shown as "(8)" may not be converted to ordinary infantry. When a unit is converted, a "Non-Motorized" marker is placed on top of it. That marker must remain on the selected unit for the rest of the game, and the unit may not later revert to mechanized infantry. A unit bearing a "Non-Motorized" marker moves as a non-motorized unit; its printed movement allowance is treated as 2 (not 3).
7.35 Ground units may not enter all-sea hexes.
7.36 A ground unit with a variable movement allowance changes its movement allowance according to the type of tactical movement it executes:
- Tactical Move: the movement allowance printed on the counter.
- Operational Move: the movement allowance × 2.
- Strategic Move and Non-combat Move: the movement allowance × 3.
7.37 A unit executing a non-combat move may not enter an enemy ZOC during its movement. If the unit is in an enemy ZOC when it is activated, it may not execute a non-combat move. A motorized unit executing a non-combat move that enters a hex through a hex side crossed by a road pays only one-third of a movement point for that hex. A non-motorized unit executing a non-combat move that enters a hex through a hex side crossed by a road pays only one-half of a movement point for that hex. Units executing a Task Force Activation may not execute a non-combat move.
7.4 Helicopter Movement
7.41 Helicopter units are subject to all of the movement restrictions in 7.1. A helicopter unit may enter any hex on the map, including sea and Peak hexes, each hex costing 1 movement point. The bonus of rivers and roads does not apply. An activated helicopter may move as far as its movement allowance, which is always 18 movement points. After it moves, it is flipped to its fatigue side.
7.42 If a helicopter unit is stacked with its higher HQ in one hex, and that HQ then moves, the helicopter unit must move together with that HQ. The HQ is a motorized unit. When the HQ's movement ends, the HQ and all helicopter units that moved with it are flipped to their fatigue sides. Helicopter units already on their fatigue side still move with the HQ and remain fatigued.
7.43 Helicopter units do not generate a ZOC. Enemy units may not enter a hex occupied by friendly helicopter units.
7.5 Airmobile Movement
7.51 If the US player chooses an HQ to execute an Airmobile Movement action, he must follow this procedure:
- Select ground units up to a number equal to or less than the HQ's "airmobile movement value". The selected units must be on their tactical (non-fatigue) side, may not be in an enemy ZOC, and must have the same higher-formation designation as the HQ. For each selected unit, the player traces a continuous path of hexes of unlimited length from the HQ to that unit. The path may not enter hexes occupied by the enemy, or hexes in an enemy ZOC (even if that ZOC is occupied by friendly units).
- Each selected unit that moves may move 18 movement points, entering each hex at a cost of 1 movement point, the same as a helicopter unit. Rivers, roads and trails are ignored. During this movement, the unit may not enter a hex occupied by the enemy or in an enemy ZOC, and may not end its movement in a sea or Peak hex.
- After the units have completed their movement, the HQ that initiated the action and all units that moved are flipped to their fatigue sides.
7.52 Only the following types of units may be selected for Airmobile Movement:
- If the HQ initiating the action is the US "101" or "1M" (1st Marine Division) HQ (both marked "HHC"), any subordinate units other than tanks, helicopters, reconnaissance units and the HQ units themselves may execute airmobile movement. (Example: US Marine units marked "MEU" may not execute airmobile movement.)
- If any other HQ initiates an airmobile movement action, only its subordinate infantry and parachute infantry units may execute airmobile movement.
- US Ranger units may execute airmobile movement with any qualifying US HQ.
8.0 Combat
When an activated unit launches an attack against enemy units in an adjacent hex, combat is conducted between the opposing units. If an attack is declared, combat must be resolved immediately. Attacks are never compulsory.
8.1 Combat Values
All ground and helicopter units have a "combat value". These values are used to calculate combat strength ratios. The tactical-side combat values of some units are shown in parentheses, indicating that their combat value is variable when they attack.
8.11 Ground and helicopter units have an "anti-tank value". When a unit with a variable combat value (in parentheses) attacks, the defender's anti-tank value determines the modifier to the variable combat value. To determine the modifier, consult the variable combat value table: index the defender's anti-tank value against the column for the defender's hex terrain. If several defending units defend, add together the anti-tank values of all of the defending units. If a defending unit occupies two or more hexes with different main terrain types, choose the terrain column that is most favourable to the defender.
The attacker's variable combat value for tank units is determined using the "Tank" row of the table; for mechanized infantry it is determined using the "Mechanized Infantry" row. If at least one defending unit is attacked across a river hex side, the attacker's variable combat value multiplier is reduced by 3. If at least one defending unit occupies a village hex, the attacker's variable combat value multiplier is reduced by 1. A variable combat value is never reduced below its printed value by these modifiers.
Example: A tank with a combat value of (3) attacks an enemy unit with an anti-tank value of 1 in Clear terrain. The tank's combat value is multiplied by 5, for a final value of 15. If a mechanized infantry unit with a combat value of (10) attacks the same unit, its combat value is multiplied by 2, for a final value of 20. If the defender occupies a village hex and is attacked across a river hex side, the attacker's multiplier is reduced by 4. The tank's combat value is therefore multiplied by 1 rather than 5, and the mechanized infantry's combat value is multiplied by 1 rather than 2.
8.12 A defender's variable combat value always uses its printed value; it is not modified. Likewise, units on their fatigue side never use variable combat values: a unit on its fatigue side always uses its printed combat value, even when attacking. When attacking only enemy helicopter units, variable combat values are not modified.
8.13 Artillery, helicopter, air and naval units have a "support value", which is used to support attacks by friendly units. Artillery units also have a "range value", which is the number of hexes within which their support value can take effect.
8.14 Combat values may be affected by supply status (see 14.0).
8.15 The Variable Combat Value Table (see the separate chart page appended to the printed rulebook).
8.2 Combat and Stacking
In any one hex, the number of ground units that may take part in attacking or defending is limited:
- The ground units taking part in combat from a given hex: at most one battalion-level ground unit (or equivalent), even if the hex contains units larger than battalion size (exceptions: see items 2 and 3 below). Company-level units count as one-third of a battalion, so at most 3 company-level ground units may take part in combat from one hex. If combat occurs and more than one battalion or equivalent-size unit is stacked in the same hex, the owning player must select 1 battalion (or at most 3 companies) to take part in that combat. Units that do not take part have their combat values and anti-tank values ignored, although they still suffer the effects of the combat result.
- Iranian regiment-size units may always take part in combat.
- All tanks, helicopters and HQ units, regardless of size, may always take part in combat, even if they are stacked with other friendly units that exceed one battalion or equivalent size.
8.3 Combat Initiation
8.31 Every attack action necessarily triggers one combat. An activated attacking unit must attack every enemy-occupied hex adjacent to it. Subject to the combat stacking limits (see 8.2), the attacker decides whether any non-activated friendly unit adjacent to any enemy-occupied hex attacked by the activated unit takes part in the attack, even if these units are fatigued. If the attacker wishes a qualifying non-activated unit to take part in the attack, it must declare this.
8.32 Only enemy units in hexes adjacent to the activated attacking unit may defend against the attack. If an enemy-occupied hex is adjacent to a non-activated attacking unit but not to the activated unit, the enemy unit in that hex may not take part in the defense.
Example: US unit 1 is the activated unit that has declared a Hasty Attack. Soviet units A and B must defend against this attack, because they are adjacent to the activated attacking unit. Soviet unit C may not take part in the defense, because it is not adjacent to the activated unit. US units 2 and 3 are non-activated units; because they are adjacent to at least one attacked Soviet-occupied hex, the US player may decide whether they take part in the attack. The US player decides that unit 2 attacks but unit 3 does not. US unit 4 is non-activated and is not adjacent to any attacked Soviet-occupied hex, so it may not attack. This combat is therefore US units 1 and 2 attacking Soviet units A and B.
8.4 Combat Resolution
Attacks are resolved by the following steps:
- The attacker declares the type of attack (Hasty, Prepared or Concentrated), making sure the Tactical Track has enough tactical points to pay for the declared attack type.
- The attacker declares which of its activated and non-activated units take part in the attack. If its units are stacked, it must observe the stacking/combat limits. If the attacker uses units with variable combat values on their tactical sides, those values are modified even if the units are non-activated. Non-activated units taking part in combat do not cause any additional reduction of the action marker.
- The attacker may use qualifying artillery, helicopter, air and naval units to support the attack. For each support unit, the action marker moves back 1 space on the Operations Track.
- Each air or helicopter unit supporting an attack must bear anti-aircraft fire (see 12.2 and 12.3).
- The attacker adds the combat values of the participating units (step 2) and the support values of the support units (step 3), giving a total.
- The defender determines which units must defend and adds their combat values, giving a total. If the defending side has stacked units, they must observe the stacking/combat limits.
- The defender may use qualifying artillery, helicopter and naval units to support its defense (see 12.0).
- The defender adds the combat values of its participating units (step 6) and the support values of its support units (step 7), giving a total.
- Combat is expressed as a combat ratio: the attacker's total (step 5) divided by the defender's total (step 8). Round the ratio in the defender's favour, and find the matching column on the Combat Results Table (CRT).
- Determine the terrain of the defender's hex. If the defending units occupy several main terrain types, choose the terrain most favourable to the defender.
- The defender declares whether it uses Entrenched Defense (阵地防守) or Mobile Defense (机动防守).
- The attacker rolls the die and, if necessary, modifies the roll (see 8.5). The modified roll is cross-indexed with the combat ratio column in the row for the terrain, giving the result on the CRT. The result takes effect immediately (see 8.6).
8.5 Combat Results Table (CRT)
8.51 The following modifiers apply to combat die rolls (cumulative):
- If at least one attacking unit and one defending unit are separated by a river hex side, subtract 3 from the die roll.
- If the attacker used a Tactical Advantage bonus in the combat, add 1 to the die roll (see 17.13).
- If the defender used a Tactical Advantage bonus in the combat, subtract 1 from the die roll (see 17.13).
8.52 If the combat ratio is higher than, or lower than, every column listed on the CRT, use the highest column (for a ratio that is too high) or the lowest column (for a ratio that is too low), respectively.
8.53 The Combat Results Table is printed on the separate chart page.
8.6 Combat Results
8.61 There are three types of combat result:
- NE: No effect (exception: 8.66).
- D: Combat affects the defender.
- A: Combat affects the attacker.
An A or D result is usually followed by an additional number or letter.
8.62 An AE or DE result means that all of the attacking or defending units involved, respectively, are eliminated. This includes units that did not provide their combat values to the combat because of stacking or combat limits. Supporting air, naval, helicopter and artillery units are not affected by combat results. Eliminated units are placed to one side and are not returned to the game.
8.63 Sometimes an A or D result is followed by a number (1 or 2). This number is the "loss result". The affected player must satisfy the loss result by executing "loss actions" equal to the number. There are two types of loss action: Retreat (撤退) and Eliminate (消灭). Loss actions are executed as follows:
- The attacker must satisfy any loss result by eliminating units. It may never retreat.
- If the defender announced "Mobile Defense", the first loss action executed to satisfy the loss result must be a Retreat. The second loss action (if any) must be an Elimination.
- If the defender announced "Entrenched Defense", all loss actions executed to satisfy the loss result must be Eliminations. It may never retreat. In addition, some combat results marked with an asterisk have different meanings (see 8.66).
8.64 To execute a Retreat, the player must move all affected units (including those that did not provide combat value because of stacking or combat limits) three consecutive hexes away. Units may not retreat into sea or Peak hexes, or into an enemy ZOC unless that ZOC is occupied by a friendly unit. (Exception: helicopters may retreat into sea, Peak or enemy ZOC hexes.) A retreating unit may not end its retreat in violation of the stacking limits, and may not re-enter the same hex. Motorized units may not cross river hex sides or enter Rough or Mountain hexes when retreating, unless the retreat crosses a hex side that has a road or trail. A unit may never retreat into a hex occupied by an enemy unit. If there is a choice of hexes to retreat to, it must retreat to the hex farthest from enemy units. Subject to these restrictions, the owning player may retreat his units into any hexes he considers appropriate. If a unit cannot retreat 3 hexes, the unit is eliminated. A retreating unit that is not on its fatigue side at that time must be flipped to its fatigue side.
8.65 For each Elimination action, the executing player must remove from the game one unit that took part in this combat and contributed its combat value to it. If there is a choice, eliminate regiment-size units first, then battalion-size units, and finally company-size units (larger units first). Fortification markers (see 9.0) may not be used to satisfy elimination results.
8.66 If the defender announces "Entrenched Defense", asterisked (*) results on the CRT are converted as follows:
- A2* → AE
- A1* → A2
- NE* → A1
8.67 If all hexes occupied by defending units are cleared as a result of a combat result, some or all of the activated attacking units may occupy the vacated hex without spending tactical points or movement points (this is called "advance"). Example: mechanized infantry units may not advance into Rough or Mountain hexes, unless the advance crosses a hex side that has a road or trail. An advance must be executed immediately, or not at all. Even if the advance is a move directly from one enemy ZOC into another, the unit may still advance. Defending units and non-activated attacking units may never advance.
9.0 Fortification
"Fortify" (修筑工事) is a tactical action that may be executed by an activated ground unit as part of a "Unit Activation" or "Task Force Activation" operational action.
9.1 How Units Fortify
9.11 The fortification action costs 3 tactical points. Since an activated unit has a limit of only 3 tactical points, if it chooses to fortify during its activation, it may not execute any movement or combat action.
9.12 When a unit fortifies, place an "Improved Position" marker in that hex. If the hex already contains an Improved Position marker, flip it to its "Strongpoint" side. If the hex already contains a Strongpoint marker, the unit may not fortify there, because a Strongpoint is the strongest form of fortification in the game.
9.13 Helicopter units may never fortify.
9.2 Effects of Fortification
An Improved Position marker has +1 combat value and +1 anti-tank value. A Strongpoint marker has +3 combat value and +2 anti-tank value. As printed:
| Fortification Type | Combat Value Bonus | Anti-tank Value Bonus |
|---|---|---|
| Improved Position | +1 | +1 |
| Strongpoint | +3 | +2 |
If an enemy unit attacks a hex containing a fortification marker (Improved Position or Strongpoint), the marker's combat value is automatically added to the defending unit's combat value. If the attacker has at least one unit with a variable combat value, the marker's anti-tank value is automatically added to the defending unit's anti-tank value. A marker's values are only used for defense; they never assist attacks. If a defending unit is isolated (see 14.1), its combat value is first reduced according to its supply status, and then the combat value bonus from the fortification marker is added.
9.3 Limitations on Fortification
9.31 A fortification action may never be executed within an enemy ZOC.
9.32 At most one fortification marker may exist in a single hex.
9.33 Fortification markers never move. When a hex containing a fortification marker contains no ground units, the marker is removed from the map. It may be used again later in the game.
10.0 Fatigue
Various actions cause units to become fatigued. A fatigued unit is flipped to its fatigue side (反面). Units that enter play (at the start of the game or when they enter the game) always start on their tactical (front) side.
10.1 How Units Become Fatigued
10.11 Ground units become fatigued in the following situations:
- Executing a Unit Activation or Task Force Activation action in which the tactical marker on the Tactical Track reaches the "0" space.
- Taking part in an attack, even as a non-activated unit. A fatigued non-activated unit is not affected further. If an activated unit launches an attack, then even if it still has tactical points remaining on the Tactical Track, it becomes fatigued at the end of combat, and the tactical marker is automatically set to 0.
- Providing combat value to a defense. A fatigued defending unit is not affected further.
- Being a ground unit that executes an airmobile movement action.
- Being an HQ unit that initiates an airmobile movement action.
- Being an artillery unit that provides its support value to an attack, or its combat value to a defense (see 12.1).
10.12 Helicopter units become fatigued in the following situations:
- Taking part in the execution of a Helicopter Activation action.
- Providing support value to an attack, or combat value to a defense.
- When the higher HQ moves, moving together with that higher HQ.
10.13 Air units become fatigued when they provide support value to an attack.
10.14 Naval units become fatigued when they provide support value to an attack, or combat value to a defense.
10.15 Ground, air and naval units that roll 0 during the action cycle may enter fatigue (see 5.3, 5.4 and 5.5).
10.2 Abilities of Fatigued Units
10.21 A fatigued ground unit may not be activated as part of a "Unit Activation", "Task Force Activation" or "Airmobile Movement" operational action. A fatigued ground unit may take part in combat.
10.22 A fatigued helicopter unit may not execute a Helicopter Activation.
10.23 A fatigued HQ unit may not initiate an airmobile movement action.
10.24 A fatigued artillery, helicopter, air or naval unit may not provide its support value to an attack, or its combat value to a defense.
10.3 Fatigue Recovery
10.31 In the First and Second Recovery Phases, both players execute the following:
- All fatigued ground and naval units (non-air units) are flipped to their tactical sides.
- Every helicopter unit that is not stacked in the same hex as its higher HQ automatically returns to the hex occupied by that HQ. This is not regarded as "movement"; the helicopter is simply picked up and placed in the HQ's hex. If the higher HQ has been eliminated, the helicopter unit is eliminated in the Recovery Phase.
10.32 In the End Phase, both players flip their air units on their fatigue sides to their tactical sides.
11.0 Air Operations
11.1 Air Units
Air units have two values: Air Superiority (空中优势值) and Support (支援值).
11.2 How Air Operations Are Conducted
In the Mission Segment of the Air Action Phase, both players review their own air units and secretly assign them to the following missions on their own Air Operations Displays:
- Air Superiority mission box, or
- Ground Support mission box.
If a player has several air units, he may assign them to the same mission box, to different mission boxes, or assign them to no mission.
11.3 Resolution of Air Operations
11.31 In the Air Superiority Segment, both players reveal their air unit mission assignments. If both sides have assigned at least 1 unit to their Air Superiority mission boxes, those units must fight an air superiority battle. The battle proceeds as follows:
- The US player rolls the die. If the result is even (including 0), the US player is the attacker; if it is odd, the Iranian/Soviet player is the attacker.
- Each player adds the air superiority values of the units in his Air Superiority mission box. The two totals are expressed as a ratio, in the form attacker total : defender total. The ratio is rounded in the defender's favour so that it matches one of the ratio values on the Air Superiority Table.
- The US player rolls the die and cross-references the roll with this ratio to determine the result.
- There are three types of result: "NE" means no effect (neither side has been defeated); "A" means the attacker wins; "D" means the defender wins. An "A" or "D" result is always followed by a number in parentheses; this is the "loss result" of the loser. The winner suffers no losses.
- The winner of an air superiority battle must eliminate a number of the loser's air superiority air units equal to the loss result. If the loser has fewer air superiority units than the loss result, the excess losses are ignored.
11.32 In the Ground Support Segment, the winner of an air superiority battle may attack the enemy air units in the opponent's Ground Support mission box. (If, in the Mission Segment, one player assigned air units to air superiority and the other player assigned none, the player with air superiority air units may attack the opponent's ground support air units in the following manner.) If the loser of the air superiority battle has no air units in its Ground Support mission box, no further action is required. If the loser's Ground Support mission box contains air units, the winner of the air superiority battle rolls the die once and consults the Ground Support Table to determine whether any of the opponent's ground support air units are eliminated or become fatigued. The units that are to be eliminated or fatigued by the air superiority battle are chosen by the winner of that battle.
11.33 Air Superiority Table: see the separate chart page.
11.34 Ground Support Table: see the separate chart page.
11.4 Air Unit Recovery
In the End Phase, both players remove their air units from the Air Action Area and set them aside. Air units on their fatigue sides are flipped to their tactical sides (air units already on their tactical sides remain unchanged). In the next turn's Mission Segment, a player may again assign his air units to air superiority or ground support missions.
12.0 Special Units
12.1 Artillery Units
Artillery units are of four types: regular artillery, self-propelled artillery, rocket artillery and parachute artillery. All four types may support friendly attacking and defending units.
12.11 The support value of an artillery unit may be added to the combat value of a friendly attacking unit if all of the following conditions are satisfied simultaneously:
- The artillery unit is on its tactical side and is not cut off or isolated.
- The artillery unit is not adjacent to an enemy unit.
- The artillery unit's higher-formation designation matches that of at least one participating attacking unit. (It need not match the designation of the activated unit.) Exception: a US artillery unit with higher-formation designation "C" may support any friendly attacking unit; all US units with higher-formation designation "C" may be supported by any US artillery unit.
- At least one enemy defending unit lies within the artillery unit's range value (counted in hexes).
- The attack type is a Prepared Attack or a Concentrated Attack (not a Hasty Attack).
- The target hex may not contain only enemy helicopter units.
12.12 Each attack may add the support values of at most 2 qualifying artillery units. The two artillery units may be stacked in the same hex or in different hexes. After each artillery unit provides its support value, it is flipped to its fatigue side, and the action marker moves back 1 space on the Operations Track.
12.13 An artillery unit supporting a Concentrated Attack has its support value multiplied by an additional 1.5.
12.14 An artillery unit's combat value (rather than its support value) may be added to the combat value of a friendly defending unit if all of the following conditions are satisfied simultaneously:
- The artillery unit is on its tactical side and is not cut off or isolated.
- The artillery unit is not adjacent to an enemy unit.
- The artillery unit's higher-formation designation matches that of at least one defending unit. Exception: a US artillery unit with higher-formation designation "C" may support any friendly defending unit; all US units with higher-formation designation "C" may be supported by any US artillery unit.
- At least one friendly defending unit lies within the artillery unit's range value (counted in hexes).
12.15 The defender may add the support value of at most 1 qualifying artillery unit to a defense. After this unit provides its combat value, it is flipped to its fatigue side. Using artillery support for defense has no effect on the action marker.
Note: section 12.15 of the printed rulebook refers to the unit providing its "combat value" in its last clause, while the preceding clause refers to its "support value". Both are transcribed as printed.
12.16 An artillery unit providing support to a friendly attacking or defending unit is not affected by unfavourable combat results.
12.17 An artillery unit adjacent to an enemy unit may take part in attack and defense like a regular ground unit. When fighting from adjacent hexes against enemy units, it always uses its combat value (not its support value). Such artillery is subject to unfavourable combat results.
12.2 Helicopter Units
Helicopter units may move during a Helicopter Activation action. They may never initiate attacks themselves, but they may support friendly attacking or defending units.
12.21 The support value of a helicopter unit may be added to the combat value of a friendly attacking unit if all of the following conditions are satisfied:
- The helicopter unit is on its tactical side, stacked in the same hex as its higher HQ (the HQ may be fatigued), and not cut off or isolated.
- The helicopter unit is not adjacent to an enemy unit.
- The helicopter unit's higher-formation designation matches that of at least one participating attacking unit. (It need not share the designation of the activated unit.) Exception: a US unit with higher-formation designation "C" may be supported by any US helicopter unit.
- The supported attack type may be a Hasty, Prepared or Concentrated Attack.
- At least one enemy defending unit lies within the 18-hex range of the supporting helicopter's movement allowance. The supporting helicopter must be able to reach the attacked hex along a continuous path of hexes that are not in enemy ZOC between the helicopter unit and the attacking unit (a hex in enemy ZOC occupied by a friendly unit may be passed through). The path is traced as in step 5 of 12.21.
- For each helicopter selected to support an attack, the attacker rolls the die once and consults the Anti-Aircraft Table:
- "No effect": the helicopter may provide its support value, and does not become fatigued.
- "Fatigue": the helicopter is flipped to its fatigue side and may not provide its support value to assist the attack.
- "Eliminate": the helicopter is eliminated and may not provide its support value to assist the attack.
12.22 The attacker may add the support values of at most three qualifying helicopter units to one attack. Each helicopter unit selected to provide support value to the attack is flipped to its fatigue side, and the action marker moves back 1 space on the Operations Track. During the support process, the supporting helicopter need not physically move to the hex where combat occurs; it remains in its original hex with its higher HQ. Once the player commits a helicopter unit to the attack, that decision is final. If the Anti-Aircraft Table requires some or all of the committed helicopters to become fatigued or to be eliminated, the player may not commit additional helicopter units to that attack.
12.23 The combat value (rather than the support value) and the anti-tank value of a helicopter unit may be added to the combat and anti-tank values of a friendly defending unit if all of the following conditions are satisfied:
- The helicopter unit is on its tactical side, stacked in the same hex as its higher HQ (the HQ may be fatigued), and not cut off or isolated.
- The helicopter unit is not adjacent to an enemy unit.
- The helicopter unit shares the higher-formation designation of at least one defending unit. Exception: a US unit with higher-formation designation "C" may be supported by any US helicopter unit.
- At least one friendly defending unit lies within the 18-hex range of the supporting helicopter's movement allowance. The supporting helicopter must trace a continuous hex path to the defending unit, as described in step 5 of 12.21.
12.24 The defender may add the combat and anti-tank values of at most three qualifying helicopter units to one defense. After each helicopter unit provides its combat and anti-tank values, it is flipped to its fatigue side. This does not affect the action marker, and the helicopter units do not need to bear anti-aircraft fire. The supporting helicopter need not physically move to the battle hex; it remains in its original hex with its higher HQ.
12.25 A helicopter unit supporting a friendly attacking or defending unit is not affected by unfavourable combat results.
12.26 A helicopter unit adjacent to an enemy unit may be attacked just like a regular ground unit. However, helicopter units may never initiate attacks. (They take part in attacks only through the support process.) When an enemy attacking unit in an adjacent hex attacks a defending helicopter, the helicopter's combat value (rather than its support value) is used, and its anti-tank value is also used if necessary. A helicopter unit that is directly attacked is affected by unfavourable combat results. A helicopter unit occupying a sea or Peak hex may not be attacked.
12.27 Anti-Aircraft Table: see the separate chart page.
12.3 Air Units
Air units executing a ground support mission may support friendly attacking units.
12.31 An air unit in the Ground Support mission box may use its support value to support the combat of a friendly attacking unit, provided that all of the following conditions are met:
- The air unit is on its tactical side.
- The attack type is a Concentrated Attack, not a Prepared or Hasty Attack.
- The target hex may not contain only enemy helicopter units.
- The attacker may add the support values of at most 2 qualifying air units to an attack.
- For each air unit selected to support an attack, the attacker rolls the die once and consults the Anti-Aircraft Table:
- "No effect": the air unit may provide its support value to the attack.
- "Fatigue": the air unit is flipped to its fatigue side and may not provide its support value to the attack.
- "Eliminated": the air unit is eliminated and may not provide its support value to the attack.
- Each air unit selected to provide its support value to the attack is flipped to its fatigue side; then the action marker moves back 1 space on the Operations Track. Air units are not physically moved to the battle hex; this is a declaration only.
12.32 Air units may never support friendly defending units.
12.33 An air unit providing support to a friendly unit is not affected by unfavourable combat results.
12.4 Naval Units
US "light" and "heavy" naval units may support friendly attacking and defending units. Naval units always remain in the US Naval Operations Display.
12.41 If all of the following conditions are met simultaneously, the support value of a US naval unit may be added to the combat value of a friendly attacking unit:
- The naval unit is on its tactical side.
- The attack type is a Concentrated Attack or a Prepared Attack, not a Hasty Attack. Exception: US "heavy" naval units may only support a Concentrated Attack.
- At least one defending unit lies south of the "Light Naval Range Line" (for a light naval unit) or south of the "Heavy Naval Range Line" (for a heavy naval unit).
- The attack target may not be a hex containing only enemy helicopter units.
- The attacker may add the support values of qualifying naval units of one or two types to each attack. After each supporting naval unit provides its support value, it is flipped to its fatigue side, and the action marker moves back 1 space on the Operations Track. Naval units are not physically moved to the battle hex; this is a declaration only.
12.42 If all of the following conditions are met, a US naval unit's combat value (rather than its support value) may be added to a friendly defending unit's combat value:
- The naval unit is on its tactical side.
- At least one defending US unit lies south of the Light or Heavy Naval Range Line, as described in item 3 of 12.41.
- The US player may add the combat values of one or two qualifying naval units to a defense. After each supporting naval unit provides its combat value, it is flipped to its fatigue side. This does not affect the action marker. Naval units are not physically moved to the battle hex; this is a declaration only.
12.43 A naval unit providing support is not affected by unfavourable combat results.
13.0 Victory Point Hexes
The map contains 15 Victory Point (VP) hexes, distinguished by their VP values, as follows:
| Name | Hex Coordinate | Type | VP Value |
|---|---|---|---|
| Abbas Port Airfield (阿巴斯港机场) | 3924 | Airfield | 7 |
| Hawadariya Airfield (哈瓦达里亚机场) | 2328 | Airfield | 3 |
| Piyad Airfield (皮亚德机场) | 1430 | Airfield | 2 |
| Abbas Port Harbour (阿巴斯港港口) | 2629 | Port | 5 |
| Tiab Port (提阿卜港) | 1632 | Port | 3 |
| Silkworm Missile Site 1 (蚕式导弹阵地1) | 1034 | Military installation | 3 |
13.1 US Control of Victory Point Hexes
Only the US player may control VP hexes.
13.11 Each VP hex has a "control zone". Except for Abbas Port Airfield, the control zone of every VP hex consists of that hex itself plus the six adjacent hexes. The control zone of Abbas Port Airfield is the 18 hexes within the airfield's control boundary.
13.12 In the Control Phase, the US player checks the control status of each VP hex he does not yet control. If the US has at least one ground unit occupying any hex in the control zone of a VP hex, and no Iranian or Soviet ground unit occupies any hex in that control zone, the US player gains control of that VP hex. He immediately places a "US Control" marker in that hex. If the hex is an airfield, he must also place a "US Airhead" marker in that hex (exception: Airhead markers are not used in Scenario 1). The US player may not voluntarily move Airhead markers out of VP hexes. Note that Airhead markers are specific to the US 1M (1st Marine Division), 29th, 82nd and 101st Division units. Within the limits of the following rules, the US player may freely choose which Airhead marker to place on a US-controlled airfield:
- At most one Airhead marker may be placed in each airfield hex.
- Airhead markers belonging to a division that is "not committed" may not be placed on the map (see 15.9).
- The first Airhead marker placed in the scenario may belong to any one of the four divisions, unless that division has not been committed.
- If the first Airhead marker placed on the map in the scenario is not the Airhead marker marked "1M" (1st Marine Division), then the second Airhead marker placed on the map in the scenario must be the one marked "1M".
13.2 Maintaining US Control
13.21 The condition for the US player to control a VP hex is that the "US Control" marker is on that hex. As long as the marker exists, the US player need not keep satisfying the control conditions listed in 13.12.
13.22 If, at the end of the First or Second Action Cycle, an Iranian or Soviet ground unit occupies any hex within the control zone of a US-controlled VP hex, the US player loses control of that VP hex, even if US units occupy hexes in the control zone at that time. In this case, remove the US Control marker from the map (and remove the Airhead marker, if present).
13.23 In the Control Phase, the US player may regain control of a VP hex he has lost, provided the conditions of 13.12 are met. If control is re-established, place a US Control marker in that hex. If the hex is an airfield, return to that hex any Airhead marker that was removed earlier, that is, place it back in its original hex.
13.24 US Control and US Airhead markers have no combat value and never take part in combat. Enemy units may enter and move through hexes containing these markers, with no penalty. Unless 13.22 is triggered, these markers are never removed from the map.
13.3 Calculating Victory Points
At the end of the scenario, the US player scores a total equal to the sum of the VP values of all VP hexes he currently controls.
13.31 After the total US VP has been determined, the players must calculate, for each Iranian or Soviet artillery unit (including all types of artillery), the hex distance to the nearest US-controlled airfield or port hex. (Exception: Iranian or Soviet artillery units currently adjacent to a US unit, and those units occupying Staging Area hexes, are ignored.) When determining the distance between an artillery unit and a US-controlled port or airfield, the reference is the hex occupied by the airfield or port itself, not any hex in its control zone. If the distance between an artillery unit and the nearest airfield or port is less than or equal to that artillery unit's range value, the US player's total VP is reduced by 1. For example: if the US total VP is 18, and three Iranian artillery units each have a US-controlled airfield or port within their range, the final US total is 15. For each Iranian or Soviet artillery unit on the map, the US VP total may be reduced by at most 1 point, even if two or more US-controlled airfields or ports are within that artillery unit's range.
13.32 Compare the final US total VP with each victory condition listed in the scenario to determine the winner.
14.0 Supply
14.1 Supply Status
14.11 From Turn 3 onward, in each Supply Phase every unit must attempt to trace a supply line to determine its supply status. The supply line is traced from the hex the unit occupies to a supply source (see 14.2). The supply line must be traced continuously through adjacent hexes, and its length is unlimited. A supply line may not enter an enemy ZOC (unless that ZOC is occupied by a friendly unit). A supply line may cross river hex sides, even where there is no road or trail.
- US supply lines: a supply line traced by a US unit may enter any type of hex, including sea and Peak hexes.
- Iranian and Soviet supply lines: a supply line traced by an Iranian or Soviet unit may enter any type of hex except sea and Peak hexes.
14.12 If a unit can successfully trace a supply line, all of its functions remain normal for the rest of the turn (that is, there is no penalty). If it had a Cut-off or Isolated marker and can now trace a supply line, the marker is removed.
14.13 If a unit cannot successfully trace a supply line, place a "Cut-off" marker on the unit. If the unit already has a Cut-off marker, flip that marker to its "Isolated" side. If it already has an Isolated marker, there is no further effect.
- Effects of Cut-off: when a cut-off unit attacks, its combat value is multiplied by one-half (rounding up). When defending, its combat and anti-tank values are not affected. If the cut-off unit is an artillery or helicopter unit, its support value is reduced to 0, and it may not support friendly defending units. In addition, a cut-off helicopter may not take part in executing a Helicopter Activation action, and a cut-off HQ may not initiate an airmobile movement action. A cut-off unit's movement allowance is not affected.
- Effects of Isolation: when an isolated unit attacks, its combat value is reduced to 1. When defending, its combat and anti-tank values are both multiplied by 0.5 (rounding down). Isolated artillery, helicopter and HQ units are subject to all the same effects as cut-off status, and more severely. The printed movement allowance of every isolated unit is reduced to 1.
14.14 Cut-off and/or isolated units stacked in the same hex must have their combat values modified separately, not as a stack.
14.15 Air units and naval units are always considered to be in supply.
14.16 Whenever cut-off or isolated units move, they must always carry their own status markers with them. If the units in a stack are cut-off or isolated and the units in that stack separate, each independent unit must carry a cut-off or isolated marker of its own status. (Status does not transfer, or disappear, because of splitting or moving away.)
14.2 Supply Sources
14.21 The US player may use any airfield or port hex bearing a US Control marker, or any US beachhead marker (see 15.8), as a supply source.
14.22 Iranian or Soviet players may use any hex within the five Staging Areas as a supply source. They may also use as supply sources any map-edge hex that is not in a Staging Area but contains a road (not only a trail), for example hexes 1032, 1034 and 4301.
14.3 Special Rules for Turns 1 and 2
All units are automatically considered to be in supply during Turns 1 and 2.
15.0 Reinforcements
15.1 Reinforcement Areas
Each player has a reinforcement area. The US reinforcement area is divided into "Airlift" and "Sealift" boxes. The Iranian/Soviet reinforcement area is divided into "Overland" and "Airlift" boxes.
15.2 US Fixed Reinforcements
Only the US player receives fixed reinforcements. In the Fixed Reinforcement step of the Reinforcement Phase, the US player determines, according to the scenario instructions, whether he has fixed reinforcements. If he does, the designated units are placed in the corresponding box (Airlift or Sealift) of the US reinforcement area.
15.3 Variable Reinforcements
In the Variable Reinforcement step of the Reinforcement Phase, each player rolls the die and consults the Variable Reinforcement Table. (Exception: this step is skipped in Turns 1 and 5, and Scenario 1 does not use it.) Cross-index each player's die roll with the column for his nationality (US, Iranian or Soviet). For the US player, the result is a number of Reinforcement Points, available immediately. For the Iranian/Soviet player, the result is a number of reinforcement units, available immediately. Reinforcement units are placed in the corresponding box of their owner's reinforcement area. (Exception: air and naval reinforcements are placed in the air or naval Operations Display.) Variable reinforcement die results may be modified (see 17.14).
15.31 When the Iranian/Soviet player has determined how many reinforcement units he gains, he must select his reinforcements under the following restrictions. When the number of units selected (regardless of size or type) equals the variable reinforcement result, he must place the units in the "Overland" box of his reinforcement area.
- In scenarios involving Iranian units, reinforcements must be chosen from Iranian units with higher-formation designation "A". If all Iranian units with designation "A" have been selected, reinforcements must be chosen from Iranian units with designation "B". If all Iranian units with designation "B" have been selected, reinforcements must be chosen from Iranian units with designation "C". If all Iranian units with designation "C" have also been selected, the Iranian player gains no further reinforcements in that scenario.
- In scenarios involving Soviet units, reinforcements must be chosen from Soviet units with higher-formation designation "5". If all Soviet units with designation "5" have been selected, reinforcements must be chosen from Soviet units with designation "84". If all Soviet units with designation "84" have been selected, the Soviet player gains no further reinforcements in that scenario. (Soviet units with higher-formation designation "103" may not be chosen as variable reinforcements.)
15.32 An Iranian or Soviet player may select any unused unit as a reinforcement, provided this does not violate 15.31. However, he may not select units that were eliminated in combat. It is recommended that players sort their own units in the counter tray (counter box) by higher-formation designation, which simplifies the reinforcement selection.
15.33 After the US player has determined his available reinforcement points, he must select reinforcement units under the following restrictions. US variable reinforcements must be placed in the "Airlift" box of the US reinforcement area.
- US units have reinforcement point values, as listed in the following table. The total reinforcement points of the units selected by the US player must equal, or be less than, the result of his variable reinforcement table.
| Unit Type | Higher-formation Designation | Reinforcement Points |
|---|---|---|
| Tank company | 82 | 1* |
| Ranger company | C | 1 |
| Headquarters | 1M, 29, 82, 101 | 1 |
| Infantry battalion | 29 | 3 |
| Artillery battalion | 29 | 3 |
| Parachute battalion | 82 | 4 |
| Marine Corps battalion | 1M | 4** |
| Reconnaissance battalion | 1M | 4 |
| Infantry battalion |
* Tank companies of the 1st Marine Division ("1M") may not be selected as variable reinforcements. ** "MEU" Marine battalions may not be selected as variable reinforcements.
- US units from "uncommitted" divisions (see 15.9) may not be selected as variable reinforcements.
- US Marine Corps "MEU" units, and all Marine Corps tank companies, may never be selected as variable reinforcements.
- US units with higher-formation designation 24, and artillery units with higher-formation designation "C", may not be selected as variable reinforcements.
- The US player may not select eliminated units as reinforcements.
Example of US variable reinforcements: The US player's variable reinforcement result is 12 reinforcement points. He decides to select one 1M headquarters unit (value 1 point). He also selects one Marine Corps battalion (4 points), two 29th Division infantry battalions (6 points, assuming that the division committed in this scenario is the 29th rather than the 101st), and one 82nd Airborne tank company (value 1 point). The total reinforcement points of these four units is 12, which is the total available to the US player. These units are placed in the US Airlift box.
15.34 A variable reinforcement result followed by a number in parentheses, "1A", "2A" or "3A", means that the number of air reinforcement units the player receives equals the number before the letter "A" (1, 2 or 3). A player receiving air reinforcements may select any unused friendly air unit (except eliminated ones). The owning player may use the selected air units to execute missions in the subsequent Air Action Phase. (Example: in Scenarios 1, 2 or 3, Soviet air units may not be selected; in Scenarios 4 and 5, Iranian air units may not be selected. In addition, British, French and Israeli special reinforcement ("S") air units may not be selected at this time.)
15.35 Some US variable reinforcement results are followed by the letter "N". This means that, in addition to the normal reinforcement result, a US heavy naval unit is immediately made available to the US player. Place that heavy naval unit on the US Naval Operations Display. If the US player already has a heavy naval unit, the "N" result is ignored.
15.36 Unused reinforcement units or points may not be saved from one turn to the next. If they are not used in the turn in which they are available, they are lost.
15.37 Variable Reinforcement Table: see the separate chart page.
15.4 Deployment of Overland Reinforcements
15.41 During the Land step of the First and Second Deployment Phases, the Iranian or Soviet player may deploy units from the "Overland" box onto the map as follows:
- He rolls the die and consults the Overland Arrival Table. The result is a letter (A, B, C, D or E), which designates the Staging Area to which Iranian or Soviet reinforcements must be deployed in the current deployment phase.
- He may remove up to 6 units from the "Overland" box and place them in the Staging Area determined in step 1. Units selected for deployment to the Staging Area may be chosen from any unit in the "Overland" box (regardless of higher-formation designation). These units are placed in any hex of the Staging Area on their tactical side, with at most one unit per hex. Exception: if a Soviet HQ is deployed, all helicopter units in the "Overland" box that share that HQ's higher-formation designation must be deployed with it. This group of units counts as one unit at deployment time, and is placed in the same hex of the Staging Area. If there are currently no helicopter units in the "Overland" box, the HQ may be deployed alone; but a helicopter unit may never be deployed alone, without its higher HQ. If the Soviet player wishes to deploy a helicopter unit from the "Overland" box to the map, and its higher HQ is already on the map, that helicopter unit may be placed directly above the HQ, even if the HQ's hex is not within the Staging Area. (But if its higher HQ currently has a "Cut-off" or "Isolated" marker, the helicopter unit may not be deployed.)
- Iranian or Soviet reinforcements may be placed within the US-controlled area.
- A unit may not be deployed to a Staging Area hex that is already occupied by friendly units. If the units from the "Overland" box cannot be placed in the designated Staging Area, those units may not be deployed in this deployment phase.
15.42 Deployment of Overland reinforcements is voluntary. Units may remain in the "Overland" box indefinitely, but once deployed to the map, they may not return to the previous box. Deployed reinforcements may be activated in subsequent action cycles. Note: the two Deployment Phases of Turn 1 are skipped, but Turn 5 proceeds normally.
15.43 Overland Arrival Table: see the separate chart page.
15.5 Deployment of Airlift Reinforcements
US or Soviet units in the "Airlift" box may be deployed onto the map during the Airlift step of the First and Second Deployment Phases (US units are deployed first, Soviet units afterward). Note: the two Deployment Phases of Turn 1 are skipped, but Turn 5 proceeds.
15.51 The deployment of US and Soviet airlift units is subject to the following restrictions:
- US units may only be deployed to airfield hexes bearing a US Control marker. Soviet units may only be deployed to airfield hexes whose control zone contains at least one Soviet ground unit and no US units at all.
- In each deployment phase, at most 3 battalion-size ground units (or equivalent) may be deployed to the Abbas Port Airfield hex (3924). In each deployment phase, at most 1 battalion-size ground unit (or equivalent) may be deployed to the Hawadariya Airfield hex (2328). In each deployment phase, at most 1 battalion-size ground unit (or equivalent) may be deployed to the Piyad Airfield hex (1430). Three companies equal one battalion, so each deployment phase may deploy 9 companies to Abbas Port Airfield, and 3 companies to Hawadariya or Piyad Airfield. Exception: if a US HQ is deployed, all helicopter units in the "Airlift" box that share its higher-formation designation must be deployed with it. This group of units counts as one battalion at deployment time, and is stacked in the same airfield hex. If there are currently no helicopter units in the "Airlift" box, the HQ may be deployed alone; but a helicopter unit may never be deployed alone, without its higher HQ. If the US player wishes to deploy a helicopter unit from the "Airlift" box, and its higher HQ is already on the map, the helicopter unit may be placed directly above its HQ, even if the HQ's hex is not an airfield. In this case, the helicopter unit counts as one battalion at deployment time and is treated as having arrived at an airfield controlled by the US player and designated by him. (But if its higher HQ currently has a "Cut-off" or "Isolated" marker, the helicopter unit may not be deployed to the map.)
- A US unit may be deployed to an airfield hex only if its higher-formation designation matches the "Airhead" marker (see 13.12) in that hex. Exception: US units with higher-formation designation "C" (including special reinforcements; see 17.2) may be deployed to any US-controlled airfield.
- Airlifted units are placed on the map on their tactical sides and may be activated in subsequent action cycles.
15.52 If the airfield to which the player wishes to deploy units is already occupied by friendly units, he may still deploy them, even in violation of the stacking limits. But he must satisfy that hex's stacking limit before the end of the subsequent action cycle. If he does not, the opposing player may eliminate units in that hex to ensure the stacking limit is not exceeded.
15.6 Parachute Drop
Only the US player may execute a parachute drop. A parachute drop does not take place in a deployment phase; it is an operational action that the US player may choose to execute during an action cycle.
15.61 Parachute drops may only be made in Turns 1 to 4; they may not be made in Turn 5. In addition, if in a turn the Iranian or Soviet player wins an air superiority battle (see 11.3), no parachute drop may be executed in that turn. Exception: regardless of who wins the air superiority battle, a parachute drop may always be executed in Turn 1.
15.62 Only US, British, French or Canadian parachute infantry, parachute artillery or Ranger units located in the "Airlift" box may take part in a parachute action.
15.63 The US player may declare at most one parachute drop per action cycle. In the first action of the first action cycle of Turn 1, all US units in the "Airlift" box may take part, regardless of size. In the second action cycle of Turn 1, and in all subsequent action cycles, at most one battalion plus one company (or at most four companies) may take part in a parachute drop.
15.64 When a parachute drop is declared, the participating units are removed from the "Airlift" box and deployed onto the map, subject to the following restrictions:
- At most one battalion plus one company may be placed in the same hex; or, at most four companies may be placed in the same hex.
- Units may not be placed in an enemy ZOC.
- Units may only be placed in Clear or Broken terrain hexes.
- If two or more units take part in a parachute drop, the distance between them may be decided by the US player as he wishes.
15.65 A unit that executes a parachute drop must be placed on its tactical side, and may be activated later in the same action cycle. However, that unit may not execute airmobile movement. If it is activated, its printed movement allowance is ignored; instead, during that action cycle its movement allowance is limited to 1. (Therefore, it has 2 movement points in an Operational Move action, and 3 movement points in a Strategic or Non-combat Move action.) In all subsequent action cycles, the unit regains its printed movement allowance. A unit may execute a fortification action in the same action cycle as its parachute drop. An artillery unit may support friendly units in the same action cycle as its parachute drop.
15.7 Deployment of Sealift Reinforcements
US units located in the "Sealift" box may be deployed onto the map during the Sealift step of the First and Second Deployment Phases, as follows:
- Sealift units may only be deployed to port hexes bearing a US Control marker.
- In each deployment phase, at most 2 battalion-size ground units (or equivalent) may be deployed to the Abbas Port hex (2629). In each deployment phase, at most 1 battalion-size ground unit (or equivalent) may be deployed to the Tiab Port hex (1632). Three companies equal one battalion, so each deployment phase may deploy 6 companies to Abbas Port and 3 companies to Tiab Port. Example: if a US HQ is deployed, all helicopter units in the "Sealift" box that share its higher-formation designation must be deployed with it. This group counts as one battalion at deployment time and is stacked in the same port hex. Helicopter units may not be deployed in the same hex as their higher HQ (and vice versa).
Note: the sentence "Helicopter units may not be deployed in the same hex as their higher HQ" in item 2 is printed as it stands. It conflicts with the example in the same item, which requires the helicopter units to be deployed together with their HQ in one port hex, and it differs from the airfield rule in 15.51; the printed text is transcribed unchanged.
- If the US player wishes to deploy units to a port hex that is already occupied by friendly units, violating the stacking limit, he may still deploy them. But he must satisfy the stacking limit by the end of the subsequent action cycle. If he does not, the opposing player may eliminate units in that hex to ensure the stacking limit is not exceeded.
- Sealift units are placed on the map on their tactical sides and may be activated in subsequent action cycles.
15.8 Amphibious Assault
Only the US player may execute an amphibious assault. This type of assault does not take place in a deployment phase; it is an operational action that the US player may choose to execute during an action cycle. At most three amphibious assault actions may be declared in each action cycle.
15.81 Only the US Marine Corps "MEU" units (11MEU, 13MEU and 22MEU) and the US Marine Corps tank companies (A-1TK, B-1TK and C-1TK) may execute an amphibious assault. MEU units and Marine tank companies must be in the US "Sealift" box to take part in an amphibious assault. They may also be deployed to the map through the normal sealift procedure (but may never be deployed through the airlift).
15.82 If the US player declares an amphibious assault, he must select one MEU unit from the "Sealift" box. He may also select one Marine tank company to accompany the MEU in the assault (a tank company may not carry out an amphibious assault alone). The selected MEU unit (and its accompanying tank company, if any) is placed on its tactical side in any landing hex. If the landing hex is occupied by enemy units, follow 15.83. If the landing hex is not occupied by enemy units, follow 15.84.
15.83 If the landing hex is occupied by an enemy, the US MEU unit and its accompanying tank company (if any) taking part in the amphibious assault must immediately attack that hex. This attack is part of the amphibious assault, not a separate operational action. It is resolved as normal combat, with these exceptions:
- Only the enemy units in the landing hex itself defend; enemy units in adjacent hexes are ignored.
- The defending player must announce Entrenched Defense (not Mobile Defense).
- Only the MEU unit that has landed, and its accompanying tank company, may add their combat values to the attack.
- The US player may add the support values of one or two unfatigued naval units and one or two unfatigued ground-support air units to the attack (ground-support air units must bear anti-aircraft fire; see 12.31). Artillery and helicopter units may not support this attack. Tactical Advantage bonuses are available at this time (see 17.13).
- Regardless of the terrain occupied by the defender, all combat is resolved using the "Amphibious Assault" column of the CRT.
- Although Marine tank companies have variable combat values, when they take part in an amphibious assault the variable combat value table is not consulted. In an amphibious assault, the printed combat value (2) on the Marine tank company counter is always used.
- If defending units are forced to retreat out of their hex by a combat result, the MEU unit and its accompanying tank company (if any) must occupy that hex, and must immediately be flipped to their fatigue sides. They may not be activated later in the current action cycle. If the combat result is "NE" (no effect), the US units are removed from the landing hex, flipped to their fatigue sides and returned to the sealift box. They may take no further action in the current cycle. In the next Recovery Phase these units are flipped back to their tactical sides, after which they may take part in another amphibious assault. If a US unit receives any unfavourable combat result (any result including an "A"), it is eliminated.
15.84 If the landing hex is not occupied by an enemy, the MEU unit and its accompanying tank company (if any) enter that hex on their tactical sides. They may be activated later in the same action cycle, as part of a Unit Activation or Task Force Activation action. If activated, the US unit's printed movement allowance is ignored; instead, during that period, its printed movement allowance is treated as 1. (Therefore, an Operational Move action gives it a movement allowance of 2, and a Strategic or Non-combat Move action gives it a movement allowance of 3.) The MEU unit and the tank company that landed with it regain their printed movement allowances in subsequent action cycles. During their activation, the US units may attack normally.
15.85 If an MEU unit successfully occupies the land hex corresponding to its landing hex, the US player immediately places a Beachhead marker in that hex. A Beachhead marker may neither move nor take part in combat. Enemy and friendly units may enter a hex containing a Beachhead marker, with no unfavourable effect. If, at the end of an action cycle, an Iranian or Soviet unit occupies a hex containing a Beachhead marker, that marker is eliminated. Beachhead markers are US supply sources.
15.9 Commitment of US Divisions
At the start of every scenario except Scenario 1, the US player must determine the commitment status of each of his divisions.
- The 82nd Airborne Division, the 1st Marine Division ("1M") and all US units with higher-formation designation "C" are automatically considered "committed".
- At the start of the scenario, the US player rolls the die to determine the commitment status of the 29th (Light) Division and the 101st (Air Assault) Division. If the result is even (including 0), the 29th Division is committed and the 101st Division is not. If the result is odd, the 101st Division is committed and the 29th Division is not. Units of an uncommitted division may not appear in the scenario. Exception: 24th Division units may not be committed, even though those units will sometimes be brought out as sealift reinforcements.
16.0 Turn 1: Special Rules
16.1 Iranian/Soviet Operational Action Die Rolls
During the First Action Cycle of Turn 1, all die rolls by the Iranian or Soviet player to determine the number of Operational Actions available to him are reduced by 4. During the Second Action Cycle of Turn 1, all such die rolls by the Iranian or Soviet player are reduced by 2. A die result may not be reduced below 0.
16.2 Phases
In all scenarios starting in Turn 1, the Reinforcement Phase, the First and Second Deployment Phases and the Random Events Phase are always skipped.
17.0 Optional Rules
The following rules may be used only with the agreement of both players.
17.1 Special Forces Operations
In some scenarios, players receive Special Forces units. The US Special Forces unit is called a "Special Forces" (特种部队) team; the Soviet unit is called a "Vysotniki" (abbreviated "VTNKI", that is, "Soviet Army Assault Team") team.
17.11 Before the game begins, each player secretly assigns his Special Forces units to mission boxes on the Special Forces Operations Area (突击队行动区). Each player's operations area has two mission boxes: "Long Range Mission" and "Tactical Mission". To assign a Special Forces unit to a mission, place it in one of the mission boxes in the operations area. For the rest of the game (unless it is eliminated), that unit may not be moved out of its mission box. A player may assign all of his Special Forces units to one mission, or assign them to two missions.
17.12 In each Special Forces Phase, each player who has Special Forces units rolls the die once and consults the Special Forces Action Table. The table has three columns: one column applies to Special Forces units on a Long Range mission; one column applies to those on a Tactical mission; and the last column determines whether any Special Forces unit is lost. Each player cross-references his die result with all three columns. There are six possible results. (Note: a single roll may produce at most three results at once.)
- No effect ("NE"): no further action is required.
- Tactical Advantage ("TA").
- Delay Enemy Reinforcements ("DER").
- Raid Enemy Airfield ("REA").
- Fatigue Enemy Unit ("FEU").
- Special Forces Loss ("0", "1" or "2").
17.13 If a player obtains a "Tactical Advantage" result, he checks his "Tactical Mission" box. If there are no Special Forces units in that box, the result has no effect. However, each Special Forces unit in that mission box may give its owning player one Tactical Advantage bonus for a combat that occurs later in this turn. Each Special Forces unit in the Tactical Mission box may be used to generate one Tactical Advantage bonus in the current turn. Each Special Forces unit used for this purpose is flipped to its reverse side, and it may not be used again until it has produced a "Tactical Advantage" result on the Special Forces Action Table. Each player may use at most one Tactical Advantage bonus per combat. If a Tactical Advantage bonus is applied to an attack, the combat die roll is increased by 1; if it is applied to a defense, the combat die roll is reduced by 1. If both players have a Tactical Advantage bonus available, the Soviet player must first declare whether he will use his bonus in the combat; the US player then declares whether he uses his bonus. In the End Phase, all Special Forces units on their reverse sides are flipped back to their front sides. If a "Tactical Advantage" result is obtained again later, the Special Forces units may be used again for this purpose.
17.14 If a player obtains a "Delay Enemy Reinforcements" result, he checks his "Long Range Mission" box. If there are no Special Forces units in that box, the result has no effect. However, for each Special Forces unit in that box, the opposing player's variable reinforcement die roll in the subsequent Reinforcement Phase of the current turn is reduced by 1. Note: if this result is obtained in Turn 1 or Turn 5, it is converted to a "Raid Enemy Airfield" result (see 17.15).
17.15 If a player obtains a "Raid Enemy Airfield" result, he checks the "Long Range Mission" box. If there are no Special Forces units in that box, the result has no effect. If at least one Special Forces unit is in that box, the player rolls the die once for each Special Forces unit in the box:
- Roll 0: the Special Forces player eliminates one enemy air unit in the opponent's Air Action Area.
- Roll 1 or 2: the Special Forces player fatigues one enemy air unit in the opponent's Air Action Area. A fatigued air unit may not be assigned a mission in the subsequent Air Action Phase; it recovers from fatigue in the End Phase.
- Other results: no effect.
Note: Soviet Special Forces may never eliminate or fatigue US Navy ("USN") air units.
17.16 If a player obtains a "Fatigue Enemy Unit" result, he checks his "Long Range Mission" box. If there are no Special Forces units in that box, the result has no effect. However, for each Special Forces unit in that box, the player may fatigue one enemy ground unit (including HQ units) anywhere on the map (flip it to its reverse side). A unit fatigued in this way is fatigued only for the First Action Cycle of the current turn. Such units recover normally from fatigue in the First Recovery Phase. If the enemy player has no ground units on the map, this result has no effect.
17.17 If a player obtains a "0" result in the "Special Forces Loss" column, his Special Forces units are not affected. If he obtains a "1" or "2" result, he must eliminate the designated number of Special Forces units from his Special Forces operations area. Eliminated Special Forces units are immediately removed from their mission boxes. These units may not take part in any mission obtained from this die roll, nor may they return to the game.
17.18 Special Forces Action Table: see the separate chart page.
17.2 Random Events
17.21 In every Random Events Phase starting from Turn 2, the US player rolls the die, and the players consult the Random Events Table. (Exception: no random events occur in Scenario 1.) There are three possible random events:
- Silkworm/Backfire Attack (蚕式/逆火攻击).
- B-52 Attack.
- Special Reinforcement.
17.22 If the "Silkworm/Backfire Attack" result is obtained, the Iranian or Soviet player must immediately attack one US naval unit of his choice on the US Naval Operations Display. To execute this attack, the Iranian/Soviet player rolls the die:
- Roll 0 to 2 (inclusive): the naval unit is eliminated.
- Roll 3 to 5 (inclusive): the naval unit becomes fatigued.
- Other results: no effect.
This event may occur several times in a game. If there are no US naval units in the game, this result is ignored. Note: if at any time in Scenarios 1, 2 or 3 the US player controls two Silkworm VP hexes, the "Silkworm Attack" results on the Random Events Table are ignored for the rest of the game, even if the Iranian player regains control of one or both of those hexes.
17.23 If the "B-52 Attack" result is obtained, the US player must immediately attack one enemy-occupied hex of his choice, subject to these restrictions:
- The hex must be at least 3 hexes away from the nearest US unit.
- The hex must be Clear or Broken terrain, or any hex containing a road or trail. The hex may be in a Staging Area.
- To execute the attack, the US player rolls the die:
- Roll 0 or 1: all enemy units in the target hex are eliminated.
- Roll 2 to 4 (inclusive): one enemy unit selected by the US player is eliminated.
- Other results: no effect.
17.24 If the "Special Reinforcement" result is obtained, either player may gain a special reinforcement. Special reinforcements are units with higher-formation designation "S". To determine the unit, the player checks the abbreviation in parentheses after the result:
- US: the US player receives the US paratroop battalion "3/325".
- UK (英国): the US player receives the British paratroop battalion "2/PR" and the air unit "801" (Sea Harrier, 海鹞).
- FR (法国): the US player receives the French paratroop battalion "1/CP" and the air unit "11F" (Super Étendard, 超级军旗).
- IS (以色列): the US player receives the Israeli air unit "5" (F-15).
- CA (加拿大): the US player receives the Canadian company "A-1/RCR".
- IR (伊朗): the Iranian player receives the Iranian infantry battalions "AYGD-1" and "AYGD-2".
- SO (苏联): the Soviet player receives the Soviet Ranger battalions "Rvki-1" and "Rvki-2".
17.25 US special reinforcements are placed in the US Airlift box (air units excepted; air units are placed in the US Air Operations Display). Iranian special reinforcements are placed in the Iranian Overland box. Soviet special reinforcements are placed in the Soviet Airlift or Overland box. If a special reinforcement result has already appeared, that result is converted to "No effect" for the rest of the game. For combat support purposes: all US special reinforcements have higher-formation designation "C"; Iranian special reinforcements have higher-formation designation "A"; and Soviet special reinforcements have higher-formation designation "103".
17.26 Random Events Table: see the separate chart page.
17.3 Revolutionary Guard Human Wave Attack
An Iranian infantry regiment-size unit bearing the "RVGD" designation may, at the Iranian player's decision, carry out a "human wave attack" (人海攻击). A unit may carry out a human wave attack only when it takes part in an attack from its tactical side. A human wave attacking "RVGD" unit has its combat value multiplied by 2, but it is automatically eliminated after combat resolution. The losses from its elimination may be used to satisfy the loss results of that combat. The Iranian regiment-size units "AYGD-1" and "AYGD-2" may not carry out human wave attacks.
17.4 10th Mountain Division (Light)
The US player receives three optional counters from the 10th Mountain Division (Light): 1/22, 2/14 and 3/14. In a scenario in which the 29th Infantry Division is committed, the US player may replace any three infantry units of the 29th Division with units of the 10th Mountain Division. For airlift purposes, the 10th Mountain Division units are treated as equivalent to infantry battalions of the 29th Division. Although their higher-formation designation is "10", for support purposes it is treated as "29". A 10th Mountain Division infantry battalion entering a mountain hex spends 2 movement points (not 3).
17.5 A-10 and Attack Helicopters
If the US player wins an air superiority battle, and a US A-10 air unit is currently executing a ground support mission, the US player may execute a special operational action called an "Air Strike" (空中打击). If an air strike is declared, the US player immediately moves the action marker back 1 space and flips the A-10 unit to its fatigue side. To execute the air strike, the US player selects any Iranian or Soviet motorized unit (or motorized stack) on the map that occupies a hex containing a road or trail. The US player rolls the die:
- Roll 0: all enemy motorized units in the target hex are eliminated.
- Roll 1 or 2 (inclusive): one enemy motorized unit selected by the US player is eliminated.
- Other results: no effect.
If the target hex is also within the range of US helicopter units (printed as "support value 12"), the US player may commit any number of those helicopter units to the air strike. Each helicopter unit committed to the air strike that is within 18 hexes of the target hex causes the action marker to move back 1 space. A helicopter unit committed to the air strike must be on its tactical side, although taking part will cause it to be flipped to its fatigue side. Before taking part in the strike, each helicopter unit must bear anti-aircraft fire separately from the A-10 unit. Helicopter units may not take part in a strike initiated by a non-A-10 unit. If helicopters take part, the strike is resolved as a single combat. However, for each helicopter unit taking part in the strike, the US player subtracts 1 from his air strike die roll.
Note: before the air strike is resolved, the A-10 unit must bear anti-aircraft fire (see 12.3, step 5).
18.0 Scenarios
There are five scenarios. The first is the Introductory scenario, which lasts only two turns and uses US and Iranian units. The other four scenarios each last five turns. Scenarios 2 and 3 involve only US and Iranian units; Scenarios 4 and 5 involve only US and Soviet units. The background and special notes for each scenario follow. To simplify initial setup, players need not deploy units bearing exactly the unit designations listed in a scenario's deployment table. As long as a unit's values, type, size and higher-formation designation match a listed unit, the player may deploy any such unit to the designated hex or box.
18.1 Scenario 1: US Invasion (Introductory Version)
- Background: The 82nd Airborne Division brigade on standby at Fort Bragg, and the Marine Expeditionary Unit (MEU) deployed in the Arabian Sea, have been ordered to seize all airfields, ports and other important military targets on the southern Iranian coast along the Strait of Hormuz. The local Iranian coastal defense and militia units, facing an imminent attack, have received no warning.
- Scenario length: The scenario ends at the end of Turn 2.
- Special Forces units: None.
- US deployment:
| Unit | Higher Designation | Size | Type | Combat Value | Deployment Location |
|---|---|---|---|---|---|
| 1/325 | 82 | Battalion | Parachute infantry | 8 | US Airlift box |
| 2/325 | 82 | Battalion | Parachute infantry | 8 | US Airlift box |
| 4/325 | 82 | Battalion | Parachute infantry | 8 | US Airlift box |
| 1/319 | 82 | Battalion | Parachute artillery | 3 | US Airlift box |
- Iranian deployment:
| Unit | Higher Designation | Size | Type | Combat Value | Deployment Location |
|---|---|---|---|---|---|
| 101–109 (nine units) | A | Battalion | Coast Defense | 2 each | Any Victory Point hex, at most 1 unit per hex |
| 901 | A | Battalion | Militia | 1 | Any Victory Point hex, at most 1 unit per hex |
| 902 | A | Battalion | Militia | 1 | Any Victory Point hex, at most 1 unit per hex |
| 1RVGD | A | Regiment | Infantry | 8 |
- US fixed reinforcements:
| Turn | Unit | Higher Designation | Size | Type | Combat Value | Deployment Location |
|---|---|---|---|---|---|---|
| 2 | 11MEU | 1M | Battalion | Marine infantry | 9 | US Sealift box |
| 2 | B-1TK | 1M | Company | Tank | (2) | US Sealift box |
| 2 | 1/504 | 82 | Battalion | Parachute infantry | 8 | US Airlift box |
- Special rules:
- a. All US units must be deployed to the map by parachute drop or amphibious assault; airlift and sealift may not be used. Note that during the First Action Cycle of Turn 1, the US player may execute one parachute drop operational action. In that action, under the parachute rules (see 15.6), he may place all units in the "Airlift" box on the map. This counts as one operational action.
- b. In this scenario, the US player may not place Airhead markers on airfields.
- c. This scenario skips the Variable Reinforcement step and both (First and Second) Deployment Phases.
- d. No random events occur in this scenario.
- Victory conditions: At the end of the game, the US player determines all the VP hexes he controls. The total VP value of the controlled hexes is then reduced by the number of Iranian artillery units that have a US-controlled airfield or port within their range (see 13.31). The adjusted total US VP is compared with the following table to determine the winner and the degree of victory:
| US VP Total | Result |
|---|---|
| 27 or more | US decisive victory |
| 23–26 | US substantive victory |
| 19–22 | US marginal victory |
| 15–18 | Iranian marginal victory |
| 11–14 | Iranian substantive victory |
| 10 or less | Iranian decisive victory |
Game balance note: some of our playtesters felt that Scenario 1 is unfavourable to Iran. If you also feel this way, reduce the US total VP at the end of the game by 1 point.
18.2 Scenario 2: US Invasion (Standard Version)
- Background: This scenario simulates the same situation as Scenario 1, but the game length is extended by three days, and this scenario uses additional rapid-deployment US units and Iranian reinforcement units.
- Scenario length: The scenario ends at the end of Turn 5.
- Special Forces units: The US player has six Special Forces teams. The Iranian player has no Special Forces units.
- US deployment:
| Unit | Higher Designation | Size | Type | Combat Value | Deployment Location |
|---|---|---|---|---|---|
| 1/325 | 82 | Battalion | Parachute infantry | 8 | US Airlift box |
| 2/325 | 82 | Battalion | Parachute infantry | 8 | US Airlift box |
| 4/325 | 82 | Battalion | Parachute infantry | 8 | US Airlift box |
| 1/319 | 82 | Battalion | Parachute artillery | 3 | US Airlift box |
- Iranian deployment:
| Unit | Higher Designation | Size | Type | Combat Value | Deployment Location |
|---|---|---|---|---|---|
| 101–109 (nine units) | A | Battalion | Coast Defense | 2 each | Any Victory Point hex, at most 1 unit per hex |
| 901 | A | Battalion | Militia | 1 | Any Victory Point hex, at most 1 unit per hex |
| 902 | A | Battalion | Militia | 1 | Any Victory Point hex, at most 1 unit per hex |
| 1RVGD | A | Regiment | Infantry | 8 |
- US fixed reinforcements:
| Turn | Unit | Higher Designation | Size | Type | Combat Value | Deployment Location |
|---|---|---|---|---|---|---|
| 2 | 11MEU | 1M | Battalion | Marine infantry | 9 | US Sealift box |
| 2 | B-1TK | 1M | Company | Tank | (2) | US Sealift box |
| 4 | 13MEU | 1M | Battalion | Marine infantry | 9 | US Sealift box |
| 4 | C-1TK |
- Special rules: None.
- Victory conditions: The same procedure as in Scenario 1 applies: the US player's controlled VP hexes are totalled, and the total is reduced by the number of Iranian artillery units with a US-controlled airfield or port within their range (see 13.31). The adjusted total is compared with the following table:
| US VP Total | Result |
|---|---|
| 28 or more | US decisive victory |
| 24–27 | US substantive victory |
| 19–23 | US marginal victory |
| 14–18 | Iranian marginal victory |
| 10–13 | Iranian substantive victory |
| 9 or less | Iranian decisive victory |
18.3 Scenario 3: CENTCOM
- Background: This scenario simulates the same situation as Scenario 2, but assumes the United States had three to four weeks to prepare for this operation. The two heavy brigades of the 24th Infantry Division will arrive at the Strait of Hormuz by sea at the start of the scenario.
- Scenario length: The scenario ends at the end of Turn 5.
- Special Forces units: The US player has six Special Forces teams. The Iranian player has no Special Forces units.
- US deployment:
| Unit | Higher Designation | Size | Type | Combat Value | Deployment Location |
|---|---|---|---|---|---|
| 1/325 | 82 | Battalion | Parachute infantry | 8 | US Airlift box |
| 2/325 | 82 | Battalion | Parachute infantry | 8 | US Airlift box |
| 4/325 | 82 | Battalion | Parachute infantry | 8 | US Airlift box |
| 1/319 | 82 | Battalion | Parachute artillery | 3 | US Airlift box |
- Iranian deployment:
| Unit | Higher Designation | Size | Type | Combat Value | Deployment Location |
|---|---|---|---|---|---|
| 101–109 (nine units) | A | Battalion | Coast Defense | 2 each | Any Victory Point hex, at most 1 unit per hex |
| 901 | A | Battalion | Militia | 1 | Any Victory Point hex, at most 1 unit per hex |
| 902 | A | Battalion | Militia | 1 | Any Victory Point hex, at most 1 unit per hex |
| 1RVGD | A | Regiment | Infantry | 8 |
- US fixed reinforcements:
| Turn | Unit | Higher Designation | Size | Type | Combat Value | Deployment Location |
|---|---|---|---|---|---|---|
| 2 | 11MEU | 1M | Battalion | Marine infantry | 9 | US Sealift box |
| 2 | B-1TK | 1M | Company | Tank | (2) | US Sealift box |
| 4 | 13MEU | 1M | Battalion | Marine infantry | 9 | US Sealift box |
| 4 | C-1TK |
- Special rules: None.
- Victory conditions: The US player's controlled VP hexes are totalled, and the total is reduced by the number of Iranian artillery units with a US-controlled airfield or port within their range (see 13.31). The adjusted total is compared with the following table:
| US VP Total | Result |
|---|---|
| 31 or more | US decisive victory |
| 27–30 | US substantive victory |
| 22–26 | US marginal victory |
| 17–21 | Iranian marginal victory |
| 13–16 | Iranian substantive victory |
| 12 or less | Iranian decisive victory |
18.4 Scenario 4: Soviet Invasion
- Background: This scenario simulates a Soviet invasion of Iran. Two regiments of the 103rd Guards Airborne Division have landed by parachute near the port of Abbas to seize nearby important airfields and ports. At the same time, two Soviet motorized rifle divisions from the Turkestan Military District are advancing rapidly southward, meeting little effective resistance from Iran, aiming to link up with the airborne troops. In response, the US is deploying elements of the 18th Airborne Corps and the 1st Marine Division to prevent the Soviet closure of the Strait of Hormuz.
- Scenario length: The scenario ends at the end of Turn 5.
- Special Forces units: The US player has six Special Forces teams. The Soviet player has four Army assault ("Vysotniki") teams.
- US deployment:
| Unit | Higher Designation | Size | Type | Combat Value | Deployment Location |
|---|---|---|---|---|---|
| 1/325 | 82 | Battalion | Parachute infantry | 8 | US Airlift box |
| 2/325 | 82 | Battalion | Parachute infantry | 8 | US Airlift box |
| 4/325 | 82 | Battalion | Parachute infantry | 8 | US Airlift box |
| 1/319 | 82 | Battalion | Parachute artillery | 3 | US Airlift box |
- Soviet deployment:
| Unit | Higher Designation | Size | Type | Combat Value | Deployment Location |
|---|---|---|---|---|---|
| 1/583 | 103 | Battalion | Parachute infantry | 4 | Any Clear, Broken, City or Victory Point hex, at most 1 unit per hex |
| 2/583 | 103 | Battalion | Parachute infantry | 4 | Same as above |
| 3/583 | 103 | Battalion | Parachute infantry | 4 | Same as above |
| 1/688 | 103 | Battalion | Parachute infantry | 4 |
- US fixed reinforcements:
| Turn | Unit | Higher Designation | Size | Type | Combat Value | Deployment Location |
|---|---|---|---|---|---|---|
| 2 | 11MEU | 1M | Battalion | Marine infantry | 9 | US Sealift box |
| 2 | B-1TK | 1M | Company | Tank | (2) | US Sealift box |
| 4 | 13MEU | 1M | Battalion | Marine infantry | 9 | US Sealift box |
| 4 | C-1TK |
- Special rules: None.
- Victory conditions: The US player's controlled VP hexes are totalled, and the total is reduced by the number of Soviet artillery units with a US-controlled airfield or port within their range (see 13.31). The adjusted total is compared with the following table:
| US VP Total | Result |
|---|---|
| 28 or more | US decisive victory |
| 24–27 | US substantive victory |
| 20–23 | US marginal victory |
| 16–19 | Soviet marginal victory |
| 11–15 | Soviet substantive victory |
| 10 or less | Soviet decisive victory |
18.5 Scenario 5: Soviet Invasion (Extended Warning Version)
- Background: This scenario simulates the same situation as Scenario 4, but assumes the US had three to four weeks of warning of the Soviet invasion. At the start of the scenario, the two heavy brigades of the 24th Infantry Division arrive at the Strait of Hormuz by sea.
- Scenario length: The scenario ends at the end of Turn 5.
- Special Forces units: The US player has six Special Forces teams. The Soviet player has four Army assault ("Vysotniki") teams.
- US deployment:
| Unit | Higher Designation | Size | Type | Combat Value | Deployment Location |
|---|---|---|---|---|---|
| 1/325 | 82 | Battalion | Parachute infantry | 8 | US Airlift box |
| 2/325 | 82 | Battalion | Parachute infantry | 8 | US Airlift box |
| 4/325 | 82 | Battalion | Parachute infantry | 8 | US Airlift box |
| 1/319 | 82 | Battalion | Parachute artillery | 3 | US Airlift box |
- Soviet deployment:
| Unit | Higher Designation | Size | Type | Combat Value | Deployment Location |
|---|---|---|---|---|---|
| 1/583 | 103 | Battalion | Parachute infantry | 4 | Any Clear, Broken, City or Victory Point hex, at most 1 unit per hex |
| 2/583 | 103 | Battalion | Parachute infantry | 4 | Same as above |
| 3/583 | 103 | Battalion | Parachute infantry | 4 | Same as above |
| 1/688 | 103 | Battalion | Parachute infantry | 4 |
- US fixed reinforcements:
| Turn | Unit | Higher Designation | Size | Type | Combat Value | Deployment Location |
|---|---|---|---|---|---|---|
| 2 | 11MEU | 1M | Battalion | Marine infantry | 9 | US Sealift box |
| 2 | B-1TK | 1M | Company | Tank | (2) | US Sealift box |
| 4 | 13MEU | 1M | Battalion | Marine infantry | 9 | US Sealift box |
| 4 | C-1TK |
- Special rules: None.
- Victory conditions: The US player's controlled VP hexes are totalled, and the total is reduced by the number of Soviet artillery units with a US-controlled airfield or port within their range (see 13.31). The adjusted total is compared with the following table:
| US VP Total | Result |
|---|---|
| 31 or more | US decisive victory |
| 27–30 | US substantive victory |
| 23–26 | US marginal victory |
| 19–22 | Soviet marginal victory |
| 14–18 | Soviet substantive victory |
| 13 or less | Soviet decisive victory |
Charts, Tables, Areas and Records (Index)
Charts and Tables
- (7.16) Terrain Effects Chart
- (8.15) Variable Combat Value Table
- (8.53) Combat Results Table
- (11.33) Air Superiority Table
- (11.34) Ground Support Table
- (12.27) Anti-Aircraft Table
- (15.37) Variable Reinforcement Table
- (15.43) Overland Arrival Table
- (17.18) Special Forces Action Table
- (17.26) Random Events Table
Areas (on the map)
- US Air Operations Area
- Iranian/Soviet Air Operations Area
- US Naval Operations Area
- US Reinforcement Area
- Iranian/Soviet Reinforcement Area
- US Special Forces Operations Area
- Soviet Special Forces Operations Area
Records (on the map)
- Turn Record Track
- Operations Point Record Track
- Tactical Point Record Track
Summaries
- Brief game sequence
- Operational action summary
- Tactical action summary
Designer's Notes
The designers' notes are reproduced below as printed, with the designers' bylines omitted.
"Light Division" (轻型师) would more appropriately be titled "Rapid Deployment Force" (快速部署部队), because this game simulates the capabilities of various US intervention forces. Apart from the 29th Infantry (Light) Division, the game also depicts parts of the 82nd Airborne Division, the 101st Air Assault Division, the 1st Marine Division, and the 24th Mechanized Division. However, the name "Rapid Deployment Force" was already in use, so we chose "Light Division" as an appropriate title. After all, apart from the 24th Mechanized Division, all US Army rapid deployment forces are in fact light infantry units.
Austin and I had two basic goals when developing this project. First, to design a playable game that could be learned and completed in a relatively short time. Second, to create a credible scenario in which the capabilities of US rapid deployment forces, and of their potential enemies, could be accurately depicted.
The game system of Light Division is what core players call an "interactive" system: because actions frequently alternate between the players, no one side is left overwhelmed for long. Just as in real war, a unit's actions are often based not on any clearly defined grand strategy, but on "what the enemy over the hill is doing". This "action-reaction" style of system usually makes each game highly unpredictable. In addition, participants are often forced to watch closely each move of the opponent, rather than wandering off to watch a twenty-minute baseball game.
The game is deliberately designed to be short (five game turns), so that players can play a complete scenario in a reasonable time: for example, one evening, and at most two evenings. Also, US military doctrine holds that five days of continuous combat, or slightly longer, is roughly the limit of light infantry endurance, especially when combat occurs far from friendly supply sources. After five days, light units will need to be replaced by new light units, or by "heavy" infantry and armoured units transported by sea.
One of the most difficult aspects of the game is calculating the military capabilities of Iran and the Soviet Union, especially the former. After the Iran–Iraq War, little was known about the organization and strength of Iran's conventional military forces; even less was known about the Revolutionary Guard (Pasdaran). Of course, in determining Iranian order of battle, deployment areas and potential reinforcements, we relied heavily on guesswork. Iran's actual military capability may well be stronger, or weaker, than the game depicts. Players should feel free to experiment with the initial Iranian units and deployments in all scenarios.
As for the Soviet Union, the problem is not understanding the organization and strength of its military units. Rather, we must determine how many units the Soviets could actually deploy against the Strait of Hormuz and, once they arrived there, how to supply them. Although the Soviets are indeed closer to the Strait of Hormuz than the US (only 750 miles from Ashgabat to the sea, whereas from Fort Bragg to the strait is more than 10,000 miles), the Soviets would likely find it much harder to supply their forces in the Persian Gulf region than the US would. The 750 miles from Ashgabat to the sea is extremely barren terrain, home to hostile people.
However, the supply route from the US to the Strait of Hormuz is entirely by water, and cannot be effectively interdicted unless full-scale war breaks out between the US and Soviet navies. The US Navy has deployed its main military strength to the Persian Gulf for more than a decade, so there is clear evidence that major military operations in this region can be launched and supported successfully. (In fact, a major military operation was already carried out during the Persian Gulf escort operations of 1987 and 1988.) However, a full-scale war in this region may prove a far more difficult logistical problem.
We sincerely hope you enjoy Light Division, not only for its gameplay value but also because it depicts a little-known aspect of US military-political strategy. In this game we do not intend to judge whether US, Iranian or Soviet diplomatic policies are right or wrong, even though these policies may trigger the events simulated in the game. Instead, our goal is to let players clearly understand how such a conflict might unfold. Whatever people think about this complex subject, we all surely hope that the events depicted in the game never happen. From all possibilities, in reality there will be no "decisive victory" grade; in the long run, all participants will be losers.
If you enjoy Light Division and wish to see more games of this kind, please write to the 3W company to express your feelings and suggestions for improvement. If there is sufficient interest, we may be able to create more and better games of this kind in the future. We sincerely thank you for your support. Happy gaming.
In the early days of the RDF (Rapid Deployment Force, now CENTCOM), a not very funny joke circulated in military circles: "What on earth is a Rapid Deployment Force?" The answer: "Gentlemen, they're light infantry. You and I take M16 rifles, and two Pan Am tickets." For a time, this was not far from the truth. When Pan Am was struggling with financial problems and deregulation in the early 1980s, the Pentagon was racking its brains over the development and customization of units for the strategic "Rapid Deployment Force" mission, while also grappling with the serious problems of long-range support and sustainment.
To resolve the tension between the key requirement for effective ground combat power and the inherent problems of strategic sustainment, one preliminary "answer" was the creation of the so-called "Light Division". The Light Division (LID) is largely airborne in nature and has "sufficient" combat power to hold and/or control key terrain before heavier (mechanized) units can arrive by sea.
Even in this relatively mature stage, more than ten years later, nobody really knows whether the strategic design requirements have been met. In the early 1980s I analyzed three preliminary Light Division organization and equipment tables (TO&E), one of them in detail. Even at that time, an open secret was that these simulated units, if faced with motorized (let alone mechanized) opponents, lacked enough ground transport to maintain their limited tactical mobility. In addition, there was an obvious lack of an effective medium-range anti-tank missile system with a range of 2,000 meters. (The US "Dragon" anti-tank missile, with a range of 1,000 meters, is simply not enough in the Middle East or Southwest Asia, the main operating area of CENTCOM. We should have bought the European "Milan" missile, but you may also have heard about the procurement disputes.) The debate over the Light Division continues, and frankly, the current "standard" Light Division may not exist in current equipment for more than two or three years. However, rest assured that some form of light infantry unit will always exist in every force structure. (For a futurist view on this, read Heinlein's Starship Troopers.)
I raised these somewhat detailed issues in the designer's notes so that players understand the efforts Joe Balkoski and I made to address some of these elements and integrate them into this game. And yes, for you hardcore players, I use the word "game" because we tried to balance playability with realism.
In a narrow sense of the terminology, calling this game "Light Division" is not strictly accurate. In fact, the 29th Light Division (I explain later why we included it) or a brigade from the 10th Mountain Division (if you use the game balance rules) appears late in the scenarios. However, in a broader sense the game covers a range of light infantry units of various tactical structures and types. Broadly speaking, the 82nd Airborne Division and the 101st (Air Assault) Division are of light organization, as are Iran's coast defense forces, the US Army Rangers, the US Marine Corps, and Soviet airborne troops. The Iranian Revolutionary Guard (Pasdaran) organization is almost a militia with simple equipment, although a militia of high fighting spirit. The "abstracted" Special Forces teams are, in the classical sense, "light" units.
As for including the National Guard's 29th Infantry Division (in fact a reserve formation made up of units from Maryland, Virginia and the District of Columbia), there are several good reasons. First, and most interestingly, Joe Balkoski had just finished writing its history (as an advertisement for a good book, Beyond the Beachhead, Stackpole Books, Harrisburg, Pennsylvania). To be serious: over the next decade, the entire structure of US military strength will depend increasingly on readily available reserve formations to support and reinforce existing units that must be committed to action in a short time. The reorganization effort is partly because of tight budgets, partly because the view of the "threat" has changed (if the Soviets continue to moderate), and partly because the Department of Defense re-evaluated our strategic error in Vietnam. Anyone familiar with Colonel Harry Summers' On Strategy understands this trend. Simply put: if Washington decides to intervene on a large scale (and three or more divisions attacking Iran is large scale), the government must gain the support of the people. The one thing that gains that support, and that is an important political indicator both at home and abroad, is the decision to mobilize citizen-soldier reserves.
Last point: why (once again) mention the Strait of Hormuz? Everyone who is educated knows that this bottleneck is the lifeline of oil, and Bandar Abbas really is a key strategic location. Anyway, this game can actually be traced back to an unclassified and very simple spreadsheet-based airlift logistics simulation that I started at the end of 1983, when I was taking part in a two-week Army Reserve training duty at the US Army War College at Carlisle Barracks, Pennsylvania. Another Army officer asked me whether this "exercise" could be incorporated into an unclassified theater-level simulation that accurately depicted the "strategic stranglehold" extending from the US to, as you guessed, the rear line of the Persian Gulf. My "agreement" was the beginning of this commercial game's fuzziness. The initial game's logistics flow was nightmarish: very accurate from a simulation perspective, but unplayable. Then Joe proposed the solution of "operational actions".
Tactical Hints
Iranian side
The Iranian player must absorb the initial US assault and build fortifications. Strongpoint fortifications in City hexes are very good; Strongpoints are even better. Be careful to protect any artillery units (Scenario 1 has no artillery units), and in the last turn of the game try to place the main Abbas Port airfield within their range of fire.
A Revolutionary Guard human wave attack against unsupported US units can be very effective. The trick is to lure the US player into attacking, making him use up his artillery and naval fire support units, and then attack a front-line battalion or a Ranger company and destroy it.
If regiment-size units can turn Victory Point hexes into strongpoints, then the Holbuk Dam (霍尔布克大坝) and the radio tower in the mountains can resist all attacks except the most closely coordinated one. Isolated Iranian units that hold out and wait for heavy air units or (if possible) US heavy naval units to arrive can be "dug out" by 16-inch naval guns, which can take out the Revolutionary Guard, and any other target on earth.
The Russians are another matter. Engage and destroy the Soviet airborne units in Abbas Port quickly. Dispatch Ranger companies or follow-up airborne battalions to establish a delaying position north of Abbas Port, and beware of flank attacks from the west. At a minimum, deploy one battalion's worth of fortifications at the road crossing the river at hex 4022, west of Abbas International Airport. Listen to me, you will be glad you did.
As more reinforcements arrive, especially the precious Marine M1 tank company, begin to expand the defensive line and try to encircle the Soviet penetrating units. Let a fast-moving Ranger unit seize the radio tower at hex 3121, just for the VP.
Soviet side
Soviet initial control of Abbas International Airport is rather weak. The Soviet player must build fortifications and wait for overland reinforcements to arrive. If possible, dispatch an airborne battalion to the northern road to link up with the advancing mechanized units.
The US Marine Expeditionary Units (MEUs) advancing inland from the beach and port area are almost unstoppable if they receive air and naval gunfire support. But note that Marine units need nearly a whole turn to complete combat deployment. A proactive Soviet player may occupy the airfields and the urban hexes of Abbas Port south along the coast. If they succeed in building fortifications in those hexes, the US Marines will be in trouble.
Soviet units advancing overland must not get bogged down in combat with US Ranger units in delaying positions. If possible, bypass them. Otherwise attack the advance guard with strong force and, with artillery and helicopter support, drive them off the road.
The Soviet ideal goal is to attack the urban hexes of Abbas Port between the international airport and the secondary Piyad airfield (hex 1403), thereby splitting the US beachhead. If the Soviets can seize control of the air, that is a big step toward winning the game.
US player
Concentration is the key to the game. The Soviets and Iranians cannot control all the airfields. Be sure to capture and hold at least one airfield in Turn 1.
Silkworm missile launch sites are a nuisance, and an important one. Make sure to destroy them early in Turn 1.
Use your air power.
Concentrated Marine Expeditionary Units (MEUs) can form an effective "main attack point", although advancing is relatively slow. Look for chances to let a Marine tank company rapidly break through a gap in the Soviet line. Try to push battles deeper, destroying enemy artillery. Destroying one or two artillery units this way could completely stem the Soviet offensive, but such opportunities are few. In most cases, your paratroopers, light infantry and Marine infantry units will not advance easily. If you choose to include relevant content in custom scenarios, you will find that the 101st Air Assault Division's helicopters can partly make up for the lack of tactical mobility of mechanized units, but not entirely. Remember, mobility is actually the Russians' problem. After the US seizes the international airport, it is in an interior-lines position. However, the limiting factor is operational points. That long supply line back to the US will dampen even the most carefully laid plans.
However, the Russians are also at the end of their supply line. In some respects, the passes of the Zagros mountains and the roads across western Afghanistan are even broader than the Mediterranean and Atlantic combined.
The publisher's closing note to players (a request to contact the companies about the game) is omitted, as it is publisher correspondence rather than rules text.