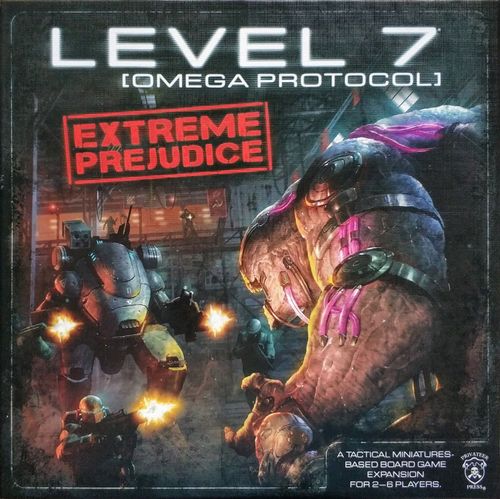
Level 7 [Omega Protocol]: Extreme Prejudice
Level 7 [Omega Protocol]: Extreme Prejudice Rulebook
Table of Contents
Table of Contents
Contents
- 24 map tiles
- 2 passage tiles
- 1 objective tile
- 4 overseer dashboard pieces
- 2 commando character sheets
- 6 stance cards
- 1 downed card
- 43 kit cards
- 9 enemy stat cards
- 18 room cards
- 10 investigate cards
- 1 Ghin commando plastic figure
- 1 Meatsac operator plastic figure
- 2 warden plastic figures
- 2 brute plastic figures
- 10 guard plastic figures
- 1 downed Ghin commando marker
- 1 downed Meatsac marker
- 5 door markers
- 4 rubble markers
- 2 EMI markers
- 1 vent marker
- 2 peril markers
- 2 clone nest markers
- 1 barricade marker
- 15 move tokens
- 4 passkey tokens
- 1 objective token
- 56 adrenaline tokens
Component Descriptions
Plastic Figures: Highly detailed miniatures representing the new commandos and enemies.
Kit Cards: Unique kit cards for the two new commandos, an added kit card for each of the five original commandos, and new cards to include in the common kit deck.
Move Tokens: New move tokens to track commandos' exertion and exhaustion during each round.
Stat Cards: A stat card for each new enemy and an alternate stat card for each enemy in the core game.
Overseer Dashboard Pieces: New dashboard pieces giving the overseer more enemies and abilities to use against commandos.
Stance Cards: Three unique stance cards for each new commando.
Downed Card: A new downed card for the MEATSAC Operator commando.
Downed Markers: A unique downed marker for each new commando in this expansion.
Door Markers: Additional door markers that can be used in any Omega Protocol mission.
Investigate Cards: New cards to be shuffled into the Investigate deck for all missions.
Room Cards: New room cards specific to the five expansion missions.
Objective Tiles: Two additional objective tiles to be used in the new missions.
Map Tiles: Map tiles for the five new missions in Extreme Prejudice.
Map Element Markers: New and additional map element markers. The markers are: 1. Rubble Marker, 2. Clone Nest Marker, 3. Barricade Marker, 4. Peril Marker, 5. Wall Marker.
New Core Rules
Extreme Prejudice includes a number of new rules and components that add to those presented in the LEVEL 7 [OMEGA PROTOCOL] core game.
New Setup Rules
Some components in this expansion, such as the map tiles and room cards, are used only in the new missions, but many components are intended for use in any LEVEL 7 [OMEGA PROTOCOL] game. All cards in this expansion are marked with the expansion icon to distinguish them from core game components.
Shuffle the new Investigate cards into the Investigate deck and add the new kit cards to the proper decks. Rules for the other components that can be used in any mission are given below.
Stat Cards
This expansion includes new stat cards for the enemies introduced in the new missions as well as alternate stat cards for all enemies from the core game. When building the reserves for a mission that calls for an enemy from the core game, the overseer can choose to use either the original card or the alternate card. Unused stat cards are returned to the box before the game begins.
Alternate Doors
Extreme Prejudice includes three new door markers: Wrecked, Encrypted, and Electrified. Each of these alternate doors shares an icon with a door from the core game. Each mission lists the core game door markers (Jammed, Locked, Short Circuit) the overseer can use. During setup, the overseer can choose to replace one of the listed door markers with an alternate door marker that shares the same icon.
Using Alternate Doors
For EP Mission 1, the setup rules call for three passkey doors and give the overseer "access to one Locked, one Jammed, and one Short Circuit door." The overseer wants to use an alternate door in this mission. He can choose from all three alternate doors because they all share an icon with a listed door. He replaces the Short Circuit door with the Electrified door, then returns all unused doors to the box.
Alternate Dashboard Pieces
Extreme Prejudice introduces three new standard dashboard pieces plus an alternate dashboard piece labeled Explosion, which can replace a Cave In dashboard piece in any mission. When building the dashboard for a mission, the overseer can trade any listed piece for its alternate piece. The unused dashboard piece is returned to the box.
Optional Kit Point Difficulty Adjustments
Commando players who want a greater challenge when playing with a larger squad can use the following kit card point totals when building their characters.
- Three commandos: 6 kit points each
- Four commandos: 5 kit points each
- Five commandos: 4 kit points each
New Gameplay Rules
This expansion includes the following new rules that permanently modify the core rules in the LEVEL 7 [OMEGA PROTOCOL] rulebook.
New Commando Ranks
Use this updated rank list when determining
- Team Leader
- Countermeasures Specialist
- Meatsac Operator
- Heavy Support Specialist
- Rifleman
- Reconnaissance Specialist
- Ghin Commando
The rank sentence above is printed in the rulebook's box as "Use this updated rank list when determining" and the printed text does not complete it. It is transcribed as printed.
Making a Combined Move
Example: The Heavy Support Specialist wants to move past the MEATSAC Operator. One move action will not allow him to move completely past the larger model's base, and a commando cannot end a move action in the same space as another figure. Heavy Support instead uses a combined move action to take two move actions as a single action, which allows him to end his move action in an unoccupied space. This combined move action costs the Heavy Support Specialist two adrenaline.
Combined Move
The combined move rule modifies the standard move action rules for commandos. Rather than taking a single move as an action, a commando can make a combined move. When making a combined move action, a commando takes any number of move actions together as one action. The adrenaline cost for a combined move action is equal to the total cost of the individual move actions it includes.
When using a combined move action, a commando must flip a move token for every move action included in the combined move action. During the Timer Phase of each round, all move tokens with the red side up are flipped to the blue side.
Move Tokens and Exhaustion
The new move tokens are used to track each commando's level of exhaustion, the energy drain and fatigue experienced during a turn as a result of exertion. Every commando starts the mission with three move tokens. Each time a commando takes a move action, one of his move tokens is flipped from the blue side to the red side. As long as a commando has a blue move token available to flip, the move action has the normal adrenaline cost. Once all of a commando's move tokens have been flipped to the red side, a move action costs the commando one additional adrenaline.
Commando abilities that grant free move actions instead reduce the cost of move actions by one, to a minimum of zero. When taking move actions that cost zero adrenaline, a commando must still flip a move token from the blue side to the red side.
Example: When the rifleman uses his Double Time stance to take the first move action during his turn, he flips one move token from blue to red even though he does not increase his adrenaline.
Figure Sizes
For clarity, Extreme Prejudice introduces names for figure sizes. Figures with bases the size of one space are referred to as small figures, and figures with square bases the size of four spaces are large figures.
Large Figures and Squeezing
Squeezing Through. The overseer wants to move the brute to attack the commando. The brute's Speed of 4 is not enough to reach the commando unless the brute squeezes through the small gap between the walls. The brute uses an additional point of movement the first time part of its base moves into a wall space.
EP Mission 1: Getting Over the Rainbow
Sitrep
Tin Man Team has been sent on a covert op to infiltrate a Russian facility that intel indicates could be the new base of Dr. Cronos. The place is crawling with human soldiers, but no evidence of Ghin activity is visible. As the team moves deeper into the base, they discover an entrance to what appears to be a large underground complex. The team's countermeasures specialist is picking up strange interference on his psychotronic gear, which may mean the Agency has finally caught up with Cronos.
Setup
Build the map according to the EP Mission 1 Setup diagram.
Reserves
- Rogue clones: 8
- Guards: 10
- Fear hunters: 1
Door Markers
This mission uses the A, B, and C passkey doors. Three passkey zones are marked on the map. Passkey doors must be placed in these zones, and only one passkey door can be used in each zone.
In addition to the passkey doors, the overseer has access to one Locked, one Jammed, and one Short Circuit door.
Energy Pool Minimum
The number of commandos times two.
Room Stacks
Make the following eight room stacks:
- Guard Station, Clear
- Armed Response, Vent
- Hunting Party, Corrosive Gas
- Flanking Party, Rubble
- Faulty Intel, Flanking Party
- Armed Response, Clear
- Corrosive Gas, Clone Nest
- Armed Response, EMI
Place a room stack in every room except for the commando starting room and the A-Lift room.
Overseer's Dashboard
Build the dashboard out of the following pieces:
- Accelerated Response
- Frenzy
- Cave In
- Guard Patrol
- Charge
- Hasten
- Clone Flankers
- Surprise Attack
- Dodge
Gameplay
Each time a guard is killed, roll a black die. If a single hit is rolled, randomly choose one of the four passkey tokens and place it facedown in the space the guard was in. Only one passkey token can be placed in this way each round. An active commando on or adjacent to a passkey token can increase his adrenaline by one to pick it up.
Events
First Passkey Token Placed: After the first passkey token is placed on the map, reduce the cost of all dashboard abilities that spawn guards by one, to a minimum of one.
Third Passkey Token Placed: After the third passkey token is placed on the map, the Speed stat of guards becomes 7.
Crisis Point
The Crisis Point is triggered at the start of the ninth round or when a door in passkey zone 3 is opened. After the Crisis Point is triggered, at the start of each Overseer Phase the overseer opens a door connecting a hidden room to the revealed section of the map and resolves the room's cards normally. Discard the door marker with no effect.
Commando Victory
The commandos win if more than half of the commandos exit through the A-Lift objective tile. When a commando moves onto the A-Lift tile, remove him from the map; he has exited.
Overseer Victory
The overseer wins if he kills at least half of the commandos.
Easy Mode
Any number of passkey tokens can be placed each round.
Hard Mode
All of the commandos must exit the map in order for the commandos to win. The overseer wins as soon as one commando is killed.
EP Mission 2: The Thing Behind the Curtain
Sitrep
The reason the Agency had so much difficulty tracking Cronos to this facility is the presence of a jamming system that scrambles outgoing signals. Tin Man must disable the jammer in order to report their findings and request further instructions.
Setup
Build the map according to the EP Mission 2 Setup diagram. The diagram carries the printed callouts "Place EMI marker on tile 1B" and "Tile under doors (A)" and "Tile under doors (B)".
Reserves
- Rogue clones: 8
- Warrior clones: 6
- Guards: 10
- Fear hunters: 3
- Blasters: 2
- Rejects: 1
- Brutes: 2
- Handlers: 1
- Wardens: 1
Door Markers
Two Locked, two Jammed, and two Short Circuit.
Energy Pool Minimum
The number of commandos times two.
Room Stacks
Make the following eight room stacks:
- Hunting Party, Vent
- Gunnery Team, EMI
- Brute, Warden
- Guard Station, EMI
- Armed Response, Vent
- Clone Nest, EMI
- Corrosive Gas, EMI
- Handler, Reject
This mission uses two control panel objective tiles. For the four room stacks going into rooms with objective zones, add a clear card, a brute card, or one of the control panel objective cards. Place a room stack in every room except for the commando starting room.
Overseer's Dashboard
Build the dashboard out of the following pieces:
- Accelerated Response
- Fear Hunter
- Blaster
- Frenzy
- Charge
- Guard Patrol
- Clone Flankers
- Hasten
- Clone Reinforcements
- Surprise Attack
- Dodge
Gameplay
The jammer protecting the facility is operated through two control panels. To complete this mission, the commandos must disable the jamming system by placing two objective tokens on the control panels, either two tokens on one panel or one token on each panel.
Once each turn, a commando on a control panel with no enemy figures can attempt a 4 Intelligence challenge action to place an objective token on the control panel.
If there is no objective token on the control panel, the commando must increase his adrenaline by four to attempt the challenge action. If the control panel already has one objective token on it, a commando must increase his adrenaline by six to perform the action.
Events
First Control Panel Found: After the first room containing a control panel objective is revealed, flip the commando entrance passage over onto its red side, and spawn two guards there for free.
Second Control Panel Found: After the second room containing a control panel objective is revealed, reduce the cost of all dashboard abilities that spawn guards by one, to a minimum of one, for the remainder of the game.
Crisis Point
The Crisis Point is triggered at the start of the eighth round or when the first objective token is placed on a control panel. Once the Crisis Point is triggered, add a black die to every guard's attack roll for the remainder of the game. In addition, at the start of each Overseer Phase, the overseer can open a door connecting a hidden room to the revealed section of the map and then resolve the room's cards normally. Discard the door marker with no effect.
Commando Victory
The commandos win if two objective tokens are placed onto control panels.
Overseer Victory
The overseer wins if he kills more than half the commandos.
Easy Mode
The challenge actions to place a token require a 3 Intelligence challenge.
Hard Mode
The commandos cannot place two objective markers on the same control panel.
EP Mission 3: Horse of a Different Color
Sitrep
Tin Man has discovered a large Ghin presence in the base and reported back to the Agency, which responded with new orders. Rather than continuing their covert infiltration, the team's objective now is to "terminate the Ghin with extreme prejudice."
The Countermeasures Specialist reports a concentration of readings indicating Ghin in the south wing of the complex.
Setup
Build the map according to the EP Mission 3 Setup diagram.
Reserves
- Rogue clones: 10
- Warrior clones: 8
- Guards: 10
- Fear hunters: 3
- Blasters: 2
- Brutes: 2
- Handlers: 2
- Wardens: 2
Door Markers
Two Locked, two Jammed, and two Short Circuit.
Energy Pool Minimum
The number of commandos times two.
Room Stacks
Make the following eight room stacks:
- Warden, Fire Team
- Warden, Vanguard
- Handler, Flanking Party
- Handler, Brute
- Armed Response, Faulty Intel
- Guard Station, Gunnery Team
- Brute, Vent
- Fear Hunter, Clone Nest
Place a room stack in every room except for the commando starting room.
Overseer's Dashboard
Build the dashboard out of the following pieces:
- Accelerated Response
- Dodge
- Blaster
- Fear Hunter
- Brute
- Frenzy
- Charge
- Guard Patrol
- Clone Flankers
- Hasten
- Clone Reinforcements
- Surprise Attack
Gameplay
When spawning a hybrid on a tile already occupied by a Ghin, reduce the spawning cost by one, to a minimum of zero.
Whenever a warden or handler is killed, the overseer rolls a die for each hybrid and clone on the same tile. If a double hit is rolled, remove that figure from the map.
Events
First Ghin Killed: After the commandos have killed one Ghin, increase the energy pool minimum to three per commando.
Second Ghin Killed: After the commandos have killed two Ghin, increase the energy pool minimum to four per commando.
Crisis Point
The Crisis Point is triggered at the start of the twelfth round or after the commandos have killed three Ghin. When the Crisis Point is triggered, reduce the cost of activating enemies by one, to a minimum of zero, for the remainder of the mission. In addition, the overseer can spend five adrenaline to open one door that connects a hidden room to the explored portion of the map at the start of each of his Activate Enemies steps and then resolve the room's cards normally. Discard the door marker with no effect.
Commando Victory
The commandos win if they kill both wardens and both handlers.
Overseer Victory
The overseer wins if he kills all the commandos.
Easy Mode
Do not increase the energy pool minimum when the first Ghin is killed.
Hard Mode
Do not roll to remove clones and hybrids when a Ghin is killed.
EP Mission 4: It's a Twister!
Sitrep
By eliminating a large number of Ghin, the commandos have disrupted the enemy's control over the other creatures in the base. With many clones and hybrids out of control, fighting has broken out between the human guards and the alien beasts throughout the base. Tin Man uses the chaos to their advantage, tracking Dr. Cronos deeper into the facility.
Setup
Build the map according to the EP Mission 4 Setup diagram.
Reserves
- Rogue clones: 10
- Warrior clones: 8
- Guards: 10
- Fear hunters: 3
- Blasters: 2
- Rejects: 4
- Brutes: 2
Door Markers
Shuffle one Jammed, one Locked, and one Short Circuit door marker and draw two. Then use unlocked door markers for the remaining doors.
Energy Pool Minimum
The number of commandos times two.
Room Stacks
Make the following six room stacks:
- Gunnery Team, Rubble
- Hunting Party, Rubble
- Armed Response, Fire Team
- Brute, Guard Station
- Warden, Armed Response
- Corrosive Gas, Recon Patrol
Place a room stack in every room except for the commando starting room.
Overseer's Dashboard
Build the dashboard out of the following pieces:
- Accelerated Response
- Blaster
- Brute
- Cave In
- Charge
- Clone Flankers
- Clone Reinforcements
- Dodge
- Fear Hunter
- Frenzy
- Hasten
- Reject
- Surprise Attack
Gameplay
After each Spawn Enemies step, the overseer rolls one black die for each lift in a revealed room, starting with the A-Lift. Spawn one guard in the lift for each hit rolled.
The guards in this mission are friendly only to other guards and are activated once at the end of each Activate Enemies step for free. If the guard is more than five spaces from a ghin, clone, or hybrid, roll a black die. If a single hit is rolled, the highest-ranking commando player activates the guard. On any other result, the overseer activates the guard. If the guard is within five spaces of a ghin, clone, or hybrid, no roll is made and the highest-ranking commando player activates the guard.
Crisis Point
The Crisis Point is triggered at the start of the eighth round or after four doors have been opened. After the Crisis Point, increase the Speed stat of all enemies by one and add a black die to enemy attack rolls for the remainder of the mission.
Commando Victory
The commandos win if more than half of the team exits the map. When a commando moves completely onto the enemy passage marker on tile 20A, remove him from the map; he has exited.
Overseer Victory
The overseer wins if he kills at least half of the commandos.
Easy Mode
When activating guards, no roll is made for guards within six spaces of a ghin, clone, or hybrid.
Hard Mode
When spawning guards, roll one red die for each lift.
EP Mission 5: The Falling House
Sitrep
Tin Man has cut off Dr. Cronos' escape route in a large hangar bay. This is their chance to end his menace once and for all. Unfortunately, the Ghin have regained control of the enemy forces. Hordes of alien creatures and the base's guards are converging here to help Cronos escape. Tin Man has access to limited amounts of explosives and can use them to partially seal some of the passages leading into the area in an attempt to keep from being outflanked.
Setup
Build the map according to the EP Mission 5 Setup diagram.
Reserves
- Rogue clones: 10
- Warrior clones: 8
- Guards: 6
- Fear hunters: 3
- Blasters: 2
- Rejects: 4
- Brutes: 2
- Handlers: 2
- Wardens: 2
Door Markers
Door markers are not used in this mission.
Energy Pool Minimum
The number of commandos times three.
Room Stacks
Make the following five room stacks:
- Armed Response, Recon Patrol, Blaster
- Armed Response, Vanguard, Brute
- Flanking Party, Recon Patrol, Fear Hunter
- Vanguard, Fire Team, Brute
- Reject, Reject, Reject
Add a handler, a warden, or the Dr. Cronos card to each room stack.
There are no rooms in this mission. Place the room stacks near the dashboard instead of on the map.
Overseer's Dashboard
Build the dashboard out of the following pieces:
- Accelerated Response
- Blaster
- Brute
- Cave In
- Charge
- Clone Flankers
- Dodge
- Fear Hunter
- Frenzy
- Hasten
- Reject
- Surprise Attack
Gameplay
The commandos divide the bomb markers among themselves at the start of the mission. Each commando can carry a maximum of two bomb markers.
A commando with a bomb marker can increase his adrenaline by two to partially seal an adjacent enemy passage with a bomb. When a commando takes this action, he places one of the bomb markers he is carrying under the passage tile.
The game ends at the end of the eighth round.
At the start of each Spawn Enemies step, the overseer chooses a room stack and spawns the enemies on the cards within three spaces of one enemy passage without a bomb marker. The overseer must choose the stack with Dr. Cronos on or before the fourth round.
Crisis Point
The Crisis Point is triggered at the start of the game.
Events
Third Room Stack Spawned: At the end of the round in which the overseer spawns the third room stack, the energy pool minimum is increased to the number of commandos times four.
Game End
Commando Victory
The commandos win if they kill Dr. Cronos.
Overseer Victory
The overseer wins if he kills all of the commandos or if the game ends before Cronos is killed.
Easy Mode
Using a bomb marker requires a commando to increase his adrenaline by one.
Hard Mode
Using a bomb marker requires a 3 Intelligence challenge.