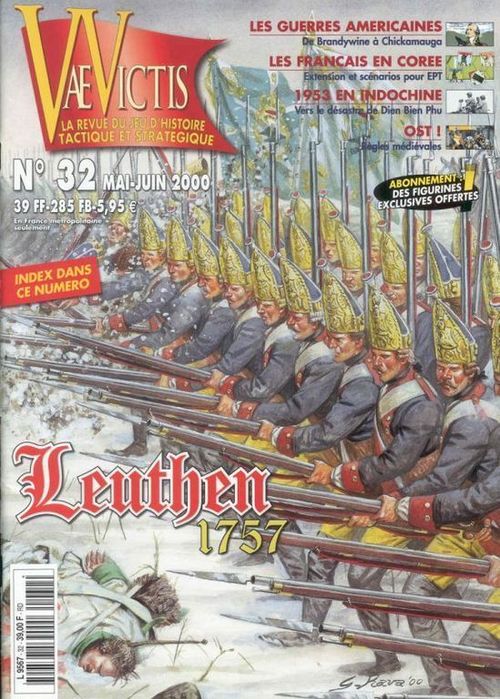
Leuthen 1757
Leuthen 1757 Rulebook
Table of Contents
Table of Contents
0. Generalities
One of the players controls the Prussian army of Frederick II, the other the Austrian army of Prince Charles of Lorraine.
Abbreviations
The game requires the use of one six-sided die (noted 1d6) and one ten-sided die (noted 1d10) for which 0 equals zero (and not 10).
The ten-sided die is used to determine initiative and for fire.
The six-sided die is used for shock combat, charges, breaching, and disorganization checks.
For simplification, the abbreviation hex is used in the rules for hexagon.
Game scale
One turn equals one half hour of real time and the game lasts fourteen and a half turns. One hex on the map equals 350 meters. An infantry unit represents one, two, or three regiments, or the equivalent of a brigade. A cavalry unit represents from four to eight squadrons. Each combat points equals from 500 to 800 men.
1. Combat Units
Infantry and cavalry units are grouped into formations, according to the commander, identified by a colored symbol. This organization is important for the activation rules, with units of the same formation always acting together (see 5).
Brigades, the basic tactical unit, are represented by one or two counters, depending on their strength.
Each infantry and cavalry unit possesses a combat strength, a movement allowance, and in red, a morale factor.
After a combat loss, units lose combat points. They use their reverse side (or a replacement counter for three-strength point units that have already been flipped over) to indicate losses. Units may not voluntarily break down into smaller units, or combine into larger ones.
2. Facing
All units follow facing rules (unit front) that influence movement and combat.
Infantry: Infantry units possess two frontal hexes, two flank hexes, and two rear hexes.
Cavalry: Cavalry units possess four frontal hexes and two rear hexes.
Artillery (see 10) and infantry units in towns: Six frontal hexes.
Commanders in chief (see 8) and formation leaders (see 9): their facing is not important; they always face to the front.
3. Stacking
Stacking in a hex is limited to one unit.
Exceptions:
- One infantry (or Dragoon) unit and one battery; or two batteries not totaling more than four fire points;
- Leaders do not count for stacking.
4. Sequence of Play
Leuthen 1757 is played in fourteen and a half turns, consisting of several phases each. In Scenario 1, only the Prussian player performs in the Operations phase of Game Turn 15; in Scenario 2, only the player that gains the initiative may perform in the Operations phase on the last turn. All other phases are carried out normally.
Command verification
Each player verifies that his formation leaders are in command. Leaders that are out of command are indicated with the appropriate marker (8.3).
Artillery barrages
The two players, Prussian first, may fire with their artillery batteries.
Operations phase
The players proceed one after the other, through several Operations segments (up to limit of the number of formations in each army), during which each player successively activates one of his formation leaders. After all leaders have been activated, the Operations phase ends.
The exact procedure for each segment is as follows:
- Determine the initiative for the segment. Each player rolls 1d10 (the Prussian player adds 2 to the die for being on the tactical offensive). The player with the higher roll wins the initiative (in case of tie, the Prussian player wins).
- Activate a formation belonging to the player winning the initiative. If the player that wins the initiative does so with a die roll equal to or greater than double his opponent, he may activate in a combined manner two formations at the same time (but he is not obliged to do so).
- Activate a formation belonging to the player that did not win the initiative.
Note: The player that wins the initiative has the choice of reversing the order of activation and having his opponent go first. However, if he does so, he may only activate one formation even if his initiative roll was double.
When a player has the initiative, he may then move the units belonging to one or more formations (see 5). When a formation is activated, all of the units of that formation may move and attack (including the formation leader). He then flips the formation leader to its reverse side when the formation's activation is finished.
Once both of the players have activated formations, the dice are re-rolled to begin a new Operations segment continuing until all formations have been activated.
Command phase
The Commanders in chief may move. The formation leaders are all returned to the front sides of their counters.
Rally phase
Out of Command markers are removed from formation leaders. Disorganization markers are removed from units that are not in enemy zones of control, and Routed units check to see if they retain that status.
The turn then ends and the Turn marker is advanced one space.
5. Corps Activation
A formation leader and his units that are in command may be activated when the owning player has the initiative, either first or second in a Operations segment. The activation of a formation leader and that formation's units are considered to be as one.
When a player has the initiative in an Operations segment (that is, it is his turn to activate one or more formations), he designates one (or more) of his formation leaders that has not already been activated, and flips over the counter. The units belonging to this leader's formation may then move. A formation's activation consists of two parts: movement and combat.
During that segment, all units of the formation may move. They may then engage in combat with adjacent enemy units. Artillery units that have already fired in Phase B may not fire again in the Operations phase (place an Initial Fire marker on them).
The different formations of each army (each identified by a national symbol and a different color) are as follows:
Prussian army
- Independent units
- Zieten cavalry corps
- Von Driesen cavalry corps
- Prince Ferdinand infantry corps
- Von Retzow infantry corps
- Forcade infantry corps
- Von Bevern infantry corps
- Wedel infantry corps
- Wurtemberg cavalry corps
Austrian army
- Independent units
- Nadasdy cavalry
- Serbelloni cavalry corps
- Lucchese cavalry corps
- Kheul infantry corps
- Colloredo infantry corps
- Arenberg infantry corps
A formation may only be activated once per turn and each unit may only move and attack once per turn.
6. Zones of Control
All units exert a Zone of Control (ZOC) into their frontal hexes, which affect all adjacent enemy units located in those hexes.
Exception: Leaders and artillery do not possess ZOCs.
6.1 ZOC properties
A ZOC has the following properties:
- A unit that enters an enemy ZOC must stop moving;
- A unit that retreats into an enemy ZOC as a result of combat becomes Disorganized and suffers a step loss (see 11.6);
- Moving directly from one enemy ZOC hex to another is prohibited;
- Leaving an enemy ZOC costs +1 additional movement point (exception: withdrawal retreat, see 7.3);
- The presence of a friendly unit in an enemy ZOC cancels this last case for command limitations and leader movement.
A ZOC does not extend into the following terrain: forests or towns.
6.2 Properties of flanks and rear
Flank hexes: Flank hexes of enemy units do not interdict movement. A unit that retreats into an enemy flank hex as a result of combat suffers Disorganization (see 11.6).
Rear hexes: Rear hexes of an enemy unit do not interdict movement. A unit may retreat into an enemy rear hex as a result of combat without penalty.
7. Movement
7.1 Generalities
An active unit, or formation leader, may move using all or part of its movement allowance. Entering a hex costs a certain number of Movement points (MP) to the moving unit. Terrain costs are listed on the Terrain Table. Movement points may not be accumulated from one turn to the next. The movement of a unit or stack of units must be completed before moving on to another unit of the same corps.
Movement may only be made into a unit's two front hexes, without changing formation, even for cavalry.
The stacking rules must be obeyed during movement (no passing through units).
Artillery units (see 10) may not move if the fired during Phase B. Commanders in chief have their own rules for movement (see 7.4).
The +1 MP cost for changing elevation only takes effect when moving uphill.
Subject to all other applicable rules, a unit may always move one hex, even it does not have enough movement points.
7.2 Changing facing
A unit may change its facing by spending 1 MP per hex vertex.
Changing facing in an enemy ZOC costs 2 MP per vertex and requires a Facing check: the player rolls 1d6 and adds the morale of the unit. If the result is less than or equal to five the unit is Disorganized. Regardless of the result, the unit changes facing.
7.3 Withdrawal from an enemy ZOC
A unit may leave a hex located in an enemy ZOC by two methods:
- It may advance into one of its two frontal hexes if not occupied by an enemy unit and not in an enemy ZOC. Cost is +1 MP.
- It may withdraw one hex (following the retreat rules, see 11.6) into one of its two rear hexes (not a flank hex) maintaining its facing. Cost is half of its MPs (plus the cost of the terrain). The unit may then change its facing normally.
7.4 Leader movement
Commanders in chief may move four hexes during the Command phase, but they may not enter a front or flank hex of an enemy unit unless it is occupied by a friendly unit.
8. Commanders in Chief
Each side possesses one Commander in chief: King Frederick II for the Prussians, and Prince Charles for the Austrians (as noted in 8.4, Field Marshal Daun may become the Commander in chief of the Austrian army).
8.1 Generalities
Each Commander in chief possesses a command factor (expressed in number of hexes, regardless of terrain) that represents its ability to control formation leaders. Field Marshal Anhalt-Dessau and Field Marshal Daun are considered reserve formation leaders; they may only command independent units or formation units that have lost their leader (Field Marshal Daun may become Commander in chief under the conditions listed in 8.4). In the latter case, they are considered to command that formation until the end of the game.
8.2 Command
To be in command, a formation leader must be within the command range of its Commander in chief. This range is traced to the formation leader by a chain of hexes (terrain does not matter, but the distance may only be a certain maximum number of hexes) that does not enter an enemy frontal or flank hex that is not occupied by a friendly unit.
8.3 Out of command formations
A formation leader that is not in command at the beginning of the turn receives an Out of Command marker. The leader may be chosen for activation during an Operations phase, but its units may not function unless it passes an activation check.
Activation check: an Out of Command formation leader is activated if it rolls on 1d6 less than or equal to its activation value.
If it passes, all of the units in its formation may function normally. If it fails, the units may not be used but the formation is still considered to have been activated.
8.4 Death of Commanders in chief
A Commander in chief is eliminated (for the game, at least) whenever the units with which it is stacked are completely eliminated by combat or retreat. If it is King Frederick II, the Prussian player loses the game. If it is Prince Charles, all Austrian units are considered to be Disorganized for one complete turn until Daun becomes the acting commander.
9. Formation Leaders
Formation leaders represent the different corps commanders of each army. They each command several brigades.
A formation leader is activated under the rules for activation (see 5) and command (see 8). A leader may only be activated once per turn; it is flipped to its reverse side to indicate that it has been activated.
A formation leader moves like a cavalry unit.
9.1 Unit command
When activated, a formation leader enables all of his formation's units to act that are within his command range at the instant of activation. To be in command, a unit must be within the command range of the formation leader using the same procedure as in rule 8.2.
A unit may also be In Command if it is part of a battle line that is within the range of the leader (see 9.3).
Verification of unit command is made at the beginning of a formation's activation, before any movement. A unit Out of Command at the beginning of an activation will remain so, even if the leader moves within range.
A formation leader does not need to be stacked with any of its units in order to command.
9.2 Out of Command units
A unit that is Out of Command at the moment of its formation's activation may not attack. It may still change facing and move, but with only half of its movement allowance (rounded up). It may not move further away from its formation leader.
An Out of Command unit that disengages from an enemy ZOC uses up its entire movement allowance.
9.3 Battle lines
A unit outside the command range of its formation leader may still be In Command if it is located adjacent to a unit of the same corps, flank to flank, and at least one unit in the line is within range of the formation leader. Cavalry units need only be adjacent to one another to form a battle "line".
9.4 Death of formation leaders
A formation leader is eliminated when all of the units it is stacked with are eliminated due to combat or retreat. The formation leader is immediately replaced by an aide de camp (identified by a replacement band), that the player is free to place where he wishes. An aide de camp is replaced in the same manner.
10. Artillery
Organic battalion artillery is integrated into the combat strengths of the units.
10.1 Artillery fire
An artillery unit may fire:
- During the Barrage phase;
- During the Operations phase if it has not fired in the Barrage phase;
- In reaction to an enemy shock attack, even if the artillery unit has already fired in the Barrage phase or the Operations phase. Reaction fire is resolved before shock.
10.2 Procedure
Range and field of fire: the maximum range of artillery is three hexes. Artillery may only fire through their two frontal hexes.
Line of sight: an artillery battery must have a line of sight to its target in order to fire. The following elements block line of sight:
- All units between the firer and the target;
- All obstacle hexes (town/village, forest, elevation), excluding hex edges, between the firer and the target.
The line of sight of an artillery battery at a lower elevation is not blocked if the obstacle is adjacent to the target.
A battery may always fire at an adjacent unit.
Artillery may not fire at enemy artillery that is alone in a hex.
Results of artillery fire: the player rolls 1d10.
- If the result is 0 or less the target unit is Disorganized and suffers a step loss;
- If the result is less than the value of the battery the target unit is Disorganized;
- If the result is equal to the value the target unit must make a Disorganization check;
- If the result is greater than the value the fire has no effect.
10.3 Destroying artillery
An artillery unit is immediately destroyed if the infantry (or dragoon) unit it is stacked with is destroyed or must retreat. An artillery unit not stacked with infantry (or dragoons) is automatically destroyed by any attack after its reaction fire.
11. Combat
Units of an active corps may attack adjacent enemy units that are in their ZOC. Attacking is not mandatory. The player whose Activation phase it is is called the attacker and his opponent is called the defender. Attacks may be made as either fire or shock (not both). An infantry unit being attacked by shock may perform reaction fire before resolving the shock attack.
11.1 Fire
A unit may fire on one unit of its choice that occupies one of its frontal ZOC hexes.
To resolve infantry fire, the player rolls 1d10 and adds the protection value of the target hex.
For fire by a cavalry unit, add +1 to the roll.
- If the result is 0: the target unit is Disorganized and suffers a step loss;
- If the result is less than the firing unit's combat strength (but not 0): the target unit is Disorganized;
- If the result is equal to the firing unit's combat strength: the target unit must make a Disorganization check.
11.2 Shock
A unit may attack once per turn, when its corps is active.
A unit may attack several units at once as long as they are all adjacent and in the attacker's ZOC. In this case, they are attacked together by combining their combat strengths. Similarly, several friendly units may attack the same enemy unit by combining their attacking combat strengths. However, several friendly units may not attack several enemy units. The attacks must be resolved separately.
A unit may be attacked several times per turn but only once per Operations segment (that is, a unit may only be attacked once by an active formation).
A cavalry unit may not attack an enemy unit located in terrain that it could not move into.
Cavalry charges: Cavalry units receive a bonus if they charge. To execute a charge, a cavalry unit must move at least two hexes without changing facing before making contact with an enemy unit, and only through clear terrain. The unit being attacked must also be in clear terrain.
11.3 Shock procedure
Calculate the ratio of the sum of the attackers against the sum of the defenders. The ratio is always rounded in favor of the defender.
The different modifiers (see 11.4) are applied and the attacker rolls 1d6. He consults the Combat Results Table (see map) and obtains, for the terrain occupied by the defender, the combat result. The result is applied immediately before moving on to another combat.
Terrain effects and morale are integrated into the Combat Results Table.
Terrain: when several units are attacked simultaneously, apply the terrain most favorable to the defender for combat resolution.
Morale: obtain the morale difference between the attacker and the defender. When units with different morale participate on the same side (in attack or defense), use the lowest morale rating.
11.4 Combat modifiers
The combat modifiers are as follows:
- Flank and rear: an infantry unit attacked from its flank causes a +1 column shift to the right on the table (benefiting the attacker). A unit attacked from the rear causes a +2 column shift to the right. For multiple attackers, use the orientation least favorable to the defender.
- Routed units: an attack against a routed unit causes a +2 column shift to the right on the table.
- Cavalry charge: a cavalry charge causes a +1 column shift to the right.
- Cavalry attacking a town/village: cavalry attacking a unit in a built up hex causes a -1 column shift to the left.
All modifiers are cumulative.
11.5 Shock results
The possible shock results are as follows:
- 1 or 2: the number of combat points eliminated from the units involved. The player is free to distribute losses among his units as he sees fit.
- D: all units of the affected side involved in the combat are Disorganized.
- R or R2: all affected units retreat one or two hexes (see 11.6).
- *: if any of the affected units are cavalry that are already Disorganized, they are eliminated.
- E: affected units are eliminated.
Results are applied in the following order: losses (and elimination of Disorganized cavalry), Disorganization, then retreat.
11.6 Unit retreats
Unit retreats must be made, as much as possible, in the following priority: into terrain the unit may enter, outside of enemy ZOCs or flank hexes, and free of friendly units in accordance with the stacking rules. Units that retreat maintain their initial facing.
- A unit whose retreat is impossible due to the presence of enemy occupied hexes or impassible terrain is eliminated.
- A unit that must retreat into an enemy ZOC suffers a step loss and/or Disorganization. The player rolls 1d6 and adds the morale of the retreating unit. 1 to 3 = 1D; 4 = 1; 5 = D; 6+ = no effect.
- A unit that must retreat into an enemy flank hex may suffer Disorganization. The player rolls 1d6 and adds the morale of the retreating unit. 1 to 4 = D; 5+ = no effect.
- A unit that must retreat into friendly-occupied hex in violation of the stacking limits displaces the already present units. They must retreat into a vacant hex. The unit being displaced is automatically Disorganized.
This new retreat may cause a chain reaction to occur. The normal retreat rules are applied, including the automatic Disorganization. The player is free to eliminate a unit to avoid causing other units to displace.
11.7 Advance after combat
In the event of a retreat or elimination, one of the victorious units, attacker or defender, may advance into the vacated hex (after either shock or fire). The advance is limited to one hex, even if the retreat is two hexes. The choice of whether to advance or not must be made immediately, before any other actions.
12. Disorganization and Rout
12.1 Disorganization check
Whenever a unit must make a Disorganization check, he rolls 1d6. If the result is less than or equal to the unit's morale rating, it remains Ordered; otherwise, it is Disorganized (place a Disorganized marker on the unit).
Note: Ignore the abbreviations on the Disorganization markers.
12.2 Disorganization
A unit that fails a Disorganization check, that suffers an automatic Disorganization result from combat (fire or shock), or that retreats into an enemy ZOC receives a Disorganization marker. Disorganization has no effect on the unit. However, a Disorganized unit that suffers a new Disorganization result risks becoming Routed (see Rout check, 12.3).
Disorganization markers are removed at the end of the turn. A Disorganized unit may not remove its marker if it occupies an enemy ZOC.
12.3 Rout
A unit that suffers a second Disorganization result, regardless of the cause, risks becoming Routed. It must make a new Disorganization check with a +2 penalty to the die roll.
- Results less than or equal to the unit's morale rating: the unit takes one step loss and remains Disorganized.
- Results greater than the unit's morale rating: the unit immediately routs. The Disorganization marker is replaced with a Rout marker.
Important: A cavalry unit that is already Disorganized may be directly eliminated (see the Combat Results Table), whatever its strength, following combat if it suffers a * result.
12.4 Effects of rout
A Routed unit may not attack. It does not possess a ZOC. It may not move voluntarily (see below).
A unit that routs must immediately retreat towards a friendly board edge (west for the Prussians, east for the Austrian) by the shortest route, obeying the retreat rules.
Exception: A routed unit may move through friendly units in excess of the stacking limits. Any units that are passed through become Disorganized. If they already are, they must make a Rout check (12.3).
Routing units are moved three hexes, regardless of terrain type (impassible terrain is prohibited) and change their orientation to match their movement. If the third hex would be overstacked, the unit continues to retreat until it enters a free hex. Routed units that cannot retreat at least three hexes are eliminated.
12.5 Rally checks
In the Rally phase, Routed units of both sides make Rally checks. These checks are mandatory and are performed like Disorganization checks with the following modifiers:
- -1 if a Commander in chief or formation leader is adjacent to the unit;
- -2 if a Commander in chief is stacked with the unit.
If the modified result is less than or equal to the unit's morale rating, it is rallied and the Rout marker is removed.
If the result is greater than the unit's morale rating, it must immediately retreat three more hexes (12.4). A unit located in an enemy ZOC may not make a check and must continue to Rout (i.e. automatically fails).
12.6 Light troops
These units receive a morale bonus (+1) when occupying a woods hex and they do not require a Disorganization check for entering a woods or town/village hex.
Scenarios
Scenario 1
Units that set up on or north of the 14XX hex row may not be activated for the first two turns. Independent units are not affected.
Scenario 2
This scenario has a maximum of five additional turns than Scenario 1. These additional turns are called strategic turns and take place prior to Game Turn 1.
Placement
Austrian set up is the same as in Scenario 1. The Prussians enter by hexes 0919, 1020, 1119, 1220, 1319, and 1420 in columns by formation. The units are placed one behind the other in accordance with the stacking rules. Units enter the map using MPs. If a unit does not have sufficient MPs to enter on the first turn, it must wait for a following turn.
Rules
Prussian units have their movement allowance doubled during the strategic turns as long as they do not move within three hexes or less of an Austrian unit within LOS.
Austrian units may not move.
The play proceeds until a Prussian unit is visible within three hexes or the Austrian successfully rolls for early initiative. At the beginning of the second strategic turn, the Austrian player rolls 1d10. If the roll is equal to or less than 1, that turn is the last strategic turn and the following turn will be Game Turn 1. In addition, the Austrian player may also move in the last strategic turn in the same manner as the Prussians (double MPs).
However, no unit may move closer than three hexes of an enemy unit within LOS.