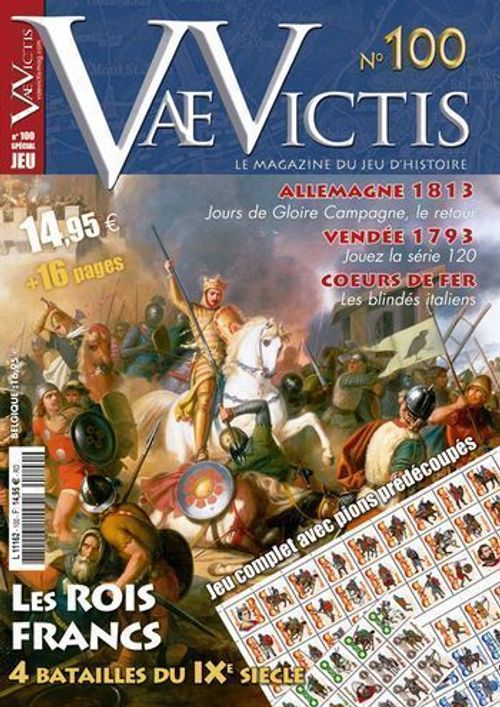
Les Rois Francs
Les Rois Francs Rulebook
Table of Contents
Table of Contents
- 1 - Basics
- 2 - Counters
- 3 - Scénarios
- 4 - Game Sequence
- 5 - Stacking
- 6 - Commanders
- 7 - Movement
- 8 - Zones of Control
- 9 - Combat
- 10 - Victory Conditions
- 11 - Optional Rules
- Scenario 1 - Fontenoy en Puisaye, June 25th 841
- Scenario 2 - Jengland, August 22nd 851
- Scenario 3 - Brissarthe, July 2nd 866
- Scenario 4 - Montfaucon en Argonne, June 24th 888
- Terrain Effect Chart
- Combat Result Table
1 - Basics
The game is played with two players and includes the following materials:
- several maps, each with a hexagonal grid printed on it to regulate movement (the hexagons are hereafter referred to as hexes);
- possible terrain features placed on the map;
- one or two sided counters representing the combat units;
- 1 turn marker;
- 8 Charge markers;
- a Combat Results Table and a Terrain Effects Chart
Players will also need to supply a 6 sided die.
2 - Counters
There are 6 types of unit: infantry (figure on foot and without a range value), foot soldiers with missile weapons (figure on foot and with a range value), cavalry (figure on horseback and without a range value), mounted soldiers with missile weapons (figure on horseback and with a range value), commanders (represented by a face) and baggage (represented by a wagon).
Most units have two sides (or 2 step loss); the front side with the unit's full strength values, called "complete", and the reverse side which has lower values, and represents the "reduced" unit. Commanders, baggage and some units have only one side.
Units have no facing.
The counters bear the following information:
- the background colour indicates which army the unit is in;
- the unit's name;
- the strength points, also representing the unit's morale;
- the range in hexes (if missile fire is possible);
- the movement points, expressed in MPs.
Counter description (from the diagram): Name; Strength and Moral Points; Movement Points; Range. A white background shows that the unit has lost a step. A unit shown with a destroyed marking is destroyed.
3 - Scénarios
The two players choose the scenario that they wish to play. The scenario will give them the necessary instructions to place the different overlays on the map which simulate the terrain of the particular battlefield, unit deployment, the side playing first (player 1), the player who plays second (player 2) and finally any special rules that may apply.
3.1 - Scenarios length
Each scenario lasts a set number of turns. In Phase 6 of each turn the Turn Marker is advanced one square on the Turn Record Track. The game finishes at the end of the last turn, if neither of the two sides has previously achieved the victory conditions.
4 - Game Sequence
Each turn is composed of 6 phases:
- Movement of Player 1
- Combat of Player 1
- Movement of Player 2
- Combat of Player 2
- Check victory conditions
- Advance the Turn Marker
5 - Stacking
A unit may never be placed in a hex occupied by another unit, friendly or enemy. However, during movement a unit may pass through a hex occupied by a unit from the same side.
Exception: the commander and/or one baggage unit may be placed on another friendly unit (infantry, cavalry, missile infantry, missile cavalry).
6 - Commanders
A commander adds his strength points to those of the unit with which he is stacked (both in attack and defence).
In addition, during morale checks, he adds a bonus of 1 to the unit with which he is stacked and to any units situated in the six adjacent hexes.
A commander retreats if the unit with which he is stacked retreats (after a R result or an unsuccessful morale check). He is also eliminated if the unit is eliminated. He is also eliminated if he is alone in a hex and an enemy unit passes through that hex.
Commanders never check their morale.
7 - Movement
During his movement phase, each player moves as many units as he wishes, within the Movement Point limits of each unit. A unit will expend a varying number of MPs depending on the terrain present in the hex it wishes to enter (see Terrain Effects Chart). If a unit does not have enough MPs available to enter a hex, it may not enter the hex. A unit may not keep unused MPs for use in the next turn. Unused MPs are permanently lost. Each unit must have finished its movement before another unit may move.
8 - Zones of Control
Each unit extends an influence into the six hexes surrounding the hex it occupies. These hexes constitute its "Zone of Control". Zones of Control have particular qualities:
- A unit may enter an enemy Zone of Control without expending any extra MPs. However it must stop its movement upon entry.
- A unit may not pass directly from one enemy Zone of Control to another; it must first of all enter a hex free of any enemy Zone of Control.
- Zones of Control do not extend over river hexsides, unless crossed by a bridge.
- A unit may not retreat into an enemy Zone of Control.
9 - Combat
9.1 - Basics
Combat is optional and takes place between one or several attacking units and one defending unit.
In order to fight, the attacking unit, in the case of infantry or cavalry, must be adjacent to the unit it wishes to engage; for those units able to shoot missiles, the target unit must be within the range in hexes indicated on the counter. Several units may together attack a single enemy unit, providing that each attacking unit is within the required distance. This is treated as a single combat, and is resolved with one die roll. Each unit may only attack, or be attacked, once per phase. Each combat is resolved separately, and combat results are applied immediately.
9.2 - Charge
Each cavalry unit (but not missile cavalry) that charges adds +2 to its strength in attack. It's possible if:
- The charged enemy unit is in a clear, road or bridge hex.
- The charging unit must move only towards its target and the hexes crossed must be road or clear hexes. No retreat before going back in the same hex for example.
A commander stacked with a charging unit adds only his strength points (the charge bonus applies to the unit not the commander). The charging unit must advance after combat.
9.3 - Units with a missile firing capacity
A unit capable of firing (mounted or on foot) may engage:
- an adjacent unit in attack or in defence (hand to hand). However it must reduce its strength by 1 (minimum : 1 strength point). This only applies to combat, not to morale checks. A missile firing unit on its own may only attack in hand to hand combat at odds better than 1/1.
- a unit within firing range, but only in attack and if the firing unit is not adjacent to an enemy combat unit. The firing unit suffers neither elimination, retreat, morale check, unless it is attacking another unit capable of firing. It may fight alone, or add its strength points to other units attacking the same hex, either in hand to hand combat, or by missile fire. It may fire over an enemy unit.
9.4 - Baggage
A Baggage unit cannot attack. It always has a strength of 1 in defense (never modified by the terrain). It has no ZoC and can only be attacked hand to hand. The combat results of R & T have no effects on baggage.
When another unit is stacked with a baggage unit, the combat unit can only be attacked hand to hand and adds its Strength to the baggage's strength. The R combat result (after a combat or a morale check) has no effects on the two units. On the contrary, the combat results of T (with a step loss), 1 and 2 are applied normally on the combat unit and the baggage unit is automatically eliminated if the defending unit is eliminated. When a baggage unit is eliminated, it is turned over on its Pillé side and has no more effects on Combat and Stacking.
Example of combat
The units of Lothaire attack Fontenoy. If the Austrasie cavalry unit and the Bourgogne infantry unit join their attack, they will have 5FP against 2FP for the Provence unit thus obtaining a ratio of 2 to 1. If the Bowmen unit supports the attack, it adds 1PF to allow a ratio of 3 to 1 (6FP against 2FP). But the unit of Charles the Bald is firmly entrenched in the town of Fontenoy (plus one to the die result) and behind a creek (another plus one to the die result).
To cancel the defensive bonus of the creek, Lothaire decides to charge with his Aquitaine cavalry which adds 3FP + 2FP for charging + 0FP for the commander. To charge, the unit must go to 0710 then 0709. There would be no charge if the unit had moved in 0810, 0809 and then 0808 or 0709. The Aquitaine cavalry now being on the same side of the creek that the defending unit, the terrain bonus for the creek no longer applies. The force ratio is now 4 to 1 (11FP in attack and 2FP in defense) with a defensive bonus for the village.
Lothaire could have continued to attack the 3 FP Neustrie unit located in 0611. But he would not have the same bonus for charging even by moving successively in 0811 and then 0711 or 0712 because the unit must do all of its movement in a straight line towards the charged enemy unit.
It should be noted that the Bowmen unit could have fired by itself against the Provence unit. But given the force ratio, it cannot do better than making it retreat and the other units couldn't then attack Lothaire (11.1 Each unit may only attack, or be attacked, once per phase.) or enter the vacated hex (6. the movement phase takes place before the combat phase).
9.5 - Combat resolution
Once combat has been declared, the attacking player adds together the strength points of the attacking units, including any possible charge bonus. The defender does the same for the defending unit, also taking into account any bonus due to the terrain. The ratio between the two forces is worked out, expressed with the attacker's ratio first and the defender's second. This ratio may go from 1/2 (or "1 against 2") to 4/1 (or "4 against 1"), and is always rounded in favour of the defender. The attacker then rolls the die. According to circumstances, the number rolled may be modified by the nature of the terrain (see Terrain Effects Chart).
Lastly, using the final strength points ratio and the number rolled on the die, the players refer to the Combat Results Table (eventually modified by the terrain). The result of the combat is where the two lines meet. Combat results are applied immediately.
9.6 - Terrain
All modifiers due to terrain are cumulative. Only the terrain of the defending unit counts. If at least one attacking unit is on the same side as the defending unit, the corresponding die bonus doesn't apply.
9.7 - Combat results
1st letter:
- A : Attacker
- D : Defender
2nd letter or digit:
- 2 : 2 step losses
- 1 : 1 step loss
- T : Morale check
- R : Retreat 1 hex
9.8 - Retreat
A R result leads to a retreat of one hex of all the affected units. A unit which is unable to retreat because it has an impassable terrain or an enemy Zone of Control behind it, suffers a step loss unless it is surrounded by friendly units. In this event, the retreating unit displaces a friendly unit, occupies the vacated hex, and the owning player carries out a morale check on the displaced unit. The adjacent unit must also be able to retreat in accordance with the rules. If not, the same procedure is repeated. In this way several units may retreat in sequence, each undergoing a morale check, all as the result of one combat.
Note : This simulates the possibility of panic overtaking those units watching their comrades retreat or flee.
If a unit is forced to retreat off the map it is eliminated.
9.9 - Allocation of step losses
Each unit has one or two steps. Units which have only one step loss are eliminated after their first step loss. Upon the first step loss, a two step loss unit is turned onto its reduced side; on the second step loss the unit is eliminated. Losses are distributed as the owning player desires, but in such a way as to ensure as far as possible that all step losses are applied. If two or more units are attacking, losses may thus be distributed amongst them.
Example : Player 1 attacks with one full strength and one reduced unit. He suffers an A2 result. He therefore has the choice of either reducing the full strength unit and eliminating the reduced unit, or simply eliminating the full strength unit.
9.10 - Morale Check
When a morale check is required the owning player rolls a die for each unit concerned and compares the die roll with the unit's morale value. He adds 1 to the unit's morale value if the commander is stacked with, or is adjacent to the unit.
- If the result is lower than the unit's morale there is no effect.
- If the result is equal to the unit's morale, it must retreat 1 hex.
- If the result is greater than the unit's morale level, it suffers 1 step loss. If the unit is already reduced, it is eliminated.
9.11 - Advance after combat
When the result of a combat forces the defender to retreat or when the defender is eliminated, one of the adjacent attacking units may, if it wishes, occupy the hex abandoned by the defender, without regard to the effects of any Zones of Control or movement limits. This doesn't apply if the defender has retreated before the combat (for example the Breton cavalry at the battle of Jengland). The reverse is also true for the defender.
The decision whether or not to occupy the opponent's hex must be announced immediately after the combat has been resolved. A unit which has charged must always occupy the hex of an opposing unit which has retreated or has been eliminated.
If several units are eligible to advance, only one unit (plus eventually a commander) may advance.
Example of retreat and morale
This is the attack phase of the Franks. The Ecuyers unit and the Frankish cavalry unit decide to attack the militia of Rennes unit. The Frankish player rolls a die and gets a 4 with a result of DT. Thus the defending unit tests his morale. The militia unit has a morale of 2 + 1 thanks to his adjacent commander. It rolls a die and gets a 3. This result being the same as to his morale value, the militia of Rennes unit must retreat to the hex 0609 and push back the units that were there in another hex because the hexs 0509, 0607 and 0709 are in enemy ZOC. The displaced unit will have to test its morale with the benefit of the bonus of Erispoe.
This is the attack phase of the Britons. The Breton cavalry unit 4FP attacks the Frankish unit 2FP in 0207 and gets a DR. Hexes 0308, 0208 and 0206 are in enemy ZOC and hexes 0108 and 0107 are impassable. The Frankish unit must take a loss. It would be the same for the Frankish unit in 0309 if it were to retreat because it isn't adjacent to any friendly unit and is surrounded by enemy ZOC.
10 - Victory Conditions
During Phase 5 of each turn the players check to see if one of the two armies has passed its Army Morale Threshold (specified for each scenario). Each player totals the strength points of his own eliminated units. If his commander is eliminated, he adds the strength of the latter to the total, + 4 points. If a Baggage unit is eliminated, he adds its strength + 2 points. Then he checks to see if he has passed his Army's Morale Threshold.
If one player has reached the threshold or more, the other player achieves a major victory.
If both armies have passed their thresholds at the end of the same turn, the player whose army has passed the threshold by the least achieves a minor victory.
If, at the end of the scenario, neither army has passed its Morale Threshold, players should refer to the victory conditions for that particular scenario.
11 - Optional Rules
Both players must agree on one or several optional rules to apply them.
10.1 - Moving from an ennemy ZOC to another ennemy ZOC
A unit that is in an enemy ZOC may go directly into another enemy ZOC. It must first test its morale. If a leader is stacked with the unit, he follows in every way the results of this unit.
- If the result is lower than the morale of the unit, the unit passes through another enemy ZOC.
- If the result is equal to the morale of the unit, nothing happens.
- If the result is higher than unit morale, it suffers 1 step loss. If the unit was already on his side reduced, it is eliminated. If a leader was stacked with the unit, he is also eliminated.
10.2 - Counter charge
To simulate implicitly the counter-charges, the charge bonus applies only against units not having that ability.
Scenario 1 - Fontenoy en Puisaye, June 25th 841
Lothair I against Louis the German and Charles the Bald. On the death of Charlemagne's successor, Louis the Pious, and despite the settlement agreement of Worms of May 30th 839, his sons immediately began to fight amongst themselves. On July 24th 840 in Strasbourg the new Emperor Lothair I declared that the whole of the empire was to be under his control. Depending on whom they owed loyalty to, the nobility gathered under the Emperor's banner or that of his two brothers, Charles the Bald and Louis the German.
In June 841 the 150,000 men on each side were drawn up for battle near Fontenoy en Puisaye. Lothair and Pepin II were prevailing when all of a sudden the arrival of Guérin, Duke of Provence, at the head of an army of southerners reversed the situation. If all the nobles had chosen sides, this did not apply to Bernard, Marquis of Septimania, who sat waiting to see the outcome of the confrontation before entering the battle on the victor's side. The battle finally ended with a resounding victory for Charles the Bald and Louis the German.
The death toll was very high, especially among the Frankish nobility. Despite this the conflict was to continue for another two years before a new treaty of settlement was signed in Verdun in early August 843. The Empire's unity was broken.
- First player: Charles the Bald/Louis the German
- Number of turns : 7
Set-up
When the specific strength of a unit is not indicated, those units having the same name but different values are placed in the designated hexes at the owning players discretion.
Army of Lothaire I (blue units)
- Lothaire I, Emperor : 0309
- Aquitaine (Cavalry) : 0314
- Aquitaine (Infantry) : 0313
- 2 x Bowmen : 0204, 0212
- 3 x Austrasie (Cavalry) : 0307 à 0309
- 2 x Austrasie (Infantry) : 0207, 0209
- Bourgogne (Cavalry) : 0202
- 2 x Bourgogne ( Infantry) : 0304, 0305
Army of Louis the German and Charles the Bald (red units)
- Charles le Chauve : 0912
- Neustrie (Cavalry Force 4) : 0904
- 2 x Neustrie (Cavalry Force 3): 0912, 0814
- 1 x Neustrie Force 3 and 1 x Neustrie Force 2 (Infantry) : 0903, 0913
- Bowmen : 0914
- 3 x Bavière (Cavalry) : 0906, 0907, 0909
- Bavière (Infantry) : 0908
Reinforcements
The first Provence unit arrives on turn 3 by hex 0515, 1115, 1208 or 0901 (Player's choice).
The second Provence unit comes on turn 4 by the same selection of hexes.
Neutral
Catalogne : 0502
Special Rules
At the beginning of turn 4, each player rolls one die and adds the number of eliminated or reduced enemy units. Whoever has the highest total can activate the Catalogne unit as part of his army for the rest of the game. In case of a tie, the process is repeated on the following turn.
If one army attacks this unit before turn 7, it automatically sides with the opposite army.
Army morale threshold
- Army of Lothaire I: 16
- Army of Louis the German and Charles the Bald : 14
Victory conditions
If neither player has succeeded in winning a major victory by the end of turn 7, each player totalizes the Force of his eliminated units. The player with the lowest total has a minor victory. Otherwise, it's a draw. The three brothers are unable to overcome by force. They let their representatives negotiate a peace. Will they succeed?
Scenario 2 - Jengland, August 22nd 851
Franks against Bretons. After a first Breton victory against the Franks in 845 by Nominoë (Nevenoe in Breton) his son Erispoe continued with repeated attacks against the Frankish marches. Charles the Bald, intent on profiting from the father's death to bring his son back into line, organised an expedition to Brittany the early summer of 851. He concentrated his army at Angers and advanced towards Brittany. With the way through Beslé, on the road from Nantes to Rennes, blocked by the Bretons the main confrontation took place north of Guéméné-Penfao.
The royal army was deployed in two lines. The front line, composed of Saxon infantry, was decimated by the Breton cavalry which employed its usual tactics of harassment followed by simulated flight, allowing them to rain javelins on the powerless opposing troops. The Franks, accustomed to hand to hand combat were paralysed by this technique that caused heavy losses in their ranks.
The next day the struggle was continued, ending with a major defeat for the Franks. Seeing this, Charles the Bald fled secretly under cover of darkness, abandoning all of the royal baggage train in order to maintain appearances and to gain time. When morning came, the Frankish army was seized with panic upon learning of the king's flight and thought only of doing the same. The Bretons rushed upon them, invading the Frankish camp which was full of riches, laying their hands on all its goods, pursuing the fleeing columns of Franks, killing or capturing those they came upon while only flight saved the remainder of the army.
In Autumn Erispoe and Charles the Bald signed a peace treaty in Angers; Charles himself handed over the royal insignia to his conqueror. The cities of Rennes and Nantes and the district of the pays de Retz passed into Breton hands.
- First player: The Frankish player deploys first. The Breton player plays first.
- Number of turns : 7
Set-up
When the specific strength of a unit is not indicated, those units having the same name but different values are placed in the designated hexes at the owning players discretion.
Frankish army (red units)
- Charles the Bald (older) : On a Frankish cavalry unit
- 2 x Saxe : 0903, 1004
- Cavalry Force 3, Ecuyers (Squires) and 2 x Cavalry Force 2 : 0701, 0901, 1001, 1201
- 3 x Infantry Force 3 and 3 x Infantry Force 2 : 0403, 0504, 0603, 1304, 1403, 1504
- 3 x Bowmen : 0502, 1002, 1502
Breton army (green units)
- Erispoe: On a Breton cavalry unit
- 1 x Breton Cavalry Force 4, 4 x Breton Cavalry Force 3 and 2 x Breton Cavalry Force 2: 0507, 0606, 0907, 1006, 1107, 1406, 1507
- 2 x Breton Infantry Force 3 and 1 x Breton Infantry Force 2 : 0408, 0608, 1008
- Milice de Rennes and Milice de Nantes : 1408, 1509
Special rules
1 - Breton Cavalry
Each time a Breton cavalry unit is attacked and if at least one of its adjacent hexes is free of enemy units, this Breton unit must roll a die. On a 5 or 6, the unit must retreat 1 or 2 hexes (even through enemy ZoC). If it must retreat off map, it is eliminated.
Historical note: The Breton horsemen threw their javelins at the enemy and then quickly retreated like the Asiatic light cavalry. This type of attack constantly frustrated the efforts of Charles the Bald at the battles of Ballon and Jengland/Beslé and had a major role in the Breton victories.
2 - The Vilaine river
All hexes 01XX are impassable (the Vilaine river) except on the bridge. The only access to the bridge is by hex 0208.
Army morale threshold
- Frankish army : 18
- Breton army : 20
Victory conditions
If neither player has succeeded in winning a major victory by the end of turn 7, each player totalizes the Force of his eliminated units. The player with the lowest total has a minor victory. Otherwise, it's a draw. The two armies are neutralized and a new confrontation will likely take place during the next campaign the following year.
Scenario 3 - Brissarthe, July 2nd 866
Franks against Vikings/Bretons. In 863 Charles the Bald had to cede the territory of Entre-Deux-Eaux, a part of Anjou to the north of Angers to Erispoe's successor, Salomon (Salaun in Breton). Even if peace between the two peoples had returned, the Bretons still regularly took part in Viking raids, and they in turn used their settlement in Noirmoutiers, along with Breton territory, as bases from which to raid Frankish lands.
It was on the way back from one of these raids in 866 that a Viking chief by the name of Hasting was surprised with 400 of his men by Robert the Strong and a large body of Frankish troops. Robert was waiting in ambush as they crossed the ford across the Sarthe near the village of Brissarthe. Once the raiders were engaged in crossing the ford, their wagons laden with booty pillaged from the town of Le Mans, the Franks emerged from the wooded hills killing a great number of the raiders. The survivors, especially those who had remained on the left bank, regrouped in the stone church of Brissarthe as the sun was setting.
The Franks settled in to spend the night besieging the place, their chiefs moving off to a safe distance, removing their helmets and protective clothing because of the summer heat. This was suddenly the moment the Vikings chose to attempt a sortie. Immediately Robert ran to the head of his men to push the Vikings back. Surprised by the speed of the Franks' reaction the Vikings turned back to the church. But in two successive shocks, several fatal blows struck Robert the Strong and Rainulf of Poitiers was killed by an arrow fired from a window in the church. With their two main leaders dead, the Franks left the battlefield leaving the Vikings free to go, escaping what had been perilously close to a stinging defeat.
Following on from his escape, Hasting was to devastate the Loire for several years more, before heading off to try his luck in England.
- First gamer : Frankish player
- Number of turns: 7
Set up
When the specific strength of a unit is not indicated, those units having the same name but different values are placed in the designated hexes at the owning players discretion.
Frankish army (red units)
- Robert le Fort (the Strong): 0302
- 1 x Neustrie (Cavalry) Force 4 and 1 x Neustrie ( Cavalry) Force 3 : 0302, 0301
- 1 x Neustrie (Infantry) Force 3 and 2 x Neustrie ( Infantry) Force 2: 0111, 0207, 0206
- 2 x Maine ( Cavalry) : 0104, 0103
- 1 x Maine ( Infantry) : 0303
- 2 x Anjou ( Cavalry) : 1003, 1002
- 1 x Anjou ( Infantry) : 1103
- 3 x Bowmen : 1204, 0112, 0106
Viking army (brown units)
- Hasting : 0605
- 2 x Breton Cavalry : 0805, 0405
- 1 x Breton Infantry : 0611
- 1 x Viking Cavalry Force 3 : 0601
- 1 x Viking InfantryForce 4, 1 x Viking Infantry Force 3 and 3 x Viking Infantry Force 2 : 0602, 0603, 0605, 0506, 0609
- 1 x Berserkers : 0607
- 2 x Bowmen : 0707, 0705
- 3 x Baggage : 0608, 0606, 0604
Special rules
1 - Berserkers
The Berserkers unit can choose to charge. If so, it adds +2 to his attacking Strength points if the enemy unit is in a clear or hill hex. If at the end of the combat, it is still adjacent to an enemy unit, it will not move before the end of the next turn.
A commander stacked with this unit only adds his Strength points. The Berserkers unit must advance after combat.
Historical note: Dressed in a bear or wolf skin and fighting under the influence of the wrath of Odin (berserserksgangr), the berserkers were deemed as insensitive to injury and fear.
2 - Viking charge
The Viking cavalry unit only adds +1 to its Strength points in attack if charging.
Historical note: 9th century Viking raiders used horses for their speed. But they did not master the art of fighting mounted as well as their Frankish opponents.
Option
The Frankish player may choose to place his units freely West of the Sarthe (on the hilly side). He can also place up to three units with 2 MP max on wood hexes. In this case, the Viking player starts the game.
Army morale threshold
- Frankish army : 17
- Viking army : 25 if no baggage unit is eliminated. 21 if 1 baggage unit is eliminated. 17 if 2 baggage units are eliminated. 13 if 3 baggage units are eliminated.
Victory conditions
If neither player has succeeded in winning a major victory by the end of turn 7, the Viking player can still have a major victory if 2 or 3 baggage units exited off map by the hexs 0315 to 0915, a minor victory if only 1 baggage unit was exited. Otherwise, it is a minor Frankish victory. (The raiders have been stopped).
Note : being overloaded with plunder, Breton units don't have the same celerity that they shown during the battle of Jengland.
Scenario 4 - Montfaucon en Argonne, June 24th 888
Franks against Danish Vikings. The eldest son of Robert the Strong, Eudes was the Count of Paris and made a name for himself during the siege of Paris in the winter of 885-886, subsequently becoming the Marquis of Neustria. Following his acquisition of numerous counties and the consequent rise in influence, he was elected King of West Francia in February following the death of the Emperor Charles the Fat in January 888.
The choice of a powerful warrior chief, even if not Carolingian, was quickly justified as new Viking raids moved further and further inland into the kingdom.
At the end of June Eudes I surprised a big Danish raid up the Meuse, near the forest of Montfaucon in the Argonne. The forest covered the approach of the Frankish army and the attack caught the Vikings completely by surprise. The raiders took flight and tried to make it back to their ships moored on the Meuse, near to the village of Dannevoux. However they were caught and massacred. Indeed, according to the chronicles of the age the Frankish heavy cavalry slaughtered 19,000 Vikings!
Despite this crushing victory, along with others that followed (for example the victory won at Louvain in 891, by Arnulf, King of East Francia) the Viking menace continued. Nonetheless, the victory at Montfaucon allowed Eudes to establish his rule on solid foundations, even though his claim to the throne continued to remain contested by Carolingian descendants.
- First player : The Viking player deploys first. The Frankish player plays first.
- Number of turns : 5 (with possibly 3 additional turns)
Set up
When the specific strength of a unit is not indicated, those units having the same name but different values are placed in the designated hexes at the owning player's discretion.
Each player secretly notes the position of his commander. Then at the end of the set-up both players simultaneously reveal this position.
Viking army (Brown units)
- Aslak : On a Viking cavalry unit
- 5 x Vikings Cavalry Force 2 : 1103, 1104, 1205, 1107, 1209
- 6 x Vikings Force 2 : 0901, 0702, 0502, 0202, 0606, 0509
- 1 x Vikings Force 3 : 0610
- 1 x Vikings Force 4 : 0305
- 3 x Vikings Force 1 : 0504, 0605, 0708
- 4 x Bowmen : 0401, 0506, 0508, 0310
- 3 x Drakkars : between 0101 and 0107 (included). The drakkars must be separated by a minimum of one hex.
Frankish army (red units)
- Eudes I : On a Neustrie Cavalry unit
- 1 x Neustrie (Cavalry) Force 4 and 6 x Neustrie ( Cavalry) Force 3: 1501, 1502, 1503, 1504, 1507, 1508, 1509
- 1 x Bowmen : 1605
- 2 x Neustrie (Infantry) Force 2 : 1505, 1506
Special Rules
1 - Drakkars
For all rules questions, the drakkars are considered as baggage units. A single Viking infantry unit (with a movement value of 2) may be stacked with a drakkar. If a Drakkar unit is eliminated, it is flipped onto its burnt side and no unit can stack with it. If a Viking infantry unit was stacked when the drakkar unit was eliminated, it is automatically eliminated.
2 - Viking charges
The Viking cavalry unit only adds +1 to its Strength points in attack if charging.
Historical note: 9th century Viking raiders used horses for their speed. But they did not master the art of fighting on horseback as well as their Frankish opponents.
3 - The Meuse river
The hexes 01XX are impassable. The only exceptions are the drakkars, any possible Viking infantry units stacked with them and the bridge, only accessible by hex 0208.
Army morale threshold
- Viking army : 19
- Frankish army : 12
Victory conditions
The Viking player has a major victory if the Frankish player exceeds his army morale threshold before the end of turn 5.
The Frankish player has a major victory if the Viking player exceeds his army morale threshold before the end of turn 5.
If neither player has succeeded in winning a major victory by the end of turn 5, the player whose difference between his army morale threshold and the sum of the Force points of his eliminated units is the greater gets a minor victory. Otherwise, the result is a draw.
In case of a minor or major Frankish victory, the Frankish player may decide to play 3 additional turns to get a decisive victory. Then, by the end of the third turn, the Frankish player must have burnt 1 drakkar unit to get this decisive victory. Otherwise, he only gets a minor victory.
In any case, if the Viking player manages to eliminate 3 Neustrie cavalry units, victory is moved up a notch in his favour (for instance : a minor Frankish victory becomes a draw, a major Viking victory becomes a decisive victory, ...)
Terrain Effect Chart
| Terrain | Movement (cost per hex) | Combat |
|---|---|---|
| 1 - Clear | 1 | - |
| 2 - Road | 0,5 | - |
| 3 - Village | 1 | +1 on the die roll |
| 4 - Woods | 2 | -1 column for the defending unit |
| 5 - Hill | 2 | -1 column for the defending unit |
| 6 - River | impassable | No retreat possible |
| 7 - Bridge | 1 (0,5 if road) | +1 on the die roll |
| 8 - Fort | 2 | - |
Combat Result Table
| Die | 1/2 and - | 2/3 | 1/1 | 3/2 | 2/1 | 3/1 | 4/1 and + |
|---|---|---|---|---|---|---|---|
| 1 | DR | DT | D1 | D1 | D1R | D2 | D2 |
| 2 | DR | DR | DT | D1 | D1 | D1 | D2 |
| 3 | AR | AR | DR | DT | DT | DT | D1 |
- A : Attacker ; D : Defender
- 2 : 2 steps losses
- 1 : 1 step loss
- T : Moral check
- R : Retreat one hex.