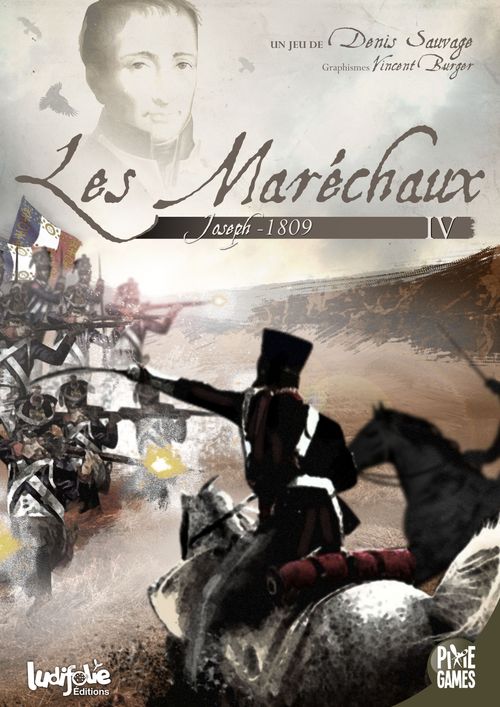
Les Maréchaux IV: Joseph 1809
Les Maréchaux IV: Joseph 1809 Rulebook
Table of Contents
Table of Contents
- 1.0 Components
- 2.0 Game Sequence
- 3.0 Initiative
- 4.0 Events
- 5.0 Operation
- 6.0 Administrative
- 7.0 Special Cases
- 8.0 Victory Conditions
- Detailed Game Sequence
- Three Armies for Madrid
- Rules Common to Several Scenarios
- Scenario 1: Joseph – Spain 1809, The Advance Toward Madrid
- Scenario 2: Joseph – Spain 1809, The Allied Retreat
- Scenario 3: Joseph – Spain 1809, Three Armies for Madrid
- Scenario 4: Joseph – Spain 1809, The Battle of Talavera
- Scenario 5: Joseph – Spain 1809, The Battle of Almonacid
- Scenario 6: Joseph – Spain 1809, The Campaign of Ocaña
- Event Markers
1.0 Components
1.1 Counters
There are three types of counters: units, commanders, and markers.
1.1.1 Units
The front of the counter indicates its affiliation and is used to simulate the fog of war. The letter "A" indicates that the unit has been activated during the turn: in the upper position, it is still available for activation; in the lower position, it is no longer available for activation.
[Illustration: unit available for activation / unit already activated]
The back of the counter indicates the kind of unit. There are four different types of units: "divisional", detachments, decoys and baggage.
"Divisional" units
For the most part, they represent a division but can also be a brigade.
The name is used to find the unit on the order of battle. The "divisional" units are sometimes grouped by "army corps" indicated by a colour code. Units without this colour code are independent.
The values correspond to its movement points (MP). If a unit has two values, this indicates that it has integrated Artillery – the upper value is used as long as it still has Artillery strength steps; the lower value is used when it has no more.
[Illustration labels: Parent Army Corps; Unit Name; Movement Points; Movement Points if integrated artillery]
Detachments
They simulate, depending on their nature, an infantry or cavalry "regiment" or an Artillery battery. They represent 1 strength step (SS) of the "arm" concerned. They are distinguished from "divisional" units by their two values – morale and MP – and are not listed on the order of battle.
[Illustration labels: Morale; Movement Points; Horse Artillery symbol]
Decoys (Leurre)
They represent the cavalry "vedettes" destined for reconnaissance or to deceive the enemy. They only have one value, indicating their movement points.
Baggages
They represent the logistical accompaniment of the troop. Certain armies may be deprived of them. They have only one value, indicating their movement points.
1.1.2 Commanders
The front is identical to the other units and the back identifies the commander and gives its strategic value (SV). The higher the value, the better the commander. A distinction must be made between the commanders in chief with one star and the subordinate commanders with no stars. Like the "divisional" units, commanders may have a colour code that indicates their affiliated "army corps" (7.10).
[Illustration labels: Parent Army Corps; Commander in Chief; Subordinate Commander; Horse Artillery symbol]
The nominative commanders boxes allow units accompanying a commander to be hidden from the opponent's view, thus preserving the fog of war. Victory points should be noted on these sheets as the game progresses.
1.1.3 Markers
There are eleven types of markers:
- Turn ("Tour") markers indicating the day, month and year are placed on the turn counter and inform players of the progress of the game.
- Battle markers are placed on the connection where a combat takes place so that players can remove the units that are present without forgetting their position.
- The MP ("PM") markers are placed on the movement track and inform players of the number of movement points spent by a stack.
- The Amplitude marker is used on the game help during combats to recall the strengths engaged in the battle.
- Events markers are attributed to players according to the scenarios at the beginning of the game or as players draw them at the beginning of each turn. They are played according to the specific rules for each scenario.
- Fatigue markers determine losses incurred during troops' marches.
- Has combatted ("A combattu") markers are placed on stacks of units that just combatted.
- Back to the river ("Dos à la rivière") markers indicate units that have just crossed a stream or river and that have entered a zone occupied by an enemy stack.
- Retreat ("Retraite") markers are placed on the connections chosen by the players when two stacks are found in the same zone.
- Demoralised ("Démoralisée") markers are placed on a stack of units having failed the morale test after losing a combat or on a detachment that becomes fatigued.
- The "Commander in Chief" marker determines whether Cuesta or Wellesley is the Commander in Chief for the Allies during this turn.
1.2 The map
The map represents the region in which the campaign in question was played out and the principal paths and roads taken by the troops. The zones correspond to the stages and are of 3 types: clear, defensive or town. Units and commanders must always be placed in a zone. The distance between two zones is approximately 10 km and is called a connection. On the map, the terrain table, turn counter and movement chart are also provided.
1.3 Order of battle
Each player has his own order of battle on which his "divisional" units are listed.
Each unit has its strength depicted in boxes called "points de force" or strength steps (SS); each box represents 1,000 infantry men, 500 cavaliers or an Artillery battery. In order to distinguish the different types of SS, the following symbols are used:
- Infantry
- Cavalry
- Heavy cavalry
- Artillery
- Horse Artillery
If a unit incurs losses, it crosses out boxes from right to left. If all of the boxes of a unit are crossed out, it is removed from the game. The top center number indicates the unit morale, the bottom right number in italic indicates the remaining Strength Steps (SS). The higher the value, the better the morale. Morale declines as losses are incurred. For a mixed unit of Infantry/Artillery or Cavalry/Artillery, the loss can be attributed as the player chooses, to either the infantry or the artillery.
Example: The Delaborde division suffered a second loss. It can assign it to (1) the infantry which will then drop to 4 SS and a morale of 3, or (2) the artillery to keep 5 SS and a morale of 4.
Detachments and baggage units are not listed in the order of battle. The detachments can be available at the beginning of the scenario or created during the game. If a detachment is created, the box is crossed out from left to right diminishing the number of SS of the unit without reducing its morale.
Example: The Leval division just created a detachment; it now only has 4 SS but keeps the morale of 4.
The nominative commanders boxes and the order of battle can be photocopied for subsequent games.
1.4 Dice
The game requires the use of several 6-sided dice.
1.5 Definitions
- A free zone is a zone without enemy units.
- A contested zone is a zone occupied by one or more units of the two camps.
- A "line of communication" is a succession of connections of free zones – all crossable – between two zones on the map. The departure and arrival zones must not be contested.
- In all cases, decimals are rounded up to the nearest whole number.
- The term depot represents a logistical centre of an army.
- A stack is composed of one or more commanders and/or an unlimited number of units.
2.0 Game Sequence
Each game turn comports the following phases:
- A- Initiative Phase
- B- Events Phase
- C- Operations Phase
- D- Administrative Phase
3.0 Initiative
Each player rolls a die and adds the strategic value of his commander in chief. The player with the higher result obtains the initiative. In the case of a tie, re-roll.
4.0 Events
Events markers are obtained in two ways: by allocation at the beginning of the game according to the scenario, or by drawing them during the events phase of each turn. For this, the markers are placed in an opaque container and then one marker is drawn at random per turn. Each player receives his own container and his own markers. A player may not draw a marker from his opponent's container. The drawing occurs simultaneously for the two players.
Events marked with a star must be played immediately; the others can be held onto. If there are no markers remaining in the container, the player does not draw an event for that turn. The "events" markers are played according to the rules for each scenario. A player can decide to tempt fate by returning the event to the bowl at a cost of 2 victory points awarded to his opponent. There is no event for the player during that turn.
5.0 Operation
Beginning with the player who won the initiative, each player alternates in conducting one of the following options:
- Activating a stack of units by moving.
- Combatting.
- Passing.
If both players pass consecutively, the operations phase for that turn is over and play continues with the administrative phase. An activated stack is pivoted to indicate that it has been activated. If a camp has activated all of its units but cannot initiate combat, it must pass.
Note that combat is not considered an activation. A unit can very well combat and then move during the following operation, move and then combat during the next operation, combat and then combat again...
5.1 Stacking
In a zone, there is no stacking limit for units and commanders. A player is not required to engage all the units of the same zone in an operation. He can form a stack and move it and then move the remaining units during another operations phase. Opponent stacks can inhabit the same zone.
5.2 Command
Before moving, a stack must first successfully pass a command test. Combatting and passing do not require a command test. A commander in chief in the same zone allows a stack to be activated without a command test except if this starting zone is contested. It will move with all of its MP. The commander in chief is not obligated to accompany this stack in its movement.
A command test proceeds as follows:
- Roll the die.
- Add the SV to the subordinate commander, if there is one.
- Add 1 if the stack contains only cavalry units.
- Add 1 if there is a line of communication between the commander in chief and the stack.
- If the stack is in a contested zone, compare the number of SS of the cavalry of the two stacks. If the stack testing its command has more cavalry SS, add 1; if not, subtract 1.
- Subtract 1 if the stack is composed of units of different "army corps", as per 7.10.
For a result of 5 or more, the stack can be freely activated with all of its MP.
For a result of 3 or 4, the stack can be freely activated, but only retains half of its MP.
For a result of 1 or 2, the stack is considered activated without doing anything. It is the opponent's turn to conduct an operation.
5.3 Movement
During a move, a stack must follow a succession of zones linked by connections of route, road or path. The cost in MP depends on the connection taken (see the terrain table). MP are attributed for the turn. A unit may not spend more MP than it possesses for the turn. It can, however, spend fewer. A stack can leave its units in a zone along the way, but it cannot reclaim any. The units that are left have completed their movement and fall under the "Activated" status.
If a stack enters a zone occupied by an enemy stack, it must stop and take an "Activated" status, unless it carries out a forced passage as per 5.3.3. To keep track of the MP spent, use the movement chart and the "PM" counter. Advance the marker on the chart each time a connection is taken.
5.3.1 Axis of retreat
At the moment in which a stack enters a zone occupied by an enemy stack, each player must determine an axis of retreat. To do so, place a "Retraite" marker on a connection between the zone of the two stacks and an adjacent zone.
The player whose stack just entered the zone must first place his marker by the connection he just crossed. His opponent may choose any connection except one already chosen by the stack that just entered the zone.
The "Retraite" marker can only be placed in the direction of a free zone. If there is no free zone, the stack has no axis of retreat.
If, during a later operation, an enemy stack enters the zone by the connection chosen for retreat by the friendly stack, the "Retraite" marker is removed. The stack without an axis of retreat will combat with a penalty of 2 for its combat strength. If another stack enters the zone, regardless of the connection used, its axis of retreat will be that of the friendly stack already present. If the stack already in the zone has no axis of retreat, the newly entering stack will also be without an axis of retreat.
The markers are removed when only units of the same camp remain in the zone.
Very important: at the beginning of its move to a contested zone, a stack cannot choose as its first movement the direction of the axis of retreat of the enemy stack with which it cohabits.
5.3.2 Fatigue
After crossing a connection, the player must draw at random a "Fatigue" marker, regardless of the connection crossed.
Different modifiers can apply for the draw. They are all cumulative:
- If the stack is composed of more than 10 SS, draw an additional marker for each connection crossed; for more than 20 SS, draw two markers; for more than 30 SS, draw 3 markers; etc. Baggage is not counted in the total.
- If it is not possible to establish a line of communication between the connection where the stack is located and one of the friendly depots, draw one additional marker for each new connection crossed.
- If the stack has received one or more "A combattu" markers, convert them by drawing the same number of "fatigue" markers before moving the stack.
- If the stack enters a zone occupied by any enemy stack – except a lone commander – draw an additional marker.
Drawn markers can be ignored in the following cases:
- If the stack is accompanied by baggage, the player can, once and only once, for each unit of baggage, return a "fatigue" marker after looking at it without taking another one.
- If the stack is accompanied by a commander, the player can, once and only once, return a "fatigue" marker without taking another one. The presence of several commanders in the stack does not allow for other "Fatigue" markers to be returned.
Tally the fatigue points accumulated by using the values noted on the counters. The drawn markers are not returned to the container after each drawing but only when the player decides to interrupt his movement. Then, all of the markers are returned to the container. If the accumulated fatigue exceeds the morale of one or more units of the stack, those units must stop their movement and lose 1 SS, except for the detachments that receive a "démoralisée" marker in its place. The other units of the stack may continue their movement.
5.3.3 Forced passage
A stack that penetrates a zone occupied by its opponent can declare a forced passage to avoid stopping there. In this case, a combat between stacks of the zone must be resolved during this same operation with the attacker reducing his Combat Potential (CP/PC) by 2. If the stack that just engaged in a forced passage won the combat, and decides to keep moving, it draws a "Fatigue" marker that it adds to its total and can continue its movement normally. If it lost the combat, the stack that attempted the forced passage then has an "activated" status, and its movement is finished.
5.3.4 Move in Battle Order
A stack that succeeded its command test can cross only one connection to enter a zone occupied by an enemy stack before testing its fatigue. [Printed as "a zone enemy occupied by an enemy stack"; the word order is corrected here.] It cannot perform a forced passage at the end of its movement and will be considered as having been activated.
5.3.5 Exiting the map
A stack may exit the map via a connection with an arrow, freely during its movement or compulsorily during the retreat after a combat. If this exit occurs toward a friendly depot, the units of the stack are eliminated but provide no victory points. If it occurs toward an enemy depot, they are eliminated and give victory points to the opponent. To exit the map freely during the movement, the units of the stack must spend the MP of the exit connection.
5.3.6 Renforts
A stack of reinforcements is placed on the entry zone specified in the scenario and is available for activation. The zone of reinforcements can be contested. In this case, the reinforcement stack places a "Retraite" marker according to 5.3.1 and then its opponent does the same. If the zone has a connection toward a friendly depot, the "Retraite" marker of the reinforcement stack must be placed on this connection. If it retreats, it follows the elimination constraints given in 5.3.5.
5.4 Combats
A combat can be initiated if friendly units are present in a contested zone. The player initiating the combat is called the attacker and his adversary, the defender. The attacker is free to compose his stack as he wishes and declare which units of the zone will combat. All of the defender's units in the zone are required to combat. Following the declaration of combat, the units of the two stacks are turned over to their back side.
Combats proceed in the following strict order:
- Withdrawal of the cavalry
- Combat amplitude
- Melee
- Retreat
- Demoralisation
- Pursuit
In any situation in which the players must carry out a common action, the attacker goes first.
5.4.1 Withdrawal of the cavalry
An attacking or defending stack composed solely of cavalry and with an axis of retreat can choose to withdraw. To do so, it attempts disengagement as per 5.2. If it succeeds – by obtaining the movement points to move – it retreats one zone along its axis of retreat. It is subjected to a pursuit as per 5.4.6. The two stacks do not receive an "A combattu" marker. The stack that withdraws remains available for activation if it was not activated this turn, regardless of the result of the command test.
5.4.2 Combat amplitude
The combat amplitude corresponds to the sum of the SS of the two stacks (including artillery and cavalry). This must be calculated to choose the corresponding column in the melee.
5.4.3 Mêlée
Calculate the combat potential (CP) of each of the stacks starting at 0, according to the following procedure:
- Add the morale of the "head unit"*
- Add the modifiers for any events markers;
- Add the bonus for artillery fire**;
- Add the strength ratio value to the stronger stack***;
- Add the SV of the commander of the stack if there is one;
- Add the defensive value of the zone (see the terrain table) for the defender only;
- Subtract 2 if the stack has no axis of retreat;
- Subtract 1 if the stack has a "Dos à la rivière" marker;
- Subtract 2 if the stack carries out a forced passage;
- Subtract 2 if at least one unit of the stack is demoralised;
- Add the value of 1d6.
* Each player designates a "head unit" in the stack. A cavalry unit in a zone of anything other than clear terrain cannot be designated as "head unit" unless there is no infantry unit in the stack. The morale value of this unit is added to the CP.
** Artillery fire – Simultaneously, each player rolls as many dice as he has Artillery SS in his stack. For each 4, 5 or 6, add 1 to the CP of the player.
*** Tally the number of SS of the two stacks by subtracting the Artillery SS and dividing by two those of the cavalry located in any zone other than clear terrain. The player with the greater total calculates his strength ratio by dividing the actual SS by those of the enemy stack. The result is added to his CP.
Example: Two stacks of 7 and 2 SS face each other. The strength ratio of the stronger stack is 4 (7 divided by 2 equals 3.5, rounded up to 4). It adds 4 to its CP.
If the strength ratio is greater than 6, the player with the greater total suffers no loss if he is victor of the combat – even if the combat results table indicates otherwise.
The final CP can be a positive, negative or zero number. The player with the greater number of CP is the winner of the combat. Losses are given on the combat table by crossing the difference in CP with the amplitude of the combats.
Losses are applied freely by the concerned players except for the first loss which must be applied to the "head unit". If the difference in CP is zero, the two stacks suffer the losses indicated, and there is no retreat phase or pursuit. The stacks receive an "A Combattu" marker and the combat and current operation are finished.
5.4.4 Retreat
The retreat distance for a losing stack is indicated on the melee table. The retreat must occur toward the zone containing the stack's "Retraite" marker and then continues in the direction of the choice of the player, in the case of a multi-zone retreat. In this case, it is prohibited to use the same zone twice.
Retreat must be carried out via free or contested zones. In the case of a contested zone, the retreat stops immediately without other effects.
If retreat is impossible or if the stack has no axis of retreat, the stack remains in place and suffers an additional SS loss per retreat zone that it had to cross, to be attributed freely.
A defeated stack becomes automatically "activated".
5.4.5 Demoralisation
At the end of his retreat, the losing player must roll 1d6. Add to the result the value of the distance of retreat from the table and compare this result with the morale of his "head unit". (In the case of the elimination of his "head unit" during the combat losses, he designates a new one.) If the result is greater than the head unit's morale, the stack becomes demoralised. A "Démoralisée" marker is placed on top.
5.4.6 Pursuit
To carry out a pursuit, compare the number of SS of the cavalry of the stacks. Pursuit is only effective if the number of SS of the winner's cavalry is greater than or equal to the number of cavalry strength steps of the loser. If the winner has no cavalry or if the combat zone is a zone of defensive terrain, there is no pursuit either.
If the pursuit is effective, the loser rolls 2d6 and adds the number of SS of the cavalry of his stack. The winner only rolls 1d6, adds the number of cavalry SS of his stack and 2 more if the losing stack contains a demoralised unit.
The difference between the total of the winner and that of the loser gives the number of additional losses that the stack must suffer. Losses are first applied to baggage units and to the SS of the artillery units, and then freely thereafter.
At the end of a pursuit, stacks with a "Non activated" status receive an "A Combattu" marker. All the stacks that participated in the combat are then turned back to their front side.
6.0 Administrative
At the end of turn, each player carries out the following actions simultaneously in the order specified:
- Test any recuperation of units (7.9)
- Test any necessary rallying of demoralised units (7.8)
- Remove all the remaining "A combattu" markers.
- Remove all the remaining "Dos à la rivière" markers.
- Turn the units to their "available" side
- Move the turn marker forward one space.
7.0 Special Cases
7.1 Commanders
A commander can be eliminated by the drawing of an event marker. The conditions for this elimination are described in the specific rules for each scenario.
All commanders have 10 MP per turn. They can move alone or accompanying a stack. Alone, they move like the cavalry without testing command or fatigue.
A lone commander in a zone with an enemy stack must be moved immediately to a free or contested contiguous zone of the owner's choice. If this move is impossible, the commander is eliminated. The adverse stack can continue its movement freely.
If a stack contains several commanders, the SV of the commander in chief is used if he is present. Otherwise, the player uses the SV of the commander of his choice.
7.2 Baggage
These units are not tested for fatigue and cannot use a "sentier" (path) connection. If these units are alone in a zone (without friendly infantry or cavalry units), they are eliminated without combat as soon as an enemy infantry or cavalry unit penetrates the zone. A baggage unit can be eliminated as a loss in combat. It counts as a loss of 1 SS.
7.3 Artillery
An Artillery detachment or integrated Artillery SS cannot use a "sentier" (path) connection. Artillery detachments that are alone are eliminated in the same way as baggage units.
7.4 Detachments
At the beginning or end of a movement in a free zone, a player can create a detachment from a non-demoralised "divisional" unit – based on the available counters. The unit loses 1 SS and the detachment counter of the same type as the "divisional" unit is placed in the zone – infantry detachment for an infantry unit, cavalry detachment for a cavalry unit. It is not possible to create Artillery detachments. However, if a "divisional" unit loses its last infantry or cavalry SS, the unit is removed from the game and the remaining Artillery SS are converted to Artillery detachments according to the available detachments. The non-converted SS are counted in VP.
In the same manner, using the reverse procedure, any "divisional" unit can recover a non-demoralised detachment. The recovered detachment cannot be used to remove a loss due to combat.
Example: The Merle division, which had already lost 4 infantry SS and performed a detachment, suffers another combat loss. It can assign it to its artillery SS or lose the last infantry SS. In that case the "divisional" unit is removed from the board and an artillery detachment is placed in the location previously occupied by the "divisional" unit. If the player no longer has an artillery detachment then the artillery SS is also lost.
A unit cannot be eliminated following the creation of a detachment; it must keep at least 1 SS. If a unit is eliminated it cannot be "recreated" by recovering a detachment.
Example: The Zayas division suffered two losses in combat, to the right, and performed a detachment, to the left. It now only has 2 SS. If it gains a detachment, it will be mandatory to erase the check on the left box. It will then have 3 infantry SS and a morale of 2.
The activation status of a detachment depends on the status of the unit to which it is attached. If the detachment is performed at the beginning of the move, the detachment will be available for activation. If done at the end it will be considered to have been activated.
If the detachment suffers a loss, it is eliminated.
A detachment may be designated as head unit.
A detachment acts in all cases like a unit with 1 SS.
7.5 Decoys
A decoy counter is considered as a cavalry unit with the following exceptions:
- If a decoy has no line of communication to a friendly depot, it is eliminated regardless of the current game phase. Consequently, a decoy in a contested zone is eliminated.
- The decoys are not affected by fatigue.
- For movement with a stack the decoys count as 0 SS.
Decoys are used to unsettle the opponent but also have a reconnaissance role since it is possible to sacrifice a decoy by penetrating a zone occupied by an enemy stack and to eliminate any decoys that comprise it; the other units remain on their front side. They are, however, limited in their movement like cavalry units and must test command to be able to move. A zone occupied by an enemy decoy is no longer free. Decoys can therefore control zones or block a line of communication, prevent a retreat....
The number of decoys is limited for each scenario. An eliminated decoy can only return to the game if allowed in the specific rules of the scenario.
The decoys available at the beginning of the scenario are placed freely during the initial positioning. They cannot be held off the map.
7.6 Fog of war
To maintain uncertainty in one's opponent, it is important to use all of the procedures proposed by the game: counters on their front side, order of battle hidden from the opponent, decoys. It is important during movement to carry out command tests and to draw "fatigue" markers, even if they have no bearing on the particular counter – a lone commander, for example.
7.7 Rivers
If a stack crosses any connection across a river toward a zone occupied by an enemy stack, a "Dos à la rivière" (Back to the river) marker is placed on it, and the stack will have a penalty of -1 on its Combat Potential. The marker is removed after the first combat, even if the stack remains in the zone. If the zone toward which the movement is directed is already contested, the marker is not added.
For its first connection of retreat only, a stack that retreats across a river by any connection suffers an additional loss to be attributed freely by the stack's owner.
Bridges on rivers can be minor or major and be destroyed or repaired using a "Génie" marker.
A destroyed minor bridge requires an additional 2 MP for crossing but does not cut communication lines.
A destroyed major bridge means the connection cannot be used and cuts communication lines.
7.8 Demoralisation
A stack containing at least one demoralised unit subtracts 2 from its CP and artillery fires are performed with a -1 die roll modifier. It moves normally but only toward one of its depots – the distance in MP from the arrival zone to the chosen depot must be less than or equal to the starting distance. If the stack has no line of communication to a friendly depot, it cannot move.
A new demoralisation on a unit that is already demoralised has no effect.
During the administrative phase, test the rallying of the demoralised units individually if they are in a free zone, were not activated and do not have an "A combattu" marker. Roll 1d6 and if the result is less than or equal to the morale of the unit, remove the marker.
7.9 Recovery
A unit that has not been activated during the turn, is not demoralised, doesn't have an "A combattu" marker, and is in a free zone can test its recuperation. Roll 1d6. If the result is less than or equal to the morale of the unit, subtract one loss from the unit. SS removed due to the creation of detachments cannot be salvaged using this procedure. Artillery SS can never be recovered.
7.10 Army corps
For certain scenarios in which the strengths are impressive, the subordinate commanders, the "divisional" units and baggage can be grouped into "army corps". The distribution of the units is described in the scenario and in the order of battle.
The corps commander (for the command test and fatigue) and the corps' baggage (for fatigue) provide a bonus if one unit from their corps is present in the stack. For the combats, use the rules of 7.1.
All units that are not assigned to a corps as well as all detachments are considered independent. The independent units have no restrictions and can combine freely with units of a corps while benefiting from the bonus of their commander or their baggage.
8.0 Victory Conditions
The victory conditions for all the scenarios add up generic victory points (VP) and specific VP. Victory is obtained by the player who received more victory points. If both players obtained the same number of VP, the game is tied.
Generic victory points:
- For each enemy SS eliminated: +0.5 VP
- For each adverse cavalry SS eliminated: +1 VP
- For each adverse Artillery SS eliminated: +1 VP
- For each adverse baggage unit eliminated: +2 VP
- For the elimination of an enemy commander: +SV of the commander in VP
- For each marker event that the opponent has returned to his container: +2 VP
- For each infantry SS recovered by the opponent: -0.5 VP
- For each cavalry SS recovered by the opponent: -1 VP
The eliminated detachments are tallied as the loss of 1 SS of the type that is concerned. If a detachment is used to recover a loss of a "divisional" unit, the detachment is considered as eliminated but is not counted in victory points. This recovery does not allow for the subtraction of VP from one's opponent.
If specific VP are allocated for the control of a zone, the player must occupy the zone with a stack and have a line of communication from this zone toward a friendly depot. If the zone is contested, no point is attributed.
Specific victory points: refer to the scenarios.
Detailed Game Sequence
A - Initiative (3.0)
B - Events (4.0)
C - Operations (5.0)
- Activate a stack through movement (5.3) and verify command (5.2).
- Combat (5.4) – attacker goes first for each step
- Turn the concerned units over to their back side
- Potentially withdraw one's cavalry (5.4.1)
- Determine the combat amplitude (5.4.2)
- Determine the "head units" (5.4.3)
- Carry out any Artillery fire (5.4.3)
- Calculate the strength ratio of the strongest stack (5.4.3)
- List the other CP modifiers – Dos à the rivière, Passage en force, Demoralisation, Terrain, Commander, No axis of retreat (5.4.3)
- Roll a die for each stack and CP (5.4.3)
- Resolve the melee (5.4.3)
- Apply the losses – 1st loss to the head unit (5.4.3)
- Carry out any retreats (5.4.4)
- Test the demoralisation of the stack if there is retreat (5.4.5)
- Carry out any pursuit (5.4.6)
- Place the "A combattu" markers on the stack(s) with the "Non activated" status (5.4.6)
- Return the units to their front side
- Pass
D - Administrative (6.0)
- Test for recuperation – non-activated, non-demoralised unit without an adverse stack in the zone
- Test for rallying – demoralised unit with no enemy stack in the zone
- Remove the remaining "Dos à the rivière" and "A Combattu" markers
- Pivot the units to their "available" side
- Advance the turn marker by one day
Three Armies for Madrid
Rules Common to Several Scenarios
-
Commanders in Chief also control Corps as follows.
- Joseph – Reserve Army for scenarios 1 to 5.
- Wellesley – British Corps for scenarios 1 to 4.
- Cuesta – Army of Estramadura for scenarios 1 to 4.
- Areizaga – Army of La Mancha for scenario 6.
- Vénégas – Army of La Mancha for scenarios 1, 2, 3 and 5.
- Soult – Reserve army for scenario 6.
-
Depots are identical for all scenarios. English and Spanish have their own depots and cannot use other ones.
- French: map exits toward Salamanque, Avila, Burgos and Guadalajara.
- Spanish: Ciudad Real, map exit toward Badajoz, Bailen, Albacete or Fuentedueñas.
- English: map exit toward Coria or Badajoz.
-
Initial placements, decoys available at the beginning of game and events to be placed within a container or to keep in hand are listed on the corresponding tables.
-
For command tests, units from the La Mancha army (scenarios 1, 2, 3, 5) are considered to have a valid communication line to a Commander in Chief if they have a valid communication line to one of the following depots: Ciudad Real, map exits toward Ailen [sic], Albacete or Fuentedueñas.
-
For command tests, units from the French 2nd, 5th and 6th corps (scenarios 1 and 3) are considered to have a valid communication line to a Commander in Chief if they have a valid communication line to one of the following French depots: map exit toward Avila or Salamanque.
-
At the beginning of each game turn, before determining initiative (scenarios 1, 2, 3, 4), the Allied player must choose Cuesta or Wellesley as Commander in Chief. He places the corresponding marker on the proper Commander counter. The other Commander in Chief then becomes a subordinate commander for the turn. After making this decision the Allied players roll a die and on a roll of 6 the roles are reversed for the whole turn.
Scenario 1: Joseph – Spain 1809, The Advance Toward Madrid
The historical background paragraph of this scenario is omitted.
Game length: The scenario starts July 18 and goes until the end of the July 30 turn, lasting 13 turns.
Specific victory conditions (for both players):
- Control of Madrid: 5 VP*
* If the zone is free of French units it is automatically controlled by the Allied player even if there are no Allied units present – exception to 8.0.
Special rules:
- The initiative automatically goes to the Allied player on the first turn.
- Joseph, Victor, units from the reserve army, the 1st corps as well as detachments and decoys that are in the same zone can be activated only as soon as an Allied unit enters the following zones – Talavera, Arenas or La Nava – or when a unit from the La Mancha army crosses the Rio Tajo. These units can still rally freely.
- On the turn following a British unit or a unit from the Estramadure army enters one of the following zones – Talavera, Arenas or La Nava – add 3 "Mésentente" event markers in the Allied event container. This addition is performed before the event draw.
- If the Allied player plays the "Renfort" event marker, he receives the divisional unit "Craufurd" in Plasencia.
Scenario 2: Joseph – Spain 1809, The Allied Retreat
The historical background paragraphs of this scenario are omitted.
Game length: The scenario starts July 29 and ends on the last turn of August 12, lasting 15 turns.
Specific victory conditions (for both players):
- Control of Madrid: 5 VP*
- Control of Trujillo, Talavera, Aranjuez, Ciudad Real and Toledo: 1 VP per zone*
* If the zone is free of French units it is automatically controlled by the Allied player even if there are no Allied units present – exception to 8.0.
For the Allied player only, at game end:
- 1 VP per "divisional" unit from the English corps exiting the map according to 5.3.5 through connections toward Badajoz or Coria starting with the August 8 turn.
- 1 VP per "divisional" unit from the Estramadure army exiting the map according to 5.3.5 through the connection toward Badajoz starting with the August 8 turn.
For the French player only, at game end:
- 1 VP per "divisional" unit from the La Mancha army exiting the map according to 5.3.5.
Special rules:
- The initiative goes to the French player on the first turn.
- Initial losses from "divisional" units count toward the final victory points tally according to 8.0 if they were not recovered.
- If the French player plays a "reinforcement" marker, he places the following units on the connection leading to map exit A.
- 1st marker: Mortier, all "divisional" units from the 5th corps and 1 decoy.
- 2nd marker: Soult, all "divisional" units from the 2nd corps and 1 decoy.
- 3rd marker: Ney, all "divisional" units from the 6th corps and 1 decoy.
Scenario 3: Joseph – Spain 1809, Three Armies for Madrid
The historical background paragraph of this scenario is omitted.
Game length: The scenario starts July 18 and ends on the last turn of August 12, lasting 26 turns.
Specific victory conditions (for both players):
- Control of Madrid: 5 VP*
- Control of Trujillo, Talavera, Aranjuez, Ciudad Real and Toledo: 1 VP per zone*
* If the zone is free of French units it is automatically controlled by the Allied player even if there are no Allied units present – exception to 8.0.
For the Allied player only, at game end:
- 1 VP per "divisional" unit from the English corps exiting the map according to 5.3.5 through connections toward Badajoz or Coria starting with the August 8 turn.
- 1 VP per "divisional" unit from the Estramadure army exiting the map according to 5.3.5 through the connection toward Badajoz starting with the August 8 turn.
For the French player only, at game end:
- 1 VP per "divisional" unit from the La Mancha army exiting the map according to 5.3.5.
Special rules:
- The initiative automatically goes to the Allied player on the first turn.
- If not already drawn, the "Foy" event marker is a mandatory draw for the French player at the beginning of the July 22 turn.
- If the Allied player plays the "Renfort" event, he receives the divisional unit "Craufurd" in Plasencia.
- If the French player plays a "reinforcement" marker, he places the following units on the connection leading to map exits A through E based on his choices made during the "Foy" event marker draw.
- 1st marker: Mortier, all divisional units from the 5th corps and 1 decoy.
- 2nd marker: Soult, all divisional units from the 2nd corps and 1 decoy.
- 3rd marker: Ney, all divisional units from the 6th corps and 1 decoy.
Scenario 4: Joseph – Spain 1809, The Battle of Talavera
The historical background paragraph of this scenario is omitted.
Game length: The scenario starts July 26 and ends on the last turn of July 30, lasting 5 turns.
Specific victory conditions (for both players):
- Control of Madrid: 5 VP*
- Control of Talavera: 5 VP*
* If the zone is free of French units it is automatically controlled by the Allied player even if there are no Allied units present – exception to 8.0.
Special rules:
- The initiative automatically goes to the French player on the first turn.
Scenario 5: Joseph – Spain 1809, The Battle of Almonacid
The historical background paragraph of this scenario is omitted.
Game length: The scenario starts July 29 and ends on the last turn of August 12, lasting 15 turns.
Specific victory conditions (for both players):
- Control of Madrid: 5 VP*
- Control of Aranjuez, Ciudad Real and Toledo: 1 VP per zone*
* If the zone is free of French units it is automatically controlled by the Allied player even if there are no Allied units present – exception to 8.0.
For the French player only, at game end:
- 1 VP per "divisional" unit from the La Mancha army exiting the map according to 5.3.5.
Special rules:
- The initiative automatically goes to the French player on the first turn.
- Initial losses from "divisional" units count toward the final victory points tally according to 8.0 if they were not recovered.
Scenario 6: Joseph – Spain 1809, The Campaign of Ocaña
The historical background paragraphs of this scenario are omitted.
Game length: The scenario starts November 8 and ends on the last turn of November 21, lasting 14 turns.
Specific victory conditions (for both players):
- Control of Madrid: 5 VP*
- Control of Trujillo, Talavera, Aranjuez, Ciudad Real and Toledo: 1 VP per zone*
* If the zone is free of French units it is automatically controlled by the Allied player even if there are no Allied units present – exception to 8.0.
Special rules:
- The initiative automatically goes to the Spanish player on the first turn.
Event Markers
All markers are discarded after they've been played. Markers with a * must be played right away, all the others can be held secretly. The effects of several markers may be combined except where specifically noted in the description of the event.
- (A) – events played by the French or Spanish player
- (F) – event played by the French player.
The phase during which the marker must be played and the potentially necessary conditions are in italics.
- Arrière-garde – Rearguard (A and F) – Phase C before the retreat phase of the combat if at least 1 cavalry SS is present in the stack that retreats – the stack in retreat suffers the loss of 1 cavalry SS and there is neither demoralisation test nor pursuit.
- Au son du canon – To the sound of the canon (A et F) – Phase C after one of the players activates a stack for combat – a stack which has not yet been activated this turn, with no "A combattu" marker, in a free zone and a valid connection toward the zone where the "Bataille" marker was placed is moved to this zone. It will take part in the ensuing combat, either attacking or defending.
- Bagages – Baggages (A) – Phase B before drawing events – Place the British baggage unit in Plasencia.
- Canicule – Heat Wave (A and F) – Phase B immediately – At the beginning of a move, any stack must pull an additional fatigue marker. This marker cannot be removed by the presence of baggage or a commander. If both players simultaneously draw this event, there is no cumulative effect but both markers are discarded.
- Charge Incontrôlée – Uncontrolled Charge (F) – Phase C before assigning losses due to melee – If the Allied stack contains "divisional" unit Payne, this unit must take the first loss instead of the head unit.
- Chargez – Charge (F) – Phase C during a combat if a "divisional" unit with at least 1 SS of heavy cavalry takes part in the combat – Add 1 to the French CP and the "divisional" unit with the heavy cavalry SS becomes head unit. This marker cannot be played if the cavalry "divisional" unit cannot be head unit.
- Contre-batterie – Counter battery (A and F) – Phase C after the Artillery fire and if the friendly stack has at least 1 Artillery SS – Successful enemy Artillery fire is not counted.
Events by Scenario
The printed event matrices show which markers are placed in each player's container for each scenario ("*" = in the container; "◊" = available, as printed in the legend).
French events (the printed matrix lists the marker name once per copy; repeated names are numbered here):
| Event | S1 | S2 | S3 | S4 | S5 | S6 |
|---|---|---|---|---|---|---|
| Arrière-garde | * | – | * | * | * | * |
| Au son du canon | * | * | * | * | * | * |
| Canicule | * | * | * | * | * | – |
| Chargez | * | * | * |
Allied events (Spanish and British markers on the Allied side):
| Event | S1 | S2 | S3 | S4 | S5 | S6 |
|---|---|---|---|---|---|---|
| Arrière-garde | * | * | * | * | * | * |
| Au son du canon | * | * | * | * | * | * |
| Bagages | * | * | * | * | – | – |
| Canicule | * | * | * |
Resolution of Combats (printed reference sheet)
The printed reference sheet "Resolution of Combats – table to help calculate the CP of each player" reads as follows.
Note the combat amplitude with the "Amplitude" marker. Place the "head" unit chosen by each player on 0. Move each player's "head" unit counter according to the following modifications:
- Add the Artillery fire bonuses (1)
- Add the value of the strength ratio to the stronger stack (2)
- Add the SV of the commander of the stack if there is one.
- Add the defensive value of the zone (see the terrain table) for the defender only.
- Subtract 2 if the stack has no axis of retreat.
- Subtract 1 if the stack has a "Dos à la rivière" marker.
- Subtract 2 if the stack performs a forced passage.
- Subtract 2 if at least one unit of the stack is demoralised.
- Add the value of a die.
(1) – For each artillery unit add 1 for each result of 4, 5, or 6 on the die.
(2) – Tally the number of SS of the two stacks, subtracting the artillery SS, and dividing by two those of the cavalry in a zone with terrain that is not clear. The player with the higher total calculates the strength ratio by dividing the effective SS by those of the adverse stack.
The printed sheet also carries a numbered track running from -5 to 75, on which the "head" unit counters are moved.
Game Aid (printed reference sheet)
Fatigue – modifiers
- +1 marker at each connection for a stack of more than 10 SS, +2 for more than 20 SS and so on.
- +1 marker per "A combattu" marker on the stack at the beginning of its movement.
- +1 marker if the stack enters a zone occupied by an enemy stack.
- +1 marker at each connection if the stack has no line of communication toward one of its depots.
Put back a marker once per baggage unit or for a lone commander accompanying the stack (cumulative).
Melee
Combat Amplitude (columns) against Difference in CP (rows). Entries are written as the winner's losses on the left and the loser's losses on the right.
| Difference in CP | 0 SS | 1 à 5 SS | 6 à 10 SS | 11 à 15 SS | 16 à 20 SS | 21 à 25 SS | 26 à 30 SS | Retreat in number of zones |
|---|---|---|---|---|---|---|---|---|
| 0 | 0 | 0 | 1 | 1 | 1 | 2 | 3 | – |
| 1-2 | 0/0 | 0/0 | 1/1 | 1/1 | 1/1 | 1/1 | 2/2 | 1 |
| 3-4 | 0/0 | 0/1 | 0/1 |
The result of the winner is on the left, that of the loser on the right. For a difference of 0, each player loses the number of SS indicated and there is no winner. Do not forget that a winner that benefitted from a strength ratio greater than six suffers no loss.
The combat amplitude corresponds to the sum of the SS of the two stacks (artillery and cavalry included).
If the amplitude is greater than 30, add the results of the column of the remaining SS – example, if the combat amplitude is 37 SS for a difference of 6 in CP, the result of the combat is 2/4 (2/3 for the column 25-30 SS and 0/1 for the column 6-10 SS).
Command test
- Roll a die.
- Add the SV of any subordinate commander.
- Add 1 if the stack only contains cavalry units.
- Add 1 if the stack has a line of communication to its commander in chief.
- If the zone is contested, compare the number of cavalry SS of the two stacks. If the stack taking the test has more cavalry SS, add 1; otherwise subtract 1.
- Subtract 1 if the stack is composed of units of different "army corps".
Total 5 or more: all the MP. Total 3 or 4: half the MP. Total 1 or 2: stack is activated.
Test of demoralisation
Roll a die and add the retreat distance. If the result is greater than the morale of the "head unit", the stack becomes demoralised.
Pursuit test
- Winner: roll 1 die + cavalry SS + 2 if the enemy stack contains at least one demoralised unit.
- Loser: roll 2 dice + cavalry SS.
- Winner's total – loser's total = number of losses.
Initial Deployment
The printed tables list where each unit, detachment and decoy is placed at the start of each scenario. Scenarios 1 and 3 share one column. Symbols as printed: "-1 (infantry loss)" is a loss of 1 infantry SS; "*1 (infantry detachment)" or "*3 (infantry detachments)" is a detachment created on the map; "Đ" means demoralised; "x" gives the number of counters placed. Where the printed sheet uses a symbol not explained in its legend, the cell says so.
French initial deployment
| Unit | Scenarios 1 & 3 | Scenario 2 | Scenario 4 | Scenario 5 | Scenario 6 |
|---|---|---|---|---|---|
| Joseph (R) | Madrid | Santa Ollala Đ | Bargas | Santa Ollala Đ | Absent |
| Soult (R) | Absent | Absent | Absent | Absent | Madrid |
| Garde Royale (R) | Madrid | Santa Ollala Đ | Bargas | Santa Ollala Đ | Madrid |
| Dessoles (R) | Madrid | Santa Ollala Đ; 3 infantry detachments | Bargas; 3 infantry detachments | Santa Ollala Đ; 3 infantry detachments |
Allied initial deployment
| Unit | Scenarios 1 & 3 | Scenario 2 | Scenario 4 | Scenario 5 | Scenario 6 |
|---|---|---|---|---|---|
| Wellesley (A) | Plasencia | Talavera | Talavera | Absent | Absent |
| Sheerbrooke (A) | Plasencia | Talavera -2 (infantry) | Torrejon | Absent | Absent |
| Hill (A) | Plasencia | Talavera -1 (infantry) | Talavera | Absent | Absent |
| Mackenzie (A) | Plasencia | Talavera -1 (infantry) | Torrejon | Absent |
The printed deployment sheets also show a legend: "-1 (infantry loss)" and "*1 (infantry detachment)"; "Đ" = demoralised.
Events and Deployment Notes (printed sheets)
The printed sheets are headed by scenario turn counts: Scenario 1 – 13 turns; Scenario 2 – 15 turns; Scenario 3 – 26 turns; Scenario 4 – 5 turns; Scenario 5 – 15 turns; Scenario 6 – 14 turns.
The printed order-of-battle sheets (French and Allied, Scenarios 1 to 5 and Scenario 6) and the printed turn-track calendar are component sheets giving each division's strength steps, morale and movement points, and the day-by-day turn record. They are not transcribed here. The deployment tables above name every unit placed on the map at the start of each scenario, and the corps and army groupings are described in "Rules Common to Several Scenarios" (items 1, 4 and 5) and in 7.10.