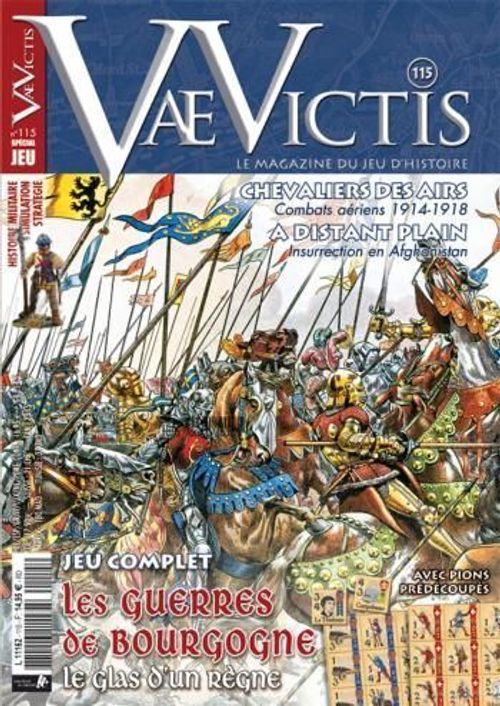
Les Guerres de Bourgogne 1474-1477
Les Guerres de Bourgogne 1474-1477 Rulebook
Table of Contents
Table of Contents
- 1 - Overview
- 2 - Definitions
- 3 - Counters
- 4 - Objectives
- 5 - Game Sequence
- 6 - Maps
- 7 - Movement
- 8 - Fatigue and Desertion
- 9 - Combats
- 9.1 - Fire
- 9.2 - Melee or assault
- 9.3 - The battle
- 9.4 - Siege
- 9.5 - Battle and siege procedure
- 9.5.1 - Initiative
- 9.5.2 - Deployment
- 9.5.3 - Tactical choice
- 9.5.4 - Random event
- 9.5.5 - Combat round
- 9.5.6 - Fire resolution
- 9.5.7 - Resolution of melees/assaults
- 9.5.8 - Result of melees/assaults
- 9.5.9 - Tactical movement
- 9.5.10 - Following combat round
- 9.5.11 - End of the combat rounds
- 9.5.12 - Control of the SZ
- 9.5.13 - Attribution of VP
- 9.5.14 - Diplomacy
- 9.5.15 - Next battle/siege
- 9.6 - Result of combats
- 9.7 - Control of the SZ
- 10 - Reinforcements/Replacements
- 11 - Diplomacy
- 12 - How to Win?
- 13 - Optional Rule
- 14 - Scenario
- Tables
1 - Overview
Game scale: A combatants counter represents 2,000 pedestrians and 1,000 cavaliers on the front side and half as many on the back side. An artillery counter represents 200 cannons of all types and calibers.
The Swiss have a red banner, the Burgundians have a blue banner, and the allies have a green banner. Their nationalities are indicated by the insignia.
Time scale: The game lasts 12 turns. The duration of a turn depends on the season: two months during clement weather (March – October) and four months during bad weather (November – February: turns 2, 7 & 12).
The game is played with a 6-sided die. The player whose phase it is is called the active player (attacker or besieger). The other player is called inactive (defender or besieged).
2 - Definitions
- Ar: Archers
- Ca: Cannons
- Camp: on one side the Duchy of Burgundy and its allies and on the other side the Swiss Confederacy and its allies
- CF: Combat Factor
- Ch: Chevaliers
- Commander: a named political and/or military figure is a historical commander on the front side of the counter and an anonymous commander is on the back side.
- Counter: the front side shows the unit at full strength (2 SS) and the back side at reduced strength (1 SS)
- Cr: Crossbowmen (Ab on the counters)
- Cu: Culveriners
- FV: Fortress Value (VF on the map)
- Ga: Gendarmes
- Hb: Halberdiers
- Movement capacity: limit of movement points that can be used to carry out movement
- MP: Movement Point
- Pi: Pikemen
- RP: Recruitment Point
- VP: Victory Point
- R&R: Reinforcements and Replacements
- RoF: Range of Fire
- RZ: Retreat Zone
- SS: Strength step
- SZ: Strategic zone
- TC: Tactical capacity of a commander
- TZ: Tactical zone
- 1D6: 6-sided die
3 - Counters
A counter is characterised by five parameters: its movement capacity in MP, a CF, an RoF expressed in the number of TZ, its cost in RP, and its nationality.
Special case of Ca: These counters only have one SS. The front side is Burgundian and the back side is Swiss.1 These units can be captured and change sides during a battle or a siege. Only the Burgundian Ca can fire on a garrison located in a fortress.2
A commander is characterised by four parameters: his movement capacity used on the strategic map and the tactical map expressed in MP, his tactical capacity, his rank expressed by 1, 2 or 3 stars, and his nationality.
The front side is a named historical commander, the back side is an anonymous commander used after the elimination of a historical commander. Commanders of the same camp can command all the units of the camp.
4 - Objectives
Victory is won by accumulating VP obtained by controlling objective SZ with VP, winning battles and sieges, and neutralising the enemy's allies.
5 - Game Sequence
A - Phase 1: Burgundian camp
- Reinforcements & replacements
- Strategic movement
- Fatigue & desertion
- Resolution of battles
- Resolution of sieges
B - Phase 2: Swiss camp
- Reinforcements & replacements
- Strategic movement
- Fatigue & desertion
- Resolution of battles
- Resolution of sieges
C - Phase 3: Communal
- Diplomacy
- Recording of VPs
- End of turn
- Determination of victory (on last game turn)
6 - Maps
There are two types of maps with different scales.
6.1 - The strategic map
For strategic movements, composed of SZ characterised by a maximum of five parameters:
- Identification number.
- Movement cost: by default, each movement by an army in an SZ costs 1 MP. The SZ that cost 2 MP are indicated on the strategic map by a mountain symbol.
- Number of VP for an objective SZ.
- Number of RP to "buy" replacements.
- FV of 1 or 2 points.
Note: Given the scale of the game and the surface of an SZ, there is always a town surrounded by ramparts or a fortified castle to house a garrison.
The status of an SZ is either controlled, neutral or disputed:
- Controlled SZ: When a control marker is placed on an objective SZ, when only one camp (army or garrison) occupies an SZ, or when an SZ is part of the original territory of one of the camps at the beginning of the game – Duchy and County of Burgundy and Swiss Confederacy. The simple presence of a commander is not enough to control the SZ.
- Disputed SZ: When two camps – army or garrison – occupy the same SZ during a siege or a battle. This state only lasts until the resolution of combats.
- Neutral SZ: When the power that has this SZ is neutral; Kingdom of France and Duchy of Lorraine at the beginning of the game or a previously allied power that is neutralised. No army of either camp can enter into France if it is neutral or into Lorraine before turn 5.
Control of an objective SZ: the SZ control marker shows the flag of the camp that alone occupies this SZ, either at the end of the victorious combat or because an army moved through this SZ and may have left a garrison. To control this objective SZ, the presence of an army or garrison is not necessary; the presence of a control marker is sufficient. The army of a camp that enters – crosses or stops in – an objective SZ controlled only by the presence of the enemy camp's control marker immediately obtains control of this SZ. When a camp controls an SZ, it benefits from its FV and its VP. The RP of enemy SZ from the original territory that are controlled by the opponent are not useable. Only the RP of a camp's initial territory can be used by the latter.
6.2 - Tactical map
Dedicated to combats and tactical movements, this map is composed of several TZ that represent a typical positioning of combatants on a 15th century battlefield.
A tactical map is divided into two equal parts – one for each camp – of 10 TZ (5 TZ per camp); left wing, right wing, 1st, 2nd and 3rd line, as well as an RZ for units to retreat from the battlefield after a tactical movement.
7 - Movement
Units can only move on the strategic map from SZ to SZ accompanied by a commander, using his movement capacity.
Units can move on the tactical map from TZ to TZ with or without their commander by using their own movement capacity.
7.1 - Strategic movement
An army moves from SZ to SZ by spending 1 MP by default for each SZ entered or 2 MP in a mountain SZ. Movement from an SZ may occur toward any adjacent SZ with a common border or junction point.
Exception: Movement across and in Lake Léman and Lake Neuchâtel is prohibited.
Movement in an SZ with a neutral power is prohibited. Movement in an SZ containing only enemy commander(s) is authorised. The commanders are placed in an SZ containing a garrison or the closest friendly army in terms of MP cost.
An army – that can combat during a battle or siege – consists of one or more units with one or more commanders placed on top of the stack of counters to clearly indicate that this is an army.
A garrison – that cannot combat during a siege – consists or one or more units with or without commander. If one or more commanders are present, they must be placed on the bottom of the pile of counters to clearly indicate that this is a garrison. A garrison is considered to be in a fortress and therefore benefits from its protection, expressed in FV. A garrison cannot perform strategic movement unless a commander is present and is placed on the stack to form an army.
At the end of a strategic movement, the commander must be clearly positioned at the bottom or top of the stack of counters. A commander can move alone on the strategic map or the tactical map at the same movement cost as a unit. At the beginning of the strategic movement sequence, a commander can place himself at the bottom of a stack of counters with no surcharge. On the contrary, a commander can place himself on top of a stack of counters with a surcharge of +2 MP; this positioning is considered as a movement in the determination of Fatigue and Desertion. Thus, if a garrison becomes an army, its strategic movement is reduced by 2 MP for this sequence. The commander of several grouped armies is the commander with the highest rank or, in the case of a tie, the choice of the camp's player.
Stacks of counters – army or garrison – cannot be examined by the opponent.
An army stops its movement in an SZ containing an enemy army or garrison. An army may cross as many SZ as the movement capacity of its commander allows. An army may cross an SZ that is controlled by the enemy but contains no enemy units. If an army enters and remains in an SZ with a garrison of its camp, all of its units are regrouped either as an army or as a garrison; an army and a garrison of the same camp must group together as one or the other.
If an army enters and crosses an SZ with a garrison of its camp, the units of the garrison may be partially or completely integrated with the army and continue the movement, if the commander's number of MP permits.
Example of movement:
- Movement from strategic zone 55: De Blamont has 3 MP. He is placed under the stack of units in a garrison. He moves to the top of the stack with a surcharge of +2 MP and the stack becomes an army. There is only 1 MP left to carry out movement toward strategic zone 46.
- Movement from strategic zone 54: Charles the Bold (Le Téméraire) has a rank of 3 stars, higher than Campobasso's single star; he therefore commands the army. His movement capacity is 3 MP. The army spends 1 MP to enter strategic zone 45 where it leaves a garrison commanded by Campobasso with no MP surcharge. There are 2 MP left to enter into mountainous zone 37 where there is a unit of Milanese pikemen. Charles the Bold stops his movement.
A stack of counters with a commander must clearly indicate if it is an army or a garrison; the Italian unit is placed without cost under the commander Charles the Bold to indicate that the whole group constitutes an army.
7.2 - Tactical movement
Units of any type, within the limit of the army commander's TC, can move at the end of each combat round. Commanders can move in unlimited number, respecting their MP. Movement occurs by spending the necessary MP to enter one or more TZ of one's camp or the enemy camp if they are free of enemy units. It is prohibited to occupy the enemy RZ. It is prohibited to enter a TZ containing units of the opposite camp unless they are Ca. The costs and movement axes – with the direction indicated – are depicted on the tactical map.
8 - Fatigue and Desertion
Armies and garrisons may be reduced by fatigue and desertion. For each stack, whether or not it has carried out movement on the strategic map, verify if SS are lost. The number of SS comprising an army or a garrison serves to determine the column on Table 1: Fatigue and desertion. Tally the total SS of armies and/or garrisons that are grouped together.
Roll 1D6, possibly adding modifiers to the result. Cross the modified die result with the determined column. The number indicated corresponds to the losses in SS to be distributed among the units chosen by the player. The eliminated units are placed in its camp's pool of eliminated units.
9 - Combats
A combat is obligatory when two enemy armies – for a battle – or an army and an enemy garrison – for a siege – are in the same SZ. If an army and an enemy garrison are in the same SZ, the attacked player may choose to combat as an army – if there is a commander in the stack – or as a garrison. This choice is definitive for all the following combat rounds.
The resolution of a battle (see 9.3) and a siege (see 9.4) occurs over several rounds of combat until only one camp occupies the SZ, by elimination or retreat following a combat or the voluntary stopping of combats by the attacker/besieger. Battles are resolved first, then sieges. As a reminder, battle and siege markers are placed in the SZ in which these combats take place and are removed when they are completed. All these combats are carried out on the tactical map and include fire – if units that can fire are present – and melee or assault.
9.1 - Fire
Only units with an RoF greater than or equal to 1 can fire: Ar, Cr, Cu and Ca.
To determine the RoF, count the TZ of the targeted unit but not that of the firing unit. For a unit present in the 1st line or the wings, an RoF = 1 permits firing at the 1st line or enemy wings, an RoF = 2 permits firing at the 2nd enemy line and an RoF = 3 permits firing at the 3rd enemy line. Ar fire can pass over a TZ that is empty or occupied by friendly or enemy units. The shooter chooses his target within RoF, but it cannot be a commander.
The fire is successful if the die roll result is less than or equal to the CF of the unit that fires. If the result is 1, it is probable that the historical commander is eliminated. For each historical commander present in the targeted TZ, roll 1D6; the commander is eliminated on a result of 1.
9.2 - Melee or assault
A melee is resolved from one TZ to an adjacent TZ. The units – except the Ca – may advance after a combat in an enemy TZ left vacant following a loss or a retreat. A ratio in the form A/D – rounded in favour of the defender – is created by taking the sum of the attacker's CF divided by the sum of the defender's CF. The combat result is indicated at the intersection of the die roll result and the column of the A/D ratio on Table 3: Combats.
9.3 - The battle
9.3.1 - Deployment
Each player is free to occupy the 5 available TZ of his camp, except the RZ. All the units and commanders of a camp are placed in their part of the tactical map. The army commander of each camp – of the highest rank or player's choice in the case of a tie – must be clearly indicated. The type of combatants and the number of units placed in each TZ are free as long as they respect the following distribution: at least 1/3 of the army – in number of SS, rounded to the closest whole number – must be placed in the TZ 1st line before placing the remaining units in the other TZ. The 2nd line may be empty while the 1st and 3rd contain units. The positioning of commanders is free.
9.3.2 - Random events
Before each battle, determine if there is a random event. The active player rolls 1D6 and checks the result on Table 2: Random Events. The events rain and snow apply to both camps.
Events arms at the ready and betrayal only apply to the active player. The event depleted wing only applies to the inactive player.
The consequence of each random event – applicable for all combat rounds of this battle – is indicated below:
- Rain: no use of firearms (Ca and Cu) is possible. These units can only combat in melee. The RoF of the Ar is reduced from 3 to 2. The RoF of the Cr does not change.
- Snow: the maximum RoF – for the Ca and Ar – is limited to 1 TZ. The RoF of the Cr and Cu remains at 1.
- Arms at the ready:3 All the units of an ally of the active camp, whose pointer is in the zone of doubt on Table 4: Alliances and whose units are present in the battle, do not combat. They are immediately placed in the RZ. No redeployment can be carried out.
- Treason:34 All the units of an ally of the active camp, whose pointer is in the zone of doubt on Table 4: Alliances and whose units are present in the battle, goes over to the enemy and combats with him until the end of the combat rounds. These units are placed immediately in a TZ free of the enemy camp of his choice. No redeployment can be carried out. If no TZ is free, ignore this event and replace it with arms at the ready.
- Depleted wing: The defender is surprised by the attack; one of his wings has no units. On an even number die roll result, move his units present in the right wing toward the line farthest away (2nd or 3rd line). On an odd die roll result, move his units present in the left wing toward the line farthest away (2nd or 3rd line). If no unit is present in the wing designated by the die roll, ignore this event. This event is not transferable from one wing to the other. This movement of units may be executed without respecting the deployment rule.
- Nothing: no random event.
9.3.3 - Tactical markers
A set of seven markers is available for each camp; there are six general markers and one that is specific to each camp. Each player chooses a number of tactical markers equal to the TC of his army commander. These markers are useable for combat rounds until there are no more or the battle is over, whichever happens first. These markers have a direct effect on the combat result; they can cancel, reduce or double losses. Nevertheless, the effect of a tactical marker can be zero if the result of fire or melee is unexpected or if the opponent reveals tactical marker(s) that cancel or diminish the effect. A marker is like a "bet" on a counted-on result. Certain markers are only useable in the presence of units – full or reduced strength – that allow their employ. If an army has no units permitting the use of tactical markers, the player still has available to him a number equal to the TC of his army commander, allowing him to deceive his opponent about his intentions. For each round, each camp chooses 0, 1 or 2 tactical markers among those already chosen for the battle, then reveals them, and uses them for this combat round – for fire and/or melee. These tactical markers are chosen – and not drawn at random – and hidden from the opponent.
The defender reveals his tactical marker(s) first, if he has chosen any, then the attacker does the same. Once chosen for this combat round, the markers cannot be modified and must be revealed and used, then put aside. If the army commander is eliminated, the new commander uses the markers already chosen, verifying that the number of tactical markers of this new commander does not exceed his TC. The surplus of tactical markers is eliminated, by owner's choice, before the following combat round.
List of markers and explanation of their function:
- Charge: useable for a melee involving at least one Ga or Ch unit from its camp. The CF of each of these units is doubled for this round only.
- Ditch: cancels out the effect of the tactical marker Charge except for an attack from the rear (see the modifiers of the tactical advantage)
- Rain of arrows: useable for each shot involving Ar of his camp. The losses inflicted on the opposing camp for each Ar shot are doubled,5 even if the random event rain is drawn.
- Harassment: useable for each shot by Cu or Cr of the camp. The losses inflicted on the opposing camp for each shot are doubled.5
- Hedge: cancels6 the effect of a rain of arrows or harassment tactical marker for each shot.
- Clashes among pikemen: useable for a melee involving at least one Pi unit from each camp. The losses inflicted for each camp are doubled, distributed first to the Pi then as the players wish. If two identical Clash among Pi markers are revealed and used by both camps, the losses are not quadrupled; they are doubled at most.
- Cut and thrust: useable for a combat involving Hb. This marker cancels out the effect of the tactical marker Clash among Pi.
- Battery: useable for each Ca counter of the camp. The losses inflicted on the enemy camp for each shot are doubled.5
Combination of the two tactical markers Ditch and Hedge: allows the player to eliminate an R result – retreat – and to diminish the losses by one SS in melee only.
9.3.4 - Modifiers of the tactical advantage
Each modifier is linked not only to the attacker's TZ from which the attack is conducted but also to the defender's TZ toward which this attack is directed. A modifier only benefits the attacker for the melee. This modifier is added to the result of 1D6 roll.
- Rear attack from the 3rd and 2nd line of the enemy camp: +3
- Flank attack from a wing to any line of the enemy camp: +2
- Frontal attack from a 1st line of the enemy camp to a 2nd line of the enemy camp or from a 2nd line of the enemy camp to a 3rd line of the enemy camp: +1
9.4 - Siege
Specifics of a siege: Only the Ca of the besieger can fire on a fortress. No other fire from the besieger or the besieged is possible. A garrison never retreats; the only way for the besieger to win a siege is to eliminate the whole garrison by an assault. Each SZ has a fortress value (FV) of 1 or 2 points. This corresponds to the number of columns on the Combat Table that are shifted to the left, in favour of the besieged. All other differences are explained in 9.5.
Each successful Ca fire by the besieger awards the elimination of 1 point from the FV, thus diminishing the benefit of the column shift to the left for the besieged. The FV can never be less than 0 and the shift to the left cannot exceed column 1/2. The presence of Ca counters in the besieged garrison gives no column shift,7 only their CF is taken into account for the calculation of the A/D ratio during an assault. At the end of a siege, the FV is again the number indicated on the map, hence, its maximum value; we consider that the fortress is rebuilt by the victor, besieger or besieged and can be used later by the camp that controls the SZ.
Example: An SZ has an FV of 2. Two Ca with a CF of 3 each fire. The results of the successive 1D6 rolls are 2 and 4. Only one shot of the Ca manages to reduce the FV by 1 point. The column shift in the Combat Table is 2-1=1 column left. The A/D ratio is 3/2 without modifier, now 1/1 after this shift of just 1 column to the left.
9.5 - Battle and siege procedure
9.5.1 - Initiative
Place a battle or siege marker in each SZ concerned by the combats. The attacker/besieger has the combat initiative.
9.5.2 - Deployment
- Battle: The defender goes first, positioning all his units and commander(s) in the TZ of his camp, respecting the rule of deployment. The attacker then does the same.
- Siege: The besieged and the besieger place all their units and commander(s) in the 1st line TZ of their respective camps.
9.5.3 - Tactical choice
- Battle: The attacker and the defender choose – not draw at random – a number of tactical choice markers as allowed by the TC of their respective army commanders.
- Siege: NA
9.5.4 - Random event
- Battle: The attacker rolls 1D6 and compares the result to the random events table. The result applies to all rounds of this battle.
- Siege: NA
9.5.5 - Combat round
- Battle: revelation of the tactical markers. The defender and then the attacker indicates if he chooses to use 0, 1 or 2 tactical markers. The markers are chosen, not drawn at random, and are clearly isolated. The defender reveals his tactical marker(s) first, if he has any, and then the attacker does the same. Once chosen for a combat round, a marker cannot be modified and must be used. They will be used during the fire and melee resolution.
- Siege: NA
9.5.6 - Fire resolution
- Battle: For the attacker and defender: Each unit may fire once per combat round, within the limits of its RoF. Each unit of a camp fires on a designated target in a TZ within RoF, alternating a unit of the attacker then a unit of the defender, until all the units have fired. If one of the camps has finished firing and the other camp still has units that have not yet fired, the latter continues its fire until all its units have fired. Fire is resolved by 1D6 roll. If the result is less than or equal to the CF of the unit that fired, 1 SS of the targeted unit is eliminated. Apply this result immediately by turning the enemy unit over to reduce its strength by one SS, possibly modified by the tactical markers that are used.
- Siege: For the besieger only: Only the Burgundian Ca can open fire on a garrison in a fortress. No other fire is possible. Fire is resolved by 1D6 roll per Ca unit present. For each Ca unit whose result is less than or equal to the CF, 1 FV point is eliminated until the FV is 0.
9.5.7 - Resolution of melees/assaults
Melees and assaults are resolved through combat rounds.
- Battle: The attacker indicates the TZ from which the attack originates and the attacked TZ. The attacker adds up the CF of his units, including the CF of units that have already fired,8 and the defender does the same. Take the A/D ratio, rounded in the defender's favour, indicated in a column on the Combats Table. Roll 1D6 and add the result, applying any modifiers linked to the tactical advantage.
- Siege: The besieger adds up the CF of his units, including the CF of the Ca that have already fired,9 and the besieged adds up the CF of his units including the CF of any Ca.9 Take the A/D ratio, rounded in favour of the besieger, indicated in a column on the Combats Table. Determine how many FV have not been eliminated by the Ca fire and shift that many columns to the left, for a maximum of 1 or 2 columns. Roll 1D6.
9.5.8 - Result of melees/assaults
The combat result is indicated on Table 3: Combats, at the intersection of the A/D ratio column, shifted or not by Ca fire and the line of the die roll result. Immediately apply this result which may be modified by the tactical markers used.
A garrison does not retreat but remains in the fortress of the SZ that it occupies, even if the FV is 0. The eliminated units are placed in the pools of eliminated units of each of the camps.
9.5.9 - Tactical movement
- Battle: Movement occurs in addition to a possible advance after combat. A number of units equal to the value of the TC of their army commander may engage in movement. The attacker carries out all his movements first then the defender does the same. These movements occur from any TZ, toward any TZ of its own camp or to a TZ conquered after battles or free of enemy units, respecting the axes of movement and MP to spend. Movement may occur toward the rear of its camp in the RZ.
- Siege: NA
Example of combat
Turn 9. Battle.
The attacker is the Burgundian. The Swiss positions himself first. He has an army of 15 SS (7 full strength units and 1 reduced unit). He must place 1/3 of his SS (5 SS) in the 1st line of battle; the rest of the placement is free.
The Burgundian has 11 SS (the cannon unit only has 1 SS) and must place 4 SS (1/3 of the SS rounded to the nearest whole number) in the 1st line of battle. More than 10 SS are engaged on either side, the victor of this battle will win 2 VP.
The Swiss army commander is he with the highest rank: R. de Lorraine with TC = 2; the Swiss secretly chooses 2 tactical markers (Clash among pikemen and Ditch). The commander of the Burgundian army is Charles the Bold with TC = 4; he secretly chooses 4 tactical markers (Charge, Rain of arrows, Battery and Harassment).
A random event is determined by the roll of 1D6, the result of which is 6 (rain or snow). Since this is not a harsh weather turn, it is rain for all the rounds of this combat (the firearms Ca and Cu cannot fire, cancelling out the advantage of the Battery marker and limiting the advantage of the Harassment to the Cr alone; the RoF of the Ar is reduced from 3 to 2).
The Swiss states he'll use 1 marker for this round, the Burgundian uses 2. The Swiss reveals Ditch and the Burgundian Charge and Rain of arrows. For the Burgundian camp the Cr and the Ar (with a reduced RoF of 2) can fire. For the Swiss, only a Cr can fire.
The Burgundian Cr targets his Swiss homologue located at RoF = 1 in the left wing. The 1D6 roll result is less than or equal to his CF of 2; 1 SS of the Swiss Cr is lost and the counter is turned over. It is the Swiss Cr's turn to fire; he targets a Burgundian Ga. The die roll result is 3 greater than his CF which is now reduced to 1. No effect. The Ar can fire with an RoF = 3 but it is reduced to 2 because of rain; it can still target the Swiss Cu whose RoF = 2. The die roll result is 2, equal to the CF of 2 of the Ar. The Cu has a loss of 1 SS x 2 from the Rain of arrows marker; it is eliminated and placed in the pool of eliminated units. Since there are no more units that can fire, move on to the resolution of the melee. The Swiss remains in place.
The Burgundian attacks from his right wing toward the Swiss left wing. His total CF is 10 (2 x CF5 for each Ga). The Swiss has a total CF of 1 (diminished CF of the Cr). The ratio is 10/1, so column 2/1 and +. The die roll result is 4. The attack is frontal, there is no modifier for tactical advantage. No loss for the attacker and 4* for the defender. The Swiss tactical marker Ditch cancels out the effect of the tactical marker Charge. The Swiss Cr is eliminated. Determine if the commander R. de Lorraine is eliminated; the die roll result = 1. He is eliminated and immediately turned over to the anonymous commander side. The new Swiss army commander has a TC of 1, allowing him to conserve the only remaining tactical marker.
Advance after combat of the two Ga in the Swiss left wing. Then the Burgundian carries out a tactical movement with a maximum of 4 units (the TC of his army commander, The Bold). He only moves the Ar unit (movement capacity of 2 MP) that advances for 2 MP in the Burgundian right wing. The Swiss does not engage in movement. End of the first round. The Burgundian chooses to carry out a 2nd combat round...
9.5.10 - Following combat round
The attacker/besieger chooses to engage in an additional round of combat. This proceeds as the first round until all the units of one camp are either eliminated or placed in an RZ, or until the attacker/besieger decides to stop the combat or retreat following a combat result. The FV of the fortress is reset to its initial value – maximum FV – during each new round.10
9.5.11 - End of the combat rounds
Once the battle is over, the units and commander(s) or the camp that lost or voluntarily stopped the combat retreat to an adjacent SZ of the player's choice that he controls. The besieger remains in the SZ if he has eliminated all the besieged or leaves the SZ if he voluntarily stops the siege.
An army that retreats to an SZ already containing an army or garrison of its camp is immediately added to it and remains in this same form – army or garrison. An army that cannot retreat is eliminated.
9.5.12 - Control of the SZ
The control marker of an objective SZ is placed on the side that shows the flag of the camp that remains in the SZ.
9.5.13 - Attribution of VP
The victor is the attacker/besieger or defender/besieged that remains alone in the SZ at the end of the battle/siege.
VP are only attributed to the victor's camp for a battle that engages at the beginning 10 SS or more from each camp.
VP are only attributed to the victor's camp for a siege of an SZ with a FV = 2.11
The VP pointer is adjusted on the VP tally scale.
9.5.14 - Diplomacy
Each battle/siege that is won by a camp – eligible for the attribution of VP – moves the pointer of each power allied to the other camp one square toward the zone of neutrality, toward the middle of the table.
The besieger who stops the siege voluntarily or after a retreat has no consequence on diplomacy.
9.5.15 - Next battle/siege
Remove the battle or siege marker from this combat. Then, move on to another battle or siege if there is one in another contested SZ.
9.6 - Result of combats
-
X SS eliminated: The SS should also be distributed among the units present in the TZ, in order of weakest CF to highest, player's choice in the case of a tie.
Exception: If the tactical marker Clash among Pi is played, the losses are first applied to the Pi, from the weakest to the highest CF, then to the other units.
The surplus of losses, if there are any, is ignored. The eliminated units are placed in the camp's pool of eliminated units. An eliminated Ca unit goes into its camp's pool of eliminated units and can return as a replacement.
-
R retreat one TZ: The units and their commander(s) must retreat one TZ, moving away from the TZ of the enemy that was just beaten; either toward the rear of their camp or toward the rear of the enemy camp if they are in it as a result of tactical movements or a flank attack. This result is ignored by the units of the Swiss Confederacy and their commanders, the Ca, the besiegers and the besieged.
If units have to retreat toward a TZ occupied by friendly units, it is stacked with the units already present in the TZ. The retreat occurs toward the rear: from the 1st line toward the 2nd line, then the 3rd line toward the RZ. The retreat of a wing or from the 3rd line occurs toward the RZ. Retreat to a TZ occupied by the enemy camp is prohibited. If units cannot retreat following a combat, they remain in the TZ but lose an additional SS.
Units that retreated into a TZ may combat normally in later rounds.
Special case for retreat in the RZ: These units can no longer participate in combats, attack, or be attacked. At the end of the combat, they leave the SZ if their camp lost the battle and they remain in the SZ if their camp won the battle. Units that retreat to the RZ of the enemy camp are eliminated.
-
Elimination of a historical commander:12 When an asterisk (*) is indicated in the combats table, a historical commander is definitively eliminated on 1D6 roll result of 1. If several historical commanders are present in the TZ, the one with the lowest rank is eliminated. In the case of equivalent rank, the owner chooses. The counter of the eliminated historical commander is immediately turned over to show the anonymous commander on the back side.
If a historical or anonymous commander is alone in a TZ after the elimination of his units, he is placed in a TZ with the units of his camp, otherwise he is eliminated, without rolling 1D6, and is placed in the pool of eliminated units.
If the army commander whose TC determined the attribution of the tactical markers is eliminated, the number of tactical markers remaining must not exceed the TC of the new army commander. The excess tactical markers are eliminated, as their owner chooses. A new army commander does not choose new markers, he keeps those that were chosen minus those that were already used, within the limits of his TC.
- Advance after combat: A TZ left free of defenders or containing only Ca or commander(s) following a combat – battle or siege – can be occupied by the attacker. A defender cannot occupy the TZ of an attacker following a combat. A Ca unit cannot retreat and remains in its TZ until the battle or the siege is finished. If the enemy camp enters the TZ containing a Ca unit following a combat, it is immediately turned over to the side of its new owner. It is then considered as a full unit of its new owner and can be used in the following round for combat. If the enemy camp does not enter the TZ containing the Ca unit, it returns to the victor at the end of the battle or siege.
9.7 - Control of the SZ
When the combats are finished, the units of the victorious camp remain in the SZ and the units of the vanquished camp are placed in an adjacent SZ that it controls. The control marker for an objective SZ must indicate the camp that controls this SZ. An army without a commander – killed in combat – may retreat to an adjacent controlled SZ and becomes a garrison if there is no army already present or it is added to another army. An army that loses a combat cannot retreat to a disputed SZ and arrive as reinforcement to a garrison or an army or retreat to an enemy-controlled or neutral SZ.
10 - Reinforcements/Replacements
There are two ways to bring units into play during the game – as reinforcements and replacements.
10.1 - Reinforcements
A reinforcement is a unit or a historical commander that enters the game for the first time. A reinforcement intervenes:
- When it is indicated on the time scale/turn counter.
- Following the intervention of France: see optional rule 13 [Intervention of the French Kingdom].
- Once and only once per game, when an army of the Burgundian camp crosses or occupies an SZ of the territory of the Swiss Confederacy (Red SZ #7, 8, 9, 10, 11, 17, 18, 19, 20 & 31) during any turn of the game. On the following turn, during the B1 – Reinforcements & replacements sequence of the Swiss player's phase, place the conditional reinforcement indicated in the scenario.
- Once per game, when a Swiss army crosses or occupies an SZ of the territory of the Duchy of Burgundy (mauve coloured SZ #53, 54, 55 & 56) during any turn of the game. On the following turn during the A1 – Reinforcements & replacements sequence of the Burgundian player's phase, place the conditional reinforcement indicated in the scenario.
If all the SZ that allow for Reinforcements and replacements are occupied by the enemy during the sequence when they must be positioned, ignore this reinforcement. The latter arrives when an SZ designated R&R is again controlled by the camp that receives the reinforcement.
10.2 - Replacement
A replacement is a previously eliminated unit or commander that returns to the game from the pool of eliminated units. The number and type of the available units are limited to the counters previously eliminated and to the RP available during this turn. The RP are used to buy units whose cost is indicated on each counter. The cost of a unit in RP is indicated on the front side and a lesser cost for a unit of reduced strength is indicated on the back side. The RP cannot be spent to return a reduced unit present on the map to full strength. The Ca taken from the enemy are considered as units in their own right of the new owner and can be replaced during the R&R sequence.
Number of RP:13 Each camp adds up the RP from each SZ of his national territory and that of his allies identified by a flag and a shield, as well as the RP of the SZ of the enemy camp that he controls, except those in the national territory. The SZ with RP controlled by the enemy camp in the presence of a control marker, a garrison or an enemy army are not counted. The total obtained for each camp corresponds to the RP that can be spent to buy units. The RP are used to buy any unit of a camp and its allies. RP are not cumulative; they must be spent each game turn, the surplus is lost.
10.3 - Placement of units and commanders as reinforcements and replacements (R&R)
The R&R – units and commanders – are positioned in the SZ identified by the flag and coat of arms of the power to which they belong.
Exception: The British R&R are placed in SZ 54. These units and commanders enter during the R&R sequence of the concerned camp during the indicated game turn or the game turn following the event Entry of an army into enemy territory, conquest of the Savoy or Lorraine.
No R&R may be placed in an SZ controlled by the enemy camp in the presence of a control marker, an enemy army or a garrison.
11 - Diplomacy
Each camp has two allies: the Duchy of Savoy and Italy (consisting of the Duchy of Milan and kingdom of Naples) are allies of Burgundy and the Duchy of Lorraine and Germany (consisting of the Netherlands and the Duchy of Austria) are allies of Switzerland.
These allies are represented by a pointer of power that moves on Table 4: Alliances to indicate their position and their evolution toward neutrality – toward the right of the table for the Burgundian allies and toward the left for the Swiss allies. An ally is either sure, in doubt or neutral. When the ally of a camp at the beginning of the game becomes neutral, the opposing camp gets a number of VP indicated on the table of alliances. The units of the ally that became neutral, if there are any, are definitively removed from the game during the diplomacy sequence of the game turn during which the pointer moved toward the zone of neutrality.
If the garrison or army units of the ally that became neutral are removed from a controlled objective SZ, the control marker of this SZ does not change and remains in place, as long as an enemy army doesn't take control of it. When the pointer of an ally is in one of the squares of the zone of doubt, the random events arms at the ready and betrayal can apply before a combat.
12 - How to Win?
12.1 - Calculation of VP
The VP won are recorded during the movement or combat sequence in which they were obtained. The VP are indicated on the VP tally scale marked 0-9 by placing the VP pointer on the appropriate number. For 0-9 VP, the front side (x1) of the VP pointer is visible. For 10 VP or more, the back side of the VP pointer is visible. VP are attributed for each of the following actions:
- Battle won involving 10 SS or more from each camp: +2 PV to the victor.
- Siege won by the besieger or the besieged if the besieged is eliminated in an SZ whose FV = 2: +1 PV.
- Objective SZ: +/-1 to +/-3 VP for its control. The taking of control awards the VP indicated; its loss removes them.
- Power of the enemy camp neutralised: 3 VP or 4 VP for the allies of the enemy camp neutralised.
At the end of his phase, a player may have enough VP to declare victory, but these conditions are no longer met when the opponent finishes his: victory is determined at the end of the last game turn during the final phase.
12.2 - Victory levels
- VP greater than or equal to 30: It's a crushing victory; a major power is eliminated from the European stage.
- VP between 25 and 29: Decisive victory; perpetual peace is declared.
- VP between 20 and 24: Marginal victory; a short truce is declared.
- Any other result: a tied game; the next war is close...
Immediate victory: the death of the Burgundian commander Charles the Bold after a combat means immediate victory for the Swiss camp.
Note: The "historical score" realised by the Swiss camp with three won battles (Grandson, Morat, Nancy), Lorraine liberated, part of the Savoy invaded, and all the Burgundian alliances neutralised is 30 VP, not counting the death, weapons in hand, of Charles the Bold.
13 - Optional Rule
From turn 7 on, if one of the camps controls Lorraine or Savoy, for even a single turn, there is the possibility that France could intervene in favour of one of them. The controlled SZ and the potential intervention are verified during the diplomacy sequence.
- When the Burgundian camp controls Lorraine (SZ #21, 22, 26, 34 & 41), France intervenes for the Swiss camp on the result of 1D6 roll greater than or equal to 5.
- When the Swiss camp controls Savoy (SZ N# 32, 33, 38, 49 & 57), France intervenes for the Burgundian camp for 1D6 = 6.
The French units are placed on the following turn during the R&R sequence of the camp for which they intervene. France remains in the camp for which it intervenes until the end of the game, regardless of the evolution of the control of the SZ representing the duchies of Savoy and Lorraine. Its RP and units are used by the camp to which it is allied. The French units are not affected by the random events arms at the ready or betrayal.
14 - Scenario
Campaign scenario: "Charles the Bold lost the goods at Grandson, courage at Morat, and life at Nancy"... An old Swiss poem taught to children.
The player chooses to place the units as a garrison or an army.
Placement of the Swiss Confederacy and its allies:
- SZ #19: Scharnachthal: 2 x Pi, 2 x Hb, 1 x Cr, 1 x Cu
- SZ #20: Diesbach, 1 x Pi, 1 x Hb (printed as "x 1 Hb" in the source; read as 1 x Hb)
- SZ #28: 1 x Ch Austrian, 3 x Alsatian Pi
Placement of the Duchy of Burgundy and its allies:
-
SZ #54: de Blamont, 1 x Ga, 1 x Ar, 1 x Cu, 1 x Pi, 1 x Ca (all Burgundian)
-
SZ #37: J. de Savoy, 1 x Italian Pi, 1 x Italian Cr
-
SZ #33: P. de Gingins, 2 x Savoyard Pi, 2 x Savoyard Cr, 1 x Italian Cr
-
Time marker: on the turn 1 square of the time scale.
-
Duration: 12 turns. Beginning: Sept.–Oct. 1474, End: Nov. 1476–Feb. 1477.
-
Table of Alliances: The allies' pointers are placed on their positions indicated on the table of alliances except for the Lorraine pointer placed on Turn 4.
-
SZ control markers: Swiss in SZ #19, Burgundian in SZ #32, 33, 37, 38, 49 & 57.
-
VP pointer: place all the VP markers on square 0.
-
Reinforcements & replacements: The sequence R&R is ignored during the first game turn.
Reinforcements by turn:
- Turn 4: R. de Lorraine, 2 x Pi, 1 x Ch placed together in Lorraine SZ chosen from SZ #21, 22, 26, 34 or 41. Put the Lorraine pointer on the table of alliances.
- Turn 5: in one of SZ #1, 12 or 21. The units are grouped into one army. They are all Burgundian except when specified: The Bold, Galeotto (Italy) and Campobasso (Italy), 2 x Ca, 2 x Ga, 2 x British Ar, 1 x Italian Ch, 1 x Italian Pi, 1 x Cu, 1 x Cr, 2 x Pi.
- Turn 6: by SZ #54: 1 x British Ar.
- Turn 7: Swiss: SZ #19: Hallwyl & Bubenberg, 1 x Pi, 1 x Hb; SZ #7: Waldamnn, 1 x Pi, 1 x Hb; SZ #18: 1 x Cu, 1 x Cr.
- Conditional Swiss reinforcements (see 10): 1 x Pi, 1 x Hb, 1 x Cr and 1 x Cu in any SZ R&R of the confederate camp.
- Conditional Burgundian reinforcements (see 10): 2 x Pi, 1 x Cr in any SZ of the Burgundian camp identified R&R.
- French reinforcements (see 13): 1 x Ga, 1 x Ar (real name: the "franc-archers") and de Craon are placed in SZ #52.
Tables
Table 1: Fatigue and Desertion
Size of the garrison or the army in number of SS, calculated at the end of the strategic movement sequence.
| Modified die | [1–4] | [5–9] | [10–19] | [20 and +] |
|---|---|---|---|---|
| 1 and - | 0 | 0 | 0 | 0 |
| 2 | 0 | 0 | 0 | 1 |
| 3 | 0 | 0 | 0 | 1 |
| 4 | 0 | 0 | 1 | 2 |
| 5 | 0 | 1 | 2 | 2 |
| 6 and + | 1 | 2 | 3 | 4 |
Modifiers:
- Game turn during the harsh period from December to January (turns 2, 7 and 12): +1
- Garrison: -1
- If a movement, of all or part of the units composing the army or garrison (units that integrate a garrison or an army during or after a movement), was just carried out during this game phase: +1
Results: 1, 2, etc.: number of SS to be eliminated, player's choice.
Table 2: Random Events
| 1D6 | Random Event |
|---|---|
| 1 | Arms at the ready or betrayal* |
| 2–4 | Nothing |
| 5 | Depleted wing |
| 6 | Rain or snow** |
Legend:
- * If the Italian commander Campobasso is present at the battle, the event arms at the ready is replaced by betrayal. Only a Burgundian ally can be concerned by this betrayal event. This betrayal result is ignored and replaced by arms at the ready for a power allied to the Swiss camp.
- ** If the game turn is during harsh weather – November–February, turns 2, 7 and 12 – the rain event is replaced by snow.
Table 3: Combat
Ratio A/D (rounded in favour of the defender).
| 1D6 | 1/2 and - | 2/3 | 1/1 | 3/2 | 2/1 and + |
|---|---|---|---|---|---|
| 1 | 4*R/0 | 2*R/0 | 1*/0 | 1/1 | 1/3R |
| 2 | 4*R/0 | 2*R/0 | 1/0 | 1/1 | 1/3R |
| 3 | 4*R/0 | 2R/0 | R/0 | 1/1 | 1/3R |
| 4 | 3R/1 | 1/1 | 0/R | 0/2R | 0/4*R |
| 5 | 3R/1 | 1/1 | 0/1 | 0/2*R | 0/4*R |
| 6 | 3R/1 | 1/1 | 0/1* | 0/2*R | 0/4*R |
Modifiers:
- Fortress value: for the besieged, shift one column to the left per FV point not eliminated by Ca fire.
- Modifiers to add to the result of 1D6 roll for a battle (tactical movement):
- Attack from a wing or a 3rd or 2nd line: +3
- Flank attack on any line: +2
- Frontal attack (all these situations in the opposing camp) from a 1st line on a 2nd line or from a 2nd line on a 3rd line: +1
Results:
- The losses are expressed in the form A/D.
- 1, 2, etc.: number of SS to eliminate. Reduce this result by 1 SS if the combined tactical modifiers Ditch and Hedge are played.
- R: retreat one TZ. This result is ignored by the units of the Swiss Confederacy and their commanders, the Ca, the besieged and the besiegers. Reduce this result by 1 SS if the combined tactical modifiers Ditch and Hedge are played.
- *: Elimination of a historical commander, during a battle or a siege, on the die roll result = 1. An anonymous commander ignores this result.
Tactical marker (see the application conditions):
- Clashes among Pi: Losses for the attacker and the defender are doubled.
Table 4: Alliances
The allies' pointers move across this table toward the zone of neutrality: for the Burgundian allies toward the right of the table, for the Swiss allies toward the left. The zones are Constant, Doubt and Neutral. The neutral column shows the VP the opposing camp receives when the ally becomes neutral.
| Burgundian allies | Neutral | Swiss allies |
|---|---|---|
| Italy | 3 VP | Lorraine |
| Savoy | 4 VP | Germany |
Note: The source table prints VP values only in the neutral column, for Italy (3 VP) and Savoy (4 VP); no VP values are printed for the Swiss allies Lorraine and Germany. The Constant and Doubt zones are shown graphically in the source and are not reproduced here.
Footnotes
-
The CF of the Burgundian artillery is higher because it is operated by men of great experience. The Swiss do not have this kind of expertise, hence a weaker CF on the back side. ↩
-
The use of the artillery in siege is mastered by the Burgundians but not by the Confederacy. ↩
-
If the allied units are the only ones present for this battle, no combat is resolved. The battle is won by the opponent and eligible for the attribution of VP if and only if all the units of the Italian ally –10 SS – are involved. The treasonous units of this allied power suffer the fate of their new camp for the time of the battle. Once the battle is over, the power for which the random event arms at the ready or betrayal was drawn remains allied with the power with whom it began the game. Its units are placed with those of its original camp if there are any left or retreat to an SZ controlled by its camp. The random event is considered a short-lived episode that is quickly solved through diplomacy or money… ↩ ↩2
-
Choice of the allied power: If several allies are eligible for this event, the one with the least number of SS is chosen. In the case of a tie, the higher result of 1D6 determines which ally is chosen. ↩
-
This result only applies to the targeted unit. If it suffers a loss of 1 SS x 2 and it has 2 SS, it is eliminated. If it suffers a loss of 1 SS x 2 and only has one SS, the extra loss is ignored rather than being attributed to another unit. ↩ ↩2 ↩3
-
The loss of 1 SS is applied without being doubled. ↩
-
During this period of early artillery use, few castles had platforms able to support the artillery. Moreover, the walls had difficulty withstanding the vibrations from the fire. ↩
-
All the shooters – Ar, Cr, Cu and operators of the Ca – possess weapons (dagger, sword, etc.) that allow them to engage in hand to hand combat, hence the tallying of their CF in melee. ↩
-
In this birth period of the artillery, a Ca unit includes a great disparity of small and large calibres whose use and effectiveness range from knocking down a rampart to providing tactical support, hence the counting of their CF during an assault for the besieged and the besieger. Only the small calibres are considered in this case. ↩ ↩2
-
A combat round corresponds to an assault of the besieged after an artillery preparation. If the assault fails, the preparation time for another assault leaves the besieged enough time to fill in the breaches with materials from the collapsed walls. ↩
-
These are SZ #13 (Strasbourg), 18 (Fribourg), 19 (Bern), 35 (Belfort), 37 (Besançon), 43 (Langres), 45 (Auxonne), 54 (Beaune), and 55 (Chalon). ↩
-
The elimination of a commander is either due to his death in combat or his capture for ransom. The death of Charles the Bold brings about an immediate victory for the Swiss camp. An anonymous commander can never be eliminated definitively because he returns in R&R. ↩
-
The RP represent both soldiers and the money to recruit and equip them. ↩