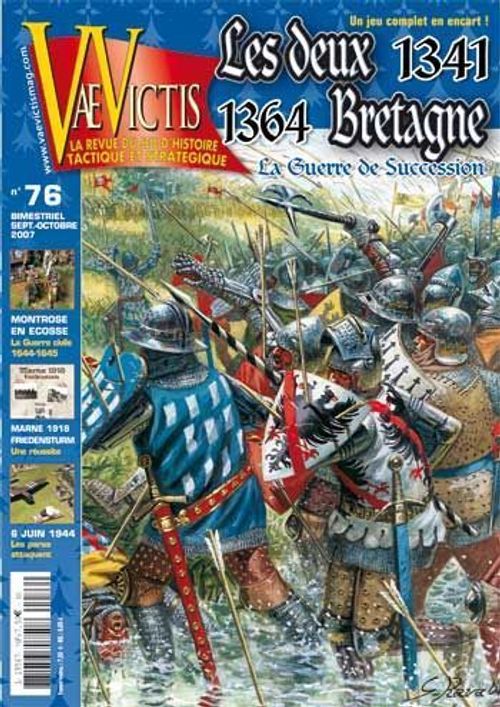
Les deux Bretagne: La guerre de succession 1341-1364
Les deux Bretagne: La guerre de succession 1341-1364 Rulebook
Table of Contents
Table of Contents
- 1.0 Introduction
- 2.0 Components
- 3.0 Control
- 4.0 Sequence of Play
- 5.0 Strategy Cards
- 6.0 Special Event Cards
- 7.0 Leaders and Stacking
- 8.0 Movement
- 9.0 Combat
- 10.0 Siege
- 11.0 Departure of Militia Units
- 12.0 Resources
- 13.0 Victory
- 14.0 Scenarios
- Extension VV77
1.0 Introduction
1.1 Historical Context
This war is considered as one of the first opening shots of the Hundred Years War. The death of Jean III resulted in a dynastic crisis which was further exacerbated by the rivalry between two families: the Blois-Penthièvre supported by King Philippe VI of France and the Montforts supported by King Edward III of England. This crisis plunged Brittany in a bloody 20 years civil war.
1.2 The Game
In the game « Les Deux Bretagne », one player controls the Blois (French and allied Bretons) and the other controls the Montforts (English and allied Bretons). Players manipulate historical characters, combat units and events with card play in order to take control of territories, thereby earning victory points (which is the goal of the game). The rules allow you to recreate the entire war in 4 scenarios (1 introductory, 2 short and 1 campaign) and correspond to the two phases of the war (Initial and Main).
1.3 Scale
A combat unit represents 100-200 knights, 300-500 mercenaries, 500-800 militia, or 2-4 artillery pieces. A leader unit represents the leader himself plus his entourage. The game turns last 2 years at the beginning and at the end of the war and 6 years from 1345 to 1361.
Note: From 1346 to 1360 (starting with the Battle of Crecy), the war in Brittany was secondary to the larger Hundred Years War conflict raging elsewhere in France. The war in this stage was confined to skirmishes and raids.
1.4 Definitions
Area: An area is a synonym of Cities and is represented by a Circle (non-fortified city) or a Star (fortified city).
Activation or Act (sometimes written on cards): Cards are used to recruit, raise resources, activate leaders... Both players have 2 activations in the first round, then for the rest of the game they have 5 each round.
2.0 Components
The game is composed of 2 counter sheets, 2 sets of cards (28 cards each), 1 rules booklet and 1 map.
2.1 Camps
There are three camps in the game: Blois, Montforts and Marauders. Blois and Montforts are player controlled while Marauders are considered independent units. Marauders are independent units that fight any player controlled units that enter the area they are in. Marauder units may be bought by the use of resource points. In the rules, all Marauder units are considered enemy units of both sides.
Translators' note: Marauders (Routiers in the original French rules) are military units (Knights and Mercenaries) who have turned to banditry in order to survive by marauding and pillaging areas they inhabit.
2.2 Combat Units
There are four types of combat units: Knights (AN English, FR French, BR Breton), Mercenaries, Militia and Artillery. Units represent formations of different sizes. All of these units can fight; some can pillage and control cities. A combat unit is any counter with a combat factor. A leader is not a combat unit. A combat unit can only attack with a leader unit (but can defend without one). A combat unit can move without a leader unit (such a unit may not attack by itself but it can join a pile which will later conduct a siege operation). A combat unit has two sides: a full side and a reduced side. A reduced side is represented by a white strip across the counter.
- Camp: Blois (blue coloured), Montfort (beige coloured), Marauders (grey coloured).
- Coat of Arms: Breton, Montfort, Blois.
- Type: Ch for Knights, ME for Mercenaries, MIL for Militia and ART for Artillery.
- Combat Factor: Combat rating of a unit in attack and defense.
- Loss Factor (FP): Represents how much damage a unit takes before it is reduced (or destroyed when already reduced).
- Movement Factor: Represents a unit's movement capacity.
2.3 Leaders
They represent the different political and military leaders who were important during the war. Leaders start the game either already on the map (in the set up) or are introduced via card play. Leaders are used to activate and recruit combat units. Leaders cannot fight, loot or take control of a city or area all by themselves. All leaders have a movement factor of 8 (not printed on the counters).
- Camp: Blois (blue) and Montfort (beige)
- Activation value: Lower left side of the counter
- Combat Bonus: Lower middle portion of the counter
- Command Value: Lower right side of the counter
Breton Leaders: Alain de Rohan, Hervé de Penhoët, Jean de Beaumanoir, Bertrand du Guesclin, Jean de Montfort (father), Guillaume de Cadoudal, Olivier de Clisson, Raoul de Cahours.
English Leaders: Edward III, William Bohun, Thomas Dagworth, Walter Bentley, Robert Knollys, John Chandos, Jean de Montfort (son).
French Leaders: Charles de Blois, Jean de Normandie, Louis d'Espagne, Guy de Nesle, Jean de Melun.
2.4 Armies
An army is a stack of units in an area containing one or more units and at least one leader.
2.5 Strategy Cards
Strategy cards are the heart of Les deux Bretagne. Every action, including movement and combat, is initiated by strategy cards. Each player has his own set of strategy cards, divided in two groups: Intervention cards and Enlisement (stalemate) cards. Each card has activation points, events and Resource points. There are 12 Intervention and 16 Enlisement cards per set (Blois and Montfort) in the game.
Translators' note: See the card guide that is included with this rules translation for a complete reference to the strategy cards in the game.
- Card number: e.g. M-17
- Activation value: Big number
- Resource Points (PS): Small number on the right hand side
- Phase of war: Title in a box (e.g. Enlisement)
- Name: Big title
- *: Event only playable once in the game
- Requisite: in red at the bottom
- Effects of the event: in black
2.6 The Map
2.61 Counties
There are 9 counties on the map composed of a variable number of areas, also called cities (some being fortified cities). This represents the historical organization of Brittany around 1340. The control of a county represents its political and/or military domination by one side (Blois and Montfort).
Historical note: In relation with the linguistic limit of the 14th century, the cities and counties are named either in French or Breton.
2.62 Control Boxes
County Control boxes are printed on the lower left hand portion of the map. A player puts a control marker in a county control box when he controls the county. If no control marker is placed, this indicates that the county is neutral and that no one controls it. The right hand side of the control box is the number of cities (castle symbol) that a player must control in the county to control it. The flag symbol indicates how many Victory points a player receives when he controls the county.
Example: The control box of Pays de Saint Brieuc indicates a player has to control 3 cities in order to control the county and is worth 2 Victory points.
2.63 Fortified Cities
A player can take control of a fortified city after a successful siege. Each fortified city has a fortification level (NF) which can be decreased or increased by card events. The NF cannot be decreased lower than 0 or increased higher than 3 via card events (Cards B-05, M-06 and M-15).
Example: The city of Brest (in the county of Bro Leon) has a NF level of 2 at the beginning of the game.
2.64 Outer Area
There are 4 outer area holding boxes on the map (Normandi, Anjev, Poatev and Bro Saoz). The blue holding boxes (Normandi, Anjev and Poatev) are only accessible by Blois units and they can go to areas with a connecting line to them (e.g. holding box Normandi is only accessible to Dol and Fougeres). The Bro Saoz holding box is only accessible by Montfort units and by naval movement.
Noirmoutier is only accessible to Raoul de Cahours with 1 combat unit maximum. Pillage and Payment rules don't apply in outer area holding boxes.
2.65 Road and Other Terrain Elements
Movement between cities is made by road movement, which are the brown lines which connect an area with another area. Certain areas have terrain which can affect combat and movement.
2.7 Dice
The game uses a ten-sided die. A zero is considered a zero (not a ten).
3.0 Control
All the counties and cities on the map are either controlled by the Blois or the Montforts, or independent. Their control is indicated by putting a Blois or Montfort marker on the city or county control box.
3.1 Cities
Control of a city is dependent on who owns the control marker placed on the said city. All cities start the game under control of one of the players as stated in the set up rules (see 14.0). All non fortified cities are controlled as soon as [sentence breaks off in the source]
Control of a non fortified city can be changed either by winning a battle in the area or by spending one movement point (as long as the city is of course not occupied by an enemy unit). Winning a battle or a siege in the city immediately grants control of the city to the victor. A city empty of units is controlled by the last player to control it. An army which ends its activation in a city but doesn't have enough movement points to take control of it must wait for a later activation to spend 1 movement point.
A city where there are only Marauders is independent. Marauders make a player lose control of this city.
3.2 Fortified Cities
A fortified city must be besieged successfully in order to be controlled. Even if the fortified city is not occupied by an enemy unit, it still needs to be besieged successfully to be controlled.
3.3 Counties
A player immediately takes control of a county if he controls a number of cities in the county equal to the control rating of the county (see 2.62).
Example: The county of Saint Brieuc has 4 cities – Saint-Brieuc, Moncontour, Lamballe and Kintin. In order to control the county of Saint Brieuc you must control at least 3 cities.
When a player takes control of a county, he immediately replaces the other player's control marker with his own.
All cities within the county are immediately under the control of the player who controls the county, with the following exceptions:
- Fortified cities controlled by the enemy
- Cities containing enemy units
These do not change control except through victory in combat or sieges (see 3.1).
Continuation of example: the Blois player takes control of the county of Saint Brieuc by controlling the cities of Saint Brieuc, Moncontour and Kintin while Lamballe is occupied by Montfort units. Blois control markers are placed in the county control box of Saint-Brieuc and all cities of the county except for Lamballe, since it's occupied by enemy units.
When the Marauders take control of a city or a county, it becomes independent and the player's control marker is discarded.
4.0 Sequence of Play
The Blois player is always the first player of each phase unless the Montfort player plays card M-01. Exception for Phase D2 b), where the Blois player always begins.
A. Pillage Removal Phase – Each player may remove 1-2 pillage markers from the map at their choice. See Turn table [12.46].
B. Card Distribution Phase – Each player picks up to his maximum hand size from the deck as indicated on the Turn Table. When there are no more cards in the deck, the discarded cards are then reshuffled back into a new deck. All cards must be drawn before the discarded cards are reshuffled back into a new deck. [5.1]
C. Action Phase – Players alternately play their cards in a number of activations as indicated on the Turn Table. A counter is used to keep track of the current number of activations of each player. Played cards are either placed on the discard pile or removed from the game. Each player may keep a maximum of only 1 card in his hand at the end of this phase. If he has more than 1 card left, he must discard as many cards as to only keep one. [5.2]
D. Resource Phase
- Militias go home: Each player rolls on the Militia Go Home Table and applies the result.
- Payment segment:
- a) Resources: Each player gets 2 Resource points for each County he controls, with the following exceptions: Pays de Dol only gives 1 Resource point; Pays nantais gives 3 Resource points.
- b) Collecting Resources: Beginning with the Blois player, both players: Step 1: Liberate leaders who are made prisoners (paying ransom). Step 2: Payment of the Combat units. Place a « Pas de solde » marker on every unpaid Combat unit. [12.1] Step 3: Converting Marauder units.
- Unpaid segment:
- a) Artillery units are removed from the map
- b) Change of sides for Knights BR
- c) Pillage: Both players roll on the pillage table for each unpaid stack of units. [12.43]
E. Continued Siege – Roll on the siege table for each area with a siege marker on it to know the effects of siege. [10.25]
F. End of Turn Phase – The Turn marker is advanced to the next turn. Apply the effects of the Plague if the Turn marker and the Plague marker are in the same space (see 6.3). Determine if automatic victory happens (at the end of each turn) or if marginal victory happens (at the end of the scenario).
5.0 Strategy Cards
Each player uses strategy cards to run the game. Each deck has two groups: Intervention cards and Enlisement cards.
5.1 Preparation of Card Decks
Both players start with Intervention cards. At the beginning of each Phase B (card draw phase), players check to see if Enlisement cards are added to the deck (which is reshuffled when the new cards are added). If a card deck is exhausted, the cards in the discard pile are all reshuffled together and a new card deck is made.
5.11 Enlisement
Enlisement cards are added at the start of Phase B after the events of plague have occurred. An Enlisement marker is placed on the turn track box containing the Plague Marker.
5.2 Use of Strategy Cards
Strategy cards are used for the following:
- Leader Activations (ACT)
- Recruit Units (REC)
- Collect Resources (SOL)
- Play Events (EVT)
A card can only be used one way at a time, except for cards with a yellow coat of arms (upper left hand corner of the card), see 5.61. A card however can be used differently each time it is used. The text of the card always takes priority over the rules.
5.3 Activations (ACT)
When a strategy card is used to activate a leader (ACT), the player can activate any leader on the map whose activation level is lower or equal to the value of the card. A 1 card allows the activation of leaders with an activation level of 1; a 3 card allows the activation of all leaders.
5.31 Active Leader
An active leader can move, do battle or besiege with a number of units equal or less than his Command Value (VC). This can be combined with the command values of any other allied leaders he is stacked with but must conform with the stacking rules (see 7.0). An active leader may move its Army from one city to another within the movement points of the slowest unit in its stack (see 8.0). It can drop or take friendly combat units while moving. An army must stop movement when it enters an area containing one or more enemy units that are not inside a fortified city (besieged or not). When this happens, movement stops temporarily and a battle begins (see 9.0). If the defending enemy units are defeated in battle, the active army may continue to move, but if the defeated defending units retreat into a fortified city, the active army must leave behind a number of units at least equal to the fortress rating of the city. A leader and combat units can be activated as many times as possible during a turn (as long as you have the cards to do it).
5.32 Free Action
Instead of playing a strategy card, players can play a free action to activate:
- 1 combat unit without a leader on it.
- 1 leader without combat units.
5.321 Leaders and units which are moved via free action can move at the max of their movement points but cannot fight or recruit, but can join a siege already in progress.
5.322 A free action counts as one activation of the player (2 or 5 depending on the turn) even if a strategy card wasn't played. A player may use as many free actions as he wants in a turn.
5.4 Recruitment (REC)
When a strategy card is played for recruitment (REC), a player can attempt to recruit combat units using a number of leaders equivalent to the activation value of the card. A leader may recruit a maximum of 2 times. A leader can only recruit in the area where he is at the time of the card play.
Important Exception: A leader cannot recruit in an area with a pillage marker in it.
Example: An activation 3 card can use up to 3 leaders to recruit, or a leader twice and the other leader once.
Leaders cannot recruit while besieged.
5.41 Recruitment Procedure
The player decides which leader will recruit and if he will use the CH Mil or ME Mil column (ART units cannot be recruited before events M-02 and B-13 have been played). For each recruitment attempt, he rolls on either column on the recruitment table and applies the modifiers.
5.411 The recruitment table gives the number of steps that are recruited for unit types. These can be used to improve reduced units back to full units or recruit new units (either as a full unit or a reduced unit). All recruitment steps must be used.
Example: A modified result of 7 on the recruitment table results in the rolling player getting 1 step of Knights (CH) and 3 Militia (MI) steps and 0 Artillery (ART).
A player can recruit BR Knights but only if he controls Rennes and Nantes. A player can recruit ART Artillery but only if the events of cards M-02 or B-13 have been played. Unless the Montfort player plays event M-01, he receives 1 less Mil unit.
5.412 The counter mix is the absolute limit of the number of units which can be recruited. If all the pieces are on the map, it is impossible to recruit more.
5.42 Placement
Units that are newly recruited are placed with the recruiting leader. Stacking limits are observed. Otherwise, the extra combat units are not recruited and don't enter play.
5.5 Resources (SOL)
When a strategy card is used to collect resources, a resource marker is used to record how many resources a player possesses. A player can use more than one card per turn to collect resources. Resources cannot be saved from turn to turn and the resource balance for both players becomes zero at the end of the turn (see 12.0).
5.6 Events
If a strategy card is played as an Event, the instructions on the card must be followed. What is written on the cards always takes precedence over the rules. If a card with an asterisk symbol is played as an Event, it is automatically removed from the game after this round. The card is not removed from the game if it is used as an ACT (activation), REC (recruitment) or as a SOL (resource).
5.61 Cards with a Yellow Coat of Arms
Cards with a yellow coat of arms (e.g. M03, M11, B18, B14 etc.) can be used as an activation and as an event at the same time, or used only as a simple event, ACT, REC or SOL. The Chevauchée cards should have a blue coat of arms.
5.62 Cards with a Green Coat of Arms
When cards with a green coat of arms are played as events, a marker corresponding to the card is placed on the Turn track to remind players that this event has already happened. When they are later played, a player can use them as ACT, REC or SOL but not as an event.
5.63 Cards with a Blue Coat of Arms
These cards are played normally (5.6).
6.0 Special Event Cards
Some events have special rules that are described below. When an event speaks of Ch, Me or Mil, it always speaks about full units.
6.1 Cards Recruiting New Leaders
The only way to introduce new leaders to the map is through the play of cards. When such a card is played, all instructions on the card are followed as to where and how the leader is placed on the map. Also it is necessary for the city to be controlled by friendly forces for the leader to be placed there. The new leader and his combat units are immediately activated.
The Montfort player can only play new leaders starting on the third activation of turn 1342. If an English leader cannot be placed on a port city due to overstacking, or the Montfort player does not control any port city, then he can be placed in Bro Saoz along with his accompanying units. These units are considered as having been activated.
6.2 External War Cards
When an event begins an external war, an opponent's leader and/or units are removed temporarily from the map and put on the external war card (cards B-06, B-21, M-18, M-25). They only come back when this external war ends. The combat units can be either full or reduced. They don't need to be paid each turn. If the opposing player cannot withdraw the required units from the map, he must recruit them on the next activation and send the required units to the external war.
A player can try to end the external war whenever he plays an activation rating 3 card. In addition to activating leaders on the map, he also gets to roll a die to end the external war. A roll of 7 or more puts an end to the external war and the card is removed from the game. The leader and 1 unit are put back on the map on any fortified city controlled by the player owning the units. The other units (if there were others) are eliminated.
6.3 Plague
6.31 Procedure
Once a game, Plague occurs in Phase F when the Turn marker is in the same track space as the plague marker (e.g. 3 turns after event M09 – Edward III or 4 turns after event B-12 Jean de Normandie have been played). When one of these two events has been played, the Plague marker's location is never affected by the play of the second event.
Historical note: At that time, not many people went to Brittany. The arrival of large armies as well as the desolation caused by the war was fertile ground for the Black Death epidemic of 1346. But overall it had a slighter impact than in the rest of Europe.
6.32 Effects
Starting with the Blois player, the players roll a die for each area where they have combat units, with the following modifiers: +1 if the area has a pillage marker; +1 if the area has more than 2 combat units in it. On a result of 6 or more, one of the combat units in the area loses a step.
6.4 Other Cards
6.41 B03 – Cahours Changes Sides
When the Blois player plays this event, he must check, in the area, whether:
- Raoul de Cahours is the only leader with Montfort units: all units stacked with him are replaced by Blois units of the same type and with the same number of steps. If he is in a fortified city, the city changes side and the control of the county is checked.
- Raoul de Cahours is stacked with other Montfort leaders, or if he is captured: he is moved to the nearest friendly combat units.
6.42 B23 – L'enfant Montfort
If Jean de Montfort is already dead, he can be replaced by Guillaume of Cadoudal; if Guillaume is also dead, then he can be replaced by Olivier of Clisson. Otherwise, this event cannot be played.
6.43 B17 – Milices urbaines
The Militia unit produced by the play of the B17 card is removed from the map when the siege it is involved in is lifted. A full unit comes back if a new siege takes place in the same area.
6.44 M17 – Jean II le Bon
If the Montfort player plays this event and if Jean de Normandie has been captured, he is automatically released and removed from the game.
Historical note: Even though Jean is dead, a council of regency is created and runs as if he was still alive.
6.45 B07, M05 and M22
The opposing player may choose full or reduced units.
7.0 Leaders and Stacking
7.1 Leaders
Leaders are used to activate stacks of units for movement and/or combat as well as for recruitment. Leaders are brought into play by card play and can be captured or killed during a battle (see 9.4).
7.11 Stacking
There is no limit as to the number of leaders that can stack in an area.
7.12 Activation
The active leader can travel with as many units as equal to his command value (VC). The active leader can also command leaders who have a lower VC. If there are multiple leaders, then the total of the command values of all the leaders in a stack is the number of units which can move and fight, to a maximum of 8 combat units.
Example: If Jean de Normandie stacked with Alain de Rohan and Herve de Penhoet is activated, he can move with both leaders and a maximum of 7 units. The total Command value for all three leaders is 7.
7.13 Combat
Only the active leader will lend his combat bonus to a combat, even though he is stacked with other leaders which have a better combat bonus.
7.2 Stacking
7.21 Stacking
Eight units is the maximum stacking limit per area. A reduced or full unit is still counted as 1 unit. Steps do not count.
7.22 Overstacking
Stacking limits are valid at all times except during movement. If at the end of movement an area is overstacked, the owning player must eliminate as many units as necessary to meet the stacking limits.
7.23 Stacking During Sieges
A stacking limit of 8 units per side is still applicable during sieges.
Example: If a Montfort army is besieged and an army comes to its rescue, the total of both armies should not be more than 8 units.
8.0 Movement
Armies move when their leader is activated with a card as ACT. Any one counter, either a leader or combat unit, may be moved with a Free Action activation (see 5.32). This combat unit is said to be "lone".
8.1 Procedure
An activated leader (see 5.3) may move his stack (up to 8 combat units) up to the limit of the movement factor of the slowest unit in the stack. It normally costs 1 to enter an area. Areas with mountain and marsh terrain cost 2 movement points to enter. A combat unit may never spend more movement points than its movement factor in a single Round.
Unused MPs are not accumulated for future Activations or transferred to other units.
Leadership Ratings of two or more leaders are used to calculate the number of units that can be activated for movement [10.12]. Note, however, that units can be picked up/dropped off as long as the total number of units in an activated stack does not exceed the combined Leadership ratings of the leaders, and as long as stacking limits are met at the end of movement.
8.11 General Rule
Movement must be from area to area connected by a brown solid line. Areas may not be skipped.
8.12 Friendly Armies
Combat units may move through a friendly stack and may end their turn in that stack as long as ending in that area would not violate stacking restrictions (see 7.21).
8.13 Dropping off Units
Units may be dropped off while moving; if the dropped-off unit had a slower movement allowance than the remainder of the stack, the stack may then continue its move with the movement allowance limits of the remaining units. Once a unit has been dropped off, its movement is over for this activation.
8.14 Picking up Units
A stack while moving may pick up friendly units and add them to the stack. However, the number of units in the stack may never exceed the activated leader's leadership rating or stacking limits. The stack's movement allowance is still equal to the slowest movement allowance of units in the original stack. Picking up friendly units does not augment the movement of the original stack. If picking up from friendly besieging forces, remove the siege marker if the remaining besieging forces are reduced below the level necessary to maintain the siege (see 10.14).
8.15 Naval Movement
8.151 Procedure: A leader (with or without combat units) may move from port city to port city by naval movement. Combat units may not use naval movement without a leader. In order to use naval movement a player must play an Activation 3 card (Montfort player), the card B01 – Marine Castillane (Blois player) or a Chevauchée card. All these cards have an anchor symbol on them denoting naval movement.
8.152 Ports Controlled by the Enemy: Port cities must be under friendly control for units starting out naval movement. For the Montforts, the starting city can be under siege, while for the Blois player a city under siege is prohibited from becoming a starting city for naval movement, except if card events B01 and B16 are played. By contrast, the destination port city need not be under friendly control. In this case, if the attacker loses the battle for the destination Port City, he must lose an additional step and return to the port city of origin (starting city).
8.153 Limits: An activation 3 card allows naval movement of only one leader and as many units as he can command. A Chevauchée card also allows naval movement to one army out of the two or three activated armies.
8.16 Forage
Every army with 5 to 8 units must, during its move, pillage one city through which it passes or stops. The moving player chooses which city to pillage, including the city in which the army stops movement. Place a pillage marker on the map. This pillaging takes effect after any battle occurring in the space. If an army cannot forage (because the area already has a Pillage marker), it takes one step loss amongst its Me/Ch units (by priority order). If an army moves to an enemy occupied city and loses a battle and retreats, that (briefly visited) city is eligible for foraging. Foraging requirements are determined at the beginning of the move and include every unit that has been picked up during the move. Units that are stacked with the army but didn't move don't count.
8.161 If an army is eliminated as a result of the combined effects of combat and foraging, the leaders survive and remain in the space to which the army would have been required to retreat. If the army won the battle but is still eliminated due to foraging requirements, while the defender still has units remaining in the space, the attacker has lost the battle and the leaders retreat.
8.2 Enemy Territory
8.21 Enemy Occupied
Units and armies may enter a city containing enemy units. But a leader moving alone may never enter a city containing enemy combat units. Entering a city occupied by enemy units or armies (that are not inside the fortified city) temporarily ends the friendly units' movement. They must conduct Combat versus the enemy units. If the active Army wins its combat, it can continue its move. If the defending combat units and leaders react by retreating inside a fortified city, the friendly units may continue to move but must leave a number of units equal to the fortress level of the city.
8.22 Moving Through Enemy Fortified Cities
If all the enemy units are inside a besieged fortress city, friendly units may travel across the city without any penalty (see 10.0 and 5.31). An Army (not a lone unit) that travels across an enemy fortress city not occupied by friendly units screening it or besieging it loses one step.
8.23 Enemy Leaders
Combat units and armies that enter a city occupied by enemy leaders without combat units may continue moving with no penalty. The enemy leaders are automatically captured.
8.24 Fortress City Retreat Reaction
Enemy units in a fortified city may react by retreating inside the fortress when friendly units enter the space. Mark such units by placing them beneath the control marker. This choice must be made immediately, when the active units enter the city space. Enemy units that retreat inside the fortress may only be attacked by Siege Combat. If after reaction no enemy combat units remain outside the fortress city, then the army may continue to move only if the army leaves a number of units equal to the fortress level of the city.
Enemy units which choose to stay outside the fortress don't gain the benefit of the fortified city and must be attacked by regular combat.
A lone leader can retreat into a fortified city as if he was a combat unit.
8.25 Non-Occupied Fortified Cities
Friendly units are not required to besiege an enemy controlled fortress city not occupied by enemy combat units, although siege (see 10.0) is the only way to take control of that city.
8.26 Taking Control of Cities
Combat units and armies gain control of each city into which they move by paying an extra movement point, unless that city is a fortress and/or occupied by enemy units or armies. Leaders moving alone cannot gain control of a City. A player must besiege a fortress city to gain control of it, regardless of whether or not it's occupied by enemy units. Armies can gain control of non-Fortress cities by winning a battle (see 9.27).
9.0 Combat
Combat may be initiated only by an Activated army against enemy combat units or armies occupying the same area.
9.1 Procedure
9.11 General Procedure
A friendly army that ends its move in an enemy occupied non-Fortress City must conduct Combat against those enemy units. If the enemy units or army are inside a Fortified City, or react by retreating inside the Fortress when friendly units enter the space, the enemy units can be attacked, but only through Siege Combat (10.0). Siege is not mandatory against an enemy controlled Fortress City. Once an enemy Fortress is under a Siege Marker, friendly units can move through the space.
9.12 Terminology
The active player is called the Attacker and the non-active player is called the Defender.
9.13 Obligation
All active and inactive units in the area are forced to participate in combat.
9.2 Combat Resolution
9.20 Procedure
Each regular (non-siege) combat is resolved using the following sequence (see 10.2 for sieges):
- Determine combat strengths
- Draw Tactical chits
- Determine the die roll modifiers
- Determine the combat column(s) to use
- Roll a die and determine results
- Apply losses
- Each player determines who won the fight
- Check if Leaders of the losing side are captured or dead
- The loser retreats
9.21 Combat Strengths
Each player totals the Combat Factors of his units involved in the combat to determine their combat strength. The attacker must total the combat strength of all his units in the area. The defender must total the combat strength of all units that have not retreated into the fortification. For the combat strength of each artillery piece, roll a die: even, combat strength is 1; odd, combat strength is 0.
9.22 Tactical Chits
If the sum of all combat factors in the area is:
- less than 13: 1 Tactical chit is drawn from the Tactical chit cup.
- between 13 and 24: 2 Tactical chits are drawn.
- between 25 and 43: 3 Tactical chits are drawn.
- more than 44: 4 Tactical chits are drawn.
The results of the tactical chits are applied before, during or after combat according to the tactical chit. They are put back in the Tactical chit cup (for later combats) unless the effects of the tactical chit say so. Tactical chits can help the attacker or the defender. They sometimes don't apply to a specific combat (because conditions are not fulfilled). In this case, players do not draw new Tactical chits. Chits with the same name are not cumulative.
9.221 Description of Tactical Chits
- T1 Surprise: Remove randomly 1 Pro-Montfort tactical chit that was just picked.
- T2 Réprimande: After the battle, if the Montfort player has lost 2 or more Me and Ch steps in battle, he withdraws the activated English leader from the map for one turn. The English leader returns next turn either in a Montfort controlled Port City or Bro Saoz. This chit has no effect if there are no English leaders.
- T3 Charge: Bonus of +1 to the combat die roll of the Blois player. Not applicable if the area fought in has either forest or marsh terrain.
- T4 Pas de quartier (No quarter): The Montfort leaders that are captured in combat are executed. Remove them after combat.
- T5 Maréchal de France (Marshal of France): Bonus of +1 to the combat die roll of the Blois player if a French leader is present in combat.
- T6 Ordre de l'étoile (Order of the Star): If at least one Blois leader is involved in combat, the Blois player must choose a bonus of either 1 or 2 to the combat roll. If the Blois player loses the battle, he must eliminate the same number of Ch and/or Me units as the bonus number he chose. This chit is then removed from the game. If the Blois player cannot eliminate enough units, then he must eliminate a leader who fought in the combat.
- T7 Débordement (Flanking): In the case of a Blois victory in battle, eliminate one additional step loss for the Montfort player (Blois player's choice).
- T8 Notre Dame! Guesclin!: 1 column shift in favour, or +2 to the combat die roll, for the Blois player if Du Guesclin or at least 1 BR Ch unit is involved in combat.
- T9 Montjoie! Saint-Denis!: 1 column in favour of the Blois player.
9.23 Die Roll Modifiers
Each player determines what die roll modifiers affect his roll. The die roll modifier is a combination of the battle rating of the leader commanding the army (if any) with the die roll modifier of any tactical chit played. Note that only the activated leader of an army is the commander for the purposes of determining the combat die roll modifier of an attacking army. Concerning the defending units, the commanding leader is the leader with the highest Command Value (if several leaders have the same CV, player's choice).
9.24 Combat Column
Each player determines which column he will use on the combat results table. This column is the result of his combat strength and the tactical chits.
9.25 Combat Results
Each player rolls a die and modifies it with the die roll modifier determined in the above step and cross-references it with the appropriate column to determine the combat result (a loss number). A roll can never be modified to less than 0 or greater than 11. Treat any modified roll less than 0 as 0 and any modified roll above 11 as 11.
9.26 Application of Losses
Each player applies to his own units the combat losses (see 9.3) required by his opponent's die roll result.
9.27 Determine Combat Winner
The player who caused the highest loss number wins the combat. If both players' loss numbers are tied, the player whose activated leader has an activation number of 1 wins. If no one or both players have an activation 1 leader, then the defending player wins.
9.28 Capture or Death of Leaders
The winning player rolls a die to see if there are any dead or captured leaders (see 9.4).
9.29 Loser Retreats
The loser of the combat must retreat (see 9.5) from the area. If the defender was the loser and retreated, the attacker gains control of the area unless the space is a Fortress city. The attacker must obtain a successful result on the Siege Table either in a later activation or in the End Phase (Continued Siege Segment) to gain control of the area. When gaining control of the area, he also checks who controls the county.
9.3 Application of Losses
The result of each player's roll on the combat results table is the opponent's loss number. That loss number must be fulfilled as closely as possible without taking more losses than the Loss Number (LN). A player may not take fewer losses than required if it is possible to take the exact loss number, but the player never takes more losses than the loss number. Losses are taken by reducing or eliminating combat units. Each step removed from a unit provides the unit's loss factor.
Example: A Montfort Army with a full Ch unit (LN 3), a reduced Me unit (LN 3) and 2 reduced Mil units (LN 2) takes 6 losses. The Montfort player has three choices: either he can eliminate the Ch unit, or he can reduce the Ch unit and eliminate the Me unit, or he can eliminate one Mil unit and reduce the second one to take exactly 6 losses. But he cannot reduce the Ch unit for 3 LN and eliminate one Mil unit (for 4 LN) because the total would be 7 LN.
9.4 Capture or Death of Leaders
9.41 Procedure
If the winning player rolled an odd number during 9.25, he checks if he has captured or killed an enemy leader:
- 4 or less: Not captured
- 5 to 8: Captured
- 9: Killed (removed from the game)
The only exception to this rule is the Blois leader Bertrand of Guesclin, who can only be captured and not killed due to combat. This is also true if the tactical chit T14 No Quarter is played.
Historical note: Bertrand of Guesclin was actually captured twice, at the Battle of Auray and later at Najera. In these battles, even though the no quarter order was given, he was still captured and spared execution.
9.42 Effects
If a Montfort leader is captured, place him in Bro C'Hall. If a Blois leader is captured, place him in Bro Saoz. Leaders are released by paying resources. Leaders who are killed are removed from the game.
9.43 Army Lost
If an army is completely destroyed, all its leaders are captured if there is a leader in the enemy army. Otherwise, all the leaders are killed and removed from the game.
Historical note: During the war, Chivalry was still present among the Nobility. But against Mercenaries, Chivalry goes out the door and no quarter is given or expected.
9.5 Retreats
At the end of a regular combat, the loser's combat counters must retreat from the city area (see 9.27 for determining the loser). The loser retreats one space away from the location of the combat.
Exception: An army defeated in regular combat may retreat inside a friendly controlled fortress in the same space.
9.51 Attacker Retreats
If the attacker is the loser, the attacker's combat counters must retreat to the city space from which they entered the defender's city space.
9.52 Defender Retreat
If the Defender is the loser, the defender's combat counters must retreat to any adjacent city space under the following restrictions:
- May not retreat to a city space containing an enemy unit or a non-besieged enemy controlled fortress city.
- May not retreat into the city space from which the attacker entered the city space of the combat.
- Must all retreat to the same city space.
- Must retreat into friendly controlled city spaces if possible, but if not may retreat into an unoccupied enemy controlled city space (without gaining control of the city space at the end of the retreat).
- May retreat into a city space in violation of the stacking limits, but at the end of the retreat enough units must be eliminated to bring the space back under stacking limits.
Defending units that can't fulfill these conditions are eliminated. If a retreat space is available, a player may not eliminate units instead of retreating.
Full example of combat: a Montfort army with Olivier de Clisson, 1 full Ch unit and 2 reduced Me attacks Malestroit (controlled by the Blois player), where a Blois army stays with Alain de Rohan, 1 full Me unit and 2 reduced Mil units. So the combat strength is 8 for the Montfort player and 7 for the Blois player. The Montfort player picks 2 tactical chits and shows Débordement and Charge. Then he rolls a die on the 8-10 column and gets a 3 (die) + 2 (bonus for the leader combat value), meaning 6 losses. Now the Blois player. He rolls a 1 (die) + 1 (thanks to the Charge tactical chit) + 1 (bonus for the leader combat value) and inflicts 3 losses on the Montfort player. Concerning the losses, the Montfort player can either reduce his Ch unit or eliminate one Me unit. The Blois player has no choice; he must eliminate his Me unit. Having lost the battle of Malestroit, the Blois player retreats to Josselin. The Montfort player immediately takes control of Malestroit and checks who controls Bro Gwened.
10.0 Siege
To gain control of an enemy controlled fortress city, the active player must besiege it, whether or not it is occupied by enemy combat units.
10.1 Establishing the Siege
10.11 Unlike regular combat, siege combat is not mandatory against enemy units in the same fortress city space as the active friendly units as long as the enemy units are inside the fortress. If the enemy units are outside the fortress, then regular combat against them is mandatory. Nor is siege combat mandatory against an unoccupied enemy controlled fortress city. Friendly units may occupy an enemy controlled or enemy occupied fortress city space indefinitely without conducting siege combat (see 10.15), but they may not gain control of that space without capturing the fortress city via siege combat.
10.12 Siege combat, like regular combat, follows movement. Units may never conduct regular combat and siege combat in the same activation. Siege combat at a fortified city cannot take place in the same activation in which the siege marker is placed at that fortified city. An active leader is needed to initiate and place a siege 0 marker and later to make a siege roll. Only a siege marker is needed to resolve the effects of siege in phase E.
A leader can place a siege 0 marker in an area with a fortified city after a battle but cannot in the same activation make the assault. A leader can also place a siege 0 marker if he starts his activation in an area with a fortified city and if he has enough combat factors with him. In this case, he can also resolve the siege in the same activation.
10.13 Siege Level: All fortified cities have a fortress strength rating. This, added to the combat factors of all units inside the fortified city, is the fortress siege level. To besiege a fortified city, the active player must have a total number of combat factors in the space equal to or greater than the siege level. If this is the case, place a siege marker on the fortified city.
Example: the Blois player wants to besiege Rennes. A Montfort unit with a combat factor of 3 is inside the city. Therefore, the Blois player must have at least 5 combat factors to besiege this fortified city (2+3).
10.14 Maintaining the Siege: To maintain a siege, enough besieging combat factors must be in the city at all times to maintain the siege level (see 10.13). If the total number of combat factors ever becomes lower than the siege level, remove the siege marker. A siege marker may be placed on the city again at the end of an activation when the number of besieging combat factors is equal to or greater than the siege level.
10.15 Masking the Fortified City: Friendly units outside of the fortified city and enemy units inside the fortified city may coexist in the same fortified city without a siege marker; the friendly units are considered to be masking the fortress. Thanks to these friendly units, an army may travel through the enemy fortified city without losses (8.22).
10.16 Sortie: If both players have units in a fortified city space without a siege marker, friendly units inside the fortified city may not exit the space unhindered. First they must Sortie against the masking force, that is, activate and move outside the fortress to conduct regular combat against the enemy units in the space. If the sortieing units win, the masking units retreat using normal retreat priorities. If the masking units win, the friendly units must retreat back inside the fortified city; they may not use the retreat to leave the fortress city space.
When a support army attacks besieging units, the besieged units can join the support army for the regular combat, within the stacking limits (7.0). The player only uses one card and, for a Chevauchée card, it only counts as one leader. Only the leader of the support army is activated, never the besieged leaders.
10.2 Siege Resolution
An army activated for an assault (siege) does not need to forage.
10.21 Conditions
- To conduct Siege combat during an activation, a siege marker must have been placed in a previous activation (see 10.12). If this is a continued siege (see 10.25), the besieging army must still activate to conduct siege combat.
- During phase E, all armies on the map with siege markers may conduct siege combat (the only combat which may be performed without activating).
10.22 Assaults and Effects of Siege: Each siege combat is resolved using the following sequence:
- Calculate Siege Combat die roll modifiers.
- Determine Outcome.
- Place Continued siege marker if necessary.
10.23 Calculate Siege Combat Die Roll Modifier: The Siege combat die roll modifier is the total of any modifiers found on the siege combat table.
Example: The Blois player besieges (Fortification level 2) and he already has a Siege 1 marker. So the siege combat die roll modifier is -1.
If the besieging player has at least 1 artillery (ART) unit participating in the siege, he rolls a die and applies the following:
| Die | Bonus in the siege |
|---|---|
| 0, 1, 2 and 3 | 0 |
| 4, 5 and 6 | 1 |
| 7, 8 and 9 | 2 |
10.24 Determine the Outcome: Roll a die, modifying the roll as required (see 10.23), and consult the siege combat table for the result:
- If successful, the fortified city is captured by the besieging player. The besieging player gains control of the fortified city (change the control marker) and any enemy units inside the fortified city are immediately eliminated. All defending leaders are captured. The effects are the same if the siege is successful and at the same time the besieging units are eliminated; then the besieging leader is not captured and stays alone inside the city.
- If unsuccessful, the fortified city does not fall (see 10.25).
10.25 Continued Siege: If a siege combat result was unsuccessful, place a siege marker with a value of 1 more than the previous marker (to a max of siege 3 marker). This marker provides a die roll modifier for a subsequent roll on the siege combat table. The modifier is equal to the value of the siege marker. If the siege is stopped and later reestablished, a siege 0 marker is placed on the fortified city.
Design note: The siege markers represent the attritional effects of numerous assaults on the defenders of the fortress as well as the cumulative effects of disease and starvation on the defenders.
Example of siege: A Blois army with a leader, 2 full Ch units and 1 full Me unit moves to Hédé, where a Montfort army made of a leader and 2 reduced Me units stays. The Montfort player decides to go inside the fortified city. The Blois army then places a siege 0 marker because it has enough combat units to raise the siege (Blois: 4 PC x 2 + 3 PC x 1 = 11; Montfort: 1 + 3 PC x 2 = 7). During the next Blois activation, the player decides to activate the besieging army. He rolls a die and looks on the Siege table, with a -1 modifier (Fortress level). He rolls a 4. The siege continues and the Montfort player eliminates one of his Me units. The siege 1 marker is now placed on the fortified city. Later, the Blois player activates his leader one more time to try to end the siege. He rolls a die without modifiers because the siege marker cancels the fortress level. The result of 7 allows the Blois player to take control of the fortified city. The Me unit is eliminated and the Montfort leader is captured (and sent to Bro C'hall). The Blois player flips his Me unit to its reduced side.
11.0 Departure of Militia Units
During phase D1, both the Blois and Montfort players roll a die, apply the modifiers and consult the Militia Departure table. The percentage result is applied to the total number of militia units that each player has on the map; the percentage result is rounded up. The losses (in steps) are immediately removed from the map.
There is no penalty if the players cannot completely fulfill the losses.
12.0 Resources
12.1 Resources
12.11 Collecting Resources
Resources are gained during the action phase by playing a strategy card as a SOL (collect resources). They can also be gained by controlling counties. Each turn, each player can use several cards as SOL. Players keep account of how many resources they received with the appropriate markers. During the resources phase, at the time of the collecting of resources, each player receives 2 PS (resource points) extra for each county under their control.
Exception: A player receives 1 PS for the control of Pays de Dol and 3 PS for control of the Pays Nantais.
Historical note: Nantes was one of the richest counties of Brittany and Dol was one of the smallest.
The Resources balance goes back to zero at the end of the turn. So all resources must be used in a turn. Resources cannot be accumulated from turn to turn. PS cannot be negative.
12.12 Utilization of Resources
The Blois player is the first to utilize resources. Resources are used by players for releasing captured leaders, for paying units and/or getting Marauders to their side.
12.2 Liberation of Captured Leaders
Each player can liberate their captured leaders by paying a ransom. The ransom paid is in resources and is equal to the VC (command value) of the captured leader.
Example: The Blois player liberates Charles de Blois for 5 PS, received by the Montfort player.
Players can also exchange leaders with the same command value.
A player cannot refuse to liberate his prisoner. On the other hand, a player can choose not to liberate his leader, to keep his resources for another use. A player can liberate or not as many leaders as he wants. A liberated leader is placed in any friendly area.
12.3 Payment of Combat Units
12.31 Procedure
Players must pay to maintain their combat units. Unpaid units will either pillage, change side, turn marauder or disappear. Leaders are never paid. Paying units is completely voluntary. A player is never required to pay any units. A unit must be paid its full pay rate whether it is a full or half strength unit. If the unit is unpaid, it receives the "Pas de Solde" marker (unit unpaid marker).
The pay rates are:
- Ch: 2 PS
- Me and Art: 1 PS
Mil units are automatically paid. Units inside a besieged fortress city may never be paid; automatically mark such units with an unpaid marker.
12.32 Supply Bases
Both camps have 2 supply bases. Both are entered into play through play of event card B19 for the Blois and event card M21 for the Montforts. All units located in a supply base are automatically paid unless the supply base is besieged. If a base is controlled by the enemy, he does not benefit from this advantage. As soon as the base is recaptured by friendly forces, the benefit comes back. Once put on an area, it is permanently there.
12.4 Effects of Non-Payment
12.41 Dispersion of Artillery Units
If an Art unit is not paid, it is automatically eliminated. It can still be recruited later.
12.42 Change of Side of Breton Knights
If a BR Ch unit is not paid, the unit is eliminated and the opposing player receives the same number of BR Ch as if they were recruited.
12.43 Pillage
During the pillage segment of the resource phase, all units marked with an unpaid marker must roll a die and consult the pillage table.
12.431 Procedure: Apply a single roll of the die to all unpaid units in a city. Modify the roll using the modifiers listed below the Pillage table. A besieger/masking force that is unpaid must roll on the pillage table. Foraging does not require control of any space.
12.432 When a besieging/masking force and a besieged force must make rolls on the pillage table, players roll simultaneously, using the current Pillage status of the city. Then each player applies the result as if there was no other force present. The pillage status of the city is then determined based on the highest pillage level attained.
12.433 Pillage Table Results
- Paid: All unpaid units are paid. Remove the unpaid marker.
- Pillage: All unpaid units are paid. Put a pillage marker on the area. Remove the unpaid counter.
- Pillage & Half of the units become Marauders: Put a pillage marker on the area. Remove the unpaid counter. The player chooses 50% (rounded up) of the Ch and/or Me units that turn Marauder. The chosen units are immediately replaced with Marauder units. A reduced regular unit must be replaced by a reduced Marauder unit and a full regular unit by a full Marauder unit. Except if there is only one unit in the area, combat immediately happens between the loyal and Marauder units, and this is resolved just like regular combat. The player with regular units is the attacker.
- Pillage and all of the units become Marauders: Put a pillage marker on the area. Remove the unpaid counter. All the Ch and Me units turn Marauder. The units are replaced by Marauder units. The control marker is removed from the area and it is considered a neutral area where no one is in control. This also affects the control of the county.
12.434 If an area which has a pillage marker on it is additionally pillaged later, it remains pillaged. For each new pillage, the stack of regular units (paid or unpaid) loses a step, as well as the stack of Marauder units (apply before combat). The step loss applies to the stack, not to each unit. The lost step must first be taken by a Me unit, or by a Ch unit if there is no Me unit.
Example: An army made of three unpaid regular units must lose a step. The player then chooses which unit will lose this step.
12.435 If all the units of an army become Marauders and only the leaders are left, the leaders are placed in any friendly area.
12.44 Unpaid Units
A unit may be unpaid any number of times during the game with no additional effects beyond the results of the pillage table every turn it is unpaid.
12.45 Effects of Pillage
A city with a pillage marker on it gets a +1 on the Pillage table. Leaders cannot recruit in areas with a pillage marker on them. If all areas and cities within a county are pillaged, reduce the victory point level of the county by 1. It comes back to normal as soon as this condition is no longer fulfilled.
12.46 Recovery from Pillage
During the Pillage Recuperation phase, each player may remove 1 or 2 pillage markers from friendly (controlled) cities which are not occupied by or adjacent to enemy units. See Turn Table.
Example of resources: A Montfort army with 3 full Ch units besieges a Blois army with a leader and 2 full Me in a fortified city. The city has no Pillage marker. The Montfort player rolls a die modified by 1 because he has 3 units pillaging. He gets a 4, so the result is "Pillage". At the same time, the Blois player rolls a die with +1 (the majority of the units in the area rolling for pillage are Mercenary units) and +2 (for being besieged). He gets a 5 modified to 8, for a result of "Pillage & half of the units become Marauders". One Me unit becomes Marauder and a combat inside the fortified city takes place. Following the combat, the Marauder Me unit gets 2 losses while the regular Me unit gets 3. The Marauder unit therefore wins the combat and the reduced regular unit and its leader must retreat. As they cannot retreat because of the siege, they are both eliminated (the leader is killed). The siege continues, but there is only one Marauder Me unit inside the fortified city.
12.5 Marauders
12.51 General
Marauder units are Ch or Me units which turn Marauder (banditry) on a roll on the Pillage table. An area occupied solely by Marauder units is considered under no one's control.
12.52 Purchasing
If the player still has PS (resources), he can buy Marauders and turn them to his side. His choice is from stack to stack and he cannot buy a single unit but must purchase the whole stack. The rates are:
- 1 unit of Ch Marauder: 1 PS for each step
- 1 unit of Me Marauder: 0.5 PS for each step
12.53 Change
If a player bought a stack of Marauders to his side, he changes the Marauder units to his own units of the same type and the same steps. The control of the area automatically changes to his own, except if a siege is under way. If there is a lack of units to replace the Marauders, the Marauders are discarded from the map without being replaced.
Example: The Blois player buys a Marauder stack made of one full Ch unit and 2 reduced Me units. It costs him 3 PS. He replaces them, in the same area, with the same number of steps and the same type of Blois units.
13.0 Victory
13.1 Victory Points
Players earn victory points by taking control of counties, killing enemy leaders and playing some event cards. PV (victory points) are tracked by PV markers.
13.11 At Start
The two players can begin with starting PV. This depends on the scenario set-ups.
13.12 Procedure
When the control of a county changes or a leader is killed, the PV total is immediately altered. Every time a county changes control, the current controller receives the PV points for control of the county and the former controller subtracts the County PV points from his total. Each time a player kills an enemy leader, he earns as much PV as the Command Value (VC) of the leader.
13.2 Automatic Victory
The game can stop at the end of any turn if one of the two players has sufficiently fulfilled conditions for an automatic victory. The automatic victory conditions are:
- Principal Capitals: If one of the players simultaneously controls Rennes, Nantes, Brest and Gwened at the end of any turn. This condition is only checked from turn 4 onwards, and in the scenario Le dogue noir from turn 8 onwards (except at the end of turn 1 and, in "The black boarhound" scenario, at the end of turn 7).
- Death of the opponent: after the Enlisement cards are added to the deck, a player automatically wins the game if he kills or captures the leader of the opposing side (Charles de Blois for the Montforts; Jean de Montfort or his son for the Blois).
- Shares of Evran: If a player fulfils the conditions for automatic victory on this card, he wins the game.
14.0 Scenarios
14.1 The Revenge of Charles de Blois (Introductory Scenario, 2 turns)
14.11 Set Up
All units are at full capacity.
Montfort Placement
- Rennes: Guillaume de Cadoudal, 1 Me, 2 Mil
- Nantes: Jean de Montfort, 1 Ch BR, 2 Me, 2 Mil
- Gwened: Olivier de Clisson, 1 Me, 1 Mil
- Machecoul: Raoul de Cahours, 1 Me
- 1 Mil at Brest, 1 Me at Ploërmel
Counties controlled by the Montforts: Bro Leon, Bro Gernev, Bro Wened, Pays nantais, Pays rennais, Pays de Saint-Malo.
Cities controlled by the Montforts: all cities in the counties above are controlled by the Montforts except for Kastell Nevez ar Faou, Lesneven, Josselin, Le Gâvre, Dinan, Saint-Malo, Fougères and Vitré, which are all controlled by Blois.
Blois Placement
- Anjev: Charles de Blois, 2 Ch FR, 2 Me
- Josselin: Alain de Rohan, 1 Ch BR, 1 Me
- Gwengamp: Hervé de Penhoët, 1 Ch BR, 1 Mil
- 1 Me at Saint-Malo
Counties controlled by the Blois: Bro Dreger, Pays de Saint-Brieuc, Pays de Dol.
Cities controlled by the Blois: All cities in the counties above are controlled by the Blois.
14.12 Duration of Scenario
The Scenario starts at Turn 1 (1341) and ends at Turn 2 (1342).
14.13 Other Placements
- The Blois player starts with the card B12 Jean de Normandie in his hand.
- The turn marker starts at 1341.
- The following tactical chits are not put into the tactical chit cup: T5, T6, T8, T13, T15, T17 and T18.
- Starting PV for the Blois: 5
- Starting PV for the Montfort: 22
14.14 Victory Conditions
The Blois player must control either Rennes or Nantes; otherwise the Montfort player wins.
14.2 The Two Jeanne (6 turns)
- 14.21 Set-up: The same set up as the introductory scenario.
- 14.22 Duration of Scenario: The Scenario starts at Turn 1 (1341) and ends at Turn 6 (1352).
- 14.23 Other Placements: The same set up as the introductory scenario.
- 14.24 Victory Conditions: Other than an automatic victory, there is a winner at the end of the scenario if a player has more than 22 PV and controls at least 3 of the following 4 cities: Rennes, Nantes, Brest and Gwened. Otherwise both players are tied.
14.3 The Black Boarhound (5 turns)
14.31 Set-up
All units are set up at their full capacity except those in brackets, which are at a reduced state.
Montfort Placement
- Karaez: Guillaume de Cadoudal, 1 Me
- Gwened: Olivier de Clisson, 1 Me
- Fougeray: Robert Knollys, 1 Me, 1 Mil
- Rennes: Walter Bentley, Jean de Montfort (son), 1 Ch AN, 2 Me, 2 Mil
Counties controlled by the Montforts: Bro Leon, Bro Gernev, Bro Wened.
Cities controlled by the Montforts: all cities in the counties above are controlled by the Montforts (except those controlled by the Blois), as well as Lannuon, Ploërmel, Hédé, Combourg, La Guerche, Fougeray, Châteaubriant and Machecoul.
Blois Placement
- Gwengamp: Charles de Blois, 2 Mil
- Josselin: Jean de Beaumanoir, 1 Me
- Gwenrann: Raoul de Cahours, 1 Mil
- Nantes: Alain de Rohan, 1 Ch BR
- Rennes: Hervé de Penhoët, 1 [Me], 2 Mil, siege marker 0
Counties controlled by the Blois: Bro Dreger, Pays de Saint-Brieuc, Pays de Dol, Pays rennais.
Cities controlled by the Blois: all cities in the counties above are controlled by the Blois, as well as Kastell Nevez ar Faou, Josselin, Dinan, Saint-Malo, Le Gâvre, Gwenrann, Clisson, Nantes.
Marauders Set-up
- Kastellin: 1 Me
- Montfort: 1 [Ch], 1 Me
- Ancenis: 1 Me
14.32 Duration of Scenario
The Scenario starts at Turn 7 (1353-1356) and ends at Turn 11 (1364).
14.33 Extras
- The Blois player starts with the card B28 Bertrand du Guesclin in his hand.
- Turn: 1353-1356
- Brest: Fortress +1
- Leaders not in the game: Thomas Dagworth, Jean de Montfort, Edward III, Guy de Nesle, Louis d'Espagne, Jean de Normandie
- Tactical chits not in the game: T6, T10
- Cards not in the game: B06, B08, B09, B12, B21, B23, B27, M07, M08, M09, M10, M17, M23, M24
- Events played with their cards still in the game: B03, B04, B10, B15, M01, M02, M04, M05, M12
- Blois starting PV: 9
- Montfort starting PV: 11
14.34 Victory Conditions
Other than an automatic victory, there is a winner at the end of the scenario if a player has more than 25 PV and controls at least 3 of the following 4 cities: Rennes, Nantes, Brest and Gwened. Otherwise both players are tied.
14.4 From Nantes to Auray through Morlaix (11 turns)
- 14.41 Set-up: The same set up as the introductory scenario.
- 14.42 Duration of Scenario: The Scenario starts at Turn 1 (1341) and ends at Turn 11 (1364).
- 14.43 Others: The initial placement and everything else is the same as the introductory scenario.
- 14.44 Victory Conditions: Other than an automatic victory, there is a winner at the end of the scenario if a player has more than 25 PV and controls at least 3 of the following 4 cities: Rennes, Nantes, Brest and Gwened. Otherwise both players are tied.
Extension VV77
I. 10 New Cards
The new cards can only be used after the approval of both players. 2 kinds of play can be accepted:
- Put one or more new cards in each player's deck while making sure that each player inserted the same total Activation value (add the Activation value of the new inserted cards).
- Replace some old cards by new cards. A player can then replace an old card with a new one if they both have the same Activation value. Players must be attentive to which cards are being discarded, some having a great influence on the game (Bombardes, Jean II le Bon, …).
II. 2 Green Markers
The B29 and M30 cards introduce 2 new tactical chits:
- T19 De guerre lasse (war weary): The combat is cancelled. The Blois army's activation is finished. Remove this chit from the game after its use.
- T20 Kuzul Brezel (war council): The Blois player can choose to retreat before combat. The activation then continues normally. Remove this chit from the game after its use.
III. 2 Leaders
The Jeanne counters are placed in a friendly area when their respective husband is captured or killed. They stay for 2 turns and then are discarded (no victory points) during phase F. They act like leaders except that they cannot recruit or fight external wars.
Special abilities:
- Jeanne de Flandre (wife of Jean de Montfort): She can use the tactical chit T10 without having to actually draw it. It is still removed after use. Historical note: If Jeanne de Flandre was a war leader, she had a very short political life.
- Jeanne de Penthièvre (wife of Charles de Blois): She can control a non-fortified city of the county of Saint-Brieuc or Bro Dreger without an additional movement point (3.1). Historical note: Jeanne de Penthièvre, despite being the real Blois leader, never led an army to combat.
IV. 20 Grey Markers
They indicate that the events of green coat of arms cards have already been played. They also indicate other important events:
Edward III roi de France (M01); Bombardes (M02); Exécution de nobles bretons (M04); Crécy (M05); Thomas Dagworth (M12); Bases anglaises (M21); Poitiers (M22); Du Guesclin va en Normandie (M25); Skuizh é vrezeliñ (M30); Cahours change de camp (B03); Croquart (B04); David II d'Ecosse (B06); Clément VI (B10); Jean de Normandie (B12); Bombardes (B13); Combat des Trente (B15); Bases françaises (B19); Etats généraux de Bretagne (B20); Trêve de Bordeaux (B25); Bertrand du Guesclin (B28).
V. Variant
For clarity reasons, the original (before the war) coats of arms of Charles de Blois and of Jean de Montfort have been chosen. In this extension, the variant allows you to use the temporary coat of arms worn by Jean de Montfort (son) by replacing his leader counter [the source document ends here]