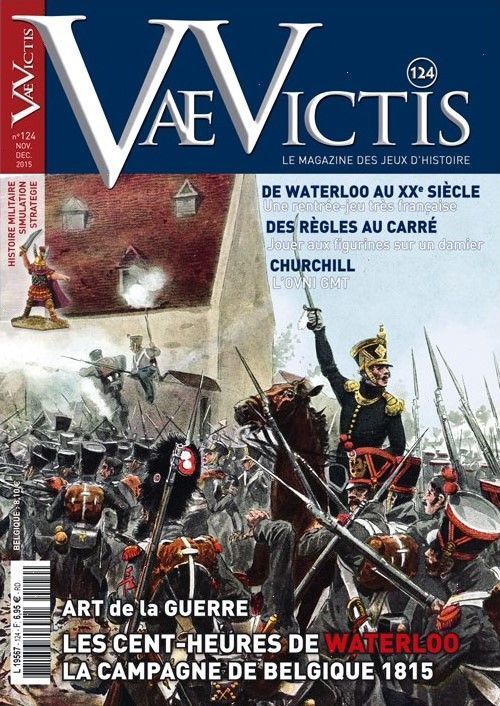
Les Cent-Heures de Waterloo: La Campagne de Belgique, 1815
Les Cent-Heures de Waterloo: La Campagne de Belgique, 1815 Rulebook
Table of Contents
Table of Contents
0.0 - Design notes
Napoleon had established the seizure of Brussels, destroying the armies that opposed him along the way, as the goal of the campaign and the designers of the game decided to take up this objective. Because Wellington never intended to withdraw to the current capital of Belgium in the case of defeat, this city is not a depot for the Anglo-Allied army in the game. Wellington specifies this decision in several letters from the spring of 1815 as well as his intentions to fall back to cover Antwerp where the British fleet was stationed. For this reason, the only Anglo-Allied depot is at Audenarde (called Oudenaarde in English).
The game concentrates on the eastern zone of the map, the "historical" zone. The number of connections between the zones does not allow for scattering units but does allow for the attempt of openings by turning movements if the enemy can be led into the trap. Napoleon, Wellington and Blücher have the same tactical bonus given their respective behaviors during this campaign. Blücher's tenacity and drive, Wellington's sang-froid and resistance, and Napoleon's legendary lack of vision that did not justify placing him above his adversaries.
The positioning of depots and the obligation to maintain of a line of communication by the 3 armies is destined to avoid unlikely cavalcades at the heart of a non-airtight enemy presence - to prevent an army corps from taking possession of a decisive point on the map without concerning itself with its way out. The designers preferred to favor the outflanking maneuvers that are always more interesting than frontal clashes. They chose to make it very difficult to completely destroy a counter because it is in pursuit that most of the losses occur (which does not date from the Napoleonic wars). At Ligny, despite significant losses, the Prussian were able to reorganize - "miraculous reorganization" must be taken ironically - which would not have been possible if the French army had pursued them. Moreover, losses are counted in deaths, wounded and disappeared and these latter two categories are always greater than the dead. Many of them were back in the ranks the following day.
1.0 - Components
1.1 - Counters
There are three types of counters: units, commanders and markers.
1.1.1 - Armies
There are three armies. The French player controls the French army. The Allied player controls the Anglo-Dutch and Prussian armies. Although they are allies, these two armies have independent morale markers and can therefore be demoralized independently. The two army commanders cannot be in the same zone at the same time. A corps of one of the two allied armies may be deployed to a wing of the other army by using the "march to the sound of the guns" marker only.
1.1.2 - Units
Two units represent a corps or the equivalent. The counters have two sides. The recto represents the unit in order and the verso the disorganized unit. Each side provides information on its identification, strength rating (bottom left) and its stacking value (bottom right).
There are three types of units:
- Infantry units (a half-corps or the equivalent).
- Line or light cavalry corps: On these counters, value 1 corresponds to the value during battles, value 2 is used for pursuits (8.7.1).
- Heavy cavalry reserve corps that only provide bonuses in combat (8.5.3).
Note: There are two types of cavalry: heavy (bonus in combat only) and light/line (units with a combat/pursuit factor). The heavy cavalry is the breaching cavalry (cuirassiers, guard) committed only during battles. The light/line cavalry (dragoons) is charged with reconnaissance, flank guard and intervenes in battles but by simply adding its combat value. Light cavalry units are adapted to reconnaissance missions. There is no specific rule concerning them aside from their free activation point and the possibility to retreat if they meet a greater strength since reconnaissance clearly was not great during this campaign. We recommend using them to get rid of decoy counters whose blocking power can be significant.
Regarding the infantry units, note that the notion of a corps is important for movement on the map (1.4), for set-up (3.0) and for the wing commanded by Ney (1.1.3).
Note: Cavalry corps have a stacking value of zero.
Note: All the Prussian corps are infantry corps even if the outline is a cavalier.
1.1.3 - Commanders
The recto of the commanders of a wing or an army is anonymous, allowing for the simulation of the fog or war at the beginning of the game. The verso indicates the identity of the commander of the wing (for the French) or of the army for the Allies. His initiative capacity and any tactical bonus are also indicated. There are also decoy counters with an identical verso. These are used at the beginning of the game and if one of the players uses the strategic event "decoy".
Special rule: Marshal Ney's tactical factor goes from +1 to 0 if he commands more than one corps.
1.1.4 - Markers
There are four types of markers:
- The "Turn" marker that keeps track of the game's progress.
- "Army morale" markers to be placed on the track to mark each army's morale level. When this level reaches 0, the army is demoralized.
- "Battle" markers associated with a number of phases (2 or 3) to serve as a reminder of the battle's duration (see 7.2.6 and 8.1).
- "Events/Activation" markers which are drawn at the beginning of each turn. On the recto, they display an activation point (AP) value, on the verso, they may display an event. They are held by the player with the recto visible. The markers may be held onto from one turn to another without limit. Markers are discarded once they are used.
1.2 - The Map
The map represents the region of Belgium and northern France where the campaign took place and encompassing the principal roads and paths that the troops followed. The zones correspond to the various stages and are of three different types: clear, difficult and depots. Difficult terrain is identified by the number 3, indicating its maximum stacking value.
Each army possesses one or more depots indicated by a star-shaped zone: the zones marked A (The Cateau), B (Avesne) and C (Rocroi) for the French; Audenarde for the Anglo-Dutch; and Namur and Wavre for the Prussians. A depot may be a difficult zone (example: Audenarde).
The units and commanders must always be placed in a zone. The distance between two zones represents between 5 and 20 km depending on the state of the lines of communication. Links between zones are called connections.
The map also features the turn counter, the morale counter for each army and the battles table.
Description of counters (diagram labels, as printed on the rulebook page):
Infantry: recto, verso, corps, half-corps, strength, stacking value, quality, tactical bonus, decoy. Commanders: recto, verso, die modifier in combat. Line cavalry: recto, verso, strength/movement, "indicates that the unit has been disorganized". Heavy cavalry: verso.
1.3 - Dice
The game requires the use of several six-sided die noted as d6.
1.4 - Definitions
- A free zone is a zone without any non-disorganized enemy units.
- A contested zone is a zone occupied by one or more units from both camps.
- A "line of communication" is a succession of connections of free zones between a zone on the map and a free depot of the same faction. Decoys do not interrupt a line of communication.
- Throughout the game, decimals are rounded up to the nearest whole number.
Stacking
- A zone of clear terrain may not contain more than 10 stacking points of the same player (those of the enemy army do not count).
- In difficult terrain, one may not stack more stacking points of an army than the value of the zone (those of the enemy army do not count).
- One may only stack units (wings or an isolated corps) in a zone containing enemy units to initiate a battle or in the case of pursuit.
Note: Zones with stacking limits (identified by the number 3) are those containing bridges over significant waterways or more urbanized zones. The stacking limit is taken into account during movement crossing these zones.
2 - Object of the game
The campaign is dissymmetrical. The goal of the French player is to take Brussels. If he succeeds in installing at least one non-disorganized infantry unit there before the end of the 8th turn, he automatically wins the campaign. If the French army's morale falls to 0, the Allied player is victorious. If the morale of the Anglo-Dutch and Prussian armies falls to 0, the French player is victorious. Any other case means victory for the allied player. There can be no tie.
3 - Set-up
The players place the turn marker on Turn 1 (15 June) and the morale markers on the squares indicated by a flag on the morale counter (24 for the French, 14 for the Anglo-Dutch and 16 for the Prussians). Starting with the Allied player, the players establish the battle order of their wings/army by dividing their infantry, line/light and heavy cavalry corps respecting the following restrictions:
- Each wing/army must contain at least one complete infantry corps (i.e. at least two units of the same corps).
- The heavy cavalry must be deployed to a wing/army; it cannot form an autonomous corps that moves about the map.
- The French player cannot deploy autonomous units at the beginning of the game (but he may make some units autonomous at this point).
- The three corps of the Imperial Guard must be deployed to the wing commanded by Napoleon.
Then, the French player places his three wing counters as well as his three "decoy" counters face down in the three possible deployment zones (blue zones marked A, B, C). Next, the Allied player deploys his two armies, his two decoy counters (one for the Anglo-Dutch, one for the Prussians) and the corps not incorporated in the battle order of one of the armies in the zones indicated on the map: red for the Anglo-Dutch and gray for the Prussians. He must respect the stacking instructions (see 1.4). The players place the "event/activation" markers in a container next to them (30 for each player). The French player begins the game with the "Duchess of Richmond's Ball" event already in hand.
4 - Sequence of play
Each game turn proceeds according to the following phases:
- Initiative Phase
- Events Phase
- Operations Phase of player A
- Battle Phase of player A
- Operations Phase of player B
- Battle Phase of player B
- Morale Phase
5- Initiative
On the first turn (15 June), the French player benefits from the initiative and plays his operations phase first. Starting with the second turn (16 June), each camp rolls 1d6 and adds the initiative value of all their commanders. The army with the higher total wins the initiative. The French player wins in case of a tie. The army that obtains the initiative chooses his action order (A or B) for the operations and battle phases of the turn. The player whose turn it is to carry out his operations and resolve the battles he initiated is called the in-phase player.
5.1 - Strategic events (*)
The players who wish to do so may play strategic events markers (6.2) at the beginning of the initiative phase, before rolling the dice. Their effects last until the end of the turn (except for decoy markers). The marker is discarded at the end of the morale phase.
5.1.1 - Decoy counters
The allies possess decoy markers that allow them to place or move (if both are on the map) a decoy counter. This counter must be positioned so that it can trace a line of communication with one of its depots (Audenarde for the Anglo-Dutch and Wavre or Namur for the Prussian).
6 - Event/Activation
Event/Activation markers are drawn during the events phase of each turn. For this, the markers are placed in an opaque container and drawn at random. Each of the players receives his own container and his own markers. He cannot draw a marker from his opponent's container.
There is no limit to the number of event/activation markers a player may keep in his hand from one turn to the next. Markers not used during a turn are not lost. Those that are used are discarded.
6.1 - Drawing procedure
For each turn, players draw as many markers as the cumulative initiative value of all their wing commanders. The base value is four for each camp but can be modified by strategic events markers ("The Emperor's Hemorrhoids" for example) or by the elimination of a wing commander (demoralization of a faction for the allies or surrounding for all).
It is possible, although rare, that a player only has two markers left to draw in the eighth turn. In this case, he has exhausted his strategic reserve (and the legs of his troops) and must be satisfied with that.
6.2 - Use as an event
These markers may be used in two ways. Some have the name of an event on the verso which refers to an effect indicated on the tables 10.2.1 (French player) and 10.2.2 (Allied player). The players may spend these markers to apply the effect. There are two types of events: strategic events, marked with an asterisk (*), that must be played at the beginning of the initiative phase (see 5.1) and the tactical events that must be played during the battles (see 8.0).
6.3 - Use for activation
The markers may also be used to activate wings/armies or independent corps (see 7.1).
7 - Operations
Each player must carry out his entire operation phase in the order chosen by the player who benefitted from the initiative.
7.1 - Activation
Each wing/army commander has as many activation points as his initiative value (which may be modified by an event). He may increase his capital in activation points by spending event/activation markers. If these markers are used in this way, they are then discarded and cannot be used for their event value if they have one (markers with 2 or 3 activation points). Each activation point is used to carry out one of the following actions:
- move;
- enter into contact with the enemy;
- reorganize.
A wing/army consisting solely of cavalry corps exceptionally possesses +1 additional activation point.
Isolated units have no activation points and must therefore spend markers to be activated (7.2.3).
Note: The AP of an event/action marker can be distributed over several actions. Example: if a player wishes to move two stacks and only has one marker worth +2, he may spend 1 AP for each stack.
7.2 - Movement
Connections are only used for movement. Units (corps or wings) must be placed in one of the zones on the map. Moving a unit or a wing/army one connection costs:
- Full connection: 1 point
- Dotted-line connection: 2 points
- Entering difficult terrain: 2 points
- Entering into contact with the enemy: +1 point for a 2-phase battle or +2 points for a 3-phase battle (see 7.2.6).
- Escaping pursuit: +1 point (see 7.2.7).
Important: As soon as a wing counter is moved, it is turned over. A decoy counter may not be moved. The French counters are removed after the beginning of the 1st turn (they are only there to add to the fog of war for the positioning of the Allies). The Allied counters are removed when they are contacted by a French troop. They may be repositioned on the map through the use of a decoy counter.
7.2.1 - Movement of wings/armies
A wing commander may use his entire Initiative Value plus a certain number of AP from event/activation markers to total 5.
Note: therefore, no wing may use more than 5 activation points per turn to move.
7.2.2 - Napoleon's case
On the French side, Napoleon is the commanding general and may move with him all the wings present in the same zone at no cost. These wings must not have moved previously during the turn and cannot move again during the turn except in the case of pursuit.
7.2.3 - Allied armies' case
Wellington's and Blücher's armies may not be located in the same zone. The two armies may exchange units by activation or with the "march to the sound of the guns" marker. However, an army general may not move with him the troops of another army. If the Allied player wishes for these troops to remain associated, he must move them as independent units (see 7.2.4).
7.2.4 - Independent units
Independent units move in the same way as wings/armies. A player may spend up to 3 activation points per independent unit.
Units of the same corps move simultaneously if the player wishes.
Note: moving 2 units of the same corps at the same time does not double the number of activation points necessary.
Cavalry corps benefit from an additional free activation point.
Note: therefore, they may use a total of 4 activation points.
If a player wants a unit to leave a wing/army, he removes it from his battle order and moves it on the map for the cost of an activation. A unit may not leave a wing after it has been activated. A corps may not join a wing until it has been activated.
A player may leave units that belong to a wing/army in a zone when he leaves it. This action does not require spending additional activation points.
7.2.5 - Difficult terrain
The zones in difficult terrain are indicated by a number that corresponds to a stacking limit. They impose the following restrictions:
- A wing or corps that enters into difficult terrain must stop.
- The sum of the stacking points of all the corps of a player present in this zone may not exceed the stacking limit for the terrain.
Reminder: only infantry corps have a stacking value, cavalry corps have a 0 stacking factor.
7.2.6 - Entering into contact with the enemy
When an independent corps or a wing enters a zone containing non-disorganized enemy units (corps, wing, decoy counter), it is said to enter into contact with the enemy. At the moment they enter into contact, the player decides if he wants to engage in a 2-phase battle (the battle begins in the afternoon) by spending an additional activation point or a 3-phase battle (the battle begins in the morning) by spending 2 additional activation points. If the visible side of the enemy unit is the verso, it is turned over. If it is a decoy, it is removed from the map. In this case, the unit or the corps that came into contact with the decoy can no longer be activated.
7.2.7 - Escaping pursuit
A wing or a corps that is disorganized following a battle and that is pursued can spend action points to escape pursuit. Movement occurs toward a zone free of enemy troops and costs an additional activation point. If he wishes and has enough activation points in reserve, his opponent may spend the number of points required to continue the pursuit and adhere to the following restrictions:
- He may not pursue into a zone containing non-disorganized enemy corps.
- He is bound by the same terrain restrictions as for normal movement.
This movement is one of only two cases in which a player may use activation points during the enemy's phase (the other is withdrawal movement, see 8.1).
7.2.8 - Movement example
Wellington (value 2) is stacked with the two counters of the 1st corps and a counter of the 2nd corps at Hal. He wishes to attack a French wing at Nivelles and engage in combat. He must spend two points to cross the difficult paths (depicted by a dotted line connection) that lead to Nivelles. For this he uses his initiative value of two. He must then use a +1 activation counter to engage a two-phase battle or a +2 activation counter for a three-phase battle.
7.3 - Reorganization
The in-phase player may spend activation points to reorganize his troops at the cost of one activation point for each organized unit. To reorganize a unit, the following conditions must be respected:
- The unit must be in a wing's battle order (meaning not independent).
- The unit must not be stacked with enemy troops (possible only in the case of pursuit).
The player may choose to carry out these reorganization actions before or after a movement or a battle. The cost in activation points does not count in the number of activation points used for the move.
8 - Battles
Battles take place after the movement phase. A battle occurs as soon as a corps or one or more wings enter into contact (see 7.2.6) with one or more non-disorganized enemy units. The in-phase player who initiated the battle is called the attacker and his opponent the defender. The attacker chooses the order of resolution of battles if there is more than one during the same phase. The players place their units and any commanders that are present face to face on the battlefield. Each battle proceeds according to a strict and unchangeable order:
- Calculation of the duration of the battle
- Withdrawal
- Grand Battery
- The Battle
- Rout and Retreat
- Pursuit
- Effects on Morale
8.1 - Duration of the battle
The attacker decides the duration of the battle according to the number of activation points he spent to contact his opponent. If he spends 1 point, the battle lasts 2 phases, if he spends 2, it lasts 3 phases.
8.2 - Withdrawal
8.2.1 - Withdrawal of disorganized units
A disorganized independent unit or a wing composed only of disorganized troops with an axis of retreat toward a free zone must withdraw. To do so, the defender spends one or more activation points depending on the movement to be carried out. If he doesn't have any activation points in reserve to be spent, this is an automatic rout. The amplitude of this rout is automatically two zones (see 8.6.1). The attacker may then choose to pursue if he respects the criteria defined in 8.7.
8.2.2 - Withdrawal of cavalry
An independent cavalry corps with an axis of retreat toward a free zone may choose to withdraw. To do so, the defender spends one or more activation points depending on the movement to be carried out. If he doesn't have any activation markers left to carry out this movement, the combat proceeds normally.
8.3 - Tactical events
The players may play one or more tactical events markers. Some of them must be played at the beginning of the battle (beginning with the defender) and their effects continue until the end of the battle.
Example: strategic advantages, half-heartedness of the Dutch troops, 1st corps, etc. They are then discarded. The others are played in reaction.
Example: "reverse slope" is played if the grand battery has brought about a disorganization, the "square" counters in reaction to a charge by enemy heavy cavalry, etc. They are played, beginning with the attacker, during the phase in which they apply, after calculating the strength ratio and declaring the heavy cavalry charges.
8.3.1 - March to the sound of the guns
When a player plays the "march to the sound of the guns" marker, he may move one or more corps from an adjacent zone. This or these corps must adhere to the following conditions:
- they must not be engaged in a battle;
- they must not be disorganized;
- they must respect the stacking rule if the battle takes place in a zone in difficult terrain.
A corps that marches to the sound of the guns always arrives during the second combat phase and cannot therefore participate in the first phase. As a reminder, the player who marches to the sound of the guns can place the concerned corps in the "march to the sound of the guns" square on the map. The Allied player may have corps of an army march to the sound of the guns toward a battle that engages units of the other army.
8.4 - Grand battery
If the battle lasts three phases (beginning in the morning) and Napoleon, the Foot Guard and at least 2 other corps are present, the French player may activate his grand battery at the beginning of the battle. He rolls 1d6. On a result of 5+, he disorganizes an enemy unit (chosen by the opponent).
8.5 - The Battle
For each phase, the two players take the sum of the strength steps of their infantry and line or light cavalry corps that are present. These corps may belong to wings of different armies. They calculate the strength ratio (from 1:3 to 3:1) then the attacker rolls 1d6 modified by any bonuses or penalties. He then checks the result on the Battle Table (8.5.1) that indicates the number of disorganized corps in each camp for the phase.
Note: strength ratios are always rounded down, for example 7:2 becomes 3:1.
8.5.1 - Battle Table
See page 14. The table is reproduced under "Battle table" at the end of this rulebook.
8.5.2 - Tactical Bonuses
Commanders of wings or an army may intervene during the battle by way of their tactical value. The attacker adds his to the result of the battle die roll and subtracts that of the defender. If several wing commanders are present, the player chooses a single tactical bonus. If Napoleon is present, his tactical bonus is automatically taken into consideration.
8.5.3 - Heavy cavalry
The French player has four corps of reserve heavy cavalry (two Cuirassiers, two mounted Guard) and the Allied player has one corps (British Household). During a battle these corps are used differently from the infantry and the line cavalry. If non-disorganized heavy cavalry corps are present during the battle, the players announce at each phase, beginning with the attacker, if they plan to have them charge. A player can use a corps to add one bonus point on the die if he is the attacker and subtract it if he is the defender. A cavalry corps is disorganized after a charge. It can be reorganized according to the same procedures as the other corps (7.3).
8.5.4 - Tactical events bonuses
Certain events markers procure tactical bonuses during one of the battle phases or counter those of the adversary. They are played beginning with the defender.
Important: tactical bonuses are cumulative.
Example: the attacking French player engages a unit of heavy cavalry (+1 on the die) and plays the tactical marker "Milhaud" (+1 on the die if heavy cavalry is engaged), the French player has +2 on the die for this combat phase.
8.5.5 - The Imperial Guard
Napoleon had the habit of keeping his Imperial Guard in reserve and only engaging it as a last resort. To simulate this, the French player cannot engage the Foot Guard unit until the second phase of a battle. It does not count in the calculation of the combat point ratios during the first phase of the battle (like a unit that marched to the sound of the guns). If the number of disorganized units exceeds the French units that combatted during this first phase, additional disorganizations cannot be allocated to the Foot Guard.
8.5.6 - End of the phase
If the two camps still have units in order, the two players begin the following phase until they have accomplished the number of combat phases chosen by the attacker (two or three).
8.6 - Result of the battle
8.6.1 - Rout
If one of the two camps has no more corps in order, he loses the battle and must rout. The rout movement must be executed in zones free of enemy troops. The amplitude of this movement depends on the number of phrases remaining. If there are two phases, this movement is two zones, if there is only one or none, this movement is one zone.
If the movement is blocked by the presence of enemy troops, the corps and commander of a wing/army are eliminated.
When the defender routs, he cannot do so toward the zone(s) where the attacker entered into contact with him. If there are no other zones possible, the troops are eliminated.
In certain exceptional cases, the two opposing armies in a battle may be in a condition to rout. If so, the defender routs and the attacker may freely reorganize one of his infantry or light cavalry corps. He may not pursue (see 8.7).
8.6.2 - Retreat
If the attacker does not succeed in disorganizing all of his opponent's troops, the battle is non decisive and he must retreat to his starting zone.
8.7 - Pursuit
The victor of a battle may choose to pursue with an independent corps or one or more wings.
8.7.1 - Pursuit conditions
In order to pursue, the chosen troops must adhere to the following conditions:
- may not be disorganized;
- comprise at least as many strength steps as the total value of the disorganized troops that rout. For this calculation, the light cavalry corps (three for the French, one for the British) counts as 2 strength steps.
- spend AP (use one or more event/activation markers in reserve).
In addition, in no case may the pursuing troops penetrate a zone where there is at least one non-disorganized enemy corps. If this occurs in the second movement of a pursuit, the pursuers stop in the first zone of pursuit.
Decoys do not hinder pursuit. If pursuing troops enter a zone containing a wing/army counter on its verso, it is turned over. If this is a decoy, it is removed and the pursuing troops may enter the zone. Otherwise, they stop before entering.
8.7.2 - Effect of the pursuit
The pursuing wing remains stacked with the pursued troops, preventing them from reorganizing. The controlling player must attempt to escape the pursuit in order to reorganize (see 7.2.6).
8.8 - Effects on morale
Players lose 1 morale point:
- per unit of disorganized infantry or line/light cavalry;
- per rout zone (2 maximum);
- in the case of retreat.
The victor of a battle (after rout or retreat) gains back one morale point. He may not exceed his initial maximum.
8.9 - Reorganization
If the attacker won the battle, he may spend activation points to reorganize his disorganized corps (7.3).
8.10 - Combat example
Let's look again at our movement example (8.7.8). The French wing at Nivelles includes Marshal Grouchy commanding the French 1st corps (2 counters), the 2-3rd corps, and the 4th cavalry corps. Wellington has 3+3+3 = 9 strength steps and Grouchy 3+3+2 = 8 strength steps. The strength ratio is therefore 9/8 or 1/1 and Wellington has chosen a 2-phase battle.
- First combat phase: Grouchy plays the event counter "Vandamme" that modifies the battle die by -1. Wellington does not play any counters. Die roll = 4 modified to 3 by the "Vandamme" counter. The battle results table gives 1D/1A. Grouchy disorganizes a counter, the 1-Ist corps moves to 2 strength steps and Wellington's counter of the 2nd corps moves to 2 strength steps.
- Second combat phase: The strength ratio is now Wellington 3+3+2 = 8 against Grouchy 3+3+2 = 8 for a result of 1/1. Grouchy decides to engage the 4th cavalry corps that modifies the battle die by -1. But Wellington plays "square" which cancels out the French heavy cavalry charge. Therefore, there is no die modifier. Die roll = 4. Result 1D/0. Grouchy disorganizes the other counter of the 1st corps and the 4th cavalry corps since it was engaged. However Grouchy still has one counter in order. The battle, therefore, is indecisive and Wellington must withdraw toward Nivelles, his starting point. Since Wellington must retreat and has a disorganized counter, the British army loses 2 morale points. Since Grouchy has two disorganized corps but won the battle, the French army loses 1 morale point.
9 - Morale phase
9.1 - Discarding of events
At the beginning of this phase, the players discard the strategic events markers played during the turn.
9.2 - Demoralized army
If one of the allied armies (Anglo-Dutch or Prussian) is demoralized, its troops (wing commanders and independent corps) are removed from the map. If the French army is demoralized the Allied player immediately wins the game.
9.3 - Destroyed army corps
For a stack of counters to be supplied, it must be able to trace a path free of zones occupied by the enemy toward one of its depots. If during this phase an army unit or a commander of a wing/army cannot trace a line of communication to one of its depots, it is destroyed. If this is an allied army, the faction is demoralized and units present on the map are immediately destroyed.
9.4 - Victory conditions
If the French army is demoralized, the Allied player wins the game. If the two armies of the Allied player are demoralized, the French player wins the game.
If the French player occupies Brussels with non-disorganized infantry troops and if the Allied player's only troops present are disorganized, he wins the game. In the unlikely case that the Allied armies and the French army are disorganized at the same time, the French player wins a marginal victory and the Allies withdraw to their bases. If after the last turn the French player has not succeeded in fulfilling one of the victory conditions, the Allied player wins.
9.5 - Advancing the turn marker
If none of these conditions is met, one of the players moves the turn marker ahead and the players start a new game turn.
10 - Solo play
Here are some principles to play 100 Hours as a solo game.
After choosing his side, the player positions the troops of his opponent after having positioned his own and forms the corps respecting the following rules.
- French opponent: At least one infantry and one cavalry corps per general, no more than one infantry corps for Ney and at least two infantry corps for Napoleon.
- Allied opponent: At least two half-corps per nationality (two for the Anglo-Dutch, two for the Prussians) deployed directly on the map. Once the corps are formed, the player mixes up the enemy generals with the decoy counters and places them face down on the table.
During the game, the player must follow the following rules when he plays the opponent's turn:
- The opponent always takes the initiative if he has the opportunity to do so.
- The opponent plays the events if he has the immediate opportunity to do so, otherwise he uses all of his initiative points (for example, if it is not possible to engage a battle during this turn, he uses an infantry general counter for his initiative points, unless the player hasn't played yet and is in a position to engage a battle himself).
- If the opponent is French he must advance at least 2 of his corps by one square or engage a battle.
- If the opponent is allied, he may never engage a battle unless it is on troops of the player that are in position to take Brussels or to cut off part of his troops from a depot.
- In the case of battle, the opponent uses all the advantages in his possession during each battle turn as soon as possible (general counters, heavy cavalry, etc.).
- If pursuit is possible, the opponent will always pursue unless the only troops available for the pursuit are Anglo-Dutch. In the case of ambiguity, choose the option the least favorable to the player.
Game advice: The French player must separate the two adverse armies, push them back successively to reach his strategic objective and/or begin a campaign of attrition to demoralize both of them. This is a design choice if there are no tie games. Napoleon had to win or lose and not finish with a half result.
Tables
Army of the North
| Name | Effect | Act. |
|---|---|---|
| Fall of Blücher* | Blücher's initiative and the tactical factor fall to 0 for a turn. | 3 |
| The Duchess of Richmond's Ball* | Wellington's initiative and the tactical factor fall to 0 for a turn. | 3 |
| Shit! | The Guard dies and does not surrender. Saves the Guard from a disorganization. | 3 |
| Kellermann (Cavalry gen.) | Modifies the die by 1 in the player's favor if a heavy cavalry unit is engaged | 2 |
| Milhaud (Cavalry gen.) | Modifies the die by 1 in the player's favor if a heavy cavalry unit is engaged | 2 |
| Vandamme (Cavalry gen.) | modifies the die by 1 in favor of the player for 1 battle phase | 2 |
| Half-heartedness of the Dutch | Disorganizes a British corps during a battle | 2 |
Allied army
| Name | Effect | Act. |
|---|---|---|
| Emperor's Hemorrhoids* | Napoleon's initiative and tactical factor of Napoleon falls to 0 for 1 turn. | 3 |
| Decoy* | Allows for the placement or replacement of a decoy counter on the map (respecting the placement for these counters). | 2 |
| 1st Corps | Disorganizes a French corps during a battle. | 3 |
| Bad weather | Reduces the duration of a battle from 3 phases to 2 (preventing use of the grand battery) | 3 |
| March to the sound of the guns | Authorizes the transfer of 1 or more corps toward a battle from an adjacent zone. The units arrive at the second battle phase. These units may not have already participated in a battle in the same turn. | 2 |
| Hougomont (Tactical Advantage) | Gives a penalty of -1 to the attack for the entire battle. Can only be used if this is the defender. | 2 |
| La Haye-Sainte (Tactical Advantage) |
Battle table
The table is read with the strength ratio of the two camps across the top and the attacker's die roll down the side. Each cell gives the number of disorganized corps for the defender (D) and the attacker (A), as "XD/XA".
| Die | 1/3 | 1/2 | 2/3 | 1/1 | 3/2 | 2/1 | 3/1 |
|---|---|---|---|---|---|---|---|
| 1 | 0/3A | 0/3A | 0/3A | 0/2A | 0/1A | 1D/1A | 1D/0 |
| 2 | 0/3A | 0/3A | 0/2A | 0/1A | 1D/1A | 1D/0 | 2D/1A |
| 3 | 0/3A | 0/2A | 0/1A | 1D/1A | 1D/0 | 2D/1A | 2D/0 |
XA = number of disorganized corps for the attacker XD = number of disorganized corps for the defender
Markers glossary
The English PDF gives the French marker names of the magazine edition as follows:
- Tour = Turn
- Marche au Canon = March to the sound of the guns
- Leurre = Decoy
- Bataille = Battle
- Evènements/Activation = Events/Activation
- Le Bal de la Duchesse de Richmond = The Duchess of Richmond's Ball
- Hémmorroïdes de L'Empéreur = The Emperor's Hemorrhoids
- Contre-pente = reverse slope
- Carré = square
- Chute de Blücher = Fall of Blücher
- Merde! = Shit!
- Tiédeur des Hollandais = Half-heartedness of the Dutch
- Intempérie = Bad weather