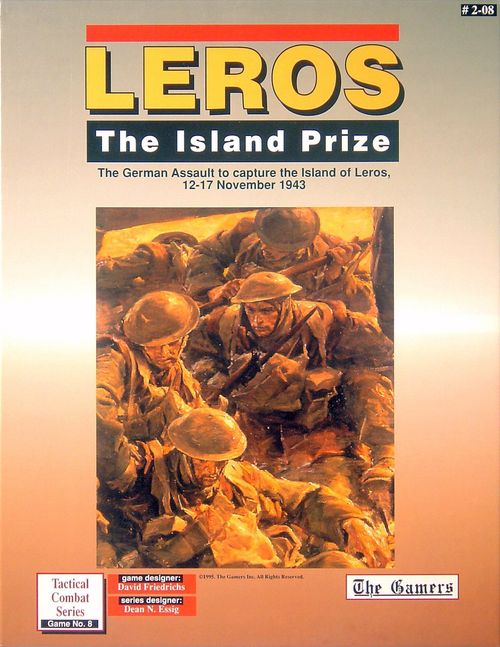
Leros
Leros Rulebook
Table of Contents
Table of Contents
- 1.0 General Special Rules
- 2.0 British Special Rules
- 3.0 German Special Rules
- 4.0 Minor Variants
- 5.0 Scenario Notes
- Scenario 1—The Curtain Rises
- Scenario 2—Drop-Zone Leros
- Scenario 3—Night Melee
- Scenario 4—The Big Show
- Scenario 5—The Curtain Falls
- Order of Battle
- Designer's Notes
- Developer's Notes
- Player's Notes
- Historical Commentary
- Annotated Bibliography
- Charts & Tables
1.0 General Special Rules
1.1 Terrain Notes
1.1a Woods. Woods hexes contain at least one complete tree within the hex. On Leros, there are only short scrub trees, so the woods are only 5 meters high, instead of the normal series height of 20 meters.
1.1b Building Hexes. Building hexes contain terra-cotta roofed building symbols. Village hexes contain white roofed building symbols.
1.1c Castle Leros. B51.17 is an ancient castle and presented a very defensible position during the battle. Area fires resolved against the Castle hex receive an additional two column shifts to the left. Prepared Defenses are allowed in the Castle's hex.
1.1d Rugged Terrain. Note that even Open terrain is considered to be Partly Protective for fire combat, sortie, and morale purposes (but is still considered to be Open for Spotting Range purposes). There is no terrain with Open combat effects on these maps.
1.1e Coast Hexes. Any hex that contains both land and sea in the hex is a coastal hex. If the center of the hex is in the sea, treat the elevation of the hex as Zero. Consider units in Pier Hexes to have an elevation of 5 meters.
1.1f Contour Interval. The contour interval on these maps is 25 meters (as opposed to the usual 20 meters).
Design Note: The terrain on Leros is extremely rugged. A quick look at the map will show that there are several areas on the map that exceed 30 degree grades (many points are vertical). In addition, there are innumerable rocky areas, areas covered by low scrub, terraced and folded terrain that could not be depicted on a wargame map. Finally, even where the ground is relatively clear and flat, the local farmers erected low (1 or 2 foot) walls of loose rocks along the edges of their fields.
1.1g Illum Scatter. When shooting Illum rounds, roll one die for direction, and another for distance. Scatter the Illum Shell to the resultant hex. No, it will never hit the hex actually intended.
A Complete Copy of Leros Includes
- 1x Box
- 1x TCS Series Rulebook (v3.1)
- 1x Game Specific Rulebook
- 2x Dice (one red, one white)
- 3x 22x34" Map
- 2x 280-counter countersheet
- 2x Charts & Tables Booklets
- 1x Registration Card
- 1x Current Price List
- Assorted Advertising Flyers
1.2 Sea Movement
Both the German and Allied players can use Sea Movement to move units to and from Leros.
1.2a Boats. Boats have no combat ability or modes; they exist only to carry ground units via Sea Movement. All Boats move one box per turn (three at night) along their Sea Movement Track (provided the weather is not Storm, see 1.4d).
1.2b Loading Points. The Loading Point Rating of each Boat is given on the Boat's counter. A Boat can carry a number of Loading Points up to its Rating. Each ground unit, regardless of type or size, counts as one Loading Point (i.e. one counter equals one Loading Point). Boats cannot be overloaded.
1.2c Heavy Loading Points. Some German ground units require booms for loading and unloading—these unit counters are Heavy Loading Points. There are no British Heavy Loading Point units requiring Sea Movement. Heavy Loading Point counters are the 120mm Mortars, the 88mm AT Guns, the Halftrack Mounted AA Guns, and the Artillery Howitzers.
- A) Heavy Loading Points can only be carried by Boats with the Two Triangle Heavy Loading Point indicator symbol.
- B) Heavy Loading Point counters can only be unloaded in a friendly occupied Pier hex. Such units cannot be unloaded during Storm turns. Heavy Loading Point units cannot move in the turn they unload, but are subject to Overwatch fires at the moment of unloading. Should the Boat arrive at its Landing Zone only to find the pier to be held by the enemy, the boat automatically aborts (no step losses) and returns to its holding box.
- C) Heavy and regular Loading Point units can be freely mixed on a Boat.
Play Note: Landing Zones containing piers are identified on the Sea Movement Tracks by the Red Boxes.
1.2d The Movement Tracks. Each player has a Sea Movement Track to carry Boats (and their loads) to or from their Holding Box to Leros. A Boat can only remain in place in the side's Holding Box OR if it fails the Storm die roll (1.4d), otherwise, Boats must continue to move. Boats cannot reverse course after they leave the Holding Box—unless they either unload or get an Abort result. Any number of Boats can occupy a given Sea Movement Box.
1.2e Embarkation & Trip Initialization. Boats in the Holding Box are ready for a trip. They may remain in the Holding Box without a trip assignment indefinitely. During any friendly Action Phase, a player can begin a trip by assigning a unit load to a Boat in the Holding Box. Place the Boat counter on top of its load and note the trip's Landing Zone on a scrap of paper. There are 16 Landing Zones which divide the coast of Leros into limited beaches. The player can choose any Landing Zone when assigning a Boat's trip, but he cannot change it later. Once a Boat is assigned a Load and a Landing Zone, it must immediately begin to Move toward that Landing Zone, advancing into the first box of the Sea Movement Track in that Action Phase.
1.2f Landing Zone Arrival. Continue the movement of the Boat and its contents on each succeeding Action Phase until the Boat reaches the Sea Movement Track Box adjacent to the number of its Landing Zone. At the beginning of the Action Phase after the Boat makes it to this last Track Box, shift them to the Approach Box, and execute Italian Coastal Gunfire (1.2g). Then place the units in any coastal hex of their assigned Landing Zone. These units begin in Move Mode and may move normally in that Action Phase. (See also the restrictions on Heavy Loading Points, 1.2c). The Boats themselves remain in the Approach Box that turn and begin their return trip in the following turn. Other than the Italian Coastal Gunfire, there is no fire combat against or from Boats.
Units always land with an implemented Op Sheet, which must be drawn up before the force leaves the Holding Box or when the game begins (if a force starts a scenario at sea). The Op Sheet can be of any type except Prepared Defense and is automatically implemented before the landing takes place—so ignore the accumulation of weighted turns associated with the regular implementation cycle.
1.2g Italian Coastal Gunfire. Italian Coastal Guns only attack German Boats. Each coastal battery is identified on the map as a terrain feature and has a Fire Value. The Battery Summary gives the Fire Values and Landing Zones covered by each battery. A given battery can only fire into one Landing Zone in a single turn.
A roll is ONLY made on the Coastal Gunfire Table if the total Fire Value directed at a Landing Zone is greater than zero.
If a battery's hex is occupied by an enemy unit at any time (including Parachute Assaults), the battery is destroyed. Batteries cannot be repaired by either side.
The Italian Coastal Guns cannot affect (and are not affected by) air or ground combat (other than by being occupied).
Each Landing Zone can be fired on by a fixed number of batteries (see the Battery Summary). Each battery can fire into any number of Landing Zones in a given turn. Determine the total Fire Value applied against the Landing Zone and roll on the Coastal Gunfire Table once for each Boat being fired on.
If a Boat is sunk, the Boat and its Load are destroyed. If the result is an Abort, kill one step from each Platoon-sized unit on the Boat and they cannot land. Aborted Boats must return to the Kos Box (see 1.2h). On any other result, there is no effect and the landing proceeds normally.
Design Note: The Italians had emplaced over 90 guns on Leros of various calibers (Russian 76, 107 and 152mm). They were placed for the most part on many of the hill tops around the island.
One might ask why the Luftwaffe cannot be used to take out these guns. Historically, the Luftwaffe spent weeks preparing the island for the invasion and were unable to make a dent in the Coastal defenses. Furthermore, much of the Luftwaffe support during the game is still devoted to that effort (sorties the player never sees)—all with the same lack of effect.
1.2h Boat Returns. An empty or aborting Boat in a Approach Box must move back to its Holding Box. This movement must begin the turn after the Boat is unloaded or Aborts.
1.2i Gilligan's Island. (Optional) Players are highly encouraged to listen to the Gilligan's Island theme song when conducting these Sea Movement functions—especially when a Storm occurs. The adventurous can sing aloud while playing. Humming is acceptable.
1.3 Surrender
Surrender only applies to campaign games. At any point on or after 0100 Nov 13, a player may demand the enemy's surrender. Each player can make TWO such demands. Roll one die. If the result is less than 6, the checking side surrenders.
Add ONE to the roll for every 10 counters (of any type or size) the checking side has in play on Leros at that moment. Round this modifier normally. Italian Coastal Gun positions do not count.
For example, the Germans call for surrender. The British have 29 units left on the island. The roll is modified by +3. If the result is 3 or more, the fight goes on, if 2 or less; the British surrender.
If both demands are unsuccessful, the enemy will not surrender. If both sides surrender on the same turn, make a second roll to determine who surrenders first; if 1-3, the British do, if 4-6, its the Germans.
No scenario begins with any Surrender demands used.
1.4 Weather
Weather limits Sea & Air Movement and Visibility. Air Movement only occurs in Normal weather. If the weather changes such that Air Movement is not possible, Air Movement in progress must abort and return to Athens.
In addition, Weather has the following effects:
1.4a Normal. Air sorties occur normally and there are no additional visibility limits.
1.4b Wind. Air sorties occur normally and there are no additional visibility limits.
1.4c Gale. No Air Sorties are allowed. Sea Movement continues normally. Visibility is limited as shown on the Weather Track. Smoke and Illum markers cannot be placed, and artillery Attack Zones do not block line of sight.
1.4d Storm. No Air Sorties are allowed. Visibility is limited as shown on the Weather Track. Smoke and Illum cannot be placed, and artillery Attack Zones do not block line of sight.
Boats no longer automatically advance along the Sea Movement Track during a Storm. The player must roll one die per Boat and the Boat only advances if the die roll is 5 or more. Otherwise, the Boat remains in place for the turn.
1.5 Minefields
There are no minefields in this game.
1.6 Automatic Transportation
The heavy AT guns (88mm), heavy mortars (120mm), heavy AA guns (Bofors), the British 2 Lbr AT Guns (due to their heavy base plate mounting), and on-map artillery of both sides are transported automatically by nominal trucks while in Move Mode. These units move with 12 MPs which are Vehicle MPs for terrain movement costs and Vehicles for Spotting Range purposes.
1.7 Assault Benefits
Certain units are better equipped and trained to handle assault-style combats. These are all the Engineer (Pio Company), Küstenjäger (Küst Company), Long Range Desert Group (LRDG), and Special Boat Service (SBS) units.
When these units participate in Assault-style combat (as attacker or defender), their fires receive a +1 shift on the Area Fire Table and, if they are the unit checking morale for their side in the combat, do not double their morale value for the Morale Table—use the regular value.
2.0 British Special Rules
2.1 Command and Control
2.1a British Commander's Intent. The British commander must hold Leros.
2.1b OP Sheet Limits. The British player is limited to 6 Implemented Op Sheets at any one time. In one-map scenarios, the British player can only have two Implemented Op Sheets at any one time.
2.1c Command Prep Rating. The British Command Prep Rating is 5.
2.1d Battalion Staff Modifier. The British do not receive the Staff modifier.
2.1e LRDG and SBS. The Long Range Desert Group and the Special Boat Service are independent units and are free to operate in any manner they wish (without Op Sheets). However, they must be part of an Implemented Prepared Defense Op Sheet to be Dug In. Even when not on an Op Sheet, these units can fire SFAs. These units are also Section sized—so don't forget they have only two steps per counter!
2.2 British Artillery
There is only one battery (18/25 lb guns) of British artillery (9 FA). There is no ammo resupply available.
2.3 British Air Support
In historical scenarios, there are no British aircraft. Only when playing the "Increased RAF Support" variant do the following apply.
2.3a Aircraft Type and Options. The only aircraft type available is the Beaufighter. See the back of each Sortie's counter for its attack ratings.
2.3b Availability. If the German Sortie Availability roll result is no aircraft, then the British player rolls on the British Sortie Availability Table. If the Germans get one or more sorties, there will be no British sorties.
2.4 Battalion Assets
Each British battalion has a number of units typically called the "HQ Company" but for simplicity are here referred to with only their battalion designation.
2.5 British Naval Gun Fire
The Royal Navy can bombard Leros. On each 1200 turn the British player can indicate two hexes for bombardment. Secretly note these hexes. Execute the attack during the following 2400 turn. Roll one die on that turn. On a 1 or 2, the attack is canceled, otherwise the attack proceeds. Conduct each attack as a 100mm Battalion artillery fire mission. Use the 4-6 hex Adjustment Table row, but no actual spotter is needed. The Royal Navy cannot fire Illum or Smoke; they can only fire HE.
Solitaire Play Note: The above rule might cause solitaire players a few problems, so those who actually want to be able to fire these missions should jot down five potential target hexes on separate scraps of paper during the 1200 turn and pull two of them randomly on the 2400 turn before rolling the cancellation die. Then proceed as above with the randomly chosen target hexes.
2.6 3-inch Mortars
While not technically the 80mm or larger called for in the series rules, British 3-inch Mortars can fire Smoke and Illum. 2-inch mortars cannot do so.
2.7 Historical vs. Free Set Up
Normally, scenario 1 is played with a free set up for the British. Players can also use the historical set up. The free set up allows the British at-start forces to set up as desired with the Op Sheets of their choice. Planned properly, the free set up can turn what might have been a confusing and frustrating first day of the battle into a delicious rat fight.
Shift the final victory one level in the favor of the British if the historical set up is used.
3.0 German Special Rules
3.1 German Command and Control
3.1a German Commander's Intent. The German commander must take Leros.
3.1b Available Op Sheets. The German player can have no more than 8 Implemented Op Sheets at any one time. In one-map scenarios, the German player can have up to three Implemented Op Sheets at any one time.
3.1c Command Prep Rating. The German Command Prep rating is 3.
3.2 German Artillery Status
3.2a Availability. The Germans have two batteries of 105mm artillery (3-Arty and 4-Arty). These batteries cannot fire until they land on the island.
3.2b Artillery Ammunition Levels. The Germans have no artillery ammunition at the beginning of any scenario. As each gun lands on Leros, increase the current Ammo pool by 8 HE, 2 Smoke and 1 Illum rounds.
3.3 German Air Sorties
3.3a Aircraft Types and Characteristics. There are three types of German aircraft: Me-109, Stuka, and Ju-88. See the back of each Sortie's counter for its attack ratings.
3.3b Availability. Roll for the number of Sorties during each Command Phase of Normal Weather DAYLIGHT turns. Roll one die on the German Sortie Availability Table.
Design Note: During the Battle of Leros, the Germans possessed complete air superiority and had superb coordination between the Luftwaffe and the ground forces. Reports vary, but on some days, the Luftwaffe flew over 500 sorties. Most analyses cite this factor as being the key to the success of the German invasion.
3.4 Battalion/Regimental Assets
Companies 4, 8, and 12 are the weapons companies for their respective infantry battalions. 13 and 14 companies are the Regimental weapons companies.
3.5 Army Group E Reserves (Campaign scenarios only.)
Starting on 1800 November 12, the German player can request the release of the Brandenburg Division's troops. Once the request is made, roll one die each hour turn. On a 6, the first reserve group is released and added to the German off-island forces. (The Para Co appears in the Athens Box; the rest appear in the Kos Box.)
After a release, further Reserves cannot be requested until 24 hours have passed since the last release. For example, say the German player requests reinforcements on turn 1800 Nov 12 and a 6 is rolled. The Para Co and 9-III-Brg are released. The next time that the German player can request reinforcements would be 1800 Nov 13.
The release order is:
- Para Co and 9-III-Brg
- 10, 11-III-Brg
- 5, 6, 7-II-Brg
When the second group (10, 11-III-Brg) is committed, the German player must force a British surrender in 72 hours or less. When the II-Brg is committed, the Germans must force a British surrender within 24 hours. In either case, the Germans lose the game if they fail to force a surrender in time.
Play Note: In scenarios where some of the Group E Reserves have been released, the player can roll for future releases beginning on the first turn of the scenario (provided Sea and Air Movement is in effect). In those scenarios, when played as campaigns, ignore the surrender time requirements above—they only apply to Scenario 1 when played as a campaign.
Design Note: The 1st Brandenburg Regiment was part of Army Group E's reserves at the start of the landings at Leros. The German high command was willing to commit two of these battalions to the battle if results would be attained. Historically, only one of these battalions (III-Brg) and the Parachute company were used.
3.6 Parachute Assaults
There are two parachute assault capable formations—the I-FJ Battalion and the Brandenburg Paratroop company (Para Co). All units in these formations may conduct Parachute Assaults, which can occur anytime during the day or night. All Air Movement ends in either a Parachute Assault or an Abort. No Op Sheet is needed to initiate an Air Drop sequence.
3.6a Direction of Drift. The German player must select his "Direction of Drift" before each drop. Do this by placing the Direction of Drift marker in the Scatter Diagram facing as desired. The Direction of Drift can be changed just before beginning any turn in which drops are to occur, but the same Direction of Drift must apply to all drops occurring in a single game turn.
3.6b Air Movement Track. Only units on the Air Movement Track can conduct Air Movement. Once a stack has its Drop Zone Hex assigned and recorded (see below) in the Athens Box, it can either enter the first Box of the Air Movement Track or remain in the Box. Once they begin movement along the track, they must advance one box per turn (three at night) along that track until the stack either aborts or enters the Leros Parachute Assault Execution Box. If the stack enters the Leros Parachute Assault Execution Box, execute the drop. In the same phase as the drop, place all empty Ju-52's into the first box of the Athens Return Leg track to begin the return flight.
3.6c Parachute Assault Planning. Parachute Assault Preparations begin during any German Action Phase. For each Drop Zone (company or battalion as desired), record any hex. No units smaller than a company can be assigned its own independent Drop Zone hex. Once assigned, the Drop Zone hex cannot be changed—unless the mission aborts and the stack returns to Athens. Ju-52's and their loads which re-enter the Athens Box can be freely rearranged and sent out again with new Drop Zone hexes, etc. as early as the next turn after they return.
3.6d Flights. All Air Transportation divides units into "Flights". In Parachute Assaults, a Flight can be one or two units. Each single counter, regardless of step size or type, counts as a unit for this purpose. Assign each Flight to a Ju-52. Write down the Drop Zone hex number and the Ju-52 ID number on scratch paper. A Ju-52 with an assigned load must remain as a stack and cannot be broken apart until either the Parachute Assault occurs OR the stack re-enters the Athens Box.
3.6e Parachute Assault. Execute Parachute Assaults in the same phase as each stack enters the Leros Parachute Assault Execution Box. Follow the sequence below for each set of Ju-52's assigned to a Drop Zone Hex separately. Make any Parachute Assault Landings as the very last action in the German Action Phase.
For each Drop Zone Hex (Company or Battalion) follow the routine below.
- Place the Drop Zone Marker in the plotted Target (or Drop Zone) Hex.
- Scatter the Drop Zone Marker by rolling one die for direction (according to the Scatter Diagram) and another for distance (DIVIDE the distance roll by 2 and round down). If the Drop Zone Marker shifts out to sea, move it to the last land hex available along the direction of scatter.
- Place the Drop Zone Marker in the resultant hex.
Then, for each Flight assigned to the Drop Zone, do the following:
- A) Roll one die and subtract 2. Displace the Flight along the Direction of Drift that number of hexes (a negative number would displace directly opposite the Direction of Drift).
- B) From that Drift Hex, roll one die. Place the Flight in the hex adjacent to the Drift Hex determined in Step A in the direction of this roll using the direction from the Scatter Diagram. Each Flight must land as a stack.
- C) Apply any automatic losses inflicted by the Parachute Loss Table, based on the range from each flight to the nearest British unit (of any type). British units further than three hexes away do not matter (even AA guns). LOS has no effect. These losses are inflicted on each unit of each Flight separately and these losses do not require Morale Checks or additions to Battalion Morale.
- D) Repeat A), B), and C) for all Flights using this Drop Zone.
3.6f Landing Atop to the Enemy. Any unit which lands on top of a British unit (of any type) is automatically destroyed. Italian Coastal Gun positions do not count for this rule. Parachute Assaults do not generate Overwatch Triggers.
3.6g Overstacking on Landing. German units can overstack without penalty in the Action Phase of their drop. Such overstacked units must split up by the end of the next German Action Phase. If still overstacked, then kill off the excess steps.
3.6h Landing in the Ocean. German units which drift out into all-sea hexes while executing their Parachute Assault scatter are destroyed. Their fate does not generate additions to Battalion Morale.
3.6i Post Landing. Units making a Parachute Assault landing must be placed into Move Mode and cannot move, fire, or change Mode in the phase they land. EXCEPTION: If these units are involved in Assault Combat, infantry can fire with a strength of 1; all other unit types are automatically eliminated. The next friendly Action Phase after such units land, they function normally.
Units entering play via Parachute Assaults can function as desired without any sort of Op Sheet up until the first NIGHT TURN of the day they drop (or the first DAY TURN if they drop at night). After that point, they must have normal Op Sheets. During their "no Op Sheet" period, these units can fire SFAs. No Parachute Assaulting unit can accrue Weighted Turns before it actually arrives on Leros.
3.6j Aborts & Returns. The German player can call off (abort) a Parachute Assault at any time before a loaded Ju-52 enters the Leros Parachute Assault Execution Box. Also, changes in the Weather can force an Abort. When an Abort occurs, simply move the stack across the Air Movement Track to the Athens Return Leg Box corresponding to its current position and execute normal Air Movement Track movement back to Athens. Aborted Parachute Assaults must return all the way—even if the Weather later returns to normal.
Ju-52's which return to Athens can have their Drop Zone Hex changed and be sent out again on any later turn allowing air movement.
Important: Units doing an Air Movement never abort for weather until they reach the first outward movement box opposite a returning movement box. (The time spent moving through those first three boxes is on-the-ground preparations.) Players wanting to self-abort a mission in those first three boxes can do so and the loaded Ju-52's return directly to the Athens Box.
Design Note: Historically, the Germans aborted their initial landing when the planes were three minutes from the drop zone, because of the dismal initial landings by the seaborne forces. They returned and landed later that same day.
3.6h Flight of the Valkyries. (Optional) Players are highly encouraged to listen to Wagner's Flight of the Valkyries when conducting these Parachute Assault functions. Humming is acceptable.
Example: Parachute Assault Scatter Sequence
First, the Drop Zone Marker for this DZ is scattered as shown from the plotted drop zone hex. The German player rolled a 3 for direction and a 4 for distance (remember, the distance is divided by 2 to get two hexes)—this scattered the DZ Marker as shown in the (hex-map) diagram. Next, the troops assigned to this DZ are divided into six flights (A-F). The German player then places out the flights one at a time with the die rolls shown. The diagram shows the end positions of all the flights landing in this group (diagram not reproduced).
| Flight | Distance Roll | Scatter Roll |
|---|---|---|
| A | 5 | 3 |
| B | 6 | 4 |
| C | 3 | 1 |
| D | 1 | 4 |
| E | 1 | 1 |
| F | 6 | 6 |
4.0 Minor Variants
The following are non-historical options which the players can use.
4.1 Increased RAF Support
This variant allows for British aircraft to appear over the island and decreases German air support slightly. When this option is used, use the rules for British aircraft (2.3) and the modifier on the German Sortie Availability Table.
There is no cost for this option.
4.2 British All-Out Effort
In this variant, the off-island reinforcements that were brought to Leros are committed initially. All elements of the Royal West Kent battalion (Kents) are available on the island and are set up freely. Also apply the extra RAF effort in 4.1.
If used, shift the victory conditions one level in favor of the Germans.
4.3 HMS Eclipse Survives
While in transit to Leros weeks before the battle, the HMS Eclipse struck a mine. Within five minutes, the ship sunk, taking not only its crew, but most of the members of the A company of the 4th Buffs. Had this not occurred, the British garrison would have been stronger.
This option is available only for Scenario 1. When playing with this option, the British player deploys A company, 4th Buffs on the map. The Set up area for the A-Buffs is within five hexes of any coastal hex on map A.
There is no cost for this option.
4.4 The Italians Fight
Leros had an garrison of over 5,000 Italian soldiers. The Italians showed no desire to help the British and the British returned the favor—but Italy had surrendered to the Allies and they could have assisted the British.
This option is available only in Scenario 1. Deploy the I-10 battalion. Up to one company of infantry and all of the MG sections may be deployed within three hexes of any coastal artillery positions. The remainder of the force must set up in Portolago and/or St. Giorgio.
If used, shift the victory conditions one level in favor of the Germans.
4.5 The Greeks Fight
A company of Greek commandos were available to the British to reinforce Leros. Historically they were not used. In this variant, add the Greek "Sacred Squadron" ("Sac Sqd" to avoid calling them the "SS"...) to the Samos Box at start.
There is no shift in victory conditions for this option.
4.6 Lt. Col. French Takes Command
The Royal Irish Fusiliers occupied Leros several weeks before the rest of 234 Brigade arrived. It's commander, Lt. Col. Frost, was a capable and experienced combat commander who knew the island and how to defend it. When the rest of the Brigade came to Leros, they brought with them their inexperienced commander.
When using this option, the British command prep rating is 4. The number of Implemented Op Sheets available is increased to 12 (4 in one-map scenarios). The battalion staff modifier can be used.
When using this option, shift the victory conditions one in favor of the Germans.
4.7 Rat Patrol
The British forces on Leros suffered from an extreme lack of transportation. Even the LRDG unit on the island was without its traditional vehicles. This option allows you to give them their jeep-like Rover vehicles.
Allow the LRDG units to have a Move Mode Movement Allowance of 15 (Vehicle MPs). Overruns with these units are OK.
There is no shift in victory conditions for this option.
5.0 Scenario Notes
5.1 Set up Notes
5.1a Set up order. The Germans always set up and write out their Op Sheets first, the British second. British units cannot be set up adjacent to a German unit—unless the British unit sets up in a Building or Village hex.
5.1b Losses at start. Losses are specified in a number of steps for the affected units. Spread the losses among the units in an organization as desired and they can be taken from any unit type in the organization.
5.1c Morale. Initial Battalion Morale is always 0 for all units.
5.1d Historical Set up. In each scenario, historical Set Up Areas exist for each Company (loosely defined to also include artillery batteries) and Battalion. A Company unit must set up in its Company area. Battalion assets can set up in either their battalion area and/or with any company of their battalion.
"Any" means the unit can set up in any of the designated Set Up Areas.
"Free" means the unit can set up in any hex on the island not adjacent to the enemy and for which a path can be traced free of enemy units (and not adjacent to them) from that unit to a friendly unit that has a set up restriction.
5.1e Non-historical Set Up. When using non-historical options, units are free to set up anywhere within any of the areas defined in the historical Set Up.
5.1f Destroyed Companies. If a given company (except the Army Group E Reserves) does not appear in the Set Up or in the Holding Boxes, the unit has been destroyed and is unavailable.
5.1g Pre-Loaded Sea and Air Movement Tracks at Start. Some scenarios indicate Set Ups for units already on the Air and Sea Movement Tracks. Players can either use these locations or can use any box further away from Leros. In either case, they can use the historical destinations or not.
5.1h Implemented Op Sheets. All scenarios begin with implemented Op Sheets. Historical orders (if given) can be turned (as is) into implemented Op Sheets before the game begins—or the player can give himself his own implemented Op Sheets.
5.2 Victory Conditions
5.2a Scenarios. Determine victory after the last turn of each scenario.
A feature is "captured" if a player either occupies or was the last to pass through its hex. A multi-hex village is "captured" only if the player was the last to occupy each of its contiguous hexes.
5.2b Campaign Games. Each of the scenarios using all three maps can also be the starting point for a campaign game. The victory conditions for the campaign game are simple: force the enemy to surrender the island or, for the British, hold out until the end of Nov 17. The levels of victory are dependent on the number of step losses taken by the winner and are as follows:
- Pyrrhic victory: over 150 steps lost
- Minor victory: 101-150 steps lost
- Major victory: 50-100 steps lost
- Strategic victory: less than 50 steps lost
Count the total step losses taken by the side—including those units already destroyed at the scenario's start.
Scenario 1—The Curtain Rises
On November 12, 1943, the Germans began an operation to capture the British-held island of Leros. The initial attacks were a fiasco. Only the landings at Mt. Appetici and Grifo Bay were successful. The Gurna Bay force was driven off and the landing at Palma Bay was destroyed by British attack. The entire assault could have easily been repulsed had the British reacted quicker. By the end of the morning, the Germans were firmly ashore.
- Start: 0640 Nov 12 (see alternate start)
- End: 1240 Nov 12 (19 turns)
- Map Area: All
- First Player: German
Alternate Start Time: General Müller wanted to make his assault landings at night, wipe out the coastal guns, and execute reinforcing landings during the day. Due to delays, this did not happen.
Optionally, the German player can select the starting time for the scenario (0100 Nov 12 being the earliest). The British player can do nothing at all until the Germans land by either sea or air. Shift the level of victory one in favor of the British if this option is used.
Special Rules (Apply Before the British Player Sets Up):
- To readjust the German Landing Zones, move the Loaded Boats to the box facing the desired Landing Zone. Plot the chosen Landing Zone(s). Regardless of the replotting done, German units scheduled to set up for a landing must be placed in the box opposite their Landing Zone (so that the invasion goes off, as planned, on the first turn).
- Pick all Drop Zone hexes.
German Information
Set up: Each of the following set up in Box A along the German Sea Movement Track to land at the Landing Zones listed (unless the landing Zones are changed before play). Historical landing areas are listed for your use if desired and can be changed freely.
- Landing Zone 3: 5-II-65 (at Palma Bay); 9-III-440, 10-III-440, 11-III-440 (at Palma Bay); 5-II-Luft, 6-II-Luft, 7-II-Luft (at Mt. Vedetta); MFP #1-4, I-Boat #1-4
- Landing Zone 4: 6-II-65, 7-II-65 (at Grifo Bay); 2-Pio (at Grifo Bay); Barge #1-5
- Landing Zone 5: Küst Co (at Mt. Appetici); MFP #5
- Landing Zone 13: 5-II-16, 6-II-16, 7-II-16 (at Gurna Bay); Barge #6-9
Place the following in Box B on the German Air Movement Track. Select actual Drop Zone hexes before play. (The historical one is given for your use if desired.) Remember that a company cannot be given more than one Drop Zone Hex.
- I-FJ (Less 4-I-FJ) (LZ hex B34.25)
- Ju-52 #1-6
Artillery: none
Ammunition: none
Kos Box: Barge #10, 3-Arty, 4-Arty, 3-Flak, 8-II-16, 13-16, 14-16, 8-II-65, 13-65, 14-65, 12-III-440, 8-II-Luft
Athens Box: 4-I-FJ
Historical Orders: Secure high ground overlooking the beach landing zones. Select any hill feature at or within 13 hexes of a coastal hex of the selected Landing Zone.
British Information
Set up: Set up the following units anywhere on the island with the implemented Op Sheets of their choice:
Kings Bn (all), Irish Bn (all), Buffs Bn (less A-Buffs), B-Kents (all), SBS, LRDG, Lgt AA, MG Bn, AT Bn, 9 FA
Artillery: 9 FA
Ammunition: 15 HE, 0 Smoke (if starting the campaign, then 60 HE, 3 Smoke)
Coastal Guns: all active
Samos Box: 2x M-Sweep, 1x Sub, Kents (Less B-Kents)
OR, the player can use the following Historical Set Up and orders:
- A-Kings: w/i 6 C39.30
- B-Kings: w/i 6 C36.14
- C-Kings: w/i 2 B40.19
- D-Kings: w/i 4 B42.06
- Kings Bn units: in any of the above Kings sectors.
- A-Irish: w/i 3 B40.25
- B-Irish: w/i 3 B35.13
- C-Irish: w/i 3 B40.13
- D-Irish: w/i 5 B27.29
- Irish Bn units: in any of the above Irish sectors
- B-Buffs: w/i 5 A29.14
- C-Buffs: w/i 3 A34.03
- D-Buffs: w/i 4 A40.17
- Buffs Bn Area: w/i 4 A28.07
- Buffs Bn units: in any of the above Buffs sectors
- B-Kents: w/i 3 B45.17
- SBS, LRDG, Lgt AA, MG Bn, AT Bn, 9 FA: Any (see 5.1d)
Artillery: 9 FA
Ammunition: 60 HE, 3 Smoke
Coastal Guns: all active
Samos Box: 2x M-Sweep, 1x Sub, Kents (Less B-Kents)
Historical Orders:
- Prepared Defense: A-Kings, B-Kings, D-Kings, A-Irish, B-Irish, D-Irish, B-Buffs, D-Buffs, Lgt AA, AT Bn
- Reserve (can be dug in): C-Kings, Kings Bn units, C-Buffs, Buffs Bn units, C-Irish, Irish Bn units, B-Kents, 9 FA, MG Bn
- No orders: SBS, LRDG
Victory
- British Major—The Germans suffer at least 40 steps of losses and none of the following features are captured by the Germans: Any coastal artillery position; Mt. Meraviglia (B43.15); Mt. Appetici (B55.12); Leros (B47.16); Portolago (B35.04)
- British Minor—Prevent the Germans from capturing any of the features above.
- Draw—The Germans occupy only one of the features above excluding any coastal artillery.
- German Minor—The Germans capture two of the features above. Draw takes precedence if the Germans capture one coastal artillery position and another feature.
- German Major—The Germans capture three of the features above.
- German Massive—The Germans capture four or more of the features above.
Op Sheet Form
The rulebook includes a photocopiable blank Op Sheet form (map of Leros place names with Time, Type, Size, Task Organization, Failure Instructions and Written Notes fields) on page 9, and further blank forms on pages 10-24; these are not transcribed.
Scenario 2—Drop-Zone Leros
The landings of I-FJ were to occur at dawn. When the air armada was three minutes from the drop zone, word reached them to abort the landings. The confused situation at the landing beaches made the Germans hesitant.
During the course of the morning, the situation on the island stabilized with the success of the landings at Grifo Bay and Mt. Appetici. The Fallschirmjägers re-embarked for the island.
In the end, the landings met with severe losses and the paratroops were at the crest of the storm of counter-attacking British forces. However, their landing and subsequent defense secured the German victory.
- Start: 1400 Nov 12
- End: 1700 Nov 12 (10 turns)
- Map Area: Map B (only)
- First Player: German
Special Rules:
- The German player must select LZ hexes before the British player sets up.
- Do not roll for Weather from 1400-1500. The Weather is Normal on those turns.
- There is no Sea Movement in this scenario.
German Information
Set up:
- 1-I-FJ, 2-I-FJ, 3-I-FJ, 6x Ju-52: Air Movement Track Box B (select LZ hexes before play, historical drop was at B34.25)
- Küst Co (Less 3 Steps): w/i 2 B59.12
Artillery: none
Ammunition: none
Kos Box: not applicable
Athens Box: none
Historical Orders:
- Attack Rachi Ridge and Germano: I-FJ
- Attack Mt. Appetici: Küst Co
British Information
Set up:
- D-Kings, Kings Bn units: w/i 4 B42.06
- A-Irish: w/i 3 B40.25
- B-Irish: w/i 3 B35.13
- C-Irish (Less 2 Steps): w/i 4 B53.13
- D-Irish: w/i 5 B27.29
- Irish Bn Area: w/i 3 B40.13
- Irish Bn units: in any of the above Irish sectors
- SBS, LRDG, B-Kents: w/i 2 B45.17
- Lgt AA (4 guns in play): Any (see 5.1d)
- MG Bn (5 MGs in play): Any (see 5.1d)
- AT Bn (Three guns in play), 9 FA (Three guns in play): Any (see 5.1d)
Artillery: 9 FA
Ammunition: 15 HE, 0 Smoke
Coastal Guns: not applicable
Samos Box: not applicable
Historical Orders: Same as scenario 1.
Victory
- British Massive—The British hold all of the following: Mt. Appetici (B55.12); Rachi Ridge (B36.21); Mt. Meraviglia (B43.15); Quaranta (B39.30); Castle Leros (B51.17)
- British Major—Four of the British Massive victory conditions occur.
- British Minor—Three of the British Massive victory conditions occur.
- German Minor—Two of the British Massive victory conditions occur.
- German Major—One of the British Massive victory conditions occurs.
- German Massive—None of the British Massive victory conditions occurs.
Scenario 3—Night Melee
After the build-up on the 13th, the Germans launched an attack in the early morning hours of the 14th along the Rachi Ridge toward Mt. Meraviglia. Simultaneously, the British started an attack against the Küstenjäger Company on Mt. Appetici. The wild melee that ensued brought both sides close to disaster. In the end little changed—other than a reduction in the number of live soldiers on Leros.
- Start: 0200 Nov 14
- End: 0500 Nov 14 (4 turns)
- Map Area: Map B only
- First Player: Choose by Die roll
Special Rules: There is no Sea or Air Movement in this scenario.
German Information
Set up:
- 6-II-65 (Less 7 Steps), 7-II-65 (Less 5 Steps), 8-II-65 (Less 120mm Mortars): w/i 5 B42.30
- 9-III-440 (Less 3 Steps), 12-III-440 (Less 120mm Mortars, 1 Mortar & 1 MG Step Lost): w/i 3 B58.11
- I-FJ (Less 15 Steps, 1 Mortar Step & 1 MG Step), Para Co (Less 4 Steps), Küst Co (Less 3 Steps), 2-Pio (Less 5 Steps): w/i 5 B35.24
Artillery: none
Ammunition: none
Kos Box: not Applicable
Athens Box: not Applicable
Historical Orders:
- Hasty Defense: 9-III-440, 12-III-440
- Prepared Defense: Küst Co
- Attack Mt. Meraviglia: I-FJ, Para Co, 2-Pio, II-65
British Information
Set up:
- A-Kings (Less 2 Steps): w/i 3 B46.11
- C-Kings: w/i 3 B34.10
- D-Kings (Less 2 Steps): w/i 3 B46.11
- Kings Bn Area: w/i 3 B42.06
- Kings Bn units: in any of the above Kings sectors
- B-Irish: w/i 3 B35.13
- One Platoon C-Irish (Less 1 Step): B51.17
- C-Irish (remainder, Less 3 Steps): w/i 3 B40.13
- Irish Bn units (Less 3 Inf & 2 MG Steps): in any of the above Irish sectors
- A-Kents, Kents Bn units: w/i 5 B35.03
- B-Kents: w/i 3 B45.17
- Lgt AA (6 guns in play), MG Bn (9 MGs in play), AT Bn (4 in play), 9 FA (Three Guns in play): Any (see 5.1d)
Artillery: 9 FA
Ammunition: 10 HE, 1 Smoke
Coastal Guns: not applicable
Samos Box: not applicable
Historical Orders:
- Attack Mt. Appetici: A-Kings, D-Kings, Kings Bn units
- Hasty Defense: C-Kings, B-Irish, C-Irish, B-Kents, Irish Bn units, Lgt AA, MG Bn, AT Bn, 9 FA
- Move to Mt Meraviglia: A-Kents, Kents Bn units
Victory Conditions
- British Major—The British hold the following features: Mt. Meraviglia (B43.15); Mt. Appetici (B55.12); Rachi Ridge (B36.21); Leros (B47.16); Castle Leros (B51.17)
- British Minor—British hold four of the features above
- Draw—British hold three of the features above
- German Minor—British hold two of the features above
- German Major—British hold one of the features above
- German Massive—British hold none of the features above
Scenario 4—The Big Show
The morning of the 14th saw the Germans advancing on Mt. Meraviglia. They hit strong resistance just as the British forces attacked along the line from Clidi to Germano. These strong British attacks made good progress. By the end of the day, the front had stabilized but the German beachheads were reduced.
- Start: 0600 Nov 14
- End: 1740 Nov 14 (36 turns)
- Map Area: All
- First Player: German
German Information
Set up:
- II-16 (Less 15 Steps and 120mm Mortars): w/i 3 B34.30 and/or B31.27
- II-65 (Less 21 Steps and 120mm Mortars): w/i 2 B38.25 and/or B41.22
- 9-III-440 (Less 3 Steps), 12-III-440 (Less 120mm Mortars, 1x MG Step & 1x Mortar Step): w/i 4 B59.13
- I-FJ (Less 21 Steps, 1 Mortar Step & 3 MG Steps), Para Co (Less 6 Steps), 2-Pio (Less 7 Steps): w/i 2 B34.21, B36.23 and/or B37.20
- Küst Co (Less 3 Steps): w/i 4 B59.13
- II-Luft (Less 9 Steps and 120mm Mortars): w/i 4 A52.06, A47.04 and/or B42.34
Artillery: none
Ammunition: none
Kos Box: 3x MFP, 2x I-Boats, 9x Barges, 3-Arty, 4-Arty, 3-Flak, 13-16, 14-16, 13-65, 14-65, 10-III-440 (3 Steps Lost), 11-III-440 (3 Steps Lost), III-Brg (all), All 120mm Mortars
Athens Box: 6x Ju-52
Historical Orders:
- Hasty Defense: II-16, Küst Co, 9-III-440, 12-III-440, II-Luft
- Attack south along the road to Leros: II-65
- Attack Mt. Meraviglia: I-FJ, Para Co, 2-Pio
British Information
Set up:
- A-Kings (Less 5 Steps), D-Kings (Less 5 Steps): w/i 3 B50.11
- B-Kings: w/i 5 C36.14
- C-Kings (Less 4 Steps): w/i 3 B34.10
- Kings Bn Area: w/i 4 B42.06
- Kings Bn units: in any of the above Kings sectors
- B-Irish (Less 1 Step): w/i 3 B35.13
- One Platoon C-Irish (Less 1 Step): B51.17
- C-Irish (remainder, Less 5 Steps): w/i 3 B40.13
- D-Irish (Less 9 Steps): w/i 2 B26.35
- Irish Bn Area: w/i 3 B40.10
- Irish Bn units (Less 3 Steps, 2 MG Steps): in any of the above Irish sectors
- B-Buffs: w/i 3 A36.13
- C-Buffs (Less 5 Steps): w/i 3 A31.05
- D-Buffs (Less 3 Steps): w/i 3 A40.15
- Buffs Bn Area: w/i 3 A27.10
- Buffs Bn units (Less 3 Steps, 2 MG Steps): in any of the above Buffs sectors
- A-Kents: w/i 4 B42.06
- B-Kents (Less 3 Steps): w/i 3 B45.17
- Kents Bn units: in any of the above Kents sectors
- SBS, LRDG: Free (see 5.1d)
- Lgt AA (4 guns in play), MG Bn (8 MGs in play), 9 FA (2 Guns in play): Any (see 5.1d)
Artillery: 9 FA
Ammunition: 20 HE, 2 Smoke
Coastal Guns: all but G, H, M
Samos Box: 2x M-Sweep, 1x Sub, C-Kents, D-Kents
Historical Orders:
- Unassigned: A-Kings, C-Kings, D-Kings, A-Kents, C-Kents, D-Kents
- Hasty Defense: B-Irish, B-Kents, Kings Bn units, Kents Bn units, Irish Bn units, Buffs Bn units, 9 FA, Lgt AA, MG Bn
- Prepared Defense: B-Kings, C-Irish, D-Irish
- Attack Clidi Ridge: B-Buffs
- Attack down road to Leros: C-Buffs
- Attack Germano: D-Buffs
- Preparing to Attack Rachi Ridge (28 Weighted Turns): B-Irish, C-Irish, B-Kents
Victory Conditions
- British Massive—The British hold all of the following features: Mt. Vedetta (A54.06); Point 320—Clidi Ridge (A45.05); S. Quirico (A34.03); Rachi Ridge (B36.21); Mt. Meraviglia (B43.15); Mt. Appetici (B55.12)
- British Major—The British hold five of the features above.
- British Minor—The British hold four of the features above.
- Draw—The British hold three of the features above.
- German Minor—The British hold two of the features above.
- German Major—The British hold one of the features above.
- German Massive—The British hold none of the features above.
Scenario 5—The Curtain Falls
By the morning of the 16th, the Germans were ready to launch their attack on Mt. Meraviglia. The fresh forces of the III-Brg spearheaded the drive. By the end of the day, the British had surrendered.
- Start: 0400 Nov 16
- End: 1740 Nov 16 (38 turns)
- Map Area: All
- First Player: German
Special Rules: To readjust the German Landing Zones, move the Loaded Boats to the box facing the desired Landing Zone. Plot the chosen Landing Zone(s) before play begins.
German Information
Set up:
- II-16 (Less 20 Steps, 1 Mortar Step, 2 MG Steps, and all 120mm Mortars): w/i 3 B41.23 and/or B34.22
- II-65 (Less 21 Steps, 1 Mortar Step, 2 MG Steps and all 120mm Mortars): w/i 3 B48.18 and/or B45.21
- III-440 (Less 11 Steps, 2 Mortar Steps, 2 MG Steps and all 120mm Mortars), Küst Co (Less 4 Steps): w/i 6 B54.13
- I-FJ (Less 21 Steps, 2 Mortar Steps & 3 MG Steps), Para Co (Less 6 Steps): w/i 3 B33.26 and/or B38.28
- III-Brg, 2-Pio (Less 7 Steps): w/i 6 B54.13
- II-Luft (Less 23 Steps): w/i 4 B54.34
German Sea Movement Track Box C for historical Landing at Landing Zone 6: MFP #1-3, I-Boat #1-2, 3-Flak, 13-16, 14-16, 3-Arty
Artillery: none
Ammunition: none
Kos Box: 9x Barges, 4-Arty, 13-65, 14-65, All 120mm Mortars
Athens Box: 6x Ju-52
Historical Orders:
- Attack Meraviglia: III-440, Küst Co, III-Brg, II-65, II-16, 2-Pio
- Hasty Defense: I-FJ, Para Co, II-Luft
- Land and move to Leros: 3-Flak, 13-16, 14-16, 3-Arty
British Information
Set up:
- A-Kings (Less 9 Steps): w/i 4 B42.12
- B-Kings: w/i 5 C36.14
- C-Kings (Less 8 Steps): w/i 3 B45.08
- D-Kings (Less 9 Steps): w/i 4 B42.14
- Kings Bn units (Less 5 Steps, 4 MG Steps, & 3 Mortar Steps): in any of the above Kings sectors
- B-Irish (Less 1 Step), D-Irish (Less 9 Steps): w/i 3 B22.34
- C-Irish (Less 11 Steps): w/i 3 B38.12
- Irish Bn Area: w/i 3 B42.13
- Irish Bn units (Less 3 Steps, 4 MG Steps & 2 Mortar Step): in any of the above Irish sectors
- B-Buffs (Less 5 Steps): w/i 4 A49.11
- C-Buffs (Less 8 Steps): w/i 4 A34.07
- D-Buffs (Less 6 Steps): w/i 4 B27.34
- Buffs Bn Area: w/i 4 A27.10
- Buffs Bn units (Less 6 Steps, 4 MG Steps, & 2 Mortar Steps): in any of the above Buffs sectors
- Kents (all, Less 18 Steps, 2 MG Steps, & 2 Mortar Steps): w/i 4 B39.15
- SBS (Less 1 Step), LRDG (Less 1 Step): Any (see 5.1d)
- Dead: A-Irish, 9 FA, AT Bn, Lgt AA, MG Bn
Artillery: none
Ammunition: none
Coastal Guns: all but G, H, M
Samos Box: 2x M-Sweep, 1x Sub
Historical Orders:
- Prep Defense: Kings (all), Irish (all), Buffs (all)
- Hasty Defense: Kents (all)
Victory Conditions
- British Massive—The British control the following features: Mt. Meraviglia (B43.15); Rachi Ridge (B36.21); Germano (B31.27)
- British Major—British hold two of the features
- British Minor—British hold one of the features
- Draw—British surrender after 1500 turn
- German Minor—British surrender on or between turns 1200 and 1500
- German Major—British surrender on or between turns 0900 and 1140
- German Massive—British surrender by 0840 turn
Order of Battle
British Organization of Forces
234th Infantry Brigade
- 2 Royal Irish Fusiliers (Irish): A Company (3x Inf); B Company (3x Inf); C Company (3x Inf); D Company (3x Inf); Bren Platoon (2x Inf, 2x 2" Mortar); AA Platoon (2x MG); Mortar Platoon (3x 3" Mortar)
- 2 Queen's Own Royal West Kents (Kents): A Company (3x Inf); B Company (3x Inf); C Company (3x Inf); D Company (3x Inf); Bren Platoon (2x Inf, 2x 2" Mortar); AA Platoon (2x MG); Mortar Platoon (3x 3" Mortar)
- 1 King's Own (Kings): A Company (3x Inf); B Company (3x Inf); C Company (3x Inf); D Company (3x Inf); Bren Platoon (2x Inf, 2x 2" Mortar); AA Platoon (2x MG); Mortar Platoon (3x 3" Mortar)
- 4 Royal East Kent (Buffs): B Company (3x Inf); C Company (3x Inf); D Company (3x Inf); Bren Platoon (2x Inf, 2x 2" Mortar); AA Platoon (2x MG); Mortar Platoon (3x 3" Mortar)
Other British forces:
- Machine Gun Battalion (partial) (MG Bn) (15x MG)
- Anti-tank Battalion (partial) (AT Bn) (8x 2 lb. AT Guns)
- 3rd Light Anti-aircraft Regt. RA (Lgt AA) (partial) (12x 40mm Bofors)
- 9th Regt. Royal Artillery (partial) (9 FA) (4x 18/25 lb or 88mm)
- Long Range Desert Group (partial) (LRDG) (3x Inf Sections)
- Special Boat Service (partial) (SBS) (3x Inf Sections)
Naval Transport Units: M-Sweep (2x Minesweeper); Sub (1x Submarine)
Organization of German Forces (Kampfgruppe Müller)
22 Air Landing Division (partial)
- II-16 Infantry (reinforced): 5 Company (3x Inf, 1x MG); 6 Company (3x Inf, 1x MG); 7 Company (3x Inf, 1x MG); 8 Company (3x MG, 3x 81mm Mortar, 2x 120mm Mortar); 13 Company (partial) (2x 75mm IG); 14 Company (partial) (2x 50mm AT Guns)
- II-65 Infantry (reinforced): 5 Company (3x Inf, 1x MG); 6 Company (3x Inf, 1x MG); 7 Company (3x Inf, 1x MG); 8 Company (3x MG, 3x 81mm Mortar, 2x 120mm Mortar); 13 Company (partial) (2x 75mm IG); 14 Company (partial) (2x 50mm AT Guns)
- 2-Engineer (2-Pio) (3x Inf, 1x MG, 1x 81mm Mortar)
- 3-22 Artillery (3-Arty) (4x 105mm Howitzer)
- 4-22 Artillery (4-Arty) (4x 105mm Howitzer)
Brandenburg Division (partial)
- II-1 Brandenburg (II-Brg): 5 Company (3x Inf, 1x MG); 6 Company (3x Inf, 1x MG); 7 Company (3x Inf, 1x MG)
- III-1 Brandenburg (III-Brg): 9 Company (3x Inf, 1x MG); 10 Company (3x Inf, 1x MG); 11 Company (3x Inf, 1x MG)
- Brandenburg Coastal Raiding Company (Küst Co) (3x Inf, 1x MG)
- Brandenburg Parachute Company (Para Co) (3x Inf, 1x MG)
Other Elements
- I-2 Fallschirmjäger Regiment (I-FJ): 1 Company (3x Inf, 1x MG); 2 Company (3x Inf, 1x MG); 3 Company (3x Inf, 1x MG); 4 Company (3x MG, 3x 81mm Mortar, 2x 105mm Recoilless Rifles)
- II-22 Luftwaffe Field Regiment (II-Luft): 5 Company (3x Inf, 1x MG); 6 Company (3x Inf, 1x MG); 7 Company (3x Inf, 1x MG); 8 Company (3x MG, 3x 81mm Mortar, 2x 120mm Mortar)
- 3-22 Flak (3-Flak) (4x 88mm AA, 4x Halftrack mounted AA)
- III-440 Infantry Regiment (from the Crete Garrison): 9 Company (3x Inf, 1x MG); 10 Company (3x Inf, 1x MG); 11 Company (3x Inf, 1x MG); 12 Company (3x MG, 3x 81mm Mortar, 2x 120mm Mortar)
Naval & Air Transport Units: MFP Boats (5x Coastal Transports); Barges (10x Pioneer Landing Barges); I-Boats (4x Sea-going Ferries); Ju-52 groups (6x Ju-52 (three aircraft each))
Designer's Notes
For such an admittedly obscure and small battle, the documentation for Leros was very complete. I was able to obtain General Müller's 40-page after action report which my good friend Jim Harkonnen translated for me. The other sources noted in the bibliography are very good and Leros is particularly enjoyable.
Even with this good documentation, there was still quite a bit of discrepancy between the records and information that was available. When conflict arose, I used my best judgment to resolve it. Any errors of commission or omission are solely my own.
Order of Battle: This has to be one of the most diverse groupings of units to come together on such a small battlefield in World War II. This game has everybody from German airborne commandos to Italian coastal gunners. It was quite a crew. The various sources had slightly different orders of battle, but I was able to come up with confirmed sources for the battle. I am very confident that this OB is as accurate and complete as can be achieved.
Map: The map source for this project was excellent. It is not often a researcher has as much dumb luck as I had with the base mapping. The source map is a 1:24,000 scale map done originally by the Italians in 1934 and updated by the British in 1941. The map had an incredible amount of detail, most of which was superfluous to the game.
One area that players will want to note is that the terrain on Leros is extremely rugged. If you are picky about LOS, a good rule of thumb to use with this game is, if there is a possible LOS obstruction, it's blocked.
Developer's Notes
Dave Friedrichs (known locally as "Fred") provided a very complete game to me for this project. Normally submissions are greeted with wholesale changes, corrections, and rebuilding—to the point where the designer no longer can recognize the final game as his own. This is quite normal around here and I would rather bruise a designer's swollen ego than put out a game in need of further development.
I polished the sea and air movement subsystems. Both were rather rough in their initial applications. I opted for a more mechanical treatment of both (eliminating numerous abstract rules needed to control the original system). Originally, I had intended that boats could be overloaded (with the rather fun rule attached that when a storm came up, the excess would be tossed overboard...), but that was eliminated as unnecessary fluff. Of those rules, only the Gilligan's Island stuff remains—an attempt to lighten the tone in a hobby where some are too serious to relax and have fun.
The air drop system was moved wholesale from Hunters from the Sky at the request of some of the playtesters. Their think was that many players would already be familiar with those rules and have an advantage in not having to learn a new method. Others argued that the system originally in Leros was an improvement. All agreed the original Leros drop system was way too bloody. The result of all that discussion is what you see here—the modified Hunters system.
I chose to make the free set up option the normal method of play for the British. After playing the Brits in their historical set ups (and being bored to death by the inability to concentrate thereby engendered), I thought that we long suffering servants of the Empire needed a break—and the ability to fight the battle our own way. If you want to use the historical positions, go right ahead—but keep the coffee pot filled while you while away the time before you get to strike back.
Player's Notes
Leros is a tough game which requires ruthless play. The campaign is a battle of annihilation. One side will completely defeat the other. You either lead your forces to victory or your forces are killed and maimed and the survivors marched off to prison camps.
British Player: Although reinforcements are available, the relative strength between the German player and yourself is never better than it is in the first two days. This is the time when victory will be most achievable. It is unlikely that the Germans will oblige you by attacking you in your prepared positions until they have the strength needed to carry the day. It will be up to you to take the battle to them and force a German surrender early in the game.
You should attempt is to talk your German opponent into the free set up. The historical set up is woefully inadequate to launch coordinated counterattacks. One defensive strategy is to concentrate one battalion on securing a lager between Portolago and Gurna Bay, break up another battalion into company hedgehogs (heavily supported by the AA and AT guns) for the piers outside the lager and keep the third battalion as a counter-attacking force to repel any Germans attempting to take a pier. By doing this, the British will have a secure area to form up from, deny the Germans the all important piers and be strong enough to launch coordinated attacks.
Another consideration is to garrison the key coastal gun positions with at least a token force. There is little that is more embarrassing than having a German MG paratrooper section land on top of your battery on Clidi Ridge, driving the gunners off before they've had a chance to fire.
If playing with the historical set up, the trick is to get your units into battle quickly. Reserves are the key and the battalion assets give the British companies a great deal of punch. The Luftwaffe makes day movement hazardous at best. Use the night to concentrate your forces and attempt to launch that one big attack that will drive a good part of the German force into the sea. If you've hurt them badly enough, go for a surrender call the next day before reinforcements arrive.
If this doesn't work, hold fast during the day, regroup that night, and hit 'em hard again. This will get progressively more difficult as the days wear on. If you haven't gotten the Germans to surrender by the morning of the 14th, it probably won't happen. At that point, set up your defense and make them pay dearly for their "victory."
German Player: The German has two friends in this game—time and the Luftwaffe. The key for victory in this game for the Germans is patience. Allow time for your forces to accumulate on the island and time for the Luftwaffe to pound the British.
During the first day, the primary goal is to establish a bridgehead, preferably one with a pier. When playing the historical game, the initial landings will be disappointing as the Italian guns will either inflict heavy losses or force the withdrawal of the landing forces. If the non-historical game is played, the German should consider using the paratroops to take out a key battery that covers a single landing zone. The Clidi battery is a particularly good target as it provides most of the protection for the north end of the island.
Establish a secure beach unobserved by the British (mortars and 25 lb. shells make for a warm welcome for your reinforcements). The German should use all of their shipping as often as possible. The faster the buildup, the better off the German position. One important consideration for the German is to capture a pier. Getting a pier is critical to getting the 120mm mortars, howitzers, 88's, and AA halftracks on the island.
The German will likely face several counter-attacks. Be ready for them. The Luftwaffe is a handy tool and should be used to break up attacks before they happen, but this is unreliable. Your best bet is to hold a solid line, use reverse slopes to avoid the British mortars and artillery and hold a reserve to reinforce threatened areas.
Historical Commentary
On the morning of November 12, 1943, the equivalent of a regiment of German infantry and a battalion of paratroopers were approaching the British held island of Leros. The landing forces were scheduled to land at several separate locations along the coast and the paratroops were to cut the island in two.
The initial landings were a fiasco. Italian gunners drove off the II-16, who were to land at Gurna Bay along the west coast. The III-440 attempted to land at several points on the north coast, and were also driven off. Only the II-65, II-22 Luftwaffe and the Küstenjäger company were able to land.
As the paratroops were flying to the island, the German commander, Gen. Müller, decided that the landings had failed and the paratroops could not be committed to such an uncertain battle. When the flight was 3 minutes from the drop zone, they received word to abort the landing and return to Athens.
One of the few successes for the German seaborne force was that of the II-65 landing at Grifo Bay and II-22 Luftwaffe landing on the north face of Mt. Vedetta. This force succeeded in landing with minimal losses and by mid-afternoon had succeeded in wiping out the Italian coastal battery on Clidi Ridge.
The other success for the Germans was the landing of the Küstenjäger Company at the base of Mt. Appetici. The initial landing was made with minimal losses and the Italian position at the summit was quickly overrun. However, the Brandenburgers were driven back over the summit by British fire.
The British were able to launch several uncoordinated counterattacks against the Germans. The most successful of these took place along the north coast at Palma Bay. 5-II-65 landed west of the bay and was taken under immediate attack by D-Buffs. The British wiped out this small beachhead before noon.
During the afternoon, with the stabilizing situation, the I-2 Fallschirmjägers were landed on the island. The force landed in the Rachi Ridge area. They quickly wiped out the A-Irish at Alinda Bay and drove the D-Irish off Germano with heavy losses.
By the end of the first day's fighting, the Germans had established beachheads at Grifo Bay and at Mt. Appetici and had cut the island in two by securing the isthmus between Gurna and Alinda Bays.
The second day of the battle, November 13, was a day of lost opportunities. The Germans launched very conservative attacks and the British were unable to coordinate a major attack.
The Germans attempted to land reinforcements. The II-16 succeeded in landing at dawn at Grifo Bay but suffered heavy losses. One of the landing boats had a rudder hit forcing the Germans to swim the last 200 meters to shore. The III-440 attempted to land at Appetici but it succeeded in landing only part of the battalion. The Germans also reinforced the paratroopers by landing the weapons company and the Brandenburg Fallschirmjägers during the early morning hours.
The majority of the fighting took place on the face of Clidi Ridge and Mt. Quirico. By the end of the day, the Germans in the Grifo Bay beachhead had made contact with the paratroops. Mt. Quirico had also been captured by the Germans but was lost to a counterattack by the British.
November 14 was the decisive day in the battle for Leros. Shortly after midnight, five companies (A-Kings, D-Kings, HQ-Kings, C-Irish and D-Irish) were in position to counterattack the Germans at Mt. Appetici. The attack was lead by Lt. Col. French, the much beloved commander of the Royal Irish Fusiliers. Just as the attack started, the German paratroops and II-65 launched an attack on the Brigade HQ on Mt. Meraviglia. HQ-Kings and the Irish companies were redirected to the defense of the Brigade HQ.
The German attack on Mt. Meraviglia was stopped before dawn. However, the forces taken from Lt. Col. French were left idle on the mountain. Lt. Col. French went forward with the remaining two companies. Progress was slow, and by dawn, the force crested the summit of Appetici only to be met by withering fire from the Germans. The British forces broke. Lt. Col. French gathered a few men around him for a last stand on the back slope of the hill. French and his brave little command were killed in the disaster, but they did allow time for their routing comrades to recover.
Shortly after the debacle on Mt. Appetici was concluded, the British launched a new assault on the Clidi Ridge. The Buffs with their reinforcements from the King's Own attacked along the entire front from Germano to Mt. Vedetta. The British assault, supported by the remaining artillery and AA guns succeeded in driving the German forces on Quirico back toward Grifo Bay. After severe fighting, the Germans were also driven off Germano.
Heavy fighting continued throughout the day as the forces centered around Meraviglia (Irish and Kents) joined in the assaults on the Germans on Rachi Ridge. By nightfall, the Germans had been hit hard. Their line along the Clidi Ridge had been broken. The solid beachhead had been divided, one group centered around Grifo Bay and the other on Rachi Ridge. The Germans were battered and in some cases isolated, but they still maintained their stranglehold on the Rachi Ridge.
The fall of night did not bring any peace with it. Shortly after dark, two British destroyers entered Alinda Bay and bombarded the German positions on Rachi Ridge and the British positions on Quirico. The remainder of the night was relatively quiet. Both sides reinforced the island. The British were able to land two companies of the Kents and the Germans the remainder of the III-440.
The fourth day of the battle, Feb. 15th, would see the beginning of the end for the British. Exhausted by the action on the 14th, the British desperately attempted to attack the German positions. The Buffs along with parts of the D-Irish and C-Kings, launched early morning attacks on Rachi from Germano and Quirico. After heavy fighting, the Germans were able to hold.
Early in the afternoon, the British mustered their last strength and committed their fresh reserves from the Kents for a final attack on Rachi Ridge from Mt. Meraviglia. These attacks were handily repulsed by massive air attacks on the advancing British forces.
The day closed with the German attack on Leros Castle. After several attempts to take the feature, the British defenders finally succumbed to the assault of the III-440, supported by waves of Stukas. By the end of the day's fight, the British were exhausted. The Germans firmly held all of their positions and had succeeded in expanding their hold on the area northeast of Leros.
The night of 15/16 was an active one for the Germans. The survivors of the fight on the Rachi Ridge moved out shortly after nightfall. They followed the road to Leros and by morning had reached positions at the base of Mt. Appetici. In the meantime, the III-Brandenburg battalion had been landed on Mt. Appetici, advanced to the west, made contact with the forces advancing from Rachi Ridge and captured the pier on Pandeli Bay. The end was near for the British defenders.
By the morning of the 16th, the Germans had succeeded in firmly linking their positions from the Rachi Ridge to Pandeli Bay. The British were battered by constant attacks and the Germans had landed a fresh, elite battalion.
The final German attack started at dawn with all of the German forces available. In tough, hand-to-hand fighting, the British positions fell one by one. Around mid-day, the Buffs around S. Quirico attempted to launch an attack to relieve the pressure on Mt. Meraviglia. The Germans quickly spotted this and smashed the assembling troops with massive air attacks.
By mid-afternoon, the battle had been decided. The Germans had overrun the Brigade HQ on Mt. Meraviglia. By dusk, the British commander, Gen. Tilney, offered the surrender of the island.
The final toll was a heavy one. The British had lost an entire infantry brigade. According to the German sources, they lost 1057 killed, wounded and missing, roughly 30% of the forces engaged.
Annotated Bibliography
- Gefechtsbericht über die Eroberung der Dodekanes-Insel Leros, by General Müller. This was the original German after action report written by the Kampgruppe commander. It and the associated maps were invaluable materials for describing the battle from the German view.
- Island Prize: Leros, 1943, by Edward B. W. Johnson, M.C. This book is a brief account of the battle concentrating on the activities of the C company, 2 Royal Irish Fusiliers. Mr. Johnson was a platoon commander in C-Irish. This was a good account of the battle and had excellent discussion of small unit actions.
- "Hard Lesson in the Aegean", article from "History of the Second World War" magazine, Part 52, pages 1433-1440. This is an excellent account of the entire campaign in the Aegean Sea in the fall of 1943. The discussion includes the battle for Kos as well as the battle for Leros.
- The Aegean Mission: Allied Operations in the Dodecanese, 1943, by Jeffery Holland. This was a good account of the battle which had very detailed accounts of the British movements. It suffers slightly due to some exaggerations of German strengths which did not exist in the battle.
- The Mediterranean and Middle East, Vol.5, by Brig. C.J.C. Molony, pp. 531-559. This is the official British account of the battles in the Aegean Sea. It is remarkably accurate, complete and even-handed for an official record.
Charts & Tables
German Sortie Availability Table
| 1D6 Roll | Sorties |
|---|---|
| 0 | none |
| 1 | 1x Me109 |
| 2 | 2x Me109 |
| 3 | 1x Stuka, 2x Me109 |
| 4 | 2x Stuka, 2x Me109 |
| 5 | 3x Stuka, 3x Me109 |
| 6 | 3x Stuka, 2x Ju88 |
| 7 | 4x Stuka, 4x Ju88 |
Modifiers:
- +1 when there are less than 4 Bofors AA guns in action on the island (Ignore this modifier in one-map scenarios.)
- -1 if the minor variant "Increased British Air Support" is being used.
British Sortie Availability Table
| 1D6 Roll | Sorties |
|---|---|
| 1 | 1x Beaufighter |
| 2 | 1x Beaufighter |
| 3 | 2x Beaufighters |
| 4 | 2x Beaufighters |
| 5 | 3x Beaufighters |
| 6 | 4x Beaufighters |
Parachute Loss Table
Losses (in steps) by Steps in Unit and Distance to Nearest British Unit:
| Steps in Units | Distance 0 | Distance 1 | Distance 2 | Distance 3 |
|---|---|---|---|---|
| 5 | 3 | 2 | 1 | 1 |
| 2 | 1 | 1 | 1 | - |
| 1 | 1 or less | - | - | - |
Subtract one hex from distance for each of the following conditions:
- ...landing on coastal hex
- ...landing on woods hex
- ...landing on village or Castle hex
- ...landing at Night
- ...one or more AA gun(s) in range (ignore LOS, use AA Gun's range)
Coastal Gunfire Table
Roll 2D6 against Total Fire Value (x1/2 at Night):
| 2D6 Roll | 1-3 | 4-5 | 6-9 | 10-14 | 15-20 | 21+ |
|---|---|---|---|---|---|---|
| 2 | - | - | - | - | - | - |
| 3 | - | - | - | - | - | - |
| 4 | - | - | - | - | - | - |
| 5 | - | - | - |
- "-": No result, landing proceeds
- A: Abort. Lose one step per unit on Boat, Boat aborts.
- S: Boat sinks
Beach Zone Summary
| Coast Zone | From Hex | To Hex | Batteries Firing into Zone | Maximum Fire Value at Zone |
|---|---|---|---|---|
| 1 | A19.34 | A36.32 | A, B | 4 |
| 2 | A37.32 | A46.21 | D, E, G | 12 |
| 3 | A47.21 | A62.05 | E, G | 9 |
| 4 | A63.05 | B53.19 | I | 2 |
| 5 | B54.19 | B58.09 | M | 1 |
Battery Summary
| Battery ID | Hex | Type | Fire Value | Fires Into Zones |
|---|---|---|---|---|
| A | A18.31 | 4x 76mm | 3 | 1, 16 |
| B | A33.28 | 2x 37mm | 1 | 1 |
| C | A09.22 | 4x 12.7mm | 1 | 15, 16 |
| D | A39.22 | 4x 76mm | 3 | 2 |
| E | A46.18 | 4x 76mm | 3 | 2, 3 |