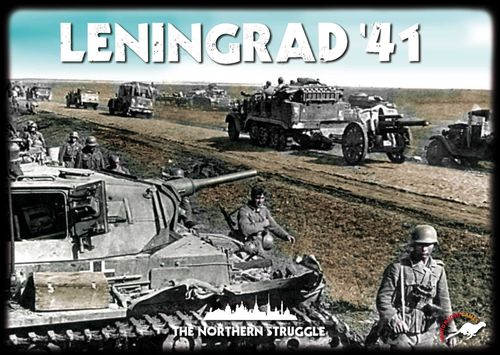
Leningrad '41
Leningrad '41 Rulebook
Table of Contents
Table of Contents
- The Armies
- 1.0 Introduction
- 2.0 Mapboard
- 3.0 Basic Definitions
- 4.0 Units
- 5.0 Reinforcements
- 6.0 Sequence of Play
- 7.0 Logistics Phase
- 8.0 Weather Check
- 9.0 Supply
- 10.0 Tactical Impulse
- 11.0 Strategic Impulse
- 12.0 Pass
- 13.0 Final Phase
- 14.0 Optional Rules
- Scenario Setup
- The Road to Leningrad – Campaign Game (July – December 1941)
The Armies
The Axis, 47 Blocks
- Hitler and Dietl
- 16th Army - 4 Blocks (Busch) - Light Blue
- 18th Army - 5 Blocks (von Küchler) - Yellow
- 41st Panzer Corps - 4 Blocks (Reinhardt) - Red
- 56th Panzer Corps - 3 Blocks (Manstein) - Green
- 39th Panzer Corps - 4 Blocks (Schmidt) - Blue
- Axis Reserves - 11 Blocks - White
- 1st Fliegerkorps - (Förster) with 4 Ju-88
- 8th Fliegerkorps - (von Richtofen) with 2 Do-17 and 2 Stuka
- The Finnish Army and the German 163rd Infantry Division - 12 Blocks (Marshal Mannerheim) - White Blocks.
The Soviets, 62 Blocks and 1 Battleship
- Stalin, Marshal Zhukov and the Battleship "Marat"
- Leningrad Front - 13 Blocks (Popov) - Light Blue
- Karelian Front - 6 Blocks (Frolov) - Yellow
- Volkhov Front - 6 Blocks (Meretskov) - Green
- NorthWestern Front - 9 Blocks (Sobennikov) - Orange
- Soviet Reserves - 26 Blocks - White
Unit Name Abbreviations
D = Dietl; R = Reinhardt; S = Schmidt; M = Manstein/Mannerheim; FK = Fliegerkorps; TT = Totenkopf; Z = Zhukov; NW = NorthWestern Front; V = Volkhov Front; K = Karelian Front; L = Leningrad Front; Sh = Shock Army; G = Guard; LM = Leningrad Militia; NKVD = People's Commissariat for Internal Affairs
Abbreviations
(X.Y) = See rule chapter X.Y; AA = Anti-Air; AR = Air Range; DF = Double Fire; DL = Defensive Line; HQ = Headquarters; LP = Logistics Point; LV = Logistics Value; LW = Luftwaffe; LW HQ = Luftwaffe Headquarters; MP = Movement Point(s); OR = Optional Rules; SF = Single Fire; SI = Strategic Impulse; TF = Triple Fire; TI = Tactical Impulse; VP = Victory Point(s)
1.0 Introduction
LENINGRAD '41 is a wargame covering the offensive of Army Group North, to capture the "birthplace" of the U.S.S.R. — Leningrad — and the all out Soviet efforts to defend it.
The Campaign Game starts after the Germans have established bridgeheads over the Daugava river and seized Riga, while the Finns are ready to strike into Karelia from the north. The Soviets must fight a two front war and defend Leningrad at all costs.
Although based on historical Orders of Battle and challenges, players must make their choices and change history!
Besides the Campaign Game (which lasts for six Turns, from July to December 1941, and is played in one to three hours) players can also choose one of the three short Scenarios.
1.1 Game Components
The game includes:
- 1 mapboard (heavy stock, laminated 86 x 62 cm)
- 1 Rules Manual (32 pages)
- 2 Rules Summary and Player Aids
- 2 Orders of Battle/Scenario Setup Aids
- 142 PVC Stickers (includes two replacement stickers for Moscow '41);
- 109 combat units (black, white and red blocks);
- 1 Marat battleship (red plate);
- 8 Luftwaffe Bombers (8 black discs)
- 83 wooden markers: 1 Weather Forecast Marker (yellow cylinder); 1 Initiative Disc (large green disc); 1 Finnish Heavy Artillery Marker (white disc); 2 Weather Markers (white discs); 1 Lend Lease Marker (green disc); 1 Baltic Control Marker (white disc); 1 Road of Life Marker (blue disc); 10 Artillery Fire Markers (squares, 5 black and 5 red); 20 Area Control Markers (cubes, 10 red, 10 black); 5 River Crossing Markers (blue cubes); 10 Out of Supply Markers (white cubes); 30 Defensive Lines (beams, 10 black and 20 red).
The Kickstarter Edition also includes two Uberblocks (24x24x12 mm) representing Hitler and Stalin, two Uberstickers and two Draw Bags for Reinforcements.
1.2 Stickering
- Apply the 19 circular stickers as follows:
- the two large stickers to the large green disc;
- the two Ladoga Control Markers to the blue disc;
- the eight Bombers to the eight black discs;
- the four Weather Markers to two white discs;
- the Finnish Heavy Artillery Marker to a white disc;
- the two Baltic Control Markers to a white disc.
- Apply the 119 square stickers as follows:
- the 5 Grey Artillery Markers to the 5 black squares;
- the 5 Pink Artillery Markers to the 5 red squares;
- and one sticker each to the 109 wooden blocks:
- German: 35 stickers to the 35 black blocks;
- Finnish: 12 stickers to the 12 white blocks;
- Soviet: 62 stickers to the 62 red blocks.
- Apply the two large stickers (Marat) to the red plate.
1.3 Units and Blocks
Units are divided into:
- Defensive Lines (wooden beams without stickers);
- Blocks (wooden blocks with a sticker).
1.4 Sides and Factions
In the game there are two sides (Soviets and Axis) and three Factions (Soviets, Germans and Finns), with the Germans and Finns belonging to the Axis Side. The only limitations for the Axis side are:
- Mannerheim can only control the Finnish Blocks (including the 163rd Infantry Division);
- German Bomber/Artillery can only support a combat if it involves at least one German Block;
- Finnish Heavy Artillery can only support a combat if it involves at least one Finnish Block.
1.5 Scale
In LENINGRAD '41, 1 cm is approximately 10 km (1:1.000.000); a Game Turn represents 1 month; a full-strength Block represents a Headquarters (HQ), a major combat formation (Combat Block) or the Supreme Leader (Leader).
1.6 Fog of War
Place the mapboard in the centre of the table. The Axis player sits at the western edge, while the Soviet player sits opposite him at the eastern edge. The game is played with "Fog of War", so Blocks are placed upright with the sticker facing the owning player so that the enemy player cannot see them. During the game – at certain points – some Blocks will be revealed.
1.6.1 Revealing Blocks
Revealing a Block means showing it, by placing it face up, in a way the enemy can clearly see it. (Example: two Axis HQs activated (revealed) during the game.)
1.7 Weather
The Weather may be Good (Sunny) or Bad (either Rainy or Snowy). The Weather is predetermined (Sunny) during all the Impulses of July, August and September, whereas it must determined by a dieroll starting from the first Axis Impulse of October (8.0).
2.0 Mapboard
The map is divided into 175 zones called Areas, each identified by a unique code and colour indicator for what kind of terrain the Area is in game terms. Combat, Movement and Stacking are influenced by whether the Area has a Green Dot, a Yellow Dot, a Red Dot or a Star Icon for a Victory Area.
The Area codes are either a number from 1 to 153 or a F, G1, G2, G3 and G4 for the five Axis Supply Source Areas, S1, S2, S3 … S12 for the 12 Soviet Supply Source Areas, H, K, T, O and L for the five Baltic Ports.
Note: the Area with the VentoNuovo Games logo in the southeastern corner is not a playable Area.
2.1 Supply Source
Units must be in supply to fully operate. Units out of supply are marked with a white cube, have limited operative possibilities and suffer Attrition.
To be in supply, a Unit must be able to trace a path of unlimited length – across Full Controlled Areas (2.5) – to a Full Controlled supply source Area.
The Soviet Supply Source is any of the 12 Areas adjacent to the Red Border of the mapboard and named S1, S2… S12 marked with the Soviet Supply Icon.
The Axis Supply Source is any of the following areas: F, G1, G2, G3 and G4 marked with the Axis Supply Icon.
Note: Area G4 is Soviet controlled at the start of the Campaign, thus the Germans must first conquer it in order to use it as a Supply Source.
2.1.1 Coastal Supply
Soviet Units in Soviet-controlled Baltic coastal Areas are always in supply.
2.2 Special Boxes
There are special boxes with special functions.
Leaders Boxes: are where Hitler (Rastenburg) and Stalin (Moscow) are deployed and restricted to. No other Unit may enter these Boxes. Hitler and Stalin cannot be eliminated and are always "in supply".
Trail to Murmansk: the 10 Boxes on the Northern Border of the mapboard, are an abstract representation of the path that the German Mountain Corps – led by General Dietl – has to follow to reach and conquer Murmansk. The first Box is Petsamo, where Dietl is deployed at the Campaign Game start, while the last one represents Murmansk itself. Murmansk grants 1 Victory Point and 1 Logistics Point.
Velikiye Luki: when the Campaign starts, five German Blocks are deployed in the special Velikiye Luki Box and are not available: Schmidt (39th Panzer Corps) HQ, 12th Panzer Division, 18th and 20th Motorized Divisions, the 8th FliegerKorps.
If the Axis controls Velikiye Luki (Area G4), then the five Blocks marked with a "V" are immediately added to the German Reinforcement Pool (see 11.0).
2.3 Absorb Bonus
The Absorb Bonus is the ability of the Defender to avoid hits (10.14). Defensive Lines, Cities and Victory/Red/Yellow Areas provide an Absorb Bonus.
2.4 Terrain
There are four different types of Areas: Green, Yellow, Red and Victory Areas.
Note: roads, railroads, bridges, islands (except the two Baltic Islands), lakes (except the four named lakes: Ladoga, Onega, Pejpus and Ilmen) and towns are named for historical accuracy with no impact on the game.
2.4.1 Green Area
A Green Area has a green dot and is considered open terrain, easy to attack and hard to defend, thus it provides no Absorb Bonus. A maximum of 4 Blocks per player may stack in a Green Area. Entering a Green Area costs 1 MP.
2.4.2 Yellow Area
A Yellow Area has a yellow dot and is considered rough terrain – usually forested or hilly – hard to attack and easy to defend, thus it provides a Single Absorb Bonus. Up to 2 Blocks per player may stack in a Yellow Area. Entering it costs 2 MP.
2.4.3 Red Area
A Red Area has a red dot and is considered swampy/heavy forested terrain, extremely hard to attack but easy to defend, and thus it provides a Double Absorb Bonus. A maximum of 2 Blocks per player may stack in a Red Area. Entering a Red Area costs 3 MP.
2.4.4 Victory Area
A Victory Area has a Yellow Star and the player controlling it gains 1 Victory Point. A Victory Area is a highly populated urban Area with concrete buildings, very hard to attack and very easy to defend. Entering a Victory Area costs 2 MP and the stacking is 2 Blocks per player. A Victory Area is considered Heavy Urban and provides a Double Absorb Bonus. There are 6 Victory Areas in the game (Riga, Tallinn, Novgorod, Ostashkov, Tikhvin and Leningrad).
2.4.4.1 Victory Points
Each Victory Area and Murmansk is worth 1 Victory Point toward winning the game, and also grants 1 Logistics Point (7.2.1).
2.4.4.2 How to win the game
Each Scenario has its own Victory Conditions. In the Campaign, the game is won in one of the following ways, whichever happens first:
A. Sudden Death (this is a Decisive Victory and the game finishes immediately) anytime a player has 7 Victory Points;
B. Alternatively, at the end of the game, the player with most Victory Points is the winner (Marginal Victory).
Example: when the Campaign starts, the Axis has 1 VP (Riga), the Soviets have 6 (Leningrad, Tallinn, Novgorod, Ostashkov, Tikhvin and Murmansk). If the Soviets conquer Riga, the game ends immediately (Soviet Decisive Victory.)
2.4.5 German Staging Areas
The four German Staging Areas (Area G1, G2, G3 and G4) are marked with a Balkan Cross and are the Areas where German Reinforcements enter the game. These 4 Areas are also an Axis Supply Source.
For the Germans, stacking restrictions are ignored in a controlled Staging Area.
Note: G4 is Soviet controlled when the Campaign starts. Area F (which contains Helsinki) is an Axis supply source, but not a German Staging Area, thus German (the Finns have no Reinforcements available) Reinforcements may NOT be deployed in it.
2.4.6 City
Some Areas contain a City. A City has a white square and the name printed in white. A controlled City grants ONE Absorb Bonus to the Defender.
2.4.7 River Crossing
Rivers affect Combat (but not Movement). See 10.13.6.1. Blocks which have engaged across a River into a newly contested Area, are marked with a blue cube. During Snowy Weather, all the rivers are considered frozen and thus the river crossing effect is ignored.
2.4.8 The Baltic Islands
Hiiumaa and Saaremaa are the only playable islands in the game.
Movement along the three white double arrows is treated exactly as River crossing, except that in this case the River Crossing Effect is in effect during any weather conditions.
2.5 Area Control
- A player controls an Area if only Units belonging to that player are in the Area (Full Control).
- If the Area is empty, the player whose Unit was the last to occupy the Area controls that Area. Blocks need not stop in an Area in order to switch control.
- If an Area contains Units of both players, the Area is contested, but is controlled by the player who controlled it most recently, and that player will act as the Defender in the combat which follows (Original Defender).
At the Campaign Game start, the Axis controls Petsamo, all the Areas in Finland and all the Areas in the Soviet Union west of the black/red start line (thus including three of the four German Staging Areas marked with a Balkan Cross). The other 133 Areas on the mapboard and nine Boxes on the Trail to Murmansk are Soviet controlled.
2.5.1 Marking Area Control
Players can use cubes of the appropriate colour (red for the Soviets, black for the Axis) to mark Area control.
2.6 Leningrad Privilege
The side controlling Leningrad may always pick one block while drawing reinforcements. It must be the last block drawn (e.g. when drawing five reinforcements, draw four at random and choose the last one).
2.7 Finnish Attack Zone (FAZ)
The Finnish Attack Zone (FAZ) is shown on the map with a blue double dotted line. It contains the Areas north of the Svir river and west of area S1.
Finnish Blocks (163rd Division included) cannot engage Soviet Units outside this area unless Leningrad is Axis controlled. However, they can move further if the Area they are entering is empty.
163rd Infantry Division
The German 163rd Infantry Division is considered Finnish in all ways, except Sniping (10.13.2).
2.8 Movement Point Cost
Entering an Area costs 1, 2 or 3 Movement Points (MP). Disengaging costs 1 extra MP.
- Green: clear terrain, 1 MP
- Yellow: rough terrain, 2 MP
- Red: extremely swampy/forested terrain, 3 MP
- Victory Area: heavy urban terrain, 2 MP
- Rastenburg/Moscow: no Movement allowed
- Dietl's Movement over the Trail to Murmansk is described in 10.10.
2.9 Stacking
Except for the four German Staging Areas – which have unlimited stacking for the Germans – each Area has a maximum stacking per player. Green Areas have a stacking limit of four Blocks per player, while Yellow, Red, and Victory Areas have a maximum stacking of two Blocks per player. The player who controls the Area can also add one Defensive Line in each Area.
Note: Stacking Limit is per player: a Green Area may contain up to eight Blocks – up to four per player – and one Defensive Line.
| Terrain | Absorb | Stacking | MP |
|---|---|---|---|
| Green | 0 | 4 | 1 |
| Yellow | 1 | 2 | 2 |
| Red | 2 | 2 | 3 |
| Victory | 2 | 2 | 2 |
3.0 Basic Definitions
The following terms are used throughout the different Impulses, Phases and Segments of a Turn and are grouped here to avoid repetition.
The game is divided into Turns which roughly represent 1 month of historical time. A Turn is divided into Impulses. During his own Impulse, a player may choose to play one of the following options:
A. a Tactical Impulse B. a Strategic Impulse (spending the Initiative Disc) C. a Pass
Then the other player performs his own Impulse. After two consecutive Passes (one each per player), players perform the Final Phase, after which the Turn is finished: the Turn Track Marker is moved forward by one space and a new Turn starts with the Logistics Phase.
The game ends immediately if a player fulfils the Sudden Death requirements (see 2.4.4.2), or lasts until the end of the Final Phase of the last Turn (December).
3.1 Fractions
Fractions are always rounded down. However, if rounded down below 1, a fraction is rounded up to 1.
Example: 7/2 = 3.5 rounded down to 3. Example: 1/2 = 0.5 rounded up to 1
3.2 Initiative
The player who holds the Initiative Disc is the player with the Initiative and has several privileges.
3.2.1 Initiative Disc
The player without the Initiative is the first to setup his units at the game start, and the first to decide what to do in the Logistics Phase (see 7.0).
The player with the Initiative plays the 1st Impulse of the Turn. Additionally, he may spend the Initiative Disc to:
- play a Strategic Impulse;
- make an Exploitation Movement (immediately after a Tactical Impulse).
4.0 Units
Leaders, HQs, Infantry, Cavalry, Motorized/Mechanized Infantry and Tanks are represented as wooden blocks and are referred to as "Blocks".
Additionally, both players have Defensive Lines (wooden beams, ten black for the Axis and twenty red for the Soviets) and the Axis has eight Bombers (wooden black discs).
4.1 Defensive Lines
Defensive Lines are fortification works, including trenches, minefields, anti-tank ditches and barbed wire, with machineguns, anti-tank and anti-aircraft guns attached.
Defensive Lines (DL) are represented by wooden beams and have no sticker.
DL are provided in a limited number in the game (20 red for the Soviets, 10 black for the Germans), but a player may – at anytime – voluntarily disband some to build new ones.
A DL may be built in any controlled and uncontested Area (not on the Trail to Murmansk) during any action (Pass, Strategic Action or Tactical Action).
To build a DL, a Combat Block (not an HQ) – instead of moving – is reduced by rotating it by 90° (step-reduction) once. A Block cannot be destroyed to build a Defensive Line.
A Defensive Line:
- cannot move, nor attack. It can only defend;
- has a (Defensive) Single Fire (hits on 6);
- has an Absorb Bonus of 1, so 2 hits are required to eliminate it;
- protects friendly Blocks: when defending, no friendly Blocks may be hit before the DL is destroyed;
- if marked Out of Supply, a DL is not destroyed unless it is in a contested Area.
4.2 Blocks
Each Block has a sticker indicating the name, the type, the Strength, the Firepower and the colour coding that indicates Movement Allowance.
A Block may represent:
- the Supreme Leader (Hitler or Stalin);
- HQs (Front HQs for the Soviets plus Zhukov; Army, Panzer Corps and Luftwaffe HQs for the Axis);
- Combat Blocks: a major military formation (Army, Corps or Division for the Soviets plus the two static Brigades (Hanko and Kuresara); Corps and Divisions for the Axis, plus the Finnish Cavalry Brigade.
Note: in the game, most Soviet Combat Blocks are Army (four dots), Corps (three dots) or Division (two dots) size formations, plus two Static Brigades (Hanko and Kuresara), while Axis Combat Blocks are Corps (four dots) or Divisions (three-two dots) plus the Finnish Cavalry Brigade (single dot).
4.2.1 Movement Allowance
Defensive Lines, Stalin, Hitler, Mannerheim and the two Soviet Static Brigades cannot move.
Other Blocks may be Fast or Slow:
- Fast Blocks (dark red sticker background colour for the Soviets, dark grey for the Axis) have 5 MP.
- Slow Blocks (pink sticker background colour for the Soviets and grey for the Axis) have 3 MP.
4.2.2 Firepower
The Firepower (of a Unit) determines its chances of scoring a hit in Combat and depends on the colour of the Block's Dots or Stars:
- Single Fire (SF), hits only on 6;
- Double Fire (DF), hits on 5 and 6;
- Triple Fire (TF), hits on 4, 5 and 6.
HQ Stars are White, thus they have DF. Marshal Zhukov/Mannerheim's Stars are Red (TF). LW HQ Stars are Blue, thus they have no Firepower.
4.2.3 Strength
Defensive Lines have a Strength of 1.
A block's Strength is equal to the number of Combat Block's dots or the number of HQ's Stars, thus usually it varies from a maximum of 4 to a minimum of 1. Exhausted HQs (Heart Level) have no Strength.
Strength is used to determine the number of dice rolled by a Unit. HQ Strength is also used to determine the HQ Command Range. Luftwaffe HQ Strength is used to determine how many Bombers the HQ may commit and their Air Range.
4.2.3.1 Reducing Strength
When a Block suffers damage, it is reduced (step-reduction) once per each Hit suffered.
Reducing a Block means rotating it counterclockwise by 90° for each Hit. A Block already reduced to Minimum Strength which suffers a Hit is destroyed.
4.2.4 Leaders
Hitler and Stalin are the (Supreme) Leaders. They cannot move, cannot be eliminated, do not affect combat, are always in supply and are restricted to Rastenburg and Moscow respectively.
Leaders play a role in the Logistics Phase and their Strength is used to calculate the Logistics Value (7.2.1).
4.2.5 Combat Blocks
A Combat Block is a major combat formation: Infantry, Static Infantry, Motorized/Mechanized Infantry, Cavalry or Tank.
Infantry is a slow Block with 3MP (Static Infantry cannot move). Motorized/Mechanized Infantry, Cavalry and Tanks are Fast Blocks and they all have 5MP.
Note: there is no distinction between Cavalry, Motorized and Mechanized Infantry; the Soviet 5th Airborne Corps and the German FJ Division act as regular Infantry.
4.2.6 HQ
An HQ represents not only the Commander himself, but also the General Staff and soldiers attached to him, along with various types of artillery and support units.
The Axis has nine HQ:
- seven Tactical HQ (16th and 18th Army; Dietl; 39th, 41st and 56th Panzer Corps; Mannerheim):
- two Luftwaffe HQ (1st and 8th FliegerKorps):
The Soviets have five Tactical HQs representing Marshal Zhukov and four Front HQs (NorthWestern, Volkhov, Kalinin and Leningrad HQ):
Each Tactical HQ has a unique colour code identifying all the Blocks belonging to it. Some Blocks on each side are "white colour-coded" and they can be commanded by any Tactical HQ.
Tactical HQs are essential for moving Combat Blocks, building Defensive Lines and providing Artillery Fire.
German LW HQs cannot command Blocks, build DL or add Artillery Fire, they can perform Airstrike (10.12.4).
5.0 Reinforcements
Reinforcements may arrive in two ways:
A. during the Logistics Phase (7.0); B. by playing the Initiative Disc during a Strategic Impulse (11.0 – Option B).
Reinforcements are randomly drawn from the player's Reinforcement Pool in a number equal to the player's Logistics Value.
German Reinforcements enter the game in any full controlled and supplied German Staging Area without stacking restrictions. No Finnish Reinforcements are available.
Soviet Reinforcements enter the game in a Victory Area or in an Area containing a City – maximum 1 Block per Area and without overstacking – provided that the Area is fully controlled (uncontested) and "in supply."
Note: an Area is in supply if it can trace a Line of Communication to a Supply Source (9.0). If a Reinforcement cannot be deployed because it does not meet the conditions above, it must be returned to the Reinforcement Pool (and no other is selected).
5.1 Coloured Letter Units
Some Blocks have a white letter inside a coloured circle on the lower right corner. These Blocks become available under specific circumstances:
- the "V" circle indicates the five German Reinforcements available if Velikiye Luki is Axis controlled;
- the "S" circle indicates the 13 Soviet Blocks available at the beginning of the September Turn;
- the "N" circle indicates the three Soviet Blocks available at the beginning of the November Turn.
Once a Block becomes available, it is immediately added to the player's Reinforcement Pool and, from that Turn on, may be drawn as a Reinforcement.
The Leningrad Militia is a regular Infantry in all respects. The "L" printed on it is used only for setup restrictions, as it is deployed in Leningrad.
6.0 Sequence of Play
- Logistics Phase (2nd, 3rd, 4th, 5th and 6th Turn)
- Impulses Phase (player with the Initiative first)
- Bad Weather Check (1st Impulse of October)
- Supply Check (always)
- HQ Activation Segment (TI only)
- Command Segment (always)
- Combat Segment (TI and SI only)
- Blitz Segment (TI only)
- HQ Deactivation Segment (TI only)
- Isolation Check (always)
- Exploitation (playing Initiative Disc after a TI)
- Final Phase
A Turn is made of a variable number of Impulses, from a minimum of two, up to unlimited. When a new Turn starts, the player with the Initiative plays the 1st Impulse, followed by the other player, and so on. A player may:
a. play a Strategic Impulse (SI) or b. play a Tactical Impulse (TI) or c. Pass
After 2 consecutive Passes (by the two players, one per player), the Turn ends and a new one begins.
7.0 Logistics Phase
The Logistics Phase is performed at the beginning of the 2nd, 3rd, 4th, 5th and 6th Turn. There is no Logistics Phase in the 1st Turn.
Players – the player without the Initiative first – must choose to:
A. declare a Logistics Pause or B. activate his Supreme Leader.
7.1 Logistics Pause
If a player declares a Logistics Pause, his Leader, instead of being activated, is regenerated to 4 stars.
7.2 Leader Activation
If a player decides to activate his Supreme Leader, the Supreme Leader is revealed. Then he may:
- restore HQ steps;
- replace Combat Blocks steps;
- deploy Reinforcements.
For a player, the number of available Regeneration Points, Replacement Points and of Reinforcements is equal to his Logistics Value.
At the end, the Supreme Leader is reduced.
Note: the Supreme Leader may be activated even if already reduced at Heart Level. If this is the case, its Strength is "0" and it remains at Heart Level (it is not eliminated).
If activated, the Leader is reduced at the end of the Logistics Phase. If not (Logistics Pause), it is restored at full strength.
Example: at the beginning of November, the Axis has the Initiative, thus the Soviets must take the first decision in the Logistics Phase. They choose the Logistics Pause, so Stalin is automatically fully regenerated and nothing else happens. Then the Axis chooses to play the Logistics Phase and activates Hitler (at Heart Level). The Axis LV is calculated by adding Hitler's Strength (0), the number of Axis HQs deployed on the mapboard and not exhausted (4), Victory Points (3) plus 2 extra Logistics Points for 21 surrendered Soviet Blocks. The value (9) is halved to 4 as the Weather is Snowy (see 8.0).
The Germans then have:
- four Regeneration Points to regenerate an HQ from 3 to 4 (1), and another HQ from Heart Level to 4 (3);
- four Replacement Points to Replace Combat Blocks' Strength: one Red (3) and one Black step (1);
- and finally they draw four Reinforcements and deploy in any full controlled German Staging Areas.
7.2.1 Logistics Value (LV)
The Logistics Value (LV) is a number used to determine:
- the number of Regeneration Points available during the Logistics Phase;
- the number of Replacement Points available during the Logistics Phase;
- the number of Reinforcement Blocks available (either in the Logistics Phase or in a Strategic Impulse);
- the maximum number of Blocks which can be moved during either a Strategic Impulse or the Exploitation Movement.
The Logistics Value is calculated in points by adding:
- the Strength of the Leader (Hitler/Stalin);
- the number of non-exhausted HQ deployed over the map (Dietl and LW HQ included);
- the number of controlled VP Areas;
- plus 1 for the Axis for every 10 surrendered Soviet Blocks, and plus 1 for the Soviets for every 10 destroyed or surrendered Axis Blocks;
Example: at the beginning of the Campaign Game, the Germans LV is 11, calculated by adding:
- Hitler's Strength (4);
- the # of Axis deployed and not exhausted HQs (6);
- the number of controlled Victory Areas: Riga (1).
7.2.1.1 Bad Weather affects Logistics
In Rain/Snow the Logistics Value is halved.
7.2.2 Replacing Strength
Replacing Strength works in the opposite way to Reducing Strength, thus a Block is rotated clockwise by 90° per step replaced. This is performed during the Logistics Phase only, by activating the Leader.
HQ Strength is Regenerated by spending Regeneration Points, while Combat Block Strength is replaced by spending Replacement Points.
One Regeneration Point is spent per every HQ step, while a number of Replacement Points, from 1 to 3, is spent per each step, depending on the step's colour:
- Black dot: 1 Replacement Point;
- White dot: 2 Replacement Points;
- Red dot: 3 Replacement Points.
Note: the number of Logistics Points determines the number of BOTH Replacement Points and Regeneration Points. You do not have to choose between the two.
8.0 Weather Check
The Weather is Sunny (good weather) in July, August and September. From October, the Weather may change to Rainy, and then afterwards to Snowy. Snowy and Rainy are Bad Weather which affect Movement, Combat and Logistics.
Rain
- Entering any Area costs 3 MP;
- Attacking Blocks' Strength, HQ Tactical/Air Range, and Strength are reduced to 1;
- The Logistics Value is halved.
Snow
- Entering any Area costs 2 MP;
- Attacking German Blocks' Strength, HQs Tactical/Air Range and Strength are halved. The attack strength of all Soviet and Finnish Blocks is not reduced in Snow;
- Rivers are Frozen (no effect on combat);
- The Axis Logistics Value is halved.
8.1 Determining the Weather
During the first Axis Impulse of October, the Soviet player deploys the Weather Forecast Marker over the first space (over the "1" result) and rolls a die:
A. on a die roll of 1, the Weather changes to Rainy. Remove the Weather Forecast Marker; B. on a die roll of 2-6, the Weather remains unchanged and, on the next Axis Impulse, the Soviet player repeats the procedure by moving the Weather Marker 1 box to the right and rolling a die (but now the weather changes on a die roll of 1-2, and so on).
In other words, once the Weather has changed to Rainy it will be Rainy for the next Impulse as well.
Starting from the next Axis Impulse, the Weather may change to Snowy, following the same procedure as described above, with the Weather Marker on the "1" box. Once changed to Snowy, the Weather remains Snowy for the remainder of the game!
9.0 Supply
At the beginning of any Impulse, the active player checks all of his Units for Supply and marks with a white cube those Units unable to trace a LOC to a Supply Source (they are Isolated).
Hitler, Stalin and Dietl are always in Supply. Soviet Blocks in controlled coastal Areas of the Baltic are always in supply.
At the end of each Impulse, the active player checks Supply for his Isolated Units only and applies Attrition.
9.1 Supply Check
At the beginning of an Impulse (a Pass, a Tactical Impulse or a Strategic Impulse), the active player must Check Supply for all his Units.
Units unable to trace a Line of Communication (LOC) at the beginning of the Impulse are Isolated for the whole Impulse and are marked with a white cube. Isolated Units cannot:
- build Defensive Lines;
- move;
- attack;
- be activated;
- receive Replacement;
- be restored;
until they can trace a LOC in any future Isolation Check (9.3). Isolated units defend normally if attacked.
9.2 Line of Communication
Units in a controlled Supply Area are always in Supply (even if the Area is contested).
A Line of Communication (LOC) is a path of unlimited length, traceable through friendly-controlled and uncontested Areas, from a Unit or from an Area to a valid Supply Source (2.1).
A LOC may neither cross nor finish – but may start in – a Contested Area (either friendly or enemy-controlled).
9.3 Isolation Check
At the end of his Impulse (a Pass, a Tactical Impulse or a Strategic Impulse) the active player must Check Supply for his Isolated Units only (those Units which have been marked with a white cube in the Initial Supply Check).
Isolated Units which are still Isolated at the end of the Impulse suffer Attrition as follows:
- Defensive Lines are destroyed if alone – without a friendly Block – in a contested Area.
- Blocks are reduced by rotating them counter-clockwise to the lower Strength (e.g. from 4 to 3, or from two Stars to the Heart Level) while those already at minimum strength automatically Surrender;
- Surrendered Blocks are permanently eliminated. The Axis player gains 1 extra Logistics Point for every 10 Surrendered Soviet Blocks, while the Soviet player gains 1 extra Logistics Point for every 10 destroyed Axis Blocks. DLs do not count toward this total for either side and may also be rebuilt.
Note: Soviet Blocks destroyed in Combat are added to the Soviet Reinforcements Pool and may re-enter game, while Soviet Blocks surrendered during Attrition are permanently eliminated and removed from the game. All Axis Blocks eliminated, either in Combat or by Attrition or deactivating exhausted HQs, are permanently eliminated: they cannot be rebuilt and they count for extra Soviet Logistics Points.
Example: in the example above, during the Supply Check, 9 Soviet Units (8 Blocks and 1 Defensive Line) are in supply as they have a LoC with any of Area S1-S12 (red supply icon), while the other 6 Soviet Units 4 (3 Blocks and 1 DL) are in supply, as they are in a controlled Baltic coastal Area, while the other two (1 Block and 1 DL) are Isolated (white cube). If in the Isolation Check at the end of the Soviet Impulse the situation has not changed, the Block in Pushkin will suffer Attrition and the DL will be eliminated (engaged alone).
10.0 Tactical Impulse
To perform a Tactical Impulse, the active player must activate at least 1 Tactical HQ (a LW HQ is not a Tactical HQ, thus it may be activated only if another Tactical HQ has been activated before).
If the active player owns the Initiative Disc and is playing a Tactical Impulse, then after having completed the Tactical Impulse, he may spend the Initiative Disc to play an Exploitation Movement (10.19).
10.1 HQ Activation Segment
The active player activates any number of his HQs, but at least one must be a Tactical HQ.
Isolated HQs cannot be activated.
Activating an HQ means that the controlling player may first Move it up its full Movement Allowance and then Reveal it (lay the HQ flat so it is visible for his opponent).
Note: while activating, an HQ must move first and then be revealed, not the other way around, but can be revealed without moving at all.
An HQ may be Activated only during the Activation Segment of a Tactical Impulse.
An HQ cannot overstack in the Area where it is Revealed, nor be Revealed into an Area containing enemy Units.
If an HQ starts the Impulse in an Area containing enemy Units, it may be Activated provided it can disengage (+1MP) and move into a full controlled (uncontested) Area. After, it may also continue moving, provided it may be Revealed in an uncontested Area, without exceeding its maximum Movement Allowance.
10.2 Tactical HQ
Each player has a number of Tactical HQs, each commanding specific Blocks:
- 7 Tactical HQs for the Axis (remember, LW HQ are not "Tactical HQ");
- 5 Tactical HQs (including Zhukov) for the Soviets.
Once activated, a Tactical HQ may:
- command "white colour-coded" Blocks and Blocks of its colour in Tactical Range and
- command any Block in the Area where it is revealed (other HQs included) and
- add Artillery Fire into 1 Battle in an adjacent Area.
Dietl can move along the Trail to Murmansk only (2.2) and has no Artillery Fire capability.
Zhukov and Mannerheim have special command abilities (10.6 and 10.7).
10.3 Tactical Range
An activated Tactical HQ may command only units within its Tactical Range (TR).
The Tactical Range is a contiguous path which must be traced from the Tactical HQ to a Block, neither passing through enemy controlled nor contested Areas, but may end in such Areas.
The length of the Tactical Range is its Strength:
- 4 Areas at 4 stars;
- 3 Areas at 3 stars;
- 2 Areas at 2 stars;
- 0 Areas once Exhausted – may command only units in the Area it occupies once revealed.
Bad Weather reduces HQ Strength, thus Tactical Range (to 1 Area in Rain, German halved in Snow).
Example: during a Tactical Impulse the German player activates Manstein (at 2 stars) which moves disengaging (+1 MP) from an existing Battle in Area 114 to Area 111 where it is revealed, and the LW HQ in Area 129. The LW HQ may commit Bombers to Airstrike, but cannot command any Blocks. Manstein may command any Block (HQs included) in Area 111, and any Green Block in range (two Areas), thus the Motorized Infantry in Area 93 is out of range.
10.4 Artillery Fire
If a Battle occurs in the same Area occupied by a Tactical HQ, the HQ fires like any other Unit (Triple Fire for Zhukov and Mannerheim, Double Fire for other Tactical HQs). LW HQs has No Firepower (blue stars).
Otherwise, an activated and not exhausted Tactical HQ (Dietl has no Artillery Fire capability) may direct its Artillery Fire (Double Fire) into 1 adjacent Area containing Units of both players by deploying the appropriate Artillery Fire Marker in the Area:
Artillery Fire is resolved during the Artillery Fire Combat Segment.
Bad Weather reduces HQ Strength, thus Artillery Fire (to 1 die in Rain, Germans halved in Snow).
10.4.1 Finnish Heavy Artillery Battalions
Once Mannerheim has been activated, the Finnish Heavy Artillery (FHA) can be used (deploy the FHA Marker in the Area) in any 1 Area inside the FAZ (2.7) which contains at least one Finnish Block. It has TF and the dice rolled are equal to Mannerheim's strength.
Example: Mannerheim has been activated in Mikkeli at 2 stars. The Finnish Heavy Artillery has TF and rolls 2 dice.
10.5 Exhausted HQ
HQs reduced to the Heart Level are Exhausted and their Strength is "0".
Exhausted HQs are not taken into account for calculating the Logistics Value.
Once Exhausted it is still possible to activate an HQ, but it is destroyed in the HQ Deactivation Segment and counts for eliminated Blocks.
Additionally:
- an Exhausted Tactical HQ has no Tactical Range, no Artillery Fire and no Firepower (so no AA Fire) and may command only Blocks in the Area it occupies once Revealed;
- Exhausted Luftwaffe HQ, Mannerheim and Dietl cannot be activated.
10.6 Marshal Zhukov
Marshal Zhukov (Z) is a very powerful Tactical HQ. It has command over all Soviet Blocks (other HQs included), thus the Army colour is irrelevant for it. It is the only Fast HQ and Blitz HQ the Soviets have. Additionally, Zhukov is the only Soviet HQ with Triple Fire (Artillery included).
10.7 Marshal Mannerheim
Marshal Mannerheim (M) is a very powerful Tactical HQ. Mannerheim is restricted to Mikkeli (Area 6) and has no Blitzing ability.
It has command over all Finnish Blocks (including the German 163rd Infantry Division), with unlimited Command Range (a LoC is still needed).
Mannerheim is the only Axis HQ with Triple-Fire. Mannerheim can add the FHA in the FAZ (10.4.1).
Example: the Axis activates Mannerheim in Mikkeli. Every Finnish Block in supply and able to trace a LoC to Mikkeli may be commanded to move/build a Defensive Line, no matter the distance from Mikkeli. Mannerheim then can also add the FHA to any ONE Combat in the FAZ which involves at least ONE Finnish Block.
10.8 Command Actions
During the Command Segment of a Pass, a Tactical Impulse or a Strategic Impulse, in-supply Blocks may be commanded to perform ONE of the following actions:
- Move
- Build a Defensive Line
Alternatively, if a Combat Block is not already at Minimum Strength and starts the Impulse in a friendly controlled and uncontested Area (not already containing a Defensive Line), then – instead of moving – it can be reduced to build a Defensive Line (4.1).
10.9 Movement
Blocks may move if they are not Isolated (9.3):
A. 1 Block in a Pass; B. a number of Blocks up to the LV during a Strategic Impulse; C. any Block in the Tactical Range of an appropriate activated HQ during a Tactical Impulse.
When a Block is moved, it must spend MP for each Area it enters (1 for Green Area; 2 for Yellow/Victory Area; 3 for Red Area).
When engaging (entering an Area containing enemy units), the Block must stop. When disengaging, the Block must spend 1 extra MP and must enter a friendly controlled uncontested Area, and then it may continue moving (even engaging again) up to its maximum Movement Allowance.
If a Block doesn't have enough MP to perform a movement, it may not do so. Blocks can overstack during movement, but not at the end. Stacking is checked at the end of each Block's movement.
10.9.1 Movement Allowance
Each Block may move up to its maximum Movement Allowance, expressed as Movement Points (MPs):
- Slow Blocks (light background): 3 MPs
- Fast Blocks (dark background): 5 MPs
10.10 Trail to Murmansk
During the Activation Segment of a Tactical Action – not during a Pass, nor during a Strategic Action – the Axis player may activate Dietl in the Box it occupies on the Trail to Murmansk.
Then, during the Combat Segment, the Axis player rolls a number of dice equal to Dietl's Strength and for every hit (at 5/6) Dietl advances one Box.
If Murmansk falls, then the Axis earns 1 VP and the Soviets lose 1 VP. Murmansk may fall in one of these two ways:
A. Dietl enters the Murmansk Box. This effect is permanent. B. all the four white bordered Areas (S1, S2, S3 and S4) are Axis controlled. In this case, the effect is not permanent, and lasts only as long as the above condition is met.
Dietl may not provide Artillery Fire, can neither Blitz nor Exploit, and its overall Strength is affected by Bad Weather. Thus, during rainy weather, Dietl's strength is reduced to 1 (rolls only 1 die), during snowy weather his strength is halved.
10.10.1 Supply
Dietl is always in Supply.
10.11 Luftwaffe HQ
The Axis player may receive two special HQs as Reinforcement: the 1st FK and the 8th FK Luftwaffe HQ.
Luftwaffe (LW) HQs are Slow Blocks (3 MP) and cannot command any Axis Block, nor be the only HQ activated to play a Tactical Impulse.
LW HQs have no Firepower (blue stars).
A LW HQ can be moved in a Tactical Impulse by Activating itself, or by another HQ activated in the Area the LW HQ occupies, or by a Pass, or by a Strategic Impulse. If Activated, a LW HQ can commit a number of Bombers – up to its Strength – to Airstrike missions over any contested Area in its Air Range.
The Air Range is equal to the activated LW HQ Strength, and the Air Range may be traced over any Area, including enemy controlled Areas, and also over Lake Ilmen and Pejpus.
Exhausted LW HQs cannot be activated.
Bad Weather reduces LW HQ Strength, thus Air Range (to 1 Area in Rain, halved in Snow) and the number of Bombers which may be committed (to 1 in Rain, halved in Snow).
10.11.1 Axis Bombers
There are two types of Axis Bombers: Level Bombers (Junkers Ju-88 and Dornier Do-17, 6 total) and Dive Bombers (Junkers Ju-87 "Stuka," 2 total.) Stuka may be called into action only by the 8th FK.
Each Bomber rolls a number of dice equal to the commanding LW HQ Strength.
Level Bombers (6x) have DF (hits on 5/6). Stukas (2x) have TF (hits on 4/5/6) and can Blitz.
Example: the German 1st FK is activated at full strength (4), thus it may commit up to 4 Level Bombers (no Stuka) into any Battle in an Air Range of 4 Areas and each Bomber rolls 4 dice and hits on 5 and 6.
Axis Bombers are subject to Soviet Anti-Air (10.13.4).
10.12 Combat
Battles are resolved in the Combat Phase.
A Battle may occur only if an Area contains Units of both players (contested). Artillery Fire/Airstrike may support a Battle in which friendly Blocks are involved, but they can not attack alone.
A Battle is mandatory only when an Area is newly contested (new engagement) in the current Impulse. It is at the Attacker's discretion whether to resolve the Battle or not if the Area was already contested at the beginning of the Impulse.
Isolated Blocks and Defensive Lines cannot attack.
There is no limit to the number of Battles which may be resolved during a Tactical or a Strategic Impulse.
No new engagements or Battles are allowed during a Pass/Exploitation.
When multiple Battles occur, players do not have to reveal Blocks until each Battle is begun.
In the Combat Segment, the Attacker chooses the order in which Battles are resolved, Area by Area, and Battles are resolved one by one as described in 10.13.
10.13 Combat Sequence
- Showdown
- Finnish Sniping
- Artillery Fire
- Defender AA
- Airstrike
- Ground Combat
10.13.1 Showdown
Both players simultaneously reveal their Blocks in the Area where the Battle is declared by the Attacker.
10.13.2 Finnish Sniping
Every time a Finnish Combat Block (not the 163rd Division) is engaged in combat (attack and defense), before regular combat, it rolls one die for each Block and the Soviets may not claim any Yellow/Red Area Absorb Bonus.
Sniping is only available in Yellow or Red Areas in the FAZ, not containing a City or a Defensive Line.
The Firepower of the Sniper Fire is the same as the Firepower of the block.
Example: a Finnish 2-red-dots Division attacks Vyborg and another one attacks Area 40. The first one cannot use Sniping, while the second one can (1 die, TF).
10.13.3 Artillery Fire
If there is an Artillery Fire marker in the Area, the Attacker rolls a number of dice equal to the HQ Strength and every die hits on 5/6. Zhukov's and Mannerheim's Artillery Firepower is stronger (red stars) and it hits on 4/5/6.
The number of Artillery Fire dice rolled is affected by Bad Weather.
10.13.3.1 Blitz Artillery Fire
If activated during the Activation Segment, Blitz HQs may freely provide additional Artillery Fire in the Blitz Segment as well, but this extra Artillery Fire must target a Combat happening in one adjacent Area.
10.13.4 Anti-Air Fire
If there are Bombers committed to the Battle in the Area, the Defender rolls AA. Every Block/Defensive Line rolls 1 die.
The AA Firepower is defined by dot/star colour. DLs have SF. Soviet AA is not affected by Bad Weather.
Every hit is an Abort result. Two hits is a Destroyed result. The Axis player can choose to accept any two hits as two Aborted or one Destroyed result. Aborted and Destroyed Bombers are not available for this Airstrike.
Aborted Bombers will become available in the next Impulse, Destroyed Bombers will become available in the next Turn.
10.13.5 Airstrike
Bombers which have survived the AA can now attack enemy units on ground. Each Bomber rolls a number of dice equal to its LW HQ Strength.
German Level Bombers have DF, Stuka have TF.
Example: the Axis activates both his LW HQs (the 1st at 4 stars commits the Ju-88, the 8th at 3 stars commits the two Stukas and one Do-17) and sends seven Bombers to Airstrike an Area in the FAZ attacked by one Black German and one White Finnish Block. He also may add the FHA. The Soviets have two Blocks (one Tank and one Infantry) and one Defensive Line (no Sniping). They roll for Anti-Air:
- the DL rolls 1 die (SF);
- the Tank rolls 1 die (DF);
- the Infantry rolls 1 die (SF).
They score 2 hits in total. The Axis player decides to take 2 hits as a Destroyed result (on the Do-17 committed by the 8th LW HQ). The remaining six Bombers (four Ju-88 and two Stukas) perform Airstrike.
Ju-88 (Level Bombers) have DF, Stukas (Dive Bombers) have TF. The two Stukas committed by the 8th LW HQ (3 stars) roll 3 dice each (TF); the four Ju-88 committed by the 1st LW HQ (4 stars) roll four dice each (DF).
10.13.6 Ground Combat
The Defender always rolls before the Attacker, unless the Defender is under Tank Attack/Sniping.
10.13.6.1 Engaging across Rivers and Islands
If the Area is newly contested during this Impulse, any attacking Block which has engaged the Area by crossing a River/double white arrow (marked with a blue cube) rolls only 1 die. Artillery Fire and Airstrikes are not affected (nor are Blocks which have engaged without crossing a River, or if the Area is not newly engaged this Impulse).
10.13.6.2 Tank Attack
The Defender is under Tank Attack if all the following four conditions are met:
- the Weather is Good;
- the Battle takes place in a Green Area;
- the Defender has no Defensive Line/City;
- the Attacker has at least one Tank and the Defender has no Tank;
Effect: the Attacker rolls before the Defender.
Note: Tank Attack does not apply if the Area is newly contested this Impulse and all attacking Tank blocks have engaged across a River/white double arrows. If at least one Tank Block avoids this situation, then the Tank Attack occurs normally.
10.14 Absorb Bonus
The Absorb Bonus is the ability of the Defender to absorb hits without being damaged, either because of rough terrain (Yellow and Red Areas), a controlled City/Victory Area or a friendly Defensive Line.
The Absorb Bonus is cumulative and the Defender may have up to 3 Defensive Absorb Bonus per Area.
The Attacker never gets any Absorb Bonus.
The Defender automatically gets at least 1 Absorb Bonus in:
- a Yellow/Red Area (controlled or not);
- an Area (controlled or not) with a friendly DL;
- a controlled Area with a City (2 Absorb Bonus in a controlled Victory Area).
No Absorb Bonus is granted along the Trail to Murmansk.
Note: the total hits obtained in one battle are applied to this Absorb Bonus. So if an attack includes bombers, artillery and then ground combat, the Absorb is applied against the total number of hits rolled by the attacker.
10.15 Applying Losses
No friendly Defender Blocks may be hit before the DL is destroyed.
Damage reduces the strongest Blocks first. If two or more Blocks have the same Strength, then the controlling player chooses how to apply Losses to his own Blocks.
The Attacker may never claim an Absorb Bonus, thus every Hit suffered is a Damage.
Instead, for the Defender, Hits may be absorbed in the order listed above from point 1 to point 3 and only after, Defender Blocks may be damaged, 1 Damage/Hit.
10.15.1 Strongest Block(s)
If one Block has more dots (or stars) than the others, this Block is the strongest and hits are applied to this Block until it is reduced. The check is then performed again to see which Block is the strongest. When multiple Blocks have the same strength, the hits can be spread amongst the Blocks.
Example: Two Axis 3-dot Tanks enter Luga (a Yellow Area with a City = 1+1 Absorb Bonus) defended by one Soviet Block and a Defensive Line (1 Absorb Bonus) for a total Absorb Bonus of 3.
In the Combat Phase the Axis discover that the Soviet block is an HQ at Heart Level. The Soviets roll 1 die (for the DL) and score 1 hit reducing one of the two Axis Tanks to 2 (at owner choice). Then the Axis roll 5 dice and score 3 hits: the first is absorbed by the Terrain, the second one is absorbed by the City, the third one is absorbed by the Defensive Line. In the eventuality of a fourth hit, this would have destroyed the Defensive Line, while a further (fifth!) hit would have been needed to eliminate the Soviet HQ.
10.15.2 Allocating Excess Hits
If all the player's Units in the Area have been destroyed, but not all Hits placed, excess Hits are lost.
10.15.3 Destroyed Units
Units destroyed in Combat or eliminated during the Final Attrition Phase are removed from the mapboard.
Destroyed Axis Bombers are deployed in the specific box of the Soviet Order of Battle (OoB), and they are not available until the next Turn.
Aborted Axis Bombers are deployed in the specific box of the German OoB and they are available from the next German Impulse.
Destroyed Defensive Lines can always be rebuilt.
Destroyed Axis Blocks are permanently eliminated and deployed in the specific box of the Soviet OoB. The Soviet player receives 1 extra Logistics Point for every 10 eliminated Axis Blocks.
Destroyed Soviet Blocks are added to the Soviet Reinforcement Pool and may re-enter the game as Reinforcements.
Surrendered Soviet Blocks are instead permanently eliminated and deployed in the specific box of the Axis OoB. The Axis player receives 1 extra Logistics Point for every 10 eliminated Soviet Blocks.
10.16 Additional Combat Rounds
Battles last for 1 round only.
If all Units of a player have been destroyed, the other player may conceal.
Exceptions:
a. Attacking Fast Blocks that have cleared a Green Area (all enemy Units have been destroyed) remain visible to mark that they may Blitz. b. If the Area is still contested, the player controlling the Area conceals his Blocks, while the other player's Blocks remain visible.
10.17 Blitz Segment
During a Tactical Impulse – not during a Pass or during a Strategic Impulse – and after all Battles have been resolved, Fast Combat Blocks (not HQs) may move and attack again (Blitz) under specific circumstances.
In the Blitz Segment, any Fast Combat Block (not HQ) may move by 1 MP to enter an uncontested Green Area, regardless whether it is friendly or enemy controlled, if all the following three conditions are met:
- It has participated in a Battle in a Green Area;
- the Area has been cleared of enemy Units;
- the Block is in range of an activated Blitzing Capable and appropriate HQ.
There are only four Blitz HQs, marked with a Yellow Bolt Icon: Zhukov, Reinhardt, Schmidt and Manstein.
Blitzing is not allowed in Bad Weather, in the Pass/Exploitation/Strategic Impulse, over the Trail to Murmansk, into a Yellow/Red Area nor into a Victory Area.
If by Blitzing a Fast Block moves into an enemy controlled Area, then a Combat is mandatory. If this Area is adjacent to an activated Fast HQ, the HQ may support the Combat with its Artillery Fire, even if it has already provided Artillery Fire in the Combat Segment. Additionally, Stuka (not Level Bombers) which have survived the previous Combat may follow friendly Fast Blocks and support the Blitz Combat as well.
Note: in the Blitz Segment, a Fast Combat Block may not move into an Area which was already contested at the beginning of the Blitz Segment.
10.18 HQ Deactivation Segment
When all Battles (Blitz included) have been resolved, every activated HQ must be reduced (rotate it counter-clockwise by 90°) and deactivated by turning it upright in order to conceal it.
Exhausted HQs are destroyed while deactivating.
Note: Yes, you can activate that HQ showing a heart, but only once! Soviet HQ can be rebuilt, Axis cannot and do count as eliminated Axis Blocks. Remember that Mannerheim and Dietl – if exhausted – cannot be activated.
10.19 Exploitation Move
After a Tactical Impulse only, (thus after the HQ Deactivation Segment) the active player may spend the Initiative Disc to perform an Exploitation Move.
During the Exploitation Move, the active player may move a number of Fast Blocks (HQ included) up to his Logistics Value and up to their maximum Movement Allowance, provided that they are not Isolated (marked with a white cube).
During the Exploitation Move no engagement or disengagement is allowed, no Defensive Line may be built and no Battle may be resolved.
The Axis may play the Exploitation in Good Weather only; the Soviets may play the Exploitation in Good Weather and in Snow as well, but not in Rain.
Afterwards, the Initiative Disc goes to the other player.
11.0 Strategic Impulse
If the active player has the Initiative Disc, then instead of playing a Pass or a Tactical Impulse, he can spend the Initiative Disc to play a Strategic Impulse.
In a Strategic Impulse, the player may choose between one of the following two options:
Option A: command a number of non-Isolated Blocks up to his Logistics Value to move or build a DL, and then in the Combat Segment resolve any number of Battles.
HQs may be moved, but NOT be revealed, during a Strategic Impulse, thus they cannot provide Artillery/Air Support, but they may move and even engage.
or Option B: call for Reinforcements, by randomly selecting a number of Blocks from his Reinforcement Pool up to his Logistics Value and deploying them at full strength (Soviet Remnants at Minimum Strength) as follows:
- Axis Reinforcements are deployed in any full controlled Axis Staging Areas (without any limit and they may overstack);
- Soviet Reinforcements in any full controlled and supplied Area which contains a City or is a Victory Area (max 1 Block/Area, without overstacking).
If a Reinforcement cannot be deployed, then it must return to the Reinforcement Pool, and no other is drawn.
Blocks are randomly drawn, except the last one if the player controls Leningrad (2.6).
No Blocks may be moved, nor DL built, nor HQs activated. No Combat is allowed.
Afterwards, the Initiative Disc goes to the other player.
Example: the Soviets play a Strategic Impulse, Option A. He spends the Initiative Disc by deploying it onto the mapboard. HQs may NOT be activated (but they can move). First he checks Supply for all of his Units (Blocks and Defensive Lines). Isolated Units cannot take any action. Then he calculates his Logistics Value: Stalin is exhausted (counts as 0), he has three HQs deployed over the map (but two are exhausted and one is at 2 Stars), controls 4 Victory Areas and has eliminated 2 Axis Blocks: thus his LV is 5. Then 5 Blocks may make an action:
- the 2-star HQ and two Combat Blocks move to engage an enemy controlled Green Area (new engagement);
- an Infantry in a friendly controlled and uncontested Area does not move and is reduced to build a Defensive Line;
- one exhausted HQ disengages from Area 4.
Then, during the Combat Phase, he must resolve the mandatory Battle and he chooses not to resolve any other. Afterwards, the Initiative Disc goes to the German player.
12.0 Pass
When a player plays a Pass, he may command ONE Block to perform one of the two following actions:
A. move up to the its maximum Movement Allowance without engaging (may disengage); B. be reduced to build a Defensive Line.
No Combat is allowed.
After two consecutive Passes, the Impulse Phase is finished and players perform the Final Phase.
13.0 Final Phase
The Final Phase is performed at the end of each Turn. In this Phase any German Destroyed Bomber returns available and the Turn Tracker is moved forward.
14.0 Optional Rules
Optional Rules (OR) add historical details and flavour, they may be used to balance the game between players with different experience or to enhance realism when playing the Campaign.
OR should not picked individually, but added by the sequence they are listed, thus OR 14.6 should not be used if OR 14.1-14.5 are not.
OR 14.1 Rail Movement
Who: Blocks (no DL) in Supply. Static Infantry may be Rail Moved.
When: during a Pass or a Strategic Impulse only (not during a Tactical Impulse).
How long: any distance from, across and to a friendly uncontested Area (no engage/disengage).
How many: during a Pass only ONE. During a Strategic Impulse a number of Blocks up to the LV may be Rail Moved. Other Blocks may be moved normally, up to the above limit and in any combination.
Exceptions: the two Baltic Islands (Area 53 and K) are not rail connected to each other, nor to Area 54.
Note: Railways depicted on the map are depicted only for historical interest and have nothing to do with this rule.
Example: the German LV is seven. In a Strategic Impulse, the German player may command four Blocks to rail-move, two Blocks to move and one Block to build a Defensive Line.
OR 14.2 The Baltic Sea
Controlling the Baltic Sea is a key point for winning the campaign, as it is a vital asset to improve logistics, getting rid of the Soviet Fleet and provide the U-Boats a safe training "lake."
When playing this OR, rule 2.1.1 is cancelled.
The player controlling the Baltic may supply any number of his Units by tracing a LoC by land from his Supply Source to a full controlled white harbour, and then by sea to another controlled white harbour, and then by land again. Only one "leg" of the LoC may be traced by sea across the Baltic.
The Baltic may be Soviet controlled, Axis controlled or contested.
The player controlling the Baltic has several advantages, as he:
- may trace Sea Supply across the Baltic;
- gains 1 Logistic Point;
- may perform 1 Sea Transport Movement between two full controlled harbours.
S1-14 and the harbors used during Sea Supply and Sea Transportation of supply must be full controlled.
There are five special white circled harbours in the game: Leningrad, Oranienbaum, Hanko, Tallinn and Kuressara. In order to control the Baltic, a player must control at least one white circled harbour of each colour, thus must fulfill all three following conditions (A+B+C):
A. control Leningrad; B. control Oranienbaum; C. control any one (at least one) of Hanko, Tallinn or Kuresaara.
Thus losing A or B or all three "C" means losing the Baltic, but does not automatically mean that the opponent controls the Baltic.
The Neva Bay is controlled by the player controlling Oranienbaum. If the Soviets lose control of the Baltic but still control the Neva Bay (Oranienbaum), Sea Supply is traceable through the Neva Bay only. The Axis cannot trace supply across the Neva Bay, unless it controls the Baltic.
Example: if the Germans capture Tallinn and Kuressara (as they historically did), the Soviets still control the Baltic (as they control Hanko, Oranienbaum and Leningrad) and thus the Neva Bay. If the Soviets lose Oranienbaum, it means that the Germans control the Neva Bay but not the Baltic, which is now contested. German control of the Neva Bay only means that the Marat is now permanently eliminated and that the Soviets cannot trace any kind of Sea Supply but does not otherwise benefit the Germans.
Example: the Soviets control the Baltic. The two Blocks in Narva and Area 76 are in supply, as they can trace a LoC to S1-S12. The Block in Tallinn and the two Units in Hanko are in sea supply, as they can trace supply between two white controlled harbours. The Block in Area 53 is Isolated, as the island of Hiiumaa has no harbour. Remember that a LoC may start from a controlled contested Area, but can never pass through nor finish in a contested Area.
Sea Transport
During any Impulse (a Pass, a Strategic or a Tactical Impulse) the active player may Sea-move ONE non-Isolated Slow Block (not a Tank, Cavalry, Mechanized Infantry or a Defensive Line – a Static Infantry may be Sea Transported) between 2 friendly uncontested Areas (cannot engage, nor disengage) that have a harbor in the Baltic. You must be in control of the Baltic in order to use Sea Transportation.
During a Pass only one Block may be Sea Transported.
During a Tactical Impulse, only one Block may be Sea Transported, provided that his controlling HQ has been activated in a Baltic harbour.
During a Strategic Impulse, Sea Transport and Rail Movement can be combined during a Strategic Impulse, so some Blocks may be Rail Moved, and 1 – only 1 – may be Sea Transported.
All restrictions still apply, so the areas where the block is moved through must all be full controlled.
OR 14.3 The Marat
The Marat was the biggest and most famous ship in the Soviet Baltic Fleet. Following the German advance across the Baltic coast, the Marat had to be withdrawn inside the fortified naval base of Kronstadt. Despite being hit and "sunk" by special developed 1,000 kg bombs (and claimed by the famous Stuka pilot Hans Rudel), in the shallow waters of the harbor, the stern of the Marat remained operative during the 900 days long siege as a floating battery.
The Marat is the only naval unit in the game and represents the Soviet Baltic Fleet. The Marat is in supply if the Soviets control Oranienbaum (even if contested).
The Marat is deployed:
A. in the Baltic if the Soviets control the Baltic Sea and the Marat is undamaged; B. in the Neva Bay if the Soviets do not control the Baltic but control the Neva Bay, OR if the Marat is damaged.
If the Soviets lose Oranienbaum, the Marat is permanently eliminated.
The Marat is a defensive asset, whose function is to provide both AA and Gunfire to any ONE battle during each German Impulse (not during a Soviet Impulse), provided the battle happens in a Baltic coastal Area.
Procedure
- During any German Impulse, after HQ activation but before German Command Step, the Soviet player may move the Marat into an already contested coastal Area (thus an Area which was already contested at the start of the current Impulse). If the Soviets control the Baltic, the Marat may be committed to any Battle in a Baltic Sea coastal Area. If the Soviets do not control the Baltic, but still control the Neva Bay, then the Marat may be committed only to a combat in one of the six coastal Areas of the Neva Bay (45, 47, L, 63, 62 and O). The Marat's commitment automatically forces that battle to be resolved during the Impulse;
- during the Command Step of a German Impulse, the German player may commit one or two of his Stukas to carry the special 1,000kg bomb to sink the Marat. Stukas committed to this special mission do not participate in the Airstrike; if the Marat is not attacked by Stukas, it provides both AA and Gunfire to the ground battle;
- in combat, the Marat has TF (DF if damaged) and rolls one die for both AA and Gunfire;
- the Marat may be eliminated (the effect is permanent) in one of the two following ways:
- A. the Axis controls Oranienbaum;
- B. the Marat is hit by TWO special 1,000 kg bombs (1 hit permanently damages it).
Example: The Soviets control the Baltic. Tallinn is already contested when the German Impulse starts. The Soviets commit the Marat to Tallinn. This battle is now mandatory. During the Command Segment, the Germans commit both the Stukas to Tallinn and declare that both are carrying the special 1.000 kg bomb. The Marat and the two Stukas will not be involved in the normal combat (which is resolved first) and instead fight against each other. The Marat rolls first for AA (TF) and scores a hit. One of the two Stukas is aborted. The other Stuka rolls ONE die and scores a hit. The Marat is flipped to the damaged side and is deployed in the Neva Bay where it remains restricted and available to support future Battles.
OR 14.4 The Road of Life
The Road of Life was a supply route opened by the Soviets during the war in the desperate attempt to resupply Leningrad across Lake Ladoga during the 900 days long siege.
If Leningrad is Soviet controlled, but has not a valid LoC to any of S1-S12 (under siege), then the Road of Life can give limited supply. Only the Soviets can use the Road of Life.
The Road of Life is considered open and operational if the Soviets fully control:
- Leningrad;
- at least one of three blue harbours on the eastern bank of Lake Ladoga (Kobona, Sjas'stroj' and Sviritsa) or that harbour is in supply itself.
The Soviet player may trace supply across Lake Ladoga and this special feature may be added in combination with the Baltic Sea Supply.
The Road of Life may supply any number of Soviet Units. However, in Areas supplied by the Road of Life, only a limited number of Reinforcements may be deployed and only a limited amount of Leaders Stars and Replacement Points may be spent.
The limit is 1 Reinforcement, 1 HQ Star and 1 Replacement Point per each full controlled and supplied blue harbour, up to a maximum of three if controlling all three.
However in Areas supplied by the Road of Life and without a land connection:
- only two Reinforcements may be deployed (but in this case only one – in Leningrad – may be deployed, as Pushkin is contested);
- only two Replacement Points may be spent (in example to replace a white step OR two black steps);
- only two HQ Stars may be Regenerated.
Example: during the Logistics Phase of October, Leningrad has no ground connection with any of the Soviet Supply Source (Area S1-S12). The Soviets have lost control of the Baltic (Tallinn, Kuresare and Hanko are Axis controlled). However the Soviet player controls Leningrad (full control) and Oranienbaum (contested, still controlling the Neva Bay) and two of three blue harbors which have a LoC with a Soviet Supply Source (S1-S12). Thus all the Soviet Units in the image above are in supply (some by tracing a LoC by land, red supply icon, some by the Road of Life, blue supply icon). Supply may be traced by sea only through the Neva Bay, thus Oranienbaum is in supply. The Marat is always in supply if the Soviets control Oranienbaum (green supply icon).
OR 14.5 Blizzard
Starting from the 1st German Impulse of December, the Weather automatically turns into Blizzard.
Effects: Logistics Value is always halved. German Blocks' Strength (the number of dice rolled and the Air/Tactical Range) is reduced to: 1/2 when defending and to 1/4 when attacking. Soviet/Finnish Blocks' Strength (the number of dice rolled and the Soviet Tactical Range) is reduced to 1/2 when attacking and it is normal when defending.
OR 14.6 Operation Typhoon
In September, Hitler issued orders for Moscow to be taken before the winter (Operation Typhoon) and ordered the best formations to be withdrawn from other fronts to be concentrated against the capital.
Starting from the 1st Axis Impulse of September, one German Block must be removed every Axis Impulse for the seven following Impulses.
The Block must be chosen by the Axis player from the following eight Blocks and in such a way that a Block of the same corps colour is not removed in two consecutive Impulses.
If one of the above eight Blocks has been eliminated, then another one must be freely chosen by the Axis player. Once all the eight German Block have been removed, then Zhukov is removed.
Example: during the 1st Axis Impulse of September, the Axis removes the 6th Tank Division (red). In the following Impulse he can remove the 8th LW HQ OR one of the 56th Panzer Corps Blocks (green). He chooses the 3rd Motorized Division (green). In the next Impulse they can either remove the 8th LW HQ or one of the three remaining 41st Panzer Corps Blocks (red). Once all the eight German Block have been removed, the Soviets must remove Zhukov.
These nine Blocks are permanently removed, but do not count for eliminated Blocks.
OR 14.7 Agility
Agility grants more mobility to some units.
- Cavalry always pays 2MP when entering an Area which would cost 3MP for any other Block (Rainy Weather included). All three Soviet Cavalry Divisions and the Finnish Cavalry Brigade get this special ability.
- The three Soviet Shock Armies and the 14 Axis Infantry Divisions (seven Finnish and seven German including the 163rd Division) are still considered Slow Blocks for any purpose, but now have 4 MP instead of 3.
- The Spanish "Azul" Division, does not suffer any penalty in Snow and it is only halved if attacking in Blizzard.
OR 14.8 Soviet 1st Tank Division
The two Soviet 1st Tank Division's regiments were detached to Kandalaksha and to Karelia respectively with the precise task to secure the communications between Murmansk and Leningrad.
The Soviet 1st Tank Division gains the ability of slowing Dietl's advance down toward Murmansk.
Precondition: the Soviet 1st Tank Division is deployed in Murmansk.
Effect: Dietl's Firepower is reduced from DF to SF.
The Soviet 1st Tank Division can be moved to Murmansk with a Pass or when moving Blocks by playing the Initiative Disc during a Strategic Impulse. After moving to Murmansk the Soviet 1st Tank Division cannot move back out for the remainder of the game.
When Dietl moves into the Murmansk Box and the Soviet 1st Tank Division is located in Murmansk, then Murmansk does not automatically fall. Instead, starting from any next Tactical/Strategic Impulse, the German player can activate Dietl to make a Combat against the 1st Tank Division.
Dietl hits the 1st Tank Division on a roll of 6. Each hit reduces the 1st Tank Division.
The 1st Tank Division cannot hit Dietl in any way, and Dietl cannot be regenerated if he occupies the Murmansk box.
If Dietl eliminates the 1st Tank Division (this effect is permanent and the 1st Tank Division counts as a surrendered Soviet Block) then Murmansk falls as well.
OR 14.9 Lend Lease
Lend Lease was a program under which the United States supplied the United Kingdom and – from September 1941 – the Soviet Union with food, oil, and materiel.
Starting from September 1941, the Soviets get 1 extra Logistics Point if they control all the following:
- Area S1;
- Area S2;
- Area S3;
- Area S4;
- Murmansk.
Scenario Setup
There are three Scenarios (Les Preludes, Leningrad in Sight and Closing the Ring) and one Campaign Game (The Road to Leningrad) included in this game. While the three scenarios are relatively easy to play and can be finished in 30-60 minutes, the full campaign game requires a bigger investment in terms of skill, experience and time. Setup is performed first by the Soviets, and afterwards by the Germans. For setup, Blocks are first grouped by nationality (block colour), then by Army/Front Colour, then – unless specified – randomly selected and deployed onto the map in Areas, as specified in the Scenario Setup Rules.
Blocks are deployed at maximum strength unless:
A. specified in the Setup instructions with a number from "1" to "4" in brackets; B. for those Soviet Blocks whose first step is marked with a "Remnants" symbol, which must be deployed at Minimum Strength.
1. Les Preludes
We find the armies pausing an instant after the Battle of Raseiniai, which had included about 1000 tanks, with 3-1 odds against the Germans. Only their tactics and Luftwaffe close support gave them the advantage, though meeting KV tanks for the first time was a great shock.
On July 1, the Germans entered Riga and set the stage for our scenario, where Army Group North aims to complete the conquest of the Baltic States and capture the key locations needed for the assault on Leningrad. Can you make these accomplishments faster than the Germans did?
- Scenario Start: July Impulses Phase.
- Weather: Good.
- Initiative: Germany.
- Scenario Setup: as in the Campaign Game.
- Scenario Length: the scenario lasts till the July Final Phase, unless a Sudden Death result occurs first.
- Special Rules: during this short scenario, each player may use the Initiative Disc only once.
- Special Victory Conditions: the game immediately ends with an Axis Victory if any of the following two conditions is met:
- a. the Axis controls Leningrad;
- b. the Axis controls Tallinn, Velikiye Luki and Pskov.
- Any other result is a Soviet Victory.
- Do not use any Optional Rules.
2. Leningrad in Sight
After having destroyed the last available enemy tank formations and capturing Pskov on July 10, von Leeb seemed ready to strike for Leningrad. The plan was for Army Group North to seize the Baltic coast, while the Finns would capture Karelia and created Greater Finland. This, they hoped, would leave Leningrad open to capture by a surprise thrust.
Even though, on August 6, Hitler repeated his order: "Leningrad first, Donetsk Basin second, Moscow third," he later detached 4th Panzer Army, von Leeb's most powerful unit, to participate in Operation Typhoon. With the Finns seemingly content to reoccupy land they lost in the Winter War but advance no further, von Leeb was left few options beyond a siege. But we know how, historically, the siege turned out. Can you lead Army Group North to victory?
- Scenario Start: July Impulses Phase.
- Weather: Good.
- Initiative: Germany.
- Scenario Setup: along the Green Dashed Line and the Soviet-Finnish border. The Soviets control Hanko, the two Baltic Islands and all the Areas east of the frontline. The Axis controls all the Areas west.
- Scenario Length: the scenario starts in the July Impulses Phase, with the Soviets playing the 1st Impulse, and ends in the Final Phase of August, unless a Sudden Death result occurs first.
- Special Victory Conditions: the game immediately ends (Sudden Death) with an Axis Victory if any of the following two conditions is met:
- a. the Axis controls Leningrad;
- b. Leningrad has no LoC with S1-S12;
- c. the Axis controls Tallinn, Velikiye Luki, Novgorod and Petrosavodsk.
- Any other result is a Soviet Victory.
- Do not use any Optional Rules.
Soviets
LV=13 (Stalin= 4; deployed not exhausted HQs= 3; Victory Points= Murmansk, Leningrad, Ostashkov, Tikvin, Tallinn and Novgorod, 6; eliminated German Blocks= 0, 0).
Eliminated Soviet Blocks: nine Soviet Blocks randomly taken (four Orange Infantry, two White Mechanized, two White Tank, the Airborne Infantry) have been eliminated and added to the Soviet Reinforcement Pool; two White Blocks (one Tank and one Mechanized) surrendered and are permanently eliminated.
Reinforcement Pool: 18 Blocks (all the nine Blocks with a Green Dot plus the nine eliminated Blocks) are in the Soviet Reinforcement Pool. The 13 Blocks with "S" and the three Blocks with "N" are not available in this scenario.
The Soviets deploy:
- Stalin, the two Static Brigades and the six Yellow Blocks (all nine at maximum strength) as in the campaign game;
- nine Defensive Lines in Area H, O, 39, 62, 79, 64, 93, 133 and G4;
- The Leningrad Militia in Leningrad (1) and the Leningrad HQ (L) Front (3) in Area L;
- six Light Blue Infantry Blocks, one each, in the following Areas: T, 59, 45, 46, 47 and 81;
- the Light Blue Mechanized Division (1) in Area 64;
- the two Light Blue Tanks (both at 1) in Area 62 and 79, one each;
- the NorthWestern HQ (NW) Front (2) and one white Tank (1) in Area 93;
- one white Tank (1, marked Isolated) in Area 110;
- finally, three Orange Infantry in Area 75, 133, G4 (one at 1, one at 2, one at 3 – Soviet player choice).
Axis
LV=11 (Hitler= 4; deployed not exhausted HQs= 6; controlled Victory Areas= Riga, 1; eliminated Soviet Blocks= 2, 0).
Eliminated Blocks: none.
Luftwaffe: not deployed yet.
Reinforcement Pool: as in the campaign game.
Defensive Lines: none.
The Axis deploys:
- Hitler, Dietl (D) HQ and the 12 Finnish Blocks as in the campaign game;
- the 18th Army HQ (2) in Area 129
- the 16th Army HQ (3) in Area G2
- Reinhardt (R) Panzer HQ (3) in Area 130;
- Manstein (M) Panzer HQ (3) and the Green Tank in Area 112;
- the TT Motorized Division in Area 131;
- two Light Blue infantry Blocks in Area 132;
- the two Red Tanks and the Red Motorized Infantry in Area 113;
- the Green Motorized Infantry in Area 91;
- three Yellow infantry (two at 4, one at 3 – Axis player choice) one in Area 74, and two in Area 55.
3. Closing the Ring
At the beginning of September, the Axis forces are looming at the gates of Leningrad, establishing jump-off points and hoping to encircle Leningrad and end the war before Christmas. (German scientists had calculated the city would reach starvation in only a few weeks.)
But, the seasonal "sea of mud" that the Russians call "Rasputitsa" is coming, followed one of the coldest winters of the century. And, the Soviets have started massing reserves that could disturb Axis operations, even before the winter comes. And with the winter comes the Siberian divisions... Can the German player either capture Leningrad or completely cut it off from support? Or can the Soviet player punish the Germans for lost time and keep their "Road of Life" open long enough?
- Scenario Start: September Logistics Phase.
- Weather: Good. Weather dieroll from October.
- Initiative: Germany.
- Scenario Setup: along the Red Dashed Line. The Soviets control Hanko, the two Baltic Islands and all the Areas east of the frontline, the Axis controls all the Areas west, including the Karelian Isthmus (Area 48 excluded).
- Scenario Length: the scenario starts with the September Logistics Phase and ends in the Final Phase of October, unless an Axis Sudden Death result occurs first.
- Special Victory Conditions: the game immediately ends (Sudden Death) with an Axis Victory if any of the following two conditions is met:
- a. the Axis controls Leningrad;
- b. the Axis controls Oranienbaum, Tikhvin, Ostashkov and Petrosavodsk.
- Any other result is a Soviet Victory.
- Do not use any Optional Rules.
Soviets
LV=10 (Stalin= 3; deployed not exhausted HQs= 3; Victory Points= Leningrad, Tikhvin, Murmansk and Ostashkov, 4; eliminated German Blocks= 0, 0).
Eliminated Blocks: 8 Soviet Blocks (one White Tank and one White Mechanized Divisions – randomly drawn – and all six Soviet Infantry Corps – two Light Blue and four Orange) surrendered and cannot be rebuilt.
Reinforcement Pool: one White Cavalry, two White Mechanized and four White Tanks Divisions – all seven randomly drawn – plus the Airborne Corps and all the 13 September Reinforcements are in the Soviet Reinforcements Pool (21 blocks).
The three Blocks marked with "N" are not available in this scenario.
The Soviets deploy:
- Stalin (3) in Moscow;
- NorthWestern HQ (NW) Front (2) in Area 146;
- Karelia HQ (K) Front in (2) Area 44;
- Leningrad HQ (L) Front (2) in Area "L" with the Leningrad Militia (3);
- the two Static Infantry in Area "H" and "K";
- The following Combat Blocks are randomly drawn and deployed follows:
- seven Light Blue blocks (may be Infantry, Mechanized or Tank Divisions) - one each - in Area "O", 61, 62, 63, 64, 65 and 66;
- five Yellow blocks (four Infantry and one Tank Division): one each in Area 48, 43, 29, 30 and 14;
- three Orange Infantry Divisions: one each in Area 136, 143 and 142;
- eight White blocks (six Infantry and two Cavalry Divisions): one each in Area 82, 97, 84, 67, 96, 98, 117 and 146.
- Ten Defensive Lines are deployed in Area 47, "O", "L", 63, 96, 97, 117, 136, 142 and 143;
Axis
LV=13 (Hitler = 3; deployed not exhausted HQs=7; controlled Victory Areas= Riga, Novgorod and Tallinn, 3; eliminated Soviet Blocks=8, 0).
Eliminated Blocks: none.
Luftwaffe: available (but both LW HQs exhausted).
Reinforcement Pool: four White Infantry Divisions.
The Axis deploys:
- Hitler (3) in Rastenburg;
- Dietl HQ (2) in Titovka;
- Mannerheim (2) in Mikkeli;
- 16th Army (2) in Area 95;
- 18th Army (2) in Area 59;
- Schmidt (S) Panzer HQ (2) in Area 79;
- Reinhardt (R) Panzer HQ (2) in Area 77;
- Manstein (M) Panzer HQ (2) in Area 116;
- 1st LW HQ (0) in Area 113;
- 8th LW HQ (0) in Area G4;
- the remaining 11 Finnish blocks - all at full strength and randomly drawn - one each in Area 32, 45 and 46; two each in Area 13, 28, 41 and 42;
- the TT Motorized Division and six White Infantry Divisions all randomly drawn one each in Area 54, "T", 59, 60, 113, 115 and G4;
- the eight remaining fast blocks (four Motorized and four Tank Divisions) are deployed randomly drawn - one step below maximum strength, one each in Area 78, 80, 81, 94, 95, 116, 133 and 134;
- the three Light Blue Infantry Corps in Area 116, 135 and G4;
- the four Yellow Infantry Corps in Area 78, 79, 80 and 81.
Once deployment is completed, the German player rolls one die for each of his seven Infantry Corps to determine their strength:
- at minimum strength on a dieroll of 1;
- at "2" strength on a dieroll of 2;
- at "3" strength on a dieroll of 3;
- at full strength on a dieroll of 4, 5 and 6.
Defensive Lines: one black DL in Area 32.
The Road to Leningrad – Campaign Game (July – December 1941)
While the original plan for Operation Barbarossa called for Leningrad to be captured before the drive on Moscow, the fluid operations of the opening month had enticed Hitler into battles of encirclement, in which he believed destroying the Soviet armies would lead to victory. By the time his attention turned back to Leningrad, the city had become a fortress, the Russian weather had delivered the infamous Rasputitsa ("sea of mud") and then came an especially cold winter. Added to this, Stalin's spy network allowed to predict Japanese intentions, which would free 50 divisions from the Far East. They would arrive just in time...
In game terms, the Soviets must buy time throughout the summer without losing too many units or VP. They must hold on to just enough land and units, through the German summer fury, to make the German fall and winter very unpleasant. Yet, they must not settle into a mindset that is only about defense, as making the German fear a sudden counterattack is vital to the long-term victory. The Axis must decide whether to go entirely for Leningrad or take advantage of the rewards of side efforts. This challenge is compounded by the randomness of their reinforcements, so the German player must balance advance planning with being flexible enough to take the best of what comes. Sometimes he must be daring, since "playing safe" will never produce victory. And yet, he must remember, it is the Soviet player who can achieve "instant victory" the fastest.
The Campaign starts in the July Impulses Phase and lasts till the Final Phase of December, unless a Sudden Death Victory (2.4.4.2) result happens first.
- Weather: Good. Weather dieroll from October.
- Initiative: Germany.
- Area Control: the Germans control Rastenburg, Petsamo, all the Areas in Finland, Area G1, G2, G3 and all the Areas west of the Daugava river. All the other Areas/Boxes are Soviet controlled.
Soviets
LV=13 (Stalin= 4; deployed not exhausted HQs= 3; Victory Points= Murmansk, Leningrad, Ostashkov, Tikhvin, Tallinn and Novgorod, 6; eliminated German Blocks= 0, 0).
Eliminated Soviet Blocks: none.
Reinforcement Pool: all the 9 Blocks with a Green Dot) are in the Soviet Reinforcement Pool; the 13 Blocks with "S" will be available in September; the three Blocks with "N" will be available in November.
Note: in total, of 62 Soviet Blocks, 37 are in play, 9 are in the Reinforcement Pool (13 will become available in September, three in November); of 47 Axis Blocks, 29 are in play, 13 are in the German Reinforcement Pool (5 become available if Velikiye Luki is German controlled).
The Soviets deploy:
- Stalin in Moscow;
- The three Soviet Defensive Lines – one each – in Area "H", "O" and 39;
- The three Soviet HQ "NW", "L" and "K" in Area 113, "L" and 42 respectively;
- The two Static Infantry in Area "K" and "H";
- The Airborne Corps in Area 129 (Remnant);
- The Leningrad Militia in Area "L" (Remnant);
- The five Yellow, the nine Light Blue, the seven Orange and the eight White units (17 Infantry, four Mechanized Infantry and eight Tanks) over the specific icon on the mapboard. Of these 29 Blocks, eight (two Infantry, two Mechanized Infantry and four Tanks) are Remnants, which are randomly selected and deployed.
Axis
LV=11 (Hitler= 4; deployed not exhausted HQs= 6; Victory Points= Riga, 1; eliminated Soviet Blocks= 0, 0).
Eliminated German Blocks: none.
Reinforcement Pool: 13 Blocks are in the Reinforcement Pool (the 1st LW HQ, one Light Blue, one Yellow and ten White Infantry Divisions).
The five Blocks marked with "V" will be available if Velikiye Luki is German controlled.
The Germans deploy (all at maximum strength):
- Hitler in Rastenburg;
- Dietl HQ in Petsamo (Trail to Murmansk);
- Mannerheim HQ in Area 6;
- the 163rd Infantry Division in Area 11;
- the Finnish Cavalry Division in Area 12;
- the two Finnish Infantry Corps in Area 24, 38;
- the seven Finnish Infantry Divisions - one each - in Area 32, "F", 9, 10, 11 and two in Area 8;
- Manstein HQ in Area 126 with a Green Mot. Div.;
- Reinhardt HQ in Area 125 with a Red Mot. Div;
- 16th Army HQ in Area 124 with two Light Blue Infantry;
- 18th Army HQ in Area 123;
- one Yellow Infantry in Area 107;
- one Yellow Infantry in Area 108;
- one Yellow Infantry in Area G1;
- two Red Tanks in Area G2;
- one Green Tank and the Mot. Div. in Area G3.