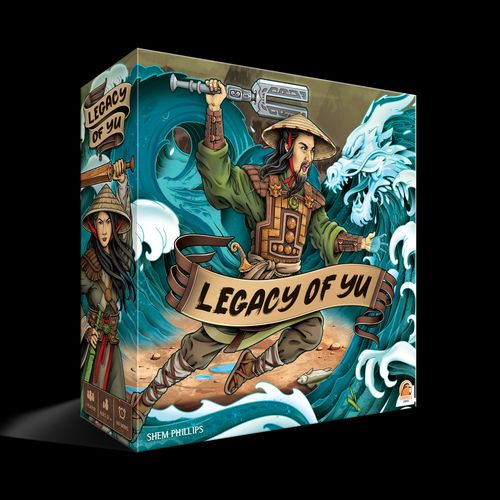
Legacy of Yu
Legacy of Yu Rulebook
Table of Contents
Table of Contents
The Campaign
Legacy of Yu is a solo-only, fully-resettable, nonlinear campaign game in which you step into the role of the legendary hero of the Xia Dynasty, Yu the Great. It will be your job to build the Canals ahead of the impending Flood, while also defending your growing settlement against neighbouring Barbarian tribes. With each game, stories will be shared and new gameplay elements added. The campaign features a self-balancing system which adapts to how well you are doing. The campaign ends once you either win or lose 7 games.
For most campaign games, you might expect to find an introductory game, to get you familiar with the systems. This is not the case for Legacy of Yu. Instead, you should be confident to jump right in and start progressing through the campaign. And don't worry if you end up losing your first few games. This will still help to unlock new elements and to progress the story.
Only open the Story Book when instructed to! Any time the game instructs you to resolve an effect showing the Gold Turtle with a number, immediately turn to that entry in the Story Book. Carefully read the entry and follow its instructions. Be careful not to read any other entries that might share the same page.
Only look through the Story Deck when instructed to! Any time the game instructs you to find certain Cards, carefully look through the Story Deck to find them. All Cards are numbered with a Grey Stone in their bottom-right corner. Be careful not to look too closely at other Cards as you search through the Story Deck.
Aim of the Game
While elements might change from game to game, the aim for each remains the same: to finish the Canals before it's too late! You win the game if you successfully build all 6 Canal sections and survive till the end of the current Round. There are 3 different ways you can lose the game:
- Due to the Flood: If the Flood moves onto an unbuilt section of the Canal, or off the right side of the Board.
- Due to the Barbarians: If there are ever 7 Barbarians along the top of the Board.
- Due to Damage: If you need to destroy a Townsfolk Card, but have none left to destroy.
Components
- 30 Townsfolk Cards
- 16 Barbarian Cards
- 7 Victory Cards
- 7 Defeat Cards
- 6 Hut Cards
- 10 Canal Cards
- 1 Story Deck (71 Cards)
- 34 Workers (10 x White, 6 x each other Colour)
- 3 Farms
- 4 Outposts
- 4 Huts
- 12 Cowrie Shells
- 9 Clay
- 9 Wood
- 9 Provisions
- 1 Barge
- 1 Flood
- 1 Story Book
- 1 Board
Important! Do not look through the Story Book or Story Deck. Be careful not to shuffle the Story Deck.
Campaign Setup
Before your first game, locate the Victory and Defeat Cards. Place the 2 Gold Cards facedown. Then, shuffle the 6 Blue Victory Cards and place them on top of the Gold Victory Card. Do the same for the 6 Black Defeat Cards, placing them on top of the Gold Defeat Card. Once you have done this, you won't need to set up these decks again for the campaign.
Don't worry if the Cards get mixed up when setting up or packing down the game between plays. Just be sure that the Gold Cards are always on the bottom, and the others are randomly placed on top. Their order will not matter between plays.
Game Setup
For each game, follow these steps:
-
Place the Board in front of you.
-
Shuffle all Townsfolk Cards. Place 10 of these facedown below the Board in the second space from the left. This forms your Ready Pile. The space to its left is for your Exhausted Pile. Place the remaining Townsfolk Cards facedown to the left of the Board to form the Townsfolk Draw Pile. Allow space nearby for the Townsfolk Discard Pile. From the top of the Townsfolk Draw Pile, reveal and place 1 Townsfolk Card faceup into each space above the Board, except for the right-most space.
-
Shuffle all Barbarian Cards and place them facedown to the right of the Board to form the Barbarian Draw Pile. Allow space nearby for the Barbarian Discard Pile. From the top of the Barbarian Draw Pile, reveal and place 1 Barbarian Card faceup into the right-most space above the Board.
-
Separate all Canal Cards into 3 facedown piles by the Jade numbers shown on their backs. Shuffle the "1-2 Jade" Canal Cards together. From these Cards, reveal and place 1 faceup onto each of the 2 left-most outlined spaces of the river, which runs across the top half of the Board. Do the same for the "3-4 Jade" Canal Cards, placing 1 faceup onto each of the 2 middle outlined spaces. Do the same again with the "5-6 Jade" Canal Cards for the 2 right-most outlined spaces of the river. Return all other Canal Cards to the "Huts & Canals" section of the box.
-
Shuffle all Hut Cards and place 1 facedown onto each of the 4 outlined spaces of the settlement in the bottom-right area of the Board. Return all other Hut Cards unseen to the "Huts & Canals" section of the box. Do not look at the other side of Hut Cards until you are permitted to do so (by constructing Huts during the game).
-
Place the 3 Farms, 4 Outposts and 4 Huts in their correct positions, as shown on the Board. Place the Flood at the far-left end of the river. Place the Barge on top of the left-most Canal Card.
-
Place all Workers and Resources (Cowrie Shells, Clay, Wood, and Provisions) into a Main Supply nearby. Also place the Story Book and Story Deck nearby. You may also wish to place the Rulebook facedown to the left of the Board, as it functions as a player aid and icon reference.
As you progress through the campaign, there may be additional elements to set up as well. These will all be explained as they are revealed.
Round Structure
Legacy of Yu is played over a series of Rounds. Each Round follows this structure:
- Harvest
- Take Actions
- Return Barge (if used)
- Suffer Attacks
- Refresh Card Row
You continue through these phases, Round after Round until you either win or lose the game. Before diving into specific phases and actions, there are a few key rules and concepts to cover:
Worker Colours
If an action requires a Labourer (White Worker), then a White Worker must be used. In other words, the "White Worker" icon does not mean "any Worker". Likewise, if an action requires a specific coloured Worker, it must be that colour. Constructed Outposts can allow you to treat a colour as a different colour (see Outposts).
Destroying Townsfolk Cards
If an action or effect requires you to destroy a Townsfolk Card, this must always be the top-most Townsfolk Card from your Ready Pile. It is removed from your Ready Pile and placed faceup into the Townsfolk Discard Pile (not your Exhausted Pile). This will often be as a result of building the Canal or suffering attacks from Barbarians. If you need to destroy (or draw) Townsfolk Cards, but have none in your Ready Pile or Exhausted Pile, you immediately lose the game due to Damage.
Drawing from an empty Ready Pile
If you ever need to draw or destroy Townsfolk Cards from your Ready Pile while it is empty, immediately shuffle your Exhausted Pile to form a new Ready Pile and advance the Flood along the river. Advancing the Flood moves it 1 space to the right. If it moves to a space where there was previously a Canal Card (the Canal has been built), nothing happens. If it moves onto a Canal Card or off the right edge of the Board, you immediately lose the game due to the Flood.
Tip: At the start of each Round, check how many Townsfolk Cards are left in your Ready Pile. This will give you an idea of how many Rounds you have available before the Flood will move.
Townsfolk and Barbarian Draw Piles
If you ever need to draw from these piles while they are empty, simply shuffle all discards to form new Draw Piles. This does not advance the Flood.
1. Harvest
Gain Workers and Resources, and draw Townsfolk Cards in preparation for the Round.
During each Harvest, you simply gain all items depicted by the Harvest icon, and return any Workers from Hut spaces to your supply. In the first Round this will usually be just the basic items shown on the Board. For example, you would draw 4 Townsfolk Cards from your Ready Pile, gain 1 Labourer (White Worker), 1 Cowrie Shell, and 1 Provision. A portion of the Harvest line also states that you gain 1 Cowrie Shell for each Outpost you have constructed. As you play the game, more items will also be added to your Harvest. This can be from constructed Farms, and any Townsfolk Cards tucked beneath the Board.
In later Rounds you may have Workers on the Hut spaces of the Board. These are returned to your supply during each Harvest. As explained under Using Huts, this is a way of using your Workers without actually spending them back to the Main Supply.
Take any Townsfolk Cards you draw from your Ready Pile into your hand. Place all Workers and Resources in front of you as your supply. There is no hand limit, nor any limit to how many Workers or Resources you may have in your supply. However, you are limited by the physical components in the game. If you ever need to take a Worker or Resource, and it is not available, you simply don't collect it. There is however, a way to trade items, which can be done at any point. This can be a way to make Workers or Resources available when they previously were not (see Trading).
A fuller example Harvest might grant you:
- 5 Townsfolk Cards from your Ready Pile
- 3 Workers: 1 White, 1 Blue and 1 of any colour (excluding White)
- 2 Provisions
- 3 Cowrie Shells
- You would also return the Labourer (White Worker) and Fighter (Red Worker) from your Hut spaces to your supply
2. Take Actions
Use all Townsfolk Cards in your hand, and take actions by spending Resources and Workers.
This phase is where you will spend most of your time during the game. There are a lot of different actions that can be taken. Most actions can be taken any number of times, granted you have the Resources or Workers to do so. This phase continues until you decide to stop. You may hold onto any number of Workers and Resources in your supply between Rounds. However, you cannot hold onto Townsfolk Cards in your hand. All Townsfolk Cards in your hand must be used in some way each Round.
Using Townsfolk Cards
Townsfolk Cards have a number of uses:
-
They can be played from your hand to your Exhausted Pile to gain the items shown in the top-left corner (only those on the brown background). A Card might provide 1 Clay if played.
-
They can be discarded from your hand to the Townsfolk Discard Pile (not your Exhausted Pile) to gain all items shown in the top-left corner (both those on the brown background and on the red background). Discarding Townsfolk Cards from your hand is not something you want to do too often, but it can be a great way of gaining those few extra items you might be seeking. A Card might provide 1 Clay and 1 Provision if discarded.
-
They can be tucked beneath the Board to improve your Harvest in future Rounds. You start the game with 1 available space for tucking a Townsfolk Card. Each Hut you construct opens up 1 more space. Each space may only hold 1 tucked Townsfolk Card. Once tucked, Townsfolk Cards will remain there for the rest of the game. A tucked Card might provide 1 Provision and 1 Cowrie Shell during each Harvest.
-
Lastly, they can be used for their Food icon shown on the left of each Card (on the tan background). You should ignore these icons until their usage is explained by events revealed throughout the Story Book.
Actions with Workers and Resources
You can use Workers and Resources for a number of different actions. These include:
- Building the Canal (max. once per Round)
- Attacking Barbarians
- Recruiting or dismissing new Townsfolk
- Constructing Farms, Outposts and Huts
- Using Huts
- Trading
More actions may be added to this list as you progress through the campaign.
Building the Canal
To build the next section of the Canal, the Barge must be sitting on the left-most Canal Card. If the Barge is not there, that's because you already built a section of it this Round (you can only take this action once per Round). If the Barge is there, follow these steps to build the next section of the Canal:
- Spend the Workers and Cowrie Shells shown at the top of the Canal Card back to the Main Supply.
- Move the Barge off the Board. There is a space for it to sit on the back of the Rulebook if you are using it.
- Remove the Canal Card from the Board, placing it aside for now.
- Resolve the effects shown along the bottom of the Canal Card from left to right. This will often be gaining Clay or Wood, destroying Townsfolk Cards, or referring to an entry in the Story Book. Townsfolk Cards destroyed this way represent the dangerous and sometimes deadly task of building the Canals.
- Return the Canal Card to the "Huts & Canals" section of the box, unless a Story Book entry specifies otherwise.
Attacking Barbarians
Left unchecked, Barbarians will storm your settlement each Round. To attack a Barbarian, follow these steps:
- Spend the Provisions shown on the Board below where the Barbarian Card is sitting.
- Spend the Workers shown on the left side of the Barbarian Card.
- Gain the rewards shown on the right side of the Barbarian Card.
- Place the defeated Barbarian Card into the Barbarian Discard Pile.
For example, the first Barbarian might require 2 Provisions, 2 Riders (Black Workers), and 1 Archer (Yellow Worker), rewarding 2 Cowrie Shells and 1 Clay if defeated. A second Barbarian might require 3 Provisions, 2 Archers (Yellow Workers), and 1 Fighter (Red Worker), rewarding 3 Cowrie Shells.
If you defeat a Barbarian with a Gold Turtle, turn to that entry in the Story Book. Carefully read the entry and follow its instructions.
Recruiting or dismissing new Townsfolk
Above the Board are a number of Townsfolk Cards for you to recruit or dismiss. When doing either, you must pay the Provisions shown on the Board below where the Townsfolk Card is sitting. The left-most Townsfolk Card each Round is always free.
- Recruit: Place the Townsfolk Card into your Exhausted Pile. You do not gain any further rewards when doing this.
- Dismiss: Place the Townsfolk Card into the Townsfolk Discard Pile, and gain the items shown in the top-left corner (only those on the brown background).
Constructing Farms, Outposts and Huts
In order to keep up with the demands of building the Canal and defending your settlement, you will want to construct some buildings. To construct a building, you will need to have an available build site. These are the square spaces directly below the river. You begin with just 1 build site, but will unlock more as you build the Canal. If you have no available build sites, you cannot take this action. Follow these steps when constructing a building:
- Spend the required Workers, Clay and Wood.
- Move the building you are constructing to any available build site, and gain any items you cover.
The position of the Flood has no effect when constructing buildings. Build sites do not need to be filled from left to right.
- Farms cost 1 Labourer, 1 Clay and 1 Wood. You may build these in any order. They provide you with additional Workers or Provisions each Harvest.
- Outposts cost 1 Labourer, 1 Clay and 3 Wood. You may build these in any order. They provide you with additional Cowrie Shells each Harvest. They also allow you to treat Workers as different colour types. For example, an Outpost could let you treat White, Red and Blue as a single colour type, so you could use a Blue Worker to construct a building, or Blue and White Workers to attack a Barbarian that requires Red Workers.
- Huts cost 1 Labourer, 3 Clay and 1 Wood. You must build these in order from left to right. They provide you with new Hut spaces to place Workers, and open new spaces for tucking Townsfolk Cards beneath the Board. When building a Hut, turn over the Hut Card and resolve its printed effects. Then return the Hut Card to the "Huts & Canals" section of the box, unless a Story Book entry specifies otherwise.
Trading
Along the river are printed a number of trades. You may use each trade any number of times, at any point during the game (not only during the Take Actions phase). This can be a good way to get around component restrictions. For example, if you needed to collect 3 Cowrie Shells, but there were only 2 available, you could spend 2 Cowrie Shells back to the Main Supply to gain 1 Provision, making those 3 Cowrie Shells available to collect. The position of the Flood has no effect on trading.
You start the game with only 1 potential trade, but more will become available as you build the Canal. Reading from left to right across the river, each trade allows the following:
- Spend 3 Cowrie Shells to gain 1 Clay or 1 Wood.
- Spend 2 Cowrie Shells to gain 1 Provision.
- Exhaust 1 Townsfolk Card from your hand to gain 2 Cowrie Shells (you gain no other benefits from that Card).
- Spend 1 Labourer (White Worker) and 1 Provision to gain 1 Worker of any colour.
- Spend 4 Cowrie Shells to gain 1 Labourer (White Worker).
- Spend 2 Provisions and 2 Cowrie Shells to draw 1 Townsfolk Card from the top of the Townsfolk Draw Pile and add it to your hand.
- Spend 1 Clay or 1 Wood to gain 1 Cowrie Shell.
Using Huts
You may place Workers from your supply onto Hut spaces. As mentioned earlier, any Workers placed here will be returned to your supply during each Harvest. Each Hut space can only contain 1 Worker, and its colour does not matter. You start the game with only 1 Hut space, but more will become available as you construct Huts. Placing Workers on Hut spaces provides a variety of immediate rewards. These rewards are very similar to those gained during each Harvest.
3. Return Barge (if used)
Once you're done taking actions, it's time to do some quick resetting before the next Round.
If you did not construct the Canal this Round, the Barge should still be on the Board. Skip this phase if that is true. If you did construct the Canal, you'll need to return the Barge to the Board. Place it onto the left-most Canal Card still on the Board. If there are no Canal Cards remaining on the Board, there is no need to return the Barge (the game is about to end).
4. Suffer Attacks
The Barbarians attack! Will you bribe them or take Damage defending your settlement?
For each Barbarian Card still above the Board you must resolve the effects shown along their bottom edge. Most Barbarian Cards will have the option to either destroy Townsfolk Cards from the top of your Ready Pile (placed into the Townsfolk Discard Pile), or to pay some combination of Workers or Resources as a bribe. You are not forced to pay the bribe. But if you cannot pay it, or choose not to, you must suffer the Damage (destroying Townsfolk Cards). When bribing with Workers, you can think of this as sending off Workers to negotiate with the Barbarian. They'll probably return back to your settlement at some point though.
For example, a Barbarian might either destroy 1 Townsfolk Card or cost 1 Labourer (White Worker) to bribe.
5. Refresh Card Row
Refill all spaces above the Board with Barbarian and Townsfolk Cards.
To refresh the Card Row, follow these steps:
- If there are any Townsfolk Cards still above the Board, slide them as far as possible to the left to fill empty spaces.
- Count up how many Barbarian Cards need to be added. This is the sum of all numbers on Barbarian Card icons found along the top shore of the river.
- If required, slide any remaining Barbarian Cards to the left so that there are enough spaces to their right for the new Barbarian Cards to be added. In the rare case that there are Townsfolk Cards in the way, discard the left-most Townsfolk Card and repeat step 1 (think of this as the Barbarians chasing off the Townsfolk).
- Reveal the required number (from step 2) of Barbarian Cards from the top of the Barbarian Draw Pile to fill spaces from right to left. If there are any spaces between Barbarian Cards at this point, slide them as far as possible to the right to fill any empty spaces. If the Barbarian Draw Pile runs out when you need to draw from it, simply shuffle the discards to form a new Draw Pile.
- In most cases, this will result in a few empty spaces in the middle, dividing the Townsfolk and Barbarian Cards. Fill these spaces from left to right by revealing Townsfolk Cards from the top of the Townsfolk Draw Pile. If the Townsfolk Draw Pile runs out when you need to draw from it, simply shuffle the discards to form a new Draw Pile.
If at this point there are 7 Barbarian Cards above the Board, you immediately lose due to the Barbarians. Even if you had completed the Canal, this would still cause you to lose. Often in your last Round you'll be aiming to finish the Canal, while also defeating as many Barbarians as possible.
End of the Game
The game ends when you either win or lose. You win the game if you successfully build all 6 Canal sections and survive till the end of the current Round. There are 3 different ways you can lose the game:
- Due to the Flood: If the Flood moves onto an unbuilt section of the Canal, or off the right side of the Board.
- Due to the Barbarians: If there are ever 7 Barbarians along the top of the Board.
- Due to Damage: If you need to destroy a Townsfolk Card, but have none left to destroy.
If you win the game, turn over the top Victory Card. This will direct you to read an entry from the Story Book.
If you lose the game, turn over the top Defeat Card. This will direct you to read 1 of 2 entries from the Story Book. If you lost due to the Flood, read the top entry. If you lost due to the Barbarians or due to Damage, read the bottom entry.
If you turned over a Gold Victory or Defeat Card, you have finished the campaign. This Card will direct you to read 1 final entry from the Story Book.
Between Games
To store your progress between games, be sure to file Cards into their correct sections of the box insert. Over the course of the campaign, various Cards will be added from the Story Deck, while others will be placed into History. Once placed into History, there is no need to access these cards again (don't worry about sorting these cards).
No Workers or Resources are carried over between games. Any remaining Townsfolk Cards in your hand or Ready/Exhausted Piles are shuffled back together with all other Townsfolk Cards during the setup of your next game. Likewise, all other elements are reset each game, such as Canal Cards, Hut Cards, buildings, etc. In other words, after resolving your Victory or Defeat Card, the current game's final state has no effect on your next game.
Resetting the Campaign
Legacy of Yu is completely resettable. This allows you to play through multiple campaigns, or to share the game with a friend to enjoy. To reset the campaign, separate all Cards using their Grey Stone numbers. The Story Deck should be sorted in its original order. Grey Stone "0-valued" Cards are the starting Cards. Regardless of whether you win or lose the campaign, you would have only seen around 40-60% of the hidden content. Combined with the randomness of how Victory and Defeat Cards are revealed, this makes each campaign feel unique.
Icon Reference
Worker types: Labourer (White), Fighter (Red), Rider (Black), Spearman (Blue), Archer (Yellow). "Any coloured Worker (not a Labourer)" and "Any Worker" icons are also used.
Resources: Wood, Clay, Provision, Cowrie Shell.
Common icons:
- Harvest — gain the depicted items.
- Advance the Flood 1 space along the River.
- Your Ready Pile.
- Shuffle your Exhausted Pile to form a new Ready Pile.
- Your Exhausted Pile.
- Damage/Destroy — Place the top Card from your Ready Pile to the Townsfolk Discard Pile.
- Draw 1 Card from the top of your Ready Pile (Note: this is never optional).
- Draw 1 Card from the top of the Townsfolk Draw Pile (to hand, unless specified otherwise).
- Reveal 1 new Card from the top of the Barbarian Draw Pile.
- Story Book reference number (Gold Turtle with a number).
- Card reference number (Grey Stone with a number).
Other icons may be revealed through Story Book entries. If you are ever unsure of a new icon's meaning, most cards have a reference number reminding you where to find the rules in the Story Book. Meat, Fish, Wheat, and Milk: You should ignore these Food icons on Townsfolk Cards until their usage is explained by events revealed throughout the Story Book.