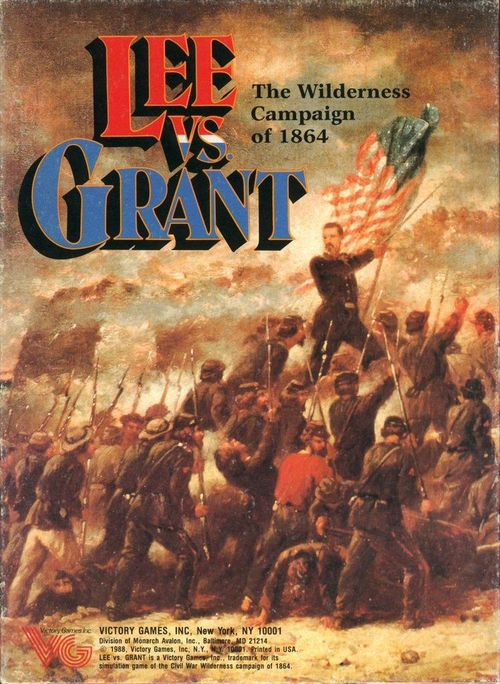
Lee vs. Grant: The Wilderness Campaign of 1864
Lee vs. Grant: The Wilderness Campaign of 1864 Rulebook
Table of Contents
Table of Contents
Game Equipment
Game Components
A complete game of Lee vs. Grant contains the following items:
- One Rules Booklet
- One 22"×32" Mapsheet
- Two 260-piece Counter Sheets
- One Charts and Tables Card
- One Display Card
- Two 6-sided dice
- One Counter Storage Tray
Game Questions
If you have any questions about the rules to Lee vs. Grant, please feel free to send in your questions, written so they can be answered with a one or two word response when possible. Be sure to enclose a stamped, self-addressed envelope with your questions. Send your questions to:
Lee vs. Grant Questions Victory Games, Inc. 43 West 33rd Street New York, NY 10001
Note: Correspondence that does not contain a stamped, self-addressed envelope will not be answered. Please do not call Victory Games with your questions.
Playing Pieces
The playing pieces (or counters) represent military forces from the Union and Confederate armies. Each force is printed in a unique color.
Sample Units
Infantry Leader (front, or "Mobile," side; back, or "Fatigued," side): shows the leader's name, his rank/type symbol, his portrait, his command affiliation, and his command value (a Fatigued leader's command value is replaced with an "F").
Cavalry Leader (front/Mobile and back/Fatigued sides): same layout as an Infantry Leader — name, rank/type, portrait, command affiliation, and command value (Fatigued value shown as "F").
Substitute Leader (front/Mobile and back/Fatigued sides): shows the rank/type, army affiliation, an identification number, and a command value (Fatigued value shown as "F").
Strength Marker (front, or "Organized," side; back, or "Disorganized," side): shows an Organized or Disorganized indicator, a cannon icon, and a combat value and manpower value (a soldier icon marks the manpower value; the Disorganized side's manpower value is printed in parentheses).
Summary of leader symbols and sizes:
- Two hollow stars: Cavalry leader (Corps)
- One hollow star: Cavalry leader (Division)
- Two solid stars: Infantry leader (Corps)
- One solid star: Infantry leader (Division)
Each corps is indicated by its own color. This color is intended to help players when determining supply for leaders.
Summary of Playing Pieces
Union (front / back): Infantry Leader; Cavalry Leader; Substitute Leader; Strength Marker (Organized front / Disorganized back).
Confederate (front / back): Infantry Leader; Cavalry Leader; Substitute Leader; Strength Marker (Organized front / Disorganized back); Robert E. Lee Marker; Confederate Bridge Marker (the front of a Confederate Bridge marker is a Union Bridge — see Bridges).
Special Union markers: Ulysses S. Grant Marker; Depot Marker; Union Bridge Marker (the back of a Union Bridge marker is a Confederate Bridge — see Bridges); Union Supply Base Marker (Build front / Complete back); Union Garrison Marker; Union Manpower Marker.
Confederate Garrison Markers: Garrison Marker, Combat Value 2 (front/back); Garrison Marker, Combat Value 1 (front/back).
Neutral Markers (front / back): Railroad Destruction (Begin / Complete); Burned Railroad Station; Breastwork / Fort; Confederate Garrison Destroyed; Weather (Clear / Rain); Inactive (1 Game Turn); Inactive (2 Action Cycles); Valley; Movement; Game Turn; Action Cycle.
Abbreviations
General Game Abbreviations
- Cav: Cavalry
- Disorg: Disorganized
- F: Fatigued
- James: Army of the James
- MP: Movement Point
- Mt: Mountain
- N Virg: Army of Northern Virginia
- Org: Organized
- Potom: Army of the Potomac
- Rmd: Richmond
- RR: Railroad
- Val: Valley
- VP: Victory Points
- ZOC: Zone of Control
Leader Names
In addition to listing the full names of the leaders and their ranks at the beginning of the campaign, the state of birth, birth and death dates, and educational background are also given.
Union Leaders
- Ames: Brigadier General Adelbert Ames (X Corps); Maine, 1835-1933; West Point 1861.
- Barlow: Brigadier General Francis Channing Barlow (II Corps); New York, 1834-1896; lawyer.
- Birney: Major General David Bell Birney (II Corps); Alabama, 1825-1864; lawyer.
- Brooks: Brigadier General William Thomas Harbaugh Brooks (XVIII Corps); Ohio, 1821-1870; West Point 1841.
- Burnside: Major General Ambrose Everett Burnside (IX Corps); Indiana, 1824-1881; West Point 1847.
- Crawford: Brigadier General Samuel Wylie Crawford (V Corps); Pennsylvania, 1829-1892; doctor.
- Ferrero: Brigadier General Edward Ferrero (IX Corps); Spain, 1831-1899; dance instructor.
- Getty: Brigadier General George Washington Getty (VI Corps); Washington, D.C., 1819-1901; West Point 1840.
- Gibbon: Brigadier General John Gibbon (II Corps); North Carolina, 1827-1896; West Point 1847.
- Gillmore: Major General Quincy Adams Gillmore (X Corps); Ohio, 1825-1888; West Point 1849.
- Grant: Lieutenant General Ulysses Simpson Grant; Ohio, 1822-1885; West Point 1843.
- Gregg: Brigadier General David McMurtrie Gregg (Cavalry); Pennsylvania, 1833-1916; West Point 1855.
Confederate Leaders
- Anderson: Major General Richard Heron Anderson (III Corps); South Carolina, 1821-1879; West Point 1842.
- Breckrdg: Major General John Cabell Breckinridge (Valley); Kentucky, 1821-1875; lawyer (former Vice President of the US).
- Colquitt: Brigadier General Alfred Holt Colquitt (Richmond); Georgia, 1824-1894; lawyer.
- Dearing: Brigadier General James Dearing (Cavalry); Virginia, 1840-1865; West Point 1861 (did not graduate).
- Early: Major General Jubal Anderson Early (II Corps); Virginia, 1816-1894; West Point 1837.
- Ewell: Lieutenant General Richard Stoddert Ewell (II Corps); Washington, D.C., 1817-1872; West Point 1840.
- Field: Major General Charles William Field (I Corps); Kentucky, 1828-1892; West Point 1849.
- Hagood: Brigadier General Johnson Hagood (Richmond); South Carolina, 1829-1898; lawyer.
- Hampton: Major General Wade Hampton (Cavalry); South Carolina, 1818-1902; legislator.
- Heth: Major General Henry Heth (III Corps); Virginia, 1825-1899; West Point 1847.
- Hill: Lieutenant General Ambrose Powell Hill (III Corps); Virginia, 1825-1865; West Point 1847.
- Hoke: Major General Robert Frederick Hoke (Richmond); North Carolina, 1837-1912; businessman.
Sequence of Play
We must strike them a blow. We must not let them pass us again. We must strike them a blow! — Robert E. Lee, 25 May 1864
Each Game Turn is performed according to a strict Sequence of Play. The Game Turn is composed of six Cycles, which in turn can be divided into Phases and Segments.
The Introductory scenarios in Section 12 use only the three Action Cycles. Players should ignore the Administrative, Valley and Terminal Cycles, and Game Turn Indication when reading through the rules for the first time.
Sequence of Play
Administrative Cycle (Advanced Game only; not on Game Turn 1)
- Random Events Phase. The Union player rolls two dice and both players consult the Random Events Table to determine the event that occurs (see Random Events).
- Union Depot Phase. The Union player may move depots to any completed supply base (see Union Depots). Union depots that were eliminated in a previous turn may be placed on any completed Union Supply Base on the map (see Union Depots).
- Supply Phase. All leaders must trace supply lines to friendly supply sources (see Supply Lines).
- Embarkation Phase (Game Turns 6, 7, and 8). Union leaders occupying port hexes are removed from the map and are placed in the Embarked Leaders box (see Sea Movement).
- Begin RR Destruction Phase. Eligible leaders may have Begin RR Destruction markers placed on them (see Railroad Destruction).
- Reinforcement Phase (Game Turns 3 to 7). Each player rolls a single die to determine the number of reinforcements he receives (see Reinforcements). Reinforcement Points are used by the players.
- Attachment Phase. Division leaders may be attached to corps leaders occupying the same hex (see ).
1st Action Cycle
-
Action Phase
A. Initiative Segment: Both players roll a single die. The player with the higher roll wins (the Confederate player wins ties). The winner of the die roll must take or yield initiative (see The Action Phase).
B. Activation Segment: The player with initiative must perform an Activation Segment or must pass (see The Action Phase).
At the end of an Activation Segment, a new Action Phase is begun, with each player rolling the die and the initiative player performing an Activation Segment or passing. Players continue to perform Action Phases indefinitely until both players have passed (see Ending the Action Phases).
-
Recovery Phase. Eligible leaders may entrench and/or place bridges. Leaders on their mobile sides possessing disorganized Strength markers have their markers flipped over to their organized sides.
Finally, leaders on their fatigued sides are flipped to their mobile sides (see Recovery).
2nd Action Cycle
Identical to 1st Action Cycle.
3rd Action Cycle
Identical to 1st Action Cycle.
Valley Cycle (Advanced Game only)
The Confederate player may declare the Breckinridge option. Next, the Confederate player rolls the die and consults the Valley Table. The result from the Valley Track is applied (see The Valley).
Terminal Cycle (Advanced Game only; not on Game Turn 1)
- Debarkation Phase (Game Turns 6, 7, and 8). Union leaders in the Embarked Leaders box are placed on their mobile sides in any unoccupied or Union-occupied port hex on the map (see Sea Movement).
- Complete RR Destruction Phase. Eligible Begin RR Destruction markers are flipped to their Complete RR Destruction sides (see Railroad Destruction).
- Union Supply Base Phase. The Union player either places a Supply Base marker on its "Build" side on the map or he flips an existing Supply Base from its "Build" side to its "Complete" side (see Union Supply Bases).
Game Turn Indication
If the last turn of a game has been completed, the Union player adds up the number of Victory Points he received, and both players check the Victory Conditions to determine the winner and the level of victory (see Victory). If the game is not over, the Game Turn marker is advanced one box on the Game Turn Record Track; players proceed to the Administrative Cycle of the next turn.
The Action Cycle Track
To keep track of the current Action Cycle, players use the Action Cycle Track (on the map) and marker. When beginning the 1st Action Cycle, place the Action Cycle marker in the first box. Once both players pass, thus ending a cycle, the marker is advanced to the next box on this track.
Basic Game Rules
Basic Concepts
The art of war is simple enough. Find out where your enemy is. Get at him as soon as you can. Strike at him as hard as you can and as often as you can and keep moving on. — Ulysses S. Grant
At the start of play, one person must be the Union player and the other the Confederate player. The Union player sits on the east side of the map and the Confederate player sits on the west.
Leaders
Each player controls his own set of leaders, which are the playing pieces that perform most of the actions in the game. Each leader has a front (mobile) side and a reverse (fatigued) side. The following information is provided on each leader counter:
- Name and Portrait
- Type: infantry (solid star) or cavalry (hollow star)
- Rank: division (one star) or corps (two stars)
- Command Affiliation (the corps which the leader controls or belongs to)
- Command Value (a quantification of the leader's abilities as a commander)
Design Note: The key military unit in the game is the corps. Each corps leader controls a mini-army that is fully capable of maneuvering independently. Tactically, however, the leaders fight best when supported by other friendly corps. A leader's Command value is a subjective evaluation, taking into account the man's leadership capability, the quality of the troops under his command, and the skill of the commander under which he serves. General Burnside, for example, is given a low Command value because he was known to be an unimaginative leader — and also because the troops in his IX Corps were not as seasoned as the Army of the Potomac veterans. Moreover, although the IX Corps always accompanied the Army of the Potomac, it did not officially belong to it for much of the campaign. Due to this unusual command arrangement, Burnside's Command value is relatively poor.
The two Union corps leaders in the Army of the James — Smith and Gillmore — are assigned extraordinarily low Command values mainly because they served under "Beast" Butler, who proved to be one of the most incompetent leaders of the war.
The players represent Lee and Grant, so the counters for these two men are simply markers rather than functional playing pieces. But Lee and Grant — as well as Generals Beauregard, Meade, and Butler — are indirectly simulated in the Command values assigned to their subordinates.
Each leader has an "F" (Fatigued) designation for its Command Value on the reverse side to indicate that he has either been activated during an Action Cycle or is unable to activate due to combat.
Strength Markers
A leader always possesses a single Strength marker. During set-up of a scenario, a Strength marker of the correct value as listed in the instructions is placed directly underneath that leader; the marker is always placed on the map on its front (organized) side.
Each Strength marker has a front (organized) and a reverse (disorganized) side. The organized side has a single number from 1 to 16, which is both the Manpower and the Combat value of the marker. The disorganized side has two numbers: The unparenthesized number (½ to 11) with a cannon icon next to it is its Combat value; and a parenthesized number (1 to 16) with a soldier icon next to it is its Manpower value.
Strength markers never function by themselves; they must always be assigned to a leader. Wherever a leader goes, the marker accompanies it. A maximum of one Strength marker may be assigned to a leader at any given time. As a leader suffers losses or gains reinforcements, his marker changes. A player may examine his opponent's Strength markers at any time.
Design Note: A single Manpower point represents about one brigade of troops. The Manpower value represents the men available to a leader. The Combat value represents their fighting ability.
The Map
The speed at which leaders move across the map and the effects of geography and foliage upon combat are dependent upon the terrain in each hex. In the game there are three categories of terrain depicted: the predominant terrain in each hex; features along the sides of hexes that affect movement and combat; and features inside a hex that are of historical significance, that affect victory, and that may affect the outcome of combat.
Design Note: The major source of information for the map was a 1:200,000 map supposedly used by the commanders in the actual campaign. At two miles per hex, this turned out to be a convenient scale, for the players have to think both tactically and strategically in the game. Features such as roads, rivers, and natural terrain can significantly affect a player's decision to offer battle in a certain hex. Players must also keep the "big picture" in mind, formulating a master plan by using those same terrain features to best advantage.
Hex Terrain
Each hex on the map is one of five major terrain types: city, clear, broken, forest, and mountain. Each terrain type has its own Movement Point cost to enter as indicated on the Terrain Chart (see the Charts and Tables Card). The Terrain Key on the map also indicates this cost.
Some hexes contain more than one type of terrain, but only one is predominant. Hexes containing broken and forest terrain are always forest hexes. A hex containing a City symbol is always a city hex for movement purposes.
Leaders are prohibited from entering mountain hexes (see Movement Restrictions). Roads and pikes are not taken into account when determining the predominant terrain in a hex.
Hexside Features
A number of terrain types appear along hexsides, such as rivers, creeks, bridges, or fords. These types affect the movement of leaders between hexes and sometimes provide a defender with a modifier when resolving combat.
Hex Features
Several other types of terrain appear within a hex, such as towns, RR stations, and ports, but these have no effect on a hex's major terrain classification.
Zones of Control
Each leader exerts a Zone of Control (ZOC) into adjacent hexes, which may limit the movement of enemy leaders. There are two types of Zones of Control: Primary and Secondary. A Primary ZOC consists of all six hexes adjacent to a leader (see illustration). A Secondary ZOC consists of all hexes adjacent to a leader which are connected to the leader's hex by a road or pike (see illustration).
Design Note: Zones of Control represent a force's ability to inhibit the movement of a nearby enemy. A battle line of 60,000 men, for example, would probably stretch beyond one hex and would force an approaching enemy to deploy into line of battle. A small cavalry screening force of a few thousand men, however, could do little more than maintain pickets on nearby roads to report on enemy movement.
Leaders' Zones of Control
Leaders with a Combat value of 4 or more exert Primary ZOC's. Leaders with a Combat value of 3 or less exert Secondary ZOC's.
It is the Combat value of a Strength marker, not the Manpower value, that determines a ZOC. The disorganized side of a Strength marker has a Combat value less than its Manpower value. Entrenchments are not taken into account when determining ZOC's; the printed Combat value of the Strength marker determines the leader's Zone of Control.
A friendly leader exerts a Zone of Control into an unoccupied hex until an enemy leader enters and stops in that hex. The enemy leader then negates the ZOC of the friendly leader in that hex for retreat and most movement purposes.
Example of Zones of Control: If the indicated leader has a Combat value of 3 or less, he exerts a ZOC only into the hexes labeled "Secondary ZOC." If he has a Combat value of 4 or more, he exerts a ZOC both into the "Secondary ZOC" hexes and the hexes labeled "Primary ZOC."
Assume that the indicated leader exerts a Secondary ZOC and that an enemy leader moves into one of the Secondary ZOC hexes. The enemy leader negates the ZOC of the indicated leader for retreat and most movement purposes.
Restrictions on Zones of Control
The following restrictions apply to Zones of Control:
- Zones of Control do not extend across unbridged or unforded major or minor river hexsides. They do extend across rivers at fords and bridges.
- Breastwork hexes, even those possessing garrisons, do not exert Zones of Control.
- ZOC's exerted by Union leaders do not extend across permanent Confederate bridges nor do ZOC's exerted by Confederate leaders extend across permanent Union bridges (see Permanent Bridges). ZOC's do extend across bridges built by either player (see Building Bridges).
Example: Kershaw, with a Combat value of 2, occupies Pole Cat Station (hex 2514). Because Kershaw has a Combat value less than 4, he exerts only a Secondary ZOC which extends into hexes 2515 and 2613; these hexes are connected by roads with 2514. Note that the ZOC does not extend into hexes 2413 or 2614 along the railroad.
Ewell, with a Combat value of 6, occupies hex 2212. He has a Primary ZOC which extends into hexes 2112 (along the road over the bridge), 2113, 2213, and 2313. The ZOC does not extend into hexes 2211 or 2312 because of the minor river hexsides.
The Action Cycle
We must destroy this army of Grant's before he gets to the James River. If he gets there, it will become a siege, and then it will be a mere question of time. — Robert E. Lee
Each Game Turn consists of three Action Cycles, during which most game activities take place.
Design Note: Every move made by a player will probably force his opponent to modify his plans in some small way. This "action-reaction" system, in which the players rarely know who is going to move next, is an attempt to simulate the unpredictable nature of Civil War operations. Lee's skill as a leader is reflected by allowing the Confederate player to win the initiative when the die rolls are the same.
The Action Phase
During each Action Cycle, the players perform an indefinite number of Action Phases, each of which is composed of an Initiative Segment and an Activation Segment.
Initiative Segment
During this segment, both players roll a die. The player with the highest roll wins. (If both players roll the same number, the Confederate player wins.) The winning player must choose one of the following two options:
- He may take initiative himself;
- He may yield the initiative to his opponent.
A player who takes initiative (or has it yielded to him) must choose one of the following options:
- He may perform an Activation Segment;
- He may pass.
Activation Segment
If the initiative player performs an Activation Segment, he selects an eligible leader and marches or entrenches (see Activation Eligibility). The selected leader is called the active leader.
A player may activate a leader and perform no action with him. This is not considered passing.
Passing
If a player passes, he does nothing. He forfeits his ability to take or receive initiative and may do nothing more for the rest of the cycle (except recover; see Recovery). The initiative player may pass at any time he wishes and must pass if he has no leaders that are eligible for activation.
Continuing Action Phases
As soon as a player completes an Activation Segment, a new Action Phase begins. Players again determine initiative as described above, and the initiative player again must choose to perform an Activation Segment or to pass. Once one player passes, his opponent automatically gains initiative for the rest of the Action Cycle and no longer rolls the die for initiative. He may perform as many Activation Segments as he wishes before passing. The Action Phases continue indefinitely until conditions for ending the Action Cycle are fulfilled (see Ending the Action Phases).
Ending the Action Phases
Action Phases continue until both players have passed. Once the Action Phases are ended, play proceeds to the Recovery Phase (see Recovery).
Activation
How are you, conscript? How are you today? The Provost Marshal's got you, In a very tight place they say! But, O, you should not mind it, Nor breathe another sigh, For you're only going to Dixie, To fight and "mind your eye"! — "How Are You, Conscript?", Union Army song, 1864
Design Note: Movement in which the welfare of the troops is more important than the distance traveled is a standard march. Movement in which the distance traveled is more important than the troops' welfare is a force march. Leaders that do not move at all may have their troops build entrenchments. As this campaign wore on, entrenchments became the predominant feature on the battlefield; Spotsylvania and Cold Harbor, in fact, resembled the battlefields of World War I more than Gettysburg.
Activation Eligibility
Only a leader belonging to the initiative player may be activated. An active leader can do one of three things:
- Standard March
- Force March
- Entrench
Standard March
A leader is eligible to perform a standard march if it is on its mobile side. The leader's Strength marker can be on its organized or disorganized side.
A standard march is performed as follows:
- The initiative player selects an eligible leader and states it will undertake a standard march.
- The leader's Movement Allowance is calculated as follows:
- Infantry Leader: The player rolls one die and adds the leader's Command value to the die result. The sum is the leader's standard march Movement Allowance.
- Cavalry Leader: The player rolls two dice and adds the leader's Command value to the dice result. The sum is the leader's standard march Movement Allowance.
- After a leader's Movement Allowance is determined, the Movement marker is placed in the box corresponding to this allowance on the Movement Track. As the leader expends Movement Points, the marker is adjusted downward. A march ends when the leader becomes fatigued (see Fatigue).
Examples of Standard March: The Confederate player has initiative and decides to activate Longstreet (an infantry leader) for a standard march. He rolls one die and gets a 4. This number is added to Longstreet's Command value of 5, for a final standard march Movement Allowance of 9. The Movement marker is placed in the 9 box of the Movement Track, and the Confederate player is ready to perform activities with Longstreet. Note that the Confederate player can perform a standard march whether Longstreet's Strength marker is on its organized or disorganized side.
In the next Action Phase, he again wins the initiative and decides to activate Dearing (a cavalry leader) for a standard march. This time he rolls both dice, obtaining an 8, and adds Dearing's Command value (5) for a standard march Movement Allowance of 13. The Movement marker is placed in the 13 box on the Movement Track.
Force March
A force march allows a leader more Movement Points, but also disorganizes his men. A leader is eligible to perform a force march if it is on its mobile side and its Strength marker is on its organized side.
A force march is performed as follows:
- The initiative player selects an eligible leader and states it will undertake a force march.
- The player immediately flips the leader's Strength marker to its disorganized side.
- The leader's Movement Allowance is calculated as follows:
- Infantry Leader: The player rolls one die and adds the leader's Command value to the die result. He then adds two to the final number. This is the leader's force march Movement Allowance.
- Cavalry Leader: The player rolls two dice and adds the leader's Command value to the dice result. He then adds four to the final number. This is the leader's force march Movement Allowance.
- After a leader's Movement Allowance is determined, the Movement marker is placed in the box corresponding to this allowance on the Movement Track. As the leader expends Movement Points, the marker is adjusted downward. A march ends when the leader becomes fatigued (see Fatigue).
Example of Force March: The Union player wins initiative and decides to activate Barlow (an infantry leader) for a force march. Barlow must be on his mobile side and the Strength marker must be on its organized side to perform a force march; as soon as Barlow is selected, the Strength marker is flipped over to its disorganized side. The Union player rolls one die, obtaining a 3, adds in Barlow's Command value of 2, and then adds 2 to the result for the force march. The final result is 7 (3+2+2=7). The Movement marker is placed in the 7 box on the Movement Track.
Entrench
A leader is eligible to entrench if it is on its mobile side and it does not already contain a Fort marker. The leader's Strength marker can be on its organized or disorganized side.
To entrench, the initiative player selects an eligible leader and flips it to its fatigued side. He places a Breastwork marker directly on top of that leader. If it already has a Breastwork marker (or is situated in a breastwork hex), a Fort marker is placed on top of the leader instead.
Leaders can also entrench during the Recovery Phase (see Recovery).
Example of Entrenching: Confederate infantry leader Pickett occupies hex 3015. The counter is currently on its mobile side. The Confederate player decides to have Pickett entrench. He flips Pickett to his fatigued side and places a Breastwork marker on the leader's counter.
Now suppose that Pickett occupies Hanover Junction (3016) instead. In this case, since the hex is a breastwork hex, the Confederate player flips Pickett over and places a Fort marker in the hex.
March Activities
There are three types of actions a marching leader may perform:
- Movement
- Attack
- Burn a RR Station
Movement
A leader moves from hex to adjacent hex, expending a number of Movement Points (MP) from its Movement Allowance equal to the cost of the major terrain in the hex entered. However, if a leader enters a hex through a hexside crossed by a road or pike, it ignores the cost of the hex's major terrain (and any rivers) and instead pays one MP. Railroads have no effect on movement. See the Terrain Chart (on the Charts and Tables card) for a full explanation of the effects of terrain on movement.
In the Advanced Game, rain increases the cost of moving along roads (see Random Events).
Example of Movement: Confederate leader Kershaw (Combat value 2) occupies Pole Cat Station (hex 2514) and Ewell (Combat value 6) occupies hex 2212. Union leaders Warren and Sedgwick occupy hex 2112, opposite Ewell. In the current Action Phase, the Union player wins the initiative and decides to activate Warren. He rolls a 2, which is added to Warren's Command value of 4, for a total Movement Allowance of 6. The Union player decides to move Warren along Bowling Green Road to hex 2411 (3 Movement Points) and then southwesterly along the road to hex 2613 (3 Movement Points). Warren has expended all his Movement Points and so the counter is flipped to its fatigued side (his Strength marker is not affected). Note that Warren does not have to stop in hex 2513, which is adjacent to Kershaw, because the Confederate leader exerts only a Secondary ZOC and no road connects 2514 with 2513.
Attack
A marching leader may attack any single adjacent hex occupied by enemy leaders. To attack a hex, the owning player must expend two Movement Points plus the number of Movement Points the leader would normally expend to enter the enemy-occupied hex.
Example of an Attack: In the example outlined above, the Union player receives the initiative in the next Action Phase and decides to activate Sedgwick for a standard march. He rolls a 5, which combined with Sedgwick's Command value of 4, gives a Movement Allowance of 9. The Union player moves Sedgwick along the same path he moved Warren into hex 2613 (6 MP). He then declares an attack against Kershaw, expending his remaining 3 MP (2 for the attack and 1 for the cost needed to enter the hex). Note that Sedgwick could not attack Kershaw from hex 2413 or 2513 because no roads connect these hexes with 2514. The cost to attack from one of these hexes would be 6 MP (2 for the attack and 4 for the cost needed to enter the hex).
Burning RR Stations
A marching leader with a Combat value of 2 or more may burn RR stations (see Burning RR Stations). The MP cost to burn a RR station is different for infantry and cavalry leaders:
- An infantry leader must expend four MP to burn a RR station;
- A cavalry leader must expend six MP to burn a RR station.
The MP cost to burn a station is over and above the MP cost to enter the hex with the station.
Restrictions
A leader cannot perform any of the above activities unless it possesses at least the requisite number of MP. A marching leader can expend some, all, or none of its MP. Unused MP may not be saved from march to march, nor may they be transferred to another leader.
A player may elect to spend no MP for a leader. This is not considered a pass. However, once a leader is activated — even if it does not move, attack, burn a RR, or entrench — it must be flipped over to its fatigued side.
Movement Restrictions
Movement of leaders is restricted by various types of terrain and by Zones of Control.
Design Note: Almost every hex on the map is considered to have minor roads and trails situated within it, but only those roads and pikes considered wide enough to accommodate the movement of large bodies of troops are depicted. Pikes are gravel-surface or "planked" roads that remained in relatively good shape even in poor weather. The "Telegraph Road" is marked as a pike even though the source map did not show it as a major road. Since it was probably the best known route between Richmond and Fredericksburg, it is considered a pike in the game. The movement penalty to attack simulates the time required to form a proper line of battle. The movement penalty for burning railroad stations simulates the time expended ripping up track, destroying bridges, and burning depots, water towers and other structures vital to the operation of a railroad.
-
Mountains: A leader can never enter a mountain hex, which is considered impassable terrain.
-
Breastwork Hexes: A leader cannot enter an enemy breastwork hex with a garrison unless that garrison is destroyed (see Breastwork Hexes). A leader may enter an enemy breastwork hex without a garrison with no penalty.
-
Rivers: A leader may not cross a major or minor river hexside except at a bridge or ford. A leader crossing a bridge or ford pays no special movement penalty; it expends the normal Movement Point cost of the predominant terrain in the hex entered. Leaders can also cross major or minor rivers along roads and pikes, paying the normal Movement Point cost (1 MP) to enter the next hex along the road/pike. Union leaders can never cross permanent Confederate bridges and Confederate leaders can never cross permanent Union bridges.
A player may cross a bridge built by his opponent at which point the bridge comes under the possession of the active player (see Building Bridges).
-
Creeks: Leaders can cross creek hexsides, paying the normal cost of the terrain in the hex entered; there is no additional MP cost to cross a creek. Leaders can also cross creeks along roads and pikes, paying the normal Movement Point cost (1 MP) to enter the next hex along the road/pike.
In the Advanced Game, rain restricts the ability of leaders to cross creek hexsides (see Random Events).
-
Enemy-Occupied Hexes: A leader can never enter a hex occupied by enemy leaders.
Beginning a March in an Enemy ZOC
If a leader begins a march in an enemy ZOC in which one or more other friendly leaders are situated, it moves normally. If a leader begins a march in an enemy ZOC in which no other friendly leaders are situated, it moves normally except that it may not move directly into an unoccupied enemy ZOC.
Example: Confederate infantry leader Longstreet occupies Pole Cat Station (2514) and Ewell occupies 2212; both leaders exert Primary ZOC's. Union cavalry leader Wilson occupies 2513. Warren and Sedgwick occupy 2112.
In an Action Phase, the Union player wins initiative and decides to activate Sedgwick; he rolls a 2 which is combined with Sedgwick's Command value of 4 for a total Movement Allowance of 6. Sedgwick moves down the Bowling Green Road to hex 2411 (3 MP) and then along the road to hex 2413. If Wilson did not occupy hex 2513, Sedgwick would have to end movement in this hex because it would then be an unoccupied hex in an enemy leader's ZOC. However, because this hex is occupied by a friendly leader, Sedgwick may continue moving.
In the next Action Phase the Union player gains initiative again and decides to move Warren. He rolls a 5, which combined with Warren's Command value of 4 yields a Movement Allowance of 9. Warren follows Sedgwick's path to hex 2513 and then enters hex 2613 (again, the presence of Wilson allows Warren to move the extra hex, rather than stopping in 2513).
Assume that Warren attacks and that neither leader is forced to retreat. The Union player again gains initiative for the next Action Phase. He decides to activate Wilson. He rolls a 5 on two dice, which combined with Wilson's Command value of 5 yields a Movement Allowance of 10. He moves Wilson into 2613 (1 MP), into 2714 (4 MP), into 2715 (4 MP), and finally into Chesterfield Station (hex 2716; 1 MP) to cut off a Confederate unit moving up from Richmond. Wilson can move into hex 2613 because the hex is occupied by a friendly leader (Longstreet's Primary ZOC is negated).
Stacking
At the end of any march or retreat, a maximum of five leaders can occupy the same hex. This restriction applies only at the end of a march; during a march, a leader may pass through any hex occupied by friendly leaders regardless of stacking restrictions.
Fatigue
A leader is flipped from its mobile to its fatigued side under any of the following circumstances:
- The Movement marker reaches 0 on the Movement Track during a march;
- A player decides that his leader's march is over even though MP remain on the Movement Track;
- A leader becomes fatigued due to combat (see Attacks);
- An active leader entrenches.
Design Note: Fatigue does not mean that a leader is tired; it simply indicates that there is no more time in the day (or, more accurately, cycle) for him to do anything else.
If a leader becomes fatigued, its march automatically ends.
A leader not yet activated that becomes fatigued after being attacked by an enemy leader cannot be activated.
Attacks
We have men enough and they will fight if our leading men will do what is right. It is no use for men to say that it has been impossible to settle this up before. I know that there has been men and money enough and now, with this Grand Army of Volunteers, if we are defeated it will be with mismanagement, nothing else. — Sgt. Will Owen, 20th Maine Volunteers, April 1864
Attack Eligibility
Only a marching leader may perform an attack. A marching leader can attack one hex at a time.
Targets of Attacks
A marching leader may attack any single, adjacent hex that is occupied by one or more enemy leaders. The attacking leader is not obligated to be in an enemy ZOC. If the attacking leader is adjacent to more than one enemy-occupied hex, it attacks only one hex at a time. (The choice of which hex to attack is left to the attacking player.) Hexes that are not attacked are ignored.
Declaring Attacks
After the player controlling the marching leader states the hex that will be the target of an attack, the attacking leader must expend 2 MP plus the normal number of MP it would cost the leader to enter the hex being attacked. (Roads and pikes are taken into account.) If the leader does not possess the requisite number of MP, the attack cannot take place. Attacks are never mandatory.
Participating in Attacks
Only the marching leader attacks. All other friendly leaders, even those stacked in the same hex as the marching leader, never participate in the actual attack. A leader may declare more than one attack per march as long as it has the required MP and it does not become fatigued. A leader with a disorganized Strength marker can attack normally.
A friendly leader stacked with an attacking leader may give a positive die roll modifier when resolving the attack (see Combat Modifiers).
Participating in Defense
All enemy leaders in the hex being attacked must combine their Combat values into a single sum; the attacker does not single out individual leaders within a hex as the target. However, the maximum Combat value that defends in a single hex is 16, even if enemy leaders possessing a combined Combat value of more than 16 occupy the hex. The defender's Combat value may be modified above 16 if his leaders are in breastwork hexes or possess Entrenchments markers (see Combat Value).
The Manpower value of disorganized Strength markers has no effect when attacking or defending — only the Combat value.
Attack Restrictions
- An attack can never take place across a major or minor river hexside unless a bridge or ford connects the attacker's and defender's hexes.
- A Union leader can never attack across a permanent Confederate bridge and vice versa (see Permanent Bridges). Attacks may take place across bridges built by either player (see Building Bridges).
Combat Value
A leader's Combat value may vary, depending on whether its Strength marker is on its organized or disorganized side. Also, a defending leader's Combat value may be modified by entrenchments.
If a leader's Strength marker is on its organized side, the leader's Combat value is simply the number shown on the marker. If a leader's Strength marker is on its disorganized side, the leader's Combat value is the marker's unparenthesized number with the cannon icon next to it, not the parenthesized figure with the soldier icon.
Design Note: An organized Strength marker represents troops who are rested and in good spirits. A disorganized Strength marker represents troops who are tired and ill-prepared for battle.
A leader with a disorganized Strength marker may have a Combat value of ½; if so, this fraction is retained during combat — it is not rounded up or down.
Entrenchments
If a defending leader is under a Breastwork marker (or is in a breastwork hex), its Combat value is doubled. If a defending leader is under a Fort marker, its Combat value is tripled.
How to Perform Attacks
An attack is resolved as follows:
- The attacker states the hex being attacked and the Movement marker is adjusted downwards on the Movement Track by the appropriate MP cost.
- The players calculate die roll modifiers (see Combat Modifiers):
- The ratio modifier must modify the die rolls.
- Any other modifiers may modify the die rolls.
- The attacker and defender each roll a single die, modifying their die rolls as required. The defender's modified die roll is subtracted from the attacker's modified die roll. The players then consult the Combat Chart and implement the results to their playing pieces (see Combat Results).
In the Advanced Game, players check their die rolls before applying modifiers to determine if a corps leader has been killed (see Loss of Leaders).
- If the attacking leader is not fatigued, it may continue its march; if it is fatigued (or it has no more MP), the march is over and a new Action Phase begins.
Combat Modifiers
Several factors may modify both the attacker's and defender's die rolls. All the modifiers listed below are cumulative. There is no limit to the number that can be added to or subtracted from a player's die roll.
Ratio Modifier
The attacker's die roll must be modified by the ratio modifier. To calculate this modifier, compare the attacking leader's Combat value to the combined Combat values of the defending leaders. Round the ratio down in favor of the defender to conform to one of the simplified ratios listed on the Ratio Chart. A die roll modifier from −9 to +10 will be listed next to each ratio. This is the attacker's ratio modifier.
Example: The attacking leader has a Combat value of 16 and the defender has a Combat value of 5; this ratio, rounded down in favor of the defender, is 3-1. On the Ratio Chart, the attacker's ratio modifier for 3-1 is listed as +2. If an attacking leader has a Combat value of 5 and attacks a defender with a value of 16, the ratio would be 1-4, rounded down in favor of the defender. On the Ratio Chart, the modifier is listed as −3.
Design Note: Terrain combat modifiers are based largely on how well artillery would function in the hex in which a battle is to take place. Union infantry units were always provided with plenty of supporting artillery. When the units fought in open terrain — where the artillery could be used to good effect at very long ranges — the Union troops had a distinct advantage; conversely, when fighting in restricted terrain — where artillery was of no value — the Union troops were at a slight disadvantage.
The bonus for supporting leaders encourages the players to concentrate their entire army for battle. By their mere presence, inactivate leaders may significantly enhance an attack, simulating the fact that a defender would not be capable of concentrating all his men against only one enemy force when there were other significant enemy forces somewhere in the vicinity.
General Lee played a decisive role on the battlefield several times during this campaign — most conspicuously at the Wilderness and Spotsylvania — rallying Confederate troops when the battle appeared lost. This is the rationale for the General Lee Bonus.
Terrain
The defender's die roll may be modified by terrain:
- If an attack is taking place across a bridge or ford crossing a major or minor river, the defender adds 3 to his die roll;
- If an attack is taking place across a creek (even across a hexside crossed by a road or pike), the defender adds 2 to his die roll;
- If a Confederate leader is being attacked in a forest hex by a Union infantry leader, the Confederate player adds 1 to his die roll;
- If a Union infantry leader is being attacked in a forest hex, the Union player subtracts 1 from his die roll;
- If a Confederate leader is being attacked in a clear hex by a Union infantry leader, the Confederate player subtracts 1 from his die roll;
- If a Union infantry leader is being attacked in a clear hex, the Union player adds 1 to his die roll.
Supporting Leaders
The attacker's die roll may be modified by inactive friendly leaders adjacent to the defender's hex at the moment the attack occurs. The following requirements must be met:
- For each hex adjacent to the defender (including the attacking leader's hex) occupied by inactive friendly leaders with a combined Combat value equal to or greater than one-half the defender's total Combat value (modified by entrenchments, if any), the attacker adds one to his die roll.
- The inactive friendly leaders providing the bonus may be on their mobile or fatigued sides and their Strength markers may be organized or disorganized.
- Friendly leaders separated from the defender by unbridged or unforded major or minor rivers cannot provide this bonus.
- Up to six hexes adjacent to the defender can provide the +1 modifier if each hex contains eligible inactive friendly leaders (for a maximum modifier of +6 for supporting leaders).
The active leader performing the attack is not taken into consideration when determining if inactive friendly leaders in the same hex meet the requirements for the modifier.
Example of Supporting Leaders: Confederate leader Longstreet, with a Combat value of 5, occupies Pole Cat Station (hex 2514). He is on his fatigued side since he was activated to perform an entrenching action. The Breastwork marker on Longstreet doubles his Combat value to 10.
The Union player during four consecutive Action Phases moves cavalry leader Wilson (Combat value 2) into hex 2513, Sedgwick (Combat value 5) to hex 2413, Warren (Combat value 9) to hex 2613, and finally Hancock (Combat value 10) into 2513. Hancock has 8 MP remaining and so can attack Longstreet.
Sedgwick's Combat value (5) is half of Longstreet's value (10), so he provides a +1 modifier. Warren has a Combat value (9), over half of Longstreet's, so he provides another +1 modifier. Wilson's value is less than half, so he provides no modifier. Note that Hancock's Combat value is not taken into account when determining Wilson's eligibility to provide the bonus since Hancock is active.
General Lee Bonus
Before the dice are rolled to resolve an attack, the Confederate player may apply a "General Lee Bonus" to an attacking or defending Confederate leader. Only an infantry corps (two star) leader may receive this bonus when attacking; if defending, at least one of the defending leaders must be an infantry corps leader. If the bonus is used, the Confederate player adds 1 to his die roll. A maximum of one such bonus may be used per Action Cycle (thus, up to three bonuses may be used per Game Turn).
After the bonus is used, the Confederate player places the General Lee marker in the "Bonus Used" box of the General Lee Display. At the beginning of the next Action Cycle, the Lee marker should be placed back in the "Bonus Available" box. Unused bonuses may not be saved from cycle to cycle.
In the Advanced Game, if a Lee Sick result is obtained on the Random Event Table, the Confederate player does not receive the General Lee Bonus for the turn in which the event occurs (see Random Events).
Confederate First Turn Bonus (Advanced Game Only)
In the Advanced Game, the Confederate player receives a +1 die roll modifier in his first attack against any Union leader during the 1st Action Cycle of Game Turn 1 only. He receives this bonus whether a leader's Strength marker is organized or disorganized (see Special Rules). If the Confederate player does not attack in the 1st Action Cycle, he never receives this bonus.
Rain (Advanced Game Only)
In the Advanced Game, the attacker subtracts 1 from his die roll during rain Game Turns. In addition, restrictions are placed on attacks across creek hexsides and fords (see Random Events).
Combat Results
The Combat Chart (printed on the Charts and Tables Card) is used to resolve each attack. Each combat produces two results: one for the attacker and one for the defender. To resolve a combat, the defender's modified die roll is subtracted from the attacker's modified die roll. Both players then consult the Combat Chart.
Both players cross-reference this resulting number on the Combat Chart. The attacking player checks under the column corresponding to the Combat value of his attacking leader. The defending player checks under the column that corresponds to the unmodified Combat value of his leaders that defended against the attack. Both players' results, which are applied immediately, may consist of a single number and one or two letters.
Design Note: In the Civil War, combat was frequently as catastrophic for the victor as it was for the vanquished. The Combat Chart reflects this: The attacker will almost certainly suffer unless he has a distinct advantage in strength and terrain.
Letter Results
There are five types of letter results:
- D (Disorganized/Fatigued): The leader's Strength marker is flipped to its disorganized side. If it is already disorganized, it remains so. Also, the leader counter is flipped to its fatigued side. If it is already fatigued, it remains so. An attacking leader that obtains a "D" result may not expend any more MP; its march is terminated.
- F (Fatigued): The leader is flipped to its fatigued side. (If it is already fatigued, it remains so.)
- r (Retreat): The leader must retreat (see Retreats, Routs, and Advances).
- R (Rout): The leader is routed (see Retreats, Routs, and Advances).
- a (Advance): The leader may advance after combat (see Retreats, Routs, and Advances).
Number Results
A number result indicates a reduction (1, 2, or 3) to the leader's Manpower value. Remove the leader's Strength marker and replace it with another one showing the reduced Manpower value (that is, the leader's Manpower value before the attack minus the loss result).
Since a leader suffering a Manpower loss must also suffer a "D" (Disorganized) result, the leader's new Strength marker must be placed on its disorganized side. If the original Strength marker was already on its disorganized side before the attack, the new Strength marker is also placed on its disorganized side.
Example: If a leader with an organized Strength marker with a Combat/Manpower value of 8 suffers a "1D" result, the leader is flipped to its fatigued side and its Strength marker is removed. A new Strength marker is placed under the leader on its disorganized side with a Manpower value of 7 (8−1=7).
Applying Results
The attacker's result applies only to the attacking leader even if other leaders are in the same hex or provided "support" (that is, provided a die roll modifier). The defender's letter result applies to all defending leaders; the defender's number result is applied to the stack as a whole, not to each individual leader. As long as the number result is fully applied, the defender may apply it to any of his defending leaders as he sees fit.
Leader Elimination
If an attack results in a leader having a Manpower value of 0 or less, the leader is removed from the map. In Basic Game scenarios, the only ways leaders are eliminated is if their Manpower value reaches 0 or if they cannot retreat/rout (see Retreats, Routs, and Advances).
In the Advanced Game, corps leaders can also be killed (see Loss of Leaders). It is possible for a leader who is eliminated due to loss of Manpower to return as a reinforcement (see Reinforcements).
Retreats, Routs, and Advances
Retreats
If the defending player suffers an "r" result, he must retreat all his defending leaders two hexes. Retreating leaders must move as a stack and cannot separate. Stacking restrictions must be adhered to after a retreat. The following restrictions apply to retreating leaders:
- They must move two contiguous hexes away from the hex where they defended. They can never end a retreat in a hex adjacent to the one from which they retreated.
- They can move into and through unoccupied hexes in enemy ZOC's, but for each unoccupied enemy ZOC hex entered, the leader loses one Manpower point from his Strength marker.
- They can never enter a mountain hex or a hex occupied by enemy leaders.
- They cannot retreat off the map.
- They can cross a major or minor river hexside only at a ford or bridge. Creeks have no effect on retreats.
- Union leaders cannot retreat across permanent Confederate bridges, and Confederate leaders cannot retreat across permanent Union bridges.
- If a leader retreats across a bridge built by the opposing player, the bridge changes ownership and is flipped over (see Building Bridges).
Movement Points are never expended in a retreat and, with the above exceptions, terrain is irrelevant.
A leader can retreat into a hex containing a friendly leader that is in an enemy ZOC without incurring a Manpower loss. However, it must end its retreat two hexes away from the one where it began its retreat, not adjacent to this hex. Also, in the Advanced Game, leaders cannot retreat across an unbridged creek hexside during a rain Game Turn (see Random Events).
Routs
If the defending player suffers an "R" result, he must retreat all his defending leaders four hexes. Routing leaders are subject to the same restrictions as retreating leaders, including the penalties for moving through enemy ZOC's. After a rout is completed, the affected leaders must be exactly four hexes away from the hex where they began their rout, counting by the shortest possible path.
Inability to Retreat or Rout
If a leader cannot fulfill the requirements of a retreat or rout, it is removed from the map and its Manpower value is completely lost.
Advance After Combat
If the attacking player receives an "a" result, the attacking leader may advance into the hex vacated by the defender. An advance is not considered movement and does not expend MP. An advancing leader can move directly from one enemy ZOC to another.
Regardless of whether or not an attacking leader advances, it may continue to expend MP after an attack as long as it was not fatigued by the combat result. However, an attacking leader may not continue to move if it finds itself in an enemy ZOC after combat. (It may attack again or burn RR stations normally.)
Cavalry Retreat Option
A cavalry leader can use the cavalry retreat option before being attacked by an enemy infantry leader. The leader can retreat under any of the following circumstances.
Design Note: Civil War horsemen were not cavalry in the European sense of the word. Rarely fighting on horseback, the troopers were really nothing more than mounted infantry. By the time of this campaign, virtually all cavalrymen were armed with short-ranged, breech-loading carbines, which proved superior in several ways to the heavier muskets used by the infantrymen. During the war, cavalry was used mostly as a reconnaissance force with a punch. When the enemy was found, the cavalry usually did not pack up and leave; instead, if the odds and terrain were favorable, the cavalry dismounted and fought on foot. Thus, they slowed the enemy down by forcing him to deploy. And it was not unheard of for a large infantry force to be decimated by the concentrated fire of the enemy cavalry's rapid-fire carbines. Moreover, cavalry was elusive; if a skirmish looked like it was going badly, they simply mounted up and rode away.
- An enemy infantry (not cavalry) leader performing a march moves into any hex adjacent to the cavalry leader;
- An enemy infantry leader is selected to perform a march while occupying a hex adjacent to the cavalry leader;
- An enemy infantry leader advances after combat into a hex adjacent to the cavalry leader.
If the cavalry leader is separated from the infantry leader by an unbridged or unforded major or minor river, the cavalry retreat option cannot be used.
Performing a Cavalry Retreat
A cavalry retreat option is voluntary. If a player wishes to perform a retreat option with one of his cavalry leaders, he states this fact as soon as his opponent has performed one of the actions listed above. The enemy leader's march is temporarily suspended while the retreat takes place. A cavalry retreat is performed as follows:
- Flip the cavalry leader to its fatigued side and flip its Strength marker to its disorganized side. If the leader is already fatigued and/or its Strength marker is already disorganized, it remains so and may still perform the retreat.
- The enemy leader whose march was interrupted immediately has its Movement Allowance reduced by 2 MP. Adjust the Movement marker downward on the Movement Track by two boxes.
- The cavalry player rolls a single die. On a roll of 1 to 5, there is no detrimental effect; on a roll of 6, the cavalry leader's Manpower value is immediately reduced by one. Replace its Strength marker with a new one possessing a Manpower value one less than the original; place the new Strength marker under the leader on its disorganized side.
If the die roll results in the leader being eliminated (see Combat Results), its counter and Strength marker are immediately removed from the map.
- The player applies an "R" (Rout) result to the cavalry leader. The leader must end its rout four hexes away from the hex in which it began its retreat, subject to normal rout restrictions (see Retreats, Routs, and Advances), except that the routing cavalry leader ignores enemy ZOC's during its retreat; it does not lose Manpower points for entering an unoccupied hex in an enemy ZOC.
- When the retreat is complete, the enemy leader whose march was interrupted resumes its activities from the point of interruption. (The enemy leader continues its march even if it triggered the cavalry retreat by entering the cavalry leader's Zone of Control.)
More Than One Cavalry Leader in a Hex
If two or more cavalry leaders are stacked in the same hex, they may perform a retreat option together. If so, only one die roll is necessary to determine if loss occurs, but all leaders must retreat as a stack and end their retreat in the same hex. A player may retreat cavalry leaders separately to different hexes, but separate die rolls (see step 4, above) for each retreating leader are required to determine if loss occurs.
A cavalry leader stacked with a friendly infantry leader may perform a cavalry retreat option, but the infantry leader cannot.
Example of Combat: It is the beginning of the game and in the first Action Phase of the 1st Action Cycle, the Union player has initiative. He decides to activate Hancock to have him seize the vital crossroads at Wilderness Tavern (hex 1117). He rolls a 4, which combined with Hancock's Command value of 4 yields a standard march Movement Allowance of 8. Hancock moves into 1117. His counter is flipped to its fatigued side.
In the next Action Phase, the Confederate player wins the initiative. He decides to activate Hill on a force march to threaten Hancock. He rolls a 5, which combined with Hill's Command value of 5 and the 2 for the force march yields a Movement Allowance of 12. He flips Hill's Strength marker to its disorganized side and moves the leader to 1217 (11 MP). Hill enters Hancock's Primary ZOC and must stop; he does not have enough MP left to attack. His counter is flipped to its fatigued side.
The Confederate player again gains initiative and decides to activate Ewell on a standard march. He rolls a 4, which is added to Ewell's Command value of 4 for a Movement Allowance of 8. Ewell expends 5 MP to enter 1118, adjacent to Hancock, and declares an attack, using up his last 3 MP.
Hancock has a Combat value of 11 and Ewell has a value of 7, so the ratio of 7 to 11 rounds down in favor of the defender to 1-2. On the Ratio Chart, the Confederate player's modifier is −1. Hill is adjacent to Hancock and has a Combat value of 6, which is more than half of Hancock's value. Thus, Hill is an eligible supporting leader and provides a +1 bonus to the attack. In addition, the Confederate player decides to use the General Lee bonus for another +1 modifier. His final die roll modifier is +1 (−1+1+1=+1).
The only modifier that applies to the Union player is a −1 for a Union infantry leader defending in a forest hex. The Union player's final die modifier is a −1.
The Confederate player rolls the die and obtains a 5, which is modified to 6. The Union player rolls a 2, which is modified to 1. The roll of 1 is subtracted from the roll of 6, resulting in a +5 difference for the attack. Both players consult the Combat Chart. The Union leader checks under the "7 to 11" column at +5 and finds a result of "1DR"; he loses one Manpower point and routs; he checks the "7 to 11" column at +5 and finds a result of "a"; he will be allowed to advance after combat.
The Union player replaces Hancock's original Strength marker of 11 with a disorganized marker with a Manpower value of 10, and he moves Hancock four hexes away from the combat hex, ending the rout in hex 1213. Hancock was already fatigued, so he simply remains fatigued. Ewell advances into hex 1117 and his counter is flipped to its fatigued side because he has no more Movement Points left (his Strength marker is not affected). The combat is now over.
Note that in the Advanced Game, the Confederate player also receives a +1 modifier for the first attack made in the 1st Action Cycle. This modifier has not been taken into account in the above example.
Burning RR Stations
It is well that war is so terrible, or we should get too fond of it. — Robert E. Lee
Marching leaders can burn RR stations. To burn a station, a leader must occupy a RR station hex and must have a Combat value (not Manpower value) of at least 2.
Design Note: Burning railroad stations simulates the limited destruction of track, bridges, switching equipment, and replenishment facilities. In the Civil War, railroad men of both sides frequently managed to keep their trains running even under the most trying conditions. As a result, the armies became adept at wrecking railroads beyond hope of repair. It took a major effort to do this, however. The rules for burning railroad stations reflect the more limited damage inflicted by raids; more complete railroad destruction is simulated in the Advanced Game (see Railroad Destruction).
Burning RR Stations
To burn a RR station, an infantry leader must expend four MP and a cavalry leader must expend six MP. As soon as the required MP are expended, a Burned marker is placed in the hex. Once a Burned marker is placed in a hex, it remains there for the rest of the game. That RR station may not be burned again. The marker has no effect on play except for victory determination in the scenarios.
The MP expended for burning a RR station are over and above the cost for entering the hex.
Example of RR Station Burning: Union cavalry leader Sheridan, with a Combat value of 3, is activated in hex 1127. The Union player rolls a 10, which added to Sheridan's Command value of 6 yields a standard march Movement Allowance of 16. Sheridan moves one hex into Orange Court House (hex 1128, spending 1 MP); he then spends 6 MP to burn the RR station (a total of 7 MP expended). A Burned marker is placed in the hex. Sheridan continues to move to Gordonsville (hex 1331), spending 4 MP. He has spent 11 MP total and does not have the 6 MP remaining to burn this RR station. He can either continue moving or wait until the next Action Cycle to burn the station.
Entrenchments
Our truest, bravest heart is gone, And we remember well The bitter anguish of the day When noble Sedgwick fell; But there is another left To lead us to the fight, And with a hearty three times three We'll cheer our gallant Wright! — "God Bless the Old Sixth Corps," Union Army song, 1864
Entrenchments enhance the defensive capabilities of leaders. There are two types of entrenchments: breastworks and forts. Some hexes on the map contain permanent breastworks; other breastworks can be built by leaders, using the neutral Breastwork/Fort markers.
Design Note: During the Peninsula campaign of 1862, the Confederates ringed Richmond with an elaborate system of fortifications. By the 1864 campaign, the entrenchments had been strengthened only slightly. More significantly, the Richmond garrison was critically short of troops by 1864; most of the men were second-rate militia. Richmond was also threatened by water. In 1862, in fact, Yankee warships — including the famous Monitor — moved up the James River in an attempt to reach Richmond, but were turned back by the Confederate guns at Drewry's Bluff.
Breastwork Hexes
There are two types of breastwork hexes: those with intrinsic garrisons (Confederate only) and those without. Union breastwork hexes benefit only Union leaders; Confederate breastwork hexes benefit only Confederate leaders.
Effects of Breastwork Hexes
The Combat values of all leaders defending in a friendly breastwork hex are doubled. (The Combat value is tripled if the hex has a Fort marker.) Leaders can enter an opponent's unoccupied breastwork hex without penalty. Union leaders cannot enter a Confederate breastwork hex with an intrinsic garrison until the garrison is eliminated. A breastwork hex can never be destroyed, even if an enemy leader occupies it or its garrison is destroyed.
A breastwork hex benefits the owning player's leaders only; if an enemy leader captures a breastwork hex, its Combat value is not doubled in defense. If the owning player later recaptures one of his breastwork hexes, his leaders again have their Combat values doubled in defense.
If a breastwork hex contains a Fort marker, this marker is removed when the leader who built it leaves the hex or when an enemy leader enters the hex. The Fort marker does not return automatically when a captured breastwork marker is recaptured by the owning player.
Garrison Markers
The Terrain Key indicates the Confederate breastwork hexes that have intrinsic garrisons (Combat value of 1 or 2). Confederate Garrison markers are placed on the map in these hexes only when Union leaders move adjacent to one of them. Once placed on the map, the Garrison marker remains in the hex until the garrison is eliminated.
A Garrison marker can never be activated; once placed on the map, it must remain in the hex it occupies until eliminated. The Combat value of a Garrison marker is used only when resolving combat (that is, when the breastwork hex is being attacked). A Garrison marker can never attack, it can only defend.
If a leader is defending in a hex with a Garrison marker, the garrison's Combat value is added to the leader's doubled (or tripled) Combat value. If there is no friendly leader in a garrison hex that is being attacked, the garrison's printed Combat value is used to determine the combat ratio. The Combat value of the garrison is never modified by a breastwork hex or by a Breastwork/Fort marker.
A Garrison marker's printed Combat value is included when determining the defender's combined, unmodified combat value on the Combat Chart. The General Lee Bonus cannot be applied to a Confederate garrison alone in a hex when resolving the attack (a corps leader in the same hex may receive the bonus).
A Garrison marker never exerts a Zone of Control itself. A friendly leader must occupy the breastwork hex and the printed Combat value of the leader's Strength marker is used to determine the ZOC.
In the Advanced Game, the Confederate player places Garrison markers on the map during the scenario's set-up (see Starting Set-Ups). Also, the Union player receives Union Garrison markers (Combat value of 4) when he builds supply bases (see Union Supply Bases); these Garrison markers remain with their Supply Base markers until eliminated.
Destroying Garrisons
A leader cannot enter a hex containing an enemy Garrison marker until the garrison has been destroyed. Any combat result containing an "r" or "R" against the hex eliminates the Garrison marker (whether it is alone in the hex or is stacked with friendly leaders). A result of "-," "D," "1D," or "F" has no effect on the Garrison marker.
A leader stacked with a Garrison marker suffers combat results normally. Manpower losses in combat can never be applied to garrisons; they may only be applied to leaders occupying the hex. If a garrison is defending by itself — without any friendly leaders — Manpower losses are ignored.
A leader does not have to enter the hex after combat to eliminate the Garrison marker. Any "r" or "R" result is sufficient to eliminate the garrison.
If the garrison is destroyed, its marker is removed from the map. If the garrison was Confederate, a Confederate Garrison Destroyed marker is placed in the breastwork hex and remains there for the rest of the game. The Confederate garrison never returns to the game once the Destroyed marker is in the hex, even if the hex is later recaptured. Union leaders may enter the hex normally.
The elimination of a garrison never counts for Victory Points for either player.
Example of Garrisons: Union cavalry leader Sheridan (Combat value of 4) is activated and moves by standard march to hex 3015, adjacent to Hanover Junction (3016) which has an intrinsic Confederate garrison of 2. As soon as Sheridan moves adjacent to the Confederate breastwork hex, a Confederate Garrison marker (Combat value of 2) is placed in the hex. The garrison does not exert a ZOC by itself, so Sheridan could continue moving around the hex if he has sufficient MP remaining.
Sheridan has 6 MP remaining and attacks the garrison. The combat ratio is 2 to 1 (4 for Sheridan versus 2 for the garrison), so the Union player receives a +1 modifier, the only one that applies to the combat. The Union player rolls a 5, which is modified to a 6. The Confederate player rolls a 1. The die roll differential is +5. The Confederate player checks the Combat Chart under the "½ to 2" column; the result is "1DR." Because the result contains an "R," the garrison is eliminated. The marker is removed from the map and a Confederate Garrison Destroyed marker is placed in the hex. The Union player receives an "a" result and so can advance into Hanover Junction.
Note that the breastwork in the hex is not destroyed when Sheridan enters the hex; his Combat value is not doubled, however, if he defends in the hex. If a Confederate leader later recaptures the hex, that leader's Combat value is doubled if he defends in combat.
Entrenchment Markers
Leaders can build Breastworks and Forts anywhere on the map by using Entrenchment markers. There are two ways for leaders to build entrenchments:
- During an Activation Segment, a leader may entrench (see Activation Eligibility);
- During a Recovery Phase, all leaders on their mobile sides may entrench (see Recovery).
If a leader entrenches, place a Breastwork marker in the hex atop the leader. If the leader already possesses a Breastwork marker (or it is in a breastwork hex), place a Fort marker on it instead. Leaders with Fort markers cannot entrench. A leader possesses a maximum of one Entrenchment marker at any given time.
Removing Entrenchment Markers
An Entrenchment marker is removed from a leader as soon as he leaves a hex, under any of the following circumstances:
- The leader suffers an "r" or "R" result in combat;
- The leader participates in a cavalry retreat option (see Cavalry Retreat Option);
- The leader leaves the hex during a march;
- The leader attacks and leaves its hex by advance after combat.
Effects of Entrenchment Markers
Entrenchments enhance the Combat values of defending leaders as follows:
- Leaders directly under a Breastwork marker have their Combat values doubled when defending;
- Leaders directly under a Fort marker have their Combat values tripled when defending.
A leader directly under a Fort marker in a Breastwork hex is tripled. Tripling is the largest enhancement a leader may receive.
The effects of Breastworks and Forts apply individually by leader, not by hex. In a stack of leaders, some may possess Entrenchment markers while others do not. Only leaders with Entrenchment markers atop their counters receive the Combat value multiple; leaders with no Entrenchment markers in the same hex use their printed Combat values when defending. To save counters in stacks of leaders, players may wish to use a maximum of one Breastwork and one Fort marker per stack, assuming that all leaders below a particular marker are subject to its benefits while those above it are not.
The intrinsic Combat value of a Garrison marker is never affected by a Breastwork/Fort marker.
Example of Entrenchment: During the 1st Action Cycle of a turn, Confederate cavalry leader F. Lee, with a Combat value of 2, moves to Hanover Junction (hex 3016). This is a Confederate breastworks hex and has a Garrison marker with a Combat value of 2. In the 2nd Action Cycle, F. Lee entrenches and a Fort marker is placed in the hex. The total Combat value of the hex is 8 (6 for Lee's tripled value plus 2 for the garrison).
In the 3rd Action Cycle, Union infantry leader Hancock, with a Combat value of 8, moves into hex 3015 and stops movement; he does not have enough MP to attack Lee. Lee has the opportunity to perform a cavalry retreat, but decides to stay in the hex. Later in the Action Cycle, Warren, with a Combat value of 9, moves into hex 2916 and has 3 MP remaining which will be used to attack F. Lee. The combat ratio is 9 to 8, or 1 to 1 rounded down.
Assume that in the ensuing attack the Union player obtains a +2 die roll differential. The result for the Confederate player is a "Dr" under the "3 to 6" column, and so F. Lee is fatigued, his Strength marker is disorganized, and he must retreat from the hex. Because of the "r" result, the garrison is destroyed, so its marker is removed from the map and a Confederate Garrison Destroyed marker is placed in the hex. The Union player receives a "Da" result on the Combat Chart, so Warren advances into the hex, his counter is flipped over to its fatigued side, and his Strength marker is disorganized.
Now assume the final die roll differential was 0 instead. In this case, a result of "D" applies to F. Lee, who remains in the hex under the Fort marker along with the Garrison marker; F. Lee is flipped to his fatigued side and his Strength marker is disorganized. Warren remains in 2916; checking under the "7 to 11" column indicates a "1D" result; Warren is fatigued and loses one Manpower point, and his new Strength marker is placed on its disorganized side.
Bridges
We accepted this war for an object, a worthy object, and the war will end when that object is obtained. Under God, I hope it never will until that time. Speaking of the present campaign, General Grant is reported to have said, "I am going through on this line if it takes all summer." I say we are going through on this line if it takes three years more. — Abraham Lincoln
Bridges enable leaders to cross major and minor rivers. Players may build bridges during the game. Bridges can never be built across creeks.
Design Note: A modern observer looking at a river labeled "minor" in the game might not think it much of an obstacle. These rivers are neither wide nor deep; usually, infantrymen and cavalrymen could cross them with little difficulty. But armies are much more than conglomerations of fighting men; there are also thousands of supply wagons, ambulances, and other miscellaneous vehicles, none of which could cross a river except at a bridge or ford. Engineer outfits, equipped with limited amounts of bridging apparatus, accompanied each army. This bridging equipment was not sufficient to bridge a very wide river, such as the James or the Rappahannock. In the game, the bridging operation simulates not only the construction of the bridge, but the preparation of a suitable approach path for wagons on both sides of the river.
Permanent Bridges
There are two types of permanent bridges printed on the map: one controlled by a player or one that both players can use. The bridges printed on the map are permanent and can never be destroyed.
A leader can cross a major or minor river only at a bridge or ford. A leader who defends across a bridge receives a favorable die roll modifier when resolving combat.
There are no bridges or fords at hexsides where roads cross creeks.
Union and Confederate Permanent Bridges
Some bridges are shown as belonging to the Union or to the Confederates. Union permanent bridges are near Fredericksburg (hexsides 1309-1310 and 1409-1410) and Belle Plain (hexsides 1405-1406 and 1405-1505); Confederate permanent bridges are at hexsides 4419-4519 and 4619-4620 and connect Richmond and Manchester (hexsides 4219-4320 and 4319-4419). These permanent bridges have the following effects:
- Union leaders can never move across permanent Confederate bridges and vice versa.
- Union ZOC's do not extend across permanent Confederate bridges and vice versa.
- Union leaders cannot attack across permanent Confederate bridges and vice versa.
- Union leaders can never advance, retreat, or rout across permanent Confederate bridges and vice versa.
Building Bridges
Bridges can be built only during the Recovery Phase (see Recovery). The following requirements must be met to build a bridge:
- Only infantry leaders on their mobile sides can build bridges;
- They must occupy a hex containing at least one unbridged minor river hexside.
For each eligible leader that meets the above requirements, the owning player may place a single Bridge marker on the map during the Recovery Phase (use Union bridges for Union leaders and Confederate bridges for Confederate leaders). To place a bridge, put the Bridge marker directly on a river hexside adjacent to the leader with one end of the bridge symbol pointing to the leader's hex and the other end pointing to a hex across the river.
A bridge cannot be built between two hexes if one of the hexes contains an enemy leader with a Combat value of 3 or more. A bridge may be built into a hex with an enemy leader whose Combat value is 1 or 2. A hexside may contain a maximum of one bridge.
A bridge cannot be built across a major river hexside except in the Advanced Game (see Union Major River Bridges). Also, during rain Game Turns, leaders cannot build bridges (see Random Events).
Removing Bridges
When a player builds a bridge, he "owns" it. He may remove the bridge from the map at any time during an Action Phase in which he has the initiative, if no enemy leader is adjacent to the bridge. A player can remove a bridge he built when an enemy leader is adjacent to it if he also has a friendly leader adjacent to the bridge. Once a bridge is removed, it must be rebuilt in order to return to the map.
Leaders can move across bridges built by enemy leaders (except for permanent bridges; see Permanent Bridges). If a leader crosses an enemy bridge, control of the bridge changes. Flip the Bridge marker over to its other side, to the Union or Confederate side depending on which leader crossed the bridge. Control of a bridge can change any number of times during a game.
A leader can retreat across a bridge built by the opposing player, and the bridge changes ownership at this time.
Bridges and Movement
A leader crossing a bridge or ford may move using the road or pike MP cost as long as a road or pike crosses that bridge or ford. Leaders crossing a bridge or ford without a road or pike must pay the MP cost of the major terrain in the hex entered. A bridge built by a leader during the game is not considered to have a road or pike running across it.
Secondary ZOC's extend across all permanent bridges which are crossed by roads and pikes, except Union and Confederate bridges (see Permanent Bridges). Primary ZOC's extend across all built and permanent bridges, except Union and Confederate bridges.
Bridges and Combat
A leader defending across a built or permanent bridge (except Union or Confederate bridges; see Permanent Bridges) receives a +3 die roll modifier when attacked; this modifier also applies to leaders defending across fords. A leader can retreat or rout across major and minor rivers only at bridges and fords; if it moves across a bridge built by an enemy leader, the bridge changes ownership (see Building Bridges). A leader that advances across an enemy bridge gains ownership of it.
Example of Bridges: Union infantry leader Burnside (Combat value of 4) moves to hex 2712 during the 1st Action Cycle of a turn. In the next Action Cycle, he is not activated and so during the Recovery Phase he can build a bridge across the Mattapony River at hexside 2712-2713. He can build the bridge even though F. Lee occupies hex 2713 because Lee has a Combat value of 2 (he would have to have a Combat value of 3 or more to prevent the bridge being built).
In the 3rd Action Cycle, Burnside attacks across the bridge. F. Lee exercises the cavalry retreat option and routs to hex 2816. Burnside moves across the bridge and stops in 2713 which is in Hill's ZOC. If Lee had defended, he would have received a +3 die roll modifier for defending across a bridge. (Note that if the bridge had been owned by the Confederate player, it would have been flipped from the Confederate side to the Union side when Burnside crossed it.)
Longstreet moves to hex 2813 to attack Burnside. In the combat Burnside takes a Manpower loss and is forced to retreat, and Longstreet is allowed to advance. The Union player decides to move Burnside back across the bridge to hex 2611, and Longstreet advances into 2713. The Union bridge remains in the hexside until either the Union player decides to remove it when he has initiative or until a Confederate leader crosses it.
Recovery
I do not believe war to be simply that lines should engage each other in battle. — Phil Sheridan
During the Recovery Phase, the following actions are performed strictly in the order listed below.
- Players may place bridges across minor river hexsides next to leaders on their mobile sides (see Building Bridges).
- Players may entrench leaders on their mobile sides (see Entrenchment Markers).
- Leaders on their mobile sides possessing disorganized Strength markers have these markers flipped to their organized sides.
- All leaders on their fatigued sides are flipped to their mobile sides. Their Strength markers are unaffected.
Design Note: Battered and dispirited troops recovered their cohesion by resting for a few days. As stragglers drifted back to the ranks and the men replenished their food and ammunition, they were shortly ready for battle again. This concept is simulated in the Recovery Phase, among other events.
A leader on its mobile side can perform the first three actions during the same Recovery Phase. Thus, it could place a bridge, entrench, and have its Strength marker organized in the same phase.
Introductory Scenarios
If victorious, we have everything to live for. If defeated, there will be nothing left for us to live for. — Robert E. Lee, prior to the 1864 campaign
There are six Introductory scenarios, each of which lasts a single Game Turn and takes about one hour to play. Each scenario portrays a specific part of the 1864 campaign; for historical background information concerning the scenarios, see the "Game as History" section in the Designer's Notes. In the set-up instructions that follow, all leaders begin the game on their mobile sides; all Strength markers are deployed on their organized sides.
Confederate Garrison markers are placed on the map when Union leaders move adjacent to their breastwork hexes (see Breastwork Hexes).
Substitute Leaders
In scenarios 4, 5, and 6, Substitute leader markers are used in place of named leaders (who had been wounded or killed in the campaign). The Substitute leaders behave in all ways like named leaders, although their Command values are less than the leaders they replaced. Confederate Substitute leaders are all from the Army of Northern Virginia, and Union Substitute leaders are all from the Army of the Potomac.
Scenario 1: Yellow Tavern
Union Set-Up
| Leader | Corps/Command | Strength Marker Combat/Manpower Value | Hex |
|---|---|---|---|
| Sheridan | Cav | 4 | 1215 (Chancellorsville) |
Confederate Set-Up
| Leader | Corps/Command | Strength Marker Combat/Manpower Value | Hex |
|---|---|---|---|
| Stuart | Cav | 1 | 1816 (Wilson's Store) |
| W. Lee | Cav | 1 | 1815 |
Game Length: One Game Turn (Game Turn 2)
Special Rules
- Sheridan cannot move or attack within 1 hex of Spotsylvania Court House (1615), Shady Grove Church (1518), Parker's Store (1218), or Hanover Junction (3016). Players may wish to place blank counters in these hexes as a reminder.
- Before the start of the game, the Union player may move Sheridan 20 MP. No attacks or RR station burnings are permitted during this movement. Afterwards, flip Sheridan's Strength marker to its disorganized side (keep Sheridan on its mobile side). Then begin the scenario.
Victory Conditions
The Union player gains or loses Victory Points (VP) for the following occurrences:
| VP | Reason |
|---|---|
| +2 | For each of the following RR stations burned: Beaverdam Station (2520), Taylorsville Station (3217), Wickham Station (3316), Ashland Station (3418), Atlee's Station (3816), Hungary Station (3820) |
| +2 | Sheridan ends the game within seven hexes of Haxall's (5216) |
| +1 | For each point of Confederate Manpower value lost |
| −1 | For each point of Union Manpower value lost |
Only the RR stations listed above count for VP. Ignore the VP values printed on the map for these stations. All other RR stations burned do not gain the Union player any VP. Players may wish to place blank counters in the RR stations listed above as a reminder.
At the end of the game, the Union VP total is calculated and the players consult the chart below to determine the winner.
| Union VP | Winner |
|---|---|
| 7 or more | Union Decisive Victory |
| 6 | Union Substantive Victory |
| 5 | Union Marginal Victory |
| 4 | Confederate Marginal Victory |
| 3 | Confederate Substantive Victory |
| 2 or less | Confederate Decisive Victory |
Scenario 2: Trevillian Station
Union Set-Up
| Leader | Corps/Command | Strength Marker Combat/Manpower Value | Hex |
|---|---|---|---|
| Sheridan | Cav | 3 | 4011 (Newcastle) |
Confederate Set-Up
| Leader | Corps/Command | Strength Marker Combat/Manpower Value | Hex |
|---|---|---|---|
| Hampton | Cav | 1 | 3616 |
| F. Lee | Cav | 1 | 3716 |
Game Length: One Game Turn (Game Turn 8)
Special Rules
- Sheridan cannot move or attack within two hexes of Hanover Junction (3016), Hanover Court House (3415), Shady Grove (3916), Cold Harbor (4213), or Despatch Station (4512). Players may wish to place blank counters in these hexes as reminders.
- Before the start of the game, the Union player may move Sheridan 20 MP. No attacks or RR station burnings are permitted during this movement. Afterwards, keep Sheridan on its mobile side and keep Sheridan's Strength marker on its organized side. Then start the game.
Victory Conditions
The Union player gains or loses Victory Points (VP) for the following occurrences:
| VP | Reason |
|---|---|
| +# | For each Burned marker placed in a RR station, the Union player receives a number of VP equal to the VP value of that station multiplied by two. For example, if the Union player burns Bumpass Turnout (2323), he receives 2 VP (1×2=2). |
| +# | If Sheridan ends the game in a Confederate RR station that is not burned, the Union player receives a number of VP equal to the VP value of that station multiplied by two. |
| +1 | For each point of Confederate Manpower value lost. |
| −1 | For each point of Union Manpower value lost. |
At the end of the game, the Union VP total is calculated and the players consult the chart below to determine the winner.
| Union VP | Winner |
|---|---|
| 11 or more | Union Decisive Victory |
| 9 to 10 | Union Substantive Victory |
| 8 | Union Marginal Victory |
| 6 to 7 | Confederate Marginal Victory |
| 5 | Confederate Substantive Victory |
| 4 or less | Confederate Decisive Victory |
Scenario 3: The Wilderness
Union Set-Up
| Leader | Corps/Command | Strength Marker Combat/Manpower Value | Hex |
|---|---|---|---|
| Sedgwick | VI | 9 | 0121 |
| Burnside | IX | 6 | 0219 (Brandy Station) |
| Warren | V | 10 | 0222 (Culpeper) |
| Hancock | II | 11 | 0420 (Stevensburg) |
| Wilson | Cav | 1 | 0618 (Sheppard's Grove) |
| Sheridan | Cav | 2 | 0717 (Richardsville) |
| Gregg |
Confederate Set-Up
| Leader | Corps/Command | Strength Marker Combat/Manpower Value | Hex |
|---|---|---|---|
| Ewell | II | 7 | 0821 |
| Stuart | Cav | 1 | 0926 |
| Hill | III | 9 | 1128 (Orange Court House) |
| Hampton | Cav | 1 | 1229 (Toddsburg) |
| F. Lee | Cav | 1 | 1312 (Salem Church) |
| Longstreet | I | 4 | 1331 (Gordonsville) |
Game Length: One Game Turn (Game Turn 1)
Special Rules
-
The Union player automatically has initiative in the first Action Phase of the game. Afterwards, initiative is determined normally.
-
In the 1st Action Cycle, the Union leader Burnside (IX Corps) may not be selected to march or entrench; place an Inactive (1 Action Cycle) marker on his counter. After the 1st Action Cycle is completed, remove the marker from Burnside.
In the 1st and 2nd Action Cycles, the Union leader Sheridan (Cav Corps) may not be selected to march or entrench; place an Inactive (2 Action Cycles) marker on his counter. After the 2nd Action Cycle is completed, remove the marker from Sheridan.
-
All Confederate leaders begin the game under Fort markers.
-
The Confederate player does not receive the +1 modifier for his first attack in the 1st Action Cycle (see Combat Modifiers).
Victory Conditions
The Union player gains or loses Victory Points (VP) for the following occurrences:
| VP | Reason |
|---|---|
| +3 | One or more Union infantry leaders ends the game in Spotsylvania Court House (1615). |
| +1 | One or more Union infantry leaders ends the game in Todd's Tavern (1416). |
| +1 | For each point of Confederate Manpower value lost. |
| −5 | One or more Confederate infantry leaders ends the game in Wilderness Tavern (1117) and/or Chancellorsville (1215). |
| −1 | For each point of Union Manpower value lost. |
At the end of the game, the Union VP total is calculated and the players consult the chart below to determine the winner.
| Union VP | Winner |
|---|---|
| +7 or more | Union Decisive Victory |
| +5 to +6 | Union Substantive Victory |
| +3 to +4 | Union Marginal Victory |
| +1 to +2 | Confederate Marginal Victory |
| −1 to 0 | Confederate Substantive Victory |
| −2 or less | Confederate Decisive Victory |
Scenario 4: Spotsylvania Court House
Union Set-Up
| Leader | Corps/Command | Strength Marker Combat/Manpower Value | Hex |
|---|---|---|---|
| Warren | V | 8 | 1117 (Wilderness Tavern) |
| Sedgwick | VI | 8 | 1117 (Wilderness Tavern) |
| Hancock | II | 8 | 1216 |
| Burnside | IX | 5 | 1216 |
Confederate Set-Up
| Leader | Corps/Command | Strength Marker Combat/Manpower Value | Hex |
|---|---|---|---|
| Ewell | II | 5 | 1118 |
| Hill | III | 7 | 1217 |
| Substitute 5 | I | 4 | 1217 |
| Stuart | Cav | 1 | 1516 |
| Hampton | Cav | 1 | 1615 (Spotsylvania C.H.) |
| W. Lee | Cav | 1 | 1914 |
Game Length: One Game Turn (Game Turn 2)
Special Rules
- The Union player automatically has initiative in the first Action Phase of the game. Afterwards, initiative is determined normally.
- All leaders begin the game under Breastwork markers, with the exception of the Confederate leader Stuart who begins the game under a Fort marker.
- The Substitute leader 5 counter (Army of Northern Virginia) replaces Longstreet in this scenario. The Substitute leader has a Command value of 4.
- At the beginning of the 2nd Action Cycle, the Confederate player may remove some, none, or all of his cavalry leaders from the map. For each cavalry leader voluntarily removed, the Union player loses 1 VP (see below). Confederate cavalry leaders may not be voluntarily removed in the 1st or 3rd Action Cycles — only at the start of the 2nd Action Cycle.
Victory Conditions
The Union player gains and loses Victory Points (VP) for the following occurrences:
| VP | Reason |
|---|---|
| +5 | If one or more Union leaders end the game in Spotsylvania Court House (1615). |
| +1 | If one or more Union leaders end the game in Wilson's Store (1816). |
| +1 | For each point of Confederate Manpower value lost. |
| −1 | For each point of Union Manpower value lost. |
| −1 | For each Confederate cavalry leader voluntarily removed (see Special Rules). |
At the end of the game, the Union VP total is calculated and the players consult the chart below to determine the winner.
| Union VP | Winner |
|---|---|
| +4 or more | Union Decisive Victory |
| +2 to +3 | Union Substantive Victory |
| 0 to +1 | Union Marginal Victory |
| −2 to −1 | Confederate Marginal Victory |
| −4 to −3 | Confederate Substantive Victory |
| −5 or less | Confederate Decisive Victory |
Scenario 5: Spotsylvania to the North Anna
Union Set-Up
| Leader | Corps/Command | Strength Marker Combat/Manpower Value | Hex |
|---|---|---|---|
| Hancock | II | 10 | 1614 |
| Warren | V | 9 | 1614 |
| Substitute 4 | VI | 8 | 1715 |
| Burnside | IX | 6 | 1715 |
Confederate Set-Up
| Leader | Corps/Command | Strength Marker Combat/Manpower Value | Hex |
|---|---|---|---|
| Ewell | II | 6 | 1516 |
| Hill | III | 7 | 1615 (Spotsylvania C.H.) |
| Substitute 5 | I | 3 | 1716 |
| Hampton | Cav | 1 | 1914 |
| W. Lee | Cav | 1 | 2413 |
| Pickett | I | 2 | 3016 (Hanover Junction) |
| Breckinridge |
Game Length: One Game Turn (Game Turn 4)
Special Rules
- The Union player automatically has initiative in the first Action Phase of the game. Afterwards, initiative is determined normally.
- All leaders begin the game under Fort markers with the exception of the Confederate leaders Breckinridge and Pickett.
- In the 1st Action Cycle, the Confederate leaders Breckinridge and Pickett may not be selected to march or entrench. Place the Inactive (1 Action Cycle) marker on their counters, and remove it once the 1st Action Cycle is complete.
- The Confederate Substitute 5 (Army of Northern Virginia) leader replaces Longstreet in this scenario. It has a Command value of 4.
- The Union Substitute 4 (Army of the Potomac) leader replaces Sedgwick in this scenario. It has a Command value of 3.
Victory Conditions
The Union player gains and loses Victory Points (VP) for the following occurrences:
| VP | Reason |
|---|---|
| +6 | One or more Union leaders end the game in Hanover Junction (3016). |
| +1 | For each point of Confederate Manpower value lost. |
| −1 | For each point of Union Manpower value lost. |
At the end of the game, the Union VP total is calculated and the players consult the chart below to determine the winner.
| Union VP | Winner |
|---|---|
| +5 or more | Union Decisive Victory |
| +3 to +4 | Union Substantive Victory |
| +1 to +2 | Union Marginal Victory |
| −1 to 0 | Confederate Marginal Victory |
| −3 to −2 | Confederate Substantive Victory |
| −4 or less | Confederate Decisive Victory |
Scenario 6: From the North Anna to the Totopotomoy
Union Set-Up
| Leader | Corps/Command | Strength Marker Combat/Manpower Value | Hex |
|---|---|---|---|
| Sheridan | Cav | 3 | 2716 (Chesterfield Station) |
| Burnside | IX | 6 | 2816 |
| Warren | V | 10 | 2817 |
| Substitute 4 | VI | 10 | 2817 |
| Hancock | II | 11 | 2916 |
Confederate Set-Up
| Leader | Corps/Command | Strength Marker Combat/Manpower Value | Hex |
|---|---|---|---|
| Substitute 5 | I | 6 | 2917 |
| Hill | III | 6 | 2918 |
| Ewell | II | 6 | 3016 (Hanover Junction) |
| Breckinridge | Valley | 1 | 3016 (Hanover Junction) |
| Hampton | Cav | 1 | 3316 (Wickham Station) |
| W. Lee | Cav | 1 | 3415 (Hanover Court House) |
| F. Lee |
Game Length: One Game Turn (Game Turn 6)
Special Rules
- The Union player automatically has initiative in the first Action Phase of the game. Afterwards, initiative is determined normally.
- Union leaders cannot enter a hex whose last two digits are numbered "19" or higher. For example, hex 2919 is off-limits to Union leaders.
- All leaders begin the game under Fort markers.
- The Confederate Substitute 5 (Army of Northern Virginia) leader replaces Longstreet in this scenario. It has a Command value of 4.
- The Union Substitute 4 (Army of the Potomac) leader replaces Sedgwick in this scenario. It has a Command value of 3.
Victory Conditions
The Union player gains and loses Victory Points (VP) for the following occurrences:
| VP | Reason |
|---|---|
| +5 | If one or more Union leaders end the game in Hanover Junction (3016). |
| +2 | If one or more Union leaders end the game in Atlee Station (3816). |
| +2 | If one or more Union leaders end the game in Wickham Station (3316). |
| +1 | If one or more Union leaders end the game in Mechanicsville (4016). |
| +1 | For each point of Confederate Manpower value lost. |
| −1 | For each point of Union Manpower value lost. |
At the end of the game, the Union VP total is calculated and the players consult the chart below to determine the winner.
| Union VP | Winner |
|---|---|
| +6 or more | Union Decisive Victory |
| +4 to +5 | Union Substantive Victory |
| +2 to +3 | Union Marginal Victory |
| 0 to +1 | Confederate Marginal Victory |
| −2 to −1 | Confederate Substantive Victory |
| −3 or less | Confederate Decisive Victory |
Advanced Game Rules
The Advanced Game adds rules which increase the game's realism as well as its complexity and length. The Advanced Game rules are not used in any Introductory scenarios. In the Advanced Game, three new cycles are added to the Sequence of Play: the Administrative Cycle, which takes place at the beginning of the turn, and the Valley and Terminal Cycles, which take place at the end.
Random Events
I am disgusted with the generalship displayed. Our men have, in many instances, been foolishly and wantonly sacrificed. Assault after assault has been ordered upon the enemy's entrenchments when they knew nothing about the strength or position of the enemy. Thousands of lives might have been spared by the exercise of a little skill; but, as it is, the courage of the poor men is expected to obviate all difficulties. — Emory Upton, Union brigade commander, VI Corps
During the Random Events Phase of each Administrative Cycle starting with Game Turn 2, the Union player rolls two dice. The dice are combined and the players consult the Random Events Table, checking the result that reads across from the dice result. The possible results are described below.
Scenario Length and Random Events
In the short scenario (3 Games Turns) of the Advanced Game, the only random event that can occur is the Union Bridge Train (that is, dice roll results of 5 and 9). All other events are treated as no effect. In the medium and long scenarios (6 and 9 Game Turns), all random events are in effect (see Advanced Game Scenarios).
Rain
The Weather marker is flipped to its Rain side in the Weather box. (At other times, the Weather marker is left on its Clear side.) The effects of rain, which last for the entire Game Turn, are as follows:
-
Zones of Control: ZOC's do not extend across fords, nor do they extend across creek hexsides not crossed by roads or pikes.
-
Attacks: The attacker subtracts 1 from all combat die rolls. Attacks cannot be made across ford hexsides nor can they be made across creeks unless there is a road or pike connecting the hexes. Attacks across a creek hexside crossed by a road/pike give the defender a +3 die roll modifier (instead of the normal +2).
-
Movement: If a leader enters a hex through a hexside crossed by a road, it expends two MP instead of one. Leaders entering a hex through a hexside crossed by a pike continue to expend one MP.
Leaders and supply lines (see Supply Lines) can cross minor and major rivers only at bridges, never at fords. Leaders (and supply lines) can cross creeks only through hexsides crossed by roads or pikes. Creek hexsides not crossed by roads or pikes are impassable.
-
Bridges: Leaders cannot build bridges.
Design Note: The rain random event does not represent just a passing shower. Rather, it indicates a deluge over a period of a day or two, which turns roads into quagmires and tiny creeks into rushing rivers.
Lee Sick
The Lee marker is placed in the "Lee Sick" box of the Lee Display. The effects apply for the rest of the Game Turn, after which time the Lee marker is placed back in the "Bonus Available" box of the Display. If Lee is sick, the following rules are in effect:
- During the Initiative Segment of all Action Phases, the Union player wins the die roll if both players' die rolls are the same.
- The Confederate player cannot use the General Lee bonus throughout the current turn (see Combat Modifiers).
Design Note: The Army of Northern Virginia suffered from a mild command paralysis when Lee became seriously ill during the campaign. In the game, the Confederate player's initiative advantage is lost when Lee is sick.
Reinforcements Enhanced
In the Reinforcement Phase of the current Administrative Cycle, either the Union or Confederate player's reinforcement die roll is increased by 1 (see Reinforcements).
Union Bridge Train
The Union player places a single Union Bridge marker in the Union Bridge Trains box. The Union player may use bridges in this box to build bridges over major rivers (see Union Major River Bridges).
Design Note: The special bridging equipment that enabled the Army of the Potomac to cross the James River in 1864 did not normally accompany the Army. In late May, Grant ordered all available bridging apparatus to be concentrated at Fortress Monroe, at the mouth of the James, in preparation for his campaign against Petersburg. It took considerable time, however, for all the equipment to be gathered. Some of it had to come from as far away as Harpers Ferry.
No Effect
The dice roll has no effect. Proceed to the next phase.
Sea Movement
Have just read your dispatch of 1 PM yesterday. I begin to see it. You will succeed. God bless you all. — Abraham Lincoln, 16 June 1864, on Grant's plan to cross south of the James
Only Union infantry leaders move by sea and only on Game Turns 6, 7, and 8. The Game Turn Track is color-coded to indicate the turns in which Union leaders can move by sea. Sea movement is used only in the long version (9 Game Turns) of the Advanced Game.
Design Note: The Federal Navy exerted complete control over Chesapeake Bay, and Grant was free to use the bay and its estuaries as water highways. Only a limited amount of shipping was available, however, so it was not possible for the Army of the Potomac to move in one huge armada. The Union player is prohibited from using sea movement at the beginning of the game because the Federal Navy was tied down moving Butler's men from Fortress Monroe to Bermuda Hundred and supplying them there.
Embarkation
During the Embarkation Phase of any Administrative Cycle starting with Game Turn 6, one Union infantry corps leader (or up to four Union infantry division leaders) occupying port hexes may be removed from the map and be placed in the Embarked Union Leaders box. The Strength marker (organized or disorganized) accompanies a leader. Leaders in this box do nothing except for debarking later on. Union leaders remain in this box for as long as the Union player wishes, but a maximum of one corps leader or four division leaders can occupy it at any given time. Corps and division leaders can never occupy the box together.
The Embarkation Phase is not used in Game Turn 9 of the long scenario. It is not used on Game Turn 6 of the medium scenario.
Debarkation
During the Debarkation Phase of the Terminal Cycle, Union leaders in the Embarked Leaders box may be placed on their mobile sides in any unoccupied or Union-occupied port hex subject to stacking restrictions. Their Strength markers are placed under them (organized or disorganized). They do nothing else during the rest of the turn.
Sea movement does not organize a disorganized Strength marker.
Railroad Destruction
Remember well Manassas field! Beauregard! Beauregard! Ever thus make tyrants yield! Beauregard! Beauregard! With armor bright in glorious fight The victor's star Fell in never fading light Upon our Beauregard! — "Beauregard," Confederate Army song, 1864
Leaders may destroy railroads. A destroyed railroad can affect supply and can gain Victory Points for the Union player.
Design Note: The complete destruction of a railroad line was a time-consuming process. In the game, a sizable unit must devote an entire turn to this task.
Eligible Leaders
Only a leader fulfilling all of the following requirements is eligible to destroy railroads:
- It must occupy an undestroyed railroad hex (including station hexes);
- It must have a Combat value of 4 or more;
- It must have a Strength marker on its organized side.
RR Destruction Markers
During the Begin RR Destruction Phase of each Administrative Cycle starting with Game Turn 2, both players (Union player first) may place Begin RR Destruction markers on any of their eligible leaders. The marker is removed from the leader under any of the following circumstances:
- The leader marches and leaves the hex;
- The leader falls to a Combat value of less than 4;
- The leader suffers a "D" (Disorganized) result in combat.
A leader with a Begin RR Destruction marker can entrench, burn RR stations, and/or build bridges. A maximum of one RR Destruction marker can occupy a hex at any given time.
Completing RR Destruction
During the Complete RR Destruction Phase of the Terminal Cycle, all leaders possessing Begin RR Destruction markers that are capable of tracing a primary supply range at this moment (see Supply Lines) have their markers flipped to their RR Destruction Complete sides. The marker is moved to the bottom of the stack. It remains in this hex for the rest of the game and cannot be removed. If a Begin RR Destruction marker cannot be flipped to its Complete side, the marker may remain in the hex indefinitely as long as conditions for its removal (see above) do not take place.
A player can place both a Burned marker and a RR Destruction marker in a hex containing a RR station. Also, a RR Destruction marker can be placed in any hex on a railroad line, not just in a RR station hex.
Effects of RR Destruction
Railroad destruction has an effect on supply lines (see Supply Lines). The Union player receives Victory Points for destroying certain Confederate railroads (see Victory). The appearance of Confederate leader Breckinridge from the Valley may be affected by destruction of the Virginia Central RR (see The Valley). A Complete RR Destruction marker has no effect on combat or movement of leaders on the map.
Example: Union cavalry leader Sheridan begins a turn in hex 1828 on the Virginia Central RR; it has a Combat value of 4 and its Strength marker is organized. During the Begin RR Destruction Phase of the Administrative Cycle, the Union player places a Begin Railroad Destruction marker on the leader. Assume that Sheridan does not activate during the three Action Cycles and is not attacked by a Confederate leader or forced to leave the hex. During the Complete RR Destruction Phase of the Terminal Cycle, the Union player flips the marker over to its Complete RR Destruction side. The marker remains in the hex for the rest of the game.
Now assume that Sheridan is attacked by a Confederate leader during one or more Action Cycles. If the attack results in Sheridan receiving a disorganized result or if his Combat value falls to less than 4, the RR Destruction marker is removed. Sheridan can again attempt to destroy the railroad on the next turn, if he meets the requirements.
Supply
A detail of Union soldiers buried the dead simply by turning the captured breastworks upon them. Thus had these unfortunate victims unwittingly dug their own graves. The trenches were nearly full of muddy water. It was the most horrible sight I had ever witnessed. — Pvt G. Norton Galloway, 95th Pennsylvania Volunteers, at Spotsylvania
To function at full effectiveness, leaders must draw supply from supply sources. Garrison markers are always considered in supply.
Design Note: Supply considerations dominated this campaign. Grant's plan to move the Army of the Potomac towards Richmond by a series of flanking movements to the east was based on the assumption that his men could be easily supplied from temporary bases on the Chesapeake. The Federal Navy, of course, controlled the bay, so Grant was free to choose convenient sites for his depots based on the location of his Army and its future area of operations. In a matter of days, the selected base site would be converted from a sleepy cove into a thriving military port. Had Grant moved against Richmond from the west, he would have had to depend on the vulnerable Orange and Alexandria Railroad for his lifeline; he probably would have had to employ an entire corps to guard the railroad.
In the game, supply lines are obstructed by enemy leaders only if those leaders remain in a blocking position for at least a turn (simulated by the placement of a Breastwork or Fort marker). A supply line was not an endless convoy that was irretrievably cut the moment the enemy appeared. Rather, it was a series of wagon trains that rolled back and forth at irregular intervals between the armies and their depots. The enemy would have to maintain a presence athwart the supply line for a considerable length of time to block it effectively.
The loss of manpower by attrition does not necessarily simulate the loss of troops due to a shortage of provisions. It can also mean that troops are being diverted from their normal duties to guard wagon trains and supply depots.
Supply Sources
Each player has different supply sources. Union and Confederate RR stations, which are supply sources, never change affiliation for the entire game.
Confederate Supply Sources
The Confederate player has two kinds of supply sources:
- Cities: Richmond (4219/4319), Manchester (4320), and Petersburg (5522) are supply sources unless they are currently occupied by Union leaders.
- RR Stations: All Confederate RR stations are supply sources, even those with Burned markers. (Those with RR Destruction Complete markers are not.) However, a Confederate RR station is a functional supply source only if it is capable of tracing a continuous path of railroad hexes to Richmond, Manchester, or Petersburg. This path must be "unblocked" (see Supply Lines).
Example: The Union player has placed a RR Destruction Complete marker in Gordonsville (1331) on the Virginia Central Railroad. This hex can no longer be used by the Confederate player for supply, but all RR stations south of Gordonsville can still be used for supply since a continuous path can be traced along the railroad to Richmond. Assume that later in the game the Union player places another RR Destruction Complete marker in Hanover Junction (3016). All the RR stations between Hanover Junction and Gordonsville are now ineligible for Confederate supply. Note that the Union player receives Victory Points only once for placing a RR Destruction Complete marker on this railroad (see Victory).
Union Supply Sources
The Union player has three kinds of supply sources:
- Depots: Union depots are used as supply sources (see Union Depots).
- Ports: The Union player may sometimes use port hexes adjacent to a supply base as supply sources (see Union Depots).
- RR Stations: Union RR stations are supply sources, even those with Burned markers, as long as they meet the conditions listed below.
Restrictions on Union RR Stations
A Union RR station is a functional supply source only if all three of the following conditions are in effect:
- The station must be capable of tracing a path of continuous railroad hexes to Bealeton Station (0115). This path must be "unblocked" (see Supply Lines).
- The station must not have a RR Destruction Complete marker on it.
- Starting with Game Turn 4, there must be one or more Union leaders, whose combined Combat values equal 6 or more, situated in one or more Union RR stations in order for all Union RR stations to be functional Union supply sources.
It is possible for Union leaders occupying Union RR stations to have a combined Combat value of less than 6 during the Supply Phase of one turn, in which case no Union RR stations could be used as supply sources, and then have a value of 6 or more in subsequent Supply Phases, in which case the RR stations would be functional supply sources.
Union Supply Bases
During a Union Supply Base Phase of each Terminal Cycle starting with Game Turn 2, the Union player can perform one of the following two actions:
- He can place one new Supply Base marker on its Build side on the map, or;
- He can flip one Supply Base marker currently on its Build side over to its reverse (Complete) side.
A building or completed Union Supply Base is considered a Union breastwork hex, doubling the Combat value of any Union leaders in the hex. It also possesses an intrinsic Union Garrison (see below). A Union leader can perform an Entrenchment action to create a Fort in the hex, in which case its Combat value is tripled.
Placement of Supply Bases
The Union player can place a Supply Base on the map on its Build side in any hex that meets both of the following conditions:
- It must consist of at least one major river hexside, and;
- It must be below that river's "head of navigation."
A hex between the head of navigation symbol and the map edge is considered below the head of navigation. The hexes listed below constitute the "head of navigation" of rivers. The hexes listed are within the head of navigation for each river.
- Aquia Creek: 0906 and 0907.
- Potomac Creek: 1306 and 1307.
- Rappahannock River: 1805 and 1905.
- Mattapony River: 4702 and 4703.
- Pamunkey River: 4507 and 4607.
- Chickahominy River: 5706 and 5606.
- James River: 5017 and 5117.
- Appomattox River: 5218 and 5319.
Example: In the illustration, the heads of navigation for the James River (hexes 5017 and 5117) and Appomattox River (hexes 5218 and 5319) are noted. Eligible hexes where Supply Bases may be built along these rivers are shaded.
Completed Supply Bases
Supply Bases remain on the map until eliminated, even if new ones are built. Subject to the above restrictions, the Union player can build as many Supply Bases as he wishes.
Union Garrison Markers
When a Union Supply Base is first placed on the map, a Union Garrison marker (Combat value of 4) is placed in the same hex under the base. The Garrison marker remains with the Supply Base until it is eliminated through combat (see Breastwork Hexes).
If a Supply Base is attacked, with or without Union leaders, and a combat result containing an "r" (retreat) or "R" (rout) occurs, both the Supply Base marker and the Union Garrison marker are removed from the map.
The printed Combat value (4) of the Union Garrison marker is used only when the hex is being attacked. The garrison's value is never modified by the Union Supply Base breastwork or by a Fort marker.
Example of Supply Bases: During the Supply Base Phase of Game Turn 2, the Union player decides to build a Supply Base in Port Royal (hex 2105). He places a Build Supply Base marker in this hex and a Union Garrison marker under it. During the Supply Base Phase of Game Turn 3, he decides to flip the Build Supply Base marker over to its Supply Base Complete side.
Union Depots
The Union player possesses six depots, one for each of his infantry corps. A Union infantry leader uses a depot as a supply source only if the depot has the same command affiliation as the leader and the depot occupies a completed Union Supply Base. (Note that each leader has a color band over its name which is the same color as its depot.) Union cavalry leaders can use any depot in a completed Supply Base as a supply source.
Union RR stations can be used as supply sources by all Union leaders regardless of command if conditions for the use of the RR stations are fulfilled (see Supply Sources).
Moving Depots
During the Union Depot Phase of any Administrative Cycle starting with Game Turn 2, the Union player can move depots to any completed Supply Base on the map. The movement of depots is voluntary; some may go to a new Supply Base, others may remain in their current base, or none may move at all.
Eliminating Depots
If a completed Union Supply Base is removed from the map due to a combat result, all depots on that base are also removed. However, in the Union Depot Phase of the next turn, the depots can be placed on any completed Supply Base on the map.
In the event that all Union Supply Bases are eliminated, depots are held off the map until a Supply Base has been completed. Then, in the next Union Depot Phase, depots may be placed on the Supply Base.
Port Hexes
A Union infantry leader can use any port hex adjacent to a Supply Base as a supply source as long as the following two conditions are met:
- The Supply Base contains a depot of the leader's command affiliation, and;
- The port is not occupied by a Confederate leader.
Union cavalry leaders can draw supply from any Union depots and therefore can use any port hex adjacent to a Supply Base containing a depot as long as the port is not occupied by a Confederate leader.
Example: A completed Supply Base and the X Corps depot occupy hex 5317. Union X Corps infantry leaders (or any cavalry leader) can use Haxall's (5216), Bermuda Hundred (5217), or City Point (5318) as supply sources. If the base and depot occupy Bermuda Hundred, they can use Haxall's and City Point as supply sources.
Supply Lines
During the Supply Phase of each Administrative Cycle starting with Game Turn 2, all leaders must attempt to trace supply lines. A supply line is a path of contiguous hexes traced from a leader to a friendly supply source. The total number of hexes (not MP) required to trace a supply line is its supply range (see below).
Restrictions to Supply Lines
The following restrictions apply when tracing supply lines:
- A supply line cannot cross a major or minor river except at a bridge or ford.
- A Union supply line cannot cross a permanent Confederate bridge and vice versa (see Permanent Bridges).
- A supply line cannot cross a bridge built and owned by the opposing player (see Building Bridges).
- A supply line cannot enter a hex occupied by an enemy leader currently situated in a breastwork hex or under a Breastwork/Fort marker, nor may the supply line enter a ZOC of an enemy leader situated in a breastwork hex or under a Breastwork/Fort marker (unless that ZOC is occupied by a friendly leader). A friendly leader in an enemy ZOC can draw supply in the hex it occupies.
- A Union supply line cannot enter a Confederate breastwork hex with an undestroyed garrison.
In rain Game Turns, supply lines are further restricted (see Random Events).
A supply line may be traced through a hex containing an enemy leader not in a breastwork hex or under a Breastwork or Fort marker, and it may also be traced through the ZOC of a leader that is not situated in a breastwork hex or under a Breastwork/Fort marker.
Example of Supply Lines: Union infantry leader Warren occupies Pole Cat Station (hex 2514) and is tracing a supply route to Port Royal (2105). Confederate leader Longstreet (Combat value of 6) occupies 2513; he exerts a Primary ZOC.
Since Longstreet is not in a breastwork hex nor under a Breastwork or Fort marker, his presence does not affect Warren's supply line. When the supply line is traced, it can go directly through Longstreet's hex.
Now assume that Longstreet is under a Breastwork marker. In this case, his presence strongly affects Warren's supply line. The supply line cannot be traced into Longstreet's hex because he is under the marker nor can it be traced through any hex in his Primary ZOC (these hexes are shaded in the example). If another Union leader occupies a hex in Longstreet's ZOC (for example, hex 2413, adjacent to both Warren and Longstreet), Warren can trace a supply line through the other Union leader.
RR Stations
For a RR station to be considered a supply source, it must be able to trace a continuous path of railroad hexes to Bealeton Station (for the Union player) or Richmond, Manchester, or Petersburg (for the Confederate player). This path cannot enter a hex occupied by an enemy leader in a breastwork hex or under a Breastwork or Fort marker, nor can it enter the ZOC of such a leader (unless the ZOC is occupied by a friendly leader). Also, the path must not enter a hex occupied by a RR Destruction Complete marker. (Burned markers have no effect.)
Supply Ranges
The number of hexes through which a leader's supply line is traced comprises that leader's supply range. There are four supply ranges, each of which has varying effects (see Supply Effects).
- Primary Supply Range: Includes any supply line from 0 to 15 hexes;
- Secondary Supply Range: Includes any supply line from 16 to 29 hexes;
- Extended Supply Range: Includes any supply line of 30 hexes or more;
- Isolated: It is impossible for a leader to trace a supply line of any length.
Supply Effects
After each leader determines its supply range, the effects of that range are applied. Effects may vary depending on whether a leader's Strength marker is organized or disorganized.
Primary Supply Range
A leader tracing a primary supply range has its Strength marker flipped to its organized side. If it is already on this side, there is no further effect.
Secondary, Extended, and Isolated Supply Ranges
A leader tracing a secondary or extended supply range (or an isolated leader that is incapable of tracing a supply line) must consult the Attrition Table (see below). Afterwards, the leader's Strength marker is flipped to its disorganized side, regardless of the Attrition Table result. If it is already on this side, there is no further effect.
Attrition Table
If a player must consult the Attrition Table for a leader, he rolls a single die. This die roll may be modified (see below). The modified die roll is cross-referenced with the column corresponding to the leader's supply range: secondary, extended, or isolated. The result may call for a Manpower loss of 1, 2, or 3. If so, place a new Strength marker under the leader that has a Manpower value 1, 2, or 3 less than the original one. In addition, the leader's Strength marker is flipped to or kept on its disorganized side.
If the Attrition Table results in a leader's last Manpower point being eliminated, it is removed from the map.
Attrition Table Modifiers
The following modifiers apply to Attrition Table die rolls:
| Die Roll Modifier | Reason |
|---|---|
| −1 | The leader's Strength marker is currently on its organized side. |
| −1 | The leader's Combat value is 2 or less. |
The above modifiers are cumulative.
Example of Attrition: Assume that Union cavalry leader Sheridan (Combat and Manpower values of 2) can trace only a secondary supply line. The Union player must roll on the Attrition Table for him. Sheridan's Strength marker is on its organized side. The Union player receives a −2 die roll modifier because Sheridan has a Combat value of 2 or less and because its Strength marker is organized. He rolls a 5, which is modified to 3. Cross-referencing 3 on the Attrition Table under the "Secondary" heading, the result is "Lose 1." The Union player removes the Strength marker of 2 and replaces it with a marker with a Manpower value of 1; then he flips the marker to its disorganized side.
Loss of Leaders
He never brought me a piece of false information . . . I can scarcely think of him without weeping. — Robert E. Lee, on the death of JEB Stuart, 12 May 1864
Leaders are removed from the map if their Manpower values reach 0 or if they are killed.
Design Note: In the game, only the death of corps leaders is taken into account because their loss sometimes had a significant effect on the conduct of the campaign. In reality, of course, division leaders were also killed — in fact, they fell much more commonly than corps commanders — but their loss and subsequent replacement did not greatly influence a unit's ability to maneuver.
Manpower Value
If a leader's Manpower value is reduced to 0, it is removed from the map and is placed in the Corps Holding Box corresponding to its command. The leader may return to play later either as a reinforcement (see Reinforcements) or by detachment (see Detachment and Attachment).
Confederate "Richmond" and "Valley" leaders are placed in any Confederate infantry Corps Holding Box, never in the cavalry box.
Death of Leaders
At the moment both players roll the dice to resolve an attack, they must check the numbers they rolled before applying die modifiers. If they roll the same number on the dice, before modifiers are taken into account, they must check to see if a leader has been killed.
Only corps (two star) leaders may be killed. If a combat involves only division (one star) leaders or substitute leaders (see below), no leaders are killed. If either the attacking leader or one of the defending leaders is a corps commander, the attacking player must roll a die again and consult the following chart:
| Die Roll | Effect |
|---|---|
| 1 or 2 | A Union corps leader is killed. |
| 3 or 4 | A Confederate corps leader is killed. |
| 5 or 6 | No leader is killed. |
A player's corps leader can be killed only if it is involved in the combat (supporting corps leaders are not considered involved in the combat). If a die roll calls for a player to lose a corps leader, but he has none involved in the combat, the result has no effect.
If the affected player has one or more corps leaders involved in the combat, he must select one of them and remove its counter from play. That leader never returns to the game.
Substitute Leaders
When a corps leader is killed, the owning player immediately draws a substitute leader of the correct army and places the counter on the killed leader's Strength marker. The effects of the attack are then resolved.
There are five pools of substitute leaders:
- Union Army of the Potomac infantry (7 leaders)
- Union Army of the James infantry (4 leaders)
- Union cavalry (3 leaders)
- Confederate Army of Northern Virginia infantry (7 leaders)
- Confederate cavalry (3 leaders)
At the start of the game, these pools of substitute leaders should be placed in the Substitute Leaders boxes on the Display Card. When a corps leader is killed, the owning player must blindly choose a substitute corps leader from one of his pools according to the following schedule:
| Killed Leader's Original Corps | Draw Substitute Leader From |
|---|---|
| Union II, V, VI, or IX Corps | Army of the Potomac infantry pool |
| Union X or XVIII Corps | Army of the James infantry pool |
| Union Cavalry Corps | Cavalry pool |
| Confederate I, II, or III Corps | Army of Northern Virginia infantry pool |
| Confederate Cavalry Corps | Cavalry pool |
When a substitute replaces a killed leader, the owning player should note the number of the substitute on a piece of scrap paper, indicating the command it now leads. For all game purposes, that substitute is now the leader of that corps. Substitute corps leaders cannot be killed in combat (see above) and they can never be removed from the corps they now command. A player can never voluntarily remove a leader from play.
Example of Leader Loss: Union infantry leader Sedgwick attacks Confederate infantry leader Hill. Both players determine the die roll modifiers that will apply to the combat, and each rolls a die. Both players roll a 3. Because they rolled the same unmodified number, they must check to see if a leader has been killed. The Union player rolls the die and obtains a 1. Sedgwick has been killed.
The Union player removes Sedgwick from the map and blindly draws one of the leaders from the Army of the Potomac box of his Union Substitute Leader Pool. In this case, he draws Substitute 4 (with a Command value of 3). He places the substitute leader on Sedgwick's Strength marker and notes down the number of the substitute leader on a piece of paper. After the leader has been replaced, both players apply the die modifiers to the attack die rolls and resolve the combat.
Note that in the example above both leaders had a corps leader involved in the combat. If the Union player had performed the attack with a division leader instead of a corps leader, he would have ignored the die result of 1, since division leaders cannot be killed. The only result that would have applied in this case would be a 3 or 4, in which case Hill would have been killed. The Confederate player would then have to remove Hill and draw a substitute leader from his Army of Northern Virginia Pool.
Reinforcements
I enclose a list of troops forwarded from this department to the Army of the Potomac since the campaign opened — 48,265 men. I shall send you a few regiments more, when all resources will be exhausted till another draft is made. — Henry Halleck, message to Grant, 7 June 1864
Design Note: Both armies were heavily reinforced during the campaign. The Army of the Potomac was strengthened by newly raised regiments and troops taken out of garrison duty in Washington, D.C. With Southern manpower almost drained, the Army of Northern Virginia was reinforced mostly by units dispatched to Virginia from other theaters.
Reinforcement Availability
Starting with Game Turn 3 and continuing through Game Turn 7, both players roll a single die during each Reinforcement Phase to determine their reinforcements. If reinforcements are not used in the turn of their arrival, they are lost.
The Game Turn Track is keyed by letters and color bands to indicate the turns in which players receive reinforcements. It should be stressed that the leaders placed in Corps Holding Boxes are not substitute corps leaders, which are kept separately in the Substitute Leader Pools.
Number of Reinforcements Received
The Union player receives a number of Reinforcement Points equal to his die roll plus 1. The Confederate player receives a number of Reinforcement Points equal to his die roll minus 1. A result of 0 for the Confederate player means he receives no reinforcements.
Confederate Reinforcement Points can be assigned to infantry leader Breckinridge (Valley) after he arrives on the map (see The Valley). Also, Union Reinforcement Points can be assigned to cavalry leader Kautz. The restrictions of 18.2 apply to both leaders.
Enhanced Reinforcements
During the Random Events Phase of the current Administrative Cycle, a player may receive a "Reinforcements Enhanced" result. If he receives this result, he adds 1 to his reinforcement die roll in the Reinforcement Phase of the current Game Turn only.
Example: During the Random Events Phase, a roll of 10 on the Random Events Table results in "Confederate reinforcements enhanced." He will receive a +1 to his reinforcement die roll.
During the Reinforcement Phase of this Game Turn, each player rolls a die. The Union player rolls a 5; he automatically adds 1 to his result for a total of 6 Reinforcement Points. The Confederate player rolls a 1; he automatically subtracts 1 from the roll, but then adds 1 for the enhanced reinforcements. He receives a total of 1 Reinforcement Point.
Reinforcement Placement
A player may use reinforcements to enhance existing leaders or to bring new leaders on the map. As leaders are enhanced or new leaders are brought onto the map, the owning player should note the number of Reinforcement Points applied to those leaders. When the number of Reinforcement Points made available to a player in a phase has been expended, he no longer deploys any more reinforcements in that phase. Subject to leader strength limits, reinforcements may be applied to only one leader or they may be divided among many leaders.
The Union player expends his Reinforcement Points first in the Reinforcement Phase and then the Confederate player expends his points.
Enhancing Leaders
During the Reinforcement Phase, any leader whose Strength marker is on its organized side may be enhanced. To enhance a leader, remove its Strength marker and replace it with one showing a Manpower value equal to its original value plus the number of Reinforcement Points applied to it. The new Strength marker is placed under the leader on its organized side.
Example: A player applies 2 Reinforcement Points to a leader with a Manpower value of 8. He removes the old Strength marker and replaces it with an organized marker with a Manpower value of 10.
New Leaders
During the Reinforcement Phase, leaders occupying a Corps Holding Box on the Display Card may be brought onto the map as reinforcements. To do so, remove one or more leaders from these boxes and place a Strength marker on its organized side under each one. The Manpower value of each Strength marker is the number of Reinforcement Points expended to place that leader on the map. New leaders are placed on the map as follows:
- Union infantry leaders must be placed directly on top of the depot bearing the same command;
- Union cavalry leaders must be placed on top of the II, V, or VI Corps depot;
- Confederate leaders must be placed in Richmond (4219/4319), Manchester (4320), or Petersburg (5522), but only if the hex in which they are placed is not occupied by Union leaders.
Union cavalry leader Kautz, if he is in the Union cavalry leader holding box, may also return atop the II, V, or VI Corps depot. Confederate infantry leader Breckinridge (Valley), after he has arrived on the map (see The Valley), may return in Richmond, Petersburg, or Manchester.
Maximum Strengths of Leaders
Leaders can never be enhanced or brought onto the map as reinforcements beyond the following Manpower values:
| Type of Leader | Maximum Manpower Value Allowed |
|---|---|
| Infantry corps leader | 16 |
| Infantry division leader | 4 |
| Union cavalry corps leader | 6 |
| Union cavalry division leader | 2 |
| Confederate cavalry corps leader | 3 |
| Confederate cavalry division leader | 1 |
Limitations to Cavalry
Each player may deploy a maximum of 1 cavalry Reinforcement Point per Reinforcement Phase, either by enhancing an existing cavalry leader or by bringing a new cavalry leader on the map. Also, each player is limited in the amount of cavalry he may have on the map at any given time:
- Union cavalry leaders: The maximum, combined Manpower value of all Union cavalry leaders can be no more than 8.
- Confederate cavalry leaders: The maximum, combined Manpower value of all Confederate cavalry leaders can be no more than 4.
Union Corps Limitations
In a Reinforcement Phase, the Union player can deploy a maximum of 1 Reinforcement Point to X Corps leaders and 1 Reinforcement Point to XVIII Corps leaders, either by enhancement or by bringing new leaders onto the map.
Example of Reinforcements: The Union player receives a total of 7 Reinforcement Points in a Reinforcement Phase (6 for the die roll plus the automatic increase of 1). He decides to apply 3 points to Warren whose Strength marker of 7 (Manpower and Combat values) is organized. He removes the 7 Strength marker and replaces it with a 10 marker on its organized side. Next he decides to bring cavalry division leader Gregg onto the map; he can assign a maximum of 1 Manpower to a cavalry leader in a phase. He places Gregg with an organized Strength marker of 1 in Port Royal (2105) where the VI Corps depot is located (he can place a cavalry leader on the II, V, or VI Corps depot).
Next the Union player decides to enhance Gillmore. The maximum he can enhance this leader is by 1 since Gillmore is in the X Corps. Gillmore's current Manpower value is 7, so the Union player replaces it with an 8 marker on its organized side. He has 2 Reinforcements Points remaining, so he decides to bring on division infantry leader Getty (VI Corps) with an organized Strength marker of 2; he places Getty and the marker in Port Royal, where the VI Corps depot is located. He has used all 7 Reinforcement Points, so his part of the phase is over.
Detachment and Attachment
I pray for peace. I would not give up peace for all the military glory of Bonaparte. — Wade Hampton, Confederate cavalry division commander
Each player has division leaders that begin the game in the Corps Holding Boxes. During the game, players can bring these leaders onto the map either as reinforcements (see Reinforcements) or by "detaching" them from corps leaders of the same command. Also, division leaders may be removed by "attaching" them to a corps leader.
Design Note: In the game, troops function best under the control of a corps leader. Sometimes, however, it is best — especially with cavalry — to split a corps into several smaller units.
Detachment
When a corps leader marches or entrenches during an Activation Segment, the owning player may detach any or all leaders currently situated in the Corps Holding Box of the corps leader's command. Subject to stacking restrictions, detached leaders can be placed in the hex in which the corps leader began its march or entrenches, or in any hex the corps leader enters during its march. After detached leaders are placed on the map, a marching leader may continue to move. Detached leaders are no longer considered participants in that march.
Placement of Detached Leaders
The moment when a division leader is detached has an effect on what it can do.
- If a detached leader is placed in the hex in which its superior leader begins a march, it is placed on its mobile side. The detached leader can be activated later in the current Action Cycle. (If the superior leader possesses a Breastwork or Fort marker when it begins its march, the detached leader is placed in the hex under the Entrenchment marker; the detached leader can later be activated to march or further entrench.)
- If a detached leader is placed in any hex except the one in which its superior leader begins its march, it is placed on its fatigued side without any Entrenchment marker. It cannot be activated in the current Action Cycle, nor can it entrench.
- If a detached leader is placed in a hex where its superior leader entrenches, it is placed on its mobile side, but it does not participate in the entrenching and does not gain an Entrenchment marker. If the superior leader creates a Breastwork or Fort, the detached leader is placed above the marker and can be activated later in the Action Cycle.
After placement on the map, detached leaders function normally. They are not obligated to remain within a certain distance of their superior leader; in fact, they may eventually attach to a different leader (see Attachment).
Strength Markers
The Strength marker of a detached leader must be placed on the same side (organized or disorganized) as the Strength marker of the corps leader performing the detachment. The Manpower value of a detached leader is limited by the following restrictions:
- Detached infantry leaders must be assigned a Strength marker with a Manpower value of 4 or less.
- Detached Union cavalry leaders must be assigned a Strength marker with a Manpower value of 2 or less.
- Detached Confederate cavalry leaders must be assigned a Strength marker with a Manpower value of 1.
The total Manpower value of all detached leaders is subtracted from the corps leader's Manpower value. A new Strength marker reflecting the corps leader's reduced Manpower value is assigned to that leader and is placed on the same side (organized or disorganized) as the marker it replaces. After detaching leaders, a corps leader must have a minimum Manpower value of 1. Even if all its subordinate leaders are detached, a corps leader must remain on the map.
Example: Union infantry leader Warren (V Corps) begins an activation in hex 2112 under a Breastwork marker; he currently has an organized Strength marker with a Manpower value of 12. His standard march Movement Allowance is 9. Before leaving 2112, the Union player decides to detach Griffen with a Manpower value of 2. He places Griffen's counter on the map with an organized Strength marker of 2. Because Warren began under a Breastwork, Griffen is placed under the Breastwork marker on its mobile side and may be activated later. Warren's Strength marker of 12 is replaced by an organized Strength marker of 10.
Warren moves to hex 2512. The Union player decides to detach another division leader, Crawford, with an organized Strength marker with a Manpower value of 2, to guard the bridge at Milford Station. Warren's organized Strength marker of 10 is replaced with an organized marker of 8. Crawford is placed on the map on its fatigued side, since the detachment occurred during a march.
Attachment
During the Attachment Phase of each Administrative Cycle starting with Game Turn 2, players may attach division leaders to corps leaders. A division leader must occupy the same hex as the corps leader to which it wishes to attach. Infantry division leaders may not attach to cavalry corps leaders and vice versa.
A division leader cannot attach to a corps leader if the addition of its Manpower value would raise the corps leader's Manpower value above a certain number:
- Infantry corps leaders cannot be raised above a Manpower value of 16.
- Union cavalry corps leaders cannot be raised above a Manpower value of 6.
- Confederate cavalry corps leaders cannot be raised above a Manpower value of 3.
How to Attach
To attach, remove an eligible division leader (and its Strength marker) from the map and place it in the Corps Holding Box corresponding to the corps leader to which it attaches. A division leader can attach to any corps leader regardless of command. The total Manpower value of all attaching division leaders is added to the corps leader's Manpower value (see maximum Manpower values, above). A new Strength marker reflecting the corps leader's enhanced Manpower value is assigned to the corps leader.
The status of the corps leader's original Strength marker (organized or disorganized) determines the side on which the new marker will be placed, even if the Strength markers of one or more attaching divisions were on the opposite side.
Confederate infantry leader Breckinridge (Valley) may be attached after he has entered the game (see The Valley).
Restrictions
The following restrictions apply to attachment:
- Division leaders can never attach to other division leaders.
- Corps leaders can never attach to any other leader.
- If a division leader with an Entrenchment marker attaches to a corps leader that is not entrenched, the corps leader does not gain the benefit of the marker (the marker is removed from the map). However, if the corps leader possesses an Entrenchment marker when division leaders attach to it, the corps leader remains entrenched after attachment.
A division leader can never attach a portion of its Strength marker to a corps leader. The whole marker is attached, and the division leader's counter is then removed.
Example of Attachment: A division leader with a Manpower value of 2 (organized) and another with a Manpower value of 3 (disorganized) attach to a corps leader with a Manpower value of 11 (disorganized). The two division leaders and their Strength markers are removed; the corps leader's Strength marker is replaced by one with a Manpower value of 16 (2+3+11=16). Because the corps leader's original Strength marker was on its disorganized side, the new marker is also placed on its disorganized side.
The Valley
Our jimmy has gone to live in a tent, They've grafted him into the army; He finally puckered up courage and went, When they grafted him into the army. I told them the child was too young, alas! At the captain's forequarters they said he would pass, They'd train him up well in the infantry class, So they grafted him into the army! — "Grafted Into the Army," Union Army song, 1864
Off-map events in the Shenandoah Valley may affect the game.
Design Note: Retention of the Shenandoah Valley was critical to the South. Even if Lee defeated Grant on the battlefield, the South would have lost the war if the Valley had fallen into Federal hands. This explains why Lee dispatched his entire II Corps, under the command of Jubal Early, to the Shenandoah in early June 1864. It was a daring decision, for Lee was already heavily outnumbered by Grant; moreover, Grant was only a day's march from Richmond at that time.
Breckinridge Option
At the start of any Valley Cycle starting with Game Turn 1, the Confederate player may declare the Breckinridge option. This option, which is strictly voluntary, may be chosen once per game. If it is declared, the Confederate player places the Breckinridge leader (Valley) on the map; the counter is placed on its mobile side, and a Strength marker on its organized side with a Manpower value of 1 accompanies Breckinridge.
Breckinridge is placed in one of the following hexes:
- Richmond (4219 or 4319) or Manchester (4320);
- Any unoccupied or Confederate-occupied Confederate RR Station that can trace a continuous path of railroad hexes to Cobham Station (1433). This path cannot enter a hex containing a RR Destruction Complete marker, a Union leader under a Breastwork or Fort marker, or the ZOC of such a leader (unless the ZOC is occupied by a Confederate leader). Burned markers in Confederate RR Stations have no effect on Breckinridge's placement.
Example: In Game Turn 6, the Confederate player decides to employ the Breckinridge option during the Valley Cycle. There is a RR Destruction Complete marker in 2817. The Confederate player places Breckinridge in Beaverdam Station (2520), the last RR station before the RR Destruction marker. Breckinridge arrives with a Manpower value of 1 and may activate in Game Turn 7. Since he exercised this option, the Confederate player must add 2 to the Valley Table die rolls for the rest of the game (see below).
The Valley Table and Valley Track
At the start of the game, the Valley marker is placed in the "0" box of the Valley Track. During the game, the marker may move to the "+1" (Confederate Initiative) or the "−1" (Union Initiative) boxes.
During each Valley Cycle starting with the first turn of the game, the Confederate player has the opportunity to declare the Breckinridge option (see above). Whether he declares the option or not, he then rolls a single die, modifying the die roll as required (see below). The modified die roll is applied to the Valley Table to determine one of three possible results:
- NE: No effect; the Valley marker remains in its current box.
- +1: The Valley marker is advanced by one box (if it already occupies the +1 box, it advances no further).
- −1: The Valley marker is reduced by one box.
Valley Table Modifiers
The following modifiers apply cumulatively to the Valley Table:
| Die Roll Modifier | Reason |
|---|---|
| +4 | All Valley Table die rolls that take place in Game Turn 7 and after. |
| +2 | The Confederate player has declared the Breckinridge option. |
| −3 | The Valley marker is currently situated in the +1 (Confederate Initiative) box. |
Effect of the Valley Track
There is no effect on the game if the Valley marker occupies the "0" box. Except for the −3 die roll modifier, there is also no effect on the game if the Valley marker occupies the "+1" (Confederate Initiative) box. However, as soon as the Valley marker reaches the "−1" (Union Initiative) box, the following rules come into effect:
- The Grant marker is placed in the Union Initiative box atop the Valley marker to indicate that the Valley Cycle is skipped for the rest of the game;
- The Confederate player must immediately choose one of the following options:
- He may do nothing, or;
- He may reduce his leaders' Manpower values by a total of 4 points. This reduction may be fulfilled by reducing a single leader's Strength marker or by reducing two or more leaders' Strength markers — as long as the total reduction in Manpower value equals 4. This reduction does not count as a loss for Victory Point purposes.
If the Valley marker reaches the "−1" (Union Initiative) box and the Confederate player does nothing, the Union player receives Victory Points (see Victory). If the Valley marker reaches the "−1" box and the Confederate player immediately reduces his Manpower by 4 points, the Union player does not receive any Victory Points.
Union Major River Bridges
When we reached the North Anna, I think the general feeling was that we should roll on, like a wave, up to the very gates of Richmond. — Col. Rufus Dawes, 6th Wisconsin Volunteers
The Union player can build bridges over major rivers using Bridge markers taken from the Union Bridge Train Box. The Confederate player never builds bridges over major rivers.
Bridge Train Box
The Union player may receive Bridge markers due to random events (see Random Events). Each time this event occurs, he receives one Union Bridge marker and places it in the Union Bridge Train Box on the map. There is no limit to the number of bridges that can occupy this box.
Bridging Major Rivers
Bridging major rivers is performed exactly like bridging minor rivers (see Building Bridges), except a bridge can never be built across an unbridgeable major river hexside. The Union player must have at least one bridge in the Bridge Train Box to bridge a major river. If there are no bridges in this box, the Union player cannot bridge a major river at that moment.
Restrictions
The following restrictions apply to building bridges over major rivers:
- Drewry's Bluff: Union leaders situated within five hexes of Drewry's Bluff (4720) cannot bridge the James River unless the Confederate garrisons in both Chaffin's Bluff (4619) and Drewry's Bluff have been destroyed. Such leaders may bridge the Appomattox River.
- Union X and XVIII Corps: Leaders of these two Union corps cannot build a bridge over a major river in Game Turns 1, 2, and 3.
Design Note: During the bridging of the James River in June 1864, Grant was concerned that a Confederate gunboat flotilla, stationed above Drewry's Bluff, would descend downstream to interfere with the river crossing. In fact, he instructed Butler to obstruct the river by sinking old vessels in midstream.
Union X and XVIII Corps leaders cannot build bridges in the short scenario of the Advanced Game (see Advanced Game Scenarios).
Removal of Bridges
The Union player may remove major river bridges during any Action Phase in which he has the initiative (see Building Bridges). A major river bridge that is removed is not placed back in the Bridge Train Box; it is considered lost.
A bridge from the Bridge Train Box may change ownership after it is placed on the map as outlined in Building Bridges.
Advanced Game Scenarios
I am now sending back to Belle Plain all my wagons for a fresh supply of provisions and ammunition and propose to fight it out on this line if it takes all summer. — Ulysses S. Grant, 11 May 1864
There are three scenarios in the Advanced Game. Before starting the game, players must agree to a length for the game: short, medium, or long.
- The Short Game begins on Game Turn 1 and ends at the end of Game Turn 3 (a total of 3 turns).
- The Medium Game begins on Game Turn 1 and ends at the end of Game Turn 6 (a total of 6 turns).
- The Long Game begins on Game Turn 1 and ends at the end of Game Turn 9 (a total of 9 turns).
Starting Set-Ups
All Advanced Game scenarios use the same starting set-ups. Leaders are always deployed on their mobile sides and their Strength markers are always placed on their organized sides. Before starting the scenario, the players should place their substitute leaders in their Substitute Leader Pools. Also, they should place all of their listed leaders in the appropriate locations in their Corps Holding boxes.
Union Set-Up
Leaders
| Leader | Corps/Command | Strength Marker Combat/Manpower Value | Hex |
|---|---|---|---|
| Sedgwick | VI | 9 | 0121 |
| Burnside | IX | 6 | 0219 (Brandy Station) |
| Warren | V | 10 | 0222 (Culpeper) |
| Hancock | II | 11 | 0420 (Stevensburg) |
| Wilson | Cav | 1 | 0618 (Sheppard's Grove) |
| Sheridan | Cav | 2 | 0717 (Richardsville) |
| Gregg |
Leader Restrictions
- Burnside can neither march nor entrench during the 1st Action Cycle of Game Turn 1. Place an Inactive (1 Action Cycle) marker on the counter and remove it when the 1st Action Cycle is completed.
- Sheridan can neither march nor entrench during the 1st and 2nd Action Cycles of Game Turn 1. Place an Inactive (2 Action Cycles) marker on the counter; after the 2nd Action Cycle is completed, remove the counter.
- Gillmore, Smith, Hinks, and Kautz can neither march nor entrench throughout Game Turns 1 and 2. Place an Inactive (2 Turns) marker on each leader. During the Game Turn Indication at the end of Game Turn 2, remove the markers from these leaders.
Supply Bases
- Place 1 Supply Base (Completed side) and a Union Garrison marker in 1505 (Belle Plain).
- Place 1 Supply Base (Completed side) and a Union Garrison marker in 5217 (Bermuda Hundred).
Depots
- Place II, V, VI, and IX Corps depots in 1505 (Belle Plain).
- Place X and XVIII Corps depots in 5217 (Bermuda Hundred).
Confederate Set-Up
Leaders
| Leader | Corps/Command | Strength Marker Combat/Manpower Value | Hex |
|---|---|---|---|
| Ewell | II | 7 (F) | 0821 |
| Stuart | Cav | 1 (F) | 0926 |
| Hill | III | 9 (F) | 1128 (Orange Court House) |
| Hampton | Cav | 1 | 1229 (Toddsburg) |
| Longstreet | I | 4 | 1331 (Gordonsville) |
| F. Lee | Cav | 1 (F) | 1312 (Salem Church) |
| Ransom |
An "F" next to a leader's Combat/Manpower value indicates the leader begins the game under a Fort marker.
Leader Restrictions
- Ransom, Hoke, Hagood, and Whiting can neither march nor entrench throughout Game Turns 1 and 2. Place an Inactive (2 Turns) marker on each leader. During the Game Turn Indication at the end of Game Turn 2, remove the markers from the leaders.
- Colquitt can neither march nor entrench throughout Game Turn 1. Place an Inactive (1 Turn) marker on the counter. During the Game Turn Indication at the end of Game Turn 1, remove the marker.
Garrisons
- Place Garrison markers with a Combat value of 2 in the following hexes (13 markers total): 3016 (Hanover Junction), 4119, 4120, 4218, 4219 (Richmond), 4220, 4318, 4319 (Richmond), 4320 (Manchester), 4418, 4619 (Chaffin's Bluff), 4720 (Drewry's Bluff), 5222 (Petersburg). Use the Terrain Key on the map for the symbology of these hexes.
- Place Garrison markers with a Combat value of 1 in the following hexes (5 markers total): 3217 (Taylorsville Station), 3316 (Wickham Station), 4321, 4419, 4420. Use the Terrain Key on the map for the symbology of these hexes.
Special Rules (Game Turns 1, 2, and 3)
Game Turns 1, 2, and 3
In the Short Game, the only random event that may occur is the Union Bridge Train; all other results have no effect (see Random Events). Union leaders cannot use sea movement (see Sea Movement). Union leaders do not have to occupy Union RR stations to use them as supply sources (see Supply Sources). Union X and XVIII Corps leaders cannot build a bridge over major rivers (see Union Major River Bridges).
Game Turns 1 and 2
Union leaders Gillmore (X Corps), Smith and Hinks (XVIII Corps), and Kautz (Cavalry Corps) and Confederate leaders Ransom, Hoke, Hagood and Whiting (Richmond) perform no actions during the first two turns of all scenarios. Inactive markers are placed on these leaders and removed during the Game Turn Indication of the second Game Turn. Starting with Game Turn 3, they can be activated normally by the owning player.
The owning player cannot activate one of the above leaders in lieu of passing during these turns.
Game Turn 1
The following rules apply only during the first turn of all scenarios:
- Confederate First Attack Bonus: The Confederate player receives a +1 die roll modifier on the first attack made in the 1st Action Cycle (only) of all Advanced Scenarios (this bonus is not used in the Introductory Scenarios).
- Administrative and Terminal Cycles: These two cycles do not take place in Game Turn 1.
- Union Initiative: The Union player automatically has initiative in the first Action Phase (not the whole 1st Action Cycle) of the game. Skip the Initiative Segment of the first Action Phase. After the first Action Phase, initiative is determined normally.
- Confederate Leader Restriction: Colquitt (Richmond) performs no actions during the first turn of all scenarios. An Inactive marker is placed on the counter and is removed during the Game Turn Indication of Game Turn 1. Starting with Game Turn 2, Colquitt can be activated normally.
- Union Leader Restrictions: Burnside performs no actions during the 1st Action Cycle of the first turn. An Inactive marker is placed on the counter; at the end of the first cycle, the marker is removed and Burnside may be activated in the 2nd and 3rd Action Cycles. Sheridan performs no actions during the 1st and 2nd Action Cycles of the first turn. An Inactive marker (2 Action Cycles) is placed on the counter; at the end of the 2nd Action Cycle, the marker is removed. Sheridan can be activated normally in the 3rd Action Cycle.
If a leader whose activities are restricted is attacked, the restrictions listed above are lifted. The leader can be activated in the Action Cycle in which it is attacked, assuming that it is not fatigued from the attack.
Victory
A game continues either until an automatic victory occurs for the Union player (see Automatic Victory) or until the completion of the last Game Turn of the scenario, based upon the length of game the players selected.
If the game does not end in an automatic victory, the Union player must determine the number of Victory Points (VP) he has gained at the end of the scenario. The Confederate player never gains VP.
Design Note: Grant's objective in the 1864 campaign was to defeat Lee's army. He knew the sources of Confederate manpower were just about drained; every Rebel who fell on the battlefield was, in effect, irreplaceable. Another of Grant's objectives was to seize — or isolate — Richmond. If the city proved too difficult to take by force, its capitulation could be achieved by destroying the railroads that emanated from the city, much as Grant had done in the Vicksburg campaign of the previous year.
Union Victory Points
The Union player gains VP in four ways:
- Union versus Confederate Manpower loss
- Burned Confederate RR stations
- Destroyed railroads
- Union initiative gained in the Valley
If a game ends in an automatic Union victory, players do not need to determine Union VP.
Manpower Loss
Both players record their manpower losses on the Manpower Loss Track on the map. At the start of the game, both Manpower markers are placed in the "0" box on this track. For each point of Manpower value lost, the owning player must move his Manpower marker upward by one box on the track. Manpower markers are never moved downwards on the track.
There are five ways of losing Manpower points:
- Combat losses (see Combat Results)
- Retreating or routing into or through enemy ZOC (see Retreats, Routs, and Advances)
- Inability to retreat or rout (see Retreats, Routs, and Advances)
- Cavalry Retreat option (see Cavalry Retreat Option)
- Attrition (see Supply Effects)
Eliminated Confederate garrisons never count towards Manpower losses (see Breastwork Hexes). Also, cavalry leaders never lose Manpower points when executing a cavalry retreat option through enemy ZOC's (see Cavalry Retreat Option).
To determine Union VP for manpower loss, follow this procedure:
- The players check the box occupied by the Confederate Manpower marker. The number of this box is multiplied by 1½ (round fractions down).
- The players check the box occupied by the Union Manpower marker (this number is never modified).
- The Union Manpower number is subtracted from the final Confederate Manpower value. This result is the final Union VP gain.
If step 3 results in a negative number for the Union player, he must reduce other Union VP gains by that number.
Burned Confederate RR Stations
The Union player receives VP in all Advanced Scenarios for Confederate RR stations possessing Burned markers. Use this procedure:
- At the conclusion of the last turn, before calculating Union VP for burned Confederate RR stations, the Union player may place a Burned marker in any unburned Confederate RR station that is occupied by a Union leader with a Combat value of 2 or more.
- The Union player adds up the VP values for all burned Confederate RR stations (indicated directly within the RR station hex). This sum is then multiplied by one-half (round fractions down). The final result is the Union VP gain.
Confederate RR stations with a value of "0" do not contribute toward Union VP. There is no VP effect for burned Union RR stations.
Destroyed Railroads
The following procedure is followed for determining Union VP for destroyed railroads in all Advanced Scenarios:
- At the end of the last turn, before calculating Union VP for destroyed railroads, the Union player may place a RR Destruction Complete marker in any railroad hex if the following conditions are met:
- A Union leader with a Combat value of 4 or more occupies the railroad hex;
- The Union leader is currently capable of tracing a primary supply range to a Union supply source (see Supply Lines).
- To determine the Union VP gain for destroyed railroads, the players must check the following six rail lines to determine if they are "operational" or "destroyed."
A rail line is operational if it does not enter a hex containing a RR Destruction Complete marker. If it enters a hex containing a RR Destruction Complete marker, it is destroyed. Union leaders, their ZOC, and Burned markers have no effect on railroad status.
The six railroads that must be checked are:
- Virginia Central RR: Starting from Richmond (4219 or 4319), a path of continuous railroad hexes must be traced to Cobham Station (1433).
- York River RR: Starting from Richmond, a path of continuous railroad hexes must be traced to West Point (4902).
- Richmond and Danville RR: Starting from Manchester (4320), a path of continuous railroad hexes must be traced to Chula Station (4334).
- Norfolk and Petersburg RR: Starting from Petersburg (5522), a path of continuous railroad hexes must be traced to Wells Station (5820).
- South Side RR: Starting from Petersburg, a path of continuous railroad hexes must be traced to Sutherland's Depot (5427).
- The Weldon: Starting from Petersburg, a path of continuous railroad hexes must be traced to Ream's Station (5824).
The path between Richmond and Hanover Junction (3016) may be traced along Virginia Central RR hexes or Richmond, Fredericksburg and Potomac RR hexes.
- After checking the status of the railroads, the Union player consults the chart below to determine how many Union VP he receives for each destroyed line.
| VP | Railroad |
|---|---|
| 14 | The Weldon |
| 12 | Richmond and Danville RR |
| 6 | South Side RR |
| 6 | Virginia Central RR |
| 3 | Norfolk and Petersburg RR |
| 1 | York River RR |
The number of Complete RR Destructions markers on a given line does not affect the number of VP the Union player receives. He receives VP per line, not per marker.
All other railroads (for example, the Richmond, Fredericksburg and Potomac Railroad) never give VP to the Union player if they are destroyed.
The Valley
If the Valley marker reaches the Union Initiative ("−1") box and the Confederate player does not immediately reduce his Manpower level by 4 (see The Valley), the Union player receives five VP at the end of the game. If the Valley marker does not reach the Union Initiative box or the Confederate player responds to Union initiative by immediately reducing his Manpower level, the Union player does not receive any VP.
Determining the Winner
The Union player combines his VP into a single sum. This number is compared to the victory conditions listed below to determine a winner and the level of victory for the winning player. Note that the number of VP the Union player must achieve to win increases as the length of the scenario increases.
Example of Determining Victory: At the end of a Medium length game (the end of Game Turn 6), the Union player has not achieved an automatic victory. Thus, he must determine how many Union VP he receives.
The Union Manpower marker is in the 20 box and the Confederate Manpower marker is in the 17 box. The figure of 17 is multiplied by 1½ for a total of 25 (17×1½=25, rounding fractions down). The Union player's figure is subtracted from the Confederate player's figure. Thus, the Union player receives 5 VP for manpower loss (25−20=5).
The Union player has burned 5 Confederate RR stations during the game. He has two Union leaders with Combat values of 2 in two unburned RR stations at the end of the game, and he is allowed to place Burned markers in these hexes. He adds up the values of the 7 burned RR stations and finds a total of 9. Multiplying 9 by one-half yields 4 (rounding fractions down). Thus, the Union player gains 4 VP for burned RR stations.
After calculating railroad status, the players determine that the South Side and York River RR's are both destroyed. Thus, the Union player receives 7 VP for this accomplishment (6 for the South Side RR plus 1 for the York River RR equals 7).
Finally, the Valley marker is situated in the Union Initiative box and the Confederate player did not immediately respond by reducing his Manpower level by 4. Thus, the Union player receives 5 VP.
All Union VP are combined for a total of 21 (5+4+7+5=21). Checking the victory schedule for the Medium Game, the players discover that the 21 VP are in the range of a Union Marginal Victory. Thus, the Union player wins the game.
Short Game (3 Game Turns)
| Union Victory Points | Winner and Level of Victory |
|---|---|
| +17 or more | Union Decisive Victory |
| +12 to +16 | Union Substantive Victory |
| +7 to +11 | Union Marginal Victory |
| +3 to +6 | Confederate Marginal Victory |
| −1 to +2 | Confederate Substantive Victory |
| −2 or less | Confederate Decisive Victory |
Medium Game (6 Game Turns)
| Union Victory Points | Winner and Level of Victory |
|---|---|
| +36 or more | Union Decisive Victory |
| +27 to +35 | Union Substantive Victory |
| +17 to +26 | Union Marginal Victory |
| +8 to +16 | Confederate Marginal Victory |
| 0 to +7 | Confederate Substantive Victory |
| −1 or less | Confederate Decisive Victory |
Long Game (9 Game Turns)
| Union Victory Points | Winner and Level of Victory |
|---|---|
| 56 or more | Union Decisive Victory |
| 41 to 55 | Union Substantive Victory |
| 26 to 40 | Union Marginal Victory |
| 13 to 25 | Confederate Marginal Victory |
| 1 to 12 | Confederate Substantive Victory |
| 0 or less | Confederate Decisive Victory |
Automatic Victory
The game immediately ends with a Union Decisive Victory if the two conditions listed below are met. In this case, there is no need to determine Union VP. The conditions for victory are:
- A Union leader with a Combat value of 4 or more ends two consecutive Action Cycles in Richmond (4219 or 4319) or Manchester (4320).
- At the end of the second Action Cycle, the leader must be capable of tracing a primary supply range to a Union supply source.
The two Action Cycles may be in different Game Turns (that is, the 3rd Action Cycle of one turn and the 1st Action Cycle of the next).
Historical Notes
by Joseph Balkoski
The United States Army was forever changed by a campaign fought in the spring of 1864. In 45 days in May and June of that year, an incessant struggle of furious maneuver and bloody battle was waged between Rebel forces under the command of General Robert E. Lee and Union troops led by General Ulysses S. Grant. Over 300,000 men participated in this campaign; when it was over, more than 100,000 had fallen in battle in a remote area of Virginia that formed a square no more than 80 miles on each side. It was the most sustained and costly period of violence in the history of the North American continent.
The 1864 campaign had significant influence on American history. In addition to sounding the death knell of the Confederacy, it marked the pinnacle of Grant's military career — a meteoric rise to fame that would land him in the White House in four years. The far-reaching effects of this campaign were still being felt in the 20th century, for American military doctrine of the post-Civil War era was directly descended from Grant's military philosophy. The United States fought the Second World War with a grand strategy patterned on Grant's basic thoughts on the Civil War (or at least what historians felt these thoughts to be). During Korea and Vietnam, many observers blamed American deficiencies on the failure to follow the teachings of Grant.
Grant was brought east by President Lincoln in early 1864 to formulate and coordinate a grand strategy that would bring the Rebellion to an end as quickly as possible. The struggle had been raging for three years and the military results, accompanied by fearful losses, were basically inconclusive. It was obvious to all that the South could no longer win the war militarily, nor could they pin their hopes on foreign assistance any longer. However, Lincoln was gravely concerned that an indecisive continuance of the war would be tantamount to handing the 1864 Presidential election to a Democrat, very likely a member of a peace-at-any-cost faction. To Lincoln, Grant was the man to obtain the decisive results for which he was so famous in the west.
Grant is one of the most misunderstood men in American history. After his death, Grant's theories on war were closely examined by soldiers and historians. However, many of the lessons learned from Grant's thoughts were not based on his real philosophy of war but on historical interpretation of that philosophy. Historical hindsight was too freely employed in this analysis.
Generally, the results of Grant's campaigns (usually unwanted results) were the basis of the historical examination, not Grant's original, unaltered plans for the conduct of a campaign. For example, it is usually assumed that Grant fully expected to wear Lee down in a brutal battle of attrition during the 1864 campaign. In reality, however, Grant expected to fight a decisive war of maneuver, much as he had achieved in the Vicksburg campaign of the previous year. He did, of course, hope to defeat Lee in battle, but more important was the commitment he made to his army for a war of continuous pressure and movement. By repeatedly moving around Lee's right flank, Grant hoped to interpose his army between the Rebels and Richmond or, at the very least, to cut the critical railroads connecting the Confederate capital to the south and west. In the process, Grant hoped to tie down the Army of Northern Virginia while a smaller army under the command of General Ben Butler moved directly against Richmond from the south. Simultaneously, another army led by General Franz Sigel was directed to seize the Shenandoah Valley, a fertile breadbasket that was vital to the Southern war effort.
Soon after the commencement of the campaign, it became clear to Grant that his original plans would never work. Primarily, Butler and Sigel — especially Butler — were revealed as inept. Few Confederate troops were tied down by these two men; in fact, Confederates from both the Valley and Richmond were able to reinforce Lee significantly about two weeks into the campaign. Moreover, Grant himself proved incapable of out-foxing Lee; each attempt to do so was foiled by the brilliant movements of the Army of Northern Virginia. When Grant found the roads south blocked, he occasionally attempted to butt his way through, usually with catastrophic results. In a 14-day period at the start of the campaign, the Army of the Potomac twice suffered casualties on the scale of Chancellorsville, a battle which had been fought precisely one year previously on almost the same ground. But unlike "Fighting Joe" Hooker, Grant kept his army moving after engaging in a scrap.
When the campaign finally ground to a halt, Grant had lost more than 60,000 men; yet, in a manner far different than he had foreseen, he had actually accomplished many of his original goals. He had planned to out-maneuver Lee and then defeat him in battle while lesser armies isolated the theater from the rest of the Confederacy. As it turned out, he wore Lee down by sheer attrition while managing to make up for Butler's and Sigel's incompetence by accomplishing some of their goals himself. By mid-June, the fate of the Confederacy was sealed just as effectively as if Lee had been decisively defeated in battle. However, the Rebellion's death was to be agonizingly slow for both the victor and the vanquished.
In April 1864, Robert E. Lee faced a perplexing situation. With the Southern economy in ruins, its manpower exhausted, and the chance of foreign intervention virtually nil, Lee recognized that the last hope for the Confederacy's survival lay in a decisive military victory. The only chance for such a victory was to attack Grant aggressively as the Army of the Potomac moved out of its winter encampments. This was no easy task, for Lee was outnumbered two-to-one and he had virtually no resources to replace the fallen. Nevertheless, he rapidly moved against the Yankees as they entered the Wilderness on 5 May. Although Grant was defeated here, Lee's victory was not conclusive. Afterwards, Grant seized the initiative and retained it for the rest of the campaign.
Although the Army of Northern Virginia brilliantly responded to all of Grant's flanking movements, it was far too drained to consider any further offensive operations. Lee did manage to inflict an enormous number of casualties on the Army of the Potomac; Richmond, too, was spared; but for Lee it was the classic case of winning the battle but losing the war. "We must destroy this army of Grant's before he gets to the James River," he said to Jubal Early in May. "If he gets there, it will become a siege and then it will be a mere question of time." An intact Army of the Potomac did manage to pass over and beyond the James in mid-June; so began the Confederacy's deathwatch.
The Civil War took place halfway between the Battle of Waterloo and the opening of the First World War. Although operations in the first three years of the Rebellion were patterned after Napoleonic warfare, the 1864 campaign marked a clear turning point in military history: from that moment, Civil War battlefields resembled the Somme more than Austerlitz. Still, virtually every Civil War general, Grant and Lee included, did not grasp the dramatic effects of massed rifled weapons on the conduct of war. Despite frequent revelations of this firepower in the first three years of the war, tactical misjudgments were made repeatedly during the 1864 campaign, Grant's Cold Harbor catastrophe — in which he lost 7,000 men in forty minutes — being the most obvious example.
Most Civil War leaders considered fighting behind breastworks as defeatist. Even after the armies stalked one another for two weeks in the trenches of Spotsylvania, Grant wrote on 26 May: "Lee's army is really whipped. The prisoners we now take show it and the actions of his army show it unmistakably. A battle with them outside of intrenchments cannot be had." Lee resorted to digging in because it was his only choice; he did not possess the manpower to consider a sustained offensive in the manner of the Army of the Potomac. However, he continually searched for opportunities for local counterattacks — and occasionally found them, only to discover that the firepower that had defeated him at Gettysburg had, if anything, gotten worse.
The Armies
The fundamental operational unit in the Civil War was the corps, which was essentially a mini-army containing all services necessary for independent operations. On the march, a corps generally moved en masse, often widely separated from other friendly outfits. In battle, corps commanders usually assumed informal control of an army wing, maneuvering the battle line as they saw fit with little interference from the army leader.
Corps varied greatly in size during the war, especially in the 1864 campaign. Hancock's II Corps of the Army of the Potomac had 28,000 men at the start of the campaign, but in mid-June, Early's II Corps of the Army of Northern Virginia was functioning with less than 8,000. As they were intended to operate independently, corps maintained their own wagon trains and supply services. A large corps with fully-stocked wagon trains could be an unwieldy formation to control on the march. During Sheridan's Richmond raid in May, the Union cavalry corps, although only 10,000 strong, took up 13 miles of road.
Grant's philosophy of army organization was somewhat different than what the easterners had been used to. When he came from the west, Grant reorganized the Army of the Potomac into fewer, stronger corps, somewhat along the lines of Lee's Army of Northern Virginia. The old I and III Corps, which had been so battered at Gettysburg, were disbanded. (Robinson's and Wadsworth's divisions of I Corps becoming the 2nd and 4th divisions of V Corps, Birney's and Mott's divisions of III Corps becoming the 3rd and 4th divisions of II Corps, and Rickett's division of III Corps becoming the 3rd division of VI Corps.) To mollify the old-timers, members of the disbanded corps were permitted to continue wearing their old corps' cap badges.
Despite the complaints of the pettifoggers, Grant's policy was wise, for by 1864 the number of competent generals who could handle large numbers of troops on independent operations was small. Even with its leaner organization, the Army of the Potomac repeatedly suffered from command paralysis throughout the campaign, occasionally with catastrophic results. The indecisiveness of Smith and Hancock at Petersburg in mid-June when faced with Rebels at ten percent of their strength was perhaps the most glaring Yankee command failure of the war. In a tactical sense, the abysmal handling of the attack at Cold Harbor underscored the army's leadership deficiencies. Emory Upton, a brigade commander in VI Corps, wrote of this battle: "Some of our commanders are not fit to be corporals. Lazy and indolent, they will not even ride along their lines; yet, without hesitation, they will order us to attack the enemy, no matter what their positions or numbers. Twenty thousand of our killed and wounded should today be in our ranks." After Cold Harbor, Grant wondered aloud, "What is the matter with this army?"
In spite of command problems within the Army of the Potomac, some of which could be directly attributable to Grant, the army kept moving decisively throughout the campaign. This was a far cry from the Army of the Potomac of old, whose battles, even victorious ones, usually resulted in an extended period of recuperation during which the Rebels, of course, recovered too. Continual pressure was something Lee could not stand for very long, even though the Rebels were never defeated in the field by Grant.
The combination of poor corps leaders and an incompetent army commander in the Army of the James was the major reason for Grant's failure to achieve his goals in the 1864 campaign. When Butler and his 40,000 men landed at Bermuda Hundred on 5 May, the Federals were offered their greatest chance to win the campaign, and perhaps the war, in one stroke. However, Butler kept his force stagnant for a week. When he did sally forth out of the Bermuda Hundred neck, Beauregard was able to meet him on almost even terms and defeat him. When advised by his corps commanders, Smith and Gillmore, that the best way to operate against the Confederates was to bridge the Appomattox near Point of Rocks and advance against Petersburg from the east (the plan which was eventually adopted by Grant), Butler replied that he "was not going to build a bridge for West Point men to retreat over." Perhaps Grant's greatest mistake was to allow such a man to remain in army command.
Like Grant, Lee's philosophy of command was to entrust small numbers of dependable, experienced leaders to positions of responsibility. While Lee brilliantly controlled strategy, these leaders were to be prepared to operate semi-independently in the manner of the legendary Stonewall Jackson. The dearth of competent subordinates hurt Lee more than it did Grant, for in the South they were in shorter supply. When Stuart was killed at Yellow Tavern, Longstreet was wounded in the Wilderness, and Hill fell sick at Spotsylvania, Lee had to place inexperienced leaders in corps command and was forced to exert more direct control over operational matters than he would have wished. When Lee became seriously ill himself in late May, the Army of Northern Virginia suffered its worst command paralysis of the war. With the Army of the Potomac split into three parts by bends of the North Anna, a healthy Lee, with Jackson and Longstreet, would have exploited the awkward Yankee deployment to its fullest. Instead, Lee was prostrate and his subordinates botched the opportunity. "Why did you not do as Jackson would have done?" he scolded his underlings during a rare temper tantrum.
Notes on Geography
The Civil War was a modern war fought in primeval terrain. There were very few Waterloos in the Civil War: battlefields like Antietam and Gettysburg, where the opponents could observe each other amid the full panoply of war, were exceptions rather than the rule. Instead, the typical Civil War battle was fought in uncultivated terrain; whirlwind struggles centered around occasional open fields that had most likely been hewn out of the wilderness only in the past few decades. The contrast with the Napoleonic battlefield was striking. Much of the land fought over in the Civil War had only been settled for a few score years and most of it was still virgin wilderness. Even in Virginia, which was the first English-speaking area to be settled in North America, the terrain was highly constrictive, especially in the paths of the 1864 campaign.
The land between Richmond and Fredericksburg, where most of the battles of the eastern theater of war were fought, was practically devoid of any significant settlements. Its roads were crooked and narrow and generally took the inexperienced traveller in circles. Some areas, like the infamous "Wilderness" west of Fredericksburg, had virtually no inhabitants. The source map used in Lee vs. Grant was an 1864 War Department map at 1: 200,000 scale, which was supposedly carried by some Union commanders in the field. No one can be certain whether this map, especially its road network, is accurate. A Yankee engineer officer reported: "The country itself proved to be of the worst and most impracticable character . . . This may appear strange to those who reflect that the Commonwealth of Virginia is among the oldest of the states of the Union. They necessarily conclude that her archives should contain the most perfect geographical and topographical materials for mapping her extensive domains. The proof that such has not been the case, and that this great want has been felt by her own military officers, is shown by the large surveying parties kept by them constantly in the field."
By deciding to move by the Army of the Potomac's left at the beginning of May, Grant insured that his troops would be plentifully supplied by bases on the estuaries of Chesapeake Bay. However, this decision also took his men directly across the path of several major rivers which were to constrict Grant's movement significantly. During the campaign, the Yankees had to cross the Rappahannock, Mattapony, Pamunkey, Chickahominy, and James Rivers, plus dozens of more minor waterways.
The most serious obstacle, of course, was the James, which Grant planned to cross in mid-June to get at Petersburg from the east. In a well-coordinated operation, Army of the Potomac engineers bridged the 2,100 foot James in a remarkable eight hours. During its construction, Yankee engineers faced potential interference from a Confederate flotilla (which never materialized); more challenging was the fact that the engineers had to cope with a four-foot tidal change. The amazing nature of this feat becomes more obvious to the modern observer when one realizes that the James, at Windmill Point, is significantly wider than the Rhine at the point where Patton crossed in 1945.
Grant's Vicksburg campaign in 1863 had focused on the destruction or isolation of Confederate railroads. When these rail lines were cut, Vicksburg was a doomed city. In the 1864 campaign, Grant dealt with a more complex problem. Richmond was connected to the South by seven major railroads, four of which were operating at full capacity south of the James. To isolate Richmond, all of these lines had to be cut or damaged to the point of uselessness.
In the first stage of the campaign, Grant satisfied himself with pinpricks against the railroads north of the James, sending Sheridan's cavalry off to raid the railroads on three separate occasions. While Lee deftly guarded these lines to prevent their complete destruction, Grant swung south of the James to get at a more lucrative target: Petersburg. Three major rail lines passed through Petersburg; had it fallen to the Yankees in 1864, the Rebellion would have been just about over. When the city was saved without a moment to spare by Beauregard, the timely arrival of Lee, and Northern indecisiveness, Grant settled for an extended siege, slipping continually to his left in an attempt to cut the railroads. The Weldon line was cut in August, followed by the South Side in March. At this point, Lee was forced to abandon Richmond and Petersburg, leading his army west in a last-ditch attempt to save his men. He and the Confederacy met their end at Appomattox on 9 April 1865.
The Game as History
Game Turn 1 (May 4 – May 8)
The Army of the Potomac opened the campaign by breaking up their winter encampments around Culpeper (hex 0222) and marching across the Rapidan by way of Germanna Ford (hexside 0718-0818) and Ely Ford (0916-1015). From observation posts atop Clark's Mountain (0824), the Rebels could watch the long blue columns moving southwards.
General Ulysses S. Grant, the commander-in-chief of all Union armies, accompanied General George G. Meade's Army of the Potomac. Grant's plan was to move by his left towards Richmond, fighting Lee's Army of Northern Virginia on grounds of his own choosing. A movement against Richmond from the northeast enabled Grant to supply his army by water using bases in the tidal estuaries of Chesapeake Bay. These waterways were under the undisputed control of the Federal Navy; as long as Grant remained close to them, his supply lines would be short and secure. Had he moved against Richmond from the northwest, he would have had to use the Orange and Alexandria Railroad to haul his supplies, a line which was extremely vulnerable to Confederate guerrillas. (It went right through the heart of "Mosby's Confederacy"; in fact, Grant narrowly escaped capture by Rebel partisans on a railroad trip to Washington in March to speak to President Lincoln.) A garrison of at least 20,000 troops would have been required to secure the Orange and Alexandria.
During the first two days of movement, Grant planned to pass the Army of the Potomac safely through the Wilderness, a land of virtually unbroken forest and thick underbrush. Lee, however, had other ideas. From his winter bases around Orange Court House (1128), Lee was determined to launch the Army of Northern Virginia directly against any Yankee move to the south. With his limited manpower and slim hope for reinforcements, Lee placed faith in one major offensive: if it failed, he would have to remain on the defensive for the rest of the campaign. The best place to attack Grant was in terrain in which the movement of large bodies of troops would be severely restricted and where the superior Yankee artillery could not be used to its full effectiveness.
When Lee saw the Army of the Potomac moving across the Rapidan, he leaped at the opportunity, ordering his three infantry corps to march rapidly to the east along the Orange Turnpike and Orange Plank Road to attack Grant in the Wilderness. On 5 and 6 May, battle raged along the Turnpike and Plank Road near Wilderness Tavern (1117 and 1216). Tactically, Lee established the upper hand, inflicting twice as many casualties on the Army of the Potomac as suffered by the Army of Northern Virginia (roughly 17,000 to 8,000). More importantly, however, Grant retained control of the critical road junctions on his front and, on 8 May, moved the Army of the Potomac by its left towards Spotsylvania Court House (1615) by way of Todd's Tavern (1416). Despite Grant's defeat, he had effectively outflanked Lee and, much to the surprise of his men, he continued pressing on with his campaign plans.
As the Battle of the Wilderness was being fought, General Benjamin Butler, commanding the Army of the James, sailed some 40,000 men up the James River and landed them at Bermuda Hundred (5217) and City Point (5318), only 20 miles southeast of Richmond. Grant ordered Butler to "fortify, or rather intrench, at once," noting that "Richmond is to be your objective point." These orders were not nearly specific and forceful enough for a man of Butler's character, for "The Beast" (as Butler had been labeled by the citizens of New Orleans) had little idea of how he would accomplish his mission. After landing, his men made two weak attempts to cut the Richmond-Petersburg rail line at the Swift Creek Bridge (5221-5322), after which they satisfied themselves digging in across the Bermuda Hundred neck. Meanwhile, the Confederates could scrape up no more than a small brigade to interfere with the Yankee movements.
Game Turn 2 (May 9 – May 13)
Grant's army moved out of the Wilderness at Todd's Tavern led by General Gouverneur Warren's V Corps. However, JEB Stuart's Rebel cavalry, in very small numbers, managed to get in front of Warren and slow him up enough to allow Confederate infantry to arrive on the scene without a moment to spare. An engagement, later called the Battle of Laurel Hill, developed on the Spotsylvania Road (1516), after which the Army of the Potomac found the path to the south blocked. As both armies arrived on the field, they entrenched to a degree unparalleled in the Civil War so far.
On 10 May, limited attacks against Lee's lines near Spotsylvania yielded some local success. Two days later, Grant returned with a massive assault of some 30,000 men. In some of the heaviest fighting of the war, the Army of the Potomac bagged an entire Rebel division and came very close to shattering Lee's army altogether. Contented with this tactical success, the Yankees maneuvered slowly around the Confederates' right flank and waited for another opportunity to smash a vulnerable spot in Lee's lines.
In one week, Grant had lost 30,000 men and Lee some 20,000. Grant was demanding every spare man at Lincoln's disposal: "The arrival of reinforcements here will be very encouraging to the men, and I hope they will be sent as fast as possible, and in as great numbers," he wrote to Washington on 11 May. Lee, however, could not replace his casualties.
The loss of general officers on both sides was staggering. Lee lost three corps commanders: Longstreet of I Corps, who was felled by an accidental shot from one of his own men; Hill of III Corps, who became seriously sick after the Wilderness; and Stuart, who was killed in a Union cavalry raid. On 9 May, the Army of the Potomac lost its beloved "Uncle John" Sedgwick to a sniper as he was berating his men for taking cover from Rebel fire. "They couldn't hit an elephant at this distance!" he said, and then fell over dead from a single rifle shot. In addition, the Yankees lost at least a dozen division and brigade commanders.
On 8 May, General Phil Sheridan, commander of the Union cavalry, declared, "If I am permitted to cut loose from this army, I'll draw Stuart after me and whip him too." Grant heard of this boast and gave Sheridan his full approval for a massive raid. On 9 May, 10,000 Union horsemen moved around Lee's right flank by way of Salem Church (1312), forming a 13-mile column on the Telegraph Road. The Yankees made over 40 miles on the first day, galloping wildly into Beaverdam Station (2520) at dusk, wrecking Confederate supplies with abandon. On 10 May, the column continued to the Ground Squirrel Bridge (3122-3221) on the South Anna, closely pursued by three brigades of Rebel cavalry under Stuart. On the 11th, Sheridan continued south on the Mountain Road, detaching a small force to burn Ashland Station (3418). Stuart attempted to block the Yankees at the junction of the Mountain Road and the Brook Turnpike at a place called Yellow Tavern (3816). In the ensuing melee, the Rebels were handily brushed aside and Stuart was killed. Sheridan pressed on, skirting Richmond's eastern side. Eventually, the bluecoats moved to Haxall's (5216) on the James River where they drew supplies from Butler's forces on Bermuda Hundred.
Meanwhile, the Army of the James was showing little inclination to move. Although situated only about four miles from one of the most important railroads in the Confederacy, with little opposition, Butler seemed incapable of settling on a strategy. In the meantime, General Pierre Beauregard, commander of the Department of North Carolina and Southern Virginia, rushed troops from the Carolina coast to Petersburg (5522). By 13 May, he had gathered about 15,000 men and prepared to defend the southern approaches to Richmond. Butler's golden opportunity had passed.
It rained almost incessantly during this period. "All offensive operations necessarily cease until we can have 24 hours of dry weather," Grant telegraphed to Washington. He limited the Army of the Potomac to a slow shift to its left, forcing Lee to respond in kind. Little fighting took place and both sides recuperated from the bloody fighting of the past week.
On 16 May, the Army of the James finally moved out of Bermuda Hundred in force, advancing northwards up the Richmond-Petersburg Turnpike to the Confederate fortifications at Drewry's Bluff (4720). Meanwhile, a single Union division moved towards Petersburg and halted at the Swift Creek Bridge. Beauregard had about 10,000 men in the Drewry's Bluff line, but he was soon reinforced by 5,000 more from General Ransom's Richmond garrison. An indecisive battle was fought on the 16th. Butler, fearing complete encirclement if the Confederates moved against him from Petersburg, left the field to the Rebels and pulled back to his Bermuda Hundred lines. He was never to venture out again. Grant observed that Butler's army, "though in a position of great security, was as completely shut off from further operations directly against Richmond as if it had been in a bottle strongly corked."
In the Shenandoah Valley, the Confederates won a decisive victory at New Market over the army of General Franz Sigel on 15 May. As a result, the South retained full control of the valley and was able to transfer 2,500 men under the command of General John Breckinridge, former Vice President of the United States, directly to the Army of Northern Virginia. Lee sorely needed the men.
Game Turn 4 (May 19 – May 23)
Upon the return of clear weather, Grant ordered several attacks against Lee's lines around Spotsylvania, none of which achieved any significant gains. Both sides suffered heavy losses. On 21 May, Grant broke off the stalemate and ordered Hancock's II Corps to pull out of the line and march down the north bank of the Mattapony past Guiney's Station (2012), hoping to draw the Army of Northern Virginia out of the trenches for a battle in open country. Lee, however, did not accept the invitation to fight. Instead, fearing encirclement, he withdrew from Spotsylvania and force marched his men more than 25 miles to the south side of the North Anna near Hanover Junction (3016), where they promptly entrenched. Hanover Junction was the nexus of two important rail lines and Lee was determined to defend it resolutely.
The rest of the Army of the Potomac followed in Hancock's wake, crossing the Mattapony at Downer's Bridge (2112-2212), Milford Station (2312-2313), and Milford Bridge (2512-2513). By 23 May, the armies faced each other across the North Anna. Grant ordered limited attacks which gained bridgeheads at Jerhico Ford (2717-2718) and Quarle's Ford (2717-2817). More importantly, Hancock's II Corps made a daring assault across the Chesterfield Bridge (2816-2916), capturing the span intact and forcing Ewell's corps back almost to Hanover Junction. Meanwhile, Lee was being reinforced by Breckinridge's men from the valley and by Pickett's division, which had been on detached duty near Richmond. The Army of the Potomac was also heavily reinforced by fresh troops from Washington. In addition, Sheridan's cavalry had finally returned to Grant from its resting place on the James after its successful raid.
Near Richmond, Beauregard moved his troops forward, bottling up Butler on Bermuda Hundred. "The force under Butler is not detaining 10,000 men in Richmond and is not even keeping the roads south of the city cut," Grant wrote on 22 May. "Under these circumstances, I think it advisable to have all of it here except enough to keep a foothold at City Point (5218)."
Game Turn 5 (May 24 – May 28)
Grant declined to attack Lee on the North Anna because of the Rebels' strong entrenchments and the dangerous three-way split of the Army of the Potomac. The V and VI Corps were south of the river near Quarle's Ford; the IX Corps was north of the river at Ox Ford (2816-2917); and the II Corps was south of the river at Chesterfield Bridge. On 27 May, Grant pulled the Army of the Potomac away from the North Anna for another wide flanking movement around Lee's right. The Yankees force marched down the north bank of the Pamunkey led by two divisions of Sheridan's cavalry. (The third division, Wilson's, undertook a diversionary raid westwards along the Virginia Central Railroad.) On the evening of the 27th and early on the 28th, most of the Army of the Potomac crossed to the south side of the Pamunkey at Huntley's (3712-3812) and Bosher's (3811-3912) fords near Hanovertown (3912).
Lee, who was suffering from a severe illness, ordered the Army of Northern Virginia to abandon the North Anna and march rapidly to Atlee Station (3816), only about ten miles north of Richmond. While Lee's infantry entrenched with their right on Totopotomoy Creek, Rebel cavalry engaged Sheridan at Haw's Shop (3913), falling back slowly before the superior numbers and firepower of the Yankee cavalry.
At Bermuda Hundred, Butler stood idle. General W. F. "Baldy" Smith's XVIII Corps prepared to move by steamer to the Army of the Potomac, as per Grant's orders. At Lee's request, Beauregard pulled Hoke's division out of the line for transferral to the Army of Northern Virginia.
Game Turn 6 (May 29 – June 2)
The Army of Northern Virginia's II Corps, now under the command of Jubal Early, attempted an assault on the Mechanicsville Road (3914), which was handily repulsed by Warren's V Corps. On 31 May, Grant moved slightly to his left, slipping across the Totopotomoy towards Cold Harbor (4213). Smith's XVIII Corps began to disembark at White House (4607) on the Pamunkey and advanced along the York River Railroad towards Richmond, aiming to join up with Grant somewhere near the Chickahominy. In response, Lee slid to his right and established a strong defensive line between the Totopotomoy and the Chickahominy, centered on the Walnut Grove crossroads (4115). Both sides entrenched and probed their opponents' lines.
In the Shenandoah Valley, a Union army of about 16,000 men under the command of General David Hunter began moving against the Confederate supply center at Lynchburg. Rebel forces in the area were too weak to give battle.
Game Turn 7 (June 3 – June 7)
On 3 June, Grant ordered the II, VI, and XVIII Corps to assault the Confederate lines at Cold Harbor. With no appreciable gains of any kind, the Yankees were mown down by the concentrated fire of the Confederate infantry. In less than an hour, 7,000 Federals fell with virtually no loss for Lee. It was a Pickett's Charge in reverse, and worse. For the next four days, both sides rested, assimilated reinforcements, and engaged in desultory trench warfare.
In the Shenandoah, Hunter defeated a small Confederate force at the Battle of Piedmont and captured Staunton. Virtually no Rebels now stood between Hunter's conquest and destruction of the valley, a loss that would be grievous to the Confederacy.
Game Turn 8 (June 8 – June 12)
The Army of the Potomac and the Army of Northern Virginia remained stationary, staring at each other across trench lines sometimes less than 100 yards apart. Unbeknownst to Lee, Grant was preparing a daring flanking operation on a massive scale. Before setting the Army of the Potomac into motion, however, Grant was determined to inflict more damage on the railroads north of Richmond. He thereby ordered Sheridan to raid westwards on the Virginia Central Railroad with two divisions (Torbert's and Gregg's) and join up with Hunter near Charlottesville (off-map) if possible. Starting from Newcastle (4011), Sheridan rode north between the Pamunkey and the Mattapony, turning westwards near Pole Cat Station (2514). Lee detached the cavalry divisions of Hampton and Fitz Lee to pursue the Yankees. Stopping to tear up track occasionally during his journey, Sheridan encamped on the evening of 10 June near Trevillian Station (1729). By riding a more direct route, Hampton and Lee managed to get between Sheridan and Hunter. An inconclusive engagement — one of the largest cavalry battles of the war — was fought on the 11th at Trevillian Station. After the fighting ended, Sheridan abandoned his plans to join Hunter and turned back towards the Army of the Potomac.
With Hunter running amok in the valley, Lee detached his entire II Corps to restore the situation near Lynchburg. Although this corps had been reduced to below 8,000 men, Lee ordered it to march on Washington after dealing with Hunter, hoping to draw troops away from Grant and destroy Union railroads.
Game Turn 9 (June 13 – June 17)
The Army of the Potomac suddenly pulled away from Cold Harbor, leaving Lee in the dark about their whereabouts and intentions. While Smith's XVIII Corps embarked at White House for a return trip by steamer to Bermuda Hundred, Hancock's II Corps led the Army of the Potomac by way of the Long Bridge (4811-4912) to Wilcox's Wharf (5413) on the James, marching almost 30 miles on 13 June. Lee anticipated another simple move to his right, so he shifted his army to the south side of the Chickahominy and entrenched between White Oak Swamp (4715) and Riddell's Shop (4815). Although he did not yet realize it, Lee had been outfoxed; the Army of Northern Virginia was to be out of the battle for the next six days. Meanwhile, Federal engineers were constructing a 2,100 foot bridge across the James from Wilcox's Wharf to Windmill Point (5514). Remarkably, this dangerous and difficult task was completed in eight hours.
On 14 June, Hancock's men crossed the James (mostly by boat) and marched westwards towards Petersburg. Smith's XVIII Corps disembarked at Bermuda Hundred and also moved against Petersburg, crossing the Appomattox on a bridge near Point of Rocks (5119). The rest of the Army of the Potomac followed in Hancock's footsteps. Most of Beauregard's troops were guarding the Bermuda Hundred lines or had been detached to Lee, but "Old Bory" managed to scrape together about 3,000 men for the defense of Petersburg. On the 15th, Smith assaulted and won the Rebels' outer trenches (5521), but he did not exploit his gains. Hancock came up in the evening, but decided to wait until morning to join in the attack. In the meantime, Beauregard had pulled virtually his entire force away from the Bermuda Hundred lines and urgently requested reinforcements from Lee. Still puzzled about the whereabouts of Grant, Lee nevertheless returned Hoke's division to Beauregard. The rest of the Army of Northern Virginia, however, remained on the north bank of the James.
On 16 June, the Army of the Potomac continued its assault on the Petersburg defenses, making little headway with heavy loss. The arrival of Hoke's division from Lee swelled Beauregard's strength to 14,000. Also, Lee at last began to recognize the crisis and detached two more divisions to the south. On the 17th, the Federal attacks continued with little gain. Lee, finally deciding that the Army of the Potomac had moved against Petersburg in its entirety, ordered his whole army to succor Beauregard.
Finally resolving that frontal attacks against entrenched Rebels were fruitless, Grant settled down unhappily for trench warfare, planning to slowly slip to his left in the summer and fall to cut the railroads emanating from Petersburg. With these rail lines in Federal hands, it would be, as Lee had predicted, "a mere question of time."
In the valley, Early's II Corps reached Lynchburg in the nick of time. Fearing a battle against Lee's veterans and suffering from supply shortages, Hunter withdrew to the north while Early prepared to move to the Potomac and beyond in compliance with Lee's orders.
Charts and Tables Card
The Charts and Tables Card is a separate reference card included in the game, summarizing the tables and modifiers described in the rules above.
Terrain Chart
| Terrain Type | Movement Point Cost | Defender's Die Roll Modifier |
|---|---|---|
| City | 1 | — |
| Clear | 2 | (+1/−1) A |
| Broken | 4 | — |
| Forest | 6 | (+1/−1) B |
| Mountain | Prohibited | — |
| Pike | 1 | — |
| Road | 1 C | — |
| Railroad | No effect | — |
| Head of Navigation |
Notes:
- A: A Union infantry leader defending in a clear hex receives a +1 modifier; a Confederate leader defending in a clear hex against a Union infantry leader receives a −1 modifier.
- B: A Confederate leader defending in a forest hex against a Union infantry leader receives a +1 modifier; a Union infantry leader defending in a forest hex receives a −1 modifier.
- C: During a rain Game Turn, movement cost of a road is 2 Movement Points.
- D: A leader can cross a major or minor river at a bridge or ford.
- E: During rain Game Turns, leaders can cross creek hexsides only along pikes and roads.
- F: During rain Game Turns, a leader defending across a creek hexside receives a +3 modifier.
- G: During rain Game Turns, leaders cannot cross major or minor rivers at fords.
- H: Union leaders can never cross permanent Confederate bridges; Confederate leaders can never cross permanent Union bridges.
- I: Union leaders cannot enter Confederate breastwork hexes with garrisons unless the garrisons are destroyed.
- J: Leaders defending in a breastwork have their Combat value doubled. The intrinsic Combat value of a garrison is added to this value (the garrison's value is not doubled).
Combat Chart
Each player rolls a die and applies the applicable modifiers. The defender's final modified die roll is subtracted from the attacker's modified roll, and the final number is the row they both check to determine the results of the combat. Check the column under the heading for each side's Combat value to see how each player's units are affected.
| Attacker Die Minus Defender Die | Defender: ½ to 2 | Defender: 3 to 6 | Defender: 7 to 11 | Defender: 12 or more | Attacker: ½ to 2 | Attacker: 3 to 6 | Attacker: 7 to 11 | Attacker: 12 or more |
|---|---|---|---|---|---|---|---|---|
| −4 or less | – | – | – | – | 1D | 1D | 2D | 3D |
| −3 | – | – | – | – | 1D | 1D | 1D | 2D |
| −2 | F | F |
Key:
- #: Manpower value loss.
- D: Strength marker disorganized; leader fatigued.
- F: Leader fatigued.
- r: Leader retreat.
- R: Leader rout.
- a: Attacking leader may advance after combat.
Defender's Die Roll Modifiers:
- +3: Defending across bridge or ford.
- +2: Defending across creek (+3 during rain Game Turns).
- +1: Union infantry leader defending in clear hex.
- +1: Confederate leader defending in forest hex against Union infantry leader.
- +1: General Lee bonus in defense (Confederate player only).
- −1: Union infantry leader defending in forest hex.
- −1: Confederate leader defending in clear hex against Union infantry leader.
Attacker's Die Roll Modifiers:
- +/− #: Ratio Chart modifier.
- +1: For each hex with supporting leader adjacent to defender.
- +1: General Lee bonus in attack (Confederate player only).
- +1: First Confederate attack in 1st Action Cycle of first Game Turn (Advanced Game only).
- −1: All attacks in rain Game Turn.
Ratio Chart
| Ratio: Attacker to Defender | Attacker's Ratio Modifier | Ratio: Attacker to Defender | Attacker's Ratio Modifier |
|---|---|---|---|
| 1-10 or less | −9 | 2-1 | +1 |
| 1-9 | −8 | 3-1 | +2 |
| 1-8 | −7 | 4-1 | +3 |
| 1-7 | −6 | 5-1 | +4 |
| 1-6 | −5 | 6-1 | +5 |
| 1-5 | −4 | 7-1 | +6 |
| 1-4 |
Abbreviated Sequence of Play
Administrative Cycle (Advanced Game only; not on Game Turn 1)
- Random Events Phase
- Union Depot Phase
- Supply Phase
- Embarkation Phase (Game Turns 6, 7, and 8)
- Begin RR Destruction Phase
- Reinforcement Phase (Game Turns 3 through 7)
- Attachment Phase
First Action Cycle
- Action Phase a. Initiative Segment b. Activation Segment
- Recovery Phase
Second Action Cycle — Identical to 1st Action Cycle.
Third Action Cycle — Identical to 1st Action Cycle.
Valley Cycle (Advanced Game only)
Terminal Cycle (Advanced Game only; not on Game Turn 1)
- Debarkation Phase (Game Turns 6, 7, and 8)
- Complete RR Destruction Phase
- Union Supply Base Phase
Game Turn Indication
Attrition Table
| Die | Secondary | Extended | Isolated |
|---|---|---|---|
| 0 or less | – | – | Lose 1 |
| 1 | – | Lose 1 | Lose 1 |
| 2 | Lose 1 | Lose 1 | Lose 1 |
| 3 | Lose 1 | Lose 1 | Lose 1 |
| 4 | Lose 1 | Lose 1 | Lose 2 |
| 5 | Lose 1 | Lose 2 | Lose 2 |
| 6 | Lose 2 |
Key: −: No effect. Lose 1, 2, or 3: Manpower value loss.
Modifiers: −1: Leader's Strength marker is currently on organized side. −1: Leader's Combat value is 2 or less.
Valley Table
| Die | Valley Marker Effect |
|---|---|
| 3 or less | +1 |
| 4 or 5 | NE |
| 6 or more | −1 |
Key: NE: No effect.
Modifiers: +4: All die rolls on Game Turn 7 and after. +2: Confederate player has declared Breckinridge option. −2: Valley marker is currently in Confederate Initiative (+1) box.
March Summary
| Standard March | Force March | |
|---|---|---|
| Infantry Leader | 1 die result + Command value = Movement Allowance | 1 die result + Command value + 2 = Movement Allowance |
| Cavalry Leader | 2 dice result + Command value = Movement Allowance | 2 dice result + Command value + 4 = Movement Allowance |
Note: In order to use force march, a leader's Strength marker must be on its organized side. As soon as a force march is declared, the leader's Strength marker is flipped to its disorganized side.
Supply Summary
| Supply Range | Hexes to Supply Source | Effect on Leader |
|---|---|---|
| Primary | 0 to 15 | Strength marker to Organized side |
| Secondary | 16 to 29 | Consult Attrition Table; Strength marker to Disorganized side |
| Extended | 30 or more | Consult Attrition Table; Strength marker to Disorganized side |
| Isolated | Cannot trace supply line | Consult Attrition Table; Strength marker to Disorganized side |
Random Events Table
| Die | Result |
|---|---|
| 2 | Rain |
| 3 | Lee sick |
| 4 | Union reinforcements enhanced |
| 5 | Union bridge train |
| 6-8 | No effect |
| 9 | Union bridge train |
| 10 | Confederate reinforcements enhanced |
| 11 | Lee sick |
| 12 | Rain |