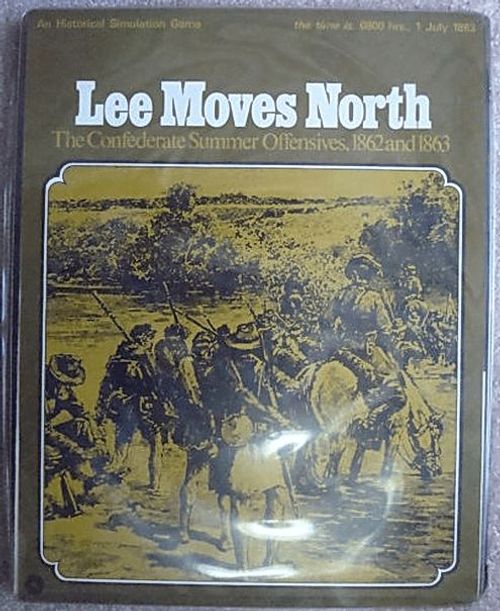
Lee Moves North: The Confederate Summer Offensive, 1862 & 1863
Lee Moves North: The Confederate Summer Offensive, 1862 & 1863 Rulebook
Table of Contents
Table of Contents
- 1.0 Introduction
- 2.0 General Course of Play
- 3.0 Game Equipment
- 4.0 Sequence of Play
- 5.0 Movement
- 6.0 Limited Intelligence
- 7.0 Rail Movement
- 8.0 Zones of Control
- 9.0 Stacking
- 10.0 Unit Reduction
- 11.0 Command Control
- 12.0 Combat
- 13.0 Combat Results Table
- 14.0 Terrain Effects Chart
- 15.0 Fortification Units
- 16.0 Supply
- 17.0 Cavalry
- 18.0 Crossing the Potomac
- 19.0 Reinforcements
- 20.0 Victory Conditions
- 21.0 How to Use the Scenarios
- 22.0 Designer's Notes
1.0 Introduction
Lee at Gettysburg is a strategic simulation of the South's two attempts to end the Civil War by bringing the war home to the North. These were the only two strategic offensives into Northern land during the Civil War. In 1862, the bulk of the Army of the Potomac was stranded on the James River, impotent under McClellan's leadership, a few miles from Richmond. Lee took a chance and ran North, trying to annihilate Pope's army and threaten Washington. In the bloody Second Battle of Bull Run, Pope was routed but not destroyed. McClellan's troops shifted north fast enough to prevent a collapse. They pursued Lee's desertion-weakened army, and nearly destroyed it in the Battle of Antietam.
By 1863, the North has shifted the emphasis onto the Western Theater leaving the Army of the Potomac relatively weak. The Army of Northern Virginia had reached its peak strength. Lee brushed past an Army of the Potomac in the middle of changing command. He drove deep into Pennsylvania, and fell into the slaughtering collision of Gettysburg. Although he retreated with the army intact, the chance of a military solution favorable to the Confederates was dead.
2.0 General Course of Play
Lee at Gettysburg is played in sequenced turns (called Game-Turns) during which Players move their units on the map, have combat and try to achieve certain objectives. Basically, the Confederate army is attempting to destroy the Union, and accomplish geographical objectives, such as cutting rail lines and occupying cities. The Union is attempting to prevent this, and maximize Confederate casualties. Given cities and rail lines on the map are worth a certain amount of Victory Points to each Player, as are the casualties inflicted upon the opposing army. (See the Victory Conditions).
There are two scenarios in Lee at Gettysburg. The first covers the 1862 Antietam Campaign, the second, the 1863 Gettysburg campaign. In addition, there are variations on these Campaign games, encompassing the more important and likely hypothetical variations. All of these games and scenarios each last 20 Game-Turns.
3.0 Game Equipment
[3.1] The Game Map: the 22" x 28" mapsheet portrays the area of Northern Virginia, Maryland and Pennsylvania where the actual campaigns took place. A hexagonal grid is printed on the map in order to regulate movement and position of the playing pieces.
[3.2] The Playing Pieces: Two differently colored sets of playing pieces (henceforth known as units) are supplied. These units represent the actual forces controlled by each side in the original campaigns. There are a number of different types of units; various markers are also supplied to record certain game functions. The playing pieces are distinguished by the various numbers and symbols on the face of each piece.
[3.21] Typical Combat Units and Markers
- Infantry units: show unit symbol, unit size, unit designation, Combat Strength and Movement Allowance. Infantry units represent mobile organizations of men capable of engaging in combat with each other.
- Cavalry units: show unit symbol, Combat Strength and Movement Allowance. Cavalry units represent the reconnaissance arm of each army.
- Leader counters: show the Leader's name, Combat Strength Bonus and Movement Allowance. Leader units represent the command control vital to the performance of infantry and cavalry units.
- Entrained markers denote that a Union combat unit is entrained, i.e., it is moving by rail and has not yet detrained.
- Fortification units: show a Combat Strength (defensive only). Fortification counters represent immobile strong points; they may never move from the hex of their initial placement, as indicated on the Scenario Charts.
- Depot Counter (see Supply Rules).
- Disruption Marker (see Combat Results Table).
- Dummy counters simulate the effects of the poor intelligence common to both armies. They are considered to be small detachments of troops, or merely figments of the imagination. They function like real infantry units in many ways.
- Control markers indicate which side was the last to pass through that hex and is entitled to the Victory Points associated with it.
Unit Sizes: XXX = Corps; XX = Division; X = Brigade.
Confederate unit abbreviations: AH = A. P. Hill; An = Anderson; Be = Beauregard; DH = D. H. Hill; DJ = D. R. Jones; Ea = Early; Ew = Ewell; He = Heth; Ho = Hood; JJ = J. R. Jones; Jo = Johnson; Mc = McLaws; Pe = Pender; Pi = Pickett; Ro = Rodes; Wa = Walker; Rep = Replacement.
[3.22] Definition of Terms
Combat Strength: the Combat Strength of each Combat unit indicates the basic offensive and defensive strength of each unit, and is composed of Combat Strength Points. Thus, a Combat unit with a Combat Strength of '8' has a basic offensive and defensive Strength equal to eight Combat Points.
Movement Allowance: the Movement Allowance for each unit is the basic number of hexes it can move during each Friendly Movement Phase. It is composed of Movement Points. Thus a Union Combat unit with a Movement Allowance of '6' can expend six Movement Points during the Union Player's Movement Phase.
[3.3] Game Scale: Each hexagon on the Lee at Gettysburg mapsheet represents 7.2 kilometers or 4.5 miles from side to side. Each Game-Turn is equal to two days of real time. The Game Length for each scenario is fifteen Game-Turns. [Errata: both the 1862 and 1863 scenarios each last 20 Game-Turns, as noted on the Turn Record/Reinforcement Track; "fifteen" is incorrect.]
[3.4] Game Charts and Tables: Various visual aids are provided for the Players to simplify and illustrate certain game functions. The Combat Results Tables detail the resolution of combat, and explains the possible results, as resolved by a comparison of Combat Strengths and a die roll. The Scenario Chart indicates the initial deployment of each Player's units.
The Turn Record/Reinforcement Chart indicates the arrival of reinforcements throughout the game.
The Terrain Effects Chart lists the effect of terrain on movement and combat and lists all other movement restrictions and costs. The Supply Effects Chart details the effect of supply on movement and combat. The Victory Points Chart indicates the Victory Point value of the game's objectives.
4.0 Sequence of Play
[4.1] The Game-Turn
Lee at Gettysburg is played in sequenced turns called Game-Turns. Each Game-Turn is composed of two Player-Turns. Each Player-Turn is composed of three Phases. The Player whose Player-Turn is occurring is known as the "Phasing" Player.
Players must strictly follow the Sequence of Play. Any play-action executed out of sequence constitutes a violation of the rules.
[4.2] Sequence Outline
A. CONFEDERATE PLAYER-TURN:
- Reinforcement Phase: The Player refers to the Scenario Chart and adds any Reinforcement Combat Units he receives, and places them as indicated by the chart. He also replaces any eliminated Dummy-counters. See the Limited Intelligence Rule.
- Movement Phase: The Player may move his units in any direction up to their full Movement Allowances, within the restrictions and benefits as outlined in the Movement, Command Control, and Zones of Control sections of the rules, and the Terrain Effects Chart. Cavalry units have the added ability to probe Enemy counters during the Movement Phase. For a detailed description, see the section concerning Cavalry.
- Combat Phase: After all Friendly movement is completed, the Combat Phase begins. The Player conducts attacks against the opposing Player's units in accordance with the rules of Combat and Command Control.
B. UNION PLAYER-TURN
The Union Player follows the exact sequence as the First Player, but of course, using his own units, and considering himself as "the Phasing Player."
C. GAME-TURN INDICATION:
The Players advance the Game-Turn indicators one step on the Turn Record.
Victory Points are recorded both during and at the conclusion of each Game-Turn; see the Victory Points Chart.
The above sequence is repeated until all twenty Game-Turns have been played (or until one of the Players concedes defeat prior to the twentieth Game-Turn). [Errata: the reference in this section to games lasting 15 Game-Turns is incorrect; both the 1862 and 1863 scenarios each last 20 Game-Turns.]
5.0 Movement
GENERAL RULE:
During the Movement Phase of a Player's Turn, the Player may move as few or as many of his units as he wishes. Each unit may move as many hexes as desired within the limits of Movement Command Control, its Movement Allowance, the Terrain Effects Chart, and the Zone of Control Rules.
PROCEDURE:
Move each unit individually, tracing a path of its movement through a line of continuous hexes on the hexagonal grid. Note that units in stacks (more than one unit per hex) cannot move as a stack. Each unit must be moved individually, and finish its movement, before the next unit can be moved.
CASES:
[5.1] How to Move Units
(A) Basically, each unit expends one Movement Point of its total Movement (point) Allowance for each hex entered. To enter some types of hexes, more than one Movement Point is expended, as explained on the Terrain Effects Chart.
(B) Movement is never required; it is always voluntary.
(C) Unused Movement Points are not transferrable between units, nor may they be accumulated from one Movement Phase to another.
[5.2] Movement Inhibitions and Prohibitions
(D) No combat may take place during the Movement Phase.
(E) No Enemy movement is permitted during a Player's Movement Phase.
(F) Movement is affected by Command Control (see those rules).
(G) Zones of Control and the Terrain Effects Chart also affect movement (see those rules and chart).
(H) Units may never enter a hex containing Enemy Combat or Fortification Units.
(J) Units may move over any combination of terrain features in the same Movement Phase, provided they have enough Movement Points to expend as they enter each hex.
(K) Moving units onto hexes occupied by other Friendly units affects their movement ability; see the Stacking rules.
(L) All movement must be done during a Friendly Movement Phase (exception: advance after combat, see Combat Case N).
(M) A unit may not enter a hex if it does not possess sufficient remaining Movement Points to enter that hex.
[5.3] Other Ways of Moving Units
(N) The Rail Movement rules detail other ways of moving units (see those rules).
[5.4] Fortifications
(P) Fortification units cannot move from their initial Placement. They have no Movement Allowance.
[5.5] Cavalry Probe
(Q) During the Movement Phase the Phasing Player may make cavalry probes when one of his face-up cavalry units is adjacent to an Enemy Unit. For details, see the cavalry rules.
[5.6] Forced March
(R) Units may increase their Movement Allowance by forced marching. Before a unit is moved (or the die rolled for movement if out of Command Control) the Player announces that it is using Forced Marching. The unit then has two additional Movement Points to expend in that Movement Phase. After completing movement, the die is rolled for each Forced Marched unit. If a '1,' '2' or '3' is rolled, the unit is disrupted (see the Combat Results Table, Explanation of Disruption). Units entraining, detraining or travelling by rail in a given Movement Phase may not use Forced March.
[Errata 5.6] Units without Command Control may also increase their Movement Allowance by Forced Marching. Procedure: First the die is spun to determine the normal movement of the unit without Command Control as explained in [11.1]. To this result, two additional Forced March Movement Points are added (Union units must still subtract one from the die roll). Following the completion of the unit's movement the die is again spun to determine whether or not the unit becomes disrupted as a result of the Forced March. Leaders may also increase their Movement Allowance by Forced Marching. Leaders which become disrupted as a result of Forced Marching suffer the normal disruption effects listed in the Explanation of Combat Results. The disruption does not affect their Command Control capability. A disrupted Leader may not contribute his Leadership Combat Bonus to Friendly attacks, but may contribute it to Friendly defending and counterattacking units.
6.0 Limited Intelligence
GENERAL RULE:
To simulate the poor intelligence available to each side during the actual campaign, a Player's infantry units are always placed in face-down mode. His cavalry units may be placed in either a face-up or a face-down mode. Face-down dummy counters are incorporated into play to further simulate the "fog of war."
PROCEDURE:
During a Player's Reinforcement Phase, he must have each of his infantry units face-down. He also replaces any Dummy counters exposed and eliminated in the prior Enemy Player-Turn. To replace a Dummy counter, the owning Player places it on top of any Friendly Leader unit or Friendly Fortification hex. Cavalry may operate in either a face-up or face-down mode. Cavalry may only change mode once during the Player-Turn.
CASES:
[6.1] Treatment of Face-Down Units
(A) Any unit that operates in a face-down mode is assumed to be infantry and operates according to the rules regarding infantry. Such units, including Dummy counters, and face-down cavalry units, possess a Zone of Control and must move at the same rate and manner as infantry.
(B) Units operating in a face-down mode must remain face-down until forced to turn face-up due to a successful Enemy Cavalry Probe or a normal combat situation.
[6.2] Attacking Face-Down Counters
(C) Whenever a real combat unit, face-down, attacks another face-down unit, the defending unit is revealed first, then the attacking units are revealed.
7.0 Rail Movement
GENERAL RULE:
Union Combat, Dummy and Leader units may move by rail and increase the extent of their movement by doing so. Cavalry units may not move by rail. [Errata 7.0: even faced-down Cavalry units may not move by rail.]
PROCEDURE:
A unit must start its Friendly Movement Phase on the rail hex. It must then expend all five of its Movement Points to entrain, and an "Entrained" marker is placed on the unit. During the following Friendly Player-Turn, the unit may begin its rail movement, expending one Movement Point for every five rail hexes moved through. It may move as far as it wishes along the rail line, up to the limits of its Movement Allowance (five). Any unit may end a Movement Phase entrained. To detrain, the unit must expend all five of its Movement Points.
CASES:
[7.1] "Moving on a Rail Line" Defined
(A) A unit "moving on a rail line" is defined as one which is moving from one rail hex to another across hex-sides crossed by the rail line itself. Units may not move by rail directly from one rail hex to another if the two hexes are not connected by a rail line across the hex-side.
[7.2] Rail Movement Restrictions
(B) Units may not move by rail, entrain, or detrain in hexes adjacent to, or occupied by Enemy Combat Units.
(C) Units may only move by rail on rail hexes capable of Friendly rail transport. The Union Player may move by rail on any rail hex north of the Potomac River. Do not confuse rail movement with supply by rail lines (see Supply rules).
(D) The Union Player is limited in the number of units that he may have entrained in a particular Movement Phase. The Union Player is limited to two infantry combat Units (or Dummy units). Leaders may be "entrained" but Leader units do not pay a movement penalty to entrain or detrain and do not count towards the two unit restriction.
(E) A unit entraining, moving by rail, or detraining may not force march in that Movement Phase.
[7.3] Off Map Rail Movement
(F) Certain rail lines leading off the edge of the map are connected (off the Map) to other rail lines leading off the map edge. Union units may move off the map and re-enter at a rail line hex that is connected to the one exited upon. The number of hexes that this off-map movement is equivalent to is the number in the box for the connecting rail lines.
[7.4] Command Control Suspended
(G) A unit does not require a leader unit to entrain, detrain or move by rail, i.e., the rules of Command Control are suspended for all rail movement operation.
8.0 Zones of Control
GENERAL RULE:
The six hexagons immediately surrounding a face-down unit (or stack of face-down units), constitute that unit's Zone of Control. Hexes upon which this Zone of Control is being exercised are called "controlled" hexes. These Zones of Control are termed "rigid" since Enemy units may not move directly from one Friendly controlled hex to another. They are termed "inactive" since opposing units in one another's Zones of Control need not attack. Cavalry units operating in a face-up mode have no Zone of Control.
NOTE:
All references to combat units should be construed to include dummy counters and cavalry units operating in a face-down mode.
CASES:
[8.1] Where Zones Do Not Extend
(A) Zones of Control do not extend across a river or mountain hexsides, but do across stream hexsides.
(B) Enemy Zones of Control never extend into hexes occupied by Friendly Combat Units.
(C) Only unentrained face-down units have a Zone of Control. Other units and markers, including entrained Combat Units and face-up units have no Zone of Control. [Errata 8.1 C: Infantry units faced-up as a result of Cavalry Probes or combat do exert a Zone of Control.]
[8.2] Effect of Fortifications
(D) Combat units in the same hex as Fortification units lose their Zone of Control. They are considered to be "in" the fort, and exert no control over adjacent hexes. Moreover, Enemy Zones of Control of units adjacent to the fortification with a Friendly Unit does not affect that unit. Enemy Zones of Control do not extend into hexes occupied by Friendly Fortification Units.
[8.3] Movement Cost to Enter or Leave Zones
(E) To enter or leave an Enemy controlled hex carries an additional Movement Point cost, above and beyond the normal cost of moving that one hex. It costs two additional Movement Points to enter an Enemy controlled hex, and one additional to leave.
9.0 Stacking
(more than one unit per hex)
GENERAL RULE:
Although units must move individually, they may end their Movement Phase stacked in the same hex as other Friendly units. There is no limit to the number of Friendly units which may end their Movement Phase in the same hex.
CASES:
[9.1] Movement Point Penalties
(A) Infantry units must pay an additional Movement Point penalty to enter or leave a hex occupied by another infantry unit. This penalty is one additional Movement Point for entering and one additional for leaving each Friendly occupied hex.
(B) Face-up cavalry units and the Leader counters expend no additional Movement Points to stack with each other or infantry (face-down) units. Infantry (face-down) units incur no movement penalty to enter or leave a hex occupied solely by face-up cavalry units and/or Leader counters.
(C) There is no additional movement penalty for entering or leaving a hex containing a Friendly Fortification unit, even if it is occupied by other Friendly infantry units. There is no movement penalty for entering or leaving a hex containing a Friendly entrained unit. A unit moving by rail pays no penalty to move through a rail hex containing other Friendly units.
[9.2] Effect on Combat
(D) All units (including Fortification units) in a stack in a single hex, must be attacked as one entire group and their Combat Strengths are totalled when attacked.
(E) Friendly units in the same hex may not attack into different hexes; see Combat, Case F.
10.0 Unit Reduction
GENERAL RULE:
The Combat and Fortification Units in Lee at Gettysburg are unitary, i.e., they may never be combined into larger units, nor may they be split into smaller units. They may, however, be reduced in strength due to combat. In combat when a Fortification or combat unit takes losses (see the Combat Results Table), the unit(s) involved are reduced in strength by substituting another unit to reflect the Strength Point losses.
PROCEDURE:
A unit with a Combat Strength of '9' receives a loss of one step. That unit is removed and replaced with a '6' Combat Strength unit. This same procedure applies to both Fortification and Combat Units. However, each step reduction results in losses of different sizes. See the Unit Step Reduction Chart.
CASES:
(A) In a case where either the defender or attacker is composed of more than one unit in a particular combat action, the owning Player may distribute the step losses among the units involved in any fashion he wishes as long as the separate step losses are equivalent to the total. Players on the defensive in a hex with a Fortification Unit may lose from either the Fortification Unit or any Combat units in the fort, at their discretion.
(B) Unit designations have been given to units for historical purposes only. It is not required to reduce a unit by replacing it with a counter of identical designation. However, it adds to the flavor of the game to replace a unit with identical identification.
[10.1] Unit Step Reduction Chart
| Unit before loss | Unit after loss of one step |
|---|---|
| UNION: 16-5 | 12-5 |
| 12-5 | 9-5 |
| 9-5 | 6-5 |
| 6-5 | 4-5 |
| 4-5 | 2-5 |
| 2-5 | destroyed |
| 1-6 | destroyed |
| CONFEDERATE: 7-6 | 5-6 |
| 6-6 | 5-6 |
| 5-6 | 4-6 |
| 4-6 | 2-6 |
| 2-6 | destroyed |
Fortifications lose one Strength Point for each step lost.
11.0 Command Control
GENERAL RULE:
The ability of each combat unit to move and attack is determined by its Command Control status at the beginning of its Movement Phase and the instant of combat. A unit without Command Control has its Movement Allowance determined by a die roll; a unit without attack Command Control may not attack, but may defend (and counterattack).
PROCEDURE:
A unit has movement Command Control if it begins its movement stacked with or adjacent to a Friendly Leader or Fortification counter. A unit has attack Command Control if it is adjacent to, or stacked with, a Friendly Leader or Fortification counter at the instant of its attack.
CASES:
[11.1] Movement Effect of No Command Control
(A) A unit that begins its movement outside of movement Command Control has its movement determined as follows: the phasing Player designates the route of march, and the destination hex, assuming the unit could move its full Movement Allowance. The Player then rolls the die and moves the unit along the route designated, moving the number of the Movement Points as shown on the face of the die. The Union Player has the added penalty of subtracting "one" from his die roll for his units.
[11.2] Combat Effect of No Command Control
(B) A unit that desires to attack may only do so if it is located within attack Command Control. A unit without attack Command Control may not engage in combat during the Combat Phase, except to defend in the Enemy Combat Phase.
[11.3] Exemptions from Command Control
(C) Some movement is exempt from movement Command Control limitations. These exceptions include:
- Any unit that begins its movement on a rail hex and desires to move by rail. However, such a unit must cease its movement on a rail hex, detrained or entrained at the conclusion of its movement. It may move off the rail line during its following Movement Phase, according to its movement Command Control status.
- Any Union unit that begins its Movement Phase in or adjacent to a Fortification unit.
- Face-up cavalry units do not need a Leader to move at full Movement Allowance.
(D) Some combat is exempt from attack Command Control limitations. These exceptions include:
- Any Union unit that begins the Combat Phase in or adjacent to a Fortification.
- Face-up cavalry units do not need a leader to engage in combat.
- No unit needs a leader in order to perform a counterattack (see the Combat Results Table).
[11.4] Leadership Combat Bonus
(E) Leaders give an added bonus to units during combat. This bonus is in the combat strength position on the leader counters. The bonus is added to the combat strength of the units stacked with the leader at the moment of the attack. The bonus can never be larger than the total strength of the stack. Example: Lee is stacked with two 5-6 divisions. The combat strength is '10' for the units, plus '10' of Lee's possible bonus of '15,' for a total of '20.'
[Errata 11.4] The Leadership Combat Bonus may be added to attacking, defending or counterattacking Friendly units stacked with a Leader.
[11.5] Leaders Always Face-Up
(F) Leader units are never intended for hidden movement (limited intelligence). They are always present on the map face-up, fully revealed.
12.0 Combat
GENERAL RULE:
Combat occurs between adjacent opposing units at the discretion of the Phasing Player; this Player is considered to be the Attacker, while the other Player is considered to be the Defender, regardless of the overall strategic positions of the two Players.
PROCEDURE:
Total up the Combat Strengths of the attacking units involved in a specific attack, and compare it to the total Combat Strength of the defending Combat and Fortification units in the hex under attack. State the comparison as a probability ratio: Attacker's Strength to Defender's Strength. Round off the ratio downward to the nearest "whole" number to yield the simplified odds found on the Combat Results Table: roll the die and read the result under the appropriate column for that die result. Apply the result of the combat immediately before going on to resolve any other combat.
The Defender must reveal the identity of his units, and then the Attacker reveals his units. However, if the Defender's force is composed solely of dummy counters, the Attacker need not reveal his units. Dummy counters may not attack and are removed from the map when revealed.
CASES:
[12.1] Which Units May Attack
(A) During the Combat Phase of his Player-Turn, a Player may attack only those Enemy units which are adjacent to Friendly units.
(B) Dummy counters may never attack or defend. Should a Dummy counter be turned face-up adjacent to an Enemy unit during the Combat Phase, it is removed from the map.
(C) Infantry (face-down) units may only attack if located within attack Command Control. Infantry units without attack Command Control may not attack during the Combat Phase, but they may defend in the Enemy Player's Combat Phase.
(D) Units adjacent to Enemy units are not compelled to attack, nor does the attacking Player have to use every adjacent unit if he does decide to attack. Attacking is completely voluntary. However, all units in the defending hexes must defend.
[12.2] Multiple Unit and Multi-Hex Combat
(E) No units may attack more than once per Combat Phase. No units may be attacked more than once per Combat Phase.
(F) No more than one Enemy-occupied hex may be attacked by a given attacking unit (or stack of attacking units), that is to say, different defending units on different hexes may not be treated as objects of attacks which might be made by a one-hex group of attacking units even if the attacking units happen to be adjacent to two or more Enemy-occupied hexes. [Errata 12.2 F: This rule should be interpreted to mean that units stacked together in one hex may only attack Enemy units defending in a single hex. Units in one hex which are adjacent to more than one Enemy occupied hex may only attack Enemy units in one of the hexes to which they are adjacent.]
(G) An Enemy-occupied hex may be attacked by as many attacking units as can be brought to bear. Conceivably, as many as six stacks of units could be brought to bear against a single Enemy-held hex.
(H) Defending units stacked in the same hex must be attacked as a single combined Combat Strength, i.e., you may not individually attack individual units which are stacked together.
(J) If one unit in a stack is used in an attack, the other units in the stack need not participate in the same attack. They may attack a different hex, or not at all. [Errata 12.2 J: This rule has been changed to the following: All units attacking from a single hex may attack Enemy units in only one adjacent hex. All units attacking from one hex must attack the same Enemy occupied hex. It is still not necessary for all units in an attacking stack to participate in the attack, but all participating attacking units (from the same hex) must combine to attack only a single Enemy occupied hex.]
[12.3] Combat Resolution
(K) Combat odds are rounded off in favor of the defender. For example, an attack of 26 Combat Points against 9 Combat Points would round off to a two-to-one odds situation.
(L) See the Combat Results Table and Unit Reduction Rules for resolution of combat and method of taking casualties.
[12.4] Supply Effects
(M) Isolated units may not attack. See the Supply Effects Chart for other effects of supply.
[12.5] Advance After Combat Option
(N) Attacking units which have retreated or eliminated all defending units from a hex have the option, before resolving any other combats, to advance some, all, or none of the attacking units into the vacated defender's hex. This must be done immediately after resolution of combat, before resolving any other combat. This optional advance does not expend any Movement Points.
[12.6] Terrain Effects
(P) There are a variety of terrain effects on combat, which are detailed on the Terrain Effects Chart.
[12.7] Leader's Invulnerability
(Q) Leader counters can never be eliminated in combat. If located on a hex in which all Friendly units are eliminated or retreated, the owning Player may move his Leader to the nearest hex occupied by another Friendly unit, regardless of intervening Enemy units or controlled hexes, or terrain.
[Errata 12.7] A Leader which is alone in a hex attacked by Enemy units is never eliminated but is moved to the nearest hex occupied by a Friendly unit instead of suffering any normal Combat Result.
13.0 Combat Results Table
(printed on the Mapsheet)
Die Roll rows 1 to 7; columns are Combat Odds (Attacker's Strength-to-Defender's Strength).
| Die Roll | 1-2 | 1-1 | 2-1 | 3-1 | 4-1 | 5-1 | 6-1 |
|---|---|---|---|---|---|---|---|
| 1 | Dr | De1Ae1 | De1Ae1 | De2Ae1 | De3Ae1 | De3Ae1 | De3Ae1 |
| 2 | +1CA | Dr | De1Ae1 | De1Ae1 | De2Ae1 | De2Ae1 | De2Ae1 |
| 3 | CA | 1CA | Dr | De1Ae1 | De2Ae1 | De2Ae1 | De2Ae1 |
(The 1-1 column, die roll 3 is printed "1CA" on the mapsheet.)
[13.1] Explanation of Combat Results
Odds less than 1-2, automatically Ae1; odds greater than 6-1, treat as 6-1.
Ae1: one of the participating attacking units must lose one step (see Combat, and Unit Step Reduction Chart). See Cavalry, Case C.
De1,2,3: the participating defending units must lose steps equal to the indicated number. The necessary number of steps may be taken from any defending units, Combat or Fortification, at the defending Player's discretion. See Cavalry, Case C.
Ar: attacker retreated and disrupted. All the attacking units must retreat a number of hexes (not Movement Points) equal to one-half their Movement Allowance (drop fractions). They are then disrupted until the end of the next Enemy Player-Turn.
Dr: defender disrupted. Same procedure as in Ar, only the result is applied to all the defending units.
CA: All of the Defender's units must immediately attack any one of the attacking units. The "counter-attacking" Defender computes the odds for his counter-attack as if he were the Attacker (except that he ignores the effects of terrain). If the outcome of this counter-attack is another CA result, then the original Attacker must immediately repeat (exactly) his original attack. This procedure continues until one Player or the other obtains a non-CA result. If the CA result obtained by the original Attacker against the Defender has a number preceding it - +1CA - then the Defender must add one to the die-roll of his ensuing counter-attack. This applies only to the original Defender's counter-attacks and never to the forced repetitions of the original Attacker's attack. If the Defender, in his counter-attack, obtains a De or Dr result against the original Attacker, the result is applied only to the original Attacker's unit which was the subject of the counter-attack, and not to those units which were not the subject of the counter-attack.
[13.2] Explanation of Disruption
Units which are disrupted may not move or attack. They may counter-attack, if they are required to due to a "CA" combat result. If they are attacked and a "Dr" is the result, or if they counter-attack and receive an "Ar" result, it is treated as a "De1" or "Ae1." All Friendly disrupted units become undisrupted at the end of each Enemy Player-Turn, unless they have been disrupted in that Enemy Player-Turn.
[13.3] Retreat Priority
When retreating as a result of combat, the owning Player retreats the units (if in a stack, then retreat them together) according to the priorities listed below.
The units must always be retreated towards:
(1) The nearest source of supply.
(2) A vacant hex.
(3) A friendly occupied hex, containing the fewest number of units. Units which are forced to retreat onto Friendly units, which are themselves involved in combat, may not participate in the combat in any manner. If as a result of combat, the Friendly units, onto which other Friendly units were forced to retreat, are themselves retreated, then all the units in that hex are forced to retreat, the first group once again.
(4) Units may not retreat through or onto the following: Enemy occupied hexes, mountain hexsides, sea hexes or hexsides. Units which are unable to fulfill the retreat part of a Dr (or Ar) result are considered to have a De1 (or Ae1) result instead.
14.0 Terrain Effects Chart
| Terrain | Movement Points (MP's) to enter | Combat effect |
|---|---|---|
| Clear Hex | 1 MP | None |
| Ocean Hex/Hexside (A) | Prohibited | Prohibited |
| Fortification Placement Hex | 1 MP, See Fortification Rules | See Fortification Rules |
| Rail Hex | 1 MP, See Rail Movement Rules | None |
| Mountain Hexside (A) | Prohibited | Prohibited |
| Pass Hexside | No additional MP's | Add one to Attacker's die roll (B) |
| Stream Hexside | One additional MP | Add one to Attacker's die roll (B) |
| River Hexside (A) | Two additional MP's |
Terrain Notes:
- (A) Zones of Control do not extend through these hexsides.
- (B) Only if all the units attack through these hexsides.
- Town Hex: No Effects.
- Port Hex: See [16.1] Supply Sources.
15.0 Fortification Units
GENERAL RULE:
Fortification units are similar to Combat units with the exception that they are static, and unable to move from the hex of their Initial Placement. They increase the Combat Strength (for the defense) of other Friendly Combat units in the same hex, and have an intrinsic Combat Strength of their own, which may only be used on the defensive.
PROCEDURE:
At the beginning of the game, Fortification units are placed on the map in accordance with the Fortification Initial Placement Chart of the appropriate year.
CASES:
[15.1] Differences Between Fortification and Combat Units
(A) Fortification units are not considered Combat units for any purposes other than combat resolution. They may be moved through freely by Friendly units, without any stacking or unstacking penalty, and have no Zone of Control.
[15.2] Effect on Combat
(B) Combat units in Fortification units have their Combat Strength for defense doubled. In addition, the strength of the Fortification itself is added on for defense. Thus a Combat unit with a Combat Strength of "five" in a Fortification unit with a strength of "two" would defend as a combined Combat Strength of "twelve." There is no doubling effect if the Combat Strength is applied offensively, nor may the Combat Strength of the Fortification Unit be applied offensively.
[15.3] Effect on Zones of Control
(C) Fortification units have no Zone of Control. In addition, Friendly units while in the same hex as Fortification units lose their Zone of Control, and Enemy units exert no Zone of Control upon a Friendly Fortified hex.
[15.4] Destruction of Fortification Units
(D) As Fortification units lose Combat Strength due to Enemy attacks, the unit is replaced by a lower Combat Strength unit. When this strength is reduced to zero, no other Fortification Unit counter is placed in that hex. The Fortification is destroyed, and for all purposes, it ceases to exist.
[15.5] Fortification Initial Placement Chart
See [21.1].
16.0 Supply
GENERAL RULE:
There are three conditions of supply: supplied, unsupplied and isolated. Infantry units are determined to be supplied through the ability to trace a supply line through the hexagons to a Supply Source. Fortification units do not require supply. Face-down cavalry and Dummy units require supply like infantry. Face-up cavalry and leader units are always considered to be in a supplied condition.
PROCEDURE:
Determine if a unit is supplied, unsupplied, or isolated at the beginning of its Movement Phase for movement and at the instant of combat for combat purposes. To be supplied, a unit must be able to trace at least one continuous line of hexes through the hexagonal grid which does not pass through Enemy occupied or controlled hexes to a Supply Source or a supply line leading to a Supply Source. A unit's distance from its Supply Source or supply line determines if the unit is supplied, unsupplied or isolated.
[Errata 16.0] Disregard Supply rules concerning Movement. The Supply Effects Chart is correct. Movement is never affected by the supply condition of the unit in question.
CASES:
[16.1] Supply Sources
(A) Each Player has several Supply Sources. The Union Player's Supply Sources include all port hexes and all hexes marked USA. The Confederate Player's Supply Sources include the hexes marked CSA and the depot counter. In addition, both Players may use the following cities as supply sources if controlled (last side that occupied the city, controls each): Port Republic (starts as CSA source), Carlisle, York, Reading (start as USA sources) and Winchester (uncontrolled).
[Errata 16.1] The USA and CSA Supply Source Hexes should be marked on the following hexes: USA - Hex #s 2901 (Philadelphia), 2301, 1301, 1101, 0111, 0112, and 0129. CSA - 2143 (Gordonsville), 2842.
(B) Rail lines may be used as supply lines from Supply Sources. A rail line may serve as a supply line if a Player controls all of the rail hexes along the line back to the Supply Source. Each of the unblocked rail hexes leading from a Supply Source is in effect a subsidiary Supply Source.
[16.2] Blocking Supply Lines
(C) Units have no ability to permanently destroy a rail line in any hex. Enemy units may block a supply line by occupying any hex or casting a Zone of Control over it. However, a rail line is never permanently impaired by this occupation or Zone of Control.
(D) When a supply line is cut, a Player may only trace supply from the nearest hex along the supply line out of the blocking unit's Zone of Control that leads to the Supply Source.
[16.3] Definition and Effects of Supply States
(E) There are varying effects for the different supply conditions. These effects are summarized on the Supply Effects Chart.
(F) A unit is "SUPPLIED" if (a) it is within six hexes of a Supply source of an unblocked rail line leading from a Supply Source.
A unit is "UNSUPPLIED" if (a) it is within seven to twelve hexes of a Supply Source or an unblocked rail line leading from a Supply source.
A unit is "ISOLATED" if it cannot meet the requirements of being supplied or unsupplied.
[16.4] Restrictions of the CSA Depot Unit
(G) The CSA depot unit acts as a Supply Source within certain restrictions. The Depot unit must be able to trace a supply line no longer than ten hexes to another Friendly Supply Source. If it cannot, it is not treated as a Supply Source. In addition, rail lines may not be used to trace a supply line (as subsidiary Supply Sources) from a depot unit.
[16.5] Supply Effects Chart
(printed on the Mapsheet)
| Supplied | Unsupplied | Isolated | |
|---|---|---|---|
| Combat Strength (offensive) | Normal | Halved | Zero |
| Combat Strength (defensive) | Normal | Normal | Halved |
| Movement Allowance | Normal | Normal | Normal |
17.0 Cavalry
GENERAL RULE:
The cavalry units in the game function differently from infantry units and perform the function of reconnaissance. Cavalry units perform differently when operated in a face-down mode than when in a face-up mode.
PROCEDURE:
Follow the rules governing infantry units when cavalry units are face down except when specific exceptions are made for cavalry units.
CASES:
[17.1] Differences of Cavalry Units
(A) Cavalry units may operate either face-up or face-down. When operating face-up, a cavalry unit may serve as an aid to reconnaissance by Probing. To probe, the units must be adjacent to an Enemy unit or stack of units. The Player rolls the die to see if his probe is successful (see Probe Chart). The Player may continue moving and probing with that unit only if the preceding probe was successful and found only a dummy unit(s) (with or without Leaders). Cavalry units which were successfully probed must remain face-up for the remainder of the Enemy Player-Turn. Cavalry units may attack with their Combat Strength in the normal fashion in the Combat Phase.
(B) A Player must decide to turn each of his cavalry units face-up or face-down prior to the start of his Movement Phase, during his Reinforcement Phase. He may not turn a cavalry unit face-up during its movement if it is moving in a face-down mode, although he may change mode after completing movement.
(C) Non-disrupted cavalry units attacked solely by infantry units are never directly affected by a "De" or "Ae" result; rather the result is applied as a "retreat" result. If the cavalry unit is disrupted, or attacked in whole or part by Enemy Cavalry units, the eliminated result is applied.
[17.2] Cavalry Probe Chart
Procedure: Roll the die for each Cavalry Probe. Add one to the die result if the Enemy unit is across a Major River hexside or if the probing cavalry is probing through a pass hexside.
| Die roll | Result |
|---|---|
| 1-4 | Probe is successful, turn all Enemy units in the probed hex face-up |
| 5-6 | Probe is unsuccessful, units remain as they are |
18.0 Crossing the Potomac
GENERAL RULE:
There are certain special rules governing Confederate presence north of the Potomac River. Whenever Confederate units cross, or are north of the Potomac River at the end of the Game-Turn, Players must consider CSA movement restrictions, Confederate desertion, and Northern militia.
[18.1] Restrictions on CSA Movement
(A) Confederate Dummy units may not move north of the Potomac River under any circumstances. In addition, Confederate cavalry units may only be north of the Potomac in a face-up mode. There are no other restrictions.
[18.2] Confederate Desertion
(B) Each time a Confederate unit crosses the Potomac entering the North, a die is rolled. If a one is the die result, that unit is revealed to the Union Player and loses one step. The loss is permanent, and the USA Player receives the Victory Points for the lost Strength Points.
[18.3] Union Militia
(C) At the end of any Union Player-Turn that any Confederate units are still north of the Potomac River, the Union Player receives additional Militia units. If the militia are not already on the map, he receives one 1-5 militia infantry unit at each of the following towns: Carlisle, Harrisburg, Columbia and Gettysburg. In addition, two more dummy units are received; these may be placed at any of the above towns, one dummy unit per town. The militia units are treated in an identical fashion as other units.
(D) If at the end of any Union Player-Turn, there are no CSA units north of the Potomac river, all six of the militia units are removed from the map. If the Confederate Player thereafter recrosses the Potomac river, the militia units are revived in an identical manner to their first appearance, intact, even if losses had been taken in their first appearance.
(E) Militia units may never move south of the Potomac River.
19.0 Reinforcements
During the Antietam Scenarios only, do reinforcements come into the game. These are brought on at the beginning of the Player-Turn at the locations indicated on the Reinforcement Chart. The entering hex counts for Movement Point expenditure.
The single CSA reinforcing unit may enter onto any hex on the south edge of the map not occupied by an Enemy unit or an Enemy controlled hex.
The USA reinforcements of Game-Turns 3 and 7 may be placed on any port hex, one unit per hex, with the leader on either hex. They may not be landed at port hexes occupied by a CSA unit, though they may land in CSA controlled hexes. The arrival of McClellan is special; wherever the Pope leader counter is on the map, it is removed, and replaced by the McClellan counter.
[Errata 19.0] Contrary to what it states in the rules, the entrance hexes for both USA and CSA Reinforcements for the Antietam Scenarios are not on the Reinforcement Track, but are listed in the rules in section [19.0]. The rules omit the entrance hex for the USA 15th Game-Turn 4-5 Infantry Reinforcement. This unit appears on either Washington hex.
[19.1] Turn Record/Reinforcement Track
Place the Game-Turn marker in the #1 box at the start of the game. At the beginning of each new Game-Turn, advance the marker to the next space. Note that there are two sets of historical dates shown in each Game-Turn box. The dates at the top refer to the 1862 game and the ones on the bottom to the 1863 game. Each game is the full twenty Game-Turns in length. The reinforcements indicated by the unit pictures on the track are received ONLY IN THE 1862 GAME. Each picture represents a single unit. At the start of the game, place these units directly on their pictures and enter them into the game in the indicated Player-Turns.
| Game-Turn | 1862 dates | 1863 dates |
|---|---|---|
| 1 | Aug. 17-18 | June 9-10 |
| 2 | 19-20 | 11-12 |
| 3 | 21-22 | 13-14 |
| 4 | 23-24 | 15-16 |
| 5 | 25-26 | 17-18 |
| 6 | 27-28 | 19-20 |
| 7 | 29-30 | 21-22 |
| 8 | 31-Sept. 1 | 23-24 |
| 9 | 2-3 |
Reinforcements (1862 game only):
- Game-Turn 3, USA: two 9-5 units and Porter 5-5. Each 9-5 arrives at a port hex (player's choice). Place the Leader with either 9-5.
- Game-Turn 4, CSA: one 4-6 Replacement unit, entering at the south edge.
- Game-Turn 7, USA: two 9-5 units and Sumner 5-5 (same placement routine as Game-Turn 3).
- Game-Turn 8, USA: McClellan 12-5. Remove the Pope Leader unit.
- Game-Turn 15, USA: one 4-5 unit, at the Washington hex.
20.0 Victory Conditions
The winner of Lee at Gettysburg is determined by the relative amount of Victory Points each Player receives during and at the conclusion of the game. The Victory Point Schedule explains the conditions for scoring Victory Points and the proper times to score each Victory Point condition. Players should keep a record of Victory Points on a piece of paper.
At the end of the game all units are revealed in their hexes and this table is consulted to score the Players' performances.
Victory Points are scored in three possible ways: the loss of Combat Strength Points during the game, the occupation of certain geographical objectives at the end of the game, and the cutting of certain rail lines by Confederate units during the game.
[20.1] Victory Point Schedule
Each Player receives one Victory Point for each Enemy Combat Point that is lost when a given unit loses a step. Thus the loss of a single step by an Enemy unit may yield anywhere from one to four Victory Points. The points are received for all losses, whether from infantry, cavalry or fortification units.
(B) Geographical Objectives:
At the end of the game each Player receives the following Victory Points for possession or control of the following hexes:
| Objective | USA | CSA |
|---|---|---|
| Washington (a) | 25 | 150 |
| Alexandria | 15 | 50 |
| Harper's Ferry | 10 | 10 |
| Shenandoah Valley (b) | 25 | 25 |
(a) Union must control both hexes, the Confederates either one.
(b) Control of Shenandoah Valley is determined by the majority control of five towns: Port Republic, New Market, Strasburg, Front Royal, Winchester.
A Player is considered to "control" an objective if one of his units is presently occupying the objective or was the last unit to move through the objective hex. The existence of a supply line to an objective hex is not required. Players should use the "Control" markers supplied.
(C) Cutting Rail Lines:
The Confederate Player receives Victory Points at the end of each Game-Turn that he cuts certain rail lines:
If the Union Player is unable to trace a clear rail line from Washington to any map edge other than the south edge, the Confederate Player receives ten Victory Points (per Game-Turn).
If the Union Player is unable to trace a clear rail line from the north or east map edge to the west map edge, the Confederate Player receives ten Victory Points (per Game-Turn).
[20.2] Levels of Victory
Decisive Confederate Victory: Confederate Player has at least 150 more Victory Points than the Union Player.
Moderate Confederate Victory: Confederate Player has 50 to 149 more Victory Points than the Union Player.
Marginal Confederate Victory: Confederate Player has 25 to 49 more Victory Points than the Union Player.
Marginal Union Victory: Union has 10 to 25 more Victory Points than the Confederate Player.
Moderate Union Victory: Union Player has 26 to 50 more Victory Points than the Confederate Player.
Decisive Union Victory: Union Player has 51 or more Victory Points than the Confederate Player.
Draw: If none of the above conditions prevail.
21.0 How to Use the Scenarios
Basically there are two games of Lee at Gettysburg: the 1862 Antietam Campaign (labeled the "1" series), and the 1863 Gettysburg Campaign (labeled the "2" series). The historical version of each campaign is presented first. The more likely historical possibilities are presented as sub-games. These scenarios vary something in the basic historical game, shifting the balance.
To begin play, the two Players agree on a given scenario and then choose sides. The Players then select their forces as given by the scenario from the available counters. Although historical designations have been included on the counters and Initial Placement, it is not necessary for Players to follow these; they need only place a unit of the proper numerical values as instructed. The USA Player always places his units first, followed by the CSA Player. Stacking is not permitted in any initial placement of units.
After all units are placed, play begins, with the CSA Player moving first.
Game 1.0: 1862 Scenarios; Antietam Campaign
Basic initial forces placement
UNION FORCES
Within two hexes of Brandystation: 9-5 (XI), 9-5 (XII), 16-5 (I), three Dummy counters, one cavalry unit, Pope.
At Fredericksburg: 12-5 (IX).
At Harper's Ferry: 6-5 (VIII).
CONFEDERATE FORCES
Within three hexes of Gordonsville: 4-6 (JJ), 4-6 (Mc), 4-6 (An), 4-6 (DJ), 4-6 (Wa), 4-6 (Ew), 4-6 (AH), 5-6 (DH), 5-6 (Ho), three cavalry units, Lee, Longstreet, Jackson. [Errata 21.0: the initial Confederate Forces for the Antietam Scenarios should include four Dummy counters.]
GAME-LENGTH
Use Game-Turns 1 through 20 on the 1862 Turn Record/Reinforcement Track.
Game 1.1: Accelerated Transfer from Peninsula. Advance all USA reinforcements two Game-turns.
Game 1.2: Slower Transfer from Peninsula. Delay all USA reinforcements two Game-Turns. Do not replace Pope with McClellan.
Game 1.3: Charleston Garrison Transferred North. Replace four of the CSA 4-6s (AH, JJ, DJ, Wa) with four 6-6s.
[21.1] Fortification Initial Placement Chart
| Position | Antietam 1862 | Gettysburg 1863 |
|---|---|---|
| Washington: east hex | 3 | 5 |
| Washington: west hex | 2 | 4 |
| Baltimore | 2 | 4 |
| Alexandria | 0 | 3 |
(Strength at start of game.)
Game 2.0: 1863 Scenarios; Gettysburg Campaign
Basic initial forces placement
UNION FORCES
North of the Rappahannock, within four hexes of Aquia Creek (not town): 16-5 (VI), 12-5 (II), 12-5 (III), 12-5 (V), 9-5 (XI), 9-5 (XII), 9-5 (I), three cavalry units, Sedgewick, Reynolds, Meade, Sickles, Hancock, three Dummy counters.
At Harper's Ferry: 6-5 (VIII).
CONFEDERATE FORCES
South of the Rappahannock, within two hexes of Brandystation: 7-6 (Mc), 7-6 (Ho), 7-6 (Ro), 6-6 (Ea), 6-6 (Jo), 5-6 (Pi), three Dummy counters, one Depot (0-6), Lee, Long, Ewell.
South of the Rappahannock, within four hexes of Fredericksburg: 7-6 (An), 6-6 (He), 6-6 (Pe), four cavalry units, Hill.
GAME-LENGTH
Use Game-Turns 1 through 20 on the 1863 Turn Record/Reinforcement Track.
Game 2.1: Western Theater Leadership brought to the East. Replace Meade, Sickles, and Hancock, with Grant, Sherman, and Sheridan.
Game 2.2: Grant Reorganizes Army of the Potomac. Same as GAME 2.1, plus, replace the 16-5 (VI), and 12-5 (II), 12-5 (III), 12-5 (V), with nine 6-5 (VI, II, III, V, XVI, XVI, XVII, XIX). Also, give the CSA two additional 6-6s (Be, DJ).
22.0 Designer's Notes
Lee at Gettysburg is essentially, like the Wilderness Campaign, a game designed around the same concepts as Franco-Prussian War, and therefore technically belongs to that family. There have been many modifications (and simplifications) made to the original mechanics of Franco-Prussian, which were admittedly cumbersome. Most of these changes were incorporated into Wilderness, but the designer felt that even this was too complex.
The essence of the simplification revolves around the combat system. There are three changes here. First the adoption of a "step reduction" system absolved Players from counting out losses Strength Point by Strength Point, and remembering all the possible strengths of the remaining units. This change allowed a single integrated Combat Results Table. Finally, the character of the earlier Civil War fighting was such that the attrition method of combat resolution, which tends to get sticky, could be expanded into a more typical Resolution table.
Combat and its results were immensely different in this period. The slogging matches of the campaigns of 1864 and 1870 just did not occur in this period. Combat was much more Napoleonic, characterised by a heavy reliance on leadership, and destroying the enemy in pursuit. Thus in Lee at Gettysburg, combat is rarely resolved on brute strength and casualties alone, but the ability of the Player to place his leader units in the right place at the right time, and to follow up a disruption result against a unit with another, inflicting "casualties" at no cost to himself. The use of disruption and retreat also encourages the Players to maintain strategic and tactical reserves to cover this possibility.
The counter-attack provision of the Combat Results Table enables the weaker force in combat to inflict heavier casualties on the attacking force than the defender receives. This often happened due to poor coordination of the attacking forces, most notably at Antietam for the Union, and Gettysburg, for the Confederates.
The forced march provision also illustrates the semi-Napoleonic nature of this war. Forces moved more rapidly than the textbooks permitted, at the risk of having their organizations dislocated due to straggling, and being vulnerable while regrouping. Although the Union forces were worse at force marching, and straggled much more, they had sufficient reserves that additional forces would be stationed along the route of march to replace straggling. In the 1863 campaign, more than half of the Army of the Potomac straggled in the march from Aquia Creek to the Gettysburg battlefield, but the losses were almost completely made up by new troops.
Rail movement in this period was almost completely ineffective. The systems for efficient troop transport were not set up until later in the war. The Southern railroads on the map were totally taken up bringing forward supply. Cavalry during the period was much more effective than later in the War. Southern cavalry, although not more numerous, was infinitely more effective.
The South was in fine shape, virtually invincible, on its own territory. However, the only way the South could win the war was to destroy the North militarily, a virtual impossibility; or destroy it politically, a good possibility. To do this, Washington had to be isolated, or the North invaded and occupied for some time, or enormous losses inflicted on Northern forces. The Southern forces in these two campaigns were much more efficient than the Northern. This is reflected in the step reduction system. The average Northern step loss is 2.67 Strength Points. The average Southern step loss is 1.625. Thus, in any given combat, the North is going to lose more points. However, the Victory Levels are such that the South has the impetus to act. Grinding away will not win the game for the South. Only decisive strategic action, invasion, will.