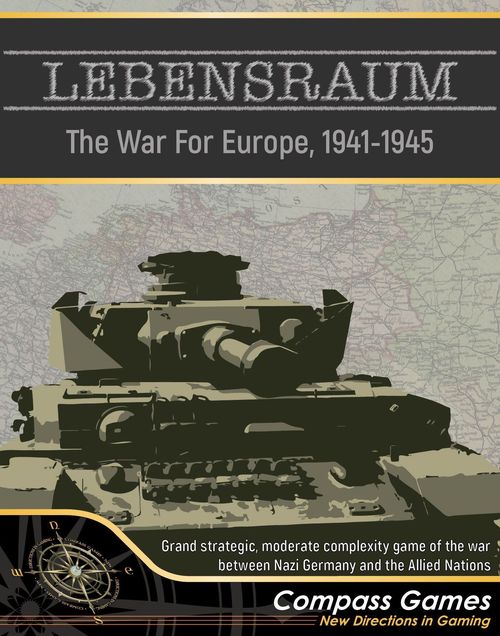
Lebensraum: The War For Europe, 1941-1945
Lebensraum: The War For Europe, 1941-1945 Rulebook
Table of Contents
Table of Contents
1.0 Introduction
LEBENSRAUM! is a combination of the original Lebensraum & West Front games. Therefore there will be one set of rules that combined both games. The text that is in BLUE applies to the campaign in the West only or if someone is playing the full game.
Transcription note: the booklet colour-codes West-only text in blue. Plain-text extraction does not preserve that colour, so the blue passages are not individually marked in this transcription; read the booklet's colour coding where it matters.
LEBENSRAUM! is a simulation of the Second World War on the East and West Fronts at a strategic level. Turns represent about 3 months. Unit counters represent entire armies. It is suggested that you read through all the rules before attempting to play. Then set up the game and play a turn. The rules are organized in a manner similar to the structure of a turn. As questions arise, consult the rules for an answer.
2.0 General Course of Play
The game may be played by 2 players, one controlling the Allied forces and the other the Axis forces, or by as many players that are present with an overall commander for each side and subordinate commanders controlling one or more Army Front HQs (also called Army Groups). The game may be played as one of a number of scenarios covering different periods of the war or as a campaign game covering the entire conflict. In all the scenarios, the objectives of the players will be to do at least as well as their historic counterparts by meeting the victory conditions of the scenario being played.
3.0 Game Equipment
A complete copy of LEBENSRAUM includes:
- 3 maps at 22" x 35" for a total playing area of 50" x 35"
- 3 sheets of 9/16" counters
- 5 player aid cards
- 1 rules booklet
- 2 6-sided dice
- 1 box and lid set
3.1 Map
The map covers all of Europe and European Russia. A grid of hexagons (called hexes) has been superimposed over the map to regulate movement and other distance related rules. Each hex on the map represents an area about 80km (50 miles) across.
3.2 Player Aid Cards
The player aid cards are a series of charts and tables used with the rules. These are printed on the various player aid cards included in the game, on the map, and in this booklet.
3.3 The Playing Pieces
The playing pieces are the die cut counters. Those representing land combat formations are referred to as units. Each is coded with information indicating the strength and quality of the unit the counter represents, as well as being colored to distinguish nationality. Counters representing leaders, Headquarters (HQ), air power, and other functions are termed markers. There are other example counters are printed on the terrain effects chart and on the map.
(The booklet's counter diagrams label the parts of a Combat Unit, Front/Army Group HQ, Leader and Economic counter; they are pictorial and are not reproduced in text.)
3.4 Die
A number of rules require the generation of random numbers in the range of 1 to 6 and hence call for a die roll – two 6-sided dice are included in the game.
4.0 Sequence of Play
4.1 General
LEBENSRAUM! is played as a series of turns, each of which is composed of a number of sequenced phases. Most of these phases are composed of a number of sequenced segments. The sequence of play is rigid and may not be varied. At the conclusion of the last phase of the sequence, the turn ends and another turn is started. The number of turns to be played is specified by the scenario. Two of the phases are joint, in that both players may go through the segments of those phases at the same time. If players agree for ease of play, the Axis player should complete each segment first. The other two phases are player phases in which the indicated player will be doing most of the actions. The player whose phase is in progress is termed the phasing player while the other player is the non-phasing player.
4.2 Sequence Outline
- LOGISTICS PHASE (Both Players):
- A. Movement Points Determination Segment
- B. Reinforcement & Replacement Segment
- C. Air, Naval, & Partisan Segment
- D. Weather Determination Segment
- E. Leader Transfer Segment
- F. HQ Creation Or Dissolution Segment
- AXIS PLAYER PHASE:
- A. Phasing Movement Segment (All Units)
- B. Non-Phasing Reserve Movement Segment (All Units)
- C. Combat Segment
- D. Leader Disposition Segment (Both Players)
- E. Phasing Tank Movement Segment (Tank Units only)
- F. Non-Phasing Reserve Tank Movement Segment (Tank Units Only)
- G. Combat Segment
- H. Leader Disposition Segment (Both Players)
- I. Supply Segment (Both Players)
- REDEPLOYMENT PHASE: (Both Players):
- A. HQ Creation Or Dissolution Segment
- B. Reserve Unit Designation Segment
- C. Strategic Transportation Segment
5.0 Movement
5.1 General
Each player phase has a number of movement segments. During the first such segment (A) the phasing player may move any or all of his units. During the second (B) segment the non-phasing player may move any or all of the units he has marked as in Reserve. Units in (A), (B), (E), and (F) are moved through a series of adjacent hexes. Each unit must pay a certain number of movement points to enter each hex, as determined by the type of unit, the terrain of the hex, and the weather for the turn. In the third movement segment (E) the phasing player may move any or all of his tank units, even if they moved previously in the phase. In the fourth segment (F) the non-phasing player may move any or all of his tank units that are in reserve. Units may not enter hexes containing opposing units, nor may they cross hex sides that are entirely sea covered (light blue).
5.2 Unit Types
There are two main types of units, infantry and tank (also called armor). There is one special type of infantry unit for each side that is an paratroop unit.
5.3 Movement Points
At the start of the first movement segment (A) the phasing player must determine the number of Movement points (MPs) that are available to use. To do this the Axis in both the Eastern and Western campaigns and Soviet players in Eastern campaign counts the number of Refinery points (RPs) that are under his control and not in transport. These are found on the economics counters and in the Starting Economics Charts. Then count the number of Oil points (Ops) under his control. These are printed in certain hexes on the map. For each combination of 1 OP and 1 RP the player receives 50 MPs. Excess Ops or RPs are not used and are not conserved for use in later turns.
The Allied player receives MPs in a different manner. At the start of his first phasing movement segment for the turn he receives 50 MPs per turns 'A' through 'D'. For turns 'E' through 'H' the Allied player receives 100 MPs. In addition, each turn that the Allies control La Havre (hex 1515) they receive an extra 50 MPs and each turn they control Antwerp (hex 1511) they receive an extra 100 MPs.
Mark the total number of MPs available for the player on the MP track with the X1, X10, X100, & X1000 counters. As a unit moves, keep track of the number of MPs it consumes and deduct these from the track when the unit completes movement. There is no limit on the number of MPs that a unit may use in a single movement segment, so long as that many are available on the player's track. MPs on the track that are not used are retained for use in subsequent turns.
5.4 Zones of Control
Each unit of A, B, or C class (see 6.2) exerts a Zone Of Control (ZOC) on the six hexes adjacent to and surrounding the location hex of the unit. In addition, each city hex on the map exerts a ZOC in the hex of the city location for the player controlling the city. A moving unit must stop its movement for the segment when entering a hex containing an opposing ZOC. A unit may leave a ZOC at the start of a movement segment without penalty if it is a tank type unit. Infantry (and paratroop) units must pay 10MP in penalty for leaving an opposing ZOC. Units may move directly from one opposing ZOC to another. ZOCs do not extend across river or all sea hex sides. Nor do ZOCs extend across border hex sides until at least one opposing unit of either player has crossed the border. From that point on ZOCs cross that particular set of border hex sides. There is no additional effect for having more than one ZOC in a hex, or having ZOCs of both players. D & E class units never exert a ZOC. HQs & leaders are never affected by nor exert a ZOC.
Example 5.4: Zone of Control. (A). The armor unit (2nd Panzer) moves into a ZOC it must pay +2 MP's because of the river and must stop because of the ZOC until the next movement segment. (B.) The next turn the 2nd Panzer moves out of the ZOC, it moves without penalty. (C.) Moves into a ZOC must stop until the next Movement Segment. If the Armor unit moves into a different ZOC again the same thing happens. (D.) The infantry unit moves into a ZOC, it must pay +1 MP's because of the river and must stop because of the ZOC until the next movement segment. (E.) The next turn the 6th Infantry unit moves out of the ZOC and pays a 10 MP penalty. Note the shaded hexes are Soviet ZOC.
A, B, and C class units exert a ZOC on the six hexes that surround the location of the unit. A friendly city hex, with or without a friendly unit on it, exerts a zone of control for that city hex only, not any of the surrounding hexes. D & E class units exert no ZOC but are effected by them as are all units. HQs and leaders do not exert ZOCs at all and are not effected by them. A Battle Group marker exerts and is effected by a ZOC in the same manner as its parent unit, that is, as per the class of the parent unit.
5.5 Stacking
Units of the same or opposing players may not be stacked. Markers may be stacked with units and players may freely examine opposing units & markers. Stacking applies at all times. You may not move a unit through a hex occupied by another unit. (Exception: you may move a unit by Strategic Transportation through a hex occupied by another unit. At the end of Strategic Transportation, of course, the unit must comply with the usual stacking limits).
5.6 Tank Breakdown
Tank type units that enter more than 2 hexes containing mountain during a single movement segment or during an advance after combat must lose 1 step (just as if lost in combat, see 6.2) for each additional such hex entered.
Example 5.6: Tank Breakdown. In the example the Russian 11th Tank armor loses 1 step because it moved more than 2 spaces at once through mountain terrain.
5.7 Battle Groups
Players have a very limited ability to break down units on the map into smaller units. This action takes place as the first activity of the Phasing Movement Segment. In 1941 the German player may create 2 of these breakdown battle groups by using all 4 markers. In 1942 the German player may create 1 breakdown battle group by using just the Battle Group A markers. No battle groups may be created in 1943 by either player. Starting in 1944 and to the end of the game the German, Russian, & Western Allied players may each create 1 battle group by using the Battle Group markers.
To create a battle group select a non-reduced unit of any type and immediately shift it to its reduced side. Place both markers for the battle group (A, B, C, I, or W) on top of that unit. One marker will remain with the unit while the other marker may be moved as if it were a separate unit of a single step of strength. The originating unit's original strength minus that units now reduced strength represents the strength of the battle group marker, which may now be moved and conduct combat independently of it originating unit. Additionally, the class of the battle group is always that of the reduced strength class of the originating unit. In all other ways, a battle group acts as a normal unit except that its MPs are considered to be paid for by the originating unit. At any time during any friendly movement segment, a battle group that is in the same hex as its originating unit may be re-combined back into that unit. To do so remove the battle group markers and flip the originating unit back to its full-strength side.
Example 5.7: Battle Groups. (example diagram; not reproduced in text)
6.0 Reinforcements & Replacements
6.1 Reinforcements
Reinforcements are new units that have never before been in play. Reinforcements due for the turn are placed during the Reinforcement & Replacement segment. When placing reinforcements, more than one may be placed in a single hex, but they may not remain so stacked after their first movement segment. Neutrals do not receive reinforcements.
6.11 Axis
During the game the Axis receives 5 new units as reinforcements. The turn of introduction for these units are noted on their counters in the upper left corner and by unit name on the Axis Reinforcement & Replacement Schedule. Axis Reinforcements are placed into play in Budapest (hex 3030), with the exception of the Italian 8th unit, which is placed in play in Tirana (hex 4032). Eliminated German units that re-enter as reinforcements are placed in Berlin. If the entry hex is enemy controlled or in an opposing ZOC at the scheduled entry time, entry is delayed until the first subsequent Reinforcement & Replacement Segment that these conditions do not apply.
6.12 Soviet
Soviet Reinforcements come into play differently. Separate out the 6 Shock infantry units. These are the Shock armies representing Siberian troops. Place them in numeric order. Also, separate out the Tank units and Guard Tank units and Guard infantry units, place them in numeric order within each grouping. Place all the other Soviet units that are not set up on the map at the start of the game in a separate pile. When the Soviet Reinforcement & Replacement Schedule indicates taking infantry armies, first take Shock armies specifically indicated by their ID number and then randomly take the rest of the infantry army reinforcements from the pile of Soviet infantry armies. When the schedule indicates taking a tank army, take them in numeric order, starting with 1 Tank. Guard & Guard Tank units may never be taken as reinforcements. When placing Soviet reinforcements into play, Shock armies must be placed in a transport line hex on the east map edge. All other Soviet reinforcements may be placed in any Soviet controlled city with a population number of 2 or more that is not in an opposing ZOC. Alternatively, they may also enter on a transport line hex on the east map edge. Reinforcements & replacements may be in Reserve when placed in play.
6.13 Allied
During the campaign game the Allies receive 8 new units as reinforcements. The turn of introduction is noted in the upper left corner of the counter just like the Axis units. In historical placement scenarios, the scenario will specify hex locations for the entry of some reinforcement units. In free placement scenarios and for reinforcement units not specified in historical placement scenarios, reinforcement units may be placed in a previous amphibious landing hex or any controlled city in a coastal hex. If a required entry hex is enemy controlled (but not if it is an opposing ZOC) the entry of that unit is delayed until the first subsequent Reinforcement & Replacement segment during which these conditions do not apply.
6.2 Replacements
All units have 'steps' representing full or reduced strengths as well as different quality classes. All Soviet and neutral units have 2 steps, the full strength front side of the counter and a reduced strength reverse side of the counter. Axis and Allied units can have up to 4 steps, represented by the front and back sides of several counters, with each step representing a different state of the same unit. Each such counter that belongs to the same unit will have the same unit ID label. Combat losses are taken as steps from the involved units.
Note that the counter and side of a unit containing a set up hex number or entry turn letter on the top line of the counter is the counter and side used for units as the game starts or the unit enters the game. Replacements for both sides come as steps as well, thus allowing units to be built back up (and, for Soviet units, new units created). Neutrals do not receive replacements.
6.21 Axis
Axis replacements are listed on the Axis Reinforcement & Replacement Schedule as a number of steps separated into two types, Infantry and Armor. During the Reinforcement & Replacement segment of the turn in which the schedule indicates the arrival of replacements, use the appropriate Armor & Infantry X1 & X10 markers to note the arrival of these replacements on the Replacements & Reinforcements track. These steps may then be used to build up reduced or eliminated units. During the same segment as the steps are received or during any subsequent Logistics phase, units that are in Reserve may be given replacement steps (See 11.3 Reserves). Axis units rebuild in the reverse of the order that they take losses. Thus, the addition of a step to an Axis unit may be used to flip the unit over to its stronger strength side or exchange its unit counter with the same unit's other counter but at the next higher unit class ('A' being highest and 'E' lowest) without changing the side relation (that is, if the counter was reduced it remains reduced when replaced). If the unit is to be given more than one step during the segment, these options may be combined. Note however that no unit may receive more than 1 improvement in class and 1 improvement in strength in a single segment. Steps not used in a segment may be conserved for use in subsequent turns. An eliminated Axis unit that is to be brought back into play by use of replacement steps takes 1 step to be returned to the counter of its lowest strength and class. Such a unit need not be in Reserve to be rebuilt and enters as if it was a reinforcement.
6.22 Soviet
Soviet replacements, unlike those for the Axis, are not scheduled. Instead, during the Reinforcement & Replacement segment, the Soviet player may produce replacement steps. Each city on the map also has a population number. Total the population of all cities under Soviet control except those in Hungary, Germany, & Neutral countries. At the start of the game this total will be 60 population points before any cities are lost or re-gained. Then total the production (PRO) of active economic counters that are under Soviet control (those in transport may not be counted). Steps may then be produced in the following manners: 10 population and 10 production points will produce 1 infantry step. 5 population and 20 production will produce one armor step. Steps may be produced of the type and quantity of the Soviet player's choice within the limits of the points available. Use the appropriate markers to note the number of steps produced on the Reinforcement & Replacement Track. Soviet steps may be used in two ways, to rebuild lost steps and to introduce new units to play. To rebuild a reduced unit, the unit must be in Reserve. Simply flip the unit over to its full-strength side if it is still in play. If the unit has been eliminated, it need not be in reserve. Keep these eliminated units in a separate pile. To rebuild it 1 step replacement will put it into play on its reduced side while 2 steps will put it into play at full strength. Rebuilt eliminated units enter the map in the same manner as Soviet reinforcements. Note that the Soviet player may choose which particular eliminated units to rebuild, rather than having to take them randomly or in any particular order. The normal Soviet infantry units that are not Shock or Guard type, but that did not start on the map, may be introduced to the map as new units by rebuilding them in the same manner as if they had been eliminated units. However, they must be brought into play in numeric order by unit ID label. Thus 28 Infantry Army would be the first unit that could be entered into play in this manner, followed by 29, etc. These units, as mentioned above, should be placed separately until they have been entered into play. The Soviet player may accumulate replacements (and reinforcement steps) for future turns. Rebuilt units may be placed (put on the map) in Reserve.
Example for 6.22 Soviet Replacements. The Russian player adds the population by counting the numbers in each city that he controls, which in this case is 60 at the beginning of the game. For production points count the counters that have a factory symbol on them. In this example the production points available is 51. The player can choose how to spend those points.
- Units in Reserve (on map but shown here): The Russian player uses 10 population and production points to flip the 42nd Army to its full-strength side. The Russian player uses 10 population and production points to flip the 6th Army to its full-strength side. The Russian player uses 10 population and production points to flip the 39th Army to its full-strength side.
- Eliminated units: The Russian player uses 5 population and 20 production points to bring the 11th Tank to its reduced side. It is placed on the map like reinforcement and may be placed in reserve.
6.3 Soviet Upgrading
The Soviet player can create Guard Inf. and Guard Tank type units by delaying the arrival of a reinforcement, rebuilt eliminated unit, or new built unit. This represents putting the unit through special training and equipping. To make a Guard Inf. unit, take an infantry type unit that was to arrive during the turn and place it aside. During the Reinforcement & Replacement segment of the following turn take the lowest unit number (ID) Guard Inf. type unit that is not in play and place it into play instead. To make a Guard Tank unit follow the same procedure but use a tank type unit. The armies that were put aside to be upgraded may not be put with other units that could be entered into play so long as the Guard or Guard Tank unit that they were upgraded to is in play. If that unit is eliminated from play, the original army should be placed back with those units that may be rebuilt. Note that the eliminated Guard Inf. or Guard Tank unit does not go into those units that may be rebuilt, but rather back with Guard units not in play. It will have to be put back in play again, in the manner detailed above, before units numbered after it that are not already on the board may be produced.
6.4 Special Units
6.41 Paratroop
Each side has one Paratroop type unit. These units enter play automatically on turn 6 as reinforcements. The Soviet unit must appear in Moscow or it may not appear. The German unit must appear in Berlin or it may not appear. Other rules for the use of these units are in rule 11.4.
6.42 Italy
The Italian 8th Army, an Axis unit, must be withdrawn by moving it off the west edge of the map by the end of turn 9. If the unit is not in play, it need not be withdrawn, but it may not re-enter play. The Axis forfeits the game if this is not done.
6.43 Tito
During the first Reinforcement & Replacement segment that Belgrade (hex 3530) is under Soviet control the Yugoslav army unit labeled (Yugosl) is placed in that hex as a reinforcement without cost to the Soviet player.
7.0 Combat
7.1 General
Combat may occur during each Combat Segment of each player phase. Units of the phasing player are considered to be the attackers and units of the non-phasing player are considered to be the defenders. Combat is voluntary, at the choice of the phasing player, and may occur between opposing units that are in adjacent hexes, so long as the units are not separated by an all sea hex side. Any or all of the phasing player's units may attack, though no unit is required to do so. Units that are attacked must, however, defend.
7.2 Procedure
The phasing player should indicate a hex containing opposing units that will be attacked. Both players may then add air, naval, and leader markers to the combat by each player placing one marker at a time, with the phasing player placing first. When one player passes adding in a marker, he may add no more, though the other player may then add as many more markers as he wishes of those which are still available. Total the strength of the defending units in the hex and modify the strength for unit class, command, terrain, air, naval, & partisan effects, if they are applicable. Next total the strength of the units attacking the hex and modify the strength for unit class, command, terrain, air, naval, & partisan effects, as applicable. Compare the resulting attacker total to the resulting defender total to produce an attacker to defender ratio. Round this ratio in the defender's favor to the nearest whole numbers and find the corresponding column on the Combat Results Table. Roll a single die and cross the resulting line to the column to determine a result. Apply the result immediately. Repeat this procedure for each hex the phasing player wishes to attack during the segment. Note that each phasing unit may attack only once during the segment, though it is possible that a defending unit may be attacked more than once due to its moving in retreat into another combat. Also, note that the order in which combat is resolved for hexes is determined by the phasing player.
7.3 Class
The class of the units involved in a combat affects the column on which the combat is resolved. After determining the column to be used, each side determines its class for the combat. If a player has only one unit in the combat, its class is the class. If the player has more than one unit in the combat, a class one higher than the lowest friendly unit class involved is the class. Remember 'A' is highest and 'E' lowest. The defender then applies his class to the combat column. If it is 'A' the indicated column is moved 2 in his favor (to the left). 'B' moves 1 left. 'C' causes no movement. 'D' moves 1 right and 'E' moves 2 right. Next the attacker applies his class to the newly indicated column. Again, it is moved in his favor, this being to the right. 'A' is 2 right, 'B' 1 right, 'C' no move, 'D' 1 left, and 'E' 2 left. The column indicated at the end of this procedure is the one used to resolve the combat.
7.4 Combat Results
Results are expressed in a number of steps lost. Attacker losses are to the left of the slash and defender losses to the right. Steps lost must be taken from the units participating in the combat and any steps incurred over that required to eliminate all opposing units becomes a combat advance for the surviving player (if there is one). The first step of loss required may always be taken either as a step loss or as a retreat of 1 hex by all involved friendly units (see RETREATS below). Subsequent steps of loss must be taken as losses. In addition, the side that takes more indicated losses (even if actual losses are the same or less after absorbing the first step in a retreat) is required to retreat any surviving units (again, if need be). If the indicated losses for both sides are the same, no retreat is required.
7.41 Step Reduction
Soviet and Neutral units have only 2 steps. To reduce one step from a unit flip it to its reduced strength side (if it was at full strength). If it was already reduced, eliminate it. Reducing a full strength Soviet and Neutral unit by 2 steps will also eliminate it. Allied units have up to 4 steps and Axis units may have up to 5 steps since each has more than one unit counter. To reduce an Axis and Allied unit by 1 step you may flip it over to its reduced strength aide or exchange it for another counter for that particular unit (by unit ID label) that has a class one lower than the original (without changing the strength side of the unit). Classes run from 'A' as the highest to 'E' as the lowest. Losses of more than 1 step to a particular Axis unit may be taken as a strength and a class reduction (flip and exchange counters) or a strength and more than one class reduction (again flip and exchange counters) or just by multiple class reductions (just exchange counters). Note that for both sides the choice of how step losses are allocated between participating friendly units is determined by the owning player.
7.42 Retreats
All units involved in a combat and required to retreat must do so by moving one hex. This is not considered movement and does not come under the movement rules. The hex moved to must be away from the units with which they were in combat and toward the nearest friendly controlled city. If more than one such city is the same distance away, the owning player may determine which is retreated toward. Units may retreat into any hex that they could enter in normal movement (including those containing opposing ZOC). Units may not retreat into hexes occupied by friendly or opposing units or across all sea hex sides. A unit that cannot retreat is instead eliminated. Units in city hexes are never required to retreat (though losses still must be taken) and may disregard this portion of a combat result. HQ or leader markers are required to retreat in the same manner as units if they are alone in a hex and that hex is entered by an opposing unit during its movement segment(s). Attackers with a retreat result may not also advance after combat. Units that will be eliminated by a combat are eliminated in the hex of the combat and may not retreat prior to elimination.
Example 7.4 for Combat Results. In the example the German player has indicated that he will be attacking the Russian player in hex 1917. The German strength is 6 and the Russian strength is 2, but neither within command of any leader or HQ markers. So both sides are halved. German strength is 3 and Russian is 1. The class for the Germans is D because it is the only one in combat, causing 1 shift to the left. For the Russians the class is E, so it causes the odds to shift 2 to the right. The final odds are 4 to 1. The German player rolls a 2 and on the combat result table the result is 0/4. The Germans have to take 0 steps and the Russians have to take 4 steps. So the Russian unit is destroyed.
Example 7.41 for Step Reduction. Russian player has 4 step losses. The 1st step loss is that the Russian 42nd army is destroyed.
7.43 Advance
Whenever all the opposing units in a combat are eliminated, surviving friendly units (attacking or defending) may advance. Like retreats, such an advance is not counted against the player's movement points. The first hex of this advance must be into a hex that was previously occupied by opposing forces that were eliminated in the combat. Subsequent advance directions are up to the owning player. The number of hexes any surviving attacking units may advance is determined by the left over number of steps in the combat result that was above those required to eliminate the opposing unit(s). Note however that an advancing unit must still stop when entering a hex containing an opposing ZOC and may not advance across sea hex sides. The rules allow an advancing unit to overrun an enemy HQ/leader. If this happens the owning player receives his HQ unit back and rolls for the fate of the leader. If the leader is neither killed nor captured in the overrun he goes back in his own Leader Pool. If an OKH/STAVKA marker is overrun, the player determines the fate of the leader normally, but the OKH/STAVKA marker is immediately returned to the player's capital city. An HQ marker may advance after combat if it is stacked with a participating unit. It advances with the participating unit, but may be dropped off in any hex on the advance path.
Example 7.43 for Advance. The German player can now advance 3 hexes because the number of excess steps are 3 favoring the Germans. The Germans move to 1918 to 1915.
Errata: the Compass Games errata sheet adds a clarification to this rule (see "Errata" at the end of this rulebook).
7.44 Command
Command is determined at the instant of combat. To be in command a unit must be within command range of a friendly HQ marker (2 hexes for Soviets, 3 hexes for Axis and Allied). Command range may be traced to a unit into or through opposing ZOC but may not be traced through hexes containing opposing units. In addition, the number of units that an HQ may put in command is a function of the Leader for that HQ. Units that are out of command for a combat have their strength halved (dropping fractions and cumulative with any other strength modifications). All units must be assigned to some HQ (even if they are out of command due to range or the limits of the HQ's leader). This assigned HQ is always the nearest HQ to the unit. If 2 HQ are at equal distance, the owning player must indicate the assigned HQ prior to resolving combat. Note that command applies for both phasing and non-phasing players.
7.45 Leaders
Each leader marker is rated with a number of stars. This number has two functions. First, it is the number of units the leader may allow his HQ to put in command for combat purposes, provided they are within range of that leader's HQ marker. In instances where a number of units in range of a leader will become out of command, the owning player is required to indicate if specific units are in or out of command when they are indicated as being involved in a combat. The non-phasing player for the combat must indicate this first. Second, it is a strength number. A leader marker (with or without its HQ marker) may be picked up and placed in a hex containing a friendly unit under that leader's command. By doing this the rating number of the leader may be added to the combat strength of the unit in the hex for attack or defense. This second use of the leader rating is always optional. A leader is never required to be added into a combat. If the leader is used in the combat he (and the HQ, if present) may not be used to satisfy required step losses or retreats, though he (and the HQ) retreat just like a unit (if so required). However, a leader (and/or HQ) that become the only survivors of a hex remain in the hex instead of retreating. Leaders that participate in combat by using their strength are subject to an In Combat roll on the Leader Fate Table. The leader for an HQ may only give combat assistance once per segment. If the HQ loses its leader, any assistance provided through that HQ carries through, so the new leader picked for the HQ may not provide combat assistance during that segment. In a similar manner, command for units of that HQ involved in prior combats during the segment is considered already used and is counted against the rating of the new leader.
7.46 Air, Naval & Partisan
During the Air, Naval, & Partisans segment each player may place his markers for each of these activities to determine their missions for the turn. When placing air, naval, & partisan markers the players should alternate placing one at a time until one player runs out and then the other player may place the rest of his. The Axis player should always place first. Note that placing these markers is always voluntary. These markers must be removed as the final action of each turn, following the completion of the Allied phase.
7.461 Air
The Axis starts all scenarios with 8 air markers while the Soviets start with 2. Starting with the 3rd turn (winter '42) the Soviet player gets 1 additional air marker each turn during the Reinforcement & Replacement segment until they have a total of 10. The Axis remains with 8 until turn 15, on which 2 are deducted at the start of the turn. Another 2 are deducted at the start of turn 16. Air markers may be used for combat support, strategic bombing, or airborne assault. Each air marker placed costs the owning player 10 movement points. The Axis player may place any number of air markers for missions with any of his HQs except the Finnish HQ. Only up to 2 air markers for air missions from the Finnish HQ may be placed with that HQ. [BLUE]The Axis starts the Italian & Campaign scenarios with 2 air markers, while the Allies start with 4. The Axis is reduced to 1 air marker on turn D and to zero markers on turn G (also in the D-Day scenario). The Allies start the Italian & Campaign scenarios with 4 air markers and increase to 5 on turn C, 6 on turn E, and 7 on turn G (also in the D-Day Scenario). Note that the Allied turn E reinforcement can be used in the Allied turn E special pre-turn activities (see rule 11.8), while all other arrivals and removals of air markers occur during the Reinforcement & Replacement Segment. In the D-Day scenario the Allies start with 6 air and the Axis start with 1.[/BLUE] Air markers may be used for combat support, strategic bombing, or airborne assault. Each air marker placed costs the owning player 10 movement points. The players may place a number of air markers for missions with any of their HQs.
Transcription note: passages printed in blue in the booklet are wrapped in [BLUE]...[/BLUE] markers here, as identified from the page image; they apply to the West campaign or the full game.
7.4611 Combat Support
To indicate a marker will be used for combat support, place it under a friendly unit HQ marker. During movement, the air marker will automatically move with the HQ marker at no additional cost. Prior to resolving a combat, first the phasing and then the non-phasing player may place an air marker on the combat hex. The marker must come from under an HQ that is in command range and providing command to at least one unit in that combat. Players may alternate placing air markers in this manner for each particular combat. Each air marker placed in a hex for combat support adds 5 to the strength of the friendly units in the hex for both attack and defense, so long as there are friendly units in the hex.
Example for 7.4611: Combat Support. The German player is defending and has a defense of 14 + 3 from the leader and another 5 because of the air marker making the total 22. For the Allies which are attacking the strength is 15 + 3 because of the leader = 18. The ratio is 1 to 1. The Germans are A class, providing a 2 column shift to the left. The Allied unit is class C providing has no shifts. The final odds are 1 to 3.
7.46121 Bomber Command
[BLUE]In addition to normal air markers, the Allied player has Bomber Command credits. These credits are equal to one quarter of the number of available Allied air markers currently in play, dropping fractions less than .5 (1 when there are 4 & 5 markers, 2 when there are 6 & 7 markers), regardless of if the Allied player has actually decided to use his available markers or not. Bomber Command credits can each be used to eliminate an economic marker if the totaled values of that marker are 4 or less. A credit applied against a marker with totaled values of 5 more make that marker inactive for a full turn. Remove the marker from the map and place it on the Turn track to be placed back in play at the start of the opposing player phase of the following turn. During the Logistics Phase in which the marker is inactive, it may not provide its values for use by its player. Bomber Command credits are restricted in that they can only be used against economic markers within Germany and, in the West Front game, against those economic markers provided with game (Bomber Command credits and targets are expanded when playing a scenario that includes the East Front). In addition, credits not used during a turn may not be conserved for use in a later turn.[/BLUE]
Example for 7.46121: Bomber Command. It is turn C and the Allied player has 5 air markers available. The Allied player may use 1 bomber command credit. The economic marker in Cologne, Germany is chosen as a target and is destroyed. It is eligible because its value is 3 ( 1 transport + 2 production), which is less than the 4 needed to destroy it.
7.4612 Strategic Bombing
To indicate a marker will be used for strategic bombing, place the air marker on a hex containing a transport line or opposing city. Such a marker is considered to break the transport line at the point of its placement. In effect that hex no longer has a transport line for that turn. If placed on a city hex, in addition to negating any transport lines in the hex, any economic markers in the city hex may not leave the hex by transport during that turn. Air markers for strategic bombing may be placed no further than 4 hexes from a friendly HQ marker.
Examples for 7.4612: Strategic Bombing. The German player is using the air marker to strategically bomb Paris. The German player is using the air marker to strategically bomb the transport line in 1813.
7.4613 Air Assault
If the Paratroop unit is in play, a single air marker may be placed into airborne assault. Put the marker with the paratroop unit for use according to the Paratroop rules (11.4).
7.462 Naval
Naval markers come designated for the body of water in which they can be used. They may be in 2 manners: for evacuation or bombardment. To indicate a marker is to be used for evacuation, place it on top of the land unit to be evacuated. A naval marker can evacuate 1 land unit per turn. The land unit must be in a city hex that is also either a partial sea hex or has a river hex side that is within 2 river hex sides of a partial sea hex. During the player's first movement segment of the phase the unit and marker may be moved to any other friendly city that meets these same standards and is on the same sea. Note that Kerch is considered to be on both the Black and Azov Seas.
To indicate a marker is to be used for bombardment place it in any partial sea hex that also contains a friendly land unit. During combat segments the unit may add 3 points of combat strength to the friendly unit(s) in the hex for attack or defense, so long as the hex remains occupied by friendly units. Placing a naval marker costs the owning player 20 MPs. Note that Gibraltar (hex 2832) is considered to be on both the Mediterranean and the Atlantic. The Allied player has two naval markers available for use in the Atlantic Ocean.
Example for 7.462: Naval Bombardment. The Allied player has decided to bombard the German army during the combat segment. The bombardment will add plus 3 to the 5th US Army's attacking and defending strength.
Example for 7.462: Naval Evacuation. The Allied player has decided to evacuate the 5th US Army in Bordeaux by placing the naval counter on top of the unit. This is possible because the 5th US Army is within 2 river hex sides of a partial sea hex.
7.463 Partisans
At the start of the Air, Naval, & Partisan segment each player should total the population numbers of his cities that are under opposing control. For each 10 opposing population points the player receives 1 partisan marker. During the same segment the players may place these markers. Partisan markers that will be used must be placed in areas that the player controlled at the start of the game but no longer controls (the areas of the cities that were counted to determine the population number). Each partisan unit placed reduces the combat strength of the nearest opposing unit by 2 points. If more than one opposing unit is equidistant, the unit affected is at the choice of the partisan placing player. It costs the owning player 5 movement points for each partisan marker placed. In addition to these partisan markers, the Soviet player always receives 1 partisan unit for Yugoslavia, which must be placed within that country. Though this will have no effect for the early and middle game, it can become important as the front lines collapse into Yugoslavia. Partisans can only be placed in cities – those once held by the player placing the markers. Partisans can be put in the city even if there's is an enemy unit in the city. Only the Allied player receives partisans in West Front. Denmark, Netherlands, Belgium, and France are considered Axis occupied at the start of all scenarios for the purposes of this rule, for a total of 29 population points (use 3 partisan markers until reduced to 25 occupied population to account for minor Italian partisans). Italy is not considered, nor are the various Eastern Europe countries, Norway, or the Balkans.
Example 7.463: Partisans. The German player has captured 7 Russian cities equaling 10 population points. For every 10 population points the German player controls the Russian player gets 1 partisan. So, the Russian player can get 1 partisan that will cost them 5 movement points. The Russian Partisan must be placed in cities in areas that the player controlled at the start of the game. In this case the partisan counter is placed in hex 3416, Dnepropetrovsk. The partisan counter reduces the combat strength of the nearest opposing unit, the 2nd Panzer, by 2 points.
8.0 Weather
During the Weather Determination segment of each turn the players must determine the dominant weather for each of the 3 major map sections. These sections are determined by hex row.
Note that the hex rows on the map run across it from East to West. The sections are divided into the North section which runs from the row numbered 00xx to 20xx, the Central section which runs from row 21xx to 35xx, and the South section, running from row 36xx to 51xx. [BLUE]The sections are divided into the North section which runs from the row numbered 00xx to 20xx, until 2027 and then North West to above Ireland. The Central section is 21xx to 35xx. The South selection, running from row 36xx to 51xx until 3620 and then North West to above Portugal; and the Central section which runs between the North and South sections.[/BLUE] Refer to the Weather Table. This table crosses each of these sections with the season of the turn in play to produce a result for each section by a single die roll. Roll one die for each section and note the results with the weather markers.
Weather results effect the movement costs to enter certain terrain types. These effects are as follows. Mud increases the MP cost for all types of terrain, except those containing mountain, by 3 points. Wet increases the MP cost for all types of terrain except those containing mountain, by 1 point. Snow increases the MP cost of all mountain types by 2 points while decreasing the cost of all marsh and river types by 1 point. Snow also decreases the Axis supply distance to 2 hexes, though Axis command range remains 3 hexes. In Winter turns (only) units may cross all water hex sides of lakes at the cost of open terrain. The small bodies of water in Norway, Sweden, Finland, and Russia completely surrounded by land are lakes.
9.0 Leaders
Leaders function for both command and combat. Each HQ must have an associated leader at all times. For convenience, we will call these leaders Front leaders. If the Front leader has been killed, wounded, or captured, or if the leader has lost 2 consecutive combats during the combat segment, replacement is required immediately. (When losing a combat, flip the losing leader marker over to the Shaken side. Should the same leader win his next combat during the same combat segment, flip the marker front side up). A combat is considered lost any time units put in command by the leader, or assigned to the leader and his HQ but left out of command for the combat, have more indicated step losses than the opposing forces in the combat. Under all other conditions, replacement is at the option of the owning player. This may occur during the Leader Disposition segments of the player phases, during which both players are allowed to replace any Front leaders they wish. Leader replacement due to losing combats happens immediately. This means, for example, before any advance. It may mean a leader is replaced, and his replacement is overrun by the attacking unit which sent the first leader to the Leader Pool. This may mean an HQ receives a better leader for combats yet to be resolved in the same Combat segment. General Staff - leaders attached to OKH/STAVKA - are unaffected by 'combat fate effects'. In other words, they don't get Shaken or replaced for losing combats. A Shaken leader stays Shaken if he is transferred. A Shaken leader who is wounded is no longer Shaken on re-entry to the game (i.e. the Leader Pool) is no longer Shaken. For the Axis player, this may occur during the Leader Disposition segments of the player phases. The Axis player is allowed to replace any Front leader he wishes at this time. [BLUE]For the Allied player leaders may not be replaced optionally during the Leader Disposition segments. The Allied player may only replace leaders due to losing combats becoming a casualty, or by transfer.[/BLUE] Also, please note that Allied leaders arrive as reinforcements along with their HQs (and general staff markers). See rule 11.2 and 11.6.
9.1 Replacement
Replacement is done as follows. All leader markers that are not in play as Front leaders or General Staff leaders (or any that have been killed, wounded, or captured) are placed face down in a pile. Randomly pick a new leader marker for each leader to be replaced without looking at their identities. Place them (while still unidentified) with each HQ that is to get a new Front leader. Then remove the old Front leader markers. The new leaders may now be turned over. Leaders that have been replaced may be handled in two manners. They can be returned to the pool of unused leaders (and hence be subject to being picked again) or they can be terminated. Being terminated represents being fired forever, sent to prison, or shot. These leader markers are placed in a separate pile for each player. [BLUE]The Allied player may not terminate leaders.[/BLUE]
9.2 Demoralization
At the start of each Leader Transfer Segment each player must roll a single die and add the result to the number of leader markers in his terminated pile. If the total is over 10, the General Officer corps and the [BLUE]Axis General Officer[/BLUE] for that player becomes demoralized and the printed value of each leader for that player is reduced by 1 for the rest of the game. If the total goes over 15, reduce by 2. Should the total go over 20, reduce by 3. A leader's printed value may not become less than zero, even if it would do so due to the above, though reduction to zero is allowed.
9.3 Movement
Leader markers do not require movement points to be moved. They automatically move with the HQ marker to which they are assigned when it moves. In addition, during each combat phase, players may move their Front leaders from their HQ markers to any hex containing friendly units that are within range of the leader's HQ and are in command due to that leader. In this position, the leader's value may be added to the combat strength of the units as in the combat rules. At the end of all combat for the segment the leaders, if still in play, are automatically moved back to the location of their HQ markers.
9.4 Transfer
During the Leader Transfer segment players may transfer front leaders between active fronts or to and from the General Staff (STAVKA markers for the Soviets, OKH markers for the Axis). To transfer front leaders, simply move them to their new HQ markers. To transfer to the General Staff move the leader marker to a General Staff marker. If the General Staff marker already had a leader, transfer him to the Front marker that was vacated, the leader pool, [BLUE](not allowed for Allies, once with a General Staff marker they cannot be transferred to the leader pool or to a Front HQ),[/BLUE] or the terminated pile [BLUE](not allowed for the Allied player)[/BLUE]. If the transfer is to a pool, draw a replacement for the vacated Front HQ. Each player has 3 General Staff markers in the Eastern Front. [BLUE]Each player in Western Front has 2 General Staff markers (though at the start of the Italian and Western Campaign scenarios the Allies have only one).[/BLUE] Each General Staff starts with a leader. It is not, however, required that each such marker always have a leader [BLUE]for the Axis.[/BLUE] For the Allies, it is required. [BLUE]An Axis[/BLUE] and General Staff leader could be transferred, but not replaced at that time, or ever, if [BLUE]the Axis[/BLUE] player so desires. If there is any debate over which player does transfers first, the players should alternate, one leader at a time, with the Axis transferring first. Rule 11.6 covers General Staff functions.
Transcription note: the inline blue spans in section 9.4 are marked from the page image; their exact word boundaries may differ slightly from the printed colour coding.
9.5 Wounded & Captured
Each Leader indicated to be wounded must have a single die rolled for him. The die result is equal to the number of turns the leader must be out of play to recover from his wounds. Count off this number of turns from the current turn and place the leader marker on the turn track. When that turn begins, the leader marker goes back into the leader pool. A captured leader has his marker given to the opposing player. Players may keep the markers they capture to keep them out of play, or they may choose to trade them back to the opposing player for the return of friendly leader markers by any mutually agreed arrangement. Returned leader markers go back into the player's leader pool, for both the Allies and Axis.
9.6 Finland
The starting Finnish leader is Mannerheim. This leader marker and the Finland HQ marker may move, but may not leave Finland. The Finish army itself is not restricted in its movement this way, as it can move inside and outside Finland, but if it moves outside Finland, since its HQ and leader cannot follow, it can become out of command. Nor may Finnish units be under the control of another leader. Should this leader be out of play, Finnish units become out of command.
10.0 Transport
10.1 General
During the Strategic Transport segment both players may use the transport lines to move their units, HQ markers, and economic markers in a very efficient manner. First each player totals the Transport (Trn.) points available to him for the turn from off map sources, aid, and economic markers that are active. Each transport point plus 10 movement points allows the player to move 1 unit or HQ marker or one point of an economic marker any distance desired along controlled transport lines. Note that economic markers with more than one point may not be moved in parts. All points of the marker must be moved at the same time. Thus a 3 Trn., 1 Pro., 1 Ref. marker would cost 5 Trn. points & 50 MP to transport.
10.2 Procedure
As each unit or marker is moved, deduct the movement points used from those on the player's track. Transport lines that are in hexes containing opposing ZOC but not also containing one or more friendly units may not be used. To move along a transport line, the moving counter must move along adjacent hexes that are connected by the line crossing their common hex sides.
Figure: "Transport Lines" diagram (map excerpt around Minsk; not reproduced in text).
10.3 Economic Markers
Economic markers that are to be transported are turned face down. They become inactive for the turn after they are moved. At the start of each Strategic Transport segment turn any such inverted markers right side up to indicate that they are again active. Economic markers that are inactive cannot be counted for any of their values. Such markers can be moved off the map. [BLUE]In addition, such markers may not be moved further East than the Halt Line (the dotted blue line on the map representing the area to the east of which will become Soviet occupied).[/BLUE] Markers under Soviet control may be moved off the East map edge. Markers under Axis control may be moved off the West map edge within the boundaries of Germany. Such markers become active again in the same manner, but become additions to the Off Map economic resources for that side. Note that, if there is dispute as to moving first for transport, alternate moving one marker at a time with the Axis player moving first. If one player passes moving, the other player may then move the rest of his transport without alternation. Also note that economic markers that have their location occupied by an opposing unit at any time during play are considered to have been captured by the opposing player. The capturing player may remove the economic marker as destroyed, or may flip it over to indicate it will be transported. During the first ensuing Transport segment, such markers must be transported off the map. After they arrive at their destination they may then be returned to production for the capturing player at full value, but only produce every other turn. When a player captures enemy Economic Markers, they must decide to destroy them or transport them immediately. If they are not transported in that side's next Strategic Transportation Segment, they are destroyed.
10.4 Food
In addition to transport, at the start of the Strategic Transport segment both players must count the number of food points under their control. [BLUE]On the Campaign in the Western Front only the Axis player must count the number of food points under their control.[/BLUE] Some will come from controlled food point locations that are printed on the map. Other food points come from off map sources and are listed in the Off Map Economic charts. Each food point feeds 10 armies (units). If a player has more armies than can be fed, the excess units must be removed from play. Specific units to be removed are at the owning player's choice. If both players must remove units for this reason, they alternate removing one unit at a time, the Axis player going first. [BLUE]The Allied player is never considered to have food requirements and can always support all of the Allied armies in play.[/BLUE]
10.5 The East Front
[BLUE]Unless the game is being played in conjunction with Lebensraum! the Axis player must represent the economic requirements of the East Front. These needs are listed on the Axis Starting Economics chart. The food, refining, and transport points listed there are always deducted from that available to the Axis player each turn prior to using any for play in the game. Thus, the East Front needs to take priority over uses in West Front, even if that means that armies in the game go unfed, without movement points, and/or untransportable.[/BLUE]
11.0 Special Rules
11.1 Supply
During the Supply segment of each player phase all players must examine the locations of their units to determine if they are in supply. To be in supply a unit must be within command range of a friendly HQ marker (though it is not required to be in command). The hexes of command range to the unit are traced in the same manner and with the same restrictions as for command. The HQ unit must in turn be within its command range of a transport line that can be traced off the map (to the East edge for the Soviets or the West edge for the Axis) by a series of adjacent hexes that do not contain opposing units or their ZOC (though the line may be traced through a hex in an opposing ZOC if the hex is also occupied by a friendly unit). [BLUE]Axis supply heads are Paris (hex 1814), Essen (1709) and/or Berlin (2003). Allied supply heads are hexes 4211, 1516-1517 (starting pre-turn E in the Italian and D-Day scenarios), Naples (3710), La Havre (1515), and/or Antwerp (1511). Note that to be considered a supply head, the hex must be friendly controlled.[/BLUE] A HQ determined to be out of supply is removed from the map and its leader must roll as if Overrun (and all units under its command will be out of supply). However, individual units (not HQ markers) that are located in a 2 or 3 rated city that began the game friendly to the unit are considered to be in partial supply. Each unit that is judged to be out of supply is reduced by 2 steps, as if by combat loss. A unit in partial supply is reduced by 1 step. No retreat to prevent the step reduction is allowed and such losses do not count as lost combats. Helsinki is a Finnish (only) supply source.
Example for 11.1: Supply. In the example the Russian 31st Army is in supply. The Russian HQ has a command range of 2 and the 31st Army is 2 hexes away. If there was no HQ then the Russian 31st would be reduced by 2 steps. If it was in a 2 or 3 rated city the army would be in partial supply and not be subject to reduction.
11.2 HQ
Each player starts with a certain number of HQ markers in play. During the HQ Creation or Dissolution segments the players may place more HQ markers into play (up to the number of such markers provided) or remove markers from play. Though it is not required, it is suggested that the HQs be placed so as to represent the north to south aspect of their names. Naturally, having more HQs in play will allow the introduction of new leaders. When moving, HQ units must pay movement points just as if they were tank type units (and hence may be moved in both movement segments). To place a HQ unit, take it from those not in use and place it in the capital city of the player (Berlin or Moscow) and pick a replacement leader for it. Deduct 20 MPs from the player's track as the cost of creation. A player may not create more than 1 HQ per HQ Creation or Dissolution segment, in addition to creating replacement HQs for any previously existing HQs that were lost in the preceding turn(s). If the player's capital is not under friendly control, new HQs may not be created. To remove an HQ simply remove it from the map and place its leader in the leader replacement pool. Note that opposing units' ZOC do not affect HQs during movement, but do in combat advance as Overruns. [BLUE]HQs that are not overrun are not attacked by opposing units, but must retreat from opposing occupied hexes. The Allied player may not create new HQs except to replace those lost in combat. New HQs for the Allied player arrive as reinforcements, along with specific leaders as indicated on the leader counters. Similarly, the Allied player may not voluntarily dissolve an existing HQ.[/BLUE] In an HQ Creation and Dissolution Segment a player may build 1 HQ and any that have previously been eliminated, all must be paid for. Every HQ build costs 20 MPs.
11.3 Reserves
During the Reserve Unit Designation segment the players may indicate which units they wish to become reserves. Any unit that is not in an opposing ZOC can be made into a reserve unit. To indicate this, place a Reserve marker on the unit(s). During the Reserve Movement segment of the opposing player's phase, any units indicated as Reserve may be moved as if in normal movement. During the Reserve Tank Movement segment tank type units indicated as reserve may be moved. As with normal movement, HQ markers may be moved in either segment, though to do so they are also required to be marked as reserve. Once a unit that is indicated as in Reserve has been moved, remove its Reserve marker. Thus, reserve tank units and HQs may not be moved in both of the Reserve movement segments of a single phase. Units that are engaged in combat lose their Reserve status. A unit put into Reserve stays that way until (a) it moves; (b) it is attacked; (c) the owning player removes it from Reserve status in a Reserve Unit Designation Segment; or (d) it receives replacements in the Reinforcement and Replacement Segment.
11.4 Paratroop
Each player receives paratroop type units as reinforcements during the game. These units may be used in the normal manner as if it were an infantry type unit in all matters except for airborne assault. To conduct an airborne assault the player must have the unit and an air marker in the same hex. This hex must be within command range of a HQ unit. During the Movement Segment the phasing player may move the paratroop unit up to 6 hexes from its start hex without any movement costs. This movement ignores all terrain and opposing units and their ZOC. The hex in which the unit is placed can be any hex except mountain type or one containing an opposing city or an opposing unit. Once the unit's move is completed the air marker is removed from the hex. Paratroop units are considered to be in command for all combats during the turn that they are used for air assault. In all subsequent turns, they are a normal infantry unit. Note that this will in effect allow an Axis paratroop unit to remain in command for both player phases of a turn while a Soviet paratroop unit will only remain in command for the Soviet Player Phase of the turn. [BLUE]The Allied paratroop unit will only remain in command for the Allied Player Phase of the turn.[/BLUE] A paratroop unit may only conduct one airborne assault per game.
Transcription note: the rule text above says "up to 6 hexes"; the printed example below says "5 hexes". Both are transcribed as printed.
Example for 11.4 Paratroops. In order to conduct an airborne assault an HQ unit has to be within range. The Allied paratrooper is allowed to move 5 hexes through anything at no movement costs, but it may not be placed in a mountain type hex, an opposing city or opposing unit. In the example the Allied paratrooper starts in 1716 and can move through ZOC, units, and cities to 2214. The paratroop unit can not end on 2117, 2216 or 2215 because they are mountain terrain. It also can not end in the same hex as the German unit.
11.5 Control
The term control is used often in the rules. One side or the other is considered to be in control of all the land hexes, units, and markers in play at all times, with the exceptions of those of the Neutral countries. At the start of all scenarios the Soviet player controls all the hexes, units, & markers of the Soviet Union. [BLUE]At the start of all scenarios the Allied player controls all the units and markers of the Allies plus the hexes of Sicily, Sardinia, England, Scotland, and Ireland.[/BLUE] The Axis player controls all of the hexes, units, & markers of all of the other countries except Sweden & Turkey. [BLUE]On the campaign in the West the Axis do not control Sweden, Switzerland, Spain, and Portugal because they are neutral.[/BLUE] As play progresses the forces of the players will gain or lose control of areas of the map due to the movements of their units. In specific, the player currently occupying a hex with a unit, or having been the last to so occupy a hex, constitutes control of that hex. However, some hexes will never be moved through by a unit but will obviously have changed hands due to the locations of the units of both aides. If such a hex is behind the front lines of the opposing units and is not occupied by a friendly unit, it should be considered to have changed to the control of the opposing player. If differences of opinion develop, use the supply rule on the hex in question. If the original controlling player could no longer provide supply to the hex (as if it were a unit) due to the location of opposing units, then he no longer controls the hex. Note that partisans, like HQs, Leaders, Air, and Naval are markers, and hence not units for purposes of establishing control.
11.6 General Staff
[BLUE]Each player has 2 markers on Western Front.[/BLUE] On the Eastern Front, 3 markers representing positions in their General Staff. These are labeled STAVKA for the Soviets and OKH for the Axis. A leader starts assigned to each of these markers, but [BLUE]Axis leaders in the West Front[/BLUE] may be changed by Transfer as the game progresses. A Staff marker without an assigned leader may not be moved and has no effect on play. General Staff leaders (those assigned to Staff markers) act in the following manner. Each player must always keep at least one in their capital at all times (though they may change which leader & marker fills this post during movement). They may be moved during their Phasing Movement segment and/or their Non-Phasing Reserve Movement segment. To be moved they are simply removed from their current location and placed in their new location (along with their Staff marker). Their location must always be in a hex containing a friendly HQ marker or the capital city. If the HQ they are with, moves during a segment in which they cannot move, they are returned to the capital. There are no costs to move a General Staff leader and such movement is never affected by opposing units or their ZOC. A General Staff leader adds his value to the value of the Front leader, for the HQ the General Staff leader is stacked with, for purposes of command, thus increasing the command ability of that Front leader. In addition, a General Staff leader may add his value to the combat value of any single unit within range of the HQ once during each combat phase (without being stacked with that unit). General Staff leaders are not subject to combat fate effects, but if the HQ they are with is overrun, they must roll for their fate in the same manner as a Front leader in such a situation. [BLUE]The Allied player begins the Italian and Campaign scenarios with only 1 CCS marker. A second Allied CCS marker and the leader marker designated for it appears as a reinforcement. Allied leaders assigned to General Staff may not be transferred back to a Front HQ.[/BLUE]
11.7 Neutrals
The Neutral countries are Sweden, & Turkey for the campaign in the East. [BLUE]The Neutral countries of Sweden, Switzerland, Spain and Portugal for the campaign in the West start all scenarios under the control of no player. They and their forces (Sweden and Portugal have no forces in this game)[/BLUE] remain out of play so long as no units of either player enter the hexes of these countries. If they are entered, the country and its forces immediately become allies of the other (non-invading) side. Their forces may be used by that player as if they were his own in all manners, as may their territory and cities, except their units may never leave their countries and are always considered to be in command and in supply. [BLUE]Note that some Spanish and Portuguese units and markers have hex location numbers that are duplicated in Eastern Europe. This is due to the overlap of this game with the Lebensraum! game map, however these units must be placed in their Iberian locations. Norway, Denmark, Yugoslavia, Albania, and Greece are further special cases.[/BLUE] Though they are Axis controlled and garrisoned they are, by political agreement, out of bounds for Soviet and Soviet allied forces. Thus, no player may move units into these countries. Similarly, the Allied player may not move his units to the East of the Halt Line printed on the map unless the game is being played in combination with Lebensraum! [BLUE]Note that the Allied port of Gibraltar (located in hex 2832) is not specifically depicted on the map. However, if the Axis player should invade Spain and move an Axis unit through that hex, the Allied Mediterranean Naval unit is immediately removed from play for the rest of the game.[/BLUE]
11.8 Surprise Attack
To represent the surprise of the invasion on Soviet forces, the Axis player gets a single Axis player combat segment prior to the start of the first turn. [BLUE]To represent the surprise of the D-Day invasion on Axis forces, the Allied player gets a single Allied player combat segment prior to the start of turn E. This is referred to a Pre-E turn.[/BLUE] Only the Axis and [BLUE]Allied[/BLUE] player may place air and naval markers during this segment and all Axis and [BLUE]Allied[/BLUE] air and naval markers are considered to be available (though no MP payment for them is made) for the segment. The weather in all map sections is clear. [BLUE]The Pre-E combat segment simply occurs between the normal end of turn D and the start of turn E. Note that the Allied reinforcements listed for the Pre-E turn on the Allied reinforcements chart are placed on their indicated start hexes before beginning the Allied combat segment that composes the Pre-E turn activities.[/BLUE] All Soviet units are considered to be in reserve at the start of this pre-turn Axis combat segment. Note that this placement over rides any other rules restricting the placement of reinforcements. At the conclusion of the combat segment, the first turn begins at the normal start of the sequence of play (the Logistics Phase).
11.9 Optional Leaders
At the agreement of both players before the start of play, the Axis player may use the 3 optional leaders provided (labeled 'Opt'). Randomly remove 3 normal leaders from the Axis pool after the game has been set up and then add the optional leaders to the pool. Note that these alterations very likely will increase the leadership level of the Axis a good deal.
11.91 West Wall
[BLUE]The West Wall fortifications are indicated by the border hex sides between Switzerland and the Netherlands with blue border symbols instead of brown. Axis units adjacent to these border hex sides and to the east of them have 5 strength points added to their combat strength in defense (only, not for attack) when attacked by units which attack them through the West Wall hex sides. If one or more of the attackers in a particular combat are not attacking through the West Wall hex sides, the extra defense for that particular combat is not used.[/BLUE]
11.92 Halt Line
As with Neutral Units, there is another restriction on movement of Allied Units. A Halt Line is printed on the map as a dotted blue line. This represents a stopping point past which Allied units may not move further to the east as per agreement with the Soviet Union. When reaching this Halt Line, Allied units may not cross it when playing scenarios that do not include the Soviet Union. In combined scenarios, crossing the Halt Line is at the option of the Allied player, or, if the Allies and Soviets are being played by separate players, at the agreement of these players.
12.0 Scenarios
[BLUE]
12.1 Invasion Italy
Set Up:
- A number of the units and markers have 4 digit numbers printed on the left side of the counter. For the Axis, these start all scenarios of the game on the map in the hexes indicated by the numbers and all armies begin in reserve status.
- For the Allies, only those units and markers with locations in Southern Italy start all scenarios on the map. The others arrive on the turn indicated on the counter and on the Allied Reinforcement Chart.
- Several leaders have designations indicating a specific Front HQ that they start the game assigned to. A "*" symbol indicates leaders that start assigned to the General Staff.
- After all these units and makers have been placed, form pools for the unused leaders for each side and set up the other unused markers and units off the map in any manner that you feel makes them convenient for later use.
Length:
- Turns A-H
Special Condition:
- As a special Salerno effect of the fighting in that area, that prohibits the US 5th AG and any units under its command, may not move more than one hex from their start location during the first turn.
- For turn A the entire Axis Player Phase is skipped, though the Axis player participates in all other parts of turn A. Until turn E the Axis units in France, Belgium, and the Netherlands may not be moved out of those countries.
Victory:
- For the Allies to win they must control all of the cities of Italy, France, Belgium, the Netherlands, and any cities in Austria, Czechoslovakia, and Germany west of the Halt Line by the end of turn G (not at the end of the game).
- For the Axis to win they must control any two German cities west of the Halt Line the end of the game. Other results are a draw.
12.2 D-Day
Set Up:
- As for 12.1 except that in Italy the Allied 5th army is at 3411 with Alexander and the 15th AG HQ while the Allied 8th army is at 3409.
- The German 14th army is in 3312, the 10th army is in 3310, and AGC HQ with Kesselring is in 3111.
Length:
- Pre-E turn throughout turn H.
Victory:
- As in 12.1.
Landing Allied units must complete a combat against any Axis units in their landing locations and if forced to retreat may, each turn, try their landing again as if again invading from England.
12.3 Campaign In The West
Set Up:
- As for 12.1 for all conditions except Allied placement. This scenario is a free attack scenario for the Allied players. A number of the normal rules are suspended or modified.
Landings:
- The Allies are not required to land at the hexes indicated on the units. Instead the Allied player is allowed 6 assault landings during the game, each of which can land one army.
- These landings are a function of the naval markers, each marker being allowed to conduct one such landing per turn in addition to any naval activities the player wishes to do. There is no MP cost for this since it is already deducted from the points available.
- These landings may take place on any clear terrain coastal hex that does not contain an opposing unit or an uncontrolled city. Atlantic naval markers may only conduct landings on the Atlantic coast and the Mediterranean marker in the Mediterranean.
- In addition, the landing site must be within 4 hexes of a hex containing a friendly city (inclusive of the landing hex, exclusive of the friendly city hex). The Gibraltar hex is considered to divide the Atlantic from the Mediterranean.
Supply:
- For purposes of supply, any 3 of these landing hexes may be considered to be supply heads instead of the stated landing hexes in the supply rules.
Leaders:
- The Allied player is also freer in his use of leaders. Though the start leaders and units remain the same and Front HQs still become available as per the Reinforcement chart, the Allied player may create and use a leader pool in the same manner as described for the Axis.
- Termination is still not allowed, but voluntary replacement is allowed. However, there are limits. Note that each leader is indicated as AM (American) or EN (English).
- The starting CCS marker must always have an AM leader. The second CCS marker still enters as a reinforcement with Tedder, but he may be replaced so long as that CSS marker always has an EN leader. The reinforcement Front HQ markers no longer comes with required leaders, however at least one, but no more than two, of the Allied Front HQs must have an EN leader, the rest are AM.
- To do this pick leaders randomly as in the Axis system until the player gets the correct leader of the proper nationality, and there is a final restriction. The Patton and Montgomery leader markers may never be transferred to the General Staff.
Special Condition:
- As for 12.1., the Axis units in France, Belgium, and the Netherlands may leave those countries on any turn.
Length:
- Same as for 12.1
Victory:
- Same as for 12.1
12.4 Invasion In The East
Set Up:
- A number of units and markers have a 4 digit number printed on the top line of the counter. These start all scenarios for the Eastern Front on the map in the hexes indicated by the numbers.
- Similarly, several leaders have designations indicating a specific Front HQ they start assigned to. A "*" symbol indicates leaders that start assigned to the General Staff.
- After all these units and markers have been placed, form pools for the unused leaders for each side and set up the other unused markers and units off the map in any manner that you feel makes them convenient for later use.
Length:
- Turns 1-3.
Victory:
- For the Axis to win it must control 2 of the following cities at the end of turn 3: Moscow, Leningrad, Kiev. For the Soviets to win they must control all three of those cities. Other results are a draw.
12.5 "Objectives"
Set Up:
- As for 12.4.
Length:
- Turns 1-6.
Victory:
- For the Axis to win it must control 2 of the following cities at the end of turn 6: Moscow, Leningrad, Stalingrad. For the Soviets to win they must control all three of those cities. Other results are a draw.
- If the victory conditions are filled at the end of any turn prior to the last turn, the game ends, at the end of that turn and the player that has fulfilled the victory conditions has won. The rest of the turns of the scenario need not be played.
12.6 "Climax"
Set Up:
- As for 12.4.
Length:
- Turns 1-10.
Victory:
- For the Axis to win it must control 1 of the following cities the end of turn 10: Moscow, Leningrad, Kiev.
- For the Soviets to win they must control all 3 of those cities plus either Minsk or Odessa. Other results are a draw.
- If the victory conditions are filled at the end of any turn prior to the last turn, the game ends, at the end of that turn and the player that has fulfilled the victory conditions has won. The rest of the turns of the scenario need not be played.
12.7 "Resurgence"
Set Up:
- As for 12.4.
Length:
- Turns 1-13.
Victory:
- For the Axis to win it must control at least one Soviet city at the end of turn 13.
- For the Soviets to win they must control all Soviet cities and the capital cities of at least 2 other countries that had been under Axis occupation or control.
- Other results are a draw. If the victory conditions are filled at the end of any turn prior to the last turn, the game ends, at the end of that turn and the player that has fulfilled the victory conditions has won. The rest of the turns of the scenario need not be played.
12.8 "Conclusions"
Set Up:
- As for 12.4.
Length:
- Turns 1-16.
Victory:
- For the Axis to win it must control all Soviet cities at the end of a turn. The game ends automatically at the end of any such turn.
- For the Soviets to win they must control all cities in Poland and the Soviet Union, as well as Berlin, Prague, Budapest, Bucharest, Sofia, & Belgrade at the end of any turn, again automatically ending the game.
- If neither player has obtained these conditions by the end of the last turn (turn 16), the game is a draw. [/BLUE]
13.0 Combination Game
Set Up:
It is possible to play the entire war in Europe from June of 1941 by combining the Lebensraum! (LEB) and West Front (WF) games. When setting up the maps lay out the WF map to overlap the LEB map, putting the Oslo hex (WF 0901) and the Sofia hex (WF 3901) over their counterpart hexes on the LEB map. This will align the two games. Begin play with the LEB game on turn one. Instead of using the Axis Off Map charts the actual occupied areas on the WF map with their markers, etc. are used. Supply for the Axis is traced to supply heads, as in the WF rules. The Axis units from WF are not set up until turn 9, which equates to turn A in WF. From that point on the games are played together with movement between the maps allowed in so far as permitted by the rules of both games. Axis units starting in France, Belgium, and the Netherlands are still required to remain in those countries if playing by the Italian scenario rules. If playing by the Campaign scenario rules they are not required to remain in their starting countries. Bomber Command credits rise to ½ of the number of Allied air markers in play, dropping fractions, and may now be applied anywhere in Germany. The Italian 8th army that leaves LEB on turn 9 must be moved to the Italian border and is then remove from play.
The Axis leader pools are combined, but one marker for the following leaders must be removed to prevent duplication: V. Rudd., V. Kluge, Model, Student, Himmler, V. Viet., and Busch. When the WF side of the game begins the replacements for both games from their charts should be combined and may be used on ether front, as may resources an air markers, such as oil and food. With this in mind, the East Front Needs from WF are no longer in effect. Axis General Staff markers can be used on either front but 2 must now remain in Berlin. The Halt Line from WF is also no longer in play and is disregarded for all purposes except judging victory. Victory conditions remain the same. Thus, in a two player game the Axis player can win, lose, or draw in both the East and the West. The Allied/ Soviet player can do likewise. The player with the greater number of wins is the overall winner. If the number is the same, the overall game is a draw.
It is suggested that at least 3 players be involved in the game, one for Axis, one for the Soviets, and one for the Allies. However, more players can easily be added. The Axis can be split into 3 players easily, one for West, one for the East, and an overall commander that controls the placement of General Staff markers, the apportioning of reinforcements, replacements, air assets, movement points, and the shifting of forces between the fronts. Similarly, the Allies can be split into 3 players with one commanding Mediterranean landings, one Atlantic landings, and the third in overall command with prerogatives as detailed above for the Axis. Though both of these split command modifications is historically reflective, dividing the Soviets into more than one player would not be, so it is not suggested, even though more than one Soviet player would greatly decrease the Soviet work load.
14.0 Design Notes
Both Lebensraum and West Front have been interesting design projects. From the outset, we wanted to show the War in the East from a very high level viewpoint. Grand strategy was what we were after. In thinking about what other strategic games on this topic had done, it seemed to me that they had all missed leadership, and somewhat slighted economics. In addition, most had not really done a lot to show the differences between the Axis and Soviet forces, other than to make Axis units stronger (or within Axis forces for that matter, note the differences between Axis infantry armies in WF and LEB). Behind each of these items and weaving among them are the main rationales and design viewpoints of the game. To get grand strategy, economic subsystems have to be an integral part of the moving, fighting, and feeding of armed forces. Similarly, leaders, as well as the staff powers and material reserves under their command, had to be integrated into the combat, movement, and supply systems. The player viewpoint could then be at the highest level, that of the leader of the nation itself.
In Lebensraum! and West Front there are no special Churchill, Hitler or Stalin rules. There could not be. With the player viewpoint that of the national leader, the players will create any special 'no retreat' situations, or similar things, directly. This viewpoint is somewhat reinforced by the fact that the leaders of all major participants tended to interfere in military affairs directly and neither were professionals in these areas. While we were able to leave things very open in Lebensraum! In this manner, the fact that the Allied player in West Front had to represent a coalition required somewhat more restricted use of leaders, HQs, and general staff resources in the historical scenarios. The players will be in a similar position. To produce realistic depictions of the differences between the combatants, wide variance in step reduction ability, as well as upgrade capability systems were developed. Thus, a German army can be fought into the ground (though it will take some time) at a cost in strength or class (a combination of morale and training) or both. While a Soviet unit can be burned out and rebuilt, or held back to be upgraded, which will somewhat extend its life expectancy in combat (as well as increasing its effectiveness) but will not change the basic thinness of individual units.
It is useful to keep in mind in a simulation of this scope and level that many specific items have been blended together to produce the game systems. All game design is synthesis, and the more strategic the scope, the greater the synthesis required. As reminders of the scale involved in the game, each turn represents the results of 3 months of activities. Each hex contains over 2000 square miles (6000 sq. Km.) of terrain. Units literally represent entire armies. The testers on occasion had difficulty with these sizes. I have not noticed such problems in other strategic WWII games, but few of them use such long turns and such large units, and none use many named leaders, which tends to make the player identify more directly with the game. Keep in mind this large scale and, though those leader counters do represent particular individuals (among other things), remember that from your player viewpoint as the overall leader of a great nation at war, such leaders are also pieces to be moved and used to the best advantage.
A word on the counters. You will note that we did not use the NATO standard symbols that are so common in wargames. Neither the Allies, Axis, or the Soviets used this symbol system during WWII. In fact, each used completely different systems. But more important, it seems that the situation maps prepared for the national leaders did not use a symbol system at all. Instead these maps indicated only army number and type for each unit's location. In line with keeping the player viewpoint realistic, we have duplicated this representation.
Sources on World War II in the East abound. Vital one volume works are: Albert Seaton's The Russo-German War 1941-45; U.S.S.R., Great Patriotic War of The Soviet Union; E. Von Manstein, Lost Victories. Major Multi-volume works include: John Erickson's, The Road to Stalingrad & The Road to Berlin; A. Rich, Hitler's War Aims (2 Vol.); & the official historical branch works of the U.S., British, German, and Soviet governments. These are fundamental starting points for gaining a grasp of what happened in the East, and if you have not looked at them, you might try to get copies.
Note on counters: Eisenhower is spelled wrong on the counter it is Eisenhauer and it should be Eisenhower.
15.0 Charts & Tables
Transcription note: the booklet's index lists "15.0 Charts & Tables", but the charts and tables are not printed as text in this booklet. Pages 21 to 23 of the PDF are full-page counter sheets (images only, no rules text) and are not transcribed. The Sequence Outline printed on the final page follows.
Sequence Outline
- LOGISTICS PHASE (Both Players):
- A. Movement Points Determination Segment
- B. Reinforcement & Replacement Segment
- C. Air, Naval, & Partisan Segment
- D. Weather Determination Segment
- E. Leader Transfer Segment
- F. HQ Creation Or Dissolution Segment
- AXIS PLAYER PHASE:
- A. Phasing Movement Segment (All Units)
- B. Non-Phasing Reserve Movement Segment (All Units)
- C. Combat Segment
- D. Leader Disposition Segment (Both Players)
- E. Phasing Tank Movement Segment (Tank Units only)
- F. Non-Phasing Reserve Tank Movement Segment (Tank Units Only)
- G. Combat Segment
- H. Leader Disposition Segment (Both Players)
- I. Supply Segment (Both Players)
- REDEPLOYMENT PHASE: (Both Players):
- A. HQ Creation Or Dissolution Segment
- B. Reserve Unit Designation Segment
- C. Strategic Transportation Segment
Errata
The following is the Compass Games economic errata sheet for Lebensraum (one page, "Lebensraum_Errata_1_1.pdf"), transcribed in full and applied as a companion to the rules above.
Economic Chart Summary
| Resources | Soviet | Germany | Allied |
|---|---|---|---|
| Oil | A | A | N/A |
| Food | B | B | N/A |
| Production | C | D | N/A |
| Refinery | A | A | N/A |
| Transport | E | E | N/A |
| Population | C, F | F | F |
Result of Resources
| Resources | Result of Resources | Rules Index |
|---|---|---|
| A (Oil) | Movement | 5.3 |
| B (Food) | Feed armies | 10.4 |
| C (Production) | Replacements | 6.22 |
| D (Production) | Can be captured by Soviets | 10.3 |
| E (Transport) | Transport | 10.1 |
| F (Population) | Partisan | 7.463 |
Economic Errata and Clarification
- Production for the Allied and West Front German are for players who want to create house rules
- There should be a Food symbol in hex 1516 (West Front)
- German East Front starts with 7 Refinery, 13 Transport, 52 Production, 5 Oil, and 3 Food
- German West Front has 29 Transport Points
- Allied West Front 7 Transport, 1 Refinery, and 22 Production
Step Reduction Example
The 4th German army has the following numbers:
- Front: 22A, 22B, 20C, 20D
- Back: 12A, 11B, 11C, 10D
Starting at 22A, a single step loss allows the choice of either flipping the counter to 12A or remove the counter by changing it to 22B.
Starting at 22A, a two step loss can be a strength and a class, or a strength and more than one class, or just two classes. So, a strength would flip to 12A and a class would reduce by shifting counters to 11B. Or, using just class, shifting 2 counters down to th 20C counter. You would not want the strength and more than one class when starting with 22A, but if you started at 11B, you might want to take it as flipping and shifting to the 20C and then shifting again to 20D. Another loss of two steps would elminate the unit. A loss of just one more would flip it down to 10D.
7.43 Advance (errata)
7.43: Advance. The first hex of an advanced into a previously defended hex ignores enemy ZOC.