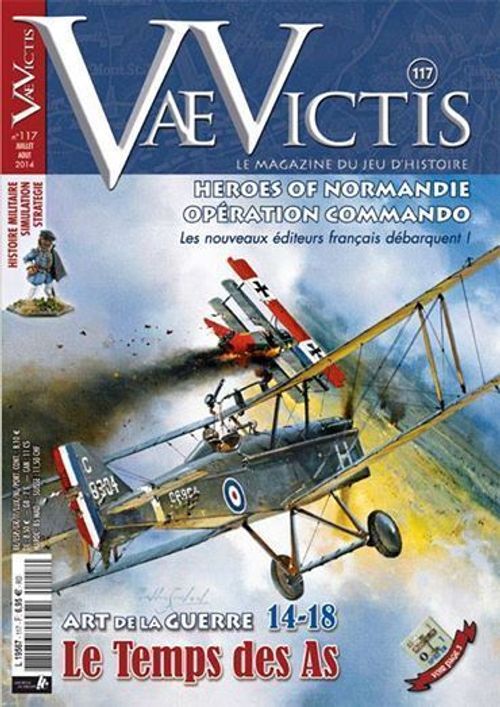
Le Temps des As
Le Temps des As Rulebook
Table of Contents
Table of Contents
- 1 Introduction
- 2 Game Components
- 3 Scale, Stacking, Vocabulary
- 4 Game Sequence
- 5 Determining the Initiative
- 6 Piloting
- 7 Combat
- 8 Suffering Damages
- 9 Recuperation and Pursuit
- 10 Checking Victory Conditions
- 11 Special Rules
- 12 Scenarios
- 13 Optional Rules
- 14 Game Variation: Alternating Manoeuvres
- Detailed Example of Turns
1 Introduction
These combats generally took place in a fairly small space, a cube of approximately 1.5 Km per side, attesting to the impressive manoeuvrability of the aircrafts engaged in what would later be known as Dogfights. At this time, more than 50 aircrafts were often involved in the same combat that observers would describe as a "beehive!".
The Age of Aces can be played with one or 2 or more players. For the sake of simplicity, these rules will use the example of a 2-player game.
Design notes: The initial idea for this game was to allow dogfights with several aircrafts in a reduced game time, in a system limiting the markers on top of counters and requiring no prior writing of orders and movements or choice of cards. Consequently, at certain points in the design, playability took precedence over simulation. Optional rules are proposed. Lastly, regarding the aircrafts, during the last two years of the war there was such a competition between the nations that the difference in engineering was at times minimal between the machines. The difference was in the pilot... you!
2 Game Components
To play, you need the following elements:
- Aircraft and balloon counters.
- "Ace" pilot counters.
- Various markers: speed, altitude, damage, turn counter.
- Two flight boards that can be photocopied for play with more than two players. You can also download them from the VaeVictis website.
- A two-sided player aid card with a summary of the principal rules, the table of the manoeuvres, and the list of the specific aircrafts with their characteristics. We recommend that you cover with plastic this page found in the middle of the rulebook.
- A map in A3 format that represents the game surface, imprinted with the hexagons to regulate the movement of the aircrafts. The edges are cut into 8 zones used in the scenarios to mark the entry/exit zones for the aircrafts.
- One six-sided die (1d6) per player (not included).
- A small opaque container (ex: a cup).
3 Scale, Stacking, Vocabulary
Scale: A hexagon represents 100 metres and a turn lasts about 1 minute. The aircrafts move on 5 altitude levels. A counter represents 1 aircraft.
Stacking: There is no stacking limit for counters (aircrafts, markers...). However, if two aircrafts simultaneously share the same hexagon at the same altitude, they could collide.
Vocabulary: The following list defines the vocabulary used in the rules:
- 1d6: roll a six-sided die
- 1d3: roll a 1d6 and read the following result: (1-2) = 1, (3-4) = 2, (5-6) = 3.
- Die roll modifier (DRM): value to add to the result obtained from the die roll.
- Resource Points (RP): Resource points are the "fuel" of the game. They are spent each turn, for each aircraft and for each manoeuvre.
- Manoeuvre: specific move that an aircraft makes for a cost given in RP.
- Flight board: table on which are placed for each aircraft in flight, its speed marker (speed), its "Ace" marker and any substantial damages. The lines on the table are numbered 1 to 5, so that the information for 5 aircrafts can be displayed simultaneously. The so-called "slow" speeds are noted in blue, and the "high" speeds are noted in red.
- Manoeuvre table: table indicating for each Manoeuvrability Class (A, B, C) the cost in RP, the minimum or maximum speed required to carry out a manoeuvre, the effects on the speed, altitude and orientation of the aircraft after the manoeuvre.
- In phase player: player whose phase it is for the manoeuvres with his aircrafts.
- Adverse aircraft: aircraft that does not belong to the player in phase.
3.1 The aircrafts
An aircraft counter reads as follows:
- Manoeuvrability class: letter indicating the overall agility of an aircraft when it manoeuvres. A is the best class and C is the worst.
- Hit value: number indicating the minimum result necessary to hit an aircraft, taking into account its wingspan and its agility. A low number indicates an aircraft that is easier to hit.
- Very High altitude: the "cloud" symbol indicates that the aircraft can climb to altitude 5 (Very High).
- Structure Points: number indicating the minimum result necessary to cause substantial damage to an aircraft, taking into account the overall quality of its construction (materials, solidity...). A low number indicates an aircraft that is easier to take down.
- Maximum speed: indicates on a dial the maximum speed that the aircraft can attain without damaging the motor.
- Number of the aircraft: associates the aircraft counter with the line of the same number on the Flight Board so that speed, Ace pilot and any particular damage counters can be placed.
The aircraft (or the balloon) counters have two sides: "fit" and "damaged" (bullet holes).
The list of the aircrafts indicates complementary information: the motor power factor, the "special" manoeuvres particular to the aircraft or those that are prohibited, the DRM due to MG to calculate damages or their unique capabilities (ex: double controls on the DH.4).
3.2 The Aces
Certain scenarios offer the possibility of having aircrafts piloted by aces, seasoned pilots that boasted an impressive record. The special qualities of these pilots are defined by two attributes, piloting and firing, in the form of a die roll modifier (generally +/- 1). The quality of the piloting, noted in white, affects the cost of the special manoeuvres designated by a "star" on the manoeuvres table (ex: a barrel roll), if the player so wishes. The quality of the fire, noted in red, affects the result of the fire test necessary to hit the target (ex: An Ace with a Fire +2 adds 2 to the fire test to hit.
An Ace is necessarily assigned to the post of Pilot and not Observer.
3.3 Markers
- Altitude is represented by a two-sided marker that is placed under the aircraft, on which is noted the value of one of the 5 altitude levels: Very Low (1), Low (2), Average (3), High (4) and Very High (5). It is not necessary to place an altitude marker for Average altitude (3). Important: only aircrafts with a "cloud" symbol next to their Hit value can ascend to altitude 5 (Very High).
- The speed markers allow players to note the speed of the aircrafts on the Flight Board.
- The damage markers are drawn at random from an opaque container when an aircraft suffers substantial damages (see 8.1 Structure Test).
- The turn counter marks the number of turns for a scenario. The side of the counter indicates which camp has the initiative.
4 Game Sequence
A game turn follows the following phases:
- Initiative
- Manoeuvres and Fire of the aircrafts of the player "in-phase"
- 2.1. Manoeuvres
- 2.2. Opportunity Fire of the adverse aircrafts
- 2.3. Fire of the aircrafts that have manoeuvred
- Manoeuvres and Fire of the adverse aircrafts
- 3.1. Manoeuvres
- 3.2. Opportunity fire of the adverse aircrafts
- 3.3. Fire of the aircrafts that have manoeuvred
- Recuperation and Pursuit
- Verification of victory conditions
Generality: After determining which camp has the initiative, the "in-phase" player chooses one of his aircrafts and manoeuvres by spending RP. The adverse player can react with opportunity fire on the aircraft of the in-phase player. At the end of his manoeuvres, the aircraft of the in-phase player can fire at a target. Finally, the player chooses a new aircraft to manoeuvre, to fire and so on. When all the in-phase player's aircrafts have manoeuvred, the adverse player does the same. The latter then becomes the new "in-phase" player.
5 Determining the Initiative
Each player rolls 1d6 and adds the Altitude level (1 to 5) of the highest aircraft in its side. The player who obtains the higher total decides to take the initiative or to give it to his opponent. The player that takes the initiative becomes the "in-phase" player.
In the case of a tie, the player that had the initiative the previous turn chooses to keep it or to give it to his opponent.
6 Piloting
6.1 Manoeuvring
6.1.1 Generality
For each aircraft, calculate its resource points (RP), then manoeuvre.
Calculate RP: each aircraft moves by carrying out manoeuvres for which he pays the cost with the RP calculated at the beginning of the turn. The player chooses the aircraft of his camp that he wishes to move, then rolls 1d6. For a result of 4-5-6, the aircraft receives one additional RP at the beginning of the turn (the speed marker does not move). Then, the calculation of the number of RP is as follows:
RP = Speed of the aircraft at the beginning of the turn +1 (if 4-5-6 on 1d6)
It is not possible to accumulate RP from one turn to another, nor to transfer them from one aircraft to another. An aircraft must spend all of its RP for the turn, including the often unwelcome risk...
Note: The risk (0 or 1) corresponds to the aircraft's wind factor, the concentration of the pilot in flight, the relative irregularity of the motor's performance, the effect of thermal turbulence...
In practice: you can note the number of RP to spend by placing the d6 in the corresponding box of the Flight Board.
6.1.2 Choose the manoeuvres
The cost of a manoeuvre is indicated on the Manoeuvres Table according to the aircraft's Class of Manoeuvrability (letter indicated on the aircraft's counter). Each manoeuvre also indicates:
- the minimum or maximum speed required at the beginning of the turn (and not mid-manoeuvre. Not to be confused with RP),
- the possibility or not to change altitude at the end of the manoeuvre,
- its effect on speed,
- the possibility or not to fire after the manoeuvre.
Effect of an Ace on manoeuvres: an Ace can, if the player wishes, remove his piloting quality for the cost of a manoeuvre noted with a "star".
Example: It costs an Albatros D.III (class B) 3 RP to perform a Side Slip. The same aircraft piloted by an Ace RP-1 spends 4 RP for an Split-S (5 RP -1 for the Ace's piloting quality).
Important:
- manoeuvres in red (Immelmann, Split-S ("renversement"), Spin ("vrille"), Chandelle) may only be performed once per turn. Similarly, the performance of certain manoeuvres requires a speed of less than, greater than, or equal to 4.
- there cannot be two consecutive Side Slip ("Glissades").
- An aircraft that exits the map, outside of its victory conditions, is considered eliminated.
In practice: before a move, you can leave the Altitude marker in its initial position and manoeuvre with the aircraft counter, so that the player can more easily correct a move. Once the move is completed, replace the Altitude marker under the aircraft counter and rotate the speed marker 90 degrees to signal that the aircraft has completed its movement.
Manoeuvres in formation: if two or more aircrafts are adjacent at the beginning of the turn at the same speed and the same altitude, they can - if the player chooses - follow the same exact manoeuvre. The player will only roll the risk die once and apply the result to the two or more aircrafts.
6.2 Changing altitude
An aircraft can only change altitude once per turn. A change in altitude is either inherent to a manoeuvre (see the manoeuvres table, example: a nosedive causes a loss of an altitude level), or voluntarily at the end of any manoeuvre that allows it, noted by a green cross in the "Altitude?" column.
Changing altitude does not cost additional RP except:
- to ascend to the Very High altitude (5),
- to ascend to an altitude when the aircraft is "loaded" (ex: bomber).
The cost of the manoeuvre is then +1 RP, cumulative.
The application of the new altitude is immediate and the altitude marker is modified accordingly.
An aircraft at Very Low altitude (1) that is forced to lower its altitude crashes (regardless of the reason for the change in altitude) and its counter is removed from the game as well as its pilot from the Flight Board.
6.3 Changing speed
Three factors affect the speed of an aircraft:
- The change in altitude chosen at the end of a manoeuvre that allows it ("Altitude?" column),
- The direct effect of a manoeuvre (ex: a Nosedive necessarily causes a loss of 1 altitude),
- The player's decision to apply part or all of the motor's Power Factor (most often 1). This Power factor is applied at the end of its last manoeuvre in addition or subtraction to increase or let up on the gas, allowing him to usually compensate for the manoeuvres performed this turn (ex: the bomber Gotha that has 2 Power Factors can decide to apply just 1 in addition or subtraction).
The new speed of an aircraft is calculated at the end of its manoeuvre phase by adding up the successive losses or gains in speed after the manoeuvres and changes in altitude and possibly using the aircraft's Power Factor.
Example: a Sopwith Camel (class A) strings together a Side Slip (-1), a "Tout droit!" (Straight Ahead) (0) then a "Turn" while descending in altitude (-1 for the turn, +1 for the descent). The effect on the speed at the end of the turn is -1 + 0 +1 - 1 = -1, that he can offset by hitting the gas (+1 Power factor).
Important: the number of RP can be greater than the maximum speed (don't confuse RP with speed).
6.4 Stalling
An aircraft risks "stalling" if its speed is less than or equal to 1 or greater than its maximum (noted on the list of the aircrafts). The following table indicates the effect according to the speed:
| Speed | Effect |
|---|---|
| Less than 1 | Automatic stall |
| Equal to 1 | Control test |
| Greater than maximum speed | Definitive loss of all its Power Factors + Control Test. Obligation to reduce its speed on the next turn to no longer exceed its maximum. Otherwise, the aircraft is eliminated! |
Control test: the player rolls 1d6 and adds the Piloting Quality value of his potential Ace (ex: if RP-1, the value is 1). The Test is successful if the result is 5 or more, the aircraft remains under control.
If the aircrafts fails the Control Test: apply the effects of a stall.
Stalling: the aircraft loses an altitude, remains in the same hexagon facing a random direction (1d6) and gains speed due to a Nosedive (+3). If the altitude falls to 0, the aircraft crashes with its pilot. Otherwise, during the next recuperation phase, a new Control test is attempted.
6.5 Colliding
Two aircrafts in the same hexagon and at the same altitude during or at the end of a movement run the risk of colliding. Each player rolls 1d6 and decides whether or not to subtract from it the Piloting Quality of his Ace, if necessary. If both players get the same result (ex: 4, 4), they collide and the two aircrafts are destroyed in flight.
7 Combat
Generalities: The principle is that of fire to hit (Fire Test) followed by a possible saving roll (Structure test) - that counts for the damage value - followed by a drawing of additional damage markers.
Fire costs no RP and isn't mandatory. An aircraft is in a situation to fire:
- for the "in-phase" player, at the end of his last manoeuvre if it allows him to do so (green cross in the "Fire?" column of the Manoeuvres Table)
- for the adverse player, during the movement of an adverse aircraft (see 7.3 Opportunity Fire).
The player must first aim then take a Fire Test. An aircraft can only fire at one target per turn (particularly to avoid the management of munitions in the game).
7.1 Aim
The following diagram indicates the fire arc for:
- the stationary MG located at the front of the aircraft: in a straight line, only in the direction of the aircraft;
- the flexible MG located at the rear: the two hexagons on each side at the rear. The hexagon immediately at the rear of the aircraft is a dead angle (no fire possible) if the target is below.
The range of all the MG brought on board the aircrafts is 4 hexagons. Calculate the distance by counting the hexagon of the target but not that of the shooter.
A weapon can aim at a target at most one altitude away (i.e. an aircraft at altitude 3 cannot target an aircraft at altitude 1 but can target altitude 2 or 4).
7.2 Fire
To hit, the player takes a Fire Test by rolling 1d6 and applying all the pertinent DRM according to the following table (i.e. the modifiers are cumulative). If the result is greater than or equal to the Hit value of the target, it is hit. There is always the risk of the weapon jamming (see 7.4 Jamming a weapon).
Fire Test Modifiers
| DRM | Condition |
|---|---|
| +1 | If the speed of the target is Low (1-2) |
| -1 | If the speed of the target is High (6+) |
| -1 | If there is a difference in altitude of 1 between the shooter and the target |
| +1 | If the two aircrafts are in the same hexagon |
| -1 | If the fire takes place at long range (4 hexagons) |
| +1 | If the shooter is in the situation to pursue his target (see 9.2) |
| -1 | (option) target in situation of deflection (see 14.2) |
| - x | Subtract the defensive value of the manoeuvre performed by the target, for opportunity fire only |
| + x | Add the Fire Quality of the Ace |
Reminder: DRM are cumulative.
7.3 Opportunity Fire
The adverse aircrafts can react to the manoeuvres of an aircraft of the in-phase player by carrying out opportunity fire, non obligatory, under the following conditions:
- For the aircraft of the in-phase player: it must have performed at least one manoeuvre.
- For the adverse aircraft: The aircraft of the in-phase player must be within the adverse aircraft's fire range for at least one of its MG (front or rear). In addition, it can only carry out one opportunity fire for this turn (only one target) per MG (an aircraft that passes within fire range of the two MGs of a two-seater is a target for the front and rear shooters).
Opportunity fire must be declared at the time, during the movement of the targeted aircraft (there is no "going back" on the movement).
If the aircraft of the in-phase player is in the same hexagon as the adverse aircraft, the latter can fire with his front stationary MG if the aircraft in phase enters exactly facing him. He can fire with the MG of his rear shooter if the in-phase aircraft enters by the fire arc of the rear MG.
Important: the adverse aircraft applies, in addition to the habitual modifiers (DRM), the DRM of the manoeuvre of the targeted aircraft at the moment of the opportunity fire. Example: an aircraft of the in-phase player carries out a Barrel Roll at the moment the adverse aircraft decides to fire. The DRM is -1 in disfavour of the opportunity fire and is added to any other DRMs.
7.4 Jam a weapon
If a natural 6 is rolled for the hit, re-roll 1d6. The weapon that fired is jammed on another natural 6 (the aviator fired too many long bursts, a bullet got stuck...).
8 Suffering Damages
8.1 Structure Test
The player whose aircraft was hit must take a Structure Test by rolling 1d6 and adding any modifiers to the damages of the attacking aircraft (noted on the Aircrafts Table in the Special column). This modifier is generally +1 for aircrafts equipped with 2 machine guns in the front, depicting increased firepower.
Note: Successfully passing this test involves testing the aircraft's capacity for resistance and distinguishes between superficial and substantial damages.
8.2 Application of damages
The result of the Structure Test is kept and compared to the Structure Points (SP) of the aircraft.
If the result is less than the SP, the aircraft successfully passes its Structure Test, the damage is minor and has no impact on the flight.
If the result is greater than or equal to the SP, the aircraft suffers significant damages. The player whose aircraft is hit draws at random a damages marker from the opaque container and immediately applies the effects.
Then:
- If the damaged aircraft is "able to fly" and the final result (possibly modified by the effect of the "Structure" damages marker) is less than double the SP, the counter is turned over to its "damaged" side.
- If the result is equal or more that twice the SP of the aircraft, it is destroyed.
- If the aircraft is already on the "damaged" side, it is destroyed and its counter is removed from the game and its damage markers are returned to the opaque container.
Important: The "Structure" damage markers add 1d3 to the result of the Structure Test, thereby augmenting the chances of destroying certain aircrafts with a few bullets!
In practice: the damage markers are placed on the line that corresponds to the concerned aircraft on the Flight Board except for the "Structure" markers that are returned to the pile.
The effects of the damages markers are cumulative (there can be several markers for one aircraft).
Certain markers specify if the effect applies to the forward position (1) or the rear position (2) (ex: destroyed weapon, wounded aviator). For a one-man aircraft, apply the effect regardless of the mention 1 or 2 on the damages counter.
The following table gives the effects of the damages markers:
| Marker | Effect |
|---|---|
| Wing (Voilure) | All the manoeuvres cost +1 RP except "Tout droit" (the wings are hit). |
| Wing, major | All the manoeuvres cost +1 RP except "Tout droit", the "red" manoeuvres are prohibited. |
| Motor | Definitive loss of all the Power Factors. |
| Weapon damaged | Machine gun damaged, the pilot can attempt to repair it with an unjamming roll during the recuperation phase (a bullet is lodged in the mechanism). |
| Fuel tank | Roll 1d6, on a result of 5 or + the aircraft explodes, otherwise definitive loss of 1 Power Factor. |
| Destroyed Weapon | Machine gun destroyed. |
| Aviator killed! | Aviator killed. If it's the pilot and there are no double controls (see 9.1), the aircraft crashes. |
| Wounded aviator! | The wounded party has a -1 DRM in fire. Moreover, if it's the pilot, all the manoeuvres cost +1 RP except "Tout droit" |
| Structure | + 1d3 damage SP, to be added to the d6 already rolled for the damages (fuselage or tailplane seriously damaged). |
9 Recuperation and Pursuit
This phase allows players to attempt to unjam his weapon, take back control of his aircraft on one hand and verify the situations for pursuit on the other.
9.1 Recuperation
Unjam a weapon: A player can make one attempt per aircraft, per weapon and per turn to put his weapon back into commission (ex: "damaged weapon" marker). Roll 1d6 and add the Piloting Quality of its Ace at the controls (where necessary). The weapon is unjammed on a result of 4 or + (then remove the damage marker).
Take back control: a disengaging aircraft can attempt to regain control by taking a Control Test (see 6.4 Stalling). Similarly, the observer of an aircraft that has double controls (ex: DH.4) can attempt to pilot his aircraft by a Control Test (ex: if his pilot is killed).
9.2 Pursuit
A pursuit situation exists when an aircraft ...
- has in his forward line of fire,
- within range (4 hexagons),
- at a difference in altitude of 0 or 1,
... an adverse aircraft not facing him (see illustration below).
An aircraft can only pursue one adverse aircraft.
The pursuing player chooses on the next turn to move immediately after the pursued aircraft, interrupting if necessary the activation order of his aircrafts, or else normally, thereby breaking off the pursuit situation.
In the same hexagon, aircraft A pursues aircraft B only if A is at an altitude above B. Pursuit of an aircraft provides a +1 DRM to the Fire Test.
As needed, mark the pursued aircraft with a pursuit marker (ex: an unused speed marker) and remove those that are no longer relevant.
In the illustration, aircraft A pursues B or C but not E (outside of the fire arc) or D (facing A). The difference in altitude of A in relation to B, C, D or E must be 1 at the most.
10 Checking Victory Conditions
Each scenario indicates the victory conditions to be verified during this phase. If the maximum number of turns specified in the scenario has not yet been reached, advance the turn marker one space.
11 Special Rules
11.1 Observation balloons
Observation balloons are attached to the ground. They can only rise or descend by one altitude every 3 turns. Their maximum altitude is Low (2). They have only one MG (DRM 0 in the Structure Test) that can shoot 360 degrees around the balloon with a range of 4.
The balloons are considered to have a low speed (+1 DRM in fire).
11.2 DCA
A DCA counter (not present on the counter sheet) has the following characteristics:
- Maximum Fire Altitude: Average (3)
- Effect zone (7 hex.): the 6 hexagons around the DCA counter and that which the DCA counter occupies.
- +1 DRM to the Structure roll
Any enemy aircraft that enters the effect zone of the DCA suffers Fire for each hex it crosses (see 7. Combat) in the same conditions as Opportunity Fire (see 7.3).
11.3 Bombing
To bomb a position, the aircraft must fly over the targeted hexagon (marked by a white dot on the map) at a speed less than or equal to 4 with a "Tout droit!" (Straight Ahead) manoeuvre and have a living aviator observer. The player rolls 1d6 for each aircraft and consults the following table to know if the target is hit:
| Altitude | Result to get (1d6) |
|---|---|
| 4 or more | Ineffective bombing |
| 3 | 6 |
| 2 | 5 or + |
| 1 | 4 or + |
The scenario specifies if the target must be hit one or more times to be considered out of commission.
12 Scenarios
12.1 Preparation
After choosing a scenario:
- Each player puts aside the types of aircrafts necessary for the scenario and chooses the aircraft numbers requested (example: 3 x Camel [#1,2,3] signifies: take the Sopwith counters with Camel numbers 1, 2 and 3).
- Each player places on his Flight Board the speed markers corresponding to the initial speed of his aircrafts, as indicated in the scenario. As needed, place the "Ace" counters on the line corresponding to the aircraft number that the Aces pilot.
- Place the damage markers in an opaque container near the map.
- Place the Turn Counter marker on the first square of the turn counter, on the side of the player with the initiative.
- Each player places his aircrafts on the map with any Altitude markers in the starting zones (A-C/1-4) 3 hexagons deep at the most, as indicated by the scenario (facing is free).
Example: the Entente aircrafts enter in zone C3-C4, the Central Powers aircrafts enter in zone B1-C1.
Start your propellers!
In practice: Look closely at your aircrafts' "special" column on the aircrafts list. You will find there the special abilities or restrictions necessary for a successful flight!
12.2 Return to the fold, January 1918
Number of turns: 8
Aircrafts of the Entente:
- 1 x Spad XIII [#1], Average Altitude (3, marker unnecessary), Speed 6, 1 x Ace RP-1/Fire+1
The allied aircraft enters by zone B1 or C1.
Aircrafts of the Central Powers:
- 1 x Fokker D.VII [#1], High Altitude (4), Speed 5, 1 x Ace RP-1
- 1 x Albatros D.III [#2], Average Altitude (3), Speed 5
The German patrol enters by zone C4, positions itself first and has the initiative on the first turn.
Victory conditions:
- Entente: Destroy at least one German aircraft before turn 6.
- Central Powers: Destroy the Spad before the last turn. Colliding is not an option...
It's a tie if neither of the camps fulfils its objective.
Notes: The Spad returns from a mission, its fuel tank is almost empty. On turn 6, it must take the path of its aerodrome and leave the map by the A2 or A3 edge.
12.3 Forced passage, May 1918
Number of turns: 6
Aircrafts of the Entente:
- 2 x Hanriot HD1 [#1,2], High (4) or Very High (5) Altitude, Speed 6, 1 x Ace RP-1/Fire+1 assigned to one of the Hanriot
- 1 x Airco DH.4 [#3], High Altitude (4), Speed 6
The aircrafts of the Entente arrive by the northern edge in zones B4 and/or C4, and position themselves first and have the initiative.
Aircrafts of the Central Powers:
- 3 x Fokker Dr 1 [#1,2,3], Very High Altitude (5), Speed 5, 1 x Ace Fire +2
The aircrafts of the Central Powers enter by the western edge in zones A3 and/or A4.
Victory conditions:
- Entente: take out the DH4 with his observer / rear gunner alive by A1 or B1 or C1.
- Central Powers: prevent the victory of the Entente and damage or take out at least one Hanriot.
12.4 Voss' last flight, 23 September 1917
Number of turns: 10
Aircrafts of the Entente:
- 4 x SE 5a [#1,2,3,4], Very High Altitude (5), Speed 6, 1 x Ace RP-1 (variation: add 1 x SE 5a)
The aircrafts of the Entente arrive by zone B4. They position themselves first and are in a "V" formation with the Ace at the point.
Aircrafts of the Central Powers:
- 1 x Fokker Dr 1 [#1], High Altitude (4), Speed 6, 1 x Ace RP-1/Fire +2 (Werner Voss)
Voss enters by zone B1 or C1 and has the initiative.
Victory conditions:
- Entente: Take out Voss without losing a single pilot.
- Central Powers: Take out at least 1 British aircraft and escape by the northern edge of the map (zones A4, B4 or C4).
Notes: Lieutenant Werner Voss engages his last combat in this long, 10 minute combat against 6 aircrafts of the 56eme Squadron R.F.C. All the SE 5/a will be hit at least once. The English pilots will say "He was everywhere!". Lt. Rhys-Davids will be credited with taking down the German Ace.
12.5 Fire on the balloons, September 1918
Number of turns: 6
Aircrafts of the Entente:
- 2 x Spad VII [#1,2], Average Altitude (3), Speed 6, 1 x Ace RP-1/Fire+1
The aircrafts of the Entente arrive by zone B4 and have the initiative.
Aircrafts of the Central Powers:
- 3 x Balloons, Low Altitude (2)
- 2 x AEG C.IV [#1,2], Average Altitude (3), Speed 5, 1 x Ace RP-1/Fire+1
- 1 x Albatross D.III [#3], Average Altitude (3), Speed 5
The German camp positions itself first. The balloons are positioned 3 hexagons from the exterior edges of zones A2, B1, C2 and at least 3 hexagons apart from each other. The aircrafts of the Central Powers form a reconnaissance patrol that enters by the southern edge in zones A1 and/or B1.
Victory conditions:
- Entente: Take out all the balloons and escape by zones A4, B4 or C4 with at least 1 aircraft (damaged or not).
- Central Powers: Prevent the victory of the Entente.
12.6 The passage of the Geese, July 1917
Number of turns: 8
Aircrafts of the Entente:
- 5 x SE5a [#1,2,3,4,5], Altitude Very High (5), Speed 5, 1 x Ace RP-1 and 1 x Ace RP-1/Fire+2
Aircrafts of the Central Powers:
- 2 x Gotha G.IV [#1,2], Average Altitude (3), Speed 4
- 2 x Albatros D.III [#3,4], Average Altitude (3), Speed 4;
- 1 x Fokker Dr1 [#5], High Altitude (4), Speed 4, 1 x Ace RP-1/Fire+1
The aircrafts of the Entente arrive by zones A1 and/or B1 and have the initiative. The squadron arrives in a V formation with an Ace at the head.
The aircrafts of the Central Powers arrive by zones A4 and/or B4 and/or C4 and position themselves first. The escort is positioned at a distance of fewer than 4 hexagons around the Gotha bombers (they are "loaded" see 6.2).
Victory conditions:
- Entente: Prevent the German victory conditions.
- Central Powers: The two Gotha must bomb the set-up hexagon, marked by a white dot, in zone B2 then leave the map - damaged or not - by zones A3-A4 and/or B4 and/or C3-4. The target is considered destroyed if it is hit once.
Notes: Over the English coasts, a squadron of British SE 5a enter in interception of several Gotha bombers on a mission to bomb a R.F.C. training camp.
12.7 New Raid, October 1917
Number of turns: 9
Aircrafts of the Entente:
- 2 x Sopwith Camel F1, Altitude Very High (5), Speed 5, 1 x Ace RP-1 and 1 x Ace RP-1/Fire+2
Aircrafts of the Central Powers:
- 3 x Roland C.II [#1,2,3], High Altitude (4), Speed 4, 1 x Ace Fire+1
- 1 x Albatros D.III [#4], High Altitude (4), Speed 4, 1 x Ace RP-1/Fire+2
The aircrafts of the Entente enter by zones A3 and/or A4 and have the initiative.
The aircrafts of the Central Powers enter by the eastern edge in zones C1 and/or C2 and position themselves first.
Victory Conditions:
- Entente: Prevent Germany victory and destroy at least one Roland C.II.
- Central Powers: Bomb the hexagons of the big city, marked by a white dot, in zone A4-B4. The target is considered destroyed with 3 hits on at least 3 different hexagons. The Roland C.II are "loaded" and can make 2 bombardment "passes" over their target. The aircrafts of the Central Powers must leave by zones C1-2-3-4.
13 Optional Rules
13.1 Aircraft by aircraft initiative
The initiative is not longer calculated globally by side, but aircraft by aircraft (regardless of the side). The order of the initiative becomes: Speed of the aircraft + Altitude Level (1 to 5). In the case of a tie, decide by manoeuvrability class (A > B > C) or else by decreasing order of the results of the 1d6 roll.
Managing the initiative at the level of each aircraft tends to slow the game down a bit but adds subtlety of reaction and tactics.
13.2 Deflection
Fire on a target facing three-quarters ahead in relation to the shooter has a penalty of -1 on the Fire Test. Note the position of the shooter in relation to his target at the time of the fire (opportunity or not).
14 Game Variation: Alternating Manoeuvres
This variation offers great interaction between the players and gives a new dynamic to the rhythm of the game. It involves alternating the activation of the aircrafts, one by one, for each side. Thus the player who won the initiative moves an aircraft, possibly gets shot at (opportunity fire), then fires. The other player now chooses one of his aircrafts and follows the same sequence (manoeuvre - opportunity fire adverse - fire). The in-phase player chooses a new aircraft and so on.
So as to not overburden the game unnecessarily, we advise against using the optional rule of aircraft by aircraft initiative with this variation.
Detailed Example of Turns
On the first turn, a French Spad XIII flying at Very High altitude (5) returns from a patrol and has located a German reconnaissance aircraft, a Roland C-2, one level below (4). The French player had the initiative on the first turn and just made a first pass with no result. He plans to return to the attack...
Turn 2
Initiative! The French player rolls 1d6, gets 2 and adds the value of his altitude (5) for a total of 7. The German gets a 3 on the die, adds his altitude (4) for a total of 7. There is a tie and the initiative stays with the player who had it the previous turn, the French, who will therefore play first (he is "in-phase").
Manoeuvres for the in-phase player. The Spad has an initial speed of 4. Its player rolls 1d6 to find out if it benefits from an additional resource point. He gets a 4 and obtains it. His resource points (RP) for this turn are thus 5. The manoeuvre class of the Spad is "A" and so he uses column A on the manoeuvres table where the cost of each manoeuvre in RP is found.
The French player decides to make a tight turn in the direction of the Roland and charge his target. He successively performs the manoeuvres: Tout Droit! (1 RP), Tight Turn (2 RP, authorised since its speed is 4), Tous Droit! twice (2x1 RP).
Opportunity fire of the adverse player. The rear machine gunner of the Roland C-2 is entitled to opportunity fire during his opponent's turn once the Spad has performed at least one manoeuvre and is within fire range (4 hex and at most one altitude of difference). The Roland decides to fire when the Spad is closest: at the end of his last manoeuvre (a Tout Droit !). The Spad is at a total range of 3 hex. The German player rolls 1d6, gets a 4, consults the fire modifiers table and applies -1 for the difference in altitude for a total of 3. This result is less than the hit value of the Spad (5). The latter is too agile and small and the opportunity fire fails.
The French player now applies the effects of his manoeuvres on his speed (-2 for the tight turn) for which he can compensate in part by applying his Power factor (+1) at the end of all his manoeuvres. His new speed is 3 (4 - 2 + 1). He reports this speed on the Flight Board.
Fire of the in-phase player. The Spad can now engage the Roland. The French player gets a 5 on the die with a -1 DRM for the difference in altitude, the result (4) is greater than or equal to the Roland's hit value (4), the target is hit!
The French player notes the damages of his fire by having the enemy aircraft take a Structure Test: the German player rolls 1d6 and gets a 3 to which is added a DRM of +1 from the MG of the Spad (2 front machine guns). The result (3+1) is greater than or equal to the Roland's structure value (4): the damages are not superficial! The French player draws at random a damages marker whose effect he immediately applies. He draws Voilure! (substantial damage to the wings) that will oblige the German aircraft to pay +1 RP for all manoeuvres from now on (except Tout Droit!). The Roland counter is now turned over to its "damaged" side. The Voilure! Marker is placed on the Flight Board.
The diagram illustrates the progression of the French movement, the German opportunity fire and the French fire.
Manoeuvre of the German player. It's the German player's turn to manoeuvre. Much more awkward (manoeuvrability class C) and much slower than his adversary (maximum speed 5), the Roland C-2 moves at a speed of 5 and gets a 5 on the die, for a welcome 6 RP given his damaged aerofoils.
During its movement, it is in no danger of opportunity fire from the Spad because its two front machine guns can only fire straight ahead. It makes a tight turn to the right for a total cost of 5 (4+1 due to the damages marker on the aerofoils) then straight ahead (1). The total loss of speed is -1 (-2 for the tight turn, offset by the +1 of the Power factor) and the new speed of the German aircraft is 4.
Fire of the German player. The German player engages the Spad with his MG: he gets a 6 on the die and applies the -1 DRM for the difference in altitude for a final result of 5, the Spad is hit (its hit value is 5). However, a natural 6 on the hit means taking the risk of having the MG jammed on a 6 obtained with a new die roll. Luckily, this is not the case. The French aircraft takes its Structure Test and gets a 3 on the die (without DRM, the Roland only has one machine gunner at the rear). The total result (3) is less than the hit value (5) of the Spad, the bullets rip through the fabric of the tailplane but without other effects (the counter remains on its "en l'etat" - upfront - side).
The following diagram illustrates these last moments.
Recuperation and Pursuit. No action this turn: no jammed weapons. The Spad is in pursuit of the Roland.
Verification of victory conditions. The turn marker is moved ahead.
Turn 3
Initiative! The French player gets a 3 on the die, his altitude remains at 5, the initiative for the player is therefore 8. The German gets a 5, his altitude is 4 and the initiative returns to him (9), which does not change the situation as the Spad is in pursuit of the Roland.
Manoeuvres for the in-phase player (German). The German player rolls 1d6, gets a 5 that awards him a bonus of +1 to his resource points (RP) for a total of 5 (4 speed points + 1). His aerofoil damages and the high speed potential of the Spad XIII (maximum speed 8) drive him to attempt to escape by diving and turning his back on the Frenchman, hoping to open an angle of fire with his rear machine gunner if the SPAD decides to chase him. He goes from Tout Droit!, to Virage (Turn) by descending in altitude (the altitude marker is removed since an altitude of 3 does not require a marker) then Tout Droit!.
The Roland's new speed is 5: lower altitude (+1 in speed) at the end of his turn (-1 in speed) while hitting the gas (+1 for Power factor).
Opportunity Fire of the out of phase player (French). No opportunity fire for the French because the Roland never enters its line of fire during its manoeuvres.
Fire of the German player. The Roland is below and behind the Spad but he cannot hit it for the difference in altitude is two (the Roland went from High to Average altitude).
Manoeuvre for the French player. It is the French player's turn to hold onto its prey. He doesn't obtain the additional resource point (2 on the die) and has 4 RP (his speed at the beginning of the turn). The pilot slides to the right (2 RP) then reduces the gas and dives into a tailspin (2 RP, a type of manoeuvre that can only be performed once per turn, authorised since the speed is 4), allowing him to come out facing as he wishes... again going after the Roland, an altitude level lower.
The new speed of the Spad remains at 4 (4 of the initial speed - 1 for the Side Slip + 2 for the Spin - 1 for the Power factor) and the altitude marker is turned over to its "4" side.
Opportunity fire of the adverse player (German). The Roland's machine gunner seizes the opportunity to fire on the Spad who merges behind him. The player obtains a 5 on the die, modified by -1 for the difference in altitude and -3 for the tailspin manoeuvre performed by the Spad for a total of 1. The French aircraft is not worried.
Fire of the French aircraft. The last manoeuvre of the Spad (Spin) prevents him from firing, as indicated on the manoeuvres table.
Recuperation and Pursuit. It's the end of the turn 3 and the situation is as follows: The quality of the Spad XIII leaves little hope for the Roland C-2 but it's not over yet ... especially since a Fokker Dr.1 enters the scene.