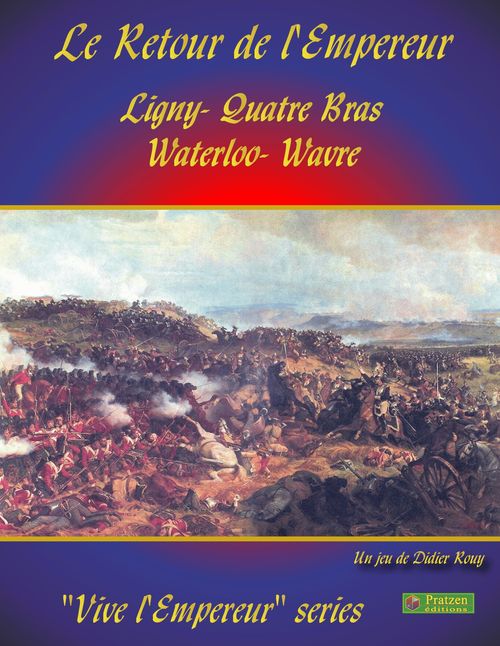
Le Retour de l'Empereur
Le Retour de l'Empereur Rulebook
Table of Contents
Table of Contents
PART ONE: VIVE L'EMPEREUR! STANDARD RULES (Version 3.2, October 2011)
Foreword
"Vive l'Empereur!" is a series of simulation games using a standard rules system and a set of exclusive rules specific to each battle. These particular rules include an historical commentary and the victory conditions for each scenario.
The aim of this system is to refight at the regimental scale the numerous battles fought during the Napoleonic Era in Europe, between 1805 and 1815. It uses a map on which the players move counters representing the combat units involved in these battles. The movement and fighting of these units is controlled by various charts and some die rolls. The game is performed by the succession of game turns divided into player turns and phases. Each player performs his whole player turn before the other player performs his own.
Games in the series: Auerstaedt 1806, Hanau 1813, Eckmuhl 1809, Friedland 1807, Austerlitz 1805, Leipzig 1813, and Le Retour de l'Empereur (four games of the 1815 campaign: Ligny, Quatre Bras, Wavre and Waterloo).
This version 3.2 implements many comments in grey including the version 3.1 and more recent precisions.
Contents of the Standard Rules
Standard Game: I Introduction; II Game Sequence; III Game Components; IV Combat Formations (IV.0 Formations, IV.A Infantry, IV.B Cavalry, IV.C Artillery); V Stacking; VI Movement and Terrain Effects; VII Fire (VII.1 Firepower, VII.2 Range, VII.3 Fire, VII.4 Offensive/Defensive Fire, VII.5 Opportunity Fire, VII.6 Line of Sight for Artillery and Skirmishers, VII.7 Blocking Terrains, VII.8 Losses, VII.9 Morale Check, VII.10 Fire Against a Square); VIII Melee (VIII.1 General Case, VIII.2 Stacks and Melee, VIII.3 Melee Value, VIII.4 Melee Strength, VIII.5 Attack Hexes, VIII.6 Flank/Rear Attack, VIII.7 Melee Prohibitions, VIII.8 Melee Combat, VIII.9 Disorganization and Retreat, VIII.10 Advance After Combat); IX Cavalry Charges; X Morale; XI Rally; XII Army Morale; XIII Reinforcements; XIV Leaders; XV Lines of Communication.
Advanced Rules: XVI Optional Rules; XVII Command and Control; XVIII Strategical Deployment; XIX Time Limits and Penalties; XX Interactive Game.
STANDARD GAME
I - Introduction
Each game can be played in several ways, either using only the standard rules for a simpler game, or using both the standard and advanced rules. In the latter case, the advanced rule prevails when they contradict the standard rules. The players can agree to use none, some or all advanced rules.
There is a third set of rules, known as specific rules. They apply to one game, and each game of the series has its own set of specific rules. The standard and advanced rules apply to all games of the series.
Some rule paragraphs may seem at first to be in the wrong chapter, or incomplete. But after you have read the whole rulebook, you will understand these paragraphs, which are summaries of rules explained farther in the rulebook. We urge you to read the rulebook at least twice, to fully understand the rules.
Approximate scale
- 1 counter = 1 infantry or cavalry regiment or 2 artillery batteries.
- 1 hexagon = about 250 meters.
- 1 game turn = 30 minutes.
- 1 loss step = 300 men or one artillery battery (about 6 guns).
II - Game Sequence
Each phase must be over before the following phase may begin. The other player can participate only during the defensive fire phase or sometimes to form square, to countercharge or to perform opportunity fire.
At the end of the two player turns, the marker on the turn record is moved to the next box on the turn track.
"The Art of War is a simple art, and a performing art. There is nothing nebulous; everything is dictated by common sense, there is no ideology." -- Napoleon
- First player turn.
- Cavalry charges.
- Regular movement.
- Second player defensive fire.
- Offensive fire.
- Melee phase.
- Rally phase.
- Second player turn. Same sequence as above, with the second player replacing the first player and vice versa.
Note: During his turn, the player is called attacker, and his opponent is called the defender whatever the tactical situation.
III - Game Components
III.1 - The combat units (Fig. 1)
They represent the various fighting formations, as opposed to the leader counters and game markers.
A combat unit counter shows: identification (regiment number or abbreviation), division, corps number, fire value, unit type, unit number, nation, melee value, movement allowance, morale and steps.
Each counter has two sides, the exposed side shows the current unit's formation:
- line or column for infantry and cavalry.
- limbered or unlimbered for artillery.
If in line or unlimbered, the unit is read "horizontally"; if in column or limbered, the unit is read "vertically".
Moreover, various symbols and values are printed on them:
- Unit Type: infantry (in line / in column); cavalry (in "Bataille" (line) / in column); artillery (unlimbered / limbered).
- Identification: regiment number or abbreviation. The identification is completed by a colored number or letter (corps, army, etc). Additionally, each counter has a unit number, to help the players find the unit on the loss sheet. For example, the 024 unit will appear on the 24th line of the loss sheet.
- Fire Range: 5 to 7 hexes for artillery, 2 for light infantry only in skirmish formation. Always 1 for infantry when no number is printed. Cavalry cannot fight by fire. As an example see IV-6 Tirailleurs.
- Firepower: this value depends on the unit type. Cavalry has none.
- Melee value: this value represents the ability of each unit to fight at close range. It is multiplied by the number of steps to determine the melee strength.
- Number of Steps: each step represents about 300 men or 6 guns. The number of steps represents the initial strength of the unit.
- Movement Allowance: number of movement points (MP for short) a unit can use every time it moves. The various terrain types have different movement costs. See the terrain effect chart.
- Morale: this value represents the staying power of a unit before breaking. At the start of the game, this value generally ranges from 6 to 11.
The melee and fire values can vary depending on the circumstances and the terrain. Round up each half. For example 5/2 = 2 1/2, rounded to 3.
III.2 - Leader counters
A leader counter represents not only the leader himself, but also his staff, his aides, and all his retinue.
The counter shows the leader's name and three numerical values. These values are:
- the combat bonus (left);
- the morale bonus (middle);
- the movement allowance (right).
The first two values are die roll modifiers, the last one is a standard movement allowance.
On the reverse side, there are two other values, initiative on the top and obedience on the bottom. The "initiative" allows the leader to act on his own, without orders, while obedience is checked when he receives a new order (advanced rules, see XVII).
III.3 - Markers
You can find also two types of markers:
- Square markers: placed back of an infantry unit in square formation. Use the line side of the infantry counter, so the two counters will really represent a square. See an example at IV.4.
- Numeric markers: placed across disorganized units. The number is the game turn during which the unit was disorganized. They are also used to indicate the presence of voltigeurs in the advanced rules.
Note: These markers can also be used to show the number of step losses (see option VII.8).
III.4 - Other Counters
- Dummies: decoys are used to lure the bad guy.
- Reserve: reserve counters are used to hide units and keep them behind the front line.
Reserve and random events are not available in every battle. Some battles may also have additional counters as explained in the special rules.
III.5 - Maps
The maps represent the battlefield. They are divided in hexagons (called "hexes" for short), and counters are placed on them.
Each hex contains a terrain type. Some terrain elements, such as ridges and streams also exist between hexes, along hexsides. The summary of terrain types used for a particular battle is given in the play aids.
For clarity's sake, there are two categories of waterways: "rivers", that is the rivers and the major streams, which cannot be crossed; and "streams", that is the brooks and the minor streams, which can be crossed with some restrictions.
The terrain type used is the one covering the majority of the hex. For example a single tree in a clear hex is played like a clear hex.
III.6 - Play Aids
There are several player aids at the end of the special rules, they can be freely copied.
- Each player has an Army sheet, to keep track of the losses. Losses are recorded by checking boxes, starting with the rightmost. A unit's remaining strength is the number of unchecked boxes.
- A sheet with the Terrain Effects Chart. These effects apply to the movement, the formation, the fire and the melee.
- A sheet with the Fire Table, the Melee Table and the Formations Table.
IV - Combat Formations
Each unit type can enter a number of formations, some of them voluntarily, other due to external factors like the terrain or the combat results (disorganized).
Formations are the heart of the game system, they determine each unit's movement and combat capabilities. The game was designed so the players will easily and instantly see a unit's current formation.
"The Art of War consists in deploying his troops so they are everywhere at the same time. Deploying the troops is the real Art of War." -- Napoleon
IV.0 - Formations
Each unit can have only one combat formation at a time, but it can change formation during the course of a game.
- Infantry:
- line (best when firing)
- column (best when meleeing)
- square (when facing cavalry)
- general order (mandatory in a town, forest, brush and castle)
- disorganized (after a failed morale check, or as the result of combat)
- skirmishers: only for light infantry, that is infantry with a printed range 2.
- Artillery:
- limbered (to move)
- unlimbered (to fire)
- disorganized
- Cavalry:
- column (usual formation for movement)
- line ("en bataille" during a charge)
- general order (town, forest, brush or castle)
- disorganized
The formation greatly influences the exposed side and the facing of the counter. The front of a unit is marked with a colored line. In most cases, a counter always has its small sides along the opposite hexsides, no matter which formation it is currently in.
IV.A - Infantry
Here is the complete list of formations the infantry can use, and their effects.
IV.1) Infantry in Line Formation
- The exposed side of the counter is the side with a line unit symbol on the long side.
- This unit symbol faces an hex junction, the small sides of the counters are along hexsides.
- Use the reduced movement allowance printed on this side.
- Can stack with artillery, limbered or unlimbered, provided the units have at least two common front hexes.
- Fire range is 1 hex (including light infantry).
- When attacking or defending through the front, use the printed melee value. It is reduced by half when attacked from a flank or rear hex.
Note: Flank and rear attacks are described in VIII-6 (with the notable exceptions of mixed order and protected flank).
(Figure: a unit in line has a front of two hexes, two flank hexes and two rear hexes.)
IV.2) Infantry in Column Formation
- The exposed side of the counter is the side with a unit symbol on the short side.
- When defending, the unit has a three-hex front.
- When attacking by fire or by melee, the unit has a one-hex front. The other two hexes are front hexes, but they cannot be used for the attacks, either by fire or melee.
- Movement can be executed through the hex facing the unit symbol only.
- Changing facing costs 1 PM per 60 degrees, except for the first change, before or after it crosses the hexside.
- Use the full movement allowance printed on this side.
- The melee value is modified by +1 when attacking, but not when defending.
- Can stack with artillery, limbered or unlimbered, provided the units have at least two common front hexes.
- The melee value is reduced by half (round up) when attacked from a flank or rear hex.
Note: Flank and rear attacks are described in VIII-6 (with the notable exceptions of mixed order and protected flank).
IV.3) Infantry in General Order
- This formation is mandatory in a town, castle, brush or wood hex.
- Use the column side of the counter.
- The six adjacent hexes are front hexes.
- The firepower is 1.
- Use the printed melee value for attack and defense.
- Town and castle only: morale checks called by combat results (fire and melee) are ignored.
- Can stack with limbered artillery in a town or forest hex (on a road in this case).
Exceptions: an infantry unit does not adopt general order if it is disorganized (see IV.5).
IV.4) Infantry in Square Formation
- This formation is allowed only in clear, farm or difficult terrain (where there is no mandatory formation).
- Use the Line side of the counter, and place a square marker along the back of the unit counter.
- The six adjacent hexes are front hexes (no flank, no rear).
- The movement allowance is 1 MP.
- Use the printed melee value against attacking cavalry.
- Halve the printed melee value when defending against infantry. If a square is attacked both by infantry and cavalry, the defending infantry is halved and the cavalry melee value is reduced to 1.
- A square cannot initiate melee.
- The firepower is the line firepower modified by -2, but with a minimum of 1.
- The morale is modified by +2 against cavalry.
- The square may include an unlimbered or limbered artillery unit in mixed order (see IX.6).
- Other infantry or artillery units may move through a square while in a different formation, but they cannot stop there except if the join the square.
- As opposed to other games, cavalry cannot enter an hex where an enemy infantry square is.
IV.5) Disorganized Infantry
This is a formation for game purposes, but actually it is the state the unit is in after it loses cohesion, and until it recovers its cohesion after some time.
- Use the column side of the counter.
- Place a numeric marker across the unit counter. Use the current game turn number.
- The six adjacent hexes are front hexes (no flank, no rear).
- Upon its disorganization, the unit immediately retreats 2 hexes (see VIII.9).
- A disorganized unit cannot attack in melee, but it can defend.
- Use the column movement allowance, but the movement can only be executed towards the lines of communication (see XV). Disorganized units are allowed but not required to move in the movement phase, but may be required in the rally phase.
- The firepower and the melee value are 1.
- Use the column morale with a -2 modifier.
- If a disorganized unit suffers a second disorganization, it is eliminated for good.
- Cannot stack with a good order unit (that is, any other formation).
IV.6) Tirailleurs
Note: this rule has been openly criticized because it allows the deployment of whole units. It has therefore been modified by allowing almost every unit to deploy a light company of voltigeurs, but the light infantry battalions can not totally deploy this way. As the rule is different, it was placed in the "optional rules" section. We encourage the players to use it after they feel comfortable with the standard rules.
Only light infantry can use this formation. Light infantry are infantry units with a printed range 2.
- This formation is allowed only in clear, farm or difficult terrain (where there is no mandatory formation) and sometimes in marshes according to the special rules.
- Use the "line" side of the counter, and place it on an hexside, to cover two hexes.
Note: when a unit enters or leaves the tirailleurs formation, the counter is moved one half hex. This operation is not a movement. It is just a change of formation. No opportunity fire or countercharge can take place except if the unit makes several formation changes to make a lateral move.
- There are three front hexes, two flank hexes and three rear hexes.
- Fire: at 1 hex range with the full firepower printed on the line side; at 2 hex range with a firepower modified by -2 with a minimum of 1.
- Offensive and defensive fire range: 2 hexes.
- Opportunity fire range: 1 hex.
- Light infantry (with a fire range 2) can fire at this range only in tirailleurs formation. In any other formation, it behaves like a normal infantry with a range 1.
- Even if just one "half-unit" (that is, what is on one of the two hexes) is disorganized because of the result of a combat that took place in one hex only, or for any other reason, the whole unit is disorganized.
- Melee against tirailleurs is resolved as if the unit was defending both hexes.
- The melee value is reduced by half (round up) in every circumstance.
Note: Flank and rear attacks are described in VIII.6 (with the notable exception of protected flank).
- Every fire attack against a unit in tirailleurs is made with a -1 to the dice.
- Everything else is similar to the line formation (see IV.1).
IV.B - Cavalry
Here is the complete list of formations the cavalry can use, and their effects.
IV.7) Cavalry in Line ("en bataille")
- Facing is similar to infantry in line formation.
- Every charge or countercharge can be performed only in line. The formation change does not cost any MP. The unit uses this formation after the countercharge morale check is resolved or at the beginning of the charge phase. The line formation is never allowed when using normal movement.
- Reverts to column formation or general order formation when the charge combat is resolved.
- Some terrain is forbidden: crossing a river, charging into a castle, gully or marsh.
- The melee value is reduced to 1 when attacking a square, brush, a town, a wood, or if the cavalry attacks from these terrain types.
- The melee value is halved when countercharged from a rear/flank hex.
Note: Flank and rear attacks are described in VIII.6 (with the notable exception of protected flank).
IV.8) Cavalry in Column
- Facing is similar to column infantry.
- This formation is mandatory in the two following cases:
- the unit is not moving
- the unit uses normal movement.
- Changing facing costs 1 PM per 60 degrees, except for the first change, before or after it crosses the hexside.
- The melee value is halved (round up) when attacked from a rear/flank hex.
Note: Flank and rear attacks are described in VIII.6 (with the notable exception of protected flank).
IV.9) Cavalry in General Order
- Mandatory in town, wood, brush and castle.
- Use the column side of the counter.
- The six adjacent hexes are front hexes (not flank, no rear).
- The melee value is 1 when the cavalry defends (no possible attack in general order).
- No morale check due to fire or melee while in a town or castle hex.
- This formation is mandatory in the following cases:
- when the unit occupies a town, brush, castle or wood hex and is not moving
- during normal movement as soon as the unit enters one of these terrain types, and until it leaves these terrain types.
Exceptions:
- if the cavalry is disorganized.
- if the cavalry charges or countercharges: it uses the line formation for the duration of the charge, with a melee value of 1 (see IX.1).
IV.10) Disorganized Cavalry
This is a formation for game purposes, but actually it is the state the unit is in after it loses cohesion, and until the unit recovers.
- Use the column side of the counter.
- Place a numeric marker across the unit counter. Use the current game turn number.
- The six adjacent hexes are front hexes (no flank, no rear).
- Upon disorganization, the unit immediately retreats 2 hexes (see VIII.9).
- Cannot charge.
- Use the column movement allowance, but movement is allowed only toward the lines of communication (see XV).
- The melee value is 1.
- Use the column morale with a -2 modifier.
- If a disorganized unit suffers a second disorganization, it is eliminated for good (exception when the army is demoralized, see XII).
- Cannot stack with a good order unit (that is, any other formation).
A cavalry unit can voluntarily adopt a disorganized state (see VI.5). The decision is immediate, the cost is 0 MP. Special: in this case, only, the marker is the previous turn's number.
IV.C - Artillery
Here is the complete list of formations the artillery can use, and their effects.
IV.11) Limbered Artillery
- Mandatory in town. In this case it has a front, flank and rear like in clear terrain.
- Movement not allowed in forest, brush, or marsh, except through a road.
- Changing facing costs 1 MP per 60 degrees, except for the first change, before or after it crosses the hexside.
- Facing is similar to column infantry.
- Fire is not allowed while limbered.
- The melee value is the printed value when defending, but attacking is not allowed.
- No morale check due to fire or melee while in a town hex.
IV.12) Unlimbered Artillery
-
This formation is allowed only in clear, farm or difficult terrain (where there is no mandatory formation).
-
Facing is similar to infantry in line formation.
-
Same thing for the front hexes.
-
Movement 0 MP unless the unit changes formation. If the artillery changes from unlimbered to limbered, the formation change cost is 2 MPs, and is subtracted from the limbered movement allowance (see VI.3). If an artillery has 5 MPs while limbered, it can change from unlimbered to limbered, and then executes a 3 MP movement. The same applies if the artillery becomes disorganized, except that the movement cost is 0 MP.
-
Can pivot 60 degrees per turn for free.
-
Range dependant fire value: The fire value decreases with the distance of the target. Subtract the number of hexes between the firing artillery and the target, with a final minimum of 1 whatever the distance up to the maximum range. For example, if the target is three hexes away (2 empty hexes between them), then the fire value will be 6-2=4. The "4" column will be used on the fire table (if no other modifier applies). A unit 7 hexes away (maximum range of some units) will be attacked at 6-6=0, therefore final value of 1.
Exception: Two batteries with one loss each combine their fire at long range. According to the rule they have a final value of 1+1 =2. In this case the final value is 1, to avoid two half batteries firing better than one full battery.
The fire value can be decreased by terrain and if the battery takes losses (see VII.1).
-
Opportunity fire range is 2 hexes only, no matter what is the printed range.
-
Melee: attack is not allowed, but the artillery can defend with the normal rules.
-
Rear attack: see VIII.6, and especially the exception that applies to unlimbered artilleries.
IV.13) Disorganized Artillery
- Place a numeric marker across the unit counter. Use the current game turn number.
- Upon its disorganization, the unit immediately retreats 2 hexes (see VIII.9) except if optional rule XVI.3 is in effect.
- Use the printed morale with a -2 modifier.
- Use the limbered movement allowance, but movement is allowed only toward the lines of communication (see XV).
- Cannot attack with melee or fire.
- Automatically eliminated if attacked in melee except if stacked with a disorganized infantry. In that case it is ignored for the melee but suffers the result of the infantry.
- If a disorganized unit suffers a second disorganization, it is eliminated for good.
- Cannot stack with a good order unit (that is, any other formation).
Historical Note: the artillery units' density was lower than the cavalry's and the infantry's. Therefore, we suggest that you apply optional rule XVI.2.
V - Stacking
Several units can occupy the same hex, but they must obey some conditions. A player cannot examine the enemy stacks, only the upper unit.
V.1 - Stacking Limits
A single hex can contain:
- either up to 10 steps of artillery and infantry
- or up to 7 steps of cavalry.
These limits are in effect at all instances, including during movement. If a unit must retreat into an hex where overstacking would occur, the whole stack is disorganized. If the stack is already disorganized, it executes an additional one or two hexes retreat, see VIII.9.
V.2 - Stacking Prohibitions
If a cavalry unit must enter an hex occupied by infantry or artillery, or vice versa (for example during a retreat move), the two stacks are immediately disorganized, and both retreat 2 hexes. If a stack is already disorganized, it executes an additional 1 or 2 hex retreat (see VIII.9). At the end of the movement, the prohibition against stacking cavalry with other types of units must be adhered to, and this can cause the player to execute as many additional retreats as necessary.
V.3 - Stacking & Combat
When several units are stacked:
- Only the top unit can fire.
- A stack can attack only one hex, it cannot split to attack several hexes.
- All the units in the stack take part in melee, attack and defense alike.
Exceptions:
- If a unit's melee value is zero, it does not take part in melee, but it suffers the combat results D, D1 and E. If a melee requires a morale test, the first unit with a positive melee value of the stack checks.
- An unlimbered artillery attacked through the rear does not fight (see the end of VIII.6).
V.4 - Stacking & Losses
The step losses are applied to the top unit.
Exceptions:
- During melee, if the top unit has a zero melee value, the losses are applied to the unit underneath.
- If the top unit is completely eliminated and if the step loss result is not totally fulfilled, the remaining losses are applied to the next combat unit, and so on. Then this next unit will execute the morale check, if any is required.
- In the rare case where the top unit is artillery and the fire comes from the flank or the rear, the guns are ignored and the infantry under the artillery takes the losses. (Exception, protected flank as explained in VIII-6, in that case the artillery takes the losses and checks for morale if needed).
V.5 - Stacking & Morale Checks
If a morale check is required, the unit stacked on top executes this check. If it succeeds, the whole stack holds. If the test fails, the unit underneath executes a morale check modified by -2, and so on.
Note: the concept "stacked on top, therefore in front" is just an easy way to explain why only the top unit checks morale and fires. If the stack is fired upon from a rear hex, the losses are still applied to the top unit.
V.6 - Stacking & Opportunity Fire
If a unit leaves the hex and exits to the rear, leaving other units in the hex, it is still subject to opportunity fire, no matter where this fire comes from. The static top unit does not screen the moving unit, the triggering event is simply exiting the hex (see VII.5). If this fire triggers a morale test, the entire stack performs it because the hex is the target.
V.7 - Stacking & Facing
At the end of the movement phase, units stacked together and with the same formation must have a common facing.
If several units are stacked together but with different formations, they can have different facings, but they must share at least two front hexes. This is called "mixed order". Front hexes and flank/rear hexes are determined with respect to the whole stack, not individual units. If an adjacent hex is a front hex for one unit, it is a front hex for all the units in the stack (the first unit "covers" the other units).
Example: mixed order. The top infantry is in line to fire and the bottom infantry is in column to get its melee value modified by +1. Both units have two front hexes which are also front hexes for the other unit. Because of mixed order, the infantry in line formation has three front hexes if attacked, and the column has two possible front hexes for fire and melee, the two hexes that are also front hexes for the line.
Exception:
- An infantry in square formation cannot stack with an infantry in any other formation.
- Skirmishers can stack only with other skirmishers.
If two units end any phase stacked together but not with compatible facings, both execute a morale check. This can happen if a movement has been interrupted by a countercharge, or if a unit retreats before combat. If both morale checks succeed, the player must change the facing of one unit to obey the rule.
Note: this case is checked only at the end of a phase.
V.8 - Disorganized Unit & Other Formation
A disorganized unit cannot be stacked with other formations, except during a retreat, or a voluntary move toward its line of communication, and in this case, the good order unit checks morale. Nevertheless, the disorganized unit cannot stay in the hex, and it continues the retreat until it enters an available empty hex. A unit in good order can move through a disorganized unit, but it cannot stop there. Order and disorder cannot coexist on the same hex at the end of the movement phase. Exception, optional rule on artillery retreat.
V.9 - Stacking: who is up, who is down
The player can change the order of his units in a stack during his movement or charge phase only (exception, artillery moving down upon infantry square formation, see IX.6). These changes are free.
VI - Movement and Terrain Effects
During his movement phase, a player can move all, some or none of his units, spending movement points (MPs) according to formation and terrain (see the Terrain Effect Table, in the play aids).
"The Art of War consists in the following: with a less numerous army, you concentrate more troops than your enemy on the point where you attack, or on the point where you are attacked. But this art cannot be learned in the books, or acquired as a habit, it is a way of acting which is the proper genius for war." -- Napoleon
VI.1 - General Case
Movement is not mandatory. Unused MPs cannot be transferred to other units, nor accumulated to be used in a subsequent turn. Each turn a unit can use its full movement allowance.
Exception: if a cavalry executed or attempted to execute a charge during the charge phase prior to the regular movement phase, it cannot execute a voluntary movement during the movement phase.
A unit must finish its movement before the next unit can move (exception, combined charges see IX.5). A pile of units can move together, their movement allowance is the allowance of the slowest unit.
The number of MPs a unit can spend is indicated on the exposed face of the counter (exception, a square has 1 MP if it remains in square. Otherwise see below). Each spent MP is subtracted from the new movement allowance. If the number of spent MPs is now higher than the exposed face (when a column goes to line for example), then the unit stops. Regarding squares, the unit may use its 1 MP to change to another formation; this 1 MP is subtracted from the allowance indicated on the new face of the counter. This MP can not be used to move and then change formation, only change formation then move with the new movement allowance. A unit with 0 MP left cannot change formation (exception, unlimbered battery). A unit must have enough MP to enter a hex, even if it is its only move that turn.
An infantry or artillery unit can enter an hex occupied by friendly units provided there is no overstacking (see V.1). The same applies to the cavalry, which can cross an hex occupied by friendly cavalry. A disorganized unit cannot voluntarily cross an hex where there is a "good order" friendly unit (except during a retreat, see V.1).
A unit can not enter an hex occupied by an enemy unit. A leader is not an unit.
VI.2 - Entering an Hex
Depending on its formation, a unit can, or cannot, enter any adjacent hex:
- Line: the unit can enter one of the 2 front hexes.
- Column, limbered: the unit can enter the central front hex (the hex where attack and fire is allowed).
- Square, general order, disorganized: the unit can enter any adjacent hex.
The MP cost when entering the hex is a function of the terrain type. See the Terrain Effect Table in the player aids. Sometimes, there is an additional cost to cross the hexside: gully, stream, going uphill, etc.
Example: a column infantry has 6 MPs. It enters a clear hex (1 MP), another clear terrain uphill, crossing a ridge (1+1=2 MPs), and ends its movement by entering a forest (2 MPs). The total movement cost is 5 MPs.
Special Cases:
- A 180 degree countermarch costs 2 MPs in any formation.
- A rearward move without a facing change or formation change costs 1 MP plus the normal terrain cost.
Note: this does not apply to formations with six front hexes: general order, square and disorganized.
- The cost of facing change of charging cavalry is covered in chapter IX.
VI.3 - Formation Change
A voluntary change of formation is executed while staying in the hex, and costs
- 1 MP for infantry,
- 2 MPs for cavalry or artillery.
But a mandatory change of formation requires no MP expenditure (from or to disorganized, from or to general order). Disorganization and rally cost no MP. All the formation changes of cavalry are always mandatory (even going "en bataille" to charge), therefore free.
Column/Line: When a unit switches formation from column to line, including a cavalry going from column to "en bataille", the two line front hexes must be among the three column front hexes. The same is true for changes from line to column.
Limbered/Unlimbered: An unlimbered artillery has 0 MP. Yet, it can change to limbered. Its movement allowance is the limbered movement allowance, with 2 MPs already spent by the formation change. During a formation change, the orientation of the new formation is free.
Example: an artillery starts the movement phase unlimbered. The movement allowance on its limbered side is 5 MPs. It can limber by spending 2 MPs, and then move with the remaining 3 MPs.
Light Infantry (with a 2 hex fire range): Light infantry can adopt all the formations available to regular infantry. It can adopt an additional formation, Tirailleurs, which allows firing at a 2 hex range (see IV.6). The counter is placed on the line side, and across an hexside. The unit occupies both hexes.
Note: this formation change does not trigger opportunity fire (or countercharge).
VI.4 - Facing Change
- A unit spends 1 MP for each 60 degree facing change.
There are two exceptions:
- unlimbered artillery can change facing 60 degrees per turn at no cost if this is its only move.
- column cavalry or infantry units, as well as limbered artillery: the first 60 degree facing change before or after entering a new hex is free. A column unit can use this free facing change at the start of its movement, and then each time it enters a new hex.
VI.5 - Deliberate Disorganization of the Cavalry
A cavalry unit can voluntarily adopt a disorganized state at any time
- during its turn
- or during its opponent's charge phase and movement phase when an enemy unit enters or starts a charge in an adjacent hex.
This decision must be immediately taken when the occasion occurs. Its cost is 0 MP. The unit must retreat two hexes (see VIII.9 for the retreat precedence). A numeric marker is placed across the unit. Use the previous turn number.
This exception applies to deliberate disorganization only, not to any other disorganization. The cavalry will be able to check its rally as soon as the next turn.
After this deliberate disorganization, the enemy unit may continue its move or charge if it has any MP left.
VI.6 - Terrain Effects on Movement
To cross a bridge, a good order unit (exception: cavalry charge) must adopt the column formation (limbered for artillery) and if necessary pay the formation change MPs. No formation change is necessary for disorganized units crossing a stream or a bridge.
A stream can be crossed in any formation but the extra cost is shown in the terrain chart of the special rules. Other special rules may apply.
In a town, brush or wood hex, a good order infantry or a non charging good order cavalry must use the general order formation (remember: free formation change). Disorganized units do not change formation.
In a town, an artillery can only be limbered or disorganized. It can cross a brush or wood hex only by using road movement, while limbered or disorganized.
VI.7 - Road
To be eligible for road movement, infantry and cavalry must be in column or disorganized. Likewise, artillery must be limbered or disorganized.
When moving on a road, a unit spends 1 MP only per hex (the road cancels streams, forests, etc). As long as the unit stays on the road, no formation change is required (this is an exception to rule VI.5).
Movement Bonus: A unit has an additional 2 MPs in a turn if it executes its whole movement on a road. Technically this bonus can be used by a unit that melees a hex outside of the road, as long as it stays on the road for its movement.
Infantry/Cavalry: If the unit leaves the road while in a town, forest of brush hex, it immediately changes to general order (spending 0 MP). If the unit stops in a road hex within the town, brush or wood, the owning player must choose one of the two possibilities: either adopt the general order formation, or stay in column on the road. In this case the unit is marked with a blank counter until it leaves the terrain (the only purpose of this counter is to remind the players the unit is on the road). If any morale check is required, a unit in this situation is automatically disorganized.
Artillery: An artillery can cross a wood or a brush hex only by road. In town, artillery can be limbered or disorganized; other formations are forbidden. If the artillery stops in a road hex within the brush or the wood, it is marked with a blank counter until it leaves the terrain (the only purpose of this marker is to remind the players the artillery is on the road). If any morale check is required, the artillery is automatically disorganized.
VI.8 - Cavalry Withdrawal
This movement is available only to good order cavalry not performing a charge. It can retreat 1 or 2 hexes as soon as an enemy unit enters an adjacent hex (not if the enemy starts its movement in an adjacent hex).
Exception: It cannot retreat if charged by an enemy cavalry or if disorganized.
A cavalry unit can execute several retreats during the same enemy movement phase if several withdrawal occasions arise during the enemy movement phase. Or it can retreat one time and countercharge another time, see IX.7, or become disorganized as described in VI.5.
To retreat, check morale first, with no modifiers.
- If the morale check succeeds, the counter is displaced 1 or 2 hexes in the direction opposite to the enemy unit triggering this special movement. The withdrawing cavalry stays in its current formation if it is compatible with the terrain. Then, the enemy unit can continue its move. This movement can trigger opportunity fire. If the cavalry is attacked again by the same unit during the same movement phase, it can withdraw again, without checking morale.
- If the morale check fails, the cavalry is disorganized, with the usual results (see VIII.9, including a 2 hex retreat). The enemy unit can move into the vacated hex and continue its movement.
VII - Fire
Infantry and artillery units (not cavalry) can open fire against enemy units within range. This can happen at several occasions during a turn. First, the enemy can use opportunity fire when the phasing player moves units, under some conditions. Then, during defensive fire phase, he executes the bulk of his fire attacks (usually against units about to attack him). And then, the phasing player can execute his own fire attacks, during the offensive fire phase.
"Military science consists in first computing all the probabilities, and then, evaluate precisely, with a nearly mathematical method, what is the share of chance... Chance is a mystery for lowly minds, and it becomes a real thing for superior men..." -- Napoleon
VII.1 - Firepower
This is the upper number on the left-hand side of the counters.
Firepower:
- Infantry firepower is a constant. It does not vary with the remaining number of steps.
- Artillery firepower is halved (round up) when an artillery loses one of its two steps.
Example: a battery with a firepower of 5 or 6 has only 3 if reduced to one step.
Note: some artilleries have 3 steps. In this case, they use a special rule, which is explained in the special rules for the battle.
- The firepower can be modified by other factors: the unit formation and the surrounding terrain. In some cases, it can even be reduced to 0, and the unit therefore cannot fire.
Historical note: it may seem odd that the firepower is not proportional to the number of remaining steps. But when arrayed in a line formation, the frontage of a regiment was never more than 400 men. So, even if the regiment is reduced to this manpower, the firepower is the same as initially. This includes two-rank units like the British.
VII.2 - Range
This is the maximum distance from the firer to the target within which fire is possible.
Remember that a unit can fire only through its front. For column infantry, only the central front hex is used, not the side front hexes.
During defensive and offensive fire:
- 1 hex for regular infantry, and for light infantry not in tirailleurs
- 2 hexes for light infantry in tirailleurs
- 5 to 7 hexes for unlimbered artillery (see the fire tables).
Note: the farther an artillery fires, the less efficient its fire attack is (unless several artilleries fire together).
During opportunity fire:
- 1 hex for regular infantry, and for light infantry whatever its formation
- 2 hexes for unlimbered artillery.
(Figure: zone of fire, from 5 to 7 hexes depending on range; zone of opportunity fire, 2 hexes.)
VII.3 - Fire
First compute the total modified firepower (with any modifiers due to the terrain or the formation), and then roll a die. If several units fire into the same hex (including infantry and artillery firing together), they must combine their firepower into a single number, and the die is rolled only once. The target of the fire is an hex, not a unit from a pile. All the units in the pile can be involved, because even if only the top unit takes the losses, the other can be involved (if extra losses are required or if the top unit misses a morale check).
Then, read the result on the fire table:
- a # result is the number of steps the target loses. Any step loss induces an immediate morale check (see VII.9).
- a * result means that the target loses no steps, but it checks morale immediately.
Exception: a unit in a town or castle hex does not check morale when fired upon.
VII.4 - Offensive/Defensive Fire
Each unit can fire twice:
- once during the defensive fire phase (during the enemy player's turn)
- once during the offensive fire phase (during the player's own turn)
That is, twice per game turn.
VII.5 - Opportunity Fire
A unit (infantry or artillery) can execute "opportunity fire" each time a unit leaves an hex into which the friendly unit can fire.
- Infantry: any front hex for a line and the melee front hex for a column (see IV-A).
- Unlimbered artillery: any hex within the front area, and within a 2-hex range (no matter what is the real range of the artillery).
Opportunity fire combat is not available when the enemy unit just changes facing or adopts a new formation while staying in the hex. The enemy unit has to leave the hex to trigger opportunity fire. Melee in itself does not trigger opportunity fire, only certain moves after combat.
The enemy unit is immediately fired upon in the vacated hex, with the corresponding formation and facing, not the formation and facing within the entered hex. This fire therefore occurs after the formation and facing change, but before the movement. Likewise, if disorganized, the 2 hex retreat starts from the vacated hex, not the entered hex (see VIII.9).
Remember that, if several units can fire on the same target, they add their modified firepower together, and only one opportunity fire attack is resolved per hex.
Example (figure): The unit exits X and enters Y. A can fire into X, because the unit is leaving X. Then the unit leaves Y. A can fire a second time, and B can fire for the first time. This fire is resolved in hex Y.
Each time an infantry or artillery gets an occasion to execute an opportunity fire attack, it is allowed to fire. There is no limit to the number of fire attacks the unit can execute, in addition to the offensive and defensive fires.
If the opportunity fire is triggered by a disorganized unit doing a retreat move, the unit that took part in the combat which disorganized the retreating unit (either fire combat or melee combat) cannot execute opportunity fire. Moreover, no unit involved in a melee that turn (either this melee, a melee resolved before in this melee phase or a melee to be resolved after but always in the same melee phase) can make an opportunity fire.
Special Cases:
- Retreating unit does not check morale if it is fired upon during its retreat.
- If several units move stacked together during the "dangerous" part of the movement, only one opportunity fire is executed, and losses are applied to the top unit (except if it is destroyed, see V.4). But this is done only if the units are stacked together during the move. If they move separately, even if the paths are the same, there are two or more opportunity fires.
- If an enemy unit or stack crosses several hexes under the fire of the same unit, it is subject to opportunity fire in each hex it leaves.
- If an enemy unit, stacked under another enemy unit, leaves the hex, it is subject to opportunity fire upon leaving the hex. Only this unit is the target of the fire attack (see V.5).
VII.6 - Line of Sight for Artillery and Skirmishers
The line of sight represents what a unit can see beyond the adjacent hexes. Without a line of sight, a unit cannot fire.
The line of sight is checked from the firing hex center to the target hex center. A line of sight passing exactly between the front and the flank is considered front. If it passes exactly between flank and rear it is considered flank.
VII.7 - Blocking Terrains
The line of sight cannot cross the following hexes (even partially crossing):
- a wood, brush, castle or town hex; Swamps and difficult terrain DO NOT block the line of sight.
- a ridge hexside;
- an hex occupied by any unit (leaders are not units). Note that the line of sight is blocked if it crosses the hex where the unit is, not just if it crosses the unit counter.
These terrains are blocking even if the firer is up one or even two levels, as these terrain changes of levels were typically minor change of elevation, not mountains. But fire is possible from these blocking hexes or to these hexes, with modifiers in some cases.
Note: a gully never blocks lines of sight.
A ridge line is located on the hexside, even if the artwork does not exactly follow the hexside. It blocks fire, except:
- if the firing unit is adjacent to the ridge line, and up that ridge.
- or if the target is adjacent to the ridge line, and up that ridge.
A line of sight going down a ridge then up a ridge to a target located up is not blocked, except if other blocking terrains are on the way (even if they are down the ridge).
Note: in some cases, the line of sight is drawn along a hexside. The line of sight is clear if at least one of the two hexes does not block the line of sight.
Example (figure with ten fire attacks): fire attacks #1, 2 and 3 are allowed (#3 is adjacent to the ridge and up), #4 is forbidden as it crosses the previous ridge, #5 is forbidden because the target is down, #6 is allowed for the same reason as 3, #7 is forbidden because the target is down, #8 and 9 are allowed as no ridge is crossed, and #10 is allowed as difficult terrain is not blocking.
VII.8 - Losses
Losses are recorded on each player's Loss Sheet, by checking the boxes starting from the right. To ease this recording, each counter has a regiment name and a sequential number.
Option: The players can choose to use the numeric markers instead of checking the boxes on the sheet. They put the loss marker across and under the counter.
Hint: This option is a good way to show which artilleries have a reduced size.
VII.9 - Morale Check
A successful morale check has no effect. But a failed morale results in:
- the target unit is disorganized (if previously disorganized, the unit is eliminated)
- the target unit retreats two hexes towards the lines of communications (see VIII.9 melee).
Morale is modified is the fire is coming from the flank or the back of the target, as explained in VIII.6.
If the fire result eliminates the last step of a unit, the morale check is executed by the unit underneath (if such a unit exists), but without the negative for being stacked under a unit that just failed a morale check.
Even if, because of the morale check, the hex is vacated by the elimination or the retreat of the target unit, the firing unit(s) cannot occupy the hex.
Note: advance after combat is possible only for melee combat.
VII.10 - Fire Against a Square
The die is modified by +1 if the target is in square formation, no matter from whom the fire comes.
VIII - Melee
During his melee phase, a player can attack one or more enemy units with adjacent friendly units. The higher the melee value or the step strength, the more powerful the attack. For infantry, column formation is ideal for melee. Cavalry is especially powerful when charging, except against an infantry square.
VIII.1 - General Case
Exception: a retreating unit can trigger a countercharge.
Melee is never mandatory. The phasing player decides whether he will attack or not.
VIII.2 - Stacks and Melee
An attacking stack cannot be split to attack different hexes. If a stack attacks, every unit that can attack takes part in the melee. Likewise, a defending stack cannot be split. If attacked, it must be attacked as a whole. Moreover, a unit cannot attack two hexes in a single melee.
VIII.3 - Melee Value
The melee value is printed under the fire value.
The melee value can be modified:
- Attacker: the formation and the defender's terrain can modify the attacker's melee value. See the Formation Table and the Terrain Effects Table in the play aids. All these modifiers are cumulative, except as indicated on the Terrain Chart.
- Defender: his formation and terrain can modify the melee value. The attacker's terrain is irrelevant (exception: charging cavalry from woods, town, brush).
The melee value is used to compute the unit's melee strength, used to resolve the combat (see VIII.4).
If an attacking unit's modified melee value is 0, this unit does not take part in the melee, and it suffers no losses.
If a defending unit's modified melee value is 0, it is ignored for the combat resolution, but it suffers the retreats, disorganizations and eliminations nevertheless.
VIII.4 - Melee Strength
For each combat, the attacker and the defender compute their melee strengths, by multiplying each unit's modified melee value by the unit's current number of steps, and adding together the results. That means that the melee strength decreases as the unit takes losses.
Example: A unit's melee value is 2, and it currently has 5 steps remaining. Its melee strength is therefore 10 (2 x 5).
VIII.5 - Attack Hexes
A unit can attack with melee combat only into front hexes.
- one of the 2 front hexes for a line infantry/charging cavalry
- one of the 3 front hexes for skirmishers
- the central front hex for a column infantry (no attack is allowed through the lateral front hexes). Cavalry can not attack in column.
- any one of the 6 adjacent hexes for an infantry in general order.
Remember that disorganized units and artillery cannot attack during the melee phase, but they can defend.
VIII.6 - Flank/Rear Attack (melee and fire)
A unit attacked from a rear or flank hex has its melee value reduced by half, rounded up. And if a morale check is required, it is modified:
- by -2 for a flank attack;
- by -3 for a rear attack.
Even if only one unit attacks from the rear or the flank, the modifiers are applied.
The attack must clearly come from the flank or rear for the modifiers to apply, sometimes a fire from 2, 4 or 6 hexes away can be on a line (from hex center to hex center) passing exactly between a flank hex and a front hex, or between a flank hex and a rear hex. In that case the modifier the most favorable to the defender applies.
Exceptions:
- Mixed Order: flank/rear attack does not apply if any defending unit is attacked from front hexes only (see V.7).
- Protected Flank: If a friendly unit X is attacked by an enemy unit Y through the flank or the rear, its flank or rear can be "protected" if Y is itself in the front of a friendly unit Z*. In this case, the flank/rear negatives do not apply. (* except if Z is a limbered artillery, or a disorganized unit (whatever its type).)
- Unlimbered Artillery:
-
Artillery alone: if attacked from a flank or rear hex, the combat result applies to the defending artillery only. Any 0 or 1 result (with or without *) is replaced by D. All other combat results are applied normally.
Example: the combat ratio is 4 vs. 1, and the die roll is 1. The melee table gives a 1/1* result, but it is replaced 0/D; if the result had been 0/D1, it would have been applied without change.
-
Artillery stacked with infantry: if the artillery is stacked with infantry and is attacked through its rear or flank, it does not participate in the melee. But if the infantry is disorganized or eliminated, the artillery suffers the same adverse results. The infantry unit takes the first loss as in this case the artillery is simply ignored for losses purposes.
-
VIII.7 - Melee Prohibitions
Some units cannot attack in melee:
- disorganized units
- units with a melee value modified to zero (because of the terrain, for example)
- Infantry in square formation
- Cavalry in column or general order
- artilleries
Note: these units can still defend if attacked in melee.
VIII.8 - Melee Combat
The attacker divides his melee strength by the defender's melee strength to get a combat ratio. This ratio is always rounded in favor of the defender.
A die is rolled, possibly modified by a leader stacked with the attacker or the defender.
The combat result from the Melee Table is applied immediately. Results are read as attacker/defender (A/D):
- 0 or 1: number of step losses.
- *: immediate morale check for the stack that took part in the combat, see X.2
- D: Disorganization and 2 hexes retreat
- D1: Disorganization, one step loss and 2 hexes retreat
- E: Elimination of all units in the target hex.
The first result applies to the attacker, the second result to the defender (A/D).
Note that a unit already disorganized which suffers a D or D1 result is eliminated.
Exception: a unit in town or in a castle does not check morale if the melee result is *.
Example 1: an infantry in line formation with no loss (7 steps, melee value 2, melee strength 14) and a column infantry with two losses (7 - 2 = 5 steps, value 2 + column modifier 1, total strength 5 x 3 = 15) attack a unit in line formation with no loss (6 steps, value 2, total 12). The combat ratio is 29:12, rounded in favor of the defender to 2:1.
Example 2: a 4-step infantry in general order (in town) attacks an adjacent forest hex. Its basic melee value is 2. It is not modified by the attacker's terrain, but it is modified by -1 because of the defender's terrain which is forest. The melee value is 1, and the melee strength is 4 (4 x 1).
VIII.9 - Disorganization and Retreat
If a combat result includes a disorganization (D, D1, or failed morale check), the involved unit(s) must retreat 2 hexes in the direction opposite to the attack. If there is a choice in the path of retreat, this retreat must be executed through empty hexes toward the line of communication, then through hexes occupied by friendly units toward the line of communication. If no such hex is available, the unit retreated into any other empty hex or into any other hex occupied by a friendly unit.
Note: if all surrounding hexes are impassable or enemy-occupied, the disorganized unit cannot retreat, and is eliminated instead.
If the retreat path crosses one or several hexes occupied by friendly units, these units must immediately check morale, unless they are already disorganized. Stacking limits must be obeyed (ex: automatic disorganization if infantry retreats over cavalry). See V Stacking.
If the retreat path crosses one or several front hexes of enemy units, the retreating units may be fired upon by the enemy units, using the rules of opportunity fire (see VII.5). But the fire cannot be executed by units that take part in a melee this phase. In other words, the retreating unit cannot be fired upon by the unit that repulsed it.
Retreating through enemy-occupied hexes if forbidden. An enemy leader is not a unit. Attacking empty hexes, hoping to get an advance after combat for free is also forbidden.
The retreat movement length is two hexes only, unless an impossibility occurs (e.g. terrain where the unit cannot stop). In this case, the unit can retreat one additional hex.
A unit that leaves the map while disorganized cannot come back. It counts as an eliminated unit for victory points purpose, except if the special rules indicate that units can exit the map through a line of communication (see XV).
VIII.10 - Advance After Combat
If the hex is vacated (all the defenders have been disorganized and have retreated), one or several attacking units can occupy it. This movement is optional. A defender may choose not to advance if the attack hex is vacated.
The advancing units can neither change formation (unless the terrain requires another formation) nor facing, and they must obey the stacking rules. The attacking units can go no further during this phase (except in the case of a victorious cavalry charge, see IX.4).
IX - Cavalry Charges
Cavalry has a considerable melee strength when charging. The only response against it is the square formation (for infantry) or the countercharge (for cavalry). However, charging an artillery's front is not advisable.
Charges occur before the other units' movements. Beware that the rules that apply to the charges and countercharges contain many exceptions to the other rules.
"Do not attack the fronts of enemy positions when you can attack their flanks." -- Napoleon
IX.1 - General Case
To attack, cavalry must charge. This move is performed during the charge phase. To make a regular move (with no combat), the cavalry moves during the movement phase. The units having performed a move (or a charge with no move) during the charge phase cannot make a regular move during the movement phase. The charging units will melee during the melee phase (exception: countercharges, which are resolved immediately).
The cavalry's formation for regular move is the column (or general order if need be). The cavalry's formation for a charge is always the line. There is no cost to change formation for a charge. Changing formation in line must obey the rule on orientation (VI.3)
To defend, a cavalry unit may opt to stay in column or general order formation, or it may attempt a countercharge during the opponent's movement or charge phases. In this case, the defending cavalry becomes for a few moments the attacker. It may also choose to become disorganized, or retreat (if attacked by infantry only).
IX.2 - Charge Movement
During his charge phase, the active player states which units will attempt to charge, but he does not state which enemy units are targeted. The charging cavalries may not be disorganized. Charges do not need to be all declared at once. Players can decide during the charge phase if charges are actually started or not. On the other hand, a declared charge must be performed, as described below.
The unit executes a normal movement with the following restrictions:
- Only two 60 degree orientation changes can be performed for the whole charge move.
- Each of this orientation change costs 2 MPs.
- Each unit can change 60 degrees only once per hex.
- There is no free orientation change (only in a regular move).
- During a charge, entering a village or a wood hex costs 6 MPs, brush 4 MPs, difficult terrain or a farm 2 MPs.
- If the unit starts its move in such a terrain, it pays this cost first.
- To cross a stream costs 6 MPs, to climb a ridge 2 MPs, to go down 2 MPs also.
- In a wood, brush, or town, the cavalry changes its formation to line for the charge. The same happens for a countercharge.
- A charging cavalry can pass through non charging friendly cavalries as long as the stacking limit is respected.
- A charging cavalry cannot cross a gully or a marsh, and cannot enter a castle or cross fortified walls.
- A charging unit does not need a clear line of sight in order to charge (remember, the turn is 30 minutes, long enough to receive an order for charging from the CO who is a few hexes ahead and can see the target).
Each charge is resolved separately. Yet, if several cavalries are stacked at the beginning of the charge phase, they can charge together. Cavalries can also come from different hexes, provided the player states he will attempt a "combined charge" (see IX.5). A leader can charge with the cavalry if it is stacked from the beginning. In that case it will not be allowed to move further during the regular movement phase.
If, during the movement, the cavalry happens to be in the neighborhood of an enemy cavalry facing the right direction, this enemy cavalry may immediately attempt a countercharge, by checking morale.
If the destination hex contains at least one infantry, the defender may attempt to form square (morale check see IX.6).
When a charging cavalry moves, the owning player can state which hex the cavalry will attack if, and when, he wants. Of course, a cavalry in line formation has two front hexes, and can attack either. The charging player may wait for the melee phase to state which hex he attacks. It is the defender's task to guess which hex is targeted... However, the cavalry can attack one hex, the other or even none by choosing to become disorganized, not both hexes.
A charging cavalry may voluntarily become disorganized at any time, (including after the combat, to be allowed to retreat 2 hexes). The game turn marker placed on the cavalry will have the previous game turn number (see VI.5 and optional rule XVI.4).
A charge ends only by a melee, losing a morale check (after a loss due to fire for example) or by voluntarily becoming disorganized at any time. Once a unit starts a charge, it cannot voluntarily stop it. If it fails to make contact, it must disorganize voluntary. Exception; if the target has been vacated due to other causes (morale failure after fire for example), then disorganization is not mandatory, cavalry simply comes back to its column face if no melee occurs. More generally, if the charge movement stops voluntarily, the cavalry is disordered. If it stops for other reasons, as if there is no target left, then the disorganization is optional.
Note: there is no morale check requirement to charge, except certain irregular or Cossack units as stated in the special rules. This morale check exists only for countercharges, see IX.7.
IX.3 - Charge Combat Resolution
All charge combats are resolved during the melee phase. The cavalry fights with the usual procedure, with all the modifiers that apply (value reduced to 1 when attacking a square, for example). Exception: a countercharge is resolved immediately upon its declaration (see IX.7).
If the target of the charge contains no enemy unit (or only markers or leaders), the melee is considered over, the cavalry comes back to its column face or can choose to become voluntarily disorganized. This can happen when the defenders retreated after a fire and its morale check.
When applying the combat results, an infantry targeted by a charge loses 1 additional step, except if in square or general order formation, or if the result was 0 step loss (see IX.6).
Remember that an already disorganized unit which gets a "D" result is eliminated.
At the end of the melee phase, every cavalry unit involved in a charge reverts to the column formation (or general order if within a town, forest or brush), obeying the rule about "facing with at least two front hexes in common", see V.7.
IX.4 - Charge Exploitation
If, when the combat is resolved, the target unit is disorganized (D combat result or failed morale check) or eliminated:
- a disorganized unit retreats 2 hexes (see VIII.9);
- the cavalry can enter the combat hex, change its orientation by 60 degrees if needed, and then initiate another melee if an enemy unit is now immediately in its front. The change of orientation is limited to 60 degrees, if the enemy retreats to a non-reachable hex there is no exploitation.
- If the new enemy unit is infantry, it can form square before the cavalry enters the adjacent hex. If the infantry cannot see it no square attempt is possible.
- The new enemy unit can be already engaged in melee with another attack, the exploiting cavalry can simply join this other attack.
- At the end of the exploitation melee, the cavalry can enter the new empty hex, but there is no further exploitation.
IX.5 - Combined Charges
The charging player can declare a "combined charge" with several cavalry units from different hexes. These cavalries do not have to meet on a single hex as long as they attack the same target. This rule allows cavalries to fight together if countercharged. Then the cavalries can move and fight as a whole. Units do not have to declare a combined charge in order to melee together the same target. The combined charge is only to avoid units countercharging one at a time small cavalry units that want to combine their strength.
IX.6 - Square
An infantry can be in square formation at the start of the charge, or it can attempt to form square at any moment during the charge (except if disorganized or if the cavalry is adjacent) even before the cavalry makes a single move.
An infantry not in square during a charge can suffer one additional step loss. When the melee is resolved, any result other than 0 implies an additional step loss. In the rare cases where 2 losses are required, the top unit takes them both.
Example: 0 still is 0, 1 becomes 2, D becomes D1, D1 becomes D2.
To attempt to form square, the defender executes a morale check, with all the usual modifiers, except the -2 for being attacked from a rear/flank hex (the troops from the last rank always looked behind from time to time, the contrary would be surprising... and the square was formed, no matter where the order was issued from). Moreover, the morale check is modified by the distance from the charging cavalry:
- If this distance is 3 hexes or more, a bonus of 1 applies.
- If this distance is 2 hexes, no modifier applies.
- If the cavalry is adjacent to the target, no square attempt can be made, the infantry must stand the melee unchanged.
The line of sight might be important. If the cavalry is 3 hexes away but is seen only at 2 hexes, the last will be used for the morale check.
If the morale check succeeds, the infantry immediately adopts the square formation. Other infantries (stacked underneath) automatically adopt this formation too.
Artillery in the square: Players can freely move artillery units up or down the pile during the square formation change, but cannot change the artillery formation. Artillery retains its orientation, it does not have 6 hexes of front as the square has.
- limbered artillery in the pile: it is protected by the square, no matter what its position in the stack is;
- unlimbered, stacked on the infantry: it can use only half of its fire value against cavalry (both in opportunity fire and regular defensive fire), and if the cavalry actually melees the hex, the artillery will take at least one step loss whatever the melee result. The artillery has no +2 morale bonus for being stacked with a square, but if attacked by cavalry, this cavalry melee value is still reduced to 1 due to the presence of the protective square. If the square is attacked by infantry only, the fire value of the artillery is full.
- unlimbered, stacked under the infantry: it can only take part in melee and does not fire, but it benefits from the +2 morale bonus.
If the morale check fails, the infantry is disorganized, but does not retreat now. It will retreat when the charge combat is resolved, unless it is eliminated during this combat.
If several infantries are stacked together, the top unit checks morale. If successful, the whole stack adopts the square formation. If it fails, it becomes disorganized, and the second unit in the stack checks morale with a -2 modifier to form square (see V.5). If all the units in the hex fail, they remain in place and wait for the melee result before retreating. If a single unit passes the morale check, the others retreat and do not wait for the cavalry melee. This avoids having units both in disorder and in square on the same hex.
IX.7 - Countercharge
An enemy cavalry can attempt to countercharge. This can happen during the charge, movement and melee phases. This is a charge "without movement", available only to the enemy cavalry. However it could happen during player A's turn if a unit from B retreats after a melee and passes in front of a non charging cavalry belonging to A.
Exception: a cavalry that is being already charged and chose not to countercharge, cannot countercharge another enemy unit passing in its front, as it is already "engaged" with the first charge.
If a unit enters one of the front hexes of an enemy cavalry unit, this cavalry can attempt to countercharge. It must first check morale:
- If the morale check fails, nothing happens and the countercharged unit may go on.
- If the morale check succeeds, the countercharging cavalry changes to line formation, but some terrain penalties may apply, see IX-1. Then, it immediately engages the enemy in melee without moving. The countercharging cavalry is the attacker for the resolution of the countercharge only.
If an infantry is countercharged, it cannot attempt to form square before the melee as the cavalry is now adjacent to this infantry.
A stack of cavalry units can also countercharge as one unit, pending all the units pass their morale check. Only the units that pass can countercharge. If the top unit fails its morale check, the unit under will check at -2 as for a regular morale check.
The countercharge is resolved like any other melee. The countercharged unit can fire normally, provided that it is facing the right way, and then the melee is resolved. Several units can countercharge at the same time; they can combine their melee value for a single melee. All the units currently stacked with the moving unit are countercharged, even if some of them were not involved in the charge.
Note: beware of combined charges! (See IX.5)
After the combat resolution:
- The countercharging cavalry does not move (no advance after combat), and reverts to the formation before the countercharge.
- No matter the combat result, the countercharge stops the active unit's movement.
- The charging cavalry reverts to column or general order (depending on the terrain where it has been countercharged). Its actions are over for this turn, which means for this present turn. It is free to move or charge at its next turn.
- But an infantry, even if countercharged, can engage in melee during the next melee phase (advance after combat is allowed).
Some remarks:
- A cavalry which failed its countercharge attempt will still be able to attempt other countercharges if a new possibility arises or any other allowed action.
- If several cavalry units are stacked together, and if some of them fail the countercharge morale check, they are ignored during the countercharge combat resolution. But they will have to check morale, if the countercharging cavalries were disorganized during the combat.
- A cavalry can initiate an unlimited number of countercharges per turn (but only once per action triggering a countercharge), whatever the result of previous countercharges.
X - Morale
Each unit has a morale basic value, usually in the 7 to 11 range. This value has no connection with the unit's step, melee and fire values. There are many times when a unit is required to check morale, to know whether it will keep its cohesion. A failure results in disorganization and an early retreat. The unit will have to be "rallied" to recover its fighting spirit, and be arrayed in a combat formation.
"In war, three quarters is a question of morale; the test of strength is only one quarter." -- Napoleon
X.1 - Causes
Morale is checked:
- each time a unit is fired upon and suffers a * result, or one or more losses. Exception: the unit has just been disorganized, and is fired upon during its retreat. In this case, the unit does not check its morale. It just loses a few more steps;
- melee result, when the table yields a "*";
- a good order unit is occupying an hex through which a disorganized unit retreats.
- a cavalry attempts a countercharge (but failure does not result in a disorganization);
- an infantry attempts to form square during a cavalry charge or countercharge.
- a disorganized unit attempts to rally.
X.2 - Morale Check
To check morale, roll two dice and add both.
If the result is lower than or equal to the morale value, the check succeeds. If the result is greater than the morale, the unit becomes disorganized or stays disorganized (depending on the cases above), and must retreat two hexes (beware of opportunity fire). See VIII.9.
Note: there is a special case for the 2 hex retreat. This special case applies to failed rally attempts. In this case, the retreat can be toward a close forest or town, see XI.4.
X.3 - Automatic Success and Automatic Failure
No matter the dice roll modifiers:
- a natural 2 is always a success;
- a natural 12 is always a failure.
X.4 - Modifiers
All modifiers are cumulative. The morale is modified by:
- Formation:
- if the unit is disorganized: -2
- if the unit is infantry in square formation, attacked by cavalry only: +2.
-
Adjacent units: if the unit attempts to rally (see XI.2) in an hex adjacent to an enemy unit: -1.
-
A leader: + morale bonus of the leader (middle value on his counter).
-
The attack or fire direction:
- if the unit is attacked or fired upon through a flank hexside: -2.
- if the unit is attacked or fired upon through a rear hexside: -3.
Exceptions: protected flanks, or when attempting to form square, see IX.6.
-
Another morale check failure in the same hex: if a unit has just failed a morale check, the morale of the unit stacked underneath is modified by -2. If this one fails, the unit stacked underneath is modified by -4, and so on.
-
Losses: if a unit has lost several steps, the morale is lowered. If the players have opted to use the decreasing strength counters, they use the morale printed on the counter currently in play. If they prefer using only the original counter, they refer to the following table to determine the morale negatives, which depends on the original step strength and the current step strength.
| Original steps \ Current steps | 7+ | 6 | 5 | 4 | 3 | 2 | 1 |
|---|---|---|---|---|---|---|---|
| 9 | - | -1 | -1 | -1 | -2 | -2 | -2 |
| 8 | - | - | -1 | -1 | -1 | -2 | -2 |
| 7 | - | - | - | -1 | -1 | -2 | -2 |
Left column: original step strength. Top line: current step strength. "-": no effect; "-1": morale modified by -1; "-2": morale modified by -2.
Note: units with an original step strength of 3 steps or less never have their morale modified because of losses.
Note: some elite units may have a slower morale decrease, as indicated on the army loss charts.
- The army morale (demoralization or Desperate levels): as described section XII below.
XI - Rally
During the rally phase, the player can attempt to rally his previously disorganized units with morale checks.
XI.1 - Eligible Units
A unit stays disorganized for at least two full turns before the first rally attempt. Exception: a cavalry choosing to become disordered, see VI.5.
In other words, a unit can be rallied only if the number on its marker is 2 lower than the current turn number.
Example, during turn 8, the player will attempt to reorganize the units with markers numbered 6 or less.
XI.2 - Rally Check
Each eligible disorganized unit can check morale, with all proper modifiers, including the -2 modifier for being disorganized.
A rally check is voluntary. Each turn, the owning player chooses which units will check, on a unit-per-unit basis.
Example, during turn 5, the player will attempt to reorganize the units with 1, 2 or 3 markers.
XI.3 - Success
If the rally die roll is successful, the "disorganized" marker is removed, and the owning player can choose any allowed formation for the unit, taking into account the terrain the unit is in.
XI.4 - Failure
If the rally die roll fails, the unit retreats two hexes:
- toward a line of communication
- or toward a town hex or a wood hex within two hexes, in any direction.
If the unit is already in a town or forest hex, it is not required to retreat for failure of a rally attempt.
XI.5 - Disorganized Units Stacking
It may happen that units disorganized during different turns are stacked together. If a unit is reorganized and the other is still disorganized, the disorganized unit must retreat 2 additional hexes, even if it is in a wood or in a town. The reason is that a good order unit cannot stack with a disorganized unit.
XII - Army Morale
"The outcome of a battle is the result of an instant, of a thought. We close in with various maneuvers, we mingle, we fight for some time, a moral fire lights, and the smallest reserve prevails." -- Napoleon
When a given level of losses and disorganization is reached, an army can become "demoralized" and then "desperate". In some scenarios, demoralization applies to army corps separately, instead of applying to the army as a whole.
Every turn, the players add the number of losses taken and the number of disorganized units and compare this total with the demoralization and desperate levels. These thresholds are given in the special rules for the battle.
When the demoralization level and then the desperate level are reached, the army (or corps) morale starts collapsing. As it includes the number of disorganized units, crossing the level can be reversible if units are rallied.
XII.1 - Demoralization Threshold and Effects
Demoralization occurs when the army (or corps) total reaches half of its total possible losses. Some elite corps may be excluded, depending on the special rules.
When the army is demoralized, each unit has its morale modified by -1.
When the army is demoralized, each unit in good order with at least one step loss immediately checks morale, including this -1 modifier. This test is a one time thing, if the corps recovers good morale (because it rallies units) and then become again demoralized, there is no morale check, only the -1 modifier.
XII.2 - Desperate Threshold and Effects
Desperate occurs when the army (or corps) total reaches a level indicated in the special rules, typically depending on its average morale.
When the army is desperate, each unit has its morale permanently modified by -2.
When the army is desperate, each unit (in good order, even with no loss) immediately checks morale, including this -2 modifier.
When a unit in a desperate corps is disorganized, it can trigger a "chain reaction":
- every adjacent good order unit belonging to a desperate corps must immediately check morale.
- the same applies to such units adjacent to the 2 hex retreat path.
If these morale checks fail, the corresponding units are themselves disorganized, they retreat 2 hexes, and they can induce other units to check morale.
XIII - Reinforcements
They enter the map during the movement phase, in any formation and order the owning player desires, and they can fight at once. If the entry hex is occupied by an enemy unit, reinforcements enter in the nearest empty hex on the map edge.
If the entry hex is a road or a trail, a unit entering after the first one subtracts one MP, the next one 2 MP, and so on; this simulates the units on the road leading to the map.
In some cases, reinforcements are placed on the map directly to a location as they become available (or released from a reserve for example). If an enemy unit enters in an hex adjacent to this location, the reinforcements are immediately placed and act normally.
XIV - Leaders
Each player has one leader per army corps, plus one or several army commander (usually Napoleon, for the French player). Leaders provide benefits to the units they are stacked with, although they are not combat units themselves.
"A warrior must have as much character strength as intelligence. Men with intelligence but no character strength are the worst; it is better to have much character strength and little intelligence." -- Napoleon
XIV.1 - The Various Leaders
Usually, each leader commands an army corps. Units in his command have the number or the abbreviation of the corps on their counters.
Each player has also one or several army commanders, and usually a supreme commander, who leads the whole army. They can command and influence any unit belonging to their side. In some cases, there is an intermediate level in the chain of command (for example, wing leaders in the Russian army).
Leaders have no firepower, and no melee value. They do not count for stacking, and they are never in a specific formation. Anytime the word "unit" is used, this does not include the leaders.
Leaders influence combats and morale checks. If several leaders are stacked with a unit, the owning player chooses which leader will influence the unit (for example a corps commander with the supreme leader).
XIV.2 - Values
The leader counters show three numerical values. These values are:
- the combat bonus (left);
- the morale bonus (center);
- the movement allowance (right).
The first two values are added to the die roll, the last one is a standard movement allowance. Use infantry costs when moving leader counters. During a movement phase, a leader can move by himself or join a pile. In any case he cannot spend more than his movement allowance by doing so. If he starts stacked with cavalry, he can join the charge but will not be able to move again at the movement phase.
XIV.3 - Combat Value Effects
The combat bonus applies to melee only. Fire is never modified by a leader.
The melee value is added to the die roll when the leader attacks and it is subtracted when the leader defends.
This bonus is added only to the units the leader commands. The army commander bonus applies to any unit belonging to his army, if the player opts to use the supreme commander instead of the corps commander.
Using the combat modifier is an option, and the player can choose not to use the leader (except in rare circumstance when the modifier is negative). The player has to clearly declare the use of the leader before rolling the die.
Example: Oudinot attacks with a unit. His combat value is +1; therefore he adds 1 to the attack die roll. When defending, Oudinot subtracts 1 from the attacker's die roll.
Example (special case): the King of Prussia has a -1 combat value. If he attacks, the die roll is modified by -1, and if he defends, the attacker's die roll is modified by +1.
Historical Note: Napoleon. His combat bonus is "1" only. This is a deliberate result of the game design, because Napoleon is the commander-in-chief and the sovereign. Therefore, he had to be careful about his life, and he had to stand away from the fighting.
XIV.4 - Morale Effects
A leader provides a morale bonus to any unit he is stacked with. This bonus is algebraically added to the stacked units when checking morale.
This bonus is added only to the units the leader commands. Exception; if a corps commander is stacked with units from another corps, the maximum value he can use for these units is +1, instead of the real value, except if his value is 0. In that case the final modifier is 0.
The army commander can apply his bonus to any unit belonging to his army, instead of the corps commander's bonus, provided the units are stacked with the army commander.
Remember that an unmodified 12 is always a failure.
Example: Napoleon has a 6 morale bonus!
XIV.5 - Elimination
A leader can be eliminated if:
- the leader is stacked with a unit that loses 2 or 3 steps in a single fire attack (2 or 3 result on the fire table). Roll another single die to check for casualty, a 6 eliminates the leader.
- the stack in the same hex is eliminated. Roll another single die, a 6 die roll eliminates the leader.
- If they are alone in an hex, and an enemy unit enters the hex, roll a die. A 6 eliminates the leader. Otherwise, he is shifted to an adjacent hex.
- Special: if a leader is totally surrounded by enemy units and is the lone survivor of a fight, a 4, 5 or 6 eliminates the leader. If he survives, he is placed on any hex two hexes away.
If several elimination cases occur simultaneously, several die rolls are executed. These tests are executed before the tests that apply to the units, such as morale checks.
If the army commander is eliminated, his army may immediately become demoralized depending on the special rules of each game.
Beware: losing a leader costs victory points. Losing the army commander is a good recipe for a major defeat.
If Napoleon dies in the battle, the French player immediately loses the game. This result is far worse than a major military defeat, because that means the end of the greatest epic of these times and of a glorious legend...
XIV.6 - Substitute Leaders
If a leader is killed, a new one appears at the start of the next game turn, stacked with a unit belonging to the leader's corps. Suppose that a division general or an aide assumes the command.
The leader counter is used, reverse side up to remind the players that the historical general has been killed. This reverse side shows the initiative value. The new leader's values are: combat bonus +0, morale bonus +1, movement allowance 10 MPs. When playing advanced rules, the initiative and obedience values are 2.
If the substitute leader is killed himself, another substitute leader appears the next turn with the same procedure.
XV - Lines of Communication
The lines of communication were the backbone of the Army. This is where supply and reinforcements came from. In game terms, the lines of communication are the main retreat path for the units. Each game will state the lines of communication for the armies.
If a unit leaves the map through a line of communication, it provides no victory point to the enemy, except specified otherwise in the game special rules.
ADVANCED RULES
Once they master the standard game, the players may want to use a more realistic rules system, to grasp more accurately the complexity of the battles of the Napoleonic Era. These new rules are optional, of course, and players can modify them as they see fit. A game becomes richer and richer through the players' input.
On a more practical side, the players agree before the game on which advanced rules they will use: none, one, some or all. Some advanced rules are rather simple, other are more difficult to apply, such as command and control. Beware, the new modifiers (die roll, combat values, etc) are not printed on the charts.
"The overall commander follows his own experience or his genius. Tactics, deployments, science can be learned in books, just like geometry. But knowledge of the higher principles of war can be acquired only through experience and by studying wars and the great captains' battles." -- Napoleon
XVI - Optional Rules
XVI.1 - Voltigeurs
If this rule is used, do not use the tirailleurs formation as described in IV.6. Almost every infantry unit can deploy voltigeurs. They are implemented by using numerical markers (used for losses, or specific markers provided in future games) deployed in an adjacent hex. This hex must be free of any unit and in the front of the deploying unit. These voltigeurs are deployed like line infantry, and therefore have two front hexes. A line infantry in column or in general order can deploy one voltigeur, a line infantry in line two, the light infantry (called light, jagers, chasseurs, grenz, rifle, legere, usually all units with a printed range of 2) can deploy three. A disorganized unit, a unit in square, or a militia unit (militia, Archduke Charles Legion, Landwehr) cannot deploy any. A unit cannot deploy more voltigeurs than the number of losses step they have left. These markers are part of the mother unit, they do not subtract losses when they are deployed, and they only simulate the presence of voltigeurs.
- They can be deployed in any terrain where the movement is allowed.
- They are deployed in an hex where the mother unit can fire, except for light infantry where they are deployed in any adjacent hex.
- Only the upper unit of the stack can deploy voltigeurs.
- They do not block the line of sight.
- To deploy and reintegrate voltigeurs does not cost any MP. This action is voluntary during the movement phase or involuntary when a friendly or enemy unit enters the hex where the voltigeur is. A unit can deploy voltigeurs once during his movement phase, and once at the end of his rally phase.
- A voltigeur unit fires on an adjacent front hex with a fire power of 1. This value is not modified, can not be added to another voltigeur fire, but one (only) can be added to a regular fire.
- Fire on a unit beyond a voltigeur is made with a negative of 1, except if this value was already one. In this case it is not modified. Several voltigeurs on the path decrease only by 1 the final fire value. As a reminder, the line of sight is not blocked.
- Voltigeurs can not stack with enemy units.
- They can never be adjacent to an enemy cavalry unit.
- A friendly voltigeur stacked on a unit is simply ignored. It is reintegrated if still stacked at the end of the movement phase.
- When an enemy infantry or artillery enters a voltigeur hex, they trigger an opportunity fire if they enter from a front hex, then the voltigeurs are reintegrated. Exception: if the infantry enters preceded by its voltigeur, then the two voltigeurs from opposite sides annihilate each other and no opportunity fire from the voltigeurs is performed.
- When an enemy cavalry enters an hex adjacent to a voltigeur, the voltigeur is simply reintegrated with no fire.
- Practically, the movement of the mother unit is made first, then the voltigeurs follow and are set around. If any opportunity fires occur their precise position is set hex by hex. They do not trigger an opportunity fire by themselves. They cannot be attacked in any way.
- With the exceptions stated above, they are not considered as "units".
XVI.2 - Artillery Losses
Artillery fire did not have the same effect when the target was infantry in close order or when it was a lone artillery battery, with a much lower number of men. Moreover, artillery was arrayed in a single line, which is why ricochet fire achieved nothing.
This optional rule exists in two flavors: A or B. Players can choose either before the start of the game.
System A - half losses: Each time an artillery is fired upon by enemy artillery, its losses are tallied as half-losses. The first time the fire table (not the melee table) indicates there is a step loss, the artillery suffers only one-half step loss, and a single bar, not a cross, is drawn on a square on the loss sheet. The artillery values are affected in no way by this half-loss. Half-losses trigger a normal morale check.
The next time the artillery suffers a half-loss, another bar is drawn on the same square, which gives a complete cross. This time, the artillery suffers all the adverse effects of having lost a step.
If the artillery is stacked on infantry:
- the first step loss is applied to the artillery (and therefore only one half applies)
- the remaining step losses, if any, are applied to the infantry as full step losses.
The morale check is executed by the artillery.
If the fire attack is a combined attack by infantry (or skirmishers) and artillery, the half-loss rule applies if the artillery provides half the total fire value or more. Use the fire value modified by terrain, distance, and any other modifier for this computation.
System B - Random Losses: Each time an enemy artillery fires on a friendly artillery, the following applies:
- if the artillery is alone in the hex, roll a die. 1-3 the loss is effective, 4-6 the loss is ignored. In all cases, the artillery checks morale.
- if the result is 2 or 3 losses required, a die is rolled for each step loss required.
- if the artillery is stacked on an infantry unit, roll a die for the first step loss. 1-3 the loss is effective, 4-6 the loss is ignored. The remaining step losses, if any, are applied to the infantry. The artillery checks morale.
If the attack is a combined fire attack, use the same rule as in system A.
XVI.3 - Artillery Retreat
A limbered artillery retreats normally if disorganized.
If an unlimbered artillery is disorganized, it does not execute a retreat, but it stays in the hex. The player puts a turn number marker across the counter, but does not retreat the counter.
- an artillery disorganized in this fashion may rally normally.
- other units in the hex act as if the artillery had left the hex, they do not take the presence of the artillery into account.
- but if the enemy enters the hex, the artillery is automatically eliminated, with no combat. This includes an artillery alone in melee. If it gets disordered where it is, and if the attacker can enter the hex, then the artillery is eliminated as it does not retreat.
- During the movement phase of the following turn, the artillery can retreat as a regular disorganized unit does (use the limbered side of the counter).
XVI.4 - Cavalry
During the Napoleonic Era, this arm was the most efficient, but also the most difficult to control, because from time to time the horses had something to say about all this. Hence possible difficulties! So, to simulate more skill when you use your cavalry, here are some additional rules.
Light Cavalry (green cavalry symbol): Cavalry units with a movement allowance of 10 or more are light cavalry. These units do not need to pass a morale check to retreat before combat (see VI.8). This automatic movement can be repeated as many times as necessary.
They can change direction three times instead of twice per charge movement. They receive a +1 die roll modifier when meleeing against disorganized units.
Remember that withdrawal before combat is not allowed if the attacking unit is light or heavy cavalry (see VI.8).
Line cavalry (green or grey cavalry symbol): cavalry unit with a movement allowance of 9. They must make a morale check to retreat before combat. They can change direction twice per charge movement. They receive a +1 in melee against light cavalry.
Heavy Cavalry (grey cavalry symbol): Cavalry units with a movement allowance of 8 or less are heavy cavalry. They can change direction only once per charge movement. When heavy cavalry charges, its melee value is modified by +1, except when charging against heavy cavalry (even stacked with light cavalry).
Charge: No cavalry unit can charge during two successive turns. A cavalry that has charged during the current turn must spend the next turn without charging, but normal movement and countercharge are authorized. Having charged does not prevent cavalry from making any defensive action, including countercharging. This rule does not apply to countercharge.
Opportunity charge: light cavalry can perform an opportunity charge 2 hexes away. The procedure is identical to a countercharge, but only if the cavalry is oriented so it can actually meet the attacking cavalry before it meets its original target. After the morale check for countercharging, the unit advances one hex toward the charging unit, which advances one hex. At that point the opportunity charge is resolved as a countercharge.
Cavalry Retreat: when the charge is over, whatever the result, light or heavy cavalry can become disorganized (see VI.5 deliberate disorganization). It must retreat toward the lines of communication. The length of the retreat can be
- 2 hexes
- or the number of remaining movement points (at least 2).
Example: a light cavalry (10 MPs) uses 4 MPs during a charge. After the charge combat, no matter the result, it can adopt the disorganized formation and retreat with up to 6 MPs.
XVI.5 - Rout
Rout can be used by the players who think that the disorganization of a unit already disorganized does not mean its elimination, but its rout. The rout makes rally more difficult, and it takes into account the stragglers who clutter the rear.
A unit already disorganized, suffering a new disorganization result (either a fire result or a melee result, but not for failing a rally morale check) becomes routed.
Its marker is replaced by two markers equal to the current turn number plus 2.
Example: a disorganized unit suffers another disorganization result during turn 4. This unit receives two "6" markers. It will be able to rally no sooner than turn 8.
The unit retreats with its whole movement allowance towards its lines of communications, and it will do the same each time it fails a rally morale check.
Other effects:
- Its morale is lowered by -3.
- Its fire value is 0.
- Its melee value is 0.
- It moves normally but only toward its lines of communications.
- Its front covers the six adjacent hexes.
- If an enemy unit enters one of the six front hexes, the routed unit retreats with its whole movement towards the lines of communication. Failing that, it retreats on any free hex. If this fails too, the unit is eliminated.
A routed unit that passes through a non routed unit "contaminates" this unit; that is, the other unit becomes immediately routed also, without any morale check. The opposite is true: if a unit in any morale status passes through the hex occupied by a routed unit, the first unit is routed too.
When rallied, a routed unit becomes in good order, just like a disorganized unit. There is no intermediate disorganized status.
XVI.6 - Morale in town, fortified farm and in a castle
If one thinks a unit in town or on a castle is too powerful because it never tests its morale, apply the following:
- A unit in town has a morale bonus of 2, with a maximum of 11. It normally checks when it takes losses or after a melee, with this bonus of 2.
- A unit in a fortified farm or a castle as a morale bonus of 3, with a maximum of 11. It normally checks when it takes losses or after a melee, with this bonus of 3.
XVI.7 - Troops reintegration
A unit in good order, out of fire range of an enemy unit, with a leader on it, that did not move during a movement phase, that already took losses, can try to recover one loss during a rally phase. It must pass a morale check (adding the leader bonus) to recover one step. If more steps have to be recovered, it can follow the same procedure the following turns.
A unit totally eliminated cannot recover losses.
XVI.8 - Modulated demoralization
For a corps-based demoralization, to avoid the players knowing exactly when it will occur, the following process is used.
When the demoralization level -5 is reached, the player rolls two dice and adds this value to the normal value -5. This gives the new threshold of demoralization. For example, for a level of 30 the player rolls when it reaches 25. If it rolls a 6, the threshold will be 31. For a 9, it will be 34, and so on.
XVI.9 - Fatigue
Warning: this very experimental rule can be very complex. It has been tested several times, but may not work in extreme situations. Please be flexible, and let us know if you experiment any problem.
Fatigue is a new parameter, at the corps level, that makes a corps engaged for too long more fragile and less efficient during the day. Corps that moves and/or engages units in melee accumulate fatigue points. Complete rest decreases this level. Fatigue has consequences on the morale.
At the beginning of each turn:
- A corps which units move more than half of their movement allowance (round up) gets a fatigue point. Add 1 to the level of a numerical marker set under the leader counter. A unit moving on a road less than half its movement allowance gets a +1 MP bonus only. Disorganized units moves are not involved in this rule.
- A corps which a unit attacks in melee gets 1 fatigue points.
Artilleries and cavalries from infantry corps do not count. Artilleries from cavalry corps do not count. Being the target of fire or melee including opportunity fire does not count.
- A corps which no unit moves at all and no unit is engaged in melee during this turn recovers one fatigue point.
- A corps which no unit moves and no unit can be fired upon recovers two points.
When 5 fatigue points are accumulated, the marker 5 under the leader is replaced by a marker 1 on the top of the leader. This is the morale drop for all units of his corps. If the corps starts recovering, the marker 1 is replaced by a marker 4 under, and so on. If the corps fatigue keeps increasing, new markers 1 to 5 are placed under, then the 1 on the top is replaced by a marker 2 after 5 new fatigue points. This system is therefore a base 5 system.
Consequences:
- 1-4 fatigue points: no effect.
- 5 points (marker 1 on the leader): all units from the corps (including cavalry and artillery) have a morale decreased by 1.
- 10 points (marker 2): all units from the corps have a morale decreased by 2.
- 15 points (marker 3): all units from the corps have a morale decreased by 3.
- 20 points (marker 4): all units from the corps have a morale decreased by 4.
One army leader (one per side per battle) can create a provisional corps (use an order marker) with units from a single corps, which can be engaged without its parent corps suffering from fatigue (for example, Legrand at Austerlitz, Duhesme at Waterloo, Wittgenstein's cavalry at Leipzig). This can be done only once per battle per side.
Cavalry units can be excluded from this rule if the players also use the rules XVI-4 above.
XVII - Command and Control
There are 5 levels of optional rules about command and control, with increasing realism and complexity. Before the game starts, the players agree which level they use. Using a given level implies using the lower levels also. For example, if the players choose the second level, that means they will use the rules from the first and second levels.
"Military genius is a gift from God, but the first quality of an overall commander is steadfastness and the will to win at all costs." -- Napoleon
XVII.1 - First Level: Leaders
Use all standard rules from chapter XIV.
Additional option when a leader is eliminated. When a leader is eliminated, roll the die a second time.
- 1 to 5: this is the number of game turns the leader cannot act.
- 6: the leader is killed or severely wounded. He is out of the game for good.
If the leader is wounded, the victory points for an eliminated leader still apply, even if the leader returns to the battlefield a few turns later. But they do not apply the second time the leader is eliminated.
XVII.2 - Second Level: Command Radius
Each unit must be within 6 hexes from its commander (corps, army or wing). The unit must draw a 6 hex path not passing through any enemy unit. The terrain cost is irrelevant, only impassable hexes are forbidden.
To be in command or not is decided at the beginning of the movement phase. Out of command units can be identified with an appropriate marker; they remain out of command for all the turn.
Leaders themselves must be within 10 hexes from their own superior commander to be allowed to move. Being out of command prevents only the leader from moving except by initiative as follows. Leaders out of the radius of a commander can move by rolling for initiative. If the die roll is equal or under the leader's initiative value, he can move up to half his movement rating this turn. If the die roll is over the value, he cannot move at all. This has to be checked every turn. Whatever the status of their leader, the units (and possibly the subordinate leaders he commands) can move provided they stay within 6 hexes (or 10 hexes for the subordinate leaders).
Obviously independent units, detached from their parent corps, in the range of another leader are typically attached to that leader for the duration of the scenario, except if stated otherwise.
An overall commander does not bother about this, and can always move and lead.
Out of command units cannot voluntarily exit their hex, except if they attempt to come back within their commander's radius. Exception: disorganized units will move toward their line of communication if they voluntarily move during the movement phase.
Out of command units can
- change facing, adopt a new formation, fire or melee;
- advance after combat;
- (for cavalry) charge into adjacent hexes (like a countercharge), countercharge or withdraw before combat (see VI.8).
During the first turn, all units are under command.
XVII.3 - Third Level: Tactical Orders
This level can be played only if each player trusts his opponent and plays a tenacious yet honest game...
With this level, the army commander sends secret orders to his subordinates. These leaders must lead their units so they will execute the army commander's plan. These orders are sent by aides (use numerical markers to represent them). See XVII.5. When using this rule, a leader no longer needs to be within 10 hexes from his superior to move.
The army commander's movement allowance is half of his normal movement allowance (round up) only. He gets back his whole movement allowance if the army is demoralized or if half of his corps (round up) have a retreat order. In this case, he no longer has to lead, and he can gallop to any place he likes.
When the aide reaches his destination, roll a die to check that the general will obey the order, see XVII.6. If the test is successful, the order is applied the next game turn. Each time a general receives an order it cancels the previous one.
If the army commander is stacked with his subordinate, the order is immediately transmitted and automatically obeyed, no die roll is made. The order is put in effect the next turn.
Tactical Orders are:
-
Attack: the leader must engage at least one third of his good order units (round up). Artilleries are not taken into account for this computation. Engaged units must move at least 4 hexes toward the enemy, and if possible, attack (with fire or melee, as the owning player sees fit).
Exceptions:
- artillery can move and fight freely:
- disorganized infantry and cavalry do not count when computing the 1/3 fraction;
- in a Guard corps, the cavalry and the artillery can be engaged separately.
Special case: a cavalry corps can freely switch from an attack order to a march order, or vice-versa, at any time.
-
March: the units of the corps can move only in column or general order formation (limbered for artillery). No attack (fire or melee) is allowed, only opportunity fire is possible. Units cannot voluntarily be disorganized.
The owning player can choose one unit, no more, in the corps, and act freely with this unit. This can be a different unit each turn. Units cannot exit the map.
The corps commander can switch to an attack or defense order freely, without checking initiative and without penalties. Once such a decision is taken, the new order is fully in effect.
Special case: a cavalry corps can freely switch from a march order to an attack order, or vice-versa, at any time.
All corps entering the battlefield have a free March order. Their destination must be specified once the leader of the corps enters the map.
-
Defense: the leader can move only 2 hexes per turn laterally but only one hex toward his line of communication, and he cannot move closer to the enemy lines of communication.
As soon as the defense order is in effect, the player must draw a line on his position, which is the forward limit of his defense area. This line is drawn 1 hex in front of the most forward units (looking toward the enemy lines of communication), and extends beyond the leftmost and rightmost units of the corps. The units belonging to the corps cannot cross this line (including during advance after combat).
When the corps commander receives an order (attack, defense, march, etc), the units are considered more apt to fight than the other units, having no combat fatigue. They have a +1 bonus to the die in each melee combat they execute for 3 turns (this turn and the next two turns).
Note: this bonus applies only if all friendly units involved in this combat are "new" units.
Cavalry Corps: A cavalry corps is rather autonomous: it can switch from an attack order to a march order (or vice-versa) at any time.
Special Cases:
- If the chain of command includes a wing commander between the army commander and the corps commander, the order must be sent from the army commander to the wing commander, and then from the wing commander to the corps commander. Specific leader rules are given for each scenario.
- At the start of the game, each leader has an initial order, freely allocated by the players. The owning player can choose any order, except if specified otherwise in the scenario.
- Corps without a valid order (either because the previous order is fulfilled and has no other order, or the order is no longer valid for example a target destination is now occupied by the enemy) adopts a defense order. No corps can be without an order.
Army Commanders Order Capabilities:
- French: 3 orders per turn
- Russia, Austria or Sweden: 1 order per turn
- Prussian: 1 order per turn in 1807 or before, 2 orders per turn after 1807
- English: 2 orders per turn
These values can vary with the battle. See the special rules.
Only the army commander can send new orders. A wing commander (if any) can never send a new order. On the other side, he can decide to send to all his corps an order that was sent for just one of his corps. All corps will receive the same order.
General Retreat Order: The army commander can send a retreat order to all corps, no matter how many corps are present nor what his order capability is. These orders are sent directly to the corps commanders, even if there are wing commanders. Of course, the army commander can send no other order this turn.
Notes:
- Movement distances are in straight line, except for forbidden terrain. To zigzag does not fulfill the requirement of a mandatory movement.
- An out of command unit complies with rule XVII.2, not to its leader's orders.
- A disorganized unit obeys the rules V.5, IV.10 or IV.13 and is not considered part of the corps as far as the orders are concerned.
- During the night, order generation, aides movement, order delivery and obedience checks are normal.
XVII.4 - Fourth Level: Written Orders
Please read the warning for the third level rules. This system is the most elaborate, but also the most difficult to play and "interpret". The system is essentially the same as level 3, with the following change: additional information is written in a free format order after the standard order.
Each order may contain several elements, including a tactic (like in the third level) and/or an objective (place, direction or enemy, with possibly a time limit), a combination of these including a succession of tactics and objectives, as well as any useful information.
Written Orders:
- Tactic (attack, march, defense, withdrawal, etc) like the third level command and control rules;
- Objective, which can be a place, a direction or an enemy (division or corps), with optional additional information like a time limit, or a start hour;
- secondary order, if the primary order succeeds;
- secondary order, if the primary order fails;
- a primary or secondary order can include additional conditions, about places, timetables or other units' actions.
- the order may also be a succession of clear indications, like "move to village X, fire on units XX, then deploy and attack".
A leader must execute his primary orders for at least 3 continuous turns. Then, starting with the fourth turn, he is allowed to consider his endeavor failed and to fall back to his secondary order. There is no penalty to change the order in this case.
Note: if a leader wants to disregard the order he has received and adopt another one, he must check initiative (see XVII.7) and he gets a morale penalty.
Example:
- attack village XXX;
- then defend in XXX, and wait for AAA corps to occupy the ridge, or attack YYY if the ridge if already controlled;
- else withdraw to ZZZ.
Comment: if, after 3 turns have elapsed, XXX still is in enemy hands, the leader can consider during the 4th turn that the attack failed, and he can withdraw to ZZZ.
Example:
- defend forest EEE;
- else withdraw to TTT
Comment: there is no success secondary order, because the primary order is a defense order.
Special Cases:
- If a primary order is fulfilled, and the corps has no secondary order for a successful primary order, the corps acts as if its order were a defense order, until it receives a new one.
- The same happens if for any reason an order becomes irrelevant (e.g. attack an already eliminated enemy, or an enemy which fled off the map).
Don't Do That: Written orders must be as clear as possible, with neither too many nor too few details. For example, do not write orders like the following:
- Attack the 24th Line (this order is too narrow, it targets a regiment, and what will the corps do when the regiment is eliminated?);
- Attack and annihilate II Corps (must include limits, else the friendly corps will have to pursue the enemy corps if it withdraws or routs, even if such a pursuit is tactically unsound);
- Defend where you are ("where you are" can vary, if units become disorganized and have to retreat farther and farther).
XVII.5 - Aides and Order Transmission
This rule applies only to the level 3 and 4 Command and Control rules. Order generation, transmission and obedience checks are performed during the movement phase.
Orders are sent using aides, which appear on the map as numeric counters. An aide starts his movement from the army commander's hex, and moves toward the recipient of the order during the movement phase.
An aide has a 12 MPs movement allowance per turn. He must spend all his MPs and end his movement as near as possible from the recipient leader. Aides are not limited in number, only the number of generated orders per turn is limited. An aide spends MPs like a column cavalry, while obeying the following rule:
- he must always be more than 2 hexes away from the nearest enemy unit
- except if the leader is within 5 hexes, in which case the aide is allowed to be one hex away from the nearest enemy unit.
When the aide reaches the leader to which the order is sent, this leader checks obedience to ensure the order was correctly transmitted (received, interpreted and understood, see XVII.6). This check is therefore performed during the movement phase, upon receipt of the order, and the order can be implemented the following turn.
Allied Armies: Some allied armies had a more rigid chain of command, with "wing leaders" commanding several corps. In this case, the aide must first reach the proper wing general, and the next turn continues toward the corps commander.
Note: this rule usually applies to the Russian Army.
Intercepting An Order: If an enemy units moves within 2 hexes from a friendly aide, the enemy player immediately moves this aide beyond this distance, to an adjacent hex. Then the enemy unit can continue its movement. This movement can be executed more than once per aide and per turn if necessary.
Note: an aide does not constitute a valid target the enemy can attack. With the game scale, it would not be realistic.
XVII.6 - Obeying Orders
This rule applies only to the level 3 and 4 Command and Control rules.
This rule shows how quickly the various leaders would put their commander's orders in effect.
The obedience value is indicated on the back of each leader counter. This value typically ranges from 3 to 5. The average value for each army is:
- France (and its allies): 4
- Coalition: 3
When the leader receives a new order, he must do an obedience check. The order is "accepted" if the die roll is less than or equal to the leader's obedience.
- Success:
- the previous order is still in effect for this turn (N);
- the new order is put in effect the next turn (N+1).
- Failure:
- the previous order is still in effect for this turn (N) and the next (N+1);
- a "delay check" is executed the next turn (N+1).
Delay Check: this check depends in no way on the leader's obedience value or any other value.
- 1-4 Success: the new order is put in effect the next turn (N+2)
- 5 Delay in the execution: same as above, but with one more delay turn (N+3)
- 6 Aide lost (or killed): the general never received the order; the previous order is still in effect...
Remember: if the army commander and the leader to which the order is sent are in the same hex, the order is automatically accepted. There is neither an obedience check nor delay check, the order is in effect the next turn.
Example: the army commander sends a new order to a corps commander during turn 2. The aide leaves the army commander's hex and reaches the leader's hex the same turn (with 12 MPs, the aide runs fast). The corps commander executes an obedience check. He has an obedience value equal to 3. If he succeeds, the order will be in effect at the start of turn 3. Unfortunately, the obedience check fails. During turn 3, the corps commander will try a delay check. On 1-4, the check will succeed, and the order will be put in effect during turn 4. On 5, the order will have a notable delay, and will be in effect during turn 5 only. On 6, the aide lost his way and never found the corps commander!
Note: if there is a wing commander, senior to the corps commander, the aide will have to reach the wing commander (with no check). Then, during turn 3, the aide will leave the wing commander and reach the corps commander. The obedience check will take place at this time. This route reflects the slowness of order transmissions in some coalition armies.
XVII.7 - Initiative
This rule applies only to the level 3 and 4 Command and Control rules and to a certain extent to the level 2.
After all orders are delivered and the obedience checks performed, a corps commander can decide to act according to his own initiative, instead of obeying the order received from the army commander or the defense order generated by default as explained in the special cases in XVII-3. He executes an initiative check. If the leader does so, his units will have a morale penalty (in levels 3 and 4), and he will have some problems if he fails. Whatever the result of the check, the effects will take place the next turn.
On the leader counter and on his card, there is an initiative value.
- genius: 5
- good: 4
- average: 3
- bad: 2
When a leader decides to modify his tactic, he rolls a die, and the new order is applied if the die roll is lower than or equal to the initiative value.
In level 2, initiative can be used by any leader out of range of any commander as explained in XVII.2. A successful initiative check allows the corps leader to move half of his movement allowance for this turn.
- Success:
- the previous tactic is still in effect for this turn (N);
- the new tactic is put in effect the next turn (N+1);
- all units in the leader's command have a -1 morale negative during the next turn only (N+1).
- Failure:
- the previous tactic is still in effect;
- all units in the leader's command have a -2 morale negative during the next turn only (N+1).
Historical Note: negatives (including half moves of the leaders) represent the leader's hesitation and confusion, as well as those of his subordinates.
Note: a wing commander cannot use his initiative to alter the order of a subordinate corps commander.
XVII.8 - Order Check
Use this rule with the level 4 Command and Control rules (or possibly level 3).
An order is never revealed to the enemy except if the opponent feels he is being cheated, having noticed for example that the actions of a given corps seem rather awkward, and therefore in contradiction to a written order of any kind. In this case, the owning player must reveal the order to his opponent, and he can ask for the order of any enemy corps he chooses (this will prevent systematic and dishonest challenges).
A common agreement or an initiative check can solve any problem. Of course, we recommend that you act faithfully, so you will enjoy playing the game.
XVII.9 - Fifth level: Pen, Paper, and ... that's all!
This new level is the most historical, as it is based on free written orders of which content is not regulated. It is also the most complex as it can let the players interpret free orders.
To be playable, the following rules are however in effect:
- Two first levels of the command and control system.
- Orders are transmitted with aides de camp at the same speed than for levels three and four.
- The number of orders is limited as in level three.
- There is no check for obedience or initiative.
Players are free to implement orders or not, but their commander can relieve them if he wishes to do so. This system is already used in the campaign system "The Flight of the Eagle" (Pratzen Editions); orders are simply written on free paper. They should include the place, time and person issuing the order, the place and recipient of the order, and the order to be followed. It can be as vague as "attack straight ahead" or extremely detailed, this is up to the players.
Message general format:
- From: / To:
- Day and time:
- Origin location: / Destination location:
- Message:
Twenty years of experience on the campaign system indicate that this system works perfectly, and includes human elements as bad faith, poor writing, misunderstandings, and trust. Playing this level requires that the players understand the degree of communication between them is limited to the written messages, except if they are physically in the same hex on the map. Of course players receiving the orders can NOT ask for verbal explanations, but they can ride to their Boss and talk. C'est la guerre...
Some perfectly historical examples.
1- Dispatch from Wellington to Colville on June 17, 1815:
To Major General the Hon. Sir C. Colville, G.C.B. '17th JUNE, 1815. 'The army retired this day from its position at Quatre Bras to its present position in front of Waterloo. 'The brigades of the 4th division at Braine le Comte are to retire at daylight tomorrow morning upon Hal. 'Major General Colville must be guided by the intelligence he receives of the enemy's movements in his march to Hal, whether he moves by the direct route or by Enghien. 'Prince Frederick of Orange is to occupy with his corps the position between Hal and Enghien, and is to defend it as long as possible. 'The army will probably continue in its position in front of Waterloo to-morrow. 'Lieut. Colonel Torrens will inform Lieut. General Sir C. Colville of the position and situation of the armies.
In this dispatch note the succession of positive orders (do that!) and conditional (if... then...).
Another example from June 15: 'The Prince of Orange is requested to collect at Nivelles the 2nd and 3rd divisions of the army of the Low Countries; and, should that point have been attacked this day, to move the 3rd division of British infantry upon Nivelles as soon as collected. 'This movement is not to take place until it is quite certain that the enemy's attack is upon the right of the Prussian army, and the left of the British army.
2- Order from Napoleon to Marmont, October 16, 1813, day of Wachau. As I will attack the Austrians, I think it is good is you cross Leipzig and place yourself in reserve at half a league of the town, between Leipzig and Liebertwolkwitz, in echelon. From there you can go to Lindenau if the enemy makes a strong attack on this point, which sounds absurd to me. I will call you to me as soon as I will see the enemy forces and be sure he is attacking me. Finally, you can support Bertrand if, as unlikely as it looks, an enemy army arrives by the road from Halle. Note how Napoleon gives several choices to Marmont depending on what happens. In fact, the whole army of Silesia under Blucher arrived by the road to Halle, and Marmont chose to stay there, which lead to the battle of Mockern.
3- Orders to the Army from Napoleon, at Brunn, December 1, 1805, eve of Austerlitz.
- Order to Marshal Davout to gather his troops at the Abbey of Raigern.
- Order to Marshal Bernadotte to take Cafarelli's position
- Order to General Cafarelli to take the Grenadiers' position
- Order to the Grenadiers to move beyond the hill, on the right of the road
- Order to the Suchet division and to the Cafarelli division to move to the right of the road, at the level of the Santon
- Order to the GHQ to move to the Hill.
4- Letter to Murat, November 6, 1805 You did not give me any news yesterday, and I learn only this morning at 8 am about the fight you had yesterday. You must write to me twice or three times a day. If I had known that the enemy was there I would have reacted differently. Close the Suchet division to the Grenadiers, and make these divisions to march together. The officer you sent me is so stupid that he could not explain anything to me. I don't know if the enemy retreated, if he stayed, the number of his guns, and the part of the Oudinot division that was engaged.
Don't hesitate to use rich and formal language, after all that was 200 years ago... For example, in a 1815 campaign we played, Wellington sent the following message to Blucher:
My dear Field Marshal, I have just received news of your movement toward Dinant. I hope and trust that you reconsider this maneuver, which I fear may well be a false movement. If the French are moving against Charleroi, as it appears they are, marching with your Second Corps to join your Third at Dinant only widens the gap between our two armies and may well expose half of your army to defeat by superior numbers of the more concentrated French. Should Bonaparte push north to Charleroi and take the crossroads there, he will be squarely between us. Nor can you maneuver effectively against his flank from Dinant, since the road network does not allow it and moving across the country would be slow and difficult. My own forces are scattered in their various cantonments and it will take at least two days to assemble a significant force at Nivelles, Quatre Bras, or Wavre. I earnestly beg you to consider the dangers of a hasty plunge into the midst of a more concentrated foe so far from our effectual aid. Your reply will find my headquarters on the road between Bruxelles and Mont St. Jean. Believe me to be your most humble and obedient servant, Wellington
XVIII - Strategic Deployment
This optional rule allows an alternate battle set-up. A battle did not start with both sides agreeing on their respective set-up. The deployment was the result of small scale combats, probes, withdrawals, occupations of key positions, etc. And then the full scale battle would start. Most simulation games start with this resulting situation.
We suggest here that you simulate the various skirmishes preceding the real battle in an abbreviated way, so each army commander will more or less decide how his army will be arrayed for the battle.
Note: this is a generic rule. It is highly dependent on the game battlefield, and so it can be altered in each specific game.
"Do not do what the enemy wants you to do, mainly because he wants you to do this. Avoid deploying your army in a battlefield he knows, and avoid at all costs a battlefield he has fortified and where he has entrenched." -- Napoleon
XVIII.1 - Dividing the map
The players mentally divide the map into 16 identical squares (4 by 4) of equal sizes. But this can vary with the simulated battle.
Each player takes in his hand the commander counters belonging to the infantry corps that were present at the start of the historical battle. He leaves the army commander and the cavalry commanders.
XVIII.2 - Entry of the Infantry Corps
The first player places one infantry corps leader counter face down on the map, in one of the four squares adjacent to his map edge. The other player does the same. Then alternating, they put another counter on the map edge, or they move an already present leader to an adjacent square (diagonal moves are not allowed), provided this square is not enemy-occupied.
This procedure lasts as long as a player has a leader to be placed who is present on the battlefield in the game set-up.
Limit: during this phase, the stacking limit is 2 infantry corps per square.
XVIII.3 - Entry of the Cavalry Corps
A cavalry corps can deploy and move with an infantry corps.
Note: the cavalry corps are not tallied when checking the 2 corps stacking limit.
XVIII.4 - Unit Deployment
When one player decides that the deployment suits him, the strategic deployment ends, and the combat units are placed in the areas which correspond to the square their leaders occupy.
First, the leaders are placed face-up on the normal-scale map. Then, alternatively (or simultaneously if the players agree), each player places a unit in the hex where its commander is, and he executes a movement, with the full movement allowance, and any allowed formation. He must obey the following limits:
- the combat unit must stay within the area that corresponds to the square of deployment;
- the combat unit must not move within 3 hexes of any enemy unit;
- combat is not allowed, of course.
Note: units can be placed under a reserve marker as soon as they enter play.
XVIII.5 - Starting the Battle
When the deployment is over, the proper battle can begin, with the standard rules.
The corps (infantry and cavalry) that have not deployed arrive as reinforcements, except if specified otherwise in the scenario rules.
This system allows variations on the historical set-up, while staying within reasonable limits.
XIX - Time Limits and Penalties
The real time available to a general to act and react is seldom simulated in wargames, yet it was a factor during battles.
This optional rule can be played after one or two games. You should use an hourglass.
"Loss of time is a real problem in war. The reasons put forward to explain the failures are always bad ones, for the real reason is the delay." -- Napoleon
XIX.1 - Allowed Time
Each player has a limited time to execute his movement phase. This time limit varies with the game and is written in the battle special rules.
Yet, this time does not include the time required to execute the enemy's reactions (opportunity fire, countercharge and square formation). Counting time is halted when such reactions are resolved.
XIX.2 - Penalty
If a player uses more time than his time limit, all units belonging to the corps have their morale lowered by -1 for each 30 seconds of excess time (round up). This penalty lasts until the start of the next game turn.
XIX.3 - Desperate Army
A desperate army has no time left!
The allowed time for a desperate army or corps is 15 seconds only, no matter what is written in the game special rules. Then the morale penalty is -1 for each 15 seconds of excess time. This penalty is recomputed each turn.
Remember that units belonging to a desperate army and with at least one step loss already have a -2 morale negative (see XII)
Every player with a desperate army will feel what panic looks like...
XX - Interactive Game
This game variant adds more interaction, more uncertainties and more thrill to the game.
Each player activates one corps during a given time limit, and then his opponent activates one corps, and play returns to the first player.
This optional rule can be played after one or two games. You should use an hourglass.
"You mainly need common sense. This is the reason why the generals make mistakes; they try to act with panache..." -- Napoleon
XXI.1 - Alternate Activation
The player with the more corps commanders activates one corps (the commander and the combat units). Once he has played all these units, the other player does the same, and this sequence lasts until there is no longer any unactivated corps.
A player can decline activating a corps if his number of unactivated corps is lower than his opponent's.
If the number of corps to activate is the same for both sides, the French player chooses who will begin the game turn.
The army commander can be activated at the same time as any corps, as the owning player sees fit.
A wing commander can be activated at the same time as any corps he commands.
Out of command units (if they exist) are played last.
XXI.2 - Game Sequence
The game sequence for this optional rule is rather similar to the standard one:
- First activated corps turn (first player).
- Cavalry charges.
- Regular movement.
- Second player defensive fire.
- Offensive fire.
- Melee phase.
- Rally phase.
- Second activated corps turn (second player). Same sequence as above, with the second player replacing the first player and vice versa.
- Third activated corps turn (first player). Same sequence as above.
And so on.
Note: the attacker is the player to whom the activated corps belongs, and his opponent is the defender for the duration of the corps activation. Then, during the next activation, the roles are swapped.
XXI.3 - Time Limit
"You must plan slowly and act swiftly." -- Napoleon
A player has a finite time limit to move the activated units. This time limit is given in the battle special rules.
If the player reaches his time limit, he immediately stops playing the current corps' units, and he activates another corps. Yet, time counting is halted when executing the enemy's reactions (opportunity fire, countercharge and square formation).
Exception: the player can spend more time than allowed, but he gets a morale penalty, as explained in the advanced rule "Time Limit", see XIX.
XXI.4 - Last Activated Leader
No corps can be activated twice in a row. Notably, the last activated corps in one turn cannot be the first activated corps during the next turn.
XXI.5 - Cavalry Corps
A player can activate a cavalry corps and another corps (infantry or another cavalry corps) at the same time, in a joint activation. There is no penalty to do so.
Both corps are played together, and they can freely execute combined attack. The player has a higher time limit than when activating a single corps (see the scenario special rules).
XXI.6 - Cross-Attached Units
When activating a corps, the player can activate up to 2 units belonging to other corps, and temporarily cross-attach to the activated corps. This allows executing combined attacks with other corps.
Of course, these units will not be activated when their regular parent corps is activated.
Note: sections on Battle Options, Randomized Events and Dummies and Reserves were removed from the present version of the rules. Most of these topics are now largely covered in the special rules of each battle and several advanced rules.
Author's Notes
New tests performed for the 1815 quadruple game brought new comments and clarification, thus completing this version 3.2.
Foreword to the present edition 3.2
The release of the Battle of Leipzig raised many questions. Some minor clarifications were added everywhere in the present version of the rules. Most are self-explanatory, some are really useful.
The most intense debate focused on command and control. Players with the most experience in "counters and hexes" games feel more comfortable with a rigid set of rules telling them precisely what they can and cannot do. On the other hand, players with more experience with miniatures may think that simple and indicative "behaviors" (more than orders per se) are preferable. Sometimes there can be misunderstandings when "please attack this position" has to be translated in a precise succession of rigid orders (march there, deploy and fire using a defend order, soften the enemy position then switch to attack mode and charge) while historical knowledge shows that "please attack this position" in fact implies all these individual orders together and that the player is free to use whatever set up and sequence events he thinks are the best to eventually carry out the order.
In fact, experience shows that command and control are the most "human" part of the game, and as such it is the most difficult to simulate. The limitless variety of historical orders as can be found in the published dispatches from both sides, and the extreme variety of situations they are supposed to cover, are a challenge that can be addressed in two different directions: rigidity and freedom. The first four levels in the command and control system proposed here tend to be more and more rigid, while the fifth one is directly based on experience acquired with the campaign system the Flight of the Eagle and gives more freedom not only to give orders, but also to execute them. It works perfectly if players cannot actually talk during the game (as in all the campaign games), but players around a table obviously have information on what happens at the other end of the table. That bias is unavoidable with any level of command and control in any event. Players are of course free to try this fifth level and come back anytime to a more rigid system.
This fifth level is the closest to History, but it relies on other important elements (demoralization by corps, possibility of alternate corps activation, fog of war) already covered in the rules to fully simulate a wide array of situations. Importantly, all these rules are optional, and the increasing complexity introduced by multiple advanced and optional rules might harm the main spirit of this game system, which is "simplicity and fun".
Finally, as players tend to forget it, here is, again, the foreword of the advanced and optional rules: Once they master the standard game, the players may want to use a more realistic rules system, to grasp more accurately the complexity of the battles of the Napoleonic Era. These new rules are optional, of course, and players can modify them as they see fit. A game becomes richer and richer through the players' input.
Foreword to the third edition
This new edition was transformed with two issues in mind. The first is a will to be as complete as possible. In fact, two championships and many games have highlighted some points open to discussion, and in that field the discussion during the game kills the fun, and therefore the game.
The second, I think the most important, is historicity. Indeed, after many games it happened that the balance between the different types of units was a little different from the historical battles. For example, the power of the cavalry was a little too high, as was the fire power of the artillery. The later has been decreased a little with these new rules. The cavalry charges are now more stringent, more difficult to use, more realistic too: less powerful against woods, squares, towns, but otherwise deadly in clear terrain. Going to square is now related to the distance of the charging cavalry, the farther it is, the easier.
Finally, the tirailleurs were kept as they were, simple to use even if not totally historical, but a new set of voltigeurs deployment was added in the optional rules. As they are a little tricky to use they were set in the optional rules section. I do recommend the players to use them.
Standard Tables (Fire Table, Melee Table, Formation Table, Morale Modifiers)
Fire Table
Fire value columns; a blank cell means no effect. * = immediate morale check; a number = step losses plus a morale check.
| Dice | 1 | 2 | 3 | 4 | 5 | 6 | 7+ |
|---|---|---|---|---|---|---|---|
| 1 | * | * | |||||
| 2 | * | 1 | 1 | ||||
| 3 | * | 1 | 1 | 1 |
- Dice +1 if target is square infantry.
- Dice -1 if target is skirmishers.
- Artillery fire value: -1 per hex from firer to target. Minimum 1 up to the maximum range.
- Line of sight: from hex center to hex center.
- Artillery with one step loss: value / 2 (round up).
- Blocking terrain: Forest, town, castle, ridgeline, unit (friendly or enemy). Ridgeline: except if firer or target on high ground and adjacent to ridge.
Melee Table
Combat ratio Attacker/Defender. Each cell is the result Attacker/Defender (A/D).
| Dice | 1/2- | 2/3 | 1/1 | 3/2 | 2/1 | 3/1 | 4/1+ |
|---|---|---|---|---|---|---|---|
| 0 | E / 1 | D1 / 1 | D / 0 | D / 0 | *1 / 1 | *0 / 0 | 0 / *0 |
| 1 | D1 / 1 | D / 0 | D / 0 | *1 / 1 | *0 / 0 | 0 / *0 | 1 / *1 |
| 2 | D / 0 | D / 1 | *1 / 1 | *0 / 0 | 0 / *0 | 1 / *1 |
Results Attacker/defender:
*: immediate morale check for the stack (not town / castle)- 0 or 1: no or one step loss
- D: disorganized + 2-hex retreat
- D1: disorganized + 1-step loss + 2-hex retreat
- E: eliminated
Die roll modifiers: +? = + attacking leader, - defending leader.
Cavalry charge: +1 step loss against infantry (except if square infantry, or if unmodified result = 0 loss).
Formation Table
Formation change: +1 MP infantry, +2 MPs artillery, +0 MP cavalry, +0 MP if general order or disorganized.
| Infantry | Movement | Fire | Melee | Morale | Rear/Flank |
|---|---|---|---|---|---|
| Column | - | - | value +1 | - | 1/2 melee |
| Line | - | - | - | - | 1/2 melee |
| Square | 1 MP | 1 | 1/2 if vs inf | +2 vs Cav | - |
| General Order | - | 1 | - | No MC in town/castle | - |
| Cavalry | Movement | Fire | Melee | Morale | Rear/Flank |
|---|---|---|---|---|---|
| Battle | - | none | Normal or 1* | - | 1/2 melee |
| Column | - | none | Col value | - | 1/2 melee |
| General Order | - | none | Col value or 1 | No MC in town/castle | - |
| Disorganized | to line of com. | none | 1 | -2 | - |
| Artillery | Movement | Fire | Melee | Morale | Rear/Flank |
|---|---|---|---|---|---|
| Limbered | - | none | No attack | - | - |
| Unlimbered | none | Normal | No attack | - | Automatic D |
| Disorganized | to line of com. | none | Eliminated | -2 | Eliminated |
"to line of com" means toward the line of communication. 1/2 means value is halved, not value is 1/2. *value 1 if versus square or versus various terrains.
Morale Modifiers
- +# Leader
- +2 Square infantry vs cavalry
- -2 Disorganized
- -1 Demoralized
- -2 Desperate
- -2 Flank attack
- -3 Rear attack
- -2 failed MC (unit stacked above)
- -1 rallying while adjacent to enemy
- -# 1 or 2 depending on losses
Note: A 2 morale check is always a pass, a 12 always a miss.
PART TWO: LE RETOUR DE L'EMPEREUR -- SCENARIOS AND SPECIFIC RULES
Vive l'Empereur! -- Le Retour de l'Empereur, June 16 and 18, 1815: Ligny, Quatre-Bras, Waterloo, Wavre. Scenarios and specific rules (Pratzen Editions 2011).
Contents of this booklet: Historical Background; Quatre-Bras (1 Historical Scenario, 2 The Duke strikes back, 3 Ney ten years younger, 4 The Prince of Orange gamble, 5 d'Erlon at the rescue); Ligny (1 Historical scenario, 2 La Victoire en chantant, 3 Vandamme Attacks, 4 Ligny on Fire, 5 Holding Thielmann, 6 The Guard Attacks, 7 Enter the Prussian IV Corps, 8 D'Erlon's outflank, 9 Remembering Mouton, 10 Solving the traffic jam); Waterloo (1 Historical Scenario, 2 D'Erlon's attack, 3 Hougoumont, 4 Cavalry madness, 5 Holding the Prussians, 6 The Guard dies, 7 No strawberries for Grouchy, 8 Prince Frederic, 9 No rain today, 10 Rethinking the pursuit force, 11 Shuffling the Allied Army); Wavre (1 Historical Scenario, 2-4 The road to Waterloo: gates #1, #2, #3, 5 Closing the distance, 6 Crossing the Dyle); Combining Games; Variations valid for the four games (1 Davout in charge, 2 Entering the X corps); Special Rules.
Historical Background
Arguably one of the most famous, if not the most famous, battle of history, Waterloo (called Mont St Jean for the French and La Belle Alliance for the Prussians) was the culminating act of Napoleon's attempt to regain the mastery of France.
Napoleon's landing on the shores of France near Cannes on March 1, 1815, sent a shock through the gathered (and argumentative) politicians, generals and crowned heads of state. The Congress of Vienna was meant to finalize the 1814 victory over Napoleon but had somewhat disintegrated into a face-off between Russia and Prussia on one side and Austria, Britain and France on the other. Napoleon's reappearance on the continental stage changed all that, and the major powers quickly agreed to raise troops and once and for all rid Europe of the constant war making and conquest of Napoleon Bonaparte. This was the Seventh Coalition.
The big four (Russia, Prussia, Britain and Austria) each pledged armies of 150,000 troops, with Britain able to make up her numbers through the use of subsidies. However, the Russian army was back in Russia, Britain was fighting a war in America with her Peninsular veteran troops, Prussia was dealing with an uncooperative Saxony and mutinous Saxon troops (Prussia was given 2/5ths of Saxony as her part of the spoils) and Austria was still slow Austria. The original offensive date of June 1 set by the Allies was changed to June 27th.
Napoleon struck on June 15th.
The British were deployed in the area of Brussels, Mons, Tournai and Ghent. Light cavalry was forward along the French border. The Prince of Orange led the I Corps (28,300), General Hill the II Corps (29,400 - of which 17,000 were detached to the west at Hal), Uxbridge the Cavalry Corps (16,500) and Wellington the Reserve (37,000 - which was essentially a third Corps). Wellington was in Brussels. Total for the British was about 111,200 troops and 203 guns. Wellington was concerned the French goal was to attack the British right, which would endanger his communications with the sea. Hence his stationing Hill's II Corps and much of his cavalry to the west. This would affect the British concentration once the French line of attack became apparent.
The Prussians were spread from Liege and Maastricht in the east (Bulow with IV Corps - 31,900), to Dinant in the south (Thielmann with III Corps - 27,900), to Charleroi and beyond in the west (Ziethen with I Corps - 31,800) and Wavre to the north (Pirch with II Corps down to Namur - 35,100). Blucher was in Namur. Total for the Prussians was 123,000 and 296 guns.
French deserters had been picked up by the Prussian outposts as early as the 12th of June. This and later reports caused Gneisenau (Chief of Staff to Blucher) to order concentrations of the Prussian Corps from their bivouac areas on the 15th. General Bulow, however, not seeing the urgency of the concentration, decided to march on the 16th. This ultimately affected the Prussian strength at Ligny.
The French Armee du Nord was massed around the Beaumont area, with the IV Corps coming up from Phillipeville. It consisted of the Imperial Guard (Drouot with 20,700), the I Corps (d'Erlon with 19,800), II Corps (Reille with 25,100), III Corps (Vandamme with 17,600), IV Corps (Gerard with 15,300), VI Corps (Lobau with 10,500), I Cavalry Corps (Pajol with 3,000), II Cavalry Corps (Exelmans with 3,400), III Cavalry Corps (Kellermann with 3,900) and IV Cavalry Corps (Milhaud with 3,100). Total for the army was 122,600 with 368 guns. (The numbers vary according to the sources used, these being from The Waterloo Campaign by Albert Nofi.)
Napoleon started his offensive on the early morning of June 15th, moving on Charleroi with the intention of splitting the Prussian from the British. Contacting the Prussian I Corps at Charleroi the French pushed the Prussians beyond the town and held possession by noon. Muddled staff work by Marshal Soult had delayed the attack and it was not vigorously pushed until Napoleon came on the scene. The battered Prussian I Corps fell back on Sombreffe, where it was joined by the Prussian II and III Corps by noon on the 16th. The IV Prussian Corps was not within supporting distance for a combat on the 16th. The aggressive Blucher was concentrating forward, even though he thought Napoleon's entire army was facing him.
Napoleon gave command of the left wing (I, II Corps and III Cavalry Corps, plus the Guard Light Cavalry) to the recently arrived Marshal Ney. Marshal Grouchy was in command of the right wing (III, IV Corps, I and II Cavalry Corps). Napoleon kept the VI Corps, the IV Reserve Cavalry Corps and the Guard infantry and heavy cavalry under his command and in reserve. The orders were for Marshal Grouchy to attack the Prussians and for Marshal Ney to move to Quatre-Bras. The reserve would support the right wing. Napoleon intended to destroy the Prussians, keep the allies apart by taking the Quatre-Bras position, and use Marshal Ney on a flanking maneuver against the Prussian right.
Although Wellington had rumors and warnings of the French advance on the seam of the Allied armies, he insisted that the French would strike at his right. When finally late on the 15th he became convinced of the direction of the French attack, he ordered his divisions to concentrate, but the forward concentration was to be at Nivelles for the Prince of Orange. Fortunately the I Corps Chief of Staff, General Constant-Rebecque, decided to hold Quatre-Bras with Perponcher's division. The Prince of Orange had gone to see Wellington in Brussels and was not on the scene when this decision was made. Had Wellington's concentration gone as ordered, Marshal Ney would have been able to attain the Quatre-Bras position and split the allied armies.
The 16th started slow for most of the troops. Ney pushed slowly on Quatre-Bras, Grouchy slowly on Ligny, the Prussians were moving toward Sombreffe and the British were concentrating their divisions in their cantonments. Only Perponcher was where he needed to be. Staff officers and ADC's from all armies were hurrying up and down the roads, alerting, notifying and delivering orders to the various commanders. Napoleon was irritated about the slow start, Blucher was arranging the remnants of the I Corps and distributing the II and III Corps as they arrived, and Wellington was starting to forward troops for a possible support for the Prussians.
This is where the games begin...
Quatre-Bras
Synopsis
The first contact between the French and Dutch-Belgians occurred on the afternoon of the 15th. Units of the 2nd Brigade of the 2nd Dutch-Belgian division of Lieutenant General Perponcher skirmished with Lefebvre-Desnouettes Guard Light Cavalry at Frasnes, a village two miles south of Quatre-Bras. The Dutch-Belgians fell back on Quatre-Bras and the French bivouacked at Frasnes, tired after a march of 22 miles on the 15th. Early on the 16th, the remainder of the 2nd Dutch-Belgian division arrived at Quatre-Bras, as did the Prince of Orange.
8,000 Dutch-Belgian troops with 16 guns occupied a front of less than 2 miles, while 18,000 French with 38 guns were close by to the south. However, Ney did not move until early afternoon.
At 1430 the French cannon started firing and the French infantry attacked. By 1500 the Dutch-Belgians were under severe pressure, when the Brunswicker's arrived (4,300 infantry and 900 cavalry).
Wellington arrived about 1500, after having visited Blucher at Sombreffe (where he had said that "If they fight here they will be damnably mauled" which proved correct). Wellington then took direct control of the fight at Quatre-Bras.
British reinforcements started to arrive. First the Dutch-Belgian 2nd Cavalry Brigade, and then Picton's 5th British Division which went to reinforce the hard pressed Dutch-Belgian infantry.
Attack and counter attack caused the battle to flow back and forth. Napoleon's message to Ney arrived about 1530 and caused Ney to redouble his efforts. He called on d'Erlon to bring his I Corps up with all possible speed while again sending Reille's troops into the attack.
A little after 1600 Ney learned that the I Corps was moving on the wrong direction! Mistaking Napoleon's directions and intent, Ney, in a rage, sent a message recalling d'Erlon.
Also about this time, the British 3rd division arrived at Quatre-Bras.
Ney sent forward Kellermann's cuirassiers, in an all but suicidal attack. The French horsemen reached the cross roads but could not stay.
Again attack and counter attack occurred. Rain started about 1800, becoming heavy. The battle died down about 2100, with the lines essentially established where they had started. The battle was tactically a draw, but was a strategic allied victory. Ney did not take the cross roads nor did he maneuver against the Prussian right flank. He also lost time, the one thing Napoleon said he must not lose.
Quatre-Bras 1 - Historical Scenario
Length: The game starts at 1400 and ends at the end of the 2000 turn. This scenario therefore lasts 13 turns.
The Allied player sets up first. The French player starts all the turns first.
French set up
- Reille, II Corps cavalry (units 62 and 63) north of Frasnes, within two hexes of the town
- II Corps 5th division (Bachelu, units 45 to 48, artillery 64) at Frasnes.
- II Corps 9th division (Foy, units 58 to 61) on the road to Charleroi, south of Frasnes.
- Marshal Ney with any unit
- Light Cavalry of the Guard (units 16, 17 and 20) half distance between Frasnes and Villers-Perwin.
Reinforcements:
- 1400: Road to Charleroi: Jerome, 6th division, units 49 to 53, artillery units 65 and 66.
- 1500: Road to Charleroi: IIIC units 124 and 125, Kellermann
- 1700: Road to Charleroi: IIIC units 126 to 128.
- 1900: South-east corner of the map: d'Erlon, units 24 to 27, 42.
- 1930: South-east corner of the map: units 28 to 31
- 2000: South-east corner of the map; units 32 to 35, artillery 043.
Allied set up and reinforcements:
- Units 13 to 17 are set up as follows:
- Unit 13 is at Gemioncourt
- Unit 14 is at Quatre-Bras
- Unit 15A is at Grand Pierrepont
- Unit 15B, 16 and 17 are anywhere on a line between Gemioncourt and Grand Pierrepont
- The Prince of Orange is at Quatre-Bras.
Reinforcements:
- 1400 - From Brussels: Picton's division, Kempt brigade units 43 and 44
- 1400 - From Ligny: Wellington
- 1430 - From Nivelles: van Merlen unit 84
- 1430 - From Brussels: Pack brigade (units 45 and 46), and Best brigade (units 52 and 53), artillery 49
- 1500 - From Brussels: Brunswick contingent, units 56 to 61
- 1600 - From Nivelles: Alten 3rd Division: C Halkett brigade units 06 and 07
- 1630 - From Nivelles: Kielmansegge brigade units 10 and 11, artillery 12
- 1700 - From Nivelles: Cooke 1st Division, Byng and Maitland brigades units 01 to 04, artillery 05.
Victory:
- If there is no French unit in good order north of the road to Nivelles-To Ligny, it is a major Anglo-Allied victory.
- If the Anglo-Allied hold the Quatre-Bras at the end of the game, this is an Anglo-Allied victory.
- If the French hold the Quatre-Bras at the end of the game, this is a French victory.
- If in addition they can exit to Ligny two full infantry divisions by the end of the game, this is a major French victory.
Special rules for this scenario in addition to the rules exposed below
- The initial set up partly counteracts special rule 9 (see the Special Rules below) on the cohesion of Anglo-Allied brigades. However, when any of these units move, they have to comply with this rule the best they can. They are not required to move.
- Use of the Guard light Cavalry. Napoleon forbad Ney to use this excellent unit. At 1600 it must withdraw from the battlefield by the eastern edge of the map. However, before this turn, these units can move and countercharge normally, but Ney must be stacked with them in order to initiate a charge. If they take any loss, these are counted as 5 losses on the morale demoralization level of the II Corps, which therefore decreases by 5 for every loss the Guard cavalry or artillery takes. The artillery unit attached to the Guard is free to act before 1600 but must follow the cavalry starting at 1600 when it withdraws.
- The Best brigade (units 52 and 53) is attached to Picton for the duration of the game.
- Demoralization levels for this battle are:
French army:
| Corps | Steps | Demoralization | Desperate level |
|---|---|---|---|
| I | 48 | 24 | 35 |
| II | 74 | 37 | 54 |
| III Cav | 15 | 8 | 13 |
Anglo-Allied army:
| Corps | Steps | Demoralization | Desperate levels |
|---|---|---|---|
| I | 64 | 32 | 40-51 |
| Reserve | 55 | 28 | 35-45 |
These special numbers are explained in special rule 5 page 34.
- Command: the Prince of Orange is an army leader with an ability of 1 order per turn, but he is only a Corps commander once Wellington arrives. He remains so for the rest of the campaign.
Quatre-Bras 2 - The Duke strikes back
Length: The game starts at 1800 and ends at the end of the 2130 turn. This scenario therefore lasts 8 turns.
The French player sets up first. The Allied player starts all the turns first.
French set up:
- II Corps (units 45 to 53 and 58 to 66) and the IIIC Corps of Kellermann (units 124 to 128) on or south of a line Grand Pierrepont-Gemioncourt-Piraumont, including all these locations. The II Corps has 10 losses spread among their infantry units, one per unit.
Allied set up:
- Perponcher division (13 to 17) is in or around Quatre-Bras. They have 6 losses to spread among the units. All start the scenario in disorder.
- Brunswick contingent (units 56 to 61) are south of Quatre-Bras on a line Bois de Bossu-Etang Materne
- Brigades Kempt and Pack (units 43 to 46) and the Best brigade (units 52 and 53) on the road to Ligny between Quatre-Bras and the map edge. Brigades Kempt and Pack have one loss per unit.
- Brigades C Halkett and Kielmansegge (units 06, 07, 10 and 11) are on the road between Quatre Bras and Gemioncourt.
- Cooke 1st Division (units 01 to 05) is on the road from the Quatre-Bras to Houtain le Val.
Reinforcements: Per scenario 1
Victory: The conditions are the same than scenario 1
Special rules for this scenario in addition to the rules shown below: Same as scenario 1.
Quatre-Bras 3 - Ney ten years younger
The overall performance of the "Prince de la Moskova" has been constantly seen as very poor (and this is a generous view) during the whole campaign. This is of course in hindsight, but poor judgment at Quatre-Bras, bad advice from Reille (seeing Brits everywhere especially where they were not), procrastination, wrong decisions in the middle of the battle, forgetting to use other arms; this did not get better at Waterloo two days later even under the eyes of the Master. By himself at Quatre-Bras, Ney had been a poor commander. Let's explore him ten years younger:
- Ney can issue two orders per turn.
- Hurrying the other divisions of the II Corps, he starts with Bachelu at Grand Pierrepont, Foy at the same level on the east of the road, Jerome at Frasnes, Kellermann on the road south of Frasnes. All these units can be used normally.
- The Guard cavalry is removed from play and sent back to Ligny.
- Understanding that d'Erlon is needed mostly at Ligny, Ney recalls Girard's division that enters at 1600 by the south-east corner of the map.
- Allied set up, reinforcement and victory conditions are unchanged.
Quatre-Bras 4 - The Prince of Orange gamble
When Napoleon struck on June 15th, the Anglo-Allied army was spread over a very large area. Curiously, the central highway from Charleroi to Brussels was empty of Anglo-Allied troops, in spite the fact that it was a possible (even likely) route of penetration between both allied armies. The young Prince of Orange, at the head of I Corps, had his headquarters at Soignes, far away from Quatre-Bras. If the HQ had been at Nivelles, in a more central position, his Corps could have been assembled more quickly and their movement to Quatre-Bras easier. The table of reinforcements by the road to Nivelles is replaced by the following:
- 1400 - From Brussels: Picton's division, Kempt brigade units 43 and 44
- 1400 - From Ligny: Wellington
- 1400 - From Nivelles: Chasse's division (units 18 to 22)
- 1430 - From Nivelles: van Merlen unit 84
- 1430 - From Brussels: Pack brigade (units 45 and 46), and Best brigade (units 52 and 53), artillery 49
- 1500 - From Brussels: Brunswick contingent, units 56 to 61
- 1500 - From Nivelles: Cooke 1st Division, Byng and Maitland brigades units 01 to 04, artillery 05.
- 1600 - From Nivelles: Alten 3rd Division, units 06 to 12
- 1700 - From Nivelles, Dutch cavalry units 82 and 83
The victory conditions are unchanged.
Quatre-Bras 5 - d'Erlon at the rescue
A considerable amount of debate has been made for two centuries around this powerful I Corps not being involved in any of the two battles fought that day. Initially planned on joining Ney at Quatre-Bras, it was diverted by Napoleon to Ligny, and later recalled by Ney, too late to be involved that day.
In hindsight, both very different points of view make sense. Ney wrongly thought being engaged with a major part of the Anglo-Allied army needed this I Corps, and his stubborn decision, although wrong, is respectable. However, without the imperial vision, unable to realize that the decision of the day was to be fought at Ligny, he deprived the Emperor of a major victory at Ligny.
This scenario explores the entry of the I Corps at Quatre-Bras. The reinforcements by the road to Charleroi are as follows, in addition to or instead of those shown in scenario 1 as needed:
- 1530: d'Erlon, Jacquinot cavalry division (units 40 and 41)
- 1600: Quiot's division (units 24 to 27 and 42)
- 1700: Donzelot's division (units 28 to 31)
- 1800: Marcognet's division (units 32 to 35 and 43)
- 1830: Durutte's division (units 36 to 39) and the artillery reserve 44.
Ligny
Synopsis
At 0500, June 16th, the battered Prussian I Corps started moving into positions north of the Ligny brook. The French outposts saw this movement and messages went off to Napoleon who had spent the night at Charleroi.
The I Prussian Corps was in position by 1100, but the II and III Corps were still on the road to Sombreffe. II Corps arrived between 1000 and noon, and III Corps between noon and 1400. The II Corps was on the right, I Corps in the center and III Corps on the left. IV Corps would not be involved.
Napoleon reached his III Corps (Vandamme) around 1100. He saw the Prussian outposts (the I Corps), and decided to immediately attack. However, Gerard's IV Corps was not yet up, and the reserve of the Guard was further back. The VI Corps hadn't yet been ordered to move up.
By 1400, the French dispositions had the I and II Cavalry Corps on the right flank, "containing" the Prussian left, with IV Corps in the center and III Corps, reinforced by a division of the II Corps on the left. The Guard and IV Reserve Cavalry Corps were in reserve.
French cannon fire opened the attack. The right flank cavalry moved forward to pin the Prussian III Corps (Thielmann) while the French III Corps moved against St Amand. A bit later the French IV Corps moved against Ligny. Bitter fighting in the streets of the villages moved the lines back and forth.
About 1400 Napoleon sent off a message to Marshal Ney to move against the Prussian right flank. The ADC carrying the message first met the French I Corps on the way to support Marshal Ney, whereupon d'Erlon started moving towards the Ligny combat. Also about this time, orders were sent to the VI Corps to advance to Fleurus.
At 1700 the Guard was ordered to deploy for attack with the artillery coming into action immediately. At 1800 the Guard was ready to advance into contact when a report arrived at Napoleon's headquarters that an unidentified force of 20,000 men was approaching the rear of the left flank. Vandamme reported that his scouts had identified this force as enemy. Napoleon held off the Guard attack, detached a brigade of Young Guard to the left and sent staff officers to identify this "enemy" column. At 1830 they returned with the news that it was d'Erlon's Corps and Napoleon put the final touches on the attack against the Prussians. At 1930 the Guard went in. Hard fighting cleared the Prussians from the villages and finally caused the fatigued Prussians to break.
Marshal Blucher led a cavalry charge in an attempt to stem the rout. His horse was hit and collapsed on top of him. French and Prussian cavalry swept back and forth but Blucher was not recognized in the growing darkness. He was mounted on a horse from the 6th Uhlans and led to the rear, much shaken from the experience.
As the Prussian I and II Corps reeled back, the III Corps withdrew north of Sombreffe. Both sides were disorganized and greatly fatigued. Night was falling. Gneisenau, Blucher's Chief of Staff, had no idea what had happened to Blucher, but made a fateful decision. The Prussians would retreat to Wavre.
Ligny 1 - Historical scenario
Length: The game starts at 1300 and ends at the end of the 2130 turn. This scenario therefore lasts 18 turns.
The Prussian player sets up first. The French player starts all the turns first.
French set up:
- II Corps 7th Division Girard (units 54 to 57) on the Chaussee Romaine within 4 hexes of the map edge
- III Corps of Vandamme (units 67 to 84) between the town of Fleurus and the stream from St Amand to Wagnee, at a maximum distance of Fleurus of 4 hexes.
- I Cav Corps (units 114 to 118) and II Cav Corps (units 119 to 123), Grouchy, on the large hill south of Ligny, east of Fleurus but not northerly of the Fleurus mill.
- Napoleon and the Gendarmes are on the mill of Fleurus.
French reinforcements
- 1300: IV Corps of Gerard (units 85 to 101) entering between the road to Charleroi and the eastern edge of the western map
- 1300: IV Cavalry Corps of Milhaud (units 129 to 133) by the road to Charleroi at Fleurus.
- 1330: the Guard (units 01 to 23 except the light cavalry units 16, 17 and 20) by the road to Charleroi to Fleurus.
- 1800: Durutte's division of the I Corps (units 36 to 39 and 44) and Jacquinot cavalry (units 40 and 41) enter by the Chaussee Romaine.
- 1900: VI Corps of Mouton (units 102 to 113) by the road to Charleroi to Fleurus.
Prussian set up:
- Blucher on the mill of Brye
I Prussian Corps
- Steinmetz brigade (units 01 to 04) St Amand, la Haye, le Hameau
- Henkel brigade (units 13 to 15) at Ligny
- Pirch and Jagow (brigades 2 and 3, units 05 to 07 and 09 to 12) in a square Ligny-Brye-La Haye)
- Unit 08 at Wagnelee
The artillery is spread one unit per brigade, in hexes adjacents to the villages if needed.
Cavalry units 16 to 18 within two hexes of the mill south of Brye.
II Prussian Corps
- Units 24 to 45 on or adjacent to the Namur-Quatre-Bras road between Trois Burettes and Sombreffe.
- II Corps Cavalry (units 37 to 40) between Brye and the Trois Burettes.
The artillery is spread one unit per brigade.
III Prussian Corps
- Units 46 to 61 are spread on the road between Sombreffe and the edge of the map to Namur. All units are on the road.
Prussian reinforcements: None, although sources vary, it looks like all of Thiemann's III Prussian Corps was already between Sombreffe and the edge of the map between noon and 1300.
Victory: At the end of the game, the French player adds the following victory points:
- St Amand, La Haye, le Hameau are all French occupied: 1 VP for the four hexes.
- Ligny is totally French occupied : 2 VP
- Sombreffe (but the Chateau), Point du Jour, 3 Burettes: 1 VP each
- Per Prussian demoralized Corps : 1 VP
- Per Prussian Desperate Corps : 1 VP in addition to the previous.
If the total is:
- 1 VP or less : large Prussian victory
- 2 or 3 VP ; small Prussian victory
- 4 to 6 VP : small French victory
- Over 6 VP : large French victory
Special rules for this scenario in addition to the rules exposed below
- For this scenario Girard, Durutte and Jacquinot are commanded by Vandamme.
- Demoralization and Desperate levels:
French army:
| Corps | Steps | Demoralization | Desperate level |
|---|---|---|---|
| Guard | 74 | None | None |
| III including II-7 | 76 | 38 | 55 |
| IV | 51 | 26 | 37 |
| VI | 38 | 19 | 28 |
| I Cav | 12 | 6 | 9 |
| II Cav | 14 | 7 | 11 |
| IV Cav | 12 |
- To add some balance, players are encouraged to try, and possibly play, the optional rule XVI-6 on morale in towns.
Prussian army:
| Corps | Steps | Demoralization | Desperate level |
|---|---|---|---|
| I | 120 | 60 | 87 |
| II | 117 | 59 | 85 |
| III | 91 | 46 | 62 |
Ligny 2 - La Victoire en chantant
Length: The game starts at 1500 and ends at the end of the 2130 turn. This scenario therefore lasts 14 turns.
The Prussian player set up first. The French player starts all the turns first.
French set up:
- III Corps of Vandamme (units 67 to 84) and II Corps 7th division Girard (units 54 to 57) between Fleurus and the hill west of St Amand, hill included. The III Corps artillery (082 a 084) is in Fleurus.
- IV Corps of Gerard (units 85 to 101) on the hill south of Ligny, adjacent to the road.
- I Cav Corps (units 114 to 118), on the hill south of Ligny, south of the road.
- II Cav Corps (units 119 to 123), on the hill south of Boignee.
- Grouchy, with any unit of the I or II Corps of cavalry.
- Napoleon and the Gendarmes are on the mill of Fleurus.
- The Guard (units 01 to 23 except the light cavalry units 16, 17 and 20), on the hill west of Fleurus.
- IV cavalry Corps of Milhaud (units 129 to 133), on the hill east of Fleurus.
French reinforcements:
- 1800: Durutte's division of the I Corps (units 36 to 39 and 44) and Jacquinot cavalry (units 40 and 41) enter by the Chaussee Romaine.
- 1900: VI Corps of Mouton (units 102 to 113) by the road to Charleroi to Fleurus.
Prussian set up:
- Blucher and Ziethen on the mill of Brye
I Prussian Corps
- Steinmetz brigade (I-1) St Amand, la Haye, le Hameau, units 01 to 04.
- Artillery 019 within 1 hex of Saint Amand or la Haye
- Artilleries 020 to 023 on the plateau of Brye.
- Unit 09 at St Amand.
- Unit 08 at Wagnelee
- Henkel (units 13 to 15) at Ligny
- Pirch and Jagow (brigades 2 and 3, units 05 to 07 and 10 to 12) in a square Ligny-Brye-La Haye)
- Cavalry units 16 to 18 entre le Bois du Loup et Sombreffe.
II Prussian Corps
- Units 24 to 36, 41 to 45 and Pirch on or adjacent to the Namur-4 Bras road between 3 Burettes and Sombreffe.
- II Corps cavalry (units 37 to 40) north of the road Nivelles-Sombreffe, adjacent to the infantry of the II Corps.
The artillery is spread one unit per brigade.
III Prussian Corps
- Units 46 to 61: in an area Sombreffe, Tongrinne, Tongrenelle and Bothey. One infantry unit can be set at Boignee.
Prussian reinforcements: None
Victory: At the end of the game, the French player adds the following victory points:
- St Amand, La Haye, le Hameau are all French occupied : 1 VP
- Ligny is totally French occupied : 2 VP
- Sombreffe, Point du Jour, 3 Burettes: 1 VP each
- Per Prussian demoralized Corps : 1 VP
- Per Prussian Desperate Corps : 1 VP in addition to the previous.
If the total is:
- 1 VP or less : large Prussian victory
- 2 or 3 VP ; small Prussian victory
- 4 to 6 VP : small French victory
- Over 6 VP : large French victory
Special rules for this scenario in addition to the rules exposed below
- For this scenario Girard, Durutte and Jacquinot are commanded by Vandamme.
- Scenarios 7, 8, 9 and 10 can be played based on the set-up of this scenario.
- To add some balance, players are encouraged to try, and possibly play, the optional rule XVI-6 on morale in towns.
- Demoralization and Desperate levels: Same as scenario 1
- Note: based on records of the battle, the French were singing before the main assault while the Prussians were silent, hence the title of this scenario.
Ligny 3 - Vandamme Attacks
Length: The game starts at 1400 and ends at the end of the 1900 turn. This scenario therefore lasts 11 turns.
The Prussian player sets up first. The French player starts all the turns first.
French set up:
- III Corps of Vandamme, the Girard division between Fleurus and the hill west of St Amand, hill included. The III Corps artillery is in Fleurus.
Prussian set up:
- Steinmetz brigade (I-1) St Amand, la Haye, le Hameau, units 01 to 04. Artillery 19 (in or adjacent to the villages).
- Artilleries 021 and 022 on the plateau of Brye.
- Unit 010 at St Amand.
- Unit 08 at Wagnelee
- Ziethen is at Brye.
Reinforcements:
- 1500: Prussian I Corps 2 brigade, units 05 to 07, artillery 20, at Brye
- 1630: Prussian II Corps, 5 brigade (units 24 to 27, artillery 41), Cavalry units 37, 38 and artillery 45 are available at 3 Burettes.
- 1700: French Young Guard, units 11 to 15, at Fleurus.
Victory: If the French control the three villages at the end of the game they win. To control means to be the sole occupant of all hexes or being the last to move through. Otherwise it is a Prussian victory.
An immediate victory can be achieved by the French if they have 8 steps on the plateau of Brye at any time. An immediate victory can be achieved by the Prussians if they have 12 steps on the plateau south of St Amand at any time. If both conditions are met at the same time this is a draw.
Special rules for this scenario in addition to the rules exposed below
- The area of play is limited on the east by a vertical line passing at Brye. No unit can move east of this line.
- Vandamme commands all the French units in this scenario. Ziethen commands all the Prussian units involved in this scenario.
- To add some balance, players are encouraged to try, and possibly play, the optional rule XVI-6 on morale in towns.
- Note: Some units of the Old Guard were committed on that front, but that was very late in the day and out of the scope of the present short scenario.
Ligny 4 - Ligny on Fire
Length: The game starts at 1400 and ends at the end of the 1700 turn. This scenario therefore lasts 7 turns.
The Prussian player sets up first. The French player starts all the turns first.
French set up:
- Elements of the IV Corps of Gerard, units 85 to 92, artilleries 99 and 101, at 2 hexes around Ligny, south of the stream.
Prussian set up:
- I Corps, 4th brigade, (units 13 to 15) at Ligny. Artillery 21 in or adjacent to Ligny. Blucher at the Moulin de Bussy.
Reinforcements:
- 1500: Prussian I Corps 3rd brigade, units 09 to 12, artillery 22, at Brye
- 1500: French Guard battery 22 is available at Fleurus.
Victory: If the French control all the hexes of Ligny at the end of the game they win a major victory. To control means to be the sole occupant of the town. Otherwise the side controlling the higher number of hexes of Ligny at the end of the game wins.
Special rules for this scenario in addition to the rules shown below
- As Ziethen is already engaged at St Amand, Blucher acts as Corps commander and can command all the Prussian units.
- The area of play is limited to the initial deployment of the units, the town of Ligny and an area two hexes wide on each side of the town. Disorganized units are excluded from these limits and can freely retreat.
- To add some balance, players are encouraged to try, and possibly play, the optional rule XVI-6 on morale in towns.
Ligny 5 - Holding Thielmann
Length: The game starts at 1600 and ends at the end of the 2000 turn. This scenario therefore lasts 9 turns.
The Prussian player sets up first. The French player starts all the turns first.
French set up:
- Grouchy, the 1 and II Corps of Cavalry (units 114 to 123), the division IV-14 (units 93 to 96, artillery 100), in the loop of the Ruisseau de la Ligne, not adjacent to it.
Prussian set up:
- III-9 (units 46 to 48) at Sombreffe.
- III-10 (units 49 and 50) at Tongrinne
- III-11 (units 51 and 52) and the cavalry (units 56 to 58) of the III Corps between both villages.
The artillery is spread one unit per brigade, in hexes adjacent to the villages if needed.
Reinforcements: None
Victory: The side controlling Point du Jour wins this scenario.
Special rules for this scenario in addition to the rules exposed below: None
Ligny 6 - The Guard Attacks
Length: The game starts at 1930 and ends at the end of the 2130 turn. This scenario therefore lasts 5 turns.
The Prussian player sets up first. The French player starts all the turns first.
French set up:
- Gerard, IV Corps of Gerard, units 85 to 92, artilleries 99 and 101, south of the Ruisseau including the part of the town of Ligny. The eight infantry units have one loss each.
- Drouot, Old and Middle Guard units 01 to 04 and 06, artilleries 22 and 23.
- The heavy Guard cavalry (units 18, 19 and 21) are south of the Ruisseau, on the left of Ligny.
- Milhaud, Milhaud's cuirassiers (units 129 to 133) are south of the Ruisseau, on the right of Ligny.
Prussian set up:
- Pirch, II Corps, brigades 6 and 8 (units 28-30 and 34 to 36), artilleries 42 and 44) are in Ligny and the hexes adjacent, north of the Ruisseau.
- I Corps cavalry (units 16 to 18) in and around Brye.
Reinforcements:
- 2100: Blucher, Prussian III Corps 12 brigade, units 53 to 55, at Brye.
Victory: If the French control all Ligny at the end of the game they win. Otherwise it is a Prussian victory.
Special rules for this scenario in addition to the rules exposed below
- To add some balance, players are encouraged to try, and possibly play, the optional rule XVI-6 on morale in towns.
Ligny 7 - Enter the Prussian IV Corps
Major events in war are sometimes linked to futile elements. When the Prussian staff learned about the French crossing the border, Blucher's chief of staff started sending orders to all the Prussian Corps. But as he was junior to Bulow, head of the IV Corps, he could not "order" him to march to Namur, only "suggest", as Blucher was not present (otherwise Blucher would have given a positive order). Thereafter, not understanding the urgency of the order, Bulow took his time and started marching only on the 16th, too late to be present at the battle of Ligny. A simple signature by Blucher would have led to the mighty IV Corps entering the battlefield of Ligny. In case this possibility is to be played, the following units enter during the battle of Ligny:
- 1600 - IV Corps cavalry (units 74 to 78) and Bulow
- 1700 - 13th brigade (units 62 to 64, artillery 79)
- 1800 - 14th brigade (units 65 to 67, artillery 80)
- 1900 - 15th brigade (units 68 to 70, artillery 81)
- 2000 - 16th brigade (units 71 to 73, artillery 82) and the artillery reserve 83
Ligny 8 - D'Erlon's outflank
This is a major what if, so plausible that it is a shame not to play it. As Napoleon had decided to outflank the Prussians, a task at first devoted to Ney via Quatre-Bras, he sent an order to d'Erlon to follow the old roman road and outflank the Prussian position. D'Erlon got this order, but the aide de camp forgot to follow up with Ney, who, furious, recalled d'Erlon. If the aide de camp had done his job, d'Erlon enters on the western Ligny map via the old roman road at the following hours:
- 1530: d'Erlon, Jacquinot cavalry division (units 40 and 41)
- 1600: Quiot's division (units 24 to 27 and 42)
- 1700: Donzelot's division (units 28 to 31)
- 1800: Marcognet's division (units 32 to 35 and 43)
- 1830: Durutte's division (units 36 to 39) and the artillery reserve 44.
Ligny 9 - Remembering Mouton
On the 15th, Napoleon left Mouton's VI Corps at Charleroi as he did not know where the first major blow would be, against the Anglo-Allied or the Prussians. For some unclear reason, in the heat of battle, Napoleon simply forgot to call Mouton to Ligny, where he had decided to make his major blow. Mouton eventually arrived at 1900 south of Fleurus, too late to be a part of the major blow on the Prussian center.
Instead of entering as shown in the scenario 1, Mouton enters at 1600 by the road to Charleroi to Fleurus.
Ligny 10 - Solving the traffic jam
Starting with June 15th at dawn, the movements of the French army were a succession of delays, lost messages, misunderstandings, traffic jams, and bad luck. The battle of Ligny started only at 1300 due to this succession of little events, what Clausewitz calls the friction of war.
If the players decide to give a little more fluidity and luck to the French army, the units enter the battlefield of Ligny as follows:
- 0900: III Corps of Vandamme by the road to Charleroi
- 0900: I Cav and II Cav between the road to Charleroi and the edge of the west map.
- 1000: IV Corps of Gerard between the road to Charleroi and the edge of the west map.
- 1000: Napoleon and the Guard by the road to Charleroi
- 1100: VI Corps of Mouton by the road to Charleroi
Prussian set up:
- Blucher and Ziethen on the mill of Brye
I Prussian Corps
- Units 001 to 015 and 019 to 023 in an area south of the roman road and the Quatre-Bras to Namur road, and north of the Ruisseau de Ligny.
- Cavalry units 016 to 018 within 2 hexes of Fleurus.
II Prussian Corps
- 5 brigade (units 024 to 027 et 041) on the road, adjacent to Point du Jour.
- 6 brigade (units 028 to 030 and 042) on the road, adjacent to Bothey.
Reinforcements:
- II Corps enters the map by the road to Namur as follows:
- 0900: 7 brigade (units 31 to 33 043) + cavalry of the II Corps (037 to 040 et 045)
- 0930: 8 brigade (units 34 to 36 and 044)
- III Corps enters the map by the road to Namur as follows:
- 1100: cavalry (units 56 to 58)
- 1130: 9 brigade (units 46 to 48 and 59)
- 1200: 10 brigade (units 49 and 50)
- 1230: 11 brigade (units 51, 52 and 60)
- 1300: 12 brigade and artillery reserve (units 53 to 55 and 61)
Intermission - June the 17th
During the night of the 16th-17th, more troops moved to Quatre-Bras, until Wellington had 45,000 men and almost 100 guns. An additional 30,000 were on the way. However, at 0730 AM Wellington learned that the Prussians had been beaten at Ligny and decided he must withdraw. The British and allies started their withdrawal at 1000.
The Prussians had been retreating all night, with the I and II Corps moving to Tilly and the III Corps to Gembloux. Orders were sent to the IV Corps to meet up with the III Corps at Gembloux also. Once these points were reached, all troops were to march to Wavre. Straggling and discouragement caused the desertion of perhaps 10,000 men.
When Napoleon went to bed at 2300 on the 16th, he did not know the result of Ney's combat against the British. He assumed Ney held the cross roads. He learned early on the 17th that Ney did not, and dispatched an order to take it. Napoleon had a leisurely morning but at 1100 once again became active. He ordered Grouchy to follow the Prussians and rode off to meet with Ney.
Arriving about 1400, he was disappointed to hear nothing. The troops were not moving. Ney arrived with d'Erlon. Napoleon, ignoring Ney, told d'Erlon to "pursue the English rearguard vigorously". However, it was not until 1400 that the I Corps could start moving, too late to impact the British. The last of the British, the Guard division, moved off at 1400 also.
As the pursuit started, a violent rainstorm began. Cavalry and horse artillery had a series of skirmishes as the British withdrew, finally coming to the ridge at Mont St Jean. As the French arrived, the British artillery opened, which caused the French to recede out of range. Wellington sent a message to Blucher saying he would accept battle if he could have the support of one Prussian Corps. The stage was being set for the next day.
Waterloo
Synopsis
Napoleon had been observing the British campfires, trying to guess their dispositions from their campfires, dimly seen through the rain. Around 0200, he decided that the British were still in place and returned to his headquarters about 0400. There he learned that Grouchy had sent a message saying that the Prussians were most likely falling back on Wavre, rather than Liege, and that he would follow. Napoleon then retired for a couple of hours sleep.
The rain overnight of the 17th-18th, ended about 0600, but left the ground sodden and difficult to maneuver across.
On rising at 0600, Napoleon had breakfast with Soult, his Chief of Staff, and discussed the British and their capabilities, which Napoleon disparaged. Napoleon had intended to start the battle about 0900, but the ground being too muddy to move artillery about, changed the plan for an attack at 1300. These orders were issued about 0900.
He sent a message to Grouchy ordering him to draw closer to the main body, while pushing any Prussians that were at Wavre. He then held a grand review of the army, an unusual event, and returned to his headquarters about 1100, taking a quick nap.
Wellington had carefully selected the positions of his army, holding the advanced posts of Hougoumont, La Haye Sainte and Fichermont. He personally deployed each and every battalion and battery. His right was strongly held, since he expected the Prussians to support his left. Skirmishers were in front, artillery dispersed along the line, strong reserves behind the front line and cavalry massed in the center rear. Because he was still concerned for his connection to the ports, he left 17,000 troops at Hal.
Prince Jerome, Napoleon's brother and commander of the 6th division, attacked Hougoumont at 1130, which opened the battle. The battle here would go on most of the day, drawing in reinforcements from both sides, but not really affecting the outcome, other than as a distraction the French did not need.
Napoleon, after his nap, supervised the placement of a Grand Battery on the French right center, which was aimed at the British center. It opened fire at 1300.
The bombardment did not do the damage that was expected of it. The muddy ground absorbed the shot and the placement of most of Wellington's troops on the reverse crest caused a lack of targets. However, those allied troops that were posted in the open took severe casualties.
The main infantry attack was by d'Erlon's Corps, arranged behind the Grand Battery. Ney gave the order and the I Corps divisions advanced through the Grand Battery towards the ridge line. The only target to be seen was allied skirmishers, some batteries and Bijlandt's 1st Dutch-Belgian Brigade of the 2nd Dutch-Belgian Division, (General Perponcher's division that did so well at Quatre-Bras), which had been hard hit by the bombardment.
Quiot's division was on the left and attacked La Haye Sainte. Durutte's was on the right and sent a brigade to the right towards Papelotte. Donzelet and Marcognet attacked straight ahead. The advance was supported on the left by Dubois's cuirassier brigade and on the left by Jacquinot's lancers.
The advance reached the crest and pushed back the Dutch-Belgians. The French could not take La Haye Sainte which was held by the 2nd KGL Light battalion.
At this point the French came into contact with the British, who fired and then opened ranks to allow their supporting cavalry room to charge. The British Household and Union brigades advanced, formed into line and charged. The French were swept back, loosing 2000 prisoners, and the British cavalry continued its charge into the French Grand Battery, where they sabred the gunners and drivers.
The French cavalry, Jacquinot's lancers on the right and two brigades of cuirassiers behind the left center, counterattacked and routed the British cavalry.
This action, French attack, British cavalry attack and French cavalry counterattack took place between 1330 and 1430, after which there was only skirmishing and a continuation of the bombardment of the Grand Battery once it got itself back into order.
Marshal Ney had ordered another attack on La Haye Sainte about 1530 which also failed. As he observed the Allied lines, he thought he saw British units starting to withdraw, although Wellington was just redeploying his lines. However, Ney thought it was time to punish a retreating enemy and ordered forward the cuirassiers.
For two hours, from 1600 to 1800, masses of French cavalry attacked the British artillery and infantry, who had deployed into square. The gunners would fire until the cavalry were close and then run into the squares for protection. The cavalry could not penetrate the squares and milled around, getting shot out of the saddle and losing horses to the British musketry. The cavalry receded, whereupon the artillery crews would rush back to their guns and give the French parting shots.
Napoleon had learned by 1530 that Grouchy was not able to stop the Prussians. He moved the VI Corps to cover the right rear flank at the Bois de Paris and by 1730 told Ney to take La Haye Sainte at all costs.
The cavalry had taken losses from the infantry garrisons in Hougoumont and La Haye Sainte during their attacks. Combats were continued by the French infantry against both these positions. Hougoumont never fell but La Haye Sainte was finally captured about 1815. Ney called for reinforcements but they were not forthcoming.
The pressure from the Prussian IV Corps had pushed the French VI Corps back into Plancenoit by 1800. Lobau called for reinforcements and Duhesme's Young Guard division threw the Prussians out of Plancenoit. The Prussians attacked again the pushed back the Young Guard. Two battalions of the Old Guard then attacked and threw out the Prussians once again. This stabilized the battle around Plancenoit about 2030, but in the meantime the Prussian I and II Corps were arriving and deploying.
Napoleon needed to break the British before the Prussians could commit all their troops and cut his line of communication to France. It was time for the Guard to attack and finally end the British stand.
At 1930, five battalions of the Middle Guard and 3 battalions of the Old Guard advanced in two lines against the British, with 1 battalion of Middle Guard and 2 battalions of Old Guard in reserve. The Guard, who had never been beaten, was fired on by British artillery and musketry. The Guard returned fire though the smoke and slowly moved forward, 3 battalions of Chasseurs on the left and 2 battalions of Grenadiers on the right of the first line. The second line was made up of the 3 Old Guard battalions.
At this point, the British Guards, whom Wellington had lying down in four ranks, are given the order to stand up and fire. They were exactly opposite the middle two Guard Chasseur battalions, only a short distance away. Surprise was complete and the volleys devastating. The French Guard battalions began to fall back.
The 1/52nd British light infantry wheeled the right flank forward, placing the battalion against the flank of the French Guard 4th Chasseurs, causing them to rout when fired upon.
The two Guard battalions to the right of the Chasseurs, the 1/3rd Grenadiers and 4th Grenadiers, had moved forward in conjunction with remnants of Donzelot's troops, sent forward by Ney. Donzelot was repulsed, while the Guard battalions caused some tired British to retire. Attacked by the allied guns and additional allied infantry, these two battalions start streaming to the rear. The whole of the Guard is routing or retreating before 2000.
The second line of Old Guard battalions were unable to stop the rout. Wellington, seeing the repulse of the Guard, signaled his line to advance. The French, shocked by the repulse of the Guard, disintegrated and streamed to the rear.
Ultimately Wellington and Blucher met about 2100 at La Belle Alliance, Napoleon's headquarters during the battle, with Blucher taking over the pursuit and letting the battered British and their allies finally rest and recover.
Waterloo 1 - Historical Scenario
Length: The game starts at 1100 and ends at the end of the 2130 turn. This scenario therefore lasts 22 turns.
The Anglo-Allied player sets up first. The French player starts all the turns first.
French set up:
The map attached can be used to help the set up in case indications are unclear. The leaders are not indicated on the map. Empty circles are used for the Guard and the VI Corps unless otherwise indicated.
- Rossomme: Napoleon and Ney as well as the Gendarmes
- At Belle Alliance and the adjacent hexes, and on the hill leading to Papelotte, this village excluded, the I Corps.
- On and adjacent to the trail Between Rossomme and Braine l'Alleud, but not adjacent to Hougoumont or its wood, up to the crossing with the road to Nivelles, the II Corps (minus the 7 division). The following units have one loss per unit: 45, 46, 47, 49, 51, 52, 53, 59 to 62. The unit 48 has two losses.
- Within two hexes of the main road between Belle Alliance and Rossomme, but not north of la Belle Alliance: the Guard and the VI Corps.
- South of the I Corps: the IV Cavalry Corps and the light cavalry of the Guard, as well as the artillery 20.
- South of the II Corps, the III Cavalry Corps and the heavy cavalry of the Guard as well as the artillery 21. Unit 124 has one loss.
- Adjacent to any unit of the VI Corps: the Domon and Subervie divisions (units 116, 117, 80, 81). These two cavalry divisions are attached to the VI Corps for all the battle.
Allied set up:
The map attached can be used to help the set up in case indications are unclear. The leaders are not indicated on the map.
Set up format: location, unit numbers, Corps and division, brigade.
- Hougoumont: Unit 03 (I-1, Cooke, Byng)
- Wood south of Hougoumont: Unit 15A (I2N, Perponcher, Saxe Nassau)
- 5 hexes north of Hougoumont on the chemin of Ohain: Units 04 (I-1, Cooke, Byng), 01 and 02 (I-1, Cooke, Maitland), unit 05 (artillery 1). Unit 01 has one loss.
- On the chemin of Ohain, between both roads leading to Brussels: Units 06 to 12 except 08 (I-3, Alten, brigades C Halkett, Ompteda, Kielmansegge, artillery unit 012). Unit 07 has one loss.
- La Haye Sainte: Unit 08 (I-3, Alten, Ompteda)
- Papelotte and Fichermont, units 15B and 16, one each, with one loss each (I-2N, Perponcher, Saxe Nassau and Saxe Orange).
- On the chemin d'Ohain, within two hexes east of the road to Charleroi, units 13 and 14 (I-2N, Perponcher, Bijland). Both units have one loss. Artillery unit 17.
- Braine l'Alleud; Units 18 to 22 (I-3N, Chasse, brigades Detmers and d'Aubreme)
- Between Merbe Braine and Mont St Jean: Hill, Units 23 to 28 (II-2, Clinton, brigades Adam, du Plat, W Halkett).
- North of this position; Units 56 to 61 (Brunswick contingent). Units 56 to 58 have one loss each.
- On the chemin of Ohain, between the crossroad of the road to Brussels from Nivelles and Braine l'Alleud, units 29, 30 (II-4 Colville, brigade Mitchell).
- On the chemin of Ohain and one hex north of it, east of la Haye Sainte but west of Papelotte, units 43 to 49, 52 and 53 (R-5 Picton, brigades Kempt, Pack, Vincke and Best). Units 43 to 46 have one loss each. Artillery 049.
- At Waterloo, units 50 and 51 (R-6 Cole, brigade Lambert).
- At Mont St Jean: Wellington, Orange and Uxbridge. The artillery units 54, 55, 79, 80 and 81, the Congreve rockets.
- In a triangle Mont St Jean-Chemin d'Ohain and the two main roads: units 62 to 64 (R-Kruse), units 65 and 66 (Cav-Somerset), units 82 to 84 (Cav-de Collaert Dutch cavalry). These units are indicated as "Res" on the map.
Reinforcements: (unit number followed by number of steps lost. If no number, full strength)
- 1300: St Lambert: Blucher, Bulow, the cavalry 74 (2), 75, 76 (1), 77 and 78, artillery 83
- 1330: St Lambert: 15 brigade, units 68, 69 and 70, artillery 79
- 1400: St Lambert: 16 brigade, units 71, 72, 73, artillery 80
- 1500: St Lambert: 13 brigade, units 62, 63, 64, artillery 81
- 1600: St Lambert: 14 brigade, units 65 (2), 66 (2), 67, artillery 82
- 1800: Road to Ohain, Ziethen, units 16 (1), 17 (2)
- 1830: Road to Ohain, units 1 (3), 2 (3), 4, 20.
- 1830: St Lambert, Pirch, units 39, 24 (3), 25 (3), 26 (3), 27, 41
- 1930: St Lambert: units 28 (3), 29 (3), 30 (3), 33 (2), 42.
All the other units from Pirch and Ziethen's Corps arrived too late to join the battle.
Victory: At the end of the game, both players add the following victory points:
- Plancenoit, la Haye Sainte, Hougoumont, Braine l'Alleud (all 4 hexes), Waterloo (all 3 hexes): 1 VP each
- Papelotte and Fichermont controlled: 1 VP.
- The entry hex of the road to Brussels: 3 VP
- 1 VP per Anglo-Allied demoralized Corps (first threshold)
- 1 VP per Anglo-Allied Desperate Corps (first of the two numbers, in addition to the VP above for being demoralized).
French player only:
- 1 VP per demoralized Anglo-Allied corps
- 2 VP per Desperate Anglo-Allied corps (not in addition to the previous VP for demoralization)
- 1 VP per Prussian demoralized corps
- 2 VP per Desperate Prussian corps (not in addition to the previous VP for demoralization)
Anglo-Allied player only:
- 1 VP per demoralized French infantry corps
- 2 VP per Desperate French infantry corps (not in addition to the previous VP for demoralization)
In case the totals are equal, the side controlling the entry hex of the road to Brussels wins. A difference of 1-4 VPs is a minor victory, a difference over 5 VPs is a major victory.
Special rules for this scenario in addition to the rules exposed below
- The initial set up partly counteracts special rule 9 on the cohesion of Anglo-Allied brigades. However, when any of these units move, they have to comply with this rule the best they can. They are not required to move.
- Hougoumont was a very strong position also much bigger than the regular fortified farms. In addition to the effects described above, a result in melee calling for disorganization only results in the defender to lose a step, it is not disorganized.
- The Prussians used soaked and difficult trails to get to the battlefield. Each unit entering spends one MP to enter, the following spends 2 MP to enter, and so on. No unit can enter stacked with another unit.
- As a reminder, Orange is only a corps commander in this battle, not an army commander.
- For this battle, Chasse's division (units 18 to 22) is attached to Hill's II corps and the Dutch cavalry (units 82 to 84) to the Cavalry corps.
- Demoralization and Desperate levels for this battle are:
French:
| Corps | Steps | Demoralization | Desperate level |
|---|---|---|---|
| Guard | 74 | None | None |
| I | 69 | 35 | 50 |
| II | 74 | 37 | 54 |
| VI + cav | 37 | 19 | 27 |
| III Cav | 15 | 8 | 13 |
| IV Cav | 12 | 6 | 11 |
Anglo-Allied army:
| Corps | Steps | Demoralization | Desperate level |
|---|---|---|---|
| I | 70 | 35 | 44-57 |
| II including Chasse | 56 | 28 | 36-46 |
| Reserve | 83 | 42 | 53-68 |
| Cavalry including the Dutch cav. | 52 | 26 | 44-56 |
Prussian army:
| Corps | Steps | Demoralization | Desperate level |
|---|---|---|---|
| I | 27 | 14 | 20 |
| II | 65 | 33 | 47 |
| IV | 114 | 57 | 78 |
Of note, the French II Corps starts with 11 losses, the French IIIcav Corps starts with one loss, the Prussian I Corps with 9 losses, and the Prussian II Corps with 20 losses. These losses are to be taken into account in the demoralization levels.
Optional Guard activation: Napoleon started this battle with a limited intelligence of where the Prussians were. He therefore kept a lot of reserves (VI Corps and the Guard) that he used in various ways once he had evidence that the Prussians were coming. On the other hand, the players know exactly where and when they will come, and may therefore chose to massively engage their reserves to make the decision before their flank is really in danger. To reflect a more historical lack of information, the Old Guard infantry (units 01 to 04 and 06 to 09) can not move before a Prussian unit reaches a vertical line passing at Ohain. The rest of the Guard and the VI Corps are free to move from the beginning.
Waterloo 2 - D'Erlon's attack
Length: The game starts at 13:30 and ends at the end of the 16:30 turn. This scenario therefore lasts 9 turns.
The Anglo-Allied player sets up first. The French player starts all the turns first.
French set up:
- I Corps, as described in the scenario 1.
- Artilleries 22, 23, 42, 43 and 44 are deployed on the hill between both positions.
- Cuirassiers unit 129 on the road four hexes south of La Haye Sainte.
Allied set up:
- Per scenario 1, everything east of the road to Brussels, the Ompteda brigade and the Somerset brigade with Uxbridge.
Reinforcements:
- 1430: the rest of the 4 Cav corps (units 130 to 132) as in scenario 1.
Victory: The French win by holding the Chemin d'Ohain from north of la Haye Sainte to its bifurcation to Papelotte.
Special rules for this scenario in addition to the rules exposed below: None
Aftermath: D'Erlon's attack was repelled and pushed back with great losses by the British elite cavalry. Later that day, part of his corps could take La Haie Sainte and Papelotte but the whole corps took a lot of losses during this first major attack.
Waterloo 3 - Hougoumont
Length: The game starts at 1130 and ends at the end of the 1930 turn. This scenario therefore lasts 16 turns.
The Anglo-Allied player sets up first. The French player starts all the turns first.
French set up:
- II Corps, 6 division (units 49 to 53 and 65) on the hill south of Hougoumont.
Allied set up:
- Byng's first half brigade (unit 03), in the Chateau.
- Wood south of Hougoumont: Unit 15A (I2N, Perponcher, Saxe Nassau)
Reinforcements:
- French: 1400: 9th division (units 58 to 61, artillery 66) on the hill south of Hougoumont.
- Anglo-Allied: 1230: Second half of Byng's brigade (unit 04), 2 hexes north of the Chateau; 1500: Brunswick unit 56
Victory: The side holding the chateau at the end obviously wins this scenario.
Special rules for this scenario in addition to the rules exposed below
- Hougoumont was a very strong position also much bigger than the regular fortified farms. In addition to the effects described above, a result in melee calling for disorganization only results in the defender to lose a step, it is not disorganized.
Aftermath: The fight slowly escalated during the day and eventually sucked in two full French divisions. A simple diversion deprived the French of two of their best divisions, for no result. The chateau was never taken.
Note: The historical deployment with light companies and the British committing small units is impossible to simulate at this scale. A unit from the Perponcher division simulates the presence of 800 men from the 2nd Nassau regiment from the Saxe-Weimar brigade.
Waterloo 4 - Cavalry madness
Length: The game starts at 1600 and ends at the end of the 1830 turn. This scenario therefore lasts 7 turns.
The Anglo-Allied player sets up first. The French player starts all the turns first.
French set up:
- Ney, Milhaud's cavalry IV Cav Corps (units 129 to 133) and the light Guard Cavalry (units 16, 17, 20) are between Hougoumont and the Belle Alliance.
Allied set up:
- Everything between the road from Charleroi to Brussels and Braine l'Alleud, except Ompteda, Byng, Somerset and the units 56 and 62. But that includes three of the units of the artillery reserve. Chasse's division can be positioned between Merbe Braine and the road.
Reinforcements:
- French: 1700: Kellermann's III Cav Corps (units 124 to 128) and the Guard Heavy Cavalry (units 18, 19, 21).
Victory: The French must hold all the hexes of the Chemin d'Ohain between both roads to Brussels at the end of the game.
Special rules for this scenario in addition to the rules exposed below: None
Aftermath: The failure of the repeated charges led by Ney is well known. No support from infantry already committed at Hougoumont or by enough guns to break the squares, the magnificent French heavy cavalry not only did not achieve anything, but was also wasted before the Prussians were heavily committed.
Waterloo 5 - Holding the Prussians
Length: The game starts at 1600 and ends at the end of the 2130 turn. This scenario therefore lasts 12 turns.
The French player sets up first. The French player starts all the turns first. (As printed in the booklet.)
French set up:
- Elements of the VI Corps of Mouton (units 102 to 108, 112 and 113) and the cavalry divisions Domon and Subervie (units 116, 117, 80, 81), on a line between Fichermont (excluded) and Maransart, but north of the Ruisseau de Lasne.
Prussian set up:
- Brigades 15 and 16 of the IV Corps (units 68 to 73, artilleries 80 and 81), Bulow, Blucher, between the French position and the Bois de Paris.
- Cavalry of the IV Corps (units 74 to 78) in the trails of the Bois de Paris.
- 13 brigade (units 62 to 64, artillery 79) between the Bois de Paris and la Chapelle St Lambert.
Reinforcements:
- French: 1800: Young Guard division (units 11 to 14) at Rossomme and adjacent hexes; 1900: unit 02 at Rossomme.
- Prussian: follow the reinforcement schedule from the historical scenario for the IV Corps and the II Corps. The I Corps is north of this position and is not involved.
Victory: The side totally holding the town of Plancenoit at the end wins this scenario. Any other result is a draw.
Special rules for this scenario in addition to the rules exposed below: None
Aftermath: The VI Corps of Mouton, more and more outnumbered, slowly withdrew to Plancenoit. The Young Guard, and some battalions of the Old Guard reinforced him and the town held almost to the end of the battle.
Waterloo 6 - The Guard dies
Length: The game starts at 1900 and ends at the end of the 2130 turn. This scenario therefore lasts 6 turns.
The Anglo-Allied player sets up first. The French player starts all the turns first.
French set up:
- Donzelot's division (units 28 to 31) with one loss per unit is at la Haye Sainte and the adjacent hexes.
- Bachelu's division (units 45 to 48) with 2 losses per unit is adjacent to the wood of Hougoumont.
- The Old Guard units 03 to 10 and the artillery reserve 22 and 23 are deployed between Hougoumont and la Belle Alliance.
Allied set up:
- Adam, Maitland and C Halkett brigades (units 01, 02, 22, 23, 06 and 07) are on the chemin of Ohain between both roads.
- Chasse division (units 18 to 22), Vandeleur, Vivian and Arenschildt brigades (units 71, 72, 75 to 77) are in second line.
- 3 artillery units from the reserve are attached to the first line.
Reinforcements: None
Victory: The French must hold all the hexes of the Chemin d'Ohain between both roads to Brussels at the end of the game.
Special rules for this scenario in addition to the rules exposed below: Hougoumont is still held, no side can penetrate in the woods or the chateau for this scenario.
Aftermath: This is part of the Legend. The Old Guard, fired upon at short range from three sides, eventually retreated, an unusual event that triggered the retreat of all the army.
Waterloo 7 - No strawberries for Grouchy
Probably the best known "what if" of all times, the arrival of the pursuit force under Grouchy on the Waterloo battlefield has made generations of Napoleon's worshipers cry. A careful examination of Napoleon's behaviour after the battle of Ligny, his unclear orders to Grouchy, some lost or late messages, misunderstandings from Grouchy to follow the spirit of the order instead of the order itself, shows that the force under Grouchy could have been much more effective, either by eventually joining the main army at Waterloo, or at least by delaying a substantial part of the Prussian army. All these are analysed in the section below under the Battle of Wavre in five major what ifs.
Waterloo 8 - Prince Frederic
Wellington spent this campaign obsessed by the idea of Napoleon moving on his right flank to cut his road to his supplies to the ports of Antwerp and Ghent. Even on the morning of Waterloo, he set up a large part of his army on his right up to Braine-l'Alleud, and left at Hal, 10 km away, a substantial force of 17,000 men under Orange's younger brother, Prince Frederic.
If the players decide to balance the battle, they can add the units 31 to 41, including the whole 1st Netherland Division, the Indian brigade, and two brigades from Hill's corps. They can probably leave the useless Hanoverian cavalry under Estorff to watch the road to Brussels at Hal. The only cavalry regiment from that unit present at Waterloo, the Hussards of Cumberland, actually refused to charge and ran away.
The additional units are set within the area of deployment of the historical battle of Waterloo, and Prince Frederic is added as a leader. Although not in charge of an official corps he can add his bonus to any Dutch unit.
Waterloo 9 - No rain today
Among the many parameters that eventually influenced that battle, the weather is an important one. Heavy rain actually fell during the night and the morning of the 18th, transforming trails into rivers of mud. Instead of starting the battle that should end the campaign, Napoleon had to wait up to 1100 for the ground to dry enough to maneuver the guns.
If the players want to give a serious advantage to the French, the battle can start at 0600 instead of 1100. On the other hand, with less mud, the Prussians could have marched a little faster, and all their reinforcements enter on the map one hour earlier than the schedule. The set ups are the same than in the historical scenario for simplicity, except that the Lambert brigade cannot move before 1000.
Waterloo 10 - Rethinking the pursuit force
On the evening of Ligny, Napoleon decided to leave there the Girard division (II Corps, units 54 to 57) because of its losses. He also decided to add the Teste division (VI Corps, units 109 to 111) to Grouchy's force.
To give a minor advantage to the French, the players can decide to add these units to their respective corps (Girard with 4 losses, one per unit). This would give more punch to the II Corps and to hold the Prussians.
Waterloo 11 - Shuffling the Allied Army
If both players agree, the Duke can freely set up his army as long as all units are deployed in a hex where any unit was deployed historically. These hexes are all marked hexes on the map attached. Players are free not to attach Chasse's division to the II Corps and the Netherland division to the cavalry
Wavre
Synopsis
Napoleon had given Grouchy the III and IV Corps and the I and II Cavalry Corps. Assuming the Prussians were retreating along their line of communication towards Liege, Grouchy did not discover the actual direction of the retreat of the mass of the Prussians until 2200 at night when he had only reached Gembloux.
By late evening on the 17th, the bulk of the Prussians had reached Wavre. Early on the 18th, Blucher, who had recovered from his earlier unhorsing, sent a message to Wellington that he was coming with his whole army, and issued orders for the Prussian army to march to Wellington's assistance. The IV Corps took the lead, with the I and II Corps behind, in a massive traffic jam. The roads were wet and the troops still disorganized from there defeat the day before and the subsequent retreat.
Blucher pushed his troops hard, leaving the III Corps at Wavre, north of the Dyle, to deal with the following French, who had finally made contact at 0930. By this time, the Prussians were nearer to Wellington than was Grouchy.
The French pursuit was not pressed hard. Contact had been made by the II Cavalry Corps, and upon questioning prisoners captured in the skirmishing, Exelmans sent the information to Grouchy about 1030 that the Prussian army was marching to support Wellington.
Grouchy set down to lunch about 1100 and the sound of guns was heard about 1130. Gerard urged Grouchy to march to the sound of the guns, but Grouchy was adamant that he was following orders and continued lunch. Exelmans courier arrived at 1230 (taking 2 hours to cover 6 miles) and the news finally electrified the French.
Grouchy ordered an attack across the Dyle, against the Prussian III Corps. The Prussian outposts south of the Dyle were quickly pushed back, but the fighting got tougher as the French reached the river. The Prussians held the heights on the north side of the river, and the French could not take the town.
At 1700, Grouchy received Napoleon's message to march immediately to Waterloo. Grouchy tried one more time to take Wavre, and failing that moved with the IV Corps towards the west. The French I Cavalry Corps took the village of Limales, where there was a crossing to the north of the Dyle. A counterattack by some Prussian III Corps troops failed to retake the village, but by then it was late and the fighting tapered off all along the Dyle. Grouchy had failed to contain the Prussians, who were at this time fatally intervening against Napoleon's right flank.
Wavre 1 - Historical Scenario
Length: The game starts at 1500 and ends at the end of the 2130 turn. This scenario therefore lasts 14 turns.
The Prussian player sets up first. The French player starts all the turns first.
French set up:
- Grouchy, Vandamme, the III Corps (units 67 to 84) minus its cavalry division (units 80 and 81), on the road to Namur up to 2 hexes of the suburb of Wavre, one unit per hex. Vandamme units have 6 losses to spread among the units.
French Reinforcements:
- 1530: Exelmans cavalry with 2 losses (units 119 to 123) by the road to Namur.
- 1630: Gerard's corps (85 to 101) by the road to Namur. 7 losses are to be spread among the units
- 1730: Pajol's (with one loss) units 114, 115 and 118, and Teste division (units 109 to 111) by the road to Namur. Pajol commands the Teste division.
Prussian set up:
- At Limale: Units 14 with 2 losses, artillery unit 19. These units from the Prussian I Corps are commanded by Thielmann.
- At Bierges, the 6 adjacent hexes, and both hexes of the bridge including the mill: Units 53, 54 and 55 and artillery 59
- Wavre including the suburb east of the Dyle: Units 49 and 50, Thielmann.
- Between Wavre and the exit to Brussels, on the road: units 51 and 52, artillery 60, cavalry units 56, 57, 58, artillery 61.
- Bas Wavre: unit 47
Note: the rest of the 9th Brigade took the road to Brussels and did not take part in this battle.
Victory: The French win a minor victory by doing two of the following:
- Exiting one infantry corps and one cavalry division (either units 97 and 98, 114 and 115, 119 and 120, or 121 and 122) by either road to la Chapelle St Lambert by the end of the game.
- Demoralizing the III Prussian Corps. This corps starts with 85 steps (including the unit of the I corps attached to it). It reaches its demoralization level at 43 losses and its Desperate level at 58.
- Taking control of the city of Wavre and exiting any unit by the road of Brussels.
The French win a major victory by filing the three conditions. Filing one condition is a minor Prussian victory. Filing no condition is a major Prussian victory.
Special rules for this scenario in addition to the rules exposed below
- The bridges at Bas Wavre and Limelette are damaged. See the special rules on how to repair them.
- Morale is evaluated by Corps for the French, as a whole for the Prussians. Demoralization and Desperate levels for this battle are:
French:
| Corps | Steps | Demoralization | Desperate level |
|---|---|---|---|
| III | 58 | 29 | 41 |
| IV | 51 | 26 | 37 |
| I Cav + Teste | 16 | 8 | 12 |
| II Cav | 14 | 7 | 10 |
Prussian army:
| Corps | Steps | Demoralization | Desperate level |
|---|---|---|---|
| III + elements of I | 85 | 43 | 58 |
Of note, demoralization levels do not include losses taken in Ligny (16 for the French), they must be counted when determining if an army is demoralized.
Wavre 2 - The road to Waterloo: Grouchy's decision gate #1
These three following scenarios are to be played at the same time as the Waterloo battle, as they have major repercussions. They explore the various times during the day where Grouchy could have decided to march to join the main army.
As brilliantly described by Thiers in his "Histoire du Consulat et de l'Empire", Grouchy had several times during the day occasion to decide to march on Waterloo. In hindsight, based on the outcome of the campaign, of course he should have marched. But the debate around his orders, his information and his judgment will never be over. The consequences of a decision to march are explored here.
Turning point 1: in this best case scenario, Grouchy decides at 1130, when he hears the sound of the guns starting the battle at Waterloo, to march with his whole army. As he is still south of the Wavre map, there are several routes and trails leading to Mont St Guibert, Moustiers and Ottignies, toward Maransart. In this case, there is no battle at Wavre, and the following units enter on the Waterloo map by the trail south-east of Maransart at the following times:
- 1500: Exelmans cavalry with 2 losses (units 119 to 123)
- 1600: Grouchy, Vandamme, the III Corps (units 67 to 84) minus its cavalry division (units 80 and 81). Vandamme units have 6 losses to spread among the units.
- 1700: Pajol's (with one loss) units 114, 115 and 118, and Teste division (units 109 to 111)
- 1800: Gerard's corps (85 to 101). 7 losses are to be spread among the units
As this frees Thiemann's corps, the later can also march on Waterloo, and enter by the road to Ohain as follows:
- 1700: Thielmann, the cavalry (units 56 to 58)
- 1800: 9 Brigade (units 46 to 48 and 59)
- 1900: 10 Brigade (units 49 and 50)
- 2000: 11 Brigade (units 51, 52 and 60)
- 2030: 12 Brigade and artillery reserve (units 53 to 55 and 61)
Wavre 3 - The road to Waterloo: Grouchy's decision gate #2
Turning point 2 could have occurred just before entering the map, around 1400. The game starts at that time, with the Prussians already set up as in scenario 1.
Grouchy, Vandamme and the III Corps as described enter the map by the road to Namur at 1400, and the reinforcements follow the schedule of scenario 1. But this time, the only victory condition is #1: Exiting one infantry corps (or four infantry divisions of different corps) and one cavalry division by either road to la Chapelle St Lambert by the end of the game.
The French win by achieving this condition. Otherwise the Prussian wins.
Units exiting by the trail to La Chapelle St Lambert may enter the Waterloo battlefield 2 hours (for cavalry) or 3 hours (for infantry/artillery) by the trail on the eastern edge south of La Chapelle St Lambert to avoid any conflict with Prussian reinforcements (these conflicts would be out of the scope of this game, in an area not covered by any map, although interesting to simulate one day...)
Wavre 4 - The road to Waterloo: Grouchy's decision gate #3
Turning Point 3: At 1700 Grouchy finally received a message from Napoleon with a positive order to march. That was much too late to have an impact on Waterloo, but we can explore the consequences on the battle at Wavre.
At 1700, Vandamme is deployed on front of Wavre, Exelmans is in front of Basse-Wavre, Gerard is half way between the road to Namur and Limale, and Pajol and Teste are still to enter the board. The Prussian set up is identical to the historical scenario, as at that time Thielmann still does not know where the main attack will be.
The victory condition is the same as in scenario 3: Exiting one infantry corps (or four infantry divisions of different corps) and one cavalry division by the road to la Chapelle St Lambert by the end of the game.
The French win by achieving this condition. Otherwise the Prussian wins.
Wavre 5 - Closing the distance
The "pursuit" after Ligny had not been a model of activity, far from it, even from veterans like Exelmans and Pajol, excellent cavalry generals. Even Grouchy was an experienced cavalry commander, and one wonders why the pursuit has not been more active.
In this scenario, the French enter the map en masse before the Prussians can freely move to Waterloo. In fact, the IV Corps of Bulow, first to pass the Dyle and join the fight, had a long way to go and start the game on the east of the Dyle. On the other hand, the damaged I and II Corps start already on the west bank and not much could have been done to stop them.
The set up is as follows:
- III Prussian Corps: as in scenario 1
- IV Prussian Corps: on the road between Wavre and the map edge to Namur, east of the Dyle, at least one unit per hex. Bulow and Blucher are stacked with any unit.
- The I and II Corps can be omitted in this scenario; they leave the game on their way to Waterloo.
- The game starts at 0600 and ends when all the units of the IV Prussian corps are either destroyed or have left the map.
- Pajol cavalry and artillery (not Teste infantry) is set up at Limelette, as well as Grouchy. The bridge is not damaged.
- Vandame and Teste enter by the trail of the south map east of the Dyle at 0600
- Exelmans enters by the trail south of the road of Namur at 0600.
- Gerard enters by the trail south of the road of Namur at 0630.
The goal is for the French to make as many losses to the Prussian IV Corps as possible. When the last unit of the IV Corps exits the map by the roads to Chapelle St Lambert (only), then we compare the number of losses with the number of steps that exited the map in good order. The higher number wins the game.
Wavre 6 - Crossing the Dyle
This time the point is not to join the Waterloo battle, but to get rid of Thielmann's III Corps. As previously said there are more bridges south of the position, and Grouchy could have marched on a more western road. In this scenario the Prussians are still expecting him on the east of the Dyle, but the corps of Exelmans, Pajol and Teste enter the map by the south edge when the game begins. Vandamme enters at 1600 and Gerard enters at 1630.
To win, the French must force the III Prussian Corps to reach its Desperate level of 58 losses by the end of the game.
Combining Games
Warning: we provide below a set of rules to link the various games, but it is difficult to foresee all the possible situations; we tried to cover most of the issues, but playing the games together will sometimes require flexibility and acting in good faith with good logic.
1 - Combining Quatre-Bras and Ligny on June 16th
The maps can be set for the main road from Nivelles to Namur to be continuous. Units may freely travel from one map to the other. Ligny starts at 1300; units at Quatre-Bras are set up but cannot move before the 1400 turn. Follow both reinforcement schedules.
However, if players agree this is the perfect place to explore a more active role played by d'Erlon's I Corps. The French staff decides before the battle of what to do with it. If the French want d'Erlon at Ligny, then it enters by the Chaussee Romaine as indicated in Ligny-Scenario 7. If they want him at Quatre-Bras, they enter according to Quatre-Bras-Scenario 5. (Note: the booklet says Ligny-Scenario 7; d'Erlon's Ligny entry is described in Ligny scenario 8 above.)
If the Anglo-Prussian players feel that the French staff is undecided (be fair!), then they can force the French to use the historical schedule instead, as described in both Ligny-scenario 1 and Quatre-Bras-scenario 1.
2 - Combining Quatre-Bras and Ligny on June 17th
Of course both battles could have turned out differently. Had Napoleon been checked at Ligny, the battle may have resumed on both sides the next day. Apply the following reinforcements.
Reinforcements
- French at Quatre-Bras: South-east corner of the map, starting at 1900 on the 16th, one division an hour: d'Erlon's I Corps.
- Prussians at Ligny: If the Prussian army is still at Ligny on the morning of the 17th, then the IV Prussian Corps of Bulow is rerouted there coming from Gembloux. It enters by the road to Wavre starting at 0800, one brigade an hour.
- Anglo-Allied
- 16th end of the day by the road from Brussels:
- 1900 Vivian
- 2000 Vandeleur
- 2030: Somerset
- 2100: Ponsonby
- 2130: artilleries 79 to 81
- On the 17th by the road from Brussels:
- 0100 Ompteda
- 0400: Artillery reserve 54 and 55:
- 0500: Vincke
- 0600: Kruse
- 0630: Grant
- 0700: Arenschild
- 0730: Dornberg
- By the road to Nivelles:
- 0800 to 0800: Chasse
- 0930: Trip and Ghigny
- 16th end of the day by the road from Brussels:
3 - Combining Waterloo and Wavre on June 18th
There are several ways to combine both battles. Playing the historical conditions leads to a minimum interaction between both battlefields because if nothing happens at Wavre before 1500, it is too late to have an impact on Waterloo. If players chose the historical conditions, then the battle starts at Waterloo at 1100, nothing happens at Wavre before 1500, and then both battles are played in parallel.
If both teams agree on having more interactions, then Waterloo is played with the historical conditions while Wavre is played using either scenario 3 or 5 (this time, Wavre starts first, then Waterloo starts at 1100), or even 6. Of note, playing Wavre scenario 2 is in itself a game combination, but as Grouchy marches on Waterloo nothing happens on the Wavre battlefield.
General conditions for travelling from Wavre to Waterloo: Units can travel from Wavre to Waterloo. Both paths (to Ohain in the north and to la Chapelle St Lambert to the south) are two hours away for cavalry, and three hours away for infantry and artillery, as it had rained a lot and the trails became very muddy.
4 - Combining Waterloo and Wavre on June 17th
An earlier and clearer victory at Ligny (involving d'Erlon for example) followed by a frank pursuit may have lead to a different situation on the 17th. It is likely that the Duke would not have waited to withdraw to Waterloo, and that the Prussian did not have so much time to recover. Apply the following modifications to the initial set up at Waterloo and Wavre:
Waterloo area:
- The game starts at 1000. The Anglo-Allied (minus the Lambert brigade and the II Corps) is deployed in its historical area. Chasse's division enters the board at that time by the road to Nivelles. Hill's II Corps enters by the road to Hall. No French units are on the map. The following enter by the road to Charleroi:
- 1000: the French II Corps (with the losses of the historical Waterloo scenario).
- 1100: the French I Corps (with 8 losses to be spread among the infantry units).
- 1200: The French III and IV Cavalry Corps.
- 1300: The Imperial Guard
- 1400: Mouton's VI Corps.
Wavre area:
- I and II Prussian Corps start in the Bierges and Wavre areas, respectively. Every infantry unit start with 3 losses (units smaller than 3 steps are eliminated), and all the units are disordered.
- III Prussian Corps, with 7 losses to be spread (the corps covered the aggressive pursuit and took losses) is east of the Dyle, on the road from Wavre to the "to Namur" hex.
- IV Prussian Corps just enters the map, by the road to Namur, starting at 1000, the cavalry units first, then one infantry brigade per hour.
French set up: no unit starts on the map. The III Corps and Exelmans units enters by the south edge, east of the Dyle, at 1000. The IV Corps, Pajol and Teste enter at the same time, but west of the Dyle. The goal is to damage and slow down the Prussians the best they can.
The Prussians can exit units IN GOOD ORDER by the road to Ohain and la Chapelle St Lambert per the rules scenario 3 above. Victory or defeat is decided at Waterloo, but the Prussians can still have their part to play.
5 - The campaign game. June 16th to 18th.
The campaign game starts on both the Quatre-Bras and the Ligny battlefields. The rest will largely depend on how the events unfold. If the double battle is undecided at the end of the 16th, the Allied player may decide to stay. Then implement the reinforcements as described in combination 2 above and keep playing on the 17th on these battlefields.
If they choose to retreat on their second position (Wavre and Waterloo), they can either use the night or not. Apply the movements as described in the night and rain turns below if they choose so.
If they do not use the night, the moves and combat are solved normally while the armies retreat. Units that exit the map are of course not lost, they reappear 2 to 6 hours later (depending on their type, the battlefield and their roads or trails) on the other battlefield. The French can of course follow them and enter on the other battlefield accordingly.
As it is impossible to simulate what happens outside of the maps, the players are to rely on good faith and good sense to solve this. No combat can occur during these off-map moves.
Transfer between battlefields.
- The transfer between Wavre and Waterloo is described in Wavre.
- The transfer between Ligny and Quatre-Bras is solved on the maps as they overlap.
- Passing from Quatre-Bras to Waterloo by the road to Brussels takes 1 hour for the cavalry and 2 for the infantry/artillery. Going from the road to Nivelles on the Quatre-Bras map to the road to Nivelles on the Waterloo map takes 3 hours for cavalry, 4 for infantry and artillery.
- Passing from the north of Ligny to Wavre takes 3 hours (4 hours for infantry/artillery) by the road, or 4 hours (6 hours for infantry/artillery) by the trails leading to the southern edge of Wavre.
Night and rain turns can be used for this travels (a night turn counts for 3 hours for the two first and 2 hours for the third, each turn of rain counts for one hour). Of note, there is no rally or loss recovery if any of these night turns are used for movement.
The various costs (for cavalry/infantry in hours) are summarized on the chart below (the chart shows the four battlefields Waterloo, Wavre, Quatre-Bras and Ligny joined by arrows):
- Waterloo - Wavre: 2/3
- Quatre-Bras - Waterloo (road to Brussels): 1/2
- Quatre-Bras - Waterloo (road to Nivelles): 3/4
- Ligny - Wavre (by the road): 3/4
- Ligny - Wavre (by the trails): 4/6
Reinforcements: Follow schedules of both the historical scenarios at Ligny and Quatre-Bras, add the reinforcements of combination 2 above, and the IV Prussian Corps enters on the 17th starting at 1000 either on the Wavre map or on the Ligny map, at the Prussian player's choice, the cavalry first, then one infantry brigade per hour.
Night and Rain turns
Night falls at the end of the 2130 turn, remember we are in June. The night is divided in 3 turns: 2200-0100, 0100-0400 and 0400-0600. There are also twelve turns of rain during these three days.
The following rules apply during the rain or night turns:
- Movement is normal
- There are no cavalry charges
- There is no fire of any kind.
- Infantry can engage in melee only if it starts the turn adjacent to the target.
- Rally is normal.
Losses recovery. Units that do not move at all during the three turns of a night recover one step of losses at the end of the third turn. This does not involve totally eliminated units, that cannot be recovered. The special counter Larrey is not used during the night.
Rally: Units that do not move at all during the three turns of night automatically rally at the end of the fourth turn. These units do not recover any loss as described above.
Variations valid for the four games
1 - Davout in charge
Another considerable debate focused on the choice of Soult as a Chief of Staff and Ney and Grouchy as wing commanders. In the level three of command the two later can issue one order per turn.
Had Davout been present (instead of being stuck as a Ministry of War) he can replace either Ney or Grouchy and can issue 3 orders per turn. The French player can also choose to make him chief of staff, this allows Napoleon to issue an unlimited number of orders per turn.
2 - Entering the X corps
"What ifs" are fun parts of wargaming. Many factors may have led to a very different campaign, and political parameters are among them. When Napoleon came back from his tiny island, the Vendee rose up and diverted quite a bit of troops to contain it. Without this unrest, a substantial 10-15,000 more troops would have been available for the Armee du Nord.
This corps, the X corps under Lamarque who was commanding them in Vendee, is made of 2 divisions including a brigade of Young Guard. The possible use of this corps generates some variations for the four games as follows:
- On the 15th, Napoleon left Mouton's VI corps at Charleroi as he did not know where the first major blow would be, against the Anglo-Allied or the Prussians. By leaving Lamarque in this position, Mouton's corps can be deployed at Ligny; it immediately follows the Guard.
- Ney knowing that another corps is available, would have let d'Erlon go to Ligny and call for Lamarque to join him. The later enter the road to Charleroi to Quatre-Bras starting at 1800. This corps is also added to the Waterloo initial set up.
- Conversely, Lamarque could have been present at Ligny instead of Mouton.
- As a consequence, the pursuit force of Grouchy is made of Gerard's IV Corps and Lamarque's X Corps at Wavre.
- As another consequence, Vandamme's III Corps is present at Waterloo.
Players are of course free to invent other variations, as long as they make sense... For example, the Guard brigade could be added to the Guard corps, and the rest of the corps is added to both Gerard and Vandamme corps, made of only three and not four divisions.
Special Rules for the Four Battles
1 - Lines of communication
They depend on the game:
- Quatre-Bras:
- French: the road to Charleroi
- Anglo-Allies; both roads to Nivelles and Brussels
- Ligny:
- French: both roads to Charleroi and Chatelet.
- Prussians: the roads to Namur, the road to Wavre and the road to Quatre-Bras.
- Wavre:
- French: the road to Namur
- Prussians: the road to Brussels
- Waterloo:
- French: the road to Charleroi
- Anglo-Allied: the roads to Brussels and Hall
- Prussians: the east edge of the map at La Chapelle St Lambert and the two trails leading to Ohain.
2 - Fortified farms and Hougoumont
The famous fortified farms of Belgium have a strong defensive potential. They are treated like a town except for the following:
- Cavalry and artillery are not allowed inside. Charges are also impossible.
- Fire factors against a unit in a farm is modified by -3, with a maximum final of 1 fire point per hex of attack. For example, if a unit in a farm is fired at by three close batteries from different hexes, the maximum firepower of the attack will be 3.
- Melee value is modified by -2, like a town, but it remains -2 from an adjacent town.
- Hougoumont was a very strong position also much bigger than the regular fortified farms. In addition to the effects described above, a result in melee calling for a disorganization only results in the defender to lose a step, it is not disorganized.
3 - Special leadership rules
The French and Prussian armies have roughly the same organization. On the other hand, the Anglo-Allied army, albeit organized in corps, did not really function as corps, but more by divisions and sometimes brigades. For example, at Waterloo, units of the I Corps are spread from Braine-l'Alleud to Papelotte. It was impossible for the Prince of Orange to command them all.
However, historically Orange asked Uxbridge to command the Netherland cavalry, and Chasse's division was in fact commanded by Hill, as the II Corps was far from complete at Waterloo. Therefore a corps-based command can be maintained, and Wellington is the corps commander of the Reserve. He can also command three other units, as explained in the standard rules.
For higher levels of command he can send up to 3 orders to corps, brigades or divisions. In addition, the corps leaders (Orange, Hill and Uxbridge) can act normally. It can be faster to activate brigades directly, but of course less of them can be activated.
The Prince of Orange is an army leader only for the few first turns of Quatre-Bras. Once Wellington arrives at Quatre-Bras the Prince becomes a corps commander and remains so for the rest of the campaign.
4 - The three-step artilleries
Several artillery units have three loss steps. They represent the elite Guard artillery reserves. As compared to other artillery units, they behave as follows:
- First step loss: their value is now 6 as fire value, 1 for melee, and 2 steps (as a normal unit).
- Second step loss: as a normal unit with one loss: fire value 3, melee value 1.
All the other issues are identical to other artillery units.
5 - Army morale
For this battle, the armies are not demoralized as a whole but by corps. Consequently, at the beginning of each turn, the players check if the total losses taken by each corps reach their demoralization or Desperate threshold. If this is the case, the army morale rules apply for this corps only. The other parts are not affected until they reach their own demoralization or Desperate levels. Remember that the effects of becoming Desperate are dramatic; no surprise that the levels are proportional to their average morale. These levels are:
French player:
| Corps | Steps | Demoralization | Desperate level |
|---|---|---|---|
| Guard | 74 | None | None |
| I | 69 | 35 | 50 |
| II | 89 | 45 | 66 |
| III | 61 | 31 | 44 |
| IV | 51 | 26 | 37 |
| VI | 38 | 19 | 28 |
| X | 36 |
Anglo-Allied army:
| Corps | Steps | Demoralization | Desperate levels |
|---|---|---|---|
| I | 93 | 47 | 59-76 |
| II complete | 88 | 44 | 56-72 |
| Reserve | 83 | 44 | 53-68 |
| Cavalry | 58 | 29 | 32-47 |
Prussian army:
| Corps | Steps | Demoralization | Desperate level |
|---|---|---|---|
| I | 120 | 60 | 87 |
| II | 117 | 59 | 85 |
| III | 91 | 46 | 62 |
| IV | 114 | 57 | 78 |
As there has been some modifications during the campaign (divisions detached and attached, units not present...), each historical scenario indicates which levels are used.
Special Anglo-Allied morale. (Printed without a rule number in the booklet.) Due to the extreme heterogeneity of the army, each Anglo-Allied Corps has one demoralization level and two Desperate levels. When the demoralization level is reached, only the non British and non KGL units are demoralized. KGL units (King's German Legion) are units 08, 09, 25 and 26. Then, when the first level of Desperate morale is reached, all non British and non KGL units of that Corps are Desperate, and the British and KGL units are demoralized. When the second number is reached, all units of the Corps are Desperate. The losses for all units of the Corps are computed for this.
(The booklet numbers the next rule 8; no rules 6 and 7 are printed.)
8 - Repairing bridges
This involves only the bridges on the Dyle river for the battle of Wavre. In the scope of this game bridges cannot be destroyed, but the battle starts with two damaged bridges, at Basse-Wavre and Limelette. No unit can cross the Dyle outside a bridge, and no unit can pass a damaged bridge.
On the other hand, the French can try to repair them, as both the III and IV Corps had engineers and pontoneers integrated in their Corps HQ. In order to repair a bridge, the French player needs to do the following:
- Move a Corps HQ (either the III or IV) adjacent to a damaged bridge.
- Spend two full turns without moving.
- At the beginning of the third turn the bridge is repaired.
- In this precise case and for these two turns the HQ becomes a "unit"; it can be attacked (not through the damaged bridge before it is repaired) and fired upon. In that case, the low density of troops in the pontoneer unit makes it a difficult target, and only a final factor of 1 can be computed for a fire attack. Remember that the bridge at Basse Wavre can be repaired only by occupying a town hex, already protected by a -2. An HQ-unit has two loss steps, it can take two losses before losing its ability to repair bridges. A loss does not slow down to repair. A destroyed HQ-unit does not destroy the leader, who retains his abilities as a leader.
Even if other units are in the hex, the HQ-unit is considered on the top and alone in the hex. Once a bridge is repaired it cannot be damaged again. The intact bridges cannot be damaged in the scope of this game. Damaging bridges was actually taking a lot of time and energy.
9 - Anglo-Allied brigades and counters
Note: this rule may be confusing for beginners. It does not have to be played if both players agree, however it is very historical and we encourage the players to eventually respect it.
Vive l'Empereur is a regiment size game. However the organization of the Anglo-Allied army was by brigade made of 3-5 battalions each. Brigades are represented in the game by two counters each (3 for the Saxe brigade) to allow for more flexibility. However, the two counters must always been in adjacent hexes (or in the same hex) at the end of the Anglo-Allied movement phase. If this is not possible (because for example one of the two counters was disorganized and retreated), then the Anglo-Allied player must, whenever possible, do his best to move the half brigades to finish their movement phase adjacent.
As these brigades were sometimes made of heterogeneous battalions, the fire and morale of the half-brigades might be different.
The Brunswick units (56 to 59) do not have to obey this rule (they were either big regiments or a group of several battalions).
10 - Special unit; the Larrey counter
As a dedication to a hero of the time, Larrey, first Surgeon of the Guard, has a special counter. This is not a leader nor a fighting unit. If it is stacked for two consecutive turns on a non moving unit, then this unit recovers a step. Then Larrey can move to a different unit, and spend another two turns there. No unit can recover more than one loss that way. If the unit is attacked or fired at during the recovery process, it does not recover any loss. A totally eliminated unit cannot recover losses that way.
11 - Strategic deployment (Advanced rule XVIII)
This rule makes sense only for the Ligny and Waterloo battles, the two others may be too small for this rule (although, players are free to try them).
If the players wish to use this optional rule as explained in the advanced rules, they proceed as follows.
Each battlefield is divided in 16 squares. The French player starts deploying corps (I, II, VI and Guard for Waterloo, III, IV, VI and Guard for Ligny) on the four south squares.
The Anglo-Allied or Prussian player deploys his army (except the IV Prussian Corps) according to the rules. The British cavalry is an independent corps, while the French cavalry corps can be attached to any infantry corps as described.
12 - Game timing and penalties (advanced rule XIX)
If this rule is used, each player has three minutes to play a corps. This includes Wellington who has three minutes to activate the units from his Reserve corps.
13 - Initiative and leader obedience (advanced rule XVII)
If this rule is used, the values of the different leaders are indicated on their back side. The top value is initiative and the bottom is obedience. All the rest obeys the advanced rules. Army leaders are Napoleon, Ney and Grouchy on the French side. They can issue 3, 1 and 1 order per turn respectively. Wellington, Orange (before Wellington enters the Quatre-Bras battlefield, as explained in paragraph 3 above), and Blucher on the Allies side, they can issue 3, 1 and 2 orders per turn respectively. All the other leaders are corps leaders.
Consequences of a commander elimination:
- Napoleon: the game is over and it is a major Allied victory.
- Ney or Grouchy: Napoleon promotes a corps commander to become army leader. The later can issue only one order per turn.
- Wellington: Orange takes over. If Orange is already eliminated, the Allied player promotes either Hill or Uxbridge as army leader. The happy volunteer can issue one order per turn.
- Blucher: a corps commander is promoted to army leader, who can issue one order per turn.
Promoted leaders retain their corps commander capabilities in addition to their new rank.
If both players agree, Davout can replace either Ney or Grouchy. Davout can issue 3 orders per turn.
14 - Various notes
- Old Guard morale: The morale of the Old and Middle Guard infantry as well as the Chasseurs a Cheval unit, does not decrease with losses (for units 1 to 3, 6 to 9 and 16).
- Other comments on the morale: Both the Prussian and the Anglo-Allied army were very heterogeneous. Prussian landwehr from newly annexed territories (Elbe, Rhine, and Westphalia) had been fighting for the French not long before 1815, while others (Pomerania, Silesia), had made two campaigns already. Instead of trying to be too subtle in differentiating them, I gave all the Prussian landwehr an average morale of 7, which is respectable. On the Anglo-Allied side, several British brigades were rather raw, others were very experienced Peninsula veterans. I also averaged the morale of the British units to 9. Moreover, some Guard units had never seen any fighting before, but their spirit was good and their training, NCOs and equipment superb. I gave them the 11 value the Guard deserves.
- Prussian brigade leaders: Various sources give different names for some of the Prussian brigade leaders. Some were nominal only, others did not join their brigade, and some replaced wounded leaders between Ligny and Waterloo. As the names have a very minor effect on the game (they are only used for some set ups) we chose a single source and stuck to it along the game.
- Swiss unit: A French unit (Swiss regiment of III Corps, unit #075) had red uniforms; you will find it in the Anglo-Allied countersheet.
- Regrouping of small units except the Gendarmes: Some units in this campaign were rather small, especially cavalry regiments. In order to avoid counters with only one step, some units were regrouped. The only exceptions are the Gendarmes unit, Napoleon staff escort, and the British rocket artillery.
15 - The Congreve Rocket Artillery
This unit does not appear in the Loss charts as it has only one loss step. It is stacked with the British artillery reserve. It acts as a normal artillery unit, but each time it fires, it rolls a second die. On a 6 on this second die, the Congreve rockets, known for their erratic behavior, misfires and is removed from play.
Note on the set-ups: When it is stated "at half distance of X and Y", draw a line between these two points, spot the hex located in the middle, and use a two hex range area around this hex as a set up zone.
Note on the map: Some elements are purely decorative (isolated trees, trees along the roads, mills). The slopes separate three levels, from the lowest to the highest: light green, light yellow + dots, medium brown. When there is a doubt, the sense of the slope symbol indicates what is high and what is low. Typically the streams and the villages are low.
Note on the losses: Several scenarios start with losses allocated to whole corps. In that case, eliminate one step from every infantry, starting at the player's choice, then start to eliminate a second step if more losses are required. Typically cavalry and artillery do not take losses that way, but the players can chose to do so.
Terrain Effects 1815
| Terrain | Normal movement cost (MP) | Cavalry charge cost (MP) | Formation | Firer (1) | Target (2) | Attacker (3) | Defender (4) |
|---|---|---|---|---|---|---|---|
| Clear | 1 | 1 | Free | - | - | - | - |
| Forest | Inf: 2; Cav: 4; Art not allowed | 6 | Inf/cav general order or disorganized | General order, value 1 | -1 | Inf: value -1; Cav: value 1 | Inf: column value; Cav: value 1 |
| Difficult (Cultivated) | Inf: 1; Cav: 2; Art: 2 | 2 | Free, but no free change of orientation | - |
Note: The terrain of the attacking unit determines its formation (general order if attacks from a forest for example), and the terrain of the defender determines the modifiers (value -2 if attacking a village for example).
*: except if either hex of the bridge or both is a village: in that case no effect on the melee value.
- (1) Firer: the unit in this terrain has a fire value of #
- (2) Target: the unit attacking this terrain has a fire value modified by #
- (3) Attacker: has a melee value (not melee strength) modified by -1 or -2 or is equal to 1
- (4) Defender: the unit defends in this terrain with a melee value equal to #