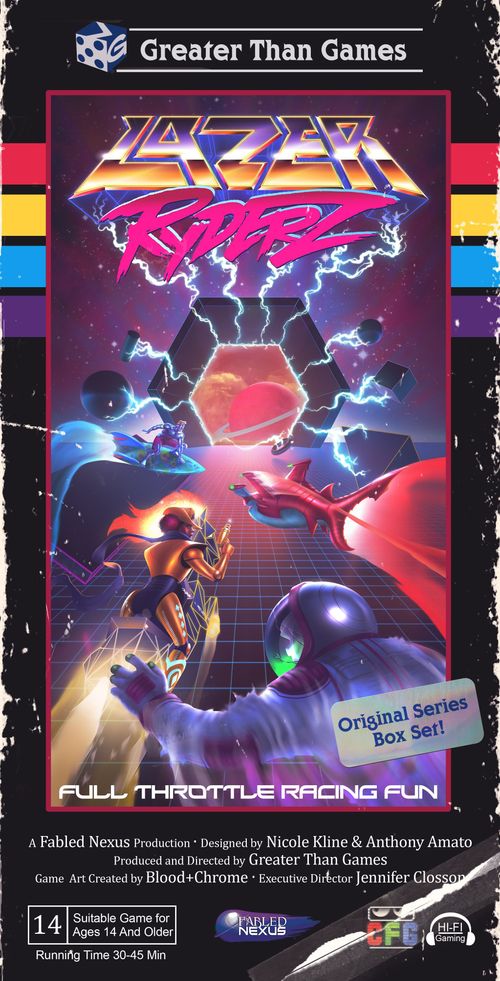
Lazer Ryderz
Lazer Ryderz Rulebook
Table of Contents
Table of Contents
Emerging Victorious!
The first player with three Prizms of their color on the table immediately wins!
Components!
- 1 6-Sided Die
- 1 Tie-Breaker Marker
- 4 Neutral Prizms
- 4 Turn Order Tokens
- 12 Character Prizms (3 in each Color)
- 4 Power Prizms
- 4 Character Stands with Plastic Light Speedometer Slider
- 4 Launch Point Tokens
- 24 1st Gear Lazer Pieces (2 Straight, 2 Soft Turns, 2 Hard Turns per Player Color)
- 24 2nd Gear Lazer Pieces (2 Straight, 2 Soft Turns, 2 Hard Turns per Player Color)
- 24 3rd Gear Lazer Pieces (2 Straight, 2 Soft Turns, 2 Hard Turns per Player Color)
- 16 4th Gear Lazer Pieces (2 Straight, 2 Soft Turns per Player Color)
- 8 5th Gear Lazer Pieces (2 Straight per Player Color)
Notes! Soft turns are indicated by a swirl behind the number, and hard turns are indicated by a lightning bolt.
Set-Up!
The Ryderz Approach!
Each player chooses a character and takes all pieces of that character's associated color.
The four characters are: Lazer Shark, Super Sheriff, Galactic Waveryder, and Phantom Cosmonaut.
Prizms Appear!
Place one neutral Prizm per player in the center of the table in an evenly spaced group. The starting Prizms can be in any configuration as long as they are no closer than the length of a straight 3rd Gear Lazer piece, they are evenly spaced, and all of the players agree that the configuration is reasonably fair.
Prizms! Prizms are the goal posts or capture points of the Lazer Ryderz race. Racing through a Prizm changes it to your color, and having 3 of them showing your color wins you the game. Beware though, as Prizms can be stolen from you by other players and converted to their color.
Start Your Engines!
All players take their Launch Point in one hand and close their eyes. While counting down from 10, all players must hold up a number of fingers equal to the Gear they want to start in on one hand, and place their Launch Point with the other. The Launch Point can go on any table edge within arm's reach, and must be as flush as possible with the table's edge.
Once the countdown reaches 0, all players open their eyes and set the slider on their character standee to the number of fingers they chose to hold up. This number is each player's starting Gear. If two or more players chose the same starting Gear, those players "Stall Out" and start in 1st Gear. In the rare case where all players Stall Out, redo the Start Your Engines! step.
Once all players have determined their starting Gear, place the Tie-Breaker Marker to the left of the player in the highest Gear.
Notes! For one-handed players, they may place their Launch Point and then signal their Gear with the same hand, taking an extra 3 seconds, if need be.
The Table Space!
There is no board in Lazer Ryderz - your table is your board. The table edges are hard barriers, so if a player's Lazer piece hits that edge, they crash. This means that the size and shape of the table used will change how the game is played. A round table of at least 3 feet in diameter is preferred, but any table will do. If a table is too small or large, some adjustments might need to be made to keep the game functioning as intended (see Modifications on page 17).
Example "Start Your Engines!" setup: four players place their Launch Point tokens at the edges of the table, with the neutral Prizms arranged in an evenly spaced group at the center.
The Round!
Each round has three phases: Opening Credits, Let's Ride, and To Be Continued...
1) Opening Credits
Hand out Turn Order Tokens (number side-up) in order from highest to lowest Gear. If two or more players are in the same Gear, then whoever among them is closest clockwise to the Tie-Breaker Marker will take the next available Turn Order Token.
2) Let's Ride!
Players take their turns in order from 1st to 4th. After a player's turn, they flip their Turn Order Marker to the "Done" side.
3) To Be Continued...
The player with the Tie-Breaker Marker passes it to their left and the Tie-Breaker Marker is kept to the left of that player.
Example! Lazer Shark is in the highest Gear so she takes the 1st Turn Order Token. Phantom Cosmonaut and the Super Sheriff are both in 3rd Gear. Phantom Cosmonaut is sitting on Lazer Shark's left, and therefore closer to the Tie-Breaker Marker, so he takes the 2nd Turn Order Token, then the Super Sheriff takes the 3rd Turn Order Token. The Galactic Waveryder is in 1st Gear, so he takes the 4th Turn Order Token.
Your Turn!
1) Shift
Choose one of the following:
- Shift UP one Gear
- Shift DOWN one Gear
- STAY in your current Gear
2) Move
Choose one of the following:
Straight Ahead! Place a straight Lazer piece with the same number as your current Gear.
Attempt a Curve! Roll the Curve die!
- If your result is your current Gear number or higher, you succeed! Place a curve piece with the same number as your current Gear.
- If the result is lower than your current Gear number, you fail to turn! Place a straight piece with the same number as your current Gear.
- If you roll the Spin Out symbol, you "Spin Out!" Place a curve piece with the same number as your current Gear, but then shift your Gear number all the way down to 1.
3) Score
If your Lazer crosses over a Prizm with both of your Lazer's long edges going from one side of the Prizm to the other (any of the Prizm can be seen on both sides of the Lazer) you have scored! This may occur over two turns.
When you score, replace the scored Prizm with one of the Prizms in your color. Newly scored Prizms should always be placed on top of the Lazer piece that scored them. If the Prizm is not locked (see Additional Rules), slide it toward the front of your Lazer until just before the point.
However, if your Lazer has passed over a Prizm but the Prizm cannot be seen on both sides of the Lazer, you have not scored. As long as the Prizm is not touching another player's Lazer, it must be Nudged (see Additional Rules).
4) Crash
If the Lazer piece you placed this turn is touching any other Lazer (including your own), or crosses the edge of the table, you have crashed! Remove all of your pieces (except for scored Prizms) from the board. Then, if you crashed into another player's Lazer, they remove their Lazer pieces starting with the piece you hit and going back to their first piece on the table (including their Launch Point). They do not remove their front most Lazer piece.
Notes! No crashes can happen due to pieces touching on top of a Prizm. This means a Prizm is the place on an enemy's Lazer that you can pass through.
5) Respawn
If you have crashed, you must now respawn! To do so, you must close your eyes, count to 10, and place your Launch Point anywhere along the edge of the table within arm's reach, just like the Start Your Engines! step. When respawning, you can choose to start in any Gear you like.
6) Prizms Reappear!
If you scored and replaced a neutral Prizm piece:
- Stand back from the table.
- Close your eyes.
- Toss the Prizm gently back onto the table without crossing over the table's edge.
- If the Prizm is touching any other piece, it must be Nudged (see Additional Rules).
Once your turn is complete, flip your Turn Order Token to the "Done" side.
FAQ!
Can I pre-measure before placing a piece? Nope! All decisions on piece selection and placement must be made before the piece gets near your Lazer. You can eyeball it from behind the table edge, but once you cross over the edge of the table with a piece, you are committed to placing it.
What happens when I run out of pieces with my current Gear number? If you ever need to place a Lazer piece and you don't have an appropriate piece in your current Gear, you must use the applicable piece of the next available number down. If you don't have any applicable pieces left, you must pull the oldest Lazer pieces off of your line until you have one in your current Gear or lower.
You must use all of the pieces of a given type (curved or straight) in your current Gear before using pieces of a lower Gear. This means, for example, that if you choose to turn and are out of hard curves in your current Gear, you must use a soft curve in your current Gear if you have it before using a curve from the next lowest Gear. However, if you successfully turn but are entirely out of curved pieces in your current Gear, you may use curve pieces from the next lowest Gear even if you have straight pieces in your current Gear.
Additional Rules!
The Nudge
In most situations when pieces overlap unscored Prizms, the Prizm must be Nudged away. The Nudged Prizm is moved away from the piece it touches until it is as far away as a Lazer piece is wide. When Nudging a piece, try to keep that piece as close to where it was as possible while maintaining the minimum Lazer-width distance from all other pieces.
Locked Prizms
Most Prizms are "Free Floating". Free Floating Prizms slide toward the front of your Lazer when scored (as described under Your Turn), and can be Nudged if crossed without scoring. However, if 2 or more Lazer pieces of different colors are touching a Prizm, or if it is a scored Prizm on a Lazer of the same color, it is "Locked". This means that it will not be Nudged even if it is crossed by another Lazer.
Modifications!
If you find your table is too small, too large, or oddly-shaped, you may want to make some of the following adjustments:
Small Tables - If your table is less than 3 feet on its shortest surface dimension:
- Remove all 5 straight, 4 soft turn, and 3 hard turn Lazer pieces. Players cannot go higher than 4th Gear.
Large Tables - If your table is more than 5 feet on its shortest surface dimension:
- Whenever you would connect a Lazer piece to the Launch Point, you may first place a 5th Gear straight piece without changing your Gear.
Oddly-Shaped Tables - If your table is oddly-shaped, such as long and thin, you may try some of the following:
- Use the small table adjustments above, and also use the 5 straight pieces to define an edge that makes the table more square.
- Use the large table adjustments above but only when starting from the sides of the table furthest from each other.
- Players are only allowed to start from the sides furthest from the center.
- Allow each player to toss one of the starting Prizms onto the board instead of placing them all in the middle.
Power Prizms!
Once your group has the basic gameplay down, you may decide to add these optional character powers to your next game for even more awesomeness. Each player starts the game with a Power Prizm (power-side up). You may activate these powers on your turn only, and after their effect is used, you must flip the Prizm to the "resting" side to show the effect has been used. This power will only get recharged (flipped power-side up) when someone else steals one of your active Prizms. You may only ever hold one use of your power at a time, so use it strategically, but don't hold onto it so long that you miss the ability to recharge and use it again!
Galactic Waveryder!
Power! Instead of placing your normal Lazer piece, you may instead place 2 hard turn Lazer pieces of your current Gear without rolling to turn.
You do not have to roll in order to place the two hard curves with this ability. If you only have one hard turn in your current Gear, that must be used first. If you do not have any hard curves in your current Gear, you must use hard curves from the next lowest Gear, etc. If you do not have sufficient hard curves in your current or lower Gears, you must remove pieces from your Lazer, starting with the oldest, until you have sufficient pieces. Galactic Waveryder can only use his power in 1st, 2nd, or 3rd Gear, as those are the only Gears that have hard turns.
Lazer Shark!
Power! After placing your Lazer piece, place the highest-numbered straight Lazer piece you have available. If you do not score this turn, you Crash.
Your bonus Lazer piece is always the longest you have available in your pool, regardless of your Gear. This means that you always place a 5 piece unless you are out of 5 pieces, in which case you place a straight 4, etc. This does not change your current Gear. You must place two Lazer pieces on the turn you activate this power, and you must score before the end of your turn. If you do not, you crash as though your Lazer had hit the edge of the table.
Super Sheriff!
Power! Choose one opponent, you may shift them up to their highest Gear or down to 1st.
When you activate this power, you select one opponent. Either shift their Ryder down to 1st Gear or up to the highest Gear. Usually, the highest Gear will be 5th Gear, but if you're playing with a modification (see Modifications), the highest Gear may be 4th Gear. As with all Prizm powers, you may only activate this ability on your turn.
Phantom Cosmonaut!
Power! You cannot crash this turn. Skip the crash phase of your turn.
Your Lazer can intersect other Lazers or the edge of the table this turn without resulting in a crash! However, keep in mind that, if the point of your Lazer is not clear of other Lazers or the table edge, you still might crash next turn!