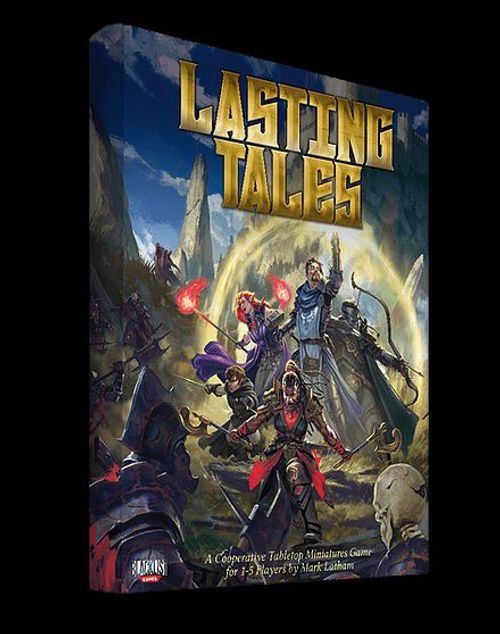
Lasting Tales
Lasting Tales Rulebook
Table of Contents
Table of Contents
- The Basics
- Tests
- Rerolls
- Randomizing
- Temporary Bonuses
- Measure
- Things You'll Need
- Game Rules
- Event Phase
- Recovery Phase
- Combat
- Common Weapons & Armor
- Morale
- Magic
- Terrain
- Buildings
- Terrain Keywords
- How Much Scenery?
- Adversaries
- Special Rules
- Conditions
- Adventures
- Adversary Profiles
- Treasure
- Treasure Tables
- Quickstart Heroes
The Basics
Before getting stuck into the meat of the rules, it's worth taking a moment to familiarize yourself with the basic principles, which will come up time and again during play.
The Miniatures
In the rules that follow, the miniatures used to play Lasting Tales are also referred to as "models." The models under the player's control represent the Party – a small group of bold, likeminded Heroes. The Party pits itself against a range of monsters and villains known collectively as Adversaries. These are explained on pg 24.
Base Sizes: All models are mounted on circular bases. Most human-sized models, and smaller, have bases of 25mm (1") diameter; Large models, such as Trolls, have bases of 50mm (2") diameter; Huge models, like Dragons and Giants, have bases of 75mm (3") diameter.
Followers: In the full game, it will be possible to recruit hirelings and allies called Followers. These models have a limited role, but can be invaluable in helping your Heroes to victory.
Characteristics
The relative strengths and weaknesses of a model are determined by its profile, comprising 7 characteristics, and one or more reserves. These primary statistics are represented by a numerical value of between 1 and 7.
- Melee Skill (MEL): Skill-at-arms is measured by this characteristic.
- Ranged Skill (RNG): A model's accuracy with ranged weapons.
- Strength (STR): A model's physique and brawn.
- Agility (AGI): A measure of dexterity, balance and nimbleness.
- Defense (DEF): Physical hardiness and resilience.
- Intellect (INT): A model's wits, cunning and accrued knowledge.
- Willpower (WIL): A measure of mental fortitude and courage.
Derived Characteristics
Every model has two special values, which are derived from their Strength and Defense characteristics. These are the Strength Bonus and Resistance. All models in this pack have these values already worked out for you, but later you'll see how they're calculated in case you have to adjust them during play.
Reserves
Reserves can decrease during a game, and sometimes increase (although they may never exceed their initial value). The value of a reserve is best recorded with a pencil, which can easily be adjusted during the game.
- Health: A model's Health points represent how much damage they can accumulate before they are removed from play.
- Fate: Fate points are the domain of Heroes – Adversaries and Followers do not have a Fate reserve. Fate represents luck and destiny, allowing heroes to achieve mighty deeds or even cheat death!
- Power: Only Wizards and other spellcasters receive a reserve of Power Points, which are expended each time the model casts a Spell.
Speed
Finally, all models have a Speed value, which shows how far in inches they can Move (pg 10). Speed is expressed as two values, a primary and secondary value. The secondary value (in parentheses) is used to randomly determine movement distances, for example when running or fleeing.
Dice
The game uses regular six-sided dice (referred to as D6). When you're required to roll multiples, these will be expressed in the rules as [number of dice]D6 – so two dice is 2D6, three dice is 3D6, and so on.
D3 and D66
Occasionally you will be asked to roll a 'D3' – this is simply a normal die roll, but scores of 1 and 2 = 1, 3 and 4 = 2, and 5 and 6 = 3.
A D66, on the other hand, is used for finding results on larger tables. Roll two D6s, nominating one as 'tens' and one as 'units' – so a roll of 1 and 6 respectively would be 16; a roll of 3 and 4 would be 34, and so on.
Tests
Most of the action during the game is dictated by passing or failing a Test. The procedure for a Test is always the same: Roll 2D6, and add the total of the roll to the characteristic of the test. For example, if you're asked to take a Strength (STR) test, and the Strength characteristic is 3, you would roll 2D6+3.
The aim is to equal or beat the target Difficulty for the Test. Unless otherwise specified, the Difficulty is 10 – if your total score is 10 or more, you've passed the Test. If it's 9 or less, you've failed.
Sometimes, the Difficulty of the Test will be specified as Simple or Hard.
| Test Difficulty | Target Number |
|---|---|
| Simple | 8+ |
| Normal | 10+ |
| Hard | 12+ |
If conflicting special rules tell you that a Test is both Simple and Hard, they cancel each other out – the Test becomes Normal instead.
Advantage and Disadvantage
In some situations, you will gain Advantage or Disadvantage to your roll.
- If you gain Advantage to a roll, you must roll an extra D6 and discard the lowest score before calculating the result.
- If you gain Disadvantage to a roll, you must roll an extra D6 and discard the highest score before calculating the result.
Advantage and Disadvantage cancel each other out – if both apply to the same Test for any reason, the Test becomes a standard one. Each can only be applied once – multiple applications of Advantage and Disadvantage have no cumulative effect.
The Rule of 2 & 12: Even the weakest Kobold has a chance of scoring a lucky blow, just as the stealthiest thief might trip and fall while attempting to sneak past a sleeping Ogre. To represent the fickle finger of fate, regardless of the model's characteristic score, a roll of 2 (double-1) always fails, and a roll of 12 (double-6) always succeeds.
The Critical Die
Sometimes – usually in combat, or when casting Spells – you will be asked to roll an extra die of a different color, called the Critical die. The Critical die is never added to the result of the Test – instead, if a Test is passed and the Critical die scores a 6, a Critical Success has been achieved. However, if the test is failed and the score on the Critical die is a 1, you've made a Critical Failure.
The exact effect of a Critical Success or Failure depends on the type of roll – more on this later. However, whenever a Critical Failure is rolled, a Hero gains the Focused condition (page 26).
Rerolls
Sometimes the rules will instruct you to reroll one or more dice. This is exactly as it sounds – pick up the dice you wish to reroll, and roll them again. The result of the reroll must be accepted, even if it's worse than the first. No die can be rerolled more than once.
The reroll rule may specify a particular die, or tell you to reroll a Test or Challenge. In the latter case, you must reroll all the dice originally rolled for the Test (including the Critical die if applicable).
Randomizing
Sometimes you'll be asked to randomly pick between several models, objectives, buildings, etc. When randomizing between two items, simply roll a die, nominating one item as odds and the other as evens. If randomizing between three items, assign each a number 1-3, and roll a D3. For four items, assign each a number, 1-4, and roll a D6, rolling any result of 5 or 6 again until a valid result is reached, and so on.
Temporary Bonuses
Sometimes, a model will have a special rule that awards them a temporary bonus (or penalty) to a named characteristic. This could last for the duration of an Attack, an activation, or an entire round – the rule will tell you how long it lasts (for example, when a Fighter uses their Armsman rule, they add +2 to their Melee characteristic for one Attack). Simply add or subtract the specified bonus to the named characteristic for that duration.
Measure
All movement and ranges in the game are determined by measuring distances between two points on the gaming area. For this, you'll need a measuring tape or long ruler marked in inches ("). You may measure a distance at any time during play.
Things You'll Need
In addition to miniatures, dice, and measuring device, you will need:
- A Gaming Area: A flat surface on which to play, measuring at least 3 feet (36"/90cm) square.
- Scenery: Model terrain, such as buildings, forests and dungeon walls.
- Character Sheets: All the information about your Heroes, at-a-glance. You can photocopy the ones in this pack, or download printable versions from www.blacklistgamesllc.com.
- Pencil and Eraser: Useful for making notes and recording your Heroes' progress.
Game Rules
Now that the basics are out of the way, it's time to delve into the core rules of the game. Once you've played an adventure or two, the rules will soon become second nature.
The Game Sequence
A game round comprises 4 phases, which must be completed in a strict order. When the fourth phase (Recovery) is complete, check to see if the game ends. If not, start the sequence again from 1.
- Initiative
- Heroes
- Event
- Recovery
The Enemy: Throughout the rules you will see the word 'enemy' or 'enemies'. This term refers to any model on the opposing side – so an Adversary is an enemy of any model in the players' Party, and members of the Party are enemies to all Adversary models. Conversely, all models on the same side are 'friends' or 'friendly' to each other.
Initiative Phase
-
In the first round, each player rolls 2D6 – the player who scores highest is the First Player. In this step of each subsequent round, the player to that player's right becomes the new First Player (use a coin or counter as a reminder).
The First Player: i. Is the first to activate one of their models in each Heroes Phase. ii. Decides the result of certain rules situations when there is no clear ruling (such as choosing the direction a Monster moves when there are two or more equally viable options).
-
Any effects that specify they take place 'at the start of the round' are resolved now, in an order determined by the First Player.
Heroes Phase
Beginning with the First Player, each player activates one of their models. Play proceeds clockwise around the table. When all players have activated one model, the sequence continues, with players who have more than one model in play activating. Continue until all models that can activate have done so.
- When a Hero activates, they may perform 1 Move, 1 Attack, and 1 Action, in any order. Some models have special abilities which may be used in place of an Action. A model doesn't have to perform all three options, or even any of them, but it must activate – when you've finished the activation, even if you didn't do anything, mark the model as 'activated' – it can't go again this round. i. If a model is Stunned when it activates, it must Stand Up. Stand the model up and remove the Stunned condition. The model may now perform an Action, but may not Move or Attack this round.
- Exhaust the Character: Place an Activated marker on the model's hero sheet. This signifies the character can't take another activation this round. Once a character is Exhausted, the next player takes a turn.
Move
Models have two Speed values – primary and secondary (in parentheses). A model may Move a number of inches (") up to its primary Speed value.
- A model must always end a move in a space that it can wholly occupy, including its base. Its base can never overlap another model's base.
- A model can Move in any direction, measuring around obstacles and other models.
- A model does not have to use all of its movement allowance.
See Terrain, later, for details of how models interact with tabletop scenery.
Diagram note: Marek correctly moves his full Speed of 5". The measurement begins at the front of the model's base, and the movement ends with the base behind the measure. The printed example also shows the incorrect method: measuring from the front of Marek's base to the back adds the diameter of the base to the total distance moved, and is incorrect.
Run
When a model Moves, it may also spend its Action for the round to Run, increasing its movement distance. The model adds its Secondary Speed value to its Speed. A model may not perform a Ranged Attack in the same activation that it Runs.
Note that when Adversaries or Civilians Move (more on this later), or a model is compelled to Move by other means (because of a Spell effect, for example), they do not also Run unless the rule specifies otherwise – only a Move is performed, not an Action.
Attack
Attack Types
A model may perform one Attack from those it has available during its activation.
An Attack will always be one of the following types:
- Melee Attack: Choose an enemy in base contact as the target of the Attack. If the model does not have an equipped Melee Weapon, it must fight Unarmed.
- Ranged Attack: Choose an enemy model in line of sight, and within your weapon's maximum range as the target of the Attack. The model must have an equipped Missile Weapon to perform this type of Attack. A model may not perform a Ranged attack and a Run Action in the same activation.
Surrounded: Ordinarily, a model may leave engagement at any time, simply by moving away from enemies in contact. However, if a model is surrounded by any combination of enemies and impassable scenery, so that its base can't physically fit between them, then it is effectively trapped and cannot leave engagement. When attacking a Surrounded model in Melee, the attacker treats the MEL Test as Simple (see Combat, page 15).
Engaged Models
A model in base contact with an enemy is engaged. Otherwise, it is unengaged.
Line of Sight
The concept of 'line of sight' allows you to work out what your models can 'see' – usually their target! If a model cannot be seen, it cannot be attacked. In Lasting Tales, all models have a 360° arc of vision, meaning that they can see all around regardless of which way the model is facing, unless otherwise specified.
The easiest way to check Line of Sight is to draw an imaginary line between the models using a tape measure. At least some part of the target must be visible, not including extended arms, weapons, clothing or other appendages that may extend over the area of the base – as models are often sculpted in dynamic poses, we have to assume that those parts that stick out recklessly are just for artistic effect.
- If you can see the whole of the target model, Line of Sight is Clear.
- If part of the model can be seen, but there are enemies or scenery in the way, Line of Sight is Obscured. (Intervening friendly models are ignored.)
- If none of the model can be seen, Line of Sight is Blocked.
Actions
A model may perform a single Action in each round. If a model is allowed to perform a bonus Action for any reason, it may not perform the same Action twice. Some models have unique abilities that may be used as an Action. Alternatively, a model may choose an Action from the standard list below.
Standard Actions List
- Aid
- Interact
- Search
- Take a Breath
- Hide
- Reload
- Swap
- Taunt
Aid
A model may use this Action to target a friendly model in contact. Choose one of the following:
- Remove the Burning or Staggered condition from the target.
- Replace the Stunned condition with the Staggered condition (target Stands Up).
Hide
An unengaged model may attempt to Hide as long as no enemies can draw an unobstructed Line of Sight to it. Take an Agility Test – if the Test is passed, the model gains the Hidden condition. Hidden models treat Obscured Line of Sight as Blocked.
- The Hidden condition is ignored (but not removed) by enemies that can trace a clear Line of Sight to the model.
- The Hidden condition is automatically removed if the Hidden model performs another Action, a Move, or an Attack.
Interact
Some markers or scenic items may be manipulated by a model if the adventure rules allow. An unengaged model in contact with such an item may Interact with it by taking a characteristic Test (the type will be specified by the adventure rules). If the Test is passed, consult the adventure rules to see what happens. If the Test is failed, there is no effect.
Reload
A model that performs a Ranged Attack with a weapon with the Slow to Reload rule may not fire that weapon again until it performs a Reload Action. Only one weapon can be reloaded per Action.
Search
A Hero may Search a Treasure chest as an Action, as long as the Hero is unengaged, and no enemy is in contact with the chest. Roll on the following table to see what the model finds, then remove the marker.
| 2D6 Roll | Result |
|---|---|
| 2 | Trap! Roll on the Traps table. See pg 31. |
| 3 | Nothing |
| 4 | 1D6 Gold |
| 5 | 2D6 Gold |
| 6-8 | 1D6 Gold, plus a Potion or Scroll (Roll on the Potions & Scrolls table, pg 34) |
| 9-11 | 1D6 Gold, plus a Keyshard (See Keyshards, pg 34) |
| 12 | 1D6 Gold, plus a Magic Artifact (Roll on the Magic Artifacts table, pg 36) |
If the model acquires a new item, they may immediately perform a free Swap Action.
Swap
An unengaged Hero may perform this Action to rearrange items in their Inventory, or to give items to another Hero.
- Equipping Items: A Hero may have up to two Melee Weapons and one Ranged Weapon equipped at any one time, plus one suit of Armor. A Shield can be equipped as long as none of the equipped weapons have the Two-Handed rule. These should be marked on the character sheet using the check-boxes next to each item slot. All other items of these types are stored in the model's Inventory. The Swap Action is used each time a Hero wishes to equip a different item from their inventory. A Hero can swap around as many items as they wish with a single Swap Action. Note: Whenever a model acquires a new item, such as through Searching, they are assumed to gain a free Swap Action to accommodate their latest acquisitions.
- Give Item: A Hero may give any number of items in their possession to another Hero within 2", as long as both players are agreeable.
Take a Breath
An unengaged Hero may stop and rest a moment. Restore 1 point of Health lost earlier in the game.
Free Actions
Sometimes a model will be permitted to perform a Free Action. These are carried out exactly as a normal Action, but does not use up the model's Action for the round – it is essentially a bonus Action. The only restriction is that a model cannot perform the same Action more than once per round.
Taunt
The Hero bellows a challenge to their foes. Gain the Taunting Condition.
Fate
Fate is a finite reserve possessed only by Heroes, which is reduced each time it is used during a game. It is used in the following ways:
- Return a Fallen Hero to Play
- Reroll a failed Test
- Perform a Special Action or Ability
Return a Fallen Hero to Play
When a Hero is reduced to 0 Health, they aren't necessarily dead – instead, they may simply have crawled away to lick their wounds and gather their strength for a second wind. Replace the model with a Fallen Hero marker. This marker can't be interacted with or attacked.
In the Recovery phase, that Hero may spend Fate to recover (see page 14).
Reroll a Failed Test
At any point in the game, when a Hero fails a Test (including an Attack Roll or Casting Roll), they may spend 1 Fate Point to reroll the dice. All the original dice are rerolled, including the Critical die if applicable.
Perform a Special Action or Ability
Some Heroes have special abilities, usually as a result of gaining a Class Skill, which require a Fate Point to use.
Event Phase
In this phase, Adversaries move and fight, and random events are resolved. The Event phase broken down into the following sequence:
- Check for Unexpected Events: The First Player rolls a D6. On a 1, an Unexpected Event occurs, and must be resolved immediately. See Adventures for the full list of Events.
- Adversary Activations: Now it's the turn of the bad guys to fight back! Every Adversary in play activates, following the simple activation steps below.
- Check Spawns: Check if any Adversaries in the Spawn pool enter play.
Adversary Activations
Resolve Adversary model activations one at a time, in an order determined by the First Player. All Adversaries have a Type, either Melee or Ranged, representing their preferred form of Attack.
Stunned Adversaries: If an Adversary is Stunned when it activates, it automatically Stands Up, but its activation then ends immediately.
Melee Adversaries
- If engaged when activated, perform a Melee Attack.
- If unengaged when activated, Move towards the closest enemy model it can see. A Melee Adversary will always Run if necessary. If an Adversary Moves into contact with an enemy, it will stop moving and perform a Melee Attack.
- An Adversary of the Melee type with a Ranged Attack option that has not performed an Attack after following the above steps, will perform a Ranged Attack if it is unengaged and there is a valid target within range and Line of Sight.
Ranged Adversaries
- If engaged when activated, perform a Melee Attack.
- If unengaged when activated, check Line of Sight and Range. i. If there is a valid target, the Adversary remains where it is, and performs a Ranged Attack. It will prioritize targets in Short Range over those at Long Range, then those with Clear Line of Sight over those with Obscured. ii. If there is no viable target, it will Move by the shortest possible distance until there is a target in range and Line of Sight, then it will perform a Ranged Attack as above. If there is no way for the Adversary to do this, go to the next step. iii. The Adversary will Move towards the closest enemy model it can see. If an Adversary Moves into contact with an enemy in its activation, it will stop moving and perform a Melee Attack.
Moving Adversaries
Adversary models will always Move towards their target point or model by the shortest and most direct route possible. They will move through Difficult Terrain only if it represents the shortest route. They will not Climb or Jump unless it is the only possible way to reach their target, or unless their special rules state otherwise – for example, an Ethereal creature has no risk of failing a Climb Test, and will therefore move through obstacles towards its target, but still will not Jump.
Stunned Heroes
An Adversary will only target a Stunned Hero if there is no other viable target.
The First Player
If there is ever any doubt about which way an Adversary Moves, or which model they target with an Attack, the First Player decides.
Spawns
When an Adversary of the Minion type is removed from play, immediately place the model near the game board, in what we call the Spawn Pool. The Spawn pool should be divided into two sections: the Graveyard, and the Reserve pool. Unless a special rule specifies otherwise, Minions removed from play are first placed in the Graveyard.
At the end of each Event phase, follow these steps:
- Roll 1D6 for each Minion in the Reserve pool. For each roll that equals or beats its Spawn value, that model returns to play following the Spawn rules (see Adventure Special Rules). Most adventures have dedicated points marked on their maps to show where Spawned models are placed.
- Roll 1D6 for each Minion in the Graveyard. For each roll that equals or beats its Spawn value, that model is moved to the Reserve pool.
Example: A Goblin Cutthroat has a Spawn value of 4+. If it is in the Reserve pool, the model will return to play on the D6 roll of 4 or more.
No Target? If an Adversary is unable to follow any of the steps in its activation sequence, it must roll a D6: On a 1-3, it will Move as far as possible towards the nearest Special Objective, Objective or Treasure Chest (in that order). On a 4-6, it will Move as far as possible towards the nearest enemy. (Models with the Hidden condition that aren't in Line of Sight are ignored.) If there are no Objectives, Special Objectives or Treasure Chests in play, don't roll – Move towards the nearest enemy instead. After completing this Move, it will Attack following its usual activation rules if possible. If there is still no viable target (because, for instance, all enemies are Hidden or Fallen), the Adversary will do nothing this turn. Mark it as activated.
Recovery Phase
This phase is where Heroes recover from a variety of game effects, and the victory conditions are checked. Use the following sequence:
- Fallen Heroes Recover
- Resolve End of Round Effects
- Regenerate Power
- Check Victory Conditions
Fallen Heroes Recover
Any Hero not in play, and currently represented by a Fallen Hero marker, may now spend a Fate Point to return to play (see Fate, page 12). The Hero restores 1d6 Health and its model must be placed on or in contact with the Fallen Hero marker. The returning Hero may not be engaged unless there is no other choice.
A Hero with no Fate remaining at this step is eliminated from the game (but may return in future adventures if you're playing as part of a Tale).
Note: A Fallen Hero is not considered to be 'in play' for rules purposes, and thus will never be targeted by enemy attacks.
End of Round Effects
Some Conditions, such as Poisoned, have effects that must be resolved in this part of the Recovery phase. See Conditions, later.
Next, resolve any special rule that states it takes place 'at the end of the round', in an order chosen by the First Player.
Regenerate Power
Any spellcaster in play, such as the Wizard, who is not at their starting amount of Power points, now automatically restores 1 point, up to their maximum. Power regenerates even if the model is Stunned or Staggered, but not if they are Fallen.
Check Victory Conditions
Some adventures have Victory Conditions which must be checked at the end of the round. If these conditions have been met, or if the round limit for the adventure has been reached, the game ends! Otherwise, begin a new round, starting with the first phase: Initiative.
Combat
Combat is one of the most important aspects of the game – from swirling melee to long-ranged archery, the arena of battle is where most adventures are won or lost!
Melee Attacks
Only models engaged with an enemy may perform Melee Attacks.
- Choose one of the model's Melee Attacks (usually a listed weapon in the case of Hero models). If a model has no weapon, it can only attack Unarmed. Now, the model will perform one strike with that weapon.
- Choose the target of the strike – this must be one of the engaged enemies.
- Make an Attack Roll – this is a Melee Skill Test. The Difficulty of the Test is determined by the enemy's MEL (see chart, below). Heroes must roll a Critical die alongside their Attack roll (see below). If the Test is passed, the strike is successful.
- Roll the Damage listed for the Attack. Add the Strength Bonus to the rolled amount.
- Deduct the target's Resistance from Damage caused, remembering to add any Armor Bonus to the Resistance.
- Deduct Damage points from the target's Health reserve, to a minimum of 0.
Melee Attack Difficulty
If the attacker's MEL is at least double the target's, the Test is Simple. If the target's MEL is at least double the attacker's, the Test is Hard. Alternatively, use this handy chart:
| Attacker's MEL \ Target's MEL | 1 | 2 | 3 | 4 | 5 | 6 | 7 | 8+ |
|---|---|---|---|---|---|---|---|---|
| 1 | N | H | H | H | H | H | H | H |
| 2 | S | N | N | H | H | H | H | H |
| 3 | S | N | N | N |
Note: A MEL of 8 or more is only possible through special rules that modify characteristics.
(S) Simple (8+) (N) Normal (10+) (H) Hard (12+)
Ranged Attacks
Only unengaged models may perform Ranged Attacks. A model may not Run and perform a Ranged Attack in the same activation.
- Choose one of the model's Ranged Attacks – if the model has no ranged weapon, it cannot ordinarily perform a Ranged attack.
- Choose a target within Range and Line of Sight.
- Make an Attack Roll – this is a Ranged Skill Test. If the target is at Long Range, the Difficulty of the Test is Hard. Heroes must roll a Critical die alongside their Attack roll (see below).
- Roll the Damage listed for the Attack.
- Deduct the target's Resistance from Damage caused, remembering to add any Armor Bonus to the Resistance.
- Deduct Damage points from the target's Health reserve, to a minimum of 0.
Range
Missile weapons and other Ranged Attack forms usually have two 'ranges' – Short and Long. Targets that lie fully outside Short Range (but still at least partially within Long Range) are hit with Hard Difficulty. Targets fully outside Long Range cannot be targeted.
Cover
When performing a Ranged Attack, if Line of Sight to the target is Obscured, then the target is behind Cover – the shot gains Disadvantage to the Attack roll.
If the only obscuring object is in contact with the attacker, it does not count as Cover – the shooter is assumed to lean around or over the scenery to take the shot.
Combat Options
When performing an Attack, a Hero may spend their Action at the same time in order to gain one of the bonuses below. Note that the use of a Combat Option must be declared before the Attack roll is made.
Aimed Shot
Ranged Attacks only. The Attack gains Advantage to the Attack roll.
Dual Wield
Melee Attacks only. A model with two one-handed weapons equipped may perform one additional strike at the end of this Attack. When performing a Dual Wield attack, you must declare which weapon is being used for the normal Attack. The other weapon is used for the additional strike.
Precision Strike
Melee Attacks only. The first strike of the Attack gains Advantage to the Attack roll.
The Critical Die
Whenever a Hero performs an Attack (either Ranged or Melee), you must roll the Critical die alongside the Test (page 7).
- On a Critical Success, you have achieved a Mighty Blow! Add an extra D6 to the Damage roll.
- On a Critical Failure, you have Fumbled! The Hero's activation ends immediately, even if they still had more to do. However, such is their shame at the failure, they gain the Focused condition (page 26).
Damage
Upon a successful Attack Roll you must roll the Damage specified for the weapon or special Attack being used. Melee Attacks add the model's Strength Bonus to this roll. The total is the amount of Damage inflicted by the Attack.
Note: A Strength Bonus is only applied once per Strike, not once per die rolled – if for any reason you are able to roll multiple dice for damage, you still only add the Strength Bonus once after all the dice are totaled.
The Strength Bonus is derived from a model's Strength characteristic. If the Strength characteristic is ever temporarily raised or reduced, the Strength Bonus may also be raised or reduced accordingly. Check the following chart:
| Strength | 1 | 2 | 3 | 4 | 5 | 6 | 7 |
|---|---|---|---|---|---|---|---|
| Strength Bonus | -1 | 0 | 0 | +1 | +2 | +3 | +4 |
Resistance
Every model has a Resistance value. This is how much Damage the model can absorb due to its toughness and natural defenses – deduct this value automatically from the Damage inflicted.
Resistance is derived from a model's Defense value. If the Defense value is ever temporarily raised or reduced, the Resistance may also be raised or reduced accordingly. Check the following chart:
| Defense | 1 | 2 | 3 | 4 | 5 | 6 | 7 |
|---|---|---|---|---|---|---|---|
| Resistance | 0 | 0 | 1 | 1 | 2 | 2 | 3 |
Armor
If the model is wearing Armor, it will gain an Armor Bonus. This value represents a pool of dice which are rolled each time the model suffers damage – for each die that scores a 5 or 6, add 1 point to the model's Resistance against that Attack to see how much Damage is absorbed in total.
Example: Marek has a Resistance value of 2, and wears Heavy Armor for an Armor Bonus of 2. He suffers 4 points of damage from an enemy Attack. He automatically deducts his RES from this amount, leaving 2 points remaining. He then rolls 2D6 – one die for each point of Armor Bonus. He scores a 4 and a 5 – the 5 is successful, the 4 is not. He therefore adds 1 extra point of RES, and loses just 1 Health point.
Zero Health
If an Attack reduces the target to 0 Health, that model is removed from play as a casualty. If the casualty is a Hero, however, it is assumed they manage to crawl away to recover, possibly able to rejoin the fight later. Place the model beside its Character sheet for now, and consult the rules for Fate.
Note: No model may ever be reduced to less than 0 Health, nor may it gain more than the amount of Health it began a game with.
Common Weapons & Armor
Melee Weapons
| Weapon | Damage | Special Rules |
|---|---|---|
| Hand Weapon | 1D6 | One-Handed |
| Dagger | 1D3 | One-Handed, Off-hand Weapon |
| Great Weapon | 1D6+3 | Two-Handed |
| Staff | 1D3+1 | Defensive Weapon, Two-Handed |
| Spear | 1D6 | Pierce 1, Support |
| Pole-Arm | 1D6+2 | Two-Handed |
| Unarmed | 1D3 | Disadvantage; Do not roll Critical die. |
Ranged Weapons
| Weapon | Short | Long | Damage | Special Rules |
|---|---|---|---|---|
| Bow | 8 | 18 | 1D6 | |
| Crossbow | 8 | 24 | 1D6+2 | Pierce 1, Slow Reload |
| Hand Crossbow | 6 | 12 | 1D6+1 | Pierce 1, Slow Reload |
| Sling | 8 | - | 1D3+1 | |
| Thrown Weapon | 6 | - | 1D6 | Hurl, Momentum |
Armor
| Type | Armor Bonus | Special Rules |
|---|---|---|
| Light Armor | 1 | |
| Heavy Armor | 2 | -1 Agility |
| Full Plate | 3 | -1 Agility, -1 Speed |
| Shield | 1 | Cannot be equipped with a Two-Handed or Ranged weapon. |
Equipment Special Rules
- Defensive Weapon: Once per round, this weapon adds 1 point to the model's Armor Bonus.
- Hurl: This ranged weapon adds the model's Strength Bonus to its Damage value.
- Momentum: A model may Attack with this weapon and still Run in the same activation.
- Slow Reload: Each time this weapon is fired, the bearer must Reload before it can be fired again. See Actions, pg 11.
- Support: A model with this weapon may perform a Melee Attack 'through' a friendly model, without themselves being in base contact. This model must be in contact with the friendly model, and the friendly model must be in contact with the target. The friendly model must be mounted on a base of equal size or smaller than the supporting model. No extra strikes from special rules may be used in the same activation that a model uses the Support rule.
- One-Handed: This weapon is eligible for the Dual Wield combat option.
- Off-hand Weapon: If this weapon is chosen to make a Dual Wield attack, it does not cost an Action.
- Pierce: The target subtracts 1 point from its Armor Bonus (if applicable).
- Two-Handed: A model may not equip a Shield, nor may it Dual Wield, while this weapon is equipped. It may still equip a Ranged Weapon – the model is assumed to switch between Ranged and Melee [the printed sentence ends here in the draft].
Morale
Some rules will require one or more models in play to perform a Morale Check. To do this, simply take a WIL test. If the Test is passed, there are no ill effects. If the Test is failed, the model gains the Shaken condition (page 26).
Panic!
- When a model with the Shaken condition fails its WIL test, it will Panic. Other game effects may also cause a model to Panic. When a model Panics, it must roll a D6 on the table below. A model cannot roll on the Panic table more than once per round under any circumstances. [the printed sentence ends with a stray fragment, "as required."]
| D6 Roll | Result |
|---|---|
| 1 | Flee!: The model Moves a number of inches equal to its secondary Speed value (in parentheses). It will attempt to use all of this movement allowance if possible. The direction of movement is as follows: • Directly away from the nearest enemy. It may not end the move closer to an enemy model than it began. • Move around Impassable terrain and friendly models by the shortest possible route. • It will move through, over, or across other terrain if permitted, jumping and climbing as normal. • The model can do nothing else this round. |
| 2 | Cower: The model cannot perform an Attack this round, and cannot voluntarily Move into engagement. |
| 3 | Rattled: The model suffers Disadvantage on all its Tests this round. |
| 4 | Hide: If the model is able to Hide, it must do so immediately. If not, treat this result as Rattled instead. |
| 5 | Foolish Bravado: The model immediately performs the Taunt Action (using its Action for the round). |
| 6 | Enraged: The model gains +1 Extra Strike for the remainder of the round. |
Magic
Wizards, and some other spellcasters, are able to cast their spells as an Action. The basic procedure is always the same.
Spellcasting Procedure
- As an Action, choose a Spell to cast from those available to the character. Some Spells have targeting conditions which must be met (such as Range, Line of Sight, or particular types of target).
- Spend the specified number of Power Points. If you can't afford the cost, the Spell can't be cast. The points must be spent even if the Spell fails.
- Take an INT Test. If the Test succeeds, the Spell is cast. Roll a Critical die alongside this Test (see Mastery & Miscasts, below).
- If the Test is passed, decide if you wish to spend additional Power Points to Boost the Spell (not all Spells permit Boosts). The Spell will inform you how many points may be spent as Boosts, and what the effect of the Boost will be.
- Finally, resolve the Spell's effect.
Spell Level
A Spell's Level equates to the Experience Level of the caster. Most Wizards know Spells that are the same or a lower Level than themselves, and some even know higher-Level Spells.
- If the Spell is of a lower Level than the caster, the Difficulty of the INT Test is Simple.
- If the Spell is of a higher Level than the caster, the Difficulty of the INT Test is Hard.
Spell Types
Each Spell falls into one of seven basic Types:
- Aura
- Charm
- Conjure
- Curse
- Direct Damage: Melee
- Direct Damage: Ranged
- Summon
Each of these Types is used as follows:
Aura
Once cast, the Spell's effect extends from the Wizard's base in a specified radius. The Spell may cause damage to enemies, embolden friends, or create a particular effect, such as Light. Unless otherwise specified, the Aura lasts for the duration of the Action.
Charm
These Spells must target a single friendly model within Range and Line of Sight, usually bestowing a positive effect upon the chosen model.
Conjure
This Spell targets a point on the gaming area within Range. Sometimes Line of Sight is required – the Spell will state if this is the case.
Curse
A Curse must target a single enemy model within Range and Line of Sight. These Spells usually inflict a debilitating effect upon the target.
Against Large and Huge models, the Difficulty of a Curse becomes Hard, unless the caster is also Large or Huge.
Direct Damage: Melee
These Spells are resolved in the same way as Melee Attacks (except that they use an INT Test for the Attack Roll, and the Critical die is used only for the purposes of Mastery & Miscasts). The Wizard must be engaged to the target and the Spell's listed properties take the place of a melee weapon.
These Spells are still treated as the model's Action, and not an attack – a Wizard so armed may use this Spell and perform a normal Attack in the same activation.
Direct Damage: Ranged
These Spells are resolved in the same way as Ranged Attacks (except that they use an INT Test for the Attack Roll, and the Critical die is used only for the purposes of Mastery & Miscasts). Line of Sight and Cover, etc. are taken into account, just as per Ranged Attacks. Spells, however, have only one Range value, which is always treated as short range. These Spells are still treated as the model's Action, and not an Attack – a Wizard so armed may use this Spell and perform a normal Attack in the same activation.
Summon
These Spells bring additional models into play, of a number and type specified in the Spell description. Choose a target point within Range (Line of Sight is not normally required). Place the specified model on that point – it cannot be placed in contact with an enemy. If more than one model is Summoned, they must be placed within 3" of the first, and also unengaged. If it's not possible to place a model at the target point (because its base won't fit, or it would be engaged, for example), place it as close as possible in an eligible position.
Once in play, a Summoned model is treated as a friendly Follower in all respects, with the caster as its patron. However, if the caster becomes a Fallen Hero, is Stunned, or is removed from play for any other reason, the Summoned Creature is automatically removed from play.
Magical Attacks: Suffice it to say, any Damage inflicted upon an enemy by means of a Spell is assumed to have the Magical keyword.
Cantrips
Cantrips are minor Spells that require no Power Points to cast. Some models are able to use Cantrips, even though they can't normally cast Spells – the casting procedure is the same.
- Cantrips have a nominal Level of 0 – the Difficulty therefore always has a base level of Simple.
- The Critical die is not rolled when casting a Cantrip – they cannot be cast with Mastery, nor can they be dangerously Miscast.
Mastery & Miscasts
Each time a Hero makes a Casting Roll, they must roll the Critical die alongside the Test (page 7).
- On a Critical Success, the Wizard has displayed true Mastery over the Spell. The caster restores 1 Power Point, up to their normal maximum.
- On a Critical Failure, the Spell has been badly Miscast, and the veil of probability is torn! Immediately resolve an Unexpected Event, as described in the Events phase. Once the Event has been resolved, assign the Focused condition to the spellcaster, then complete the model's activation as normal.
Miracles
Clerics and some other devout characters are able to perform Miracles, by use of the Commune Action. Miracles are always performed by passing a WIL Test.
Despite their similarities, Miracles are not Spells. They do not require Power Points, nor can they ever trigger a Miscast, instead using the Favor & Failure rules, below.
Favor & Failure
Each time a Miracle is performed, roll the Critical die alongside the WIL Test (page 7).
- On a Critical Success, the priest has courted the Favor of their patron deity. The priest restores 1 Health point, up to their normal maximum.
- On a Critical Failure, the gods frown upon the priest's Failure. The Hero's activation ends immediately, even if they still had more to do. However, determined to make amends, the priest gains the Focused condition.
Terrain
Although it's possible to play games of Lasting Tales across a flat, featureless tabletop, the game really comes to life when populated with three-dimensional scenery. The following rules explain how models and scenery interact in the game.
Terrain Types
In order to represent the effects of varied scenery in your games, we apply special rules to certain scenery types. In most cases, it will be up to you to decide which rules apply to which scenery pieces and make sure that all players are aware of this before the game.
The main terrain types you will encounter are:
- Open
- Difficult
- Deadly
- Impassable
- Barriers
- Gaps
Open Terrain
Examples: Flat, open ground; paths and roads; shallow water and fords; gently sloping hills; steps and stairs.
There are no restrictions, bonuses or penalties for movement across Open Terrain.
Difficult Terrain
Examples: Rocky, ruinous, or unstable surfaces; deep water and marshland; thick undergrowth and overgrown fields.
If a model Moves into, out of, or through Difficult Terrain, use its secondary Speed value (the value in parentheses – usually a random roll). Example: An Elf on foot has a Speed value of 6 (D3+3). This means the model moves 6" across open ground, but D3+3" across Difficult Terrain, such as ruins or dense woodland.
- If you move across Open Terrain and then move into Difficult Terrain, note how far you've already moved, then roll the dice for the secondary Speed value. If you've already exceeded the rolled amount, stop in contact with the terrain and end the move. Otherwise, carry on up to the rolled amount.
Note that some models are unaffected by Difficult Terrain (or Difficult Terrain with specific keywords, such as Woodland) and Move over it as they would over Open Terrain.
Difficult Terrain is also usually covered by the Area Terrain rules (see 22).
Deadly Terrain
Examples: Lava flows; bottomless pits; acid pools; roaring infernos; gaping maws of the abyss…
If a model finds itself in Deadly Terrain, it's almost always accidentally, or perhaps because it has some immunity to the type of danger it poses.
- Deadly Terrain is treated as Difficult. A model passing through it suffers D6 Damage, ignoring Armor Bonus.
- A model that starts or ends an activation within Deadly Terrain is automatically removed from play as a casualty (if the model is a Hero, place the Fallen Hero marker outside the terrain feature, on the closest edge).
Impassable Terrain
Examples: Tall dungeon pillars; locked and barred gates and buildings; wide pits and magical vortices; castle walls.
Unless otherwise agreed, no model can move through Impassable Terrain, nor may they deploy or end any form of Move upon it. It is not permitted to place markers of any kind on Impassable terrain during adventure setup.
Barriers
Examples: low walls, fences and hedges; barricades; crates and barrels.
Barriers are low, often linear, terrain features that break up the battlefield. A model treats a terrain feature as a barrier if it is:
- No more than three times its own height.
- No wider than its base.
Models can freely move across barriers up to half their own height. Taller barriers can be crossed by Climbing, as described below.
Remember that models on opposite sides of a barrier can fight each other in melee, as long as they are roughly in line with each other.
Climbing and Jumping
If a model wishes to move over an obstacle taller than half its height, it must Climb. Take an Agility Test as soon as you move into contact with the obstacle. The model must have sufficient movement – including the vertical measurement – to reach the top of the obstacle or ledge, otherwise it cannot be attempted.
- If the obstacle is up to the model's height, the test is Simple.
- If the obstacle is up to double the model's height, the test is Normal.
- If the obstacle is up to three times the model's height (the maximum possible), the test is Hard.
If the test is passed, the model moves to the first available position it can fit, then ends its Move. If the test is passed and a Critical Success is rolled, you may continue the move after completing the Climb, using up the rest of the model's allowance as normal. If the test is failed, the model can't make the Climb, and immediately ends its Move.
A model can pass over a gap up to the width of its own base without penalty. Larger gaps must be Jumped. If a model wishes to Jump across a gap, move to the edge of the gap as normal, and then measure the distance across. If the model has sufficient movement to reach the nearest point on the other side of the gap (so its base fits), you may Jump. Take a Normal Agility test.
- If the test is passed, the model moves to the nearest available position it can fit on the opposite edge, and the model may then continue moving up to the rest of its movement allowance as normal.
- If the test is failed, place the model at the bottom of the gap, as close to the start of the Jump position as possible. The model has fallen (see Falling).
Models are also free to jump down from a platform at any time, even if it risks injury – they can also be pushed from a platform involuntarily. Place the model at the bottom of the gap, as close as possible to the point they started. The model has fallen (see Falling).
Falling
When a model drops down a gap from a higher platform, and the distance fallen is greater than double its height, the model will suffer automatic Falling Damage. Measure the total height fallen, from start point to end point, and roll the listed Damage.
| Distance | Damage |
|---|---|
| Up to 3x Height | D3 |
| Up to 4x Height | D6 |
| Up to 5x Height | 2D6 |
| More than 5x Height | Remove from Play |
Area Terrain
This type of terrain, as its name suggests, covers an area of the battlefield – it can be moved through, but not always easily. It is usually represented by several scenic items affixed to a single large base. Examples include forests, swamps and ruins. The edges of area terrain must be clearly defined.
Area terrain is usually also Difficult, although it doesn't have to be – decide before the game begins whether this applies.
Some area terrain, especially forests, affects Line of Sight and provides Cover differently from normal obstacles. If players agree that a piece of Area Terrain fits this description, then models whose bases are wholly within that terrain can be seen, but claim Cover, even if the model itself is not obscured. Models on the other side of the area terrain cannot be seen at all – the forest, wheat field, or whatever, is considered too dense to see through completely.
Note: It can be an important distinction when setting up a battlefield as to what is area terrain and what is merely an obstacle. For example, a few trees mounted on individual bases are simply impassable features, which may provide cover or block line of sight depending on their size. But those same trees collected together on a scenic base become representative of a forest, which is Difficult Area Terrain.
Edge of the Battlefield
Unless the adventure dictates otherwise, models cannot leave the edge of the gaming area for any reason. If they are forced to move to it for any other reason, they simply stop in contact with the board edge, as if they had met Impassable Terrain. If they are obliged to move further (for example, a Civilian moving away from an Adversary), it will change direction after contacting the edge, and move along the edge if possible.
Some adventures allow a model to voluntarily leave the battlefield – to do this, a model must have enough remaining movement to fully clear the edge of the board, at which point the model is removed, but is not treated as a casualty.
Buildings
To keep things simple, we assume that buildings in play are locked and boarded up, so that they are simply impassable for the purposes of your game. Expanded rules for entering buildings will be included in the full rules.
Terrain Keywords
At the start of the game, players should note whether any scenery in play has either the Water or Woodland keyword. These are tags used to describe certain terrain features, and are important when dealing with models who interact with terrain in special ways. For example, a model might be able to pass freely across Water – the Water itself has no inherent special rules, but the keyword is important.
How Much Scenery?
As a general guide, unless the adventure demands a specific type of scenery, you should aim to place at least one large scenery piece (6" diameter or larger), or 2-3 small pieces (a 6" long barrier, a standing stone or altar, etc.), for every square foot of table area. So, for example, a 3' square board with 9 square foot of table area might contain four buildings and six wall sections. If you have really large scenery pieces, simply count them as two (or more) pieces whatever looks good on your tabletop. Feel free to add more scenery if you wish, but note that the more scenery in play, the more tactical the game becomes.
Although you can place small pieces of 'scatter terrain' around the board, such as individual trees and rocks, grouping these pieces together will make for a more tactical setup and, if placed together on a base, can easily define areas of Difficult Terrain.
When placing scenery, players should agree on the number of pieces they want, and then take it in turns to place one. Start with the larger items, and move down to the smaller ones. When placing scenery, remember that impassable terrain and inaccessible buildings can effectively block off sections of the game board. It's therefore recommended to leave plenty of gaps, at least as wide as the base of the largest model in play.
Adversaries
The various hostile monsters, dungeon denizens and wilderness creatures encountered in Lasting Tales are collectively known as 'Adversaries'.
An Adversary has a basic profile, with much of the same information you'd expect to find on a Hero or Follower profile. The following exceptions are of particular note:
- Type: Adversaries come in two broad types: Minions and Elites. Minions return to the Spawn pool when removed as casualties. Elites do not, but tend to be much more powerful to compensate.
- Keywords: These tags are often present alongside an Adversary's name – they serve no rules purpose on their own, but are used to interact with other special rules in the game.
- Spawn Value: See Spawns, page 14.
- Attacks and Armor: Adversary Attacks are shown in order of preference (so Melee first for a model of the Melee type, for example). Unlike Heroes, an Adversary's armament isn't important – all the relevant statistics for weapon damage and special rules, Resistance and Armor Bonus, are simply displayed on the profile. Likewise, don't worry about the Strength bonus – the total Damage for every attack is worked out for you.
- Threat Level and Unit Size: An Adversary's Threat Level is used to work out how many of a particular model to include in a game. For example, three Goblin Cutthroats form a single 'unit', which is the equivalent of a Level 1 Hero, whereas a unit of five Cutthroats would (approximately) be the equal of a Level 2 Hero.
- The unit size is displayed in parentheses – so the five Cutthroats in the example above would be written Threat Level 2 (5 models).
- Adversary models are always picked in the quantities stated – you can't take more or less than stated in the unit size, although you are free to include multiple Adversary units of the same type.
Placing Units
When an Adversary unit is deployed for an adventure, the first model in the unit is placed on the board in a valid location allowed by the adventure. Then, all the other models from the same unit must deploy within 3" of the first. The models don't have to stick together during a game (indeed, the activation rules will often force them to separate), but they will always set up together.
Designer's Note: Game Difficulty: When choosing Adversaries for your game, and placing them at the game setup stage, you may find it advantageous to pick weaker Adversaries, or place them in such a way that they are impeded. Although it's perfectly permissible within the rules, remember that this is a cooperative game, designed for fun – playing for advantage only cheapens your Hero's successes, or makes their story less heroic! In this game, you set the difficulty – so remember, if you're looking for a real challenge, or a way for your Hero to truly test their mettle, then try to tell the best story you can, and let the dice decide your fate!
Special Rules
Bleed
If a model takes Damage from an Attack with this rule, but is not removed as a casualty, they immediately suffer the Bleeding condition.
Ethereal
This model moves and runs through scenery and other models as though they weren't there (it must still end a Move in an eligible position). The model must Climb and Jump as normal, but suffers no damage from Falling. In addition, all Damage inflicted on this model must be reduced by 1 point, unless the attack has the Magical keyword.
Extra Strikes (+X)
When performing a Melee Attack, this model receives a number of extra strikes equal to X. Multiple applications of this special rule are cumulative (for example, if a Hero with Extra Strikes (+1) uses a magic sword with the Extra Strikes (+3) rule, they receive 5 strikes in total: 1 basic, +4).
Fearsome
If this model performs a Melee Attack against an enemy and inflicts any damage, the target enemy must take a Morale Check. The Morale Check is only taken once the Attack is complete (resolving any secondary strikes or similar, before taking the check).
Models with the Fearsome rule are themselves immune to this effect.
Fire
If a model takes Damage from an Attack with this rule, but is not removed as a casualty, they immediately suffer the Burning condition.
Immunity (X)
This model cannot gain the specified (X) condition.
Poison
If a model takes Damage from an Attack with this rule, but is not removed as a casualty, they immediately suffer the Poisoned condition.
Priest
This model may perform Miracles by using the Commune Action (see Miracles). In addition, whenever this model performs the Aid Action, restore 1 Health point both to the priest and the target model.
Push (X)
If a model suffers this effect, or takes Damage from an Attack with this rule but is not removed as a casualty, they are immediately Pushed back a number of inches equal to X, directly away from the source of the Attack, in a dead straight line. If the target contacts another model or terrain piece, it receives the Staggered condition.
Regenerate Health (X)
At the end of each round, this model automatically restores a number of lost Health points equal to X.
Resist (X)
When targeted by an Attack or ability with the (X) special rule, this model adds an extra D3 Resistance vs that Attack.
In addition, if the model has Resist (Magical), then it treats any WIL Test it is required to take as a result of an enemy Spell as Simple.
Spellcaster
This model may cast a Spell as an Action, and has a reserve of Power.
Shambling Horde
If the target of this model's Melee Attack is Surrounded, this model is Fearsome.
Special Action (Name)
An Adversary with a Special Action will use it at the beginning of its activation if possible. Then, it will follow the activation criteria for its Type.
Conditions
Note: A model can't have the same condition more than once – further applications have no effect.
Bleeding
The next time this model Moves, it must pass a DEF Test or immediately lose D3+1 Health points (ignoring Armor Bonus). If the Test is passed, remove the condition.
Burning
When this model activates, it must take an AGI Test. If passed, remove the condition. If failed, the model must immediately lose D3+1 Health points (ignoring Armor Bonus).
Exposed
This model reduces its Resistance by -1. Discard this condition at the end of the round.
Focused
A Hero may remove this condition to gain Advantage on a single Test. This condition remains in play until used, or until the Hero passes a Test, whichever comes soonest.
Hidden
See the Hide Action, pg 11.
Poisoned
At the end of the round, this model must pass a STR Test or immediately lose D3 Health points (no Resistance or Armor is deducted from this Damage). If the Test is passed, remove the condition.
Shaken
At the start of each of its activations, a model with this condition must take a WIL test. If passed, remove the condition. If failed, the model will Panic (see page 18).
Slowed
The model cannot Move in its next activation. Remove this Condition at the end of that activation.
Staggered
In its next activation, this model suffers Disadvantage on all its rolls. Remove this Condition at the end of that activation.
Stunned
Lie the model on its side. The next time the model activates it must Stand Up by expending both its Move and Attack. If attacked in Melee, a Stunned model is hit automatically. A friendly model may remove this condition with the Aid Action.
Taunting
When an Adversary activates within 6" and Line of Sight of this model, it treats this model as its target in all respects, even if the usual Adversary rules or adventure rules state otherwise. If the Adversary begins its activation engaged with another model, it must pass a WIL Test or immediately leave engagement to try to target this model instead.
Adventures
Every game is structured around an adventure, which provides both narrative and rules framework for your models to explore and battle.
Use the following sequence to set up your game:
- Choose an adventure.
- Form the Party (page 28) and assign Adventuring Gear (page 37).
- Set up the scenery (page 28).
- Deploy Adversaries.
- Deploy Heroes.
- Battle!
Village of the Damned
Weary after many days on the road, you are thankful to the gods when you see a village up ahead. Though the hour is late, you hold out hope that you might find an inn, or at least some hospitable local to take you in. And yet, as you draw near, you realize something is amiss. The village appears deserted. And yet, you cannot shake the feeling that you're being watched…
Round Limit: Special
Setup
Divide the board into equal quarters. In the center of each quarter, place one significant village scenery piece – a building, barn, ruin, forge, marketplace or other suitable feature (these can be solid structures, or even just rectangular pieces of card, measuring approximately 4" wide by 6" long). Place a spare token on each of these features, representing a Clue.
Place scatter terrain around the rest of the board as normal, focusing on typical village items such as barrels, crates, fences, etc.
If there are 4 or more Heroes in play, pick any two of the scenic scatter features no closer than 12" to the center of the gaming area, and place one further Clue token on each of them, for a total of 6 Clues.
Roll 1D6 for each Adversary unit that starts the game in play. Models in the unit deploy in contact with – or as close as possible to – the corresponding Spawn point (the red circles on the map).
Finally, the Party deploys within 6" of the center point, as shown.
The Party
Choose any of the pre-generated Level 1 Heroes from pages 38-44. We recommend one Hero per player, unless you're playing solo, in which case you should choose at least two Heroes.
Adversaries
As an introductory adventure, we recommend using the Adversary units detailed below (with the unit size in parentheses). The exact units will vary depending on the size of the Party.
| Heroes | Adversary Units in Play | Adversary Units in Reserve |
|---|---|---|
| 2 | Skeleton Warriors (3) | Banshee (1) |
| 3 | Skeleton Warriors (3) | Banshees (3) |
| 4 | Giant Rats (5); Skeleton Warriors (5) | Banshee (1) |
| 5 | Giant Rats (5); Skeleton Warriors (5) | Banshees (3) |
As you'll see from the chart, in this adventure some Adversaries must begin the game in Reserve – see the Dead Arise rule, below.
Extra Miniatures: For this adventure, you will also require some Zombie miniatures, and a Necromancer.
Adventure Special Rules
Civilians
Civilians are treated as friendly models to the Party, and enemies of any Adversaries in play – enemies will target Civilians just as they'd target Heroes. A Civilian has the following profile:
| Civilian | Health |
|---|---|
| 1 |
| MEL | RNG | STR | AGI | DEF | INT | WIL |
|---|---|---|---|---|---|---|
| 1 | 0 | 1 | 1 | 1 | 1 | 1 |
| Type | Speed | Resistance |
|---|---|---|
| - | 6 (D6) | 0 |
At the end of each Event phase, each unengaged Civilian will Move. A Civilian will always attempt to Move its full allowance if possible, in a straight line, jumping or climbing if necessary (but not Running).
- If the Civilian is within 6" of one or more Heroes, the nearest Hero chooses the direction of movement.
- If the Civilian is not within 6" of any Heroes, it will Move as far as possible away from the nearest enemy.
Darkness
While the Darkness rules are in play, models are subject to the following effects:
- Ranged Attacks suffer Disadvantage if the target is more than 12" away.
- Line of Sight cannot be drawn to Hidden models that are more than 12" away.
- Members of the Party treat Morale checks as Hard.
Models can negate areas of Darkness with rules that provide Light – a model or item within Light can be seen and targeted at any range, but does not suffer the Morale penalty.
Clues
You search the village for signs of life, and evidence of what might have befallen the people here.
A Hero in contact with a scenery piece marked by a Clue token may Interact with the scenery piece, using the INT characteristic. If there is more than one Hero in contact with the same scenery piece, this Test gains Advantage.
If the INT test is passed, the token is removed from the board and placed in the players' possession. However, whether or not the Test is passed, roll a D6 on the following table:
| D6 Roll | Result |
|---|---|
| 1 | Booby Trap! The Hero has triggered a Trap – roll on the Traps table to see what happens. |
| 2-3 | The Dead Return! Place a Zombie in contact with the Hero. |
| 4-5 | Survivors! Place D3 Civilians in contact with the target scenery piece. From now on, these tokens follow the Civilians special rule. |
| 6 | Jackpot! The Hero has found some abandoned treasure. Place a Treasure chest within 3" of the target scenery piece and not in contact with any Hero. The Treasure rules are now in play. |
The Final Clue: When all Clue tokens are collected (4 if there are 2-3 Heroes, or 6 if there are 4-5 Heroes), the source of the village's misfortune is discovered. See The Cursed Grave, below.
The Cursed Grave
You'll need a spare token or gravestone model to represent the Cursed Grave. When the Cursed Grave is discovered, place it anywhere on the gaming area, no closer than 10" to any Hero. The Necromancer is placed in contact with the Cursed Grave, and D3 Zombies are placed within 3" of the Necromancer.
From this point on, at the end of each round you must discard one of the Clue tokens you collected. The game ends automatically when the last token is discarded – the dead overrun the village and drive you out!
To consecrate the Cursed Grave, a Hero may Interact with it by taking a WIL Test. If the Darkness rule is not yet in effect, gain Advantage to the Test.
- The Cursed Grave has a number of 'Health' points, equal to the starting number of Heroes +1.
- If the WIL Test is passed, the Cursed Grave suffers D3 Damage. There is no other way to harm the Cursed Grave. If the Grave loses its last Health point, it is removed from play and the game ends in victory.
- However, if the WIL Test is failed, the model must either lose a Fate point, or suffer D3 Damage (ignoring Armor).
The Dead Arise
No models Spawn in the first round of this game. Beginning in the Event phase of round 2, and in each Event phase thereafter, roll for Adversary Spawns as normal.
In addition, each time a Civilian is removed from play, place a Zombie in the Spawn Pool's Graveyard.
Wasting Light
At the end of round 7, night falls. The Darkness rules apply for the rest of the game.
- Discard any unclaimed Clue tokens.
- If the Cursed Grave has not yet been revealed, it is automatically discovered (see above).
Spawn Points
Adversaries in the Reserve Pool arrive as close as possible to a random Spawn point. Roll 1D6 for each spawning model and place it at the corresponding point (or as close as possible).
Adventure Event Table
When an Unexpected Event occurs, use the table below to determine what happens.
| D6 Roll | Event |
|---|---|
| 1 | They came from the Dark…: All Minions in the Reserve pool immediately return to play. If there are no models in the Reserve pool, this result has no effect. |
| 2 | The Dead Don't Rest Easy: Place a Zombie in the Reserve Pool. |
| 3 | Grasping Hands…: Randomly pick one Hero in play. That Hero and all friendly models within 2" are Slowed as skeletal hands thrust up from shallow graves to snatch at their ankles. |
| 4 | Distant Howl…: Randomly pick one Hero – that model must take a Morale check. |
| 5 | What's That?: The First Player may choose one Clue token and move it to another scenery piece. That scenery piece may not already contain a Clue. |
| 6 | Unexpected Aid: A bedraggled villager rushes from cover and attacks the enemy! Randomly pick one Adversary in play. That model suffers D6 Damage (deducting Resistance and Armor as normal). The villager is lost in the confusion and never seen again. |
Ending the Game
The game ends either:
- When the Cursed Grave is consecrated (you have won);
- When the last Clue token is spent at the end of a round (you have lost);
- At the end of any round where there are no Heroes in play (you have lost).
Traps
In the final rules, each Environment will have its own set of unique traps. For now, there's just one Traps chart – when a Trap is triggered, roll a D6 to see exactly what it is. The Hero that triggered the trap is the 'target model'.
Adversaries do not trigger Traps, but may be caught in their area of effect if applicable.
Traps Table
| D6 Roll | Effect |
|---|---|
| 1 | Rockfall: Whether by accident or design, a pile of boulders is disturbed, forming a localised avalanche. The target model and all models within 2" must pass an AGI Test, or suffer D6 damage, adjusted for Resistance as normal. Any model that takes damage but is not removed as a casualty suffers the Stunned condition. |
| 2 | Pit Trap: A yawning pit opens up beneath your feet! Center a suitable marker of approximately 40mm diameter under the model to represent the pit (if the trap was triggered by searching a Chest or objective, the pit should be in contact with that object). The target model, and any other model even partially touched by the pit, must pass a Hard AGI Test, or fall into the pit. Any model that falls into a pit suffers D6 damage, adjusted for Resistance as normal. If they survive, they are removed from the board (but they are not a casualty). The model must use its entire Move next activation to climb out of the pit – place the model on the edge of the marker. The marker then stays in play, and is treated as a gap with a depth of 6". |
| 3 | Swinging Flail: A huge spiked ball on the end of a long chain swings out at you from the shadows. The target model suffers D6 damage, adjusted for Resistance as normal. If the model takes damage but is not removed as a casualty, it suffers the Staggered condition. |
| 4 | Poison Darts: A flurry of tiny darts shoot out from minute holes in the walls and floor. The target model suffers D6 damage, adjusted for Resistance as normal. If the model takes damage but is not removed as a casualty, it suffers the Poisoned condition. |
Adversary Profiles
Adversary profiles, as printed on the demo rules' adversary cards. Each card gives the profile, Level and unit size, Spawn value, XP, Preferred Environment, Special rules and attack profiles.
Giant Rats
Adversary Minion | Monster; Small. Health 2.
| MEL | RNG | STR | AGI | DEF | INT | WIL |
|---|---|---|---|---|---|---|
| 2 | 1 | 2 | 3 | 1 | 2 | 1 |
| Type | Speed | Resistance | Armor |
|---|---|---|---|
| Melee | 6 (D6) | 0 | 0 |
- Level: 1 (5 models)
- Spawn: 5+
- XP: 1
- Preferred Environment: Dungeon or Settlement
- Special: -
Melee Attack: Damage 1D3. Go for the Throat!: Roll the Critical die alongside this model's Attacks. It can score a Mighty Blow, just like a Hero – but if it does, remove the model from play after resolving the damage.
Zombies
Adversary Minion | Undead. Health 3.
| MEL | RNG | STR | AGI | DEF | INT | WIL |
|---|---|---|---|---|---|---|
| 2 | 0 | 2 | 2 | 2 | 1 | 1 |
| Type | Speed | Resistance | Armor |
|---|---|---|---|
| Melee | 3 (D3) | 1 | 0 |
- Level: 1 (3 models), 2 (5 models)
- Spawn: 5+
- XP: 1
- Preferred Environment: Any
- Special: Immunity (Bleeding), Shambling Horde
Melee Attack: Damage 1D6. Special: -
Skeleton Warriors
Adversary Minion | Undead. Health 3.
| MEL | RNG | STR | AGI | DEF | INT | WIL |
|---|---|---|---|---|---|---|
| 2 | 2 | 2 | 2 | 2 | 1 | 2 |
| Type | Speed | Resistance | Armor |
|---|---|---|---|
| Melee | 6 (D6) | 0 | 2 |
- Level: 1 (3 models), 2 (5 models)
- Spawn: 5+
- XP: 1
- Preferred Environment: Any
- Special: Immunity (Bleeding)
Melee Attack: Damage 1D6. Special: -
Banshees
Adversary Minion | Undead. Health 5.
| MEL | RNG | STR | AGI | DEF | INT | WIL |
|---|---|---|---|---|---|---|
| 3 | 3 | 2 | 2 | 3 | 3 | 5 |
| Type | Speed | Resistance | Armor |
|---|---|---|---|
| Ranged | 6 (D6) | 1 | 0 |
- Level: 1 (1 model), 2 (3 models), 3 (5 models)
- Spawn: 6+
- XP: 2
- Preferred Environment: Any
- Special: Ethereal, Immunity (Bleeding)
Ranged Attack: Short 8; Long -; Damage 1D6+1. Special: Magical; Wail of the Banshee: This attack ignores Resistance. However, the target deducts their current WIL from the rolled Damage. If the target takes any Damage from this attack, they must take a Morale check.
Melee Attack: Damage 1D3+1. Special: -
Apprentice Necromancer
Adversary Elite | Humanoid, Human; Spellcaster. Health 5.
| MEL | RNG | STR | AGI | DEF | INT | WIL |
|---|---|---|---|---|---|---|
| 2 | 2 | 3 | 3 | 3 | 4 | 4 |
| Type | Speed | Resistance | Armor |
|---|---|---|---|
| Ranged | 6 (D6) | 1 | 0 |
- Level: 3 (1 model)
- XP: 1
- Preferred Environment: Any
- Special: Necromancer: The first model with the Undead keyword to Spawn in each round will Spawn in contact with the Necromancer if possible. However, when the Necromancer is removed as a casualty, no more Zombies may Spawn in this game.
- Special Ability (Necromantic Magic): The Apprentice Necromancer must activate before any other adversary and when activated, roll a D6, and consult the table below.
- Withering Curse: Any model hit by the Necromancer's Ranged Attack this round (whether or not it suffers Damage) receives the Exposed condition.
- Dark Ward: The Necromancer gains an Armor Bonus of 3 until the start of their next activation.
- Deathly Vigor: All Undead Adversaries within 6" of the Necromancer gain +3" Speed until the end of the round.
- Summoning: D3 Undead models in the Reserve Pool automatically Spawn (the players may determine the models randomly, or choose). Then, all Undead models in the Graveyard move to the Reserve Pool.
- Face of Death: The Necromancer is Fearsome until the start of their next activation.
- Vengeful Dead: All Undead Adversaries within 6" of the Necromancer gain +1 Extra Strike until the end of the round.
Ranged Attack: Short 12; Long -; Damage 1D6. Special: Magical; Spell (this Attack uses INT instead of RNG, exactly as per a Direct Damage: Ranged Spell).
Melee Attack: Damage 1D3. Special: -
Treasure
When an item is acquired from a Treasure Chest, its use will depend on the item's Type. These are detailed here.
Ammunition (Weapon Type)
These items may be fired using a Weapon of the specified type. You must declare the use of the special Ammunition before making the Attack roll. Add the Ammunition's effect to the normal Attack, then discard the Ammunition.
Amulet
An Amulet must be equipped in order to use. No more than one Amulet may be equipped by a model at the same time.
Armor
This item follows all of the rules for Armor, and must be equipped to use (replacing any currently equipped Armor if applicable).
Boots
Boots must be equipped in order to use. No more than one pair of Boots may be equipped by a model at the same time.
Cloak
A Cloak must be equipped in order to use. No more than one Cloak may be equipped by a model at the same time.
Gloves
Gloves (including magical gauntlets and vambraces) must be equipped in order to use. No more than one pair of Gloves may be equipped by a model at the same time.
Headgear
Headgear includes crowns, circlets, helmets, hoods and hats. Headgear must be equipped in order to use. No more than one piece of Headgear may be equipped by a model at the same time.
Keyshard
See Keyshards, below.
Shield
This item follows all of the rules for Shields and must be equipped to use.
Potion
A Potion does not need to be equipped to use – simply record the Potion in the Hero's Inventory. A Potion requires an Action to use, and is then immediately discarded.
Ring
A Ring must be equipped in order to use. No more than one Ring may be equipped by a model at the same time.
Scroll
Scrolls do not need to be equipped to use – simply record the Scroll in the Hero's Inventory. A Scroll contains a single Spell, which may be cast by the bearer as an Action, even if they aren't usually able to cast Spells. A Scroll requires no Power to Cast, and therefore no Boosts can be applied to the Spell. They follow all of the other rules for casting Spells. When a Scroll is used, the Hero must still roll a Critical die – a roll of 6 on this die has no effect, but a roll of 1 can trigger a Miscast. Once used, the Scroll is immediately discarded – the Spell consumes all the power contained within it.
Special
The item description will tell you how it is used.
Tome
A cumbersome book that must be equipped to use. A tome takes up one hand (taking the place of a second weapon or shield, and preventing any Two-Handed item from being equipped at the same time). A Tome requires an Action to use.
Weapon
This item follows all of the rules for a Weapon of the same type, and must be equipped to use (replacing a currently equipped Weapon if applicable). A Legendary Weapon usually has one or more weapon special rules.
Treasure Tables
The Treasure tables that follow are used to generate magical items that might be found scattered in the unexplored places of the world. The full rules will also include myriad Legendary Items – unique artifacts of incredible power, that can turn a good hero into a truly great one…
Potions & Scrolls
| 2D6 Roll | Item |
|---|---|
| 2 | Potion of Fortune: The model restores its Fate to its initial value. |
| 3 | Poison: Choose one equipped weapon to apply the Poison to. If the next Attack performed with that weapon inflicts any damage at all, the target gains the Poisoned condition. |
| 4 | Potion of Resistance: Roll a D6 immediately to see what type of Resistance is conferred: 1-2) Resist Fire, 3) Resist Poison, 4) Resist Ice, 5-6) Resist Magic. Once used, the effect lasts until the start of the model's next activation. |
| 5 | Potion of Barkskin: The model gains +1 Resistance until the start of its next activation. |
| 6 | Potion of Invisibility: No model, friend or foe, may draw Line of Sight to this model. The effect lasts until the start of the model's next activation. |
| 7 | Potion of Battle: The model gains the Extra Strikes (+1) special rule until the start of its next activation. |
| 8-9 |
Keyshards
There were once powerful relics rumored to have been used in overthrowing the gods and creating evil on Aetha—these relics were called Keys. The Keys were destroyed in binding the gods to the world, shattered into thousands of pieces and lost to time. The remnants of these Keys are known as Keyshards, and hold powerful magics imbued in them by the fallen gods.
Keyshards can be bound to weapons and armor, giving them magical properties.
First, roll a D6. On a 1-5, you have found a Lesser Keyshard. On a 6, you have found a Greater Keyshard. Then, roll the Enchantment on the corresponding chart below.
| D6 Roll | Enchantment Type |
|---|---|
| 1 | Shield |
| 2-4 | Melee Weapon |
| 4-5 | Ranged Weapon (printed as such; the ranges 2-4 and 4-5 overlap) |
| 6 | Armor |
Using Keyshards
- As an Action, a Hero may apply the Keyshard to any non-magical item of the correct type in their possession. The item gains the listed enchantment immediately. Weapons enchanted in this way gain the Magical keyword.
- If the Hero does not have an item of the correct type, or doesn't wish to use the Keyshard yet, it may be stored in their Inventory or even swapped with another Hero – Until they are used, Keyshards are items like any other.
- No more than one Keyshard may be applied to the same item at any one time.
Lesser Keyshards
The enchantment lasts for the duration of the adventure. When the adventure ends, the magic fades and the item returns to normal.
Greater Keyshards
The enchantment is permanent. Note on the character sheet that the item is now enchanted. Further Keyshards cannot be applied to this weapon.
Shield Enchantments
| D6 Roll | Enchantment |
|---|---|
| 1 | Shrieking Curse: While this Shield is equipped, the bearer reduces its WIL by -2, but gains the Fearsome special rule. |
| 2 | Mighty Bash: While this shield is equipped, the bearer may add +1 Strength Bonus to a single Strike each round. If this Strike does not remove the target from play, the target receives the Staggered condition. |
| 3 | Castellan: This shield adds +2 Armor Bonus instead of the usual +1. |
| 4 | Arrow-Turning: While this Shield is equipped, this model always counts as being behind Cover. |
| 5 | Reflection: When this model is attacked in Melee, for every successful Armor Roll it makes the attacker suffers 1 point of damage, ignoring Resistance and Armor. |
| 6 | Spellbreaking: While this shield is equipped, the bearer gains the Resist (Magical) rule. |
Melee Weapon Enchantments
| 2D6 Roll | Enchantment |
|---|---|
| 2 | Dizzying: If at least one point of damage is inflicted with this weapon, target must pass a WIL Test or gain the Staggered condition. |
| 3 | Debilitating: If at least one point of damage is inflicted with this weapon, target suffers Disadvantage on its Attack Rolls for the rest of the game. |
| 4 | Force: If at least one point of damage is inflicted with this weapon, target must pass a STR Test or be Pushed D6". |
| 5 | Cowardice: If at least one point of damage is inflicted with this weapon, target must take a Morale Check. |
| 6 | Ice: If at least one point of damage is inflicted with this weapon, target must pass a STR Test or gain the Slowed condition. |
| 7-8 | Strength: This weapon gains +1 Damage. |
| 9 | Fire: If at least one point of damage is inflicted with this weapon, target must pass an AGI Test or gain the Burning condition. |
Ranged Weapon Enchantments
| 2D6 Roll | Enchantment |
|---|---|
| 2 | Pinion: If at least one point of damage is inflicted with this weapon, target must pass a WIL Test or gain the Staggered condition. |
| 3 | Envenomed: If at least one point of damage is inflicted with this weapon, target must pass a DEF Test or gain the Poisoned condition. |
| 4-5 | Seeking: Ranged Attacks performed by this weapon ignore Cover. |
| 6 | Cowardice: If at least one point of damage is inflicted with this weapon, target must take a Morale Check. |
| 7 | Ice: If at least one point of damage is inflicted with this weapon, target must pass a STR Test or gain the Slowed condition. |
| 8-9 | Huntsman: This weapon gains +1 Damage; +D3 Damage vs Large and Huge targets. |
| 10 | Fire: If at least one point of damage is inflicted with this weapon, target must pass an AGI Test or gain the Burning condition. |
Armor Enchantments
| D6 Roll | Enchantment |
|---|---|
| 1 | Cursed Defender: The wearer gains +1 Resistance, but suffers -1 INT. |
| 2-3 | Resistance: Roll a D6 as soon as the Keyshard is applied to see what type of Resist rule is conferred: 1-2) Fire, 3) Poison, 4-5) Ice, 6) Magical. |
| 4 | Deflection: The wearer gains an extra +1 Resistance Bonus vs Ranged Attacks. |
| 5 | Rebounding: When this model is attacked in Melee, for every successful Armor Roll it makes the attacker suffers 1 point of damage, ignoring Resistance and Armor. |
| 6 | Vigor: The wearer gains the Regenerate Health (1) rule. |
Magic Artifacts
The following table provides a range of common artifacts.
| 3D6 Roll | Enchantment |
|---|---|
| 3 | Boots of Sneaking: When the wearer Moves, they do not lose their Hidden condition. |
| 4 | Boots of Dashing: Once per game, when performing a Run, the wearer may add an extra D6" to the result. |
| 5 | Boots of Leaping: This model treats Jump distances as half their actual distance. |
| 6 | Helm of Waterbreathing: This model treats Impassable Terrain with the Water keyword as Difficult Terrain instead. |
| 7 | Helm of Clearsight: The wearer adds +6" to the Long Range of its ranged weapons (not Spells), and can see an additional 6" in Darkness. |
| 8 | Amulet of Warding: The wearer gains the Resist Magic keyword. |
| 9 | Amulet of Luck: Each time the wearer spends a Fate Point, roll a d6. On a 6, the Fate Point is not removed. |
Quickstart Heroes
In the full game rules, you'll be able to create your own Heroes from a large number of options, choosing Race, Class, and Equipment to suit your play style. For now, simply pick one of the Level One Heroes from the following pages, and give each a piece of gear from the list below.
Adventuring Gear
At the start of a game, each Hero may choose a single piece of Adventuring Gear from the list below. These items are treasured possessions – if they are ever discarded or lost for any reason, they are gone for good!
The Party cannot include more than one of the same item. Randomly determine which player picks an item first – they choose one item for one of their models, then the player to their right chooses one, and so on, until every Hero has one item.
- Ancestral Weapon: Fighter, Barbarian or Paladin only. Choose one of this model's signature melee weapons when this item is chosen – the choice may not be changed later. When performing a Melee Attack with that weapon, add +1 bonus Damage, but any natural roll of double-1 is a Fumble.
- Elven Bread: Elf Only. When performing a Take a Breath Action, this model may restore D3 Health instead of 1. If the die scores a natural '1', the bread runs out and is discarded.
- Enchanted Rope: This model gains Advantage to its Climb Tests. If the model ever falls into a Pit Trap, it may discard this item to automatically ignore the effect.
- Eternal Lantern: While the Darkness rules are in play, this model may activate or deactivate the lantern as an Action. While activated, the model counts as a source of Light with a 3" radius. The bearer and all friendly models within the Light gain Advantage to their Morale Checks.
- Holy Water: Priest or Paladin only. One Use Only. Discard this item after successfully hitting any Undead or Demonic creature with a Melee Attack. Add +D6 Damage to the Attack.
- Lucky Charm: This model may choose to gain Advantage on any Fate Test. But if the roll is failed, this item is lost.
- Potion of Rejuvenation: One Use Only. As an Action, this model, or a target friendly model within 3", restores their Health to maximum.
- Power Stone: Wizard only. One Use Only. Discard this item to automatically cast one of the Wizard's Spells. No Power points are expended – the stone provides all of the Power needed, plus the maximum amount of Boosts.
Pre-Generated Level 1 Heroes
The printed Level 1 hero sheets, with the starting profile, equipment and skills of each Hero. Each Hero's Fate, Health and Speed are as printed.
Ellessa Moiryth – Elf Wizard
Level 1. Speed 6 (2D3).
| MEL | RNG | STR | AGI | DEF | INT | WIL | Health | Fate |
|---|---|---|---|---|---|---|---|---|
| 3 | 4 | 3 | 4 | 2 | 4 | 3 | 6 | 5 |
Strength Bonus 0. Resistance 0. Armor Bonus 0.
- Melee Attacks: Staff (S) – D3+1 – Defensive Wpn; Two-Handed. Dagger – D3 – One-Handed, Off-Hand Weapon.
- Ranged Attacks: None.
- Armor: None.
- Skills & Special Rules: Spellcaster: This model may cast a Spell as an Action.
Spellcaster Record Sheet (Power 3):
| Spell | Level | Type | POW | Description |
|---|---|---|---|---|
| Slip | Cantrip | Curse | 0 | Target model within 6" must pass a WIL Test or gain the Slowed condition. |
| Distract | Cantrip | Curse | 0 | Target model within 6" must take a WIL Test. If failed, the caster may Move that model (following all the normal Move rules). |
| Magic Dart | 1 | Direct Damage (Ranged 12") | 1+ | Damage D3+1. Boost (2): For each Power point spent as a Boost, add D3 damage, up to a maximum total of 3D3+1. |
Adric Wright – Human Cleric
Level 1. Speed 6 (D6).
| MEL | RNG | STR | AGI | DEF | INT | WIL | Health | Fate |
|---|---|---|---|---|---|---|---|---|
| 3 | 3 | 3 | 3 | 3 | 3 | 4 | 7 | 5 |
Strength Bonus 0. Resistance 1. Armor Bonus 1.
- Melee Attacks: Hand Weapon (S) – D6 – One-Handed.
- Ranged Attacks: None.
- Armor: Light Armor – +1.
- Skills & Special Rules:
- Adaptability: Once per game, this model may gain Advantage on a single Test – decide before rolling the dice.
- Priest: This model may use the Commune Action to perform Miracles.
- Healing Word (Miracle): The Priest or one friendly model within 3" and Line of Sight restores D3+1 Health.
Kreeves the Unfallen – Human Barbarian
Level 1. Speed 6 (D6).
| MEL | RNG | STR | AGI | DEF | INT | WIL | Health | Fate |
|---|---|---|---|---|---|---|---|---|
| 4 | 3 | 4 | 3 | 3 | 2 | 3 | 8 | 5 |
Strength Bonus +1. Resistance 1. Armor Bonus 0.
- Melee Attacks: Hand Weapon (S) – D6 – One-Handed (two entries).
- Ranged Attacks: None.
- Armor: None.
- Skills & Special Rules:
- Adaptability: Once per game, this model may gain Advantage on a single Test – decide before rolling the dice.
- Rage: If this model engages an enemy after moving more than 6", it may choose to gain an extra +D3 Strength Bonus to any Melee Attack it makes this activation. However, once the Attack is complete, this model suffers Disadvantage on all their Tests for the rest of the round.
Marek Rost – Dwarf Fighter
Level 1. Speed 5 (D3+2).
| MEL | RNG | STR | AGI | DEF | INT | WIL | Health | Fate |
|---|---|---|---|---|---|---|---|---|
| 4 | 3 | 3 | 3 | 4 | 3 | 3 | 8 | 4 |
Strength Bonus 0. Resistance 1. Armor Bonus 2.
- Melee Attacks: Hand Weapon (S) – D6 – One-Handed.
- Ranged Attacks: None.
- Armor: Light Armor – +1 – (no special rule). Shield – +1 – Cannot be equipped with a Two-Handed or Ranged weapon.
- Skills & Special Rules:
- Armsman: Once per activation, when attacking with his signature weapon, Marek gains +2 MEL for the duration of the Attack.
- Stout: Marek ignores any Speed penalty incurred by equipped Armor.
Zath Hannon – Halfling Rogue
Level 1. Speed 6 (D6).
| MEL | RNG | STR | AGI | DEF | INT | WIL | Health | Fate |
|---|---|---|---|---|---|---|---|---|
| 3 | 3 | 3 | 4 | 3 | 3 | 3 | 6 | 6 |
Strength Bonus 0. Resistance 1. Armor Bonus 1.
- Melee Attacks: Dagger (S) – D3 – One-Handed, Off-hand Weapon (two entries).
- Ranged Attacks: Thrown Weapons – D6 – S 6 – L – Hurl, Momentum.
- Armor: Light Armor – +1.
- Skills & Special Rules: Backstab: When performing an Attack vs a model he couldn't see at the start of his activation, or if he began the activation with the Hidden condition, Zath adds an extra +D6 Damage.
Fale Stonely – Half-Orc Ranger
Level 1. Speed 6 (D6).
| MEL | RNG | STR | AGI | DEF | INT | WIL | Health | Fate |
|---|---|---|---|---|---|---|---|---|
| 3 | 4 | 4 | 3 | 3 | 3 | 3 | 7 | 4 |
Strength Bonus +1. Resistance 1. Armor Bonus 1.
- Melee Attacks: Hand Weapon (S) – D6 – One-Handed.
- Ranged Attacks: Bow (S) – D6 – S 8 – L 18.
- Armor: Light Armor – +1.
- Skills & Special Rules: Pathfinder: Fale treats all Woodland Difficult Terrain as Open Terrain instead. In addition, Fale may make a free Move before the start of the first round.