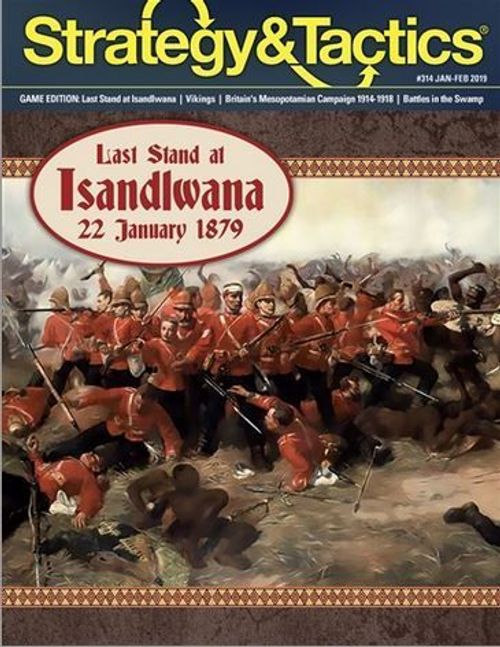
Last Stand at Isandlwana, 22 January 1879
Last Stand at Isandlwana, 22 January 1879 Rulebook
Table of Contents
Table of Contents
1.0 Introduction
1.1 Game Premise
Last Stand at Isandlwana is a two-player tactical wargame of low complexity simulating the last 90 to 240 minutes of that infamous and legendary battle of the Anglo-Zulu War. The Zulus are on the offensive, attempting to wipe out the entire British force on the map as quickly as possible. The British are attempting to win by having some remnant hold out longer than occurred historically or, alternatively, by having some portion escape off the map and get back to relative safety at Roarke's Drift (located off the map's west edge). The game is easily adapted to solitaire play.
1.1 Scale
A. Each turn is equal to 5-20 minutes, depending on the tempo of action in each turn.
B. Each hex represents 217 yards (200 meters) from side to side.
C. Each British unit represents a company (or equivalent) or a detachment of infantry (or other specialist types forced into the infantry role).
D. On the Zulu side, the individual units each represent temporary battlefield agglomerations of about 100 to 200 warriors.
Designer's Note: For Last Stand at Isandlwana to perceptually and emotionally simulate the movement and dynamism of a horrific event like the one depicted, I synthesized some elements and fragmented others. I hope the result contributes to the idea of simulation as merely a concept of mechanical analysis, while at the same time enabling it to explore the realm of the mythic and emotive. Effective design transcends the mere exposition of numeric data and procedural structure, no matter how well executed, and goes on to provide players with a broader and fuller palette for understanding the deeper history being simulated.
1.2 Abbreviations
| Abbr | Meaning | Abbr | Meaning |
|---|---|---|---|
| DRM | Die Roll Modifier | SP | Strength Point |
| MA | Movement Allowance | TRT | Turn Record Track |
| MP | Movement Point |
2.0 Components
2.1 Inventory
The components include these rules, a 34 x 22 inch map sheet, and one sheet of 176 die-cut counters. Players need to provide one or more regular (six-sided) dice to use in resolving combat and other probabilistic events that occur during play.
2.2 The Map
A. The map illustrates the militarily significant terrain found across the Isandlwana battlefield when viewed at this scale. a hexagonal grid is printed over the map to regulate the placement and movement of units across it, much as the squares on chess and checkers boards. a unit is in only one hex at any one instant.
B. Each hex contains natural or artificial terrain features that can affect the movement of units and combat between units. the various types of terrain on the map have had their exact real-world configurations altered slightly to make them coincide with the hex-grid. The relationships among them from hex to hex, however, are accurate to the degree necessary to present players with the same space/time dilemmas faced by their historic counterparts in this situation.
C. Every hex on the map has a unique four-digit identification number printed within it. They are provided to help find exact locations more quickly and to allow for the recording of unit positions if a match must be taken down before it can be completed.
Example: The Ledge, where the last of the British made their final stand, is in hex 1206.
2.3 Tables and Tracks
2.3.1 Turn Record Track
The Turn Record Track (TRT) is printed on the map and is used to record the current game turn. British reinforcements should be placed on the track in the box corresponding to their turn of arrival.
2.3.2 Turn Sequence
The Sequence of Play serves as a reminder for the order of phases within a turn (5.0).
2.3.3 Terrain Key
The Terrain Key shows the different types of terrain that made up the battlefield. Below each symbol is the movement point (MP) cost to enter or cross the displayed terrain (7.0) and the defense factor for that terrain (8.0).
2.4 Seating
The British player should sit by the map's west edge, facing east, with the Zulu player sitting opposite, by the east edge.
2.5 Counters
The counters mostly represent British soldiers or Zulu warriors. Other counters are provided as markers and memory aids.
2.6 British Combat Units
British units are red.
2.6.1 Sample British Unit
A. Some British units are printed with a single number, rather than a four-digit hex number. That number represents the turn they arrive.
B. Units are not printed with their movement allowance (MA). See 7.0 for details concerning MAs.
2.6.2 British Unit Step Reduction Counters
If a British unit is printed with a dot in its upper-right corner, that means it is a substitute unit that only comes into play when the full-strength version of its formation sustains losses in combat (8.6). Only one unit per British company (or company equivalent) is ever in play on the map at any one time.
The step reduction counters illustrated for Company A are shown as front/back pairs: 8/7, 4/3, 6/5 and 2/1.
2.6.3 British Leader Counters
British leader counters are not back printed. The front displays the leader name and hex setup number. The abbreviated names on the counters represent these individuals.
| Counter | Name |
|---|---|
| Durnfurd | Lt. Col. Anthony Durnfurd |
| Pulleine | Brevet Lt. Col. Henry Pulleine |
| Wardell | Capt. George Wardell |
| Young | Capt. Reginald Younghusband |
Designer's Note: The four officers included in the game as their own counters are those I judged to have had an influence on the battle that went beyond their immediate unit commands and surroundings.
2.6.4 British Company Units
The units below are company sized units.
| ID | Unit Name |
|---|---|
| A Co. | Company A, 1st Battalion, 24th Regiment of Foot |
| C Co. | Company C, 1st Battalion, 24th Regiment of Foot |
| E Co. | Company E, 1st Battalion, 24th Regiment of Foot |
| F Co. | Company F, 1st Battalion, 24th Regiment of Foot |
| H Co. | Company H, 1st Battalion, 24th Regiment of Foot |
| G Co. | Company G, 2nd Battalion, 24th Regiment of Foot |
| NB | Battery N, Royal Artillery (fighting as infantry) |
2.6.5 British Detachments
The units below represent detachments of small groups of about 20 men from other units or survivors from units destroyed earlier in the battle.
| ID | Detachment |
|---|---|
| 1BB | 1st Battalion Band |
| 1BP | 1st Battalion Pioneers |
| 2BG | 2nd Battalion Guards |
| 2BP | 2nd Battalion Pioneers |
| 28RD | 2nd Battalion Rear Area Detail |
| P40R | Detachment from 40th Regiment |
| RB | Rocket Battery Survivors |
2.6.6 British Ad Hoc Units
A. The units below represent small British ad hoc formations formed either before or during the battle.
| ID | Formation |
|---|---|
| Lt. A | Lt. Edgar Anstey and his ad hoc breakout group |
| QP | Quartermaster James Pullen and his ad hoc counterattack group |
| St. Iz | Capt. George Shepstone and the iziGqoza Zulus |
B. These units are not leader units, and there are no leader counters for these officers. These are ad hoc company-equivalent combat units, and none of the rules given for leaders apply to them.
2.7 Zulu Combat Units
A. The yellow Zulu units in the game are essentially anonymous. Each unit represents a constantly forming and reforming ad hoc grouping of warriors, all intermingled from the dozen Zulu regiments committed to the battle.
B. Zulu unit counters do not show their combat strength. Zulu units are all one step and have a combat strength of six (8.0).
2.8 Markers
Other counters are provided as markers and memory aids. Details of their uses are given in the sections noted below.
- Turn Marker (4.0)
- Queen's Colors Marker (5.9, 5.10, 7.8, 8.10)
- Formed Square Marker (3.2, 7.7)
- Ammunition Wagon Marker (3.2, 4.1, 5.9, 7.8, 8.7, 8.10)
- Done Marker (8.2)
3.0 Setup
3.1 Prepare to Play
A. Players should first decide who commands each side. Place the Turn marker in the first box of the TRT.
B. The British set up first.
3.2 British Setup
A. Place all British units with a four-digit setup location number directly in that numbered hex.
Play Note: Hex 2004 starts the game overstacked. The overstack must be resolved by the end of the first British Movement Phase.
Example: Place the Ammunition Wagon in hex 1008.
B. Place the Queen's Color marker and the Lt. A. unit in the 2 box of the TRT.
C. Place the seven British detachment units (2.6.5) in any hexes on the map containing a wagon or tent symbol that does not currently have any other British units (except the hex containing the Ammunition Wagon marker) occupying the hex. No more than one of these units may be placed in one hex.
D. Set aside, within easy reach, the Done and Formed Square markers.
E. Similarly set aside, within each reach, the British substitute units sorted into stacks according to the various companies to which they belong.
3.3 Zulu Set Up
Divide the Zulu units into seven groups of 16 counters each. Place one group in each of the seven onrush hexes around the edge of the map.
4.0 How to Win
4.1 British Sudden Death Victory (Live to Fight Another Day)
During any British Movement, Combat or Reaction Phase (5.2), if any British combat units, accompanied by the Ammunition Wagon and the Queen's Colors, move into any hex along the west edge of the map from 0105-0114, inclusive, play stops and the British win the game.
4.2 British End Game Victory (Survival)
At the end of Turn 6, if there is any British combat or leader unit still on the map (not eliminated), the British win the game.
4.3 Zulu Victory (Massacre)
A. At any point in the game, if there are no British leaders and/or combat units on the map; and the British did not meet the requirements of 4.1, the Zulus win the game.
B. For this rule, all British company and company-equivalent units, as well as detachments and ad hoc groups, are combat units.
5.0 Sequence of Play
5.1 Phases
A. Each turn is divided into a series of sequenced steps called phases. Every action taken by a player must be carried out in the appropriate phase as described below.
B. Once a player has finished her/his activities for a phase, s/he may not go back to perform some forgotten action or redo a poorly executed one unless the opponent graciously permits it.
5.2 The Turn Sequence Outline
A. The turn sequence outline is given below. At the end of each turn's British Leader Fatalities Phase, move forward the Turn marker to the next higher numbered box on the TRT.
B. Follow the sequence until one side achieves a sudden death victory, or the end of Turn 6 is reached, whichever occurs first (4.0).
C. The Sequence of Play is:
- Phase I: Zulu Movement Phase
- Phase II: British Reaction Phase
- Phase III: Zulu Attack Phase
- Phase IV: British Movement or Combat Phase
- Phase V: British Combat or Movement Phase
- Phase VI: Zulu Sniping Phase
- Phase VII: British Leader Fatalities Phase
5.3 Zulu Movement Phase
A. During this phase, the Zulus may move as many of their units as desired.
B. All Zulu units have an MA of 6 MPs (7.0).
5.4 British Reaction Phase
A. Each British combat unit adjacent to any Zulu units may fire against any one of those Zulu units.
B. Unlike in the British Combat Phase, there is no ranged fire during this phase; all combat is from hex to adjacent hex.
C. If British units in more than one hex are mutually adjacent to the same Zulu unit, they may combine their fire into one combat.
D. British units may not split their combat strength; each must direct its full combat strength toward one Zulu unit.
E. Combat is not mandatory.
Example: A Co. may fire at the Zulu unit in hex 0608 but cannot fire at the Zulu unit in 0708. E Co. could fire at the Zulu unit in 0708 by itself, or it could combine with A Co. to fire at the Zulu unit in 0608.
Play Note: British reaction fire is conducted by units firing on one adjacent enemy unit. During the British Combat Phase, British units may split their fire.
5.5 Zulu Attack Phase
A. Each Zulu unit adjacent to any British units may attack one adjacent unit.
B. Each Zulu unit attacks independently.
C. More than one Zulu unit can fire on the same British unit. Resolve each Zulu firing on a British unit separately.
D. British leaders cannot be the target of an attack.
E. Combat is not mandatory.
Example: In the diagram above, the Zulus have multiple options during the Zulu Attack Phase.
- The unit in hex 0607 could fire at A Co. and the unit in hex 0509 could fire at E Co.
- The unit in hex 0607 could fire at E Co. and the unit in 0509 could fire at A Co.
- Both units could fire together at E Co. or A Co. (but not at both). In this case, each unit would conduct a separate attack against the selected target.
5.6 British Movement and Combat Phases
A. At the start of Phase IV, the British announce whether they will conduct that phase as a Movement or a Combat Phase.
B. If combat is chosen for Phase IV, Phase V is automatically a Movement Phase.
C. If movement is chosen for Phase IV, Phase V is a Combat Phase.
D. The British have a choice only over the order of those two phases; they may not choose two of one and none of the other.
E. Combat in these phases may be both adjacent and ranged (8.0).
Example: In Phase IV, the British choose to conduct movement. Phase V is then a Combat Phase.
5.7 Zulu Sniping Phase
A. The Zulus roll one die and then eliminate that number of steps (up to six) from any combination of British combat units on the map adjacent to any Zulu units.
B. No more than one step may be taken from any one eligible British unit.
C. If two or more British units are stacked together, each unit in stack could suffer one hit.
D. British leaders cannot suffer hits.
E. If there are fewer total British units adjacent to Zulu units than the total calculated hits, the remaining hits are ignored.
F. Beginning on Turn 3, the Zulus apply a +3 die roll modifier (DRM) to the die roll for the remaining turns.
G. The Zulus designate the British units that suffer hits.
Example 1: At the beginning of Turn 1's Zulu Sniping Phase, there are four British units adjacent to Zulu units. The Zulus roll a 3 with one die. The Zulus select three of the four adjacent British units to each lose one step.
Example 2: At the beginning of Turn 2's Zulu Sniping Phase, there are four British units adjacent to Zulu units. The Zulus roll a 5 with one die. Each of the four adjacent British units suffers one step loss. The remaining hit is ignored as each British unit may only take one step loss.
Example 3: At the beginning of Turn 4's Zulu Sniping Phase, there are eight British units adjacent to Zulu units. The Zulus roll a 5 with one die, applying a +3 DRM, to achieve a total of eight hits. Each of the eight adjacent British units suffers one step loss.
Designer's Note: The estimate is that about one-in-four Zulus at the battle had firearms, which means, in aggregate, they had more guns there than did the British. As it was, though, most of that Zulu weaponry consisted of old Brown Bess muskets. Further, the Zulus were not good marksmen. That was due to lack of practice, that in turn was due to not having the large quantities of shot and powder to enable much practice. Even more, they were not trained or organized for volley fire. Toward the very end of the battle, however, it is estimated they had by then picked up off the ground some 200 to 400 Martini-Henrys, that were easier to load and fire than were their muskets.
5.8 British Leaders Fatality Phase
A. The Zulus roll one die per British leader adjacent to any Zulu units, but only one die roll per leader.
B. On a 1-2, the leader is immediately and permanently removed from play.
C. The Zulus must designate the leader that is being targeted.
Designer's Note: This procedure simulates the effect of Zulu warriors being able to recognize officers and senior NCOs and selectively singling them out for fire.
5.9 Turn 2 British Arrivals
At the start of Turn 2, prior to the commencement of the normal phase sequence, the British receive two new units: the Queen's Colors and Lt. Anstey's ad hoc breakout group (Lt. A.). The Queen's Colors must be placed in the hex containing the Ammunition Wagon. The Lt. A unit may be placed in the same hex or any adjacent hex. (In both cases, consider any prohibitive Zulu presence.) Once on board, the Lt. A unit functions as any other British combat unit.
5.10 Declining to Show the Colors
Instead of deploying the Queen's Colors onto the map, the British may decide (as was done during the real event by the British commander) to have the flag sent off the battlefield. That decision must be made immediately when the flag becomes available, and it may not be changed afterward. This decision effectively prevents the British from achieving a sudden death victory and the effects of 8.10.
6.0 Stacking
6.1 In General
A. Stacking is the placement of more than one friendly unit into the same hex at the same time.
B. The stacking limit only counts at the end of each unit's or stack's movement and the end of each advance after combat.
6.2 Overstacking
If a hex is ever found to be overstacked at the times in 6.1.B, correct the situation as follows:
A. If the overstack is surrounded by enemy units (all adjacent hexes are enemy occupied), all units in violation of stacking are eliminated.
B. If there is an adjacent hex not occupied by enemy units that a unit could move into, units in excess of the stacking limits may displace into that hex. If more than one such hex exists, the opponent selects the hex the overstacked units displace to.
6.3 British Stacking
A. The British may stack up to eight strength points (SPs) in a hex.
B. They may stack any number of units in a hex if the total combat strength stacked in the hex is less than 8 SPs.
C. Leaders, the Ammunition Wagon, and Queen's Colors do not count against stacking.
6.4 Zulu Stacking
A. Zulu units may not end a phase stacked.
B. Only one Zulu unit is allowed in a hex.
C. An unlimited number of Zulu units may move through a hex to another hex, however, at the end of the phase there may be only one Zulu unit in a hex.
Exception: Any number of Zulu units may stack in each onrush hex.
6.5 No Fog of War
The scale of the game obviates the need for the usual fog of war rules concerning stacking. The Zulu player is always free to examine the units beneath the top unit in British stack.
7.0 Movement
A. Each unit in the game has a designated MA representing the number of MPs it may expend per Movement Phase.
B. Units have the following MA:
| MA | Unit(s) | MA | Unit(s) |
|---|---|---|---|
| 6 | All Zulu | 2 | Formed Square Units |
| 4 | British Combat | 0 | British St. Iz Unit* |
| 4 | British Leaders | 0 | Queen's Colors** |
| 2 | Ammunition Wagon on road | 1 | Ammunition Wagon not on road |
*The St. Iz unit is a static unit. It may not move.
** Moves with the Ammunition Wagon.
7.1 Movement Procedure
A. Each unit moves from hex to adjacent hex, expending MPs from its MA for each hex entered.
B. MPs may not be saved from one phase or turn to the next, nor may they in any way be given or loaned from one unit to another.
C. Each unit's or stack's movement must be completed before the movement of the next unit or stack begins.
D. Once you have moved a unit or stack, you may not redo its movement that phase or turn unless your opponent graciously permits it.
E. Units are not required to stop their movement when moving adjacent to enemy units.
Design Note: Zones of control are not used in the game. The ability of the Zulu units to flow around pockets of resistance is a major component of the design intent.
7.2 I-GO U-GO
A. Each side may move its own units during its Movement Phase. No friendly movement takes place during the opposition's Movement Phases.
B. A player is not required to move all her/his units in a Movement Phase.
C. Each side may choose to move none, some, or all of them within the strictures given below, in each Movement Phase.
D. A moving unit need not expend all its MPs before stopping.
E. A unit may never exceed its MA during a single phase.
7.3 Required Hex Entrance Cost
No unit may move into a hex unless it has sufficient MPs available to pay all involved costs.
7.4 Stack Movement
A. Zulu units always move one at a time.
B. British units may be moved singly and/or as stacks.
C. If a British stack is moving, it may drop off units along the course of that move; however, those dropped off units may not then begin a separate move that same phase even if they have MPs otherwise remaining to them.
D. A moving British stack may only pick up units in the last hex of its move, though it could move into and through a hex containing other British units or stacks.
7.5 Terrain Costs
The number of MPs required to enter each type of terrain is shown in the terrain key on the map.
7.6 Enemy-Occupied Hexes
Units may never enter an enemy-occupied hex.
7.7 British Square
A. The British may, on a case-by-case basis form a unit into a square during the unit's movement in Phases IV or V. Alternatively a force already in square may be taken out of that formation.
B. It costs 2 MPs to form or exit a square.
C. Units in square have a MA of two MPs.
D. Units that exit square formation prior to moving may move after exiting square but have only 2 MPs remaining.
E. There is no limit on the number of British units that may be in square at any given time. If more markers are needed than the six provided in the counter-mix use coins or another marker to indicate a square.
F. When British units are attacked while in square, add one to the defense factor of the hex (but never above 6).
Example: A British unit in square is in a clear hex (defense factor of 2). The defense factor of the hex for this attack is 3.
G. British units that fire when in square subtract 1 SP from each unit firing while in square.
7.8 Ammunition Wagon and Flag Movement
A. The ammunition wagon may only move into clear, tents, and road hexes.
B. Moving along a road is defined as moving from one road to another road thru the hexside the road crosses.
C. Road and non-road movement may not be combined during the same phase.
D. If the Queen's Colors have been raised (i.e., placed on the map), the flag must always be stacked with the ammunition wagon.
Play Note: The road does not speed the movement of any units, other than the wagon. All other units moving along a road pay 1 MP per hex entered.
Designer's Note: The wagon does not have to be escorted by combat units for it to be able to move, though it is wise to always keep it well escorted.
7.9 Capt. George Shepstone and the iziGqoza Zulus
A. The St. Iz unit is a static unit. It cannot move from its setup hex, nor may it form square. (Source prints "Tt cannot"; corrected to "It" as an evident typo.)
B. It cannot attack in any phase; it only defends in place in its hex.
C. It does count against a Zulu victory via rule 4.3.
Designer's Note: The iziGqoza were Zulus who had allied with the British. Though they and their British commander, Capt. Shepstone, took part in the earlier flight of the mounted colonial troops from the battlefield, it appears that Shepstone was somehow wounded to the point of no longer being ambulatory. Rather than desert him on the field, the iziGqoza formed around him and fought until their last.
8.0 Combat
A. The SPs of British units are printed on the counters. Those numbers also represent their step strength.
B. All Zulu units have a single step and a 6 SPs.
8.1 In General
A. During the Combat or Attack Phase, the phasing side's units may attack enemy units within range.
B. A unit's combat strength can never be modified to a strength less than 1 SP.
C. All modifiers (both combat strength and defense strength) are cumulative.
D. Combat is executed by totaling the strengths of all the units firing into a given hex, and then subtracting the modified defense strength of the hex's terrain from the total modified combat strength. The resulting number is the hit number.
8.2 Restrictions
A. Each unit may conduct one attack per friendly Combat or Attack Phase.
B. A unit is never required to attack.
C. The phasing side may choose to fire with some, none, or all eligible units during each friendly Combat or Attack Phase.
D. A player need not declare all attacks at the beginning of the phase. Announce and execute them one targeted hex at a time in any order desired.
E. The resolution of an attack into one hex must be completed before that of the next hex being attacked is begun.
F. A targeted hex must contain at least one enemy unit.
G. A single attack can target only one enemy-occupied hex.
Designer's Note: If you need a memory aid to help recall if a given unit has already fired during a phase, maintain a common facing among all your units and rotate each one 180 degrees when it fires or use the done markers provided in the counter-mix. On the Zulu side, you may instead temporarily flip the counter over until the end of the phase.
8.3 Firing Procedure
The attacker designates the target hex and its in-range units to attack that hex.
8.3.1 British Fire
A. British units may fire separately or in conjunction with other units.
B. Each Zulu unit may only be fired on once per phase.
C. British units may split their fire into multiple hexes if the total combat strength used does not exceed the current strength of the unit.
D. Modify the combat strength of each attacking unit for range (8.4) and formation (7.7).
E. Total the modified combat strengths of all attacking units. The resulting number is the total attack strength for that attack.
F. Determine the defense factor of the hex being targeted (Terrain Key). Subtract the defense factor from the total attack strength (determined above). The difference is the to hit number for that attack.
G. Roll one die, if the result is less than or equal to the hit number, the targeted Zulu unit is eliminated. (8.6)
8.3.2 Zulu Attacks
A. Each Zulu unit must make a separate attack.
B. A British unit may be subjected to more than one attack per phase.
C. All Zulu units have a combat strength of six.
D. Each Zulu unit may fire into one hex in each friendly combat phase throughout the game.
E. Determine the defense factor of the hex being targeted (Terrain Key). Determine modifiers based on leaders (8.9), Queen's color's (8.10), and formation (7.7). Subtract the modified defense factor from the Zulu attack strength. The difference is the to hit number for that attack.
F. Roll one die, if the result is less than or equal to the hit number, the target unit suffers one step loss. In the case of multiple British units in a hex, the Zulus determine which units suffer hits after the roll (8.6).
G. The Zulus may distribute all hits as desired.
Design Note: Units in this game have no defense factors; terrain determines the defense strength for all attacks.
8.4 Range
A. Zulu units have a range of one.
B. British units have a maximum range of three.
C. The distance is counted in hexes, through which it may project its fire. Do not count the attacking unit's hex; do count the targeted hex.
D. Modify the combat strength of British units (not Zulu) for the effect of range as follows:
| Hexes | Modification |
|---|---|
| 1* | Add one to the unit's combat strength. |
| 2 | No effect on combat strength. |
| 3 | Subtract one from the firing unit's combat strength. |
*adjacent unit
E. Range is determined, and modifiers applied for each British unit.
Example: One British unit (strength of 3) and a second unit (strength of 4) are firing at a single Zulu unit; the first unit is firing at a range of one (adjacent) and would have an effective strength of 4 (3 + 1). The second unit is firing at a range of three and would have an effective combat strength of 3 (4 - 1). The total combat strength firing at the Zulu unit would be 7 (4 + 3).
8.5 Line of Sight
A. If firing at an odd angle across the hex grid, count the range in hexes the most direct possible route to the target hex.
B. Heights hexes may not be fired into or through.
C. No other terrain or units block the ability to fire into or through a hex.
D. It is permissible to fire along the edge of a heights hex.
Example: A British unit in hex 1206 could fire into 1006 or 0907.
8.6 Hits
A. Hits on an enemy unit during the British reaction, British Fire, and Zulu attack Phases are achieved by rolling a result less than or equal to the determined hit number (8.3).
- A 1 is always a hit.
- A 6 is always a miss.
B. A hit on a Zulu unit eliminates the unit.
C. A hit on a British unit reduces that unit by one step/SP. See 2.5.2 for information on British step strength.
Source note: the cross-reference "2.5.2" is printed as-is in the source; the British step reduction counters are described in 2.6.2.
D. British units consist of from 1-4 counters.
- When taking a hit, if the counter is showing the side with the higher strength, flip it over to its reduced side.
- If the counter is already showing its reduced side, replace it with another counter with the same ID that shows the correct reduced strength for the unit. Continue this process until a counter with a strength of one receives a hit. At that time, remove the counter from the game, that unit is eliminated.
Example: The diagram below shows the three counters that depict the Lt. A. unit.
E. Leaders are not affected by combat results. If all British combat units are eliminated in a hex containing a leader, treat the leader as follows:
- If there is a path of hexes, of any length, not occupied by Zulu units, the leader may move to the closest British occupied hex.
- If a path of hexes as mentioned above does not exist, the leader is eliminated.
- Other than receiving a hit during the British Leaders Fatalities Phase, this is the only way a British leader can be eliminated.
8.7 Advance After Combat
A. British units may never advance after combat.
B. In the Zulu Attack Phase, Zulu units may advance after combat if all British units in the target hex are eliminated. One attacking Zulu unit can advance into the targeted hex (no further) immediately after all fire has been resolved against that hex.
Exceptions: Queen's Colors and ammunition wagon are not combat units. If all British combat units are eliminated in a hex containing these two counters, a Zulu unit may advance into the hex, and eliminate the ammunition wagon and colors unit (capturing them).
8.8 Zulu Recycling and Onrush Hexes
A. When a Zulu unit is eliminated, the owner places the eliminated unit into the appropriate onrush hex listed below.
B. If a Zulu unit is eliminated in a hex in or east of the 14xx row, it may only be recycled into play via one of the four onrush hexes in that same part of the map (1601, 2301, 2506, and 2013).
C. If a Zulu unit is eliminated in a hex in or west of the 13xx hex row, it may only be recycled into play via one of the three onrush hexes in that same part of the map (1201, 1314, and 0401).
D. The Zulu stacking limit in those hexes is infinite; however, Zulu units moving out of them do so one at a time (though any number may move out that way over the course of a Zulu Movement Phase).
E. No more than one Zulu unit may attack out of any given onrush hex during a Zulu Combat Phase.
F. The Zulus do not have to empty onrush hexes of their units simply because there are any units in them; any number of Zulu units may remain indefinitely in onrush hexes.
G. British units may never move into any onrush hex and, if they attack into one, only one Zulu unit can be affected.
H. Onrush hexes are otherwise considered clear terrain.
8.9 British Leader Presence
If a British unit or stack receives a Zulu attack while a leader counter is present in its hex, add one to the defense strength of that hex. There is no additional bonus for the presence of multiple leaders.
8.10 Presence of the Queen's Colors
A. During the Zulu Attack Phase, add one to the defense factor of a hex if a British unit is stacked with the Queen's colors.
B. During the British Combat Phase (IV or V), add one to combat strength of all British units stacked with the Queen's colors.
C. If at any time in the game, the Queen's Colors are captured by the Zulus (a Zulu unit enters the hex containing the Queen's colors) all British combat strengths are reduced by one for the remainder of the game.
8.11 British Ammunition Shortage
During Turn 6, all British combat strengths are automatically reduced by one.
Exception: British units operating in the wagon's hex, as well as hexes immediately adjacent to it, are immune to this penalty.
8.12 Ammunition Wagon and Queen's Colors
A. The Ammunition Wagon and Queen's Colors do not have combat values or steps.
B. If the Ammunition Wagon is captured, all British units immediately suffer the firing penalty in 8.1.1.
Source note: the cross-reference "8.1.1" does not match a printed section of the source and is left as printed.
9.0 Solitaire Rules
Players should find this game suitable for solitaire play.
9.1 British Player
A player should play the British side. (Good luck in surviving!)
9.2 Zulu Rules
A. Move Zulu units so that every hex possible hex that a Zulu unit could reach and that is adjacent to a British unit is occupied. If two or more British units are equidistant from a Zulu unit, determine the Zulu unit's move by rolling dice. Odds should be equal for each British unit.
B. If the Ammunition Wagon and Queen's Colors are on the map, and Zulu units are within their MA to move adjacent, those adjacent hexes must be occupied first.
C. After all Zulu units have moved that could reach an adjacent hex to a British unit, or if all hexes adjacent to British units are occupied by Zulu units, the Zulu will then move to occupy all hexes two hexes away from a British unit. This continues until all Zulu units have moved.
D. Zulu units entering from an onrush hex must move onto the map unless there are no available open hexes within 6 MPs.
E. During the Zulu Attack Phase, all British units adjacent to Zulu units must be attacked. If there are not enough Zulu units adjacent to British units to fulfill that requirement, Zulu units must be allocated to the strongest British units that are adjacent to Zulu units (i.e. first attack the strongest units, then the next strongest, etc.).
F. If eligible, Zulu units will always advance after combat.
G. During the Zulu Sniping Phase, any casualties inflicted will be inflicted on the strongest British units first (in the same manner as Zulu attacks).
10.0 Optional British Set Up
The free British setup is a what if scenario. Play balance will swing in favor of the British.
A. Place all British units with a four-digit set up location in hex east of the 09xx hex row and west of the 20xx hex row. Units may not be overstacked.
B. The Ammunition Wagon must be placed in hex 1008.
C. The St. Iz. Unit must be placed in hex 1005. All rules pertaining to this unit remain in place.
D. Place the Queen's Color marker and the Lt. A. unit in the 2 box of TRT.
E. Place the seven British detachment units (2.5.5) in any hexes on the map containing a wagon or tent symbol that do not currently have any other British units (except the hex containing the ammo wagon) occupying the hex. No more than one of these units may be placed in one hex.
Source note: the cross-reference "2.5.5" is printed as-is in the source; the British detachments are listed in 2.6.5.
F. Set aside, within easy reach, the Done and Formed Square markers.
G. Similarly set aside the British substitute units within each reach, sorted into stacks according to the various companies to which they belong.
11.0 Examples of Play
The examples are printed with diagrams of the map; the diagrams are not reproduced here, and the text of each example is transcribed as printed.
11.1 British Reaction Phase
A. After completion of the Zulu Movement Phase, the British find A Co. surrounded by Zulu units. The plan is to have A Co. cut its way out of the surrounding Zulu and move to a position to support Durnfurd and C Co. During the Reaction Phase, each British unit can only fire on one adjacent enemy unit.
B. Since the goal is to get A Co. joined with C Co. the British declare they will use A Co. to fire at the Zulu unit in hex 0808. A Co. has a combat strength of 8 and is firing at a range of 1, which adds one to its combat strength, giving A Co. a combat strength of 9 (8.4). The Zulu unit is in a clear hex, the terrain Key notes it as having a defense factor of 2. The British have a hit number of 7 (8 + 1 - 2 = 7). Even though the final combat strength of 7, the British must still roll to hit because a 6 is always being a miss (8.6). Luckily, they roll a 2, which eliminates the Zulu unit. A Co. cannot advance after combat (8.7).
C. The British then designate C Co. to fire at the Zulu unit in hex 0909 (hoping to clear a path for A Co. to join it during the British Movement Phase). In this case, C Co. has a modified combat strength of 5 (4 + 1), giving the unit a hit number of 3 (5 - 2). The British roll a 4. Since it is greater than the hit number, there is no effect. At this point, the Reaction Phase ends.
11.2 Zulu Attack Phase
A. In this phase, all Zulu units that are adjacent to enemy units may conduct their attacks. There are still 5 Zulu units adjacent to A Co. so all 5 may fire. Each Zulu unit has a combat strength of 6. Zulu units do not receive any strength modifiers, so each unit ends up with a hit number of 4 (6 - 2).
B. Zulu units may not combine their attacks but may designate more than one unit to attack the same target, so the Zulus roll a die five times (8.3.2). The rolls are 4, 5, 6, 3, and 2. Since his hit number is 4, they achieve three hits on A Co. The British will replace the 8-SP strength counter with the 5-SP counter.
C. Two Zulus are adjacent to C Co. Each unit ends up with a hit number of 1 (6 - 5, defense factor of 4 + 1 for leader). One unit rolls a 1 and the other a 5, inflicting one hit on C Co. The British flip the 4-SP counter over to the its 3-SP side.
11.3 British Movement or Combat Phase
A. Since the goal of the British is get the two companies in the same hex, they conduct a Combat Phase, meaning they will conduct all fires, and then conduct movement.
B. They fire with A Co. first, firing at the unit in hex 0909. The hit number is 3 (5 - 2 (defense factor of hex)). They roll a 2, eliminating the Zulu unit.
C. C Co. then fires on the unit in hex 0908 with hit number of 2 (3 + 1 (range of one) - 2 (defense factor of target hex)). C Co. rolls a 4 and misses.
11.4 British Movement Phase
The British now move A Co. to hex 1008 at cost of 4 MPs. The 2 MP cost of hex 1008 is due to the Wagon symbol (terrain Key). The two companies can stack in the same hex due to their total combat strength being 8 or less, and leaders do not count for stacking.
11.5 Zulu Sniping Phase
For this example, assume that the two British units are the only ones adjacent to a Zulu unit. Since this is Turn 2, the Zulus roll one die with no modifiers, getting a 3. The Zulus can designate three adjacent British units to suffer one hit each, but since there are only two adjacent, the Zulus player can only designate two units to take one hit each. A Co. and C Co. are reduced to strengths of 4 and 2, respectively. (The source prints "Co." for the first unit; read as A Co. from the example's context.)
11.6 British Leader's Fatalities Phase
The Zulus now roll one die for each British leader adjacent to a Zulu unit. The Zulus designate Durnfurd as the target. A roll of a 3, which is a miss as leaders are hit only on a roll of a 1 or 2. At this point if neither side has met its sudden death victory condition, the Turn marker would be moved to the 3 box and play would resume with the Zulus moving any or all Zulu units.