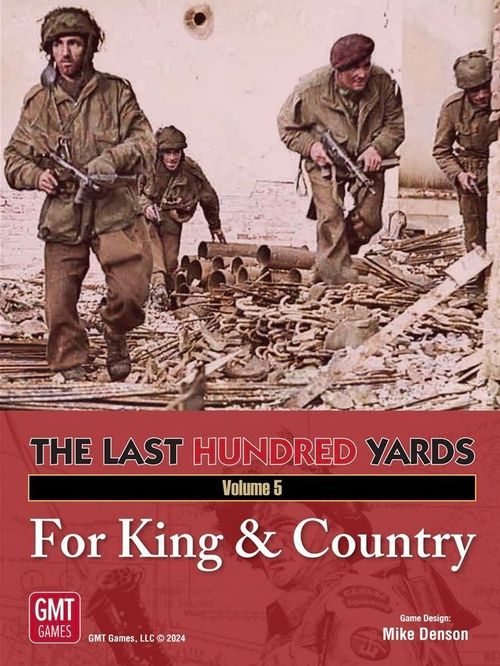
The Last Hundred Yards: Volume 5 – For King & Country
The Last Hundred Yards: Volume 5 – For King & Country Rulebook
Table of Contents
Table of Contents
- Missions 59–69
- Mission 59: Encirclement at Trun
- Mission 60: First Blood
- Mission 61: Sniper!
- Mission 62: Benzedrine and Brandy
- Mission 63: King's Own
- Mission 64: Night of the Panthers
- Mission 65: Pvt. Hall and 12th Para
- Mission 66: Ham and Jam
- Mission 67: Mike Red Beach
- Mission 68: The End
- Mission 69: Operation Windsor
- Design-Your-Own Mission Tables (British West Front)
Missions 59–69
Mission 59: Encirclement at Trun
Mission Objective: The mission ends at the end of any game turn the British control hex F5 in sector 12, or one side exceeds its Casualty Differential Limit, or the final score is > 55.
Forces:
- Canadian: C. Infantry Co., supported by one MG section and one 51mm mortar section, E. Tank Co. 1st Plt. (3 Stuart Mk VI Tanks), and B. Infantry Co., 2nd Plt. (4 steps), supported by one MG section [27 steps].
- German: 1. Infantry Kp., 1st and 2nd Plts., supported by two MG sections, two LATWs, one 8cm mortar section, and three Wire markers [14 steps].
Initiative DRM: Canadian +2
Casualty Differential Limit: Canadian [6]; German [3]
Coordination DRM: Canadian +1
Disposition of Forces:
- German: The Germans set up first Hidden, in any hex of sector 12 north of hex row I and south of hex row A.
- Canadian: The Canadians are the attacker and have the initiative at start. Units of the E. Tank Co. and C. Infantry Co. and its supporting units set up in any hex south of hex row H in sector 10. B. Infantry Co. and its supporting unit set up in any three adjacent hexes south of hex row H in sector 12.
Mission Special Rules:
- The FBE for the Canadian C. Infantry Co. and its supporting unit is the northern board edge. The FBE for the other Canadian units is the southern board edge.
- The Germans retreat and withdraw toward sector 12 hex G5, F5, or the German FBE.
- The Canadian B. Infantry Co. and its supporting unit cannot be activated (i.e., Reactions only) until the Time Lapse is > 5 minutes.
- The tanks from the Canadian E. Tank Co. are considered support units [3.2] but can only support units of the C. Infantry Co.
Victory Level:
- 0-45 Canadian Victory
- 46-55 Draw
- 56+ German Victory
Mission 60: First Blood
Mission Objective: The mission ends at the end of any game turn the German player has at least one non-shocked Jagdpanther in hex F6, F7, F8 or F9 in sector 25 (Point 226), or if one side exceeds its Casualty Differential Limit, or the Final Score is > 40.
Forces:
- British: B. Tank. Co. [12 steps]
- German: 1. SPG Kp 5th Plt (3 Jagdpanthers) [3 steps]
Initiative DRM: German +3
Casualty Differential Limit: British [8]; German [1]
Coordination DRM: British +2
Disposition of Forces:
- British: The British player sets up first. 1st Tank Plt. sets up in sector 25 with one tank in hex F3, one in hex G11 or H11, and two tanks in any one of the following hexes: F6, F7, F8 or F9. 2nd Tank Plt. sets up Hidden in any hexes between hex row G and hex row B in sector 2 (see MSR 2). 3rd Plt. sets up in motion in hexes A7 and B7 in sector 25.
- German: The German player is the attacker and has the initiative at start. The Jagdpanthers set up in motion anywhere in hex row J in sector 2.
Mission Special Rules:
- Half hexes on the east and west map edge are not in play.
- After the Germans set up and before play begins, any Hidden British tank in LOS of a German unit is immediately revealed. A Concealment marker may be placed only if the revealed unit was in a non-open terrain hex.
- The German Jagdpanthers are Elite.
- For Victory Level purposes, each British tank lost is worth one Casualty Point.
Victory Level:
- 0-30 German Victory
- 31-40 Draw
- 41+ British Victory
Mission 61: Sniper!
Mission Objective: The mission ends at the end of any game turn the Canadian player controls all stone building hexes, or if one side exceeds its Casualty Differential Limit, or the final score is > 45.
Forces:
- Canadian: A. Infantry Co. (16 steps), supported by three MG sections and one 51mm mortar section [19 steps]
- German: 1. SS Infantry Kp., 1st Plt. (2 steps) and 2nd Plt. (4 steps), supported by one MG section, one 8cm mortar section, and one sniper (section a from 1st Plt. – see MSR 1) [7 steps]
Initiative DRM: Canadian +2
Casualty Differential Limit: Canadian [5]; German [2]
Coordination DRM: Canadian +3; German +3
Disposition of Forces:
- German: Set up first Hidden, in any hex south of hex row 2.
- Canadian: Canadians are the attacker, have the initiative at start, and enter anywhere along the northern map edge.
Mission Special Rules:
-
The Canadian player ignores any Sniper result on the Fate Table. If this occurs, the Canadian player should re-roll until a result other than a Sniper is achieved. Instead, the following Sniper rules are used:
The sniper, German SS Pioneer Pelzmann, is represented by section "a" from the 1st SS platoon. Pelzmann is treated as an Elite non-combat unit and activates with the 1st Plt. His target must be specified prior to fire and is subject to the sniper fire in addition to any Small Arms Fire. To differentiate Pelzmann's fire from other Small Arms Fire, use an ATDRM marker instead of a SADRM marker.
The Sniper:
- Fire is limited to a single unit in a hex – any other units in the hex are not affected.
- May fire at an enemy unit in an assault hex.
- Cannot fire from an assault hex.
- Range is seven, and no DRM is applied for range (1.8.1).
- Cannot Split Fire.
- Does not apply the Proximity DRM. Has an Assault Value of 0.
- Is revealed if it conducts an action within two hexes and LOS of an undisrupted enemy unit.
- Gains Concealment if in Cover Terrain and not adjacent to an enemy unit.
The Target (Defending Unit):
- Does not receive any TEMs.
- Is disrupted if the Final Fire Attack die roll is > its Cohesion. If already disrupted, it suffers a casualty.
- If a leader, it suffers a casualty if the Final Fire Attack die roll is > 10.
- If subject to both sniper and Small Arms Fire, it suffers only the single most detrimental result (i.e., sniper or Small Arms Fire result).
Victory Level:
- 0-34 Canadian Victory
- 35-45 Draw
- 46+ German Victory
Mission 62: Benzedrine and Brandy
Mission Objective: The mission ends if at the end of any game turn the Germans have a total of four or more undisrupted/non-shocked combat steps in hex H5 and/or hex H6 in sector 11, or one side has exceeded its Casualty Differential Limit, or the Final Score is > 45.
Forces:
- German: 1. SS Infantry Kp., 1st Plt. and 2nd Plt. and 1st SPG Kp. 1st Plt. (2 StuG III Gs), supported by three MG sections and one 8cm mortar section [17 steps]
- British: A. Airborne Co., 1st Plt. and 2nd Plt. (4 steps), supported by one 6-pdr AT gun, one MG section, three LATWs, and one 51mm mortar section [12 steps]
Initiative DRM: German +2
Casualty Differential Limit: German [6], British [3]
Coordination DRM: German +2
Disposition of Forces:
- British: The British set up first Hidden on or between hex rows B and E in sector 11. At least one squad from each platoon must set up deployed.
- German: The Germans are the attackers, have the initiative at start, and set up on or east of hex row G on sector 3.
Mission Special Rules:
- The British had fortified building in hexes H5, H6, F5, and F6 in sector 11 prior to the German attack. For this mission, these hexes are treated as urban building hexes [Note: in this mission, vehicles are allowed to enter these hexes – this is an exception to 4.1.6b] .
- All British and German non-vehicular units are Elite [15.1]. British units do not have an Elite Coordination DRM.
- Due to low ammunition, the British suffer a -1 to their Small Arms Fire when firing in a Platoon Activation Segment.
Victory Level:
- 0-40 German Victory
- 41-45 Draw
- 46+ British Victory
Mission 63: King's Own
Mission Objective: The mission ends if at the end of any game turn the British have destroyed all the German FlaK guns, or when one side exceeds its Casualty Differential Limit, or the Final Score is > 55.
Forces:
- British: A. Airborne Co. (17 steps), supported by three MG sections and one 51mm mortar section [20 steps].
- German: 1st SS Infantry Kp. 1st Plt. (4 steps) and 2nd Plt. (3 steps), supported by two MG sections, two FlaK 36s, and two FlaK 38s [13 steps].
Initiative DRM: British +2
Casualty Differential Limit: British [6]; German [2]
Coordination DRM: British +3
Disposition of Forces: Both sides set up simultaneously – players should place a screen so that neither player can see the other player setting up.
- German: The Germans set up on or north of row J in sector 11. The FlaK units set up concealed within four hexes of hex D6 in clear terrain and not adjacent to a forest hex. The FlaK guns are considered in a fixed position and cannot be move during the mission.
- British: The British are the attackers, have the initiative at start, and set up on or south of row F in sector 2.
Mission Special Rules:
- Half hexes along the east and west map edges are not in play.
- The British Airborne units are Elite.
- The German FlaK was engaged primarily in an anti-aircraft role. To represent this, the German player receives one MOP for each game turn that at least three of the German FlaK guns do not fire. The German player no longer receives any MOPs once two FlaK guns are lost.
Victory Level:
- 0-45 British Victory
- 46-55 Draw
- 56+ German Victory
Mission 64: Night of the Panthers
Mission Objective: The mission ends at the end of any game turn the German player controls hexes G5, G6 and H5 in Sector 47, or if one side exceeds its Casualty Differential Limit, or if at the end of any game turn the Final Score is > 55.
Forces:
- Canadian: B. Infantry Co. (12 steps), supported by two MG sections, two LATWs, six 6-pdr AT Guns, two Bren Carriers, and one 76mm mortar section [22 steps].
- German: Force A: 1. Pz Kp., 1st Pz Plt. and one Command Pz (Pz V), and the 1. SS Infantry Kp., 3rd Plt., supported by one PSW 234/2 (Puma). Force B: 1. SS Infantry Kp., 1st Plt. and 2nd Plt., supported by one MG section, three 251/1 halftracks, two trucks, and one 8cm mortar section. The Puma is a support unit to the 1. SS Infantry Kp. [28 steps].
Initiative DRM: German +2
Casualty Differential Limit: German [8]; Canadian [3]
Coordination DRM: German +3; Canadian +3
Disposition of Forces:
- Canadian: The Canadian player sets up first Hidden. The two MG sections, three or four AT guns, and one infantry platoon set up in cover terrain north of hex row D in sector 3 [EXC: The Canadians cannot set up in hex E10]. The remaining two infantry platoons and AT guns and the two LATWs set up in any hex in sector 47. The AT guns cannot set up on or adjacent to the main road running from hex A7 in sector 3 to hex A7 in sector 47.
- German: The German player is the attacker and has the initiative at start. Force A sets up in motion with infantry as Riders in road hexes E10, F9, G9, H8, and H7 in sector 3. The setup constitutes the German Platoon Activation Segment. Once the Germans are set up, play begins with the Canadian Reaction Segment. Each vehicle's rear hex side is determined by the last hex side it crossed as it maneuvers north along the road. [Example: If in hex E10, a vehicle's rear hex sides are the hex sides in common with hexes E9, D9, and D10. If in hex G9, the rear hex sides are the hex sides in common with hexes G10, F8, and F9, and so on]. Force B is available and enters play in hex A7 on the road the second game turn when activated or in Reaction.
Mission Special Rules:
- Half hexes along the east and west map edges are not in play.
- This mission occurs at Night.
- Both German and Canadian non-vehicular units are Elite.
- The tanks of the German 1st Tank Plt. cannot activate (coordinate) with any infantry platoon but can be ad hoc.
- Illumination: Both the Canadians and German may request Illumination [17.4]. The Canadians are automatically granted Illumination on the first game turn. On subsequent game turns, Illumination is granted on a die roll ≤ 7 (for either side).
- The German mortar recovers on a die roll ≤ 5. The Canadian mortar recovers and extends on die rolls ≤ 5.
- In addition to the inherent trucks for Towed Guns [10.4.6.3], any Carriers listed in a player's force may be removed and returned to play in a subsequent game turn. In this mission, the Canadians have two Bren Carriers, and the Germans have three halftracks and two trucks. These Carriers may be: a) Removed from play if unloaded at the beginning of step 1 of the Clean-up Phase. b) Returned to play during any Activation or Reaction Segment in or adjacent to a hex containing a friendly unit provided the hex is not within three hexes and LOS of an enemy unit. Once placed, a Carrier may immediately load Passengers and Maneuver [10.4.6.2.1].
Victory Level:
- 0-45 German Victory
- 46-55 Draw
- 56+ Canadian Victory
Mission 65: Pvt. Hall and 12th Para
Hold the Line
Mission Objective: The mission ends if at the end of any game turn the Germans control hex I11 and the adjacent six hexes, or one side has exceeded its Casualty Differential Limit, or the Final Score is > 65.
Forces:
- British: A. Airborne Co. (10 steps), supported by two MG sections, two or three 6-pdr AT guns (see MSR 3), and two LATWs (Piat), and one 51mm mortar section [14 or 15 steps].
- German: 1. Pz Kp., 2nd Plt. and 1. Infantry Kp (17 steps – use Elite counters), supported by two MG sections, one SPW 251/1 halftrack, two trucks, and one 8cm mortar section [24 steps].
Initiative DRM: German +2
Casualty Differential Limit: British [4]; German [8]
Coordination DRM: British +3; German +2
Disposition of Forces:
- British: The British set up first Hidden in any hex on or north and west of the line running from hex A6 to K1.
- German: The Germans are the attackers and have the initiative at start. The German units enter play on the road in hex A2. All German infantry enter the map loaded and all vehicles enter in motion.
Mission Special Rules:
- The tree lines in this mission are treated as hedgerows [4.1.8.1].
- All roads are narrow: at no time can a vehicle enter a road hex containing two vehicles.
- Prior to set up, the British player makes a secret die roll. If the die roll is > 5, the British have three AT Guns, If the die roll is 5 or less, they only have two AT Guns.
- For this mission, each German truck may carry 5 steps.
- The stream is treated as a gully [4.1.18] except for the following: a) It costs non-vehicular units +1 MP to exit a gully hex. b) An AFV entering a gully hex must stop, ending its maneuver, and make a Bog Check. If the die roll is > 5, it is Shocked (it has Bogged). If the die roll is 5 or less, it may exit the hex and continue its maneuver. A shocked AFV in a gully hex that has recovered may exit the hex without another Bog Check.
- All German non-vehicular units and the British Airborne units are Elite. In addition, one of the British AT guns (selected at random and recorded during setup) is manned by Pvt. Hall and has its ATV increased by one for the mission.
- The British and German mortars recover on a die roll ≤ 5.
- The German mortar begins play in the Mortar Support Pending Box. The German player may roll for its recovery the game turn after the British take their first Fire Action.
Victory Level:
- 0-55 German Victory
- 56-65 Draw
- 66+ British Victory
Mission 66: Ham and Jam
Mission Objective: The British player makes a die roll at the end of every game turn the Elapsed Time is > 50. The mission ends at the end of any game turn the British player's die roll to end the game is > 5 or one side exceeds its Casualty Differential Limit.
Forces:
- German Garrison: 3. Kp., 1st Plt. (4 steps), supported by two MG FPs (see MSR 6) and one Pak 40 AT gun [7 steps].
- German Reinforcements: Force A: 3. Kp., 2nd Plt., supported by one MG section, two trucks, and one 8cm mortar section [7 steps]. Force B: 2. Kp., 2nd Plt., supported by two trucks and one 8cm mortar section [6 steps]. Force C: 3. Pz. Kp., 1st Plt. (1 PSW 234/2) and 1. Pioneer Kp. (Use Elite Infantry counters), 3rd Plt., supported by one truck [7 steps]. Force D: 1 Pz. Kp., 3rd Plt. (2 Pz IVs) and 1. Kp., 3rd Plt. supported by one truck [8 steps] [35 steps total].
- British: A. Airborne Co. (5 steps per Plt.) and B. Airborne Co. (5 steps per Plt.), supported by four LATW (Piats) and two 51mm mortar sections [30 steps].
Initiative DRM: British +2; German 0 (see MSR 9)
Casualty Differential Limit: British [6]; German [8]
Coordination DRM: British +3
Disposition of Forces:
-
German: All garrison units except for the FPs and the AT gun set up Hidden. One squad is deployed, and its two sections must set up within two hexes of each bridge (one per bridge). One FP sets up in hex I7 in sector 37, the other FP sets up in hex I8 in sector 38. The Pak 40 AT gun sets up in, and cannot be moved from, hex I6 in sector 37. Only three IPs are allowed in the mission (this is an exception to 20.7c). The three IPs are placed in hex A7 in sector 17 and hexes A7 and I6 in sector 37.
-
German Reinforcements: At the beginning of each game turn, if the Time Lapse has surpassed a Force's time threshold, roll a die for that Force. If the die roll is < 6 the Force enters play at the designated locations:
- After 15 minutes: Forces A and D are available. Force A enters play in hex F13, K12, or K7 in sector 17, while Force D enters in hex K7 or F0 in sector 17.
- After 20 minutes: Force B is available and enters play in hex F0 or A2 in sector 38.
- After 25 minutes: Force C is available and enters play in hex A7, A12, or F13 in sector 38.
When available, each Force must enter together on or adjacent to one of its designated road entry hexes of the listed sector.
-
British: The British are the attackers, have the initiative at start, and enter play in sector 37 via six gliders [16.0]. All units of each platoon must land in the same Landing Zone.
- 3 gliders must land in Landing Zone A (hex rows E-I) in a northerly or north-westerly direction.
- 3 gliders must land in Landing Zone B (hex rows A-D) in a southerly or south-easterly direction.
Mission Special Rules:
- Night rules are in effect for the entire mission.
- Each Horsa glider can carry up to 5 steps, one leader and either one mortar or one LATW.
- For the Glider Landing Resolution, skip 16.1.5 step 1. Instead, after units have been assigned to their gliders and placed on the map in their LZ, select one glider at random. This glider and its units were blown off course and are permanently removed from play (they rejoined later in the day!). Play then proceeds to 16.1.5 step 2.
- Garrison units begin play unalerted, have no LOS, and cannot conduct an action or be used for a Recon Event until alerted. A Garrison unit is alerted when a British unit moves adjacent; all Garrison units are alerted at the beginning of the game turn after any Fire or Assault action occurs.
- Non-Heroic non-vehicular units must stop, ending their maneuver, when entering a non-bridged hex of the old riverbed running from A1 to I9 in sector 37 (no die roll required to exit in a subsequent game turn).
- The German MG FPs have a 360° field of fire.
- Hexes F4 and G5 and all canal river hexes are impassable except via the bridges.
- Vehicles are limited to the road hexes in sector 37 due to the many ditches and channels.
- Initiative DRM becomes British 0 and German +2 at start of the turn when the lapsed time is > 30 minutes.
- All British units and German Pioneers are Elite.
- The German mortars recover on a die roll ≤ 5.
- Each British mortar is placed in the Mortar Pending Box if it landed successfully. The British player may attempt Mortar Recovery during the Mortar Fire Adjustment Phase of any game turn the Time Lapse is > 5 minutes.
- Only the Germans have Illumination capability which may be requested during any game turn a German Force containing an 8cm mortar section is in play.
- German Garrison units withdraw and retreat toward the closest FBE or the nearest German-controlled bridge. All other German units withdraw and retreat toward the closest FBE.
Victory Conditions: The British win if they control both bridges at mission end. It is a draw if they control one bridge and contest the other [21.1]. Otherwise, the Germans win.
Mission 67: Mike Red Beach
Mission Objective: The mission ends at the end of any game turn the beach is secure (i.e., no German combat unit adjacent to a beach hex), both German FlaK guns are destroyed; and the Canadians control one of the following hexes: B2, F1, or I2, or one side exceeds its Casualty Differential Limit, or the final score is > 60.
Forces:
- Canadian: A. Infantry. Co., supported by three MG sections, three LATWs, and Naval Fire Support (see MSR 9).
- Canadian Reinforcements: A. Tank Co., 1st Plt. (3 Sherman 75s), F. Tank Co., 1st Plt. (2 Sherman Crab and 1 AVRE), and B. Infantry Co., 1st Plt., supported by one MG section and one LATW [34 steps].
- German: 3. Infantry Kp., 3rd Plt. supported by three MG sections, one 8.8cm FlaK 36, one FlaK 38, two AT FPs, two LATWs, and two 8cm mortar sections (see MSR 10).
- German Reinforcements: Force A: 1st SPG Kp., 4th Plt. (3 Sd.Kfz 138Ms) and 3. Infantry Kp., 2nd Plt. (4 steps). Force B: 3 Infantry Kp., 1st Plt. (4 steps), supported by one SdKfz 10/4 FlaK halftrack, one MG section, and one truck [26 steps].
Initiative DRM: Canadian +2
Casualty Differential Limit: Canadian [9]; German [4]
Coordination DRM: Canadian +3
Disposition of Forces:
- German: The German player sets up first. All units except for the two FlaK guns and the reinforcements set up concealed in a hex adjacent to a beach hex (Exception: the FPs set up unconcealed). The FlaK guns set up concealed (but not Hidden, as an exception to 20.9.1) within two hexes of G6 and cannot be moved.
- Canadian: The Canadian player is the attacker and has the initiative the first three game turns. The Canadian player makes a die roll for each platoon to determine its setup hex along the northern map edge (each platoon includes its leader, 3 squads, 1 MG, and 1 LATW). If the die roll is 1, the platoon is set up in hex B13, a die roll of 2, hex C13, a die roll of 3, hex D13, and so on until all platoons have been placed. Re-roll if the die roll is 10 or the hex would exceed its stacking limit. After all platoons are set up, but before the mission begins, the Canadian player may move any or all his units one hex – no other action is allowed. Once he has finished moving his units, the Canadian player then calls for Reaction from the German player.
Mission Special Rules:
- Half hexes on the east and west map edge are not in play.
- Hexes E10, F9, and G9 are treated as Urban Building Road hexes [4.1.9.2; 4.2.1h].
- It cost 1½ MP for all units to enter a beach hex.
- All Canadian non-vehicular units are Elite. Use LHY Vol 2 Airborne counters for all non-vehicular units.
- Vehicles can only exit the beach along a road.
- Mines: All beach hexes adjacent to level 0 hexes are mined. All normal Mine rules apply, with the following exceptions: a) Each Canadian unit (including the Sherman Crab) that enters a Mine hex must check for casualties. Other units in a hex with a unit that suffers a casualty are not affected. b) Mines may be removed from a hex by the Canadian barrage (MSR 7) or any time a Sherman Crab or an infantry unit with an Assault Value of 3 exits the Mine hex.
- Offshore Naval Support: To soften enemy positions before the landing, the Canadians received naval fire support from Allied ships offshore. Before the Canadian setup, the Canadian player selects four different hexes adjacent to a beach hex and places four +3 MDRM markers in each selected hex. Once all MDRM markers have been placed, he makes an accuracy die roll for each marker and consults the Scatter Diagram on the map to determine its final impact hex. The Canadian player then immediately conducts and resolves each fire attack, adjusted normally for terrain, using the Mortar Fire Procedure. All MDRM markers are removed once all Naval Fire Attacks have been resolved. In addition to the normal results, if the Final Fire Resolution die roll is: a) An unmodified 10 and the impact hex contains an FP, it is destroyed. b) An unmodified die roll ≥ 6 and the impact hex contains a Mine marker, it is removed from the map.
- Smoke Screen: the Canadians receive two Smoke MFAs from offshore Mark 2 Landing Craft (LCMs). The first Smoke MFA occurs before the first game turn, immediately after the resolution of the opening barrage; the second Smoke MFA occurs at the beginning of the game turn the Canadian reinforcements enter play. Each MFA consists of 10 Smoke markers. The Primary Smoke Impact Hexes selected must be on or adjacent to a beach hex. The Canadian player makes an accuracy die roll for each marker. The MFAs cannot be extended. (Any British Primary Impact markers may be used to designate the Primary Impact hex).
- Naval Fire Support: Instead of mortar support, the Canadians have Naval Fire Support in the form of a naval battery of 5-inch guns. This support is available at the beginning of the second game turn and consists of two +3 MDRM markers. The procedure for the Naval Fire Support is the same as that of a normal MFA [11.4.5]. May only be requested by one of the three platoon leaders of the Canadian A. Infantry Co. (i.e., the first wave), recovers on a die roll ≤ 3, and cannot be extended (Use the A. Co. FO and Primary Impact marker to represent the Naval Fire Support).
Victory Level:
- 0-50 Canadian Victory
- 51-60 Draw
- 61+ German Victory
Mission 68: The End
Mission Objective: The mission ends if at the end of any game turn the Germans control 15 of the 22 urban and urban road hexes (on or within the area noted by the white line) initially controlled by the British, or one side exceeds its Casualty Differential Limit, or the Final Score is > 34.
Forces:
- British: A. Airborne Co. (9 steps) and B. Airborne Co. (7 steps), supported by three 6-pdr AT Guns, five MG sections, three LATWs (Piat), and one 76mm mortar section [24 steps].
- German: Force A: 1. Pz Kp., 2nd Plt. (2 Pz IVs), 3. Pz Kp., 3rd Plt. (2 Pz III Ns), and 2. Infantry Kp., 2nd Plt. and 3rd Plt., supported by two MG sections. Force B: 2. Pz Kp., 1st Plt. (2 Pz VI Es) and 1. Infantry Kp, 1st Plt. (5 steps) and 3rd Plt. (4 steps), supported by one MG section. Force C: 1. SPG Kp., 2nd Plt. (1 StuH 105) and 3. Infantry Kp., 1st Plt. and 2nd Plt., supported by one MG section. In addition, the Germans have one 12cm mortar platoon [44 steps].
Initiative DRM: German +1
Casualty Differential Limit: British [6]; German [8]
Coordination DRM: German +2; British +3
Disposition of Forces:
- British: The British set up first in hexes on or within the British perimeter (white line). All hexes through which the white line passes must contain at least one combat unit. Units not set up in a perimeter hex may set up Hidden in any hex within the perimeter.
- German: The Germans are the attackers and have the initiative at start. All units of each force must set up in any hex of one of the three red setup lines (no more than one force per setup area). All tanks begin play in motion.
Mission Special Rules:
- The river is impassable.
- Hexes I8 and J8 have two levels. The road passing under the bridge is at level 0 while the bridge hexes above are at level 1. These level 1 bridge hexes cannot be entered by any unit (i.e., these hexes are not in play).
- As an exception to 20.9.2, Hidden British units are revealed when within two (instead of three) hexes and LOS of an enemy unit.
- As an exception to 10.1.1, the German vehicles' Maneuver Allowance is limited to 3 MP (instead of the usual 5 MP) due to the rubble in the streets.
- Both the German and British non-vehicular units are Elite.
- For this mission, the ATV of each of the three British 6-pdr AT guns is increased by one.
- The British mortar section recovers on a die roll ≤ 5 and may be requested by units of either company.
- As its sole action for the game turn, a British AT Gun in a road hex may move one hex along the road provided it passes a check. Roll a die: if the roll is ≤ its Cohesion, the AT gun may move the one hex. If not, it remains in its current hex and is marked as having conducted an action.
- The German 12cm mortar platoon has a Primary Mortar Value of 3 and a Secondary Mortar Value of 1. MFAs are HE ammo only and cannot be extended; the mortar recovers on a die roll ≤ 5. [NOTE: the MFA procedure for the 12cm mortar is the same in all aspects as for an 8cm mortar except for the MV, which is one more].
Victory Level:
- 0-30 German Victory
- 31-34 Draw
- 35+ British Victory
Mission 69: Operation Windsor
Mission Objective: The mission ends at the end of any game turn the Canadians have eliminated all German FPs and FlaK units and control all building hexes within two hexes of hex F4 in sector 41, or one side exceeds its Casualty Differential Limit, or at the end of any game turn the Final Score is > 75.
Forces:
- Canadians: A. Tank Co. (6 Sherman 75s and 3 Fireflies), A. Infantry Co. (17 steps), and B. Infantry Co. (17 steps), supported by four MG sections, four LATWs, and one 76mm mortar platoon [46 steps].
- German: 1. Pz. Kp., 2nd Pz Plt. (3 Pz IVs) and the 1. SS Infantry Kp., 1st Plt., 2nd Plt. (4 steps), and 3rd Plt., (2 steps), supported by five MG sections, two LATWs, three PaK 40 AT guns, two MG FP, two AT gun FPs, one FlaK 36, two FlaK 38, one 80mm mortar platoon, and two dummies [29 steps].
Initiative DRM: Canadian +2
Casualty Differential Limit: Canadian [10]; German [10]
Coordination DRM: German +3; Canadian +2
Disposition of Forces:
- German: The German player sets up first. Force A – Airport Security: The 3rd Infantry Plt., one MG section, the four FPs, and the three FlaK units set up concealed in sector 59. One FlaK 38 must set up in the Air Traffic Control Tower (hex H8). All remaining FP and FlaK units must be positioned on or adjacent to a road hex, at least two hexes away from another FP or FlaK unit and not in a Hangar hex (hexes I4–I7 and C7–C9) or airstrip hex (hexes F2–F11). Force B: 1st and 2nd Infantry platoons, four MG sections, two LATWs, and the three PaK 40 AT guns set up in any hex in sector 41. Units setting up south of hex row 2 in sector 41 set up Hidden. Reinforcements: 1. SS Pz. Kp., 2nd Tank Plt., enters play per MSR 8. The dummies (including IPs) may set up in any hex in sector 59 (the IPs for the dummies remain in play after the dummies are revealed).
- Canadian: The Canadian player is the attacker and has the initiative at start. A. Infantry Co. sets up in any forest hex north of hex row 3 in sector 56. B. Infantry Co. sets up in any forest hex north of hex row 3 in sector 50. Support weapons set up with or adjacent to any infantry unit in sectors 50 or 56. The tanks set up on the road within two hexes of hex F6 in sector 50 and/or F6 in sector 56.
Mission Special Rules:
- The aircraft are for art purposes only and do not affect play in any way.
- Vehicles cannot enter a Hangar hex.
- All German units are Elite (use Elite counters).
- The German FlaK positions have been fortified and provide the defender an additional -1 DRM against all fire.
- The FPs have a 360-degree field of fire and lose their Concealment the first time they fire.
- The Airport Security Force includes the three FlaK units and the four FPs, and for activation purposes is part of and activates with the German 3rd SS Infantry platoon.
- The Germans withdraw/retreat towards their FBE or hex F4 in sector 41 if controlled by the Germans.
- German Reinforcements: The German player makes a d10 die roll at the beginning of any game turn in which the Time Lapse is > 15 minutes. If the die roll is ≤ 6, the reinforcements are immediately available. At time of entry, the German player makes a subsequent die roll and refers to the map above to determine the reinforcements point of entry. [The map shows the point-of-entry die-roll ranges 1-2, 3-5, 6-8 and 9-10 on its edge hexes; the map is not transcribed.]
- The Canadian and German mortar platoons may each fire normally as a single mortar platoon or as two separate mortar sections. To fire as a platoon, both mortar sections must be in the Mortar Support Available Box at the same time. At the end of a platoon MFA, the two mortar sections' FO/Primary Impact markers (not the mortar platoon FO/Primary Impact markers) are placed in the Mortar Support Pending Box. Each individual mortar section for both the Canadians and Germans recovers normally on a die roll ≤ 5.
Victory Level:
- 0-65 Canadian Victory
- 66-75 Draw
- 76+ German Victory
Design-Your-Own Mission Tables (British West Front)
The DYO mission form is a blank photocopy sheet for recording a designed mission and is not transcribed. The tables that go with it follow.
Force and Support Table
| a | b | c | d | e | |
|---|---|---|---|---|---|
| Defender Platoons [Inf/Tank] | 1/0 | 1/0 | 2/0 | 2/1 | 3/1 |
| Defender Support Points | 10 | 15 | 15 | 20 | 30 |
| Attacker Platoons [Inf/Tank] | 2/0 | 3/0 | 4/0 | 5/1 | 6/1 |
| Attacker Support Points* | 20 | 20 | 25 | 30 | 45 |
* If Sector contains Urban Terrain, increase the Attacker Base Force by one Platoon.
Casualty Differential Table
| # of Defending Platoons | 1-3 Odd | 1-3 Even | 4-6 Odd | 4-6 Even |
|---|---|---|---|---|
| Attacker CDL | 4 | 5 | 6 | 7 |
| Defender CDL | 2 | 3 | 3 | 4 |
Initiative DRM Table
| Attacker die roll | DRM | Defender die roll | DRM |
|---|---|---|---|
| 1 | 0 | 1-2 | -1 |
| 2-3 | 1 | 3-7 | 0 |
| 4-8 | 2 | 8-9 | 1 |
| 9-10 | 3 | 10 | 2 |
Coordination DRM Table
| Attacker die roll | DRM | Defender die roll | DRM |
|---|---|---|---|
| 1 | 0 | 1-2 | -1 |
| 2-6 | 1 | 3-8 | 0 |
| 7-10 | 2 | 9-10 | 1 |
Hill Table
| die roll | Level | Note |
|---|---|---|
| 1-3 | x1 | Low Hills |
| 4-8 | x2 | Medium Hills |
| 9-10 | x3 | High Hills |
Miscellaneous Table
| die roll | # of Mines, Wire, IPs or Dummy markers |
|---|---|
| 1-3 | 1 |
| 4-7 | 2 |
| 8-10 | 3 |
Armor Support Table
| Commonwealth die roll | Type | German die roll | Unit Type |
|---|---|---|---|
| 1-8 | Archer | 1 | StuG 105 |
| 9-10 | AVRE | 2-7 | StuG IIIG |
| 8-10 | Tiger |
Support Purchase Table
| Unit | Gr | CW | Notes |
|---|---|---|---|
| Infantry Plt. | 24 | 20 | +6 each for Elite |
| Infantry Sqd. | 9 | 7 | +2 each for Elite |
| Infantry Sec. | 4 | 4 | +1 each for Elite |
| Engineer Sqd. | 10 | 8 | |
| MG Sec. | 5 | 5 | |
| LATW Sec. | 3 | 3 | |
| Dummies | 2 |