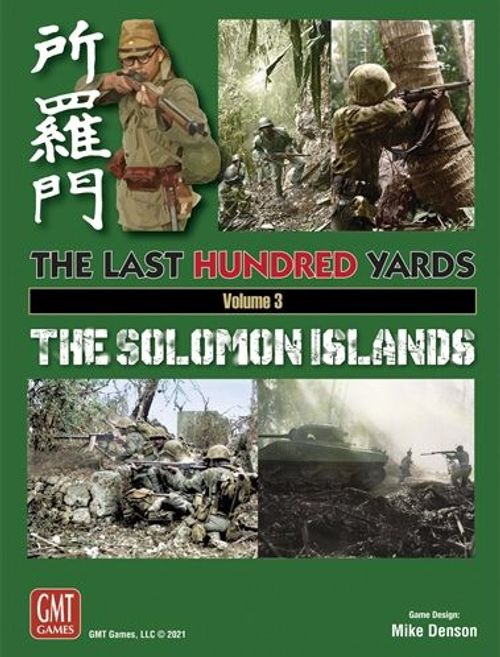
The Last Hundred Yards: Volume 3 – The Solomon Islands
The Last Hundred Yards: Volume 3 – The Solomon Islands Rulebook
Table of Contents
Table of Contents
Mission 33: The Outpost
By Christian Snyder
September 1942: In the weeks following the vicious fighting during the Battle of the Tenaru, both sides stayed on constant alert as they attempted to build up their forces. Ultimately, the Japanese felt confident that soon they would be able to attempt another effort to retake Henderson Field by attacking from the ridge and hills due south of the airstrip. Prior to this, each side kept tabs on each other through constant patrols, and observation posts overlooking the approaches to the airfield. Denying the Americans the ability to patrol or control these outposts would surely facilitate the upcoming attack by taking away their advanced warning.
Mission Objective: The mission ends if at the end of any game turn there are no American combat units on or within one hex of the ridgeline (E6, F5, G5), or either side exceeds their Casualty Differential Limit, or the Final Score is ≥ 46.
Forces:
- American: Able Marine Co., 3rd Plt., supported by one MG section and one 60mm mortar section [7 steps]
- Japanese: 2nd Infantry Co., 1st Plt. (7 steps) and 2nd Plt. (6 steps) supported by one MG section [14 steps]
Initiative DRM: Japanese +1
Casualty Differential Limit: American [2]; Japanese [5]
Disposition of Forces:
- Americans: The Americans set up first Hidden [20.9] on, or within two hexes of the ridge line (E6, F5, G5).
- Japanese: The Japanese are the attackers and have the initiative at start. 1st Plt. sets up on or south of hex row 10. 2nd Plt. sets up in and enters from hex row J on, or south, of hex J7.
Mission Special Rules:
- Hex rows A, B, J, and K are not in play.
- Hill levels are x2.
- The first 15 minutes of the mission takes place at Night followed by Twilight [17.0].
- The American mortar recovers on a die roll ≤ 5.
- The American player secretly makes a die roll on the Miscellaneous Table on the DYO Mission Form to determine the number of mines available for placement. Mines [19.1] must be deployed within the American set up area.
- Americans are allowed illumination [17.5].
Victory Level:
- 0 – 35 Japanese Victory
- 36 – 45 Draw
- 46+ American Victory
Mission 34: The Lost Patrol
By Christian Snyder
12 August 1942: 1st Marine Division Intel Officer Frank Goettage asked for and received permission from Major General Vandergrift to conduct a long-range patrol to locate Japanese remnants who he suspected to be on the verge of surrender. His patrol of 25 Marines would be decimated mere hours into their patrol and resulted in the launching of several rescue attempts after survivors made their way to the Marine perimeter around Henderson to report on the disaster.
Mission Objective: The mission ends at the end of any game turn when the Survivors have been located and all American units are on a beach hex, or either side exceeds their Casualty Differential Limit, or the Final Score is ≥ 56.
Forces:
- American: Baker Marine Co., 1st Plt. (5 steps), and 2nd Plt. (3 steps), supported by one MG section [9 steps]. Lost Patrol: see MSR 2.
- Japanese at start: Force A: 1st Infantry Co., 1st Plt. (4 steps) supported by one MG section. Force B: 1st Infantry Co., 2nd Plt. (5 steps) [10 steps]
Initiative DRM: American +1
Casualty Differential Limit: American [3]; Japanese [4]
Coordination DRM: American (+3)
Disposition of Forces:
- Japanese: The Japanese set up first. Force A sets up Hidden [20.9] in hexes south of hex row 7. Force B sets up Hidden in any hexes south of hex row 11 [see MSR 4].
- Americans: The Americans are the attackers, have the initiative at start, and setup in any hex in hex row 12.
Mission Special Rules:
- All American units are Elite.
- Lost Patrol: Prior to Japanese set up, the American player selects and records any three non-adjacent jungle hexes within three hexes of hex F0 as the possible hexes where the Survivors, if any, may be found. At the end of any activation or reaction when an American combat unit occupies a selected hex, the American player makes a search die roll for each hex occupied. If the die roll is ≤ 5, the Survivors have been found in that hex. If not found earlier, the Survivors are automatically discovered in the last hex searched. Once found, place one squad and one section from Baker Co., 2nd platoon and one Concealment marker (representing the remains of the Survivors) in a cup. A single counter is drawn from the cup and if a combat unit, is placed in the hex and is marked "activated". If the concealment marker is drawn, only the remains of the Survivors were found.
- Immediately after the survivors have been found and for the remainder of the Mission, the Americans are limited to two hexes when retreating, and in Reaction, each Japanese unit may maneuver up to two hexes whether or not it observed an enemy action.
- Japanese Force B: Although Hidden, these units are not revealed, voluntarily or involuntarily, until the game turn after the survivors have been located, at which time they are revealed normally.
- Any American unit that is forced to retreat from the beach must conduct an exit die roll [10.2a].
- Any American unit that suffers a Panic result on the Fate Table is marked activated in its current hex instead of Withdrawing.
Victory Level:
- 0 – 45 American Victory
- 46 – 55 Draw
- 56+ Japanese Victory
Mission 35: The Ambush
By Christian Snyder
March 1944: Japanese soldiers of the 6th Division have prepared for the last several weeks for an offensive against the American forces at Bougainville. Divided into three assault units, they advanced against the American positions. Fierce fighting defined these battles that occurred at all levels of command. The Japanese of Magata Unit advanced along a logging trail against the American 37th Infantry Division around Taylor and Cox's Creek. Initially successful, the Magata Unit would drive back the Buckeye Division. Supported by armor, the 37th would counterattack to regain the lost ground each time. As each separate action concluded, lulls in the fight would ensue, followed by a renewed effort by the Soldiers of the Magata Unit to again take the US positions. This back and forth fight would go on for eight days with each side advancing and retreating over the same land.
Mission Objective: The mission ends if at the end of any game turn American units do not contest either of the southern approach roads (see MSR 5), or either side exceeds its Casualty Differential Limit, or the Final Score is ≥ 51.
Forces:
- American: Easy Infantry Co. (16 steps) and Charlie Tank Co., 1st Tank Plt. (3 M4A1(75) tanks), supported by three MG sections, one 81mm mortar section (see MSR 6), and one 60mm mortar section [22 steps]
- Japanese at start: 1st Infantry Co. (12 steps), supported by two (2) MG sections and one 81mm mortar section [14 steps]
- Reinforcements: 2nd Infantry Co., 1st Plt. (6 steps) and 2nd Plt. (6 steps), supported by one 75mm Infantry Gun and one MG section [14 steps, 28 total steps]
Initiative DRM: Japanese +1; Americans +1
Casualty Differential Limit: American [4]; Japanese [7]
Coordination DRM: American (+1); Japanese (+1)
Disposition of Forces:
- Japanese at start: The Japanese are the attackers and have the initiative at start and set up first. 1st Infantry Co. sets up Hidden [20.9] in any non-road cover terrain hex south of hex row 8.
- American: Set up unconcealed in road hexes running from F1 to H6 (inclusive) and no more than four combat steps per hex. All tanks are in motion.
Mission Special Rules:
- Half hexes on the east and west board edges are not in play.
- No unit can set up in an Improved Position except for the Japanese 75mm IG.
- Japanese have Coordination on the first game turn.
- All Japanese Hidden units are revealed after the Americans set up and prior to play.
- There are two "southern approach" roads, F0 to H6 as well as J2 to H6, representing the "American's main axis of advance", as well as their relief routes for withdrawal or reinforcement. To "contest" a road, American units must occupy at least three hexes along one of these two roads.
- The American 81mm mortar section begins play in the Mortar Support Pending Box, and may only be requested or extended by a Platoon Leader. (The 81mm Mortar Platoon markers are used to represent the 81mm Mortar section).
- American units Retreat/Withdraw toward their FBE.
- The American mortar recovers on a die roll ≤ 5.
- Japanese Reinforcements: The Japanese player makes a die roll at the beginning of any game turn in which the Time Lapse is > 10 minutes. If the die-roll is ≤ 5, the reinforcements are immediately available and set up Concealed in any Jungle hex north of hex row 8. Reinforcing Knee Mortar target markers are placed in the Mortar Support Available Box.
Victory Level:
- 0 – 40 Japanese Victory
- 41 – 50 Draw
- 51+ American Victory
Mission 36: Galloping Horse Ridge
By Christian Snyder
13 January 1943: The soldiers of the US Army's 25th Infantry Division prepared for their third day of fighting on Galloping Horse Ridge where their objective was to take the final hill and thereby further the American advance to secure the island. Brought in to relieve the beleaguered Marines on Guadalcanal, the infantrymen of the 25th would continue the hard-pressed fight against the Japanese. Over the course of a month, the Division would struggle ridge to ridge, hill to hill, and over rivers and streams to drive the Japanese defenders off the island. These actions on Galloping Horse Ridge were later depicted in the book and movie of the same name, The Thin Red Line.
Mission Objective: The mission ends if at the end of any game turn there are no Japanese combat units in a hill hex east of the road running from C10 to I11, or either side exceeds their Casualty Differential Limit, or the Final Score is ≥ 71.
Forces:
- Americans at start: Easy Infantry Co., (14 steps), supported by one MG section, one FT and one 60mm mortar section [15 steps]
- Reinforcements: Fox Infantry Co. (12 steps) supported by one 60mm mortar section [12 steps, 27 total steps]
- Japanese: 1st Infantry Co., 1st Plt. (5 steps), and 2nd Plt. (4 steps), supported by two (2) MG FPs, one MG section and one 81mm mortar section [12 steps]
Initiative DRM: American +2
Casualty Differential Limit: American [6], Japanese [8]
Disposition of Forces:
- Japanese: The Japanese set up first Hidden [20.9]. 1st Plt. and one MG FP set-up in any hill hex east of the road running from C10 to I11. 2nd Plt., one MG FP and one MG set up in any hill hex west of the road running from C10 to I11.
- American: The Americans are the attackers and have the initiative at start. Easy Co. enters play in hexes C1 and D0. Fox Co. enters play on or between hexes F0 and I1.
Mission Special Rules:
- Hill levels are x2.
- Hex rows A, B, J and K are not in play.
- The American mortar recovers on a die roll ≤ 5.
- American Easy Co's. objective is the level 4 hill F11. Easy Co can only enter this sector's hill via hill hexes on or east of the road running from C10 to I11.
- Reinforcement: The American player makes a die roll at the beginning of any game turn in which any one of the following occurs: a) the American CDL is ≥ 2; or b) the American player has suffered ≥ 3 Casualties; or c) the Time Lapse is ≥ 25 minutes. If the die roll is ≤ 4 the reinforcements are immediately available and enter play on or between hexes F0 and I1.
- No Japanese unit is allowed to cross the road running from hex C10 to I11.
Victory Level:
- 0 – 60 American Victory
- 61 – 70 Draw
- 71+ Japanese Victory
Mission 37: The Raid
By Christian Snyder
17 August 1942: Elite Marine Raiders came ashore on Makin Island having debarked from two submarines for the purposes of taking Japanese prisoners, gathering intelligence, and destroying the enemy radar installation. This was also done to partially distract the Japanese from the upcoming invasion of Guadalcanal. Designed to be a small, highly trained organization, the Raiders were expected to strike deep behind Japanese lines. All told, Marine Raiders would fight extensively in the Solomon Island Campaign where they would earn praise for their results on both Makin and Tulagi Islands.
Mission Objective: The mission ends if at the end of any game turn the Radar Facility has been destroyed and all American combat units have exited the map, or either side the exceeds their Casualty Differential Limit, or the Final Score is ≥ 66.
Forces:
- American: Able Marine Co. (15 steps) [15 total steps]
- Japanese at start: 1st Infantry Co., 1st Plt. (6 steps)
- Reinforcement A: 1st Infantry Co., 3rd Plt. (7 steps) supported by one MG section [8 steps]
- Reinforcement B: 2nd Infantry Co., 1st Plt. (7 steps) supported by one MG section, one 81mm mortar section and three trucks [8 steps] [22 steps total]
Initiative DRM: American: +2
Casualty Differential Limit: American [3]; Japanese [8]
Coordination DRM: American (+3)
Disposition of Forces:
- Japanese: Starting forces setup first Hidden [20.9] within three hexes of F4 in sector 29.
- American: The Americans are the attackers and have the initiative at start. After the Japanese have set up, the Americans setup off map adjacent to any hex along either the north or south edge of sector 29. All units must enter the same map edge.
Mission Special Rules:
- Half hexes along the north and south board edges are not in play after the entry of the American force.
- Hill levels are x2.
- The Americans cannot use the Road Bonus.
- The American forces are Elite.
- The first 15 minutes of the mission takes place at Night followed by Twilight [17.0].
- The Radar Facility is in hex F4 of sector 29. The American platoon with the with the least steps at start is an Engineer platoon. Only units of the Engineer platoon may attempt destruction of the site. The facility is destroyed if at the beginning of any game turn the American engineering platoon leader and a an undisrupted squad of the same platoon occupy hex F4, and all other American units are within three hexes of hex F4, and the American player makes a die roll ≤ 5.
- The die roll to blow the radar facility counts as an Action for the attempting Engineering platoon leader and his squad for that game turn. This action does not cause a reaction but may result in the loss of Concealment.
- Beginning the Game Turn after the Radar Facility is destroyed, each Japanese unit's maneuver allowance is increased to two hexes in Reaction [this is an exception to 10.1.2a].
- American units are limited to two hexes in Retreat if the they begin their retreat in sector 30. In addition, if an Americans unit in sector 30 suffers a Panic result on the Fate Table they are marked activated in their current hex instead of Withdrawing.
- Japanese Reinforcements: The Japanese player makes a die roll at the beginning of any game turn in which the Time Lapse is > 15 minutes for Reinforcement A and a separate die roll > 25 minutes for Reinforcement B. If the die roll is ≤ 5, that reinforcement may enter play that game turn. Reinforcement A enters in any hex along the west edge of sector 29. Reinforcement B if on foot, enters in any hex along the east edge of sector 30, or if mounted along the road entering the east edge of sector 30.
- Japanese Retreat/Withdrawal: Units of the 1st Infantry Co. Withdraw/Retreat toward, or to, whichever of the following hexes (Red) are closest: A7, K7 or FO in sector 29. Units of the 2nd Infantry Co. Withdraw/Retreat toward the closest FBE in sector 30.
- Provided the Radar Facility has been destroyed, the Final Score is reduced by 1 VP for every two steps (rounded up) of American units exited within two hexes of hex F0 in sector 30.
Victory Level:
- 0 – 55 American Victory
- 56 – 65 Draw
- 66+ Japanese Victory
Mission 38: Expanding the Perimeter
By Christian Snyder
1 November 1943: The 3rd Marine Division and the 37th Infantry Division conducted an amphibious assault on the island of Bougainville at the Cape of Torokina. Fierce jungle fighting defined this island battle as the Americans sought to expand their perimeter on the island to build up several airfields and ultimately eject the last Japanese forces from the Solomon Islands. The first airfield would a be fighter strip close to the beach with later additional, larger airfields built further inland. While fighting was in starts and fits along the entire perimeter, it was fiercest in the sector of the 3rd Marine Division as it advanced inland.
Mission Objective: The mission ends if at the end of any game turn the Americans control all six Wooden Building hexes in sector 31 and have a Line of Communication (LOC) of uncontested hexes along a road to a beach hex, or either side exceeds their Casualty Differential Limit, or the Final Score is ≥ 71. [LOC is contested if a Japanese combat unit is within Close Range (unmodified), the range in hexes a unit can fire without a Range DRM, and LOS to a road hex.]
Forces:
- American: Able Marine Co., 1st Plt. (5 steps) and 2nd Plt. (5 steps), Baker Marine Co., 2nd Plt. (5 steps) and 3rd Plt. (5 steps), and Baker Tank Co., 2nd Plt. (3 M5A1 tanks), supported by three MG sections, one FT, two LATWs and two 60mm mortar sections [26 total steps].
- Japanese at start: Group A: 1st Infantry Co., 1st Plt. (Knee Mortar Squad and 4 steps), one FP(AT) and two MG sections [9 steps]. Group B: 2nd Plt. (Knee Mortar Squad and 2 steps), one FP(AT) and one FP(MG) [6 steps]. Group C: 2nd Plt. (3 steps), two MG sections and one 47mm AT Gun [6 steps]. In the Mortar Available Box: one 81mm mortar section [see MSR 6].
- Reinforcements: 3rd Plt. (less the Knee Mortar Squad) and one MG section. [7 Steps] [28 total steps].
Initiative DRM: American +2
Casualty Differential Limit: American [5]; Japanese [8]
Coordination DRM: American (+3)
Disposition of Forces:
- Japanese: Japanese set up first. Group A units, excluding the platoon leader, are placed in a cup and nine Concealment markers are placed in hexes on or between hex rows 1 and 6 (inclusive) in sector 28. Group B units, excluding the platoon leader, are placed in a cup and seven Concealment markers are placed in hexes on or between hex rows 7 and 12 in sector 31. Group C units are placed in a cup and seven Concealment markers in hexes on or north of hex row 5 in sector 31. No more than two Concealment markers may be placed in a single hex [see MSR 8 for additional restrictions]. The Japanese player defines the orientation of each FP when placed on the map.
- American: The Americans are the attackers and have the initiative at start. Able Marine Co. sets up in any beach hex west of the river. Baker Marine Co. sets up in any beach hex east of the river. All other units, including Baker Tank Co., may set up with either Able or Baker Marine Cos.
Mission Special Rules:
- Hex D10 in sector 31 is a level 2 hill.
- The American Marines are Elite.
- After each call for Reaction by the American player, the Japanese player may make a die-roll for each hex containing a Concealment Marker that is within LOS of an American unit that conducted an Action in the current Platoon Activation Cycle. The Japanese player must make the die roll when an enemy unit enters, or is within two hexes and LOS of, a hex containing a Concealment Marker. (The Japanese player may opt to remove a Concealment marker instead of making a die roll). If the die-roll ≤ 5, the activated Concealment Marker is removed, and the Japanese player draws a single unit from its corresponding cup. The unit is placed Concealed in the hex, and if eligible, with an IP [4.1.16]. The platoon leaders of the 1st and 2nd platoon are placed on the map with the first unit drawn other than an FP. If the die-roll is > 5, no unit is drawn, and the activated Concealment Marker is removed from play. This die-roll is reduced by two if there is a Japanese unit within two hexes of the activated Concealment Marker. Immediately upon being placed, the Japanese unit may React and conduct Actions normally. Once all of the Japanese units have been drawn from their corresponding cups, any remaining Concealment Markers from that Groups area are removed from play. Any units of a group remaining in the cup after all Concealment markers for that group have been revealed are not in play.
- Japanese Reinforcements: The Japanese player makes a die roll at the beginning of any game turn an American unit is north of a line running from hex A1 in sector 31 along the river to hex I8, then to J8 ending in half-hex K8. If the die roll is ≤ 5, his reinforcements are immediately available and enter within one hex of one of the three roads (selected at random) entering sector 31 from the north (F0), west (A2) or east (K2) board edges.
- The American Mortars recover on a die roll ≤ 6.
- The Japanese 81mm mortar is available at start, may be requested by any eligible unit regardless of whether its platoon leader is within range or in play, and recovers on a die roll ≤ 5.
- No fire is allowed against any Concealment markers placed at start.
- Japanese units in each group may not exit their setup area unless they exit the map from a FBE [10.2]. In addition, units from Group A may exit onto sector 31 and in doing so are removed from play as if exiting an FBE.
Victory Level:
- 0 – 60 American Victory
- 61 – 70 Draw
- 71+ Japanese Victory
Mission 39: The Plantation
By Christian Snyder
24-25 July 1943: The US Army 43rd Infantry Division advanced on the Lambeti Plantation in New Georgia with Marine tanks as it attempted to capture the Japanese Airbase at Munda Point. The fighting was intense and did not see the gains expected as Marine tanks were engaged by anti-tank guns and the attack slowed. This and other smaller battles across the entire front highlighted the tenacious Japanese defense of the airfield, the difficulty of jungle fighting, and the limits of the American fighting man. Following these battles, additional forces would be brought in, and the 34th Division Commander relieved for a more aggressive commander.
Mission Objective: The mission ends if at the end of any game turn there are no Japanese combat units within one hex of the Plantation (Hexes F4,F5,G5), or either side exceeds their Casualty Differential Limit, or the Final Score is ≥ 56.
Forces:
- American: Easy Infantry Co., 1st Plt., (5 steps), and 2nd Plt. (5 steps), Fox Infantry Co., 3rd Plt., (5 steps) and Baker Marine Tank Co., 2nd Tank Plt. (4 M5A1 tanks) supported by three MG sections and two 60mm mortar sections (one for each Infantry Co.). [22 steps]
- Japanese: 2nd Infantry Co., 2nd Plt. (6 steps) and 3rd Plt. (6 steps) supported by two MG sections, two 47mm AT Guns and one 81mm mortar section. [16 steps]
Initiative DRM: American +1
Casualty Differential Limit: American [4]; Japanese [7]
Disposition of Forces:
- Japanese: Set up first Hidden [20.9] anywhere south of Row 9.
- American: Are the attackers and have the initiative at start, and setup in any hex north of hex row 9.
Mission Special Rules:
- The half hexes along the western and eastern edges are not in play.
- The tanks are Marine and the infantry is Army – the Marines and Infantry are not allowed to activate together in Coordinated [7.1] or Ad Hoc [7.2b] Activations.
- The American mortars recover on a die roll ≤ 5.
Victory Level:
- 0 – 45 American Victory
- 46 – 55 Draw
- 56+ Japanese Victory
Mission 40: Edson's Ridge
By Christian Snyder
12 September 1942: The Japanese of the 35th Infantry Brigade are bearing down on the American perimeter, which controls the ridge dominating Henderson Airfield, the spot the 2nd Marine Division HQ least expected. Controlling the ridge would enable the Japanese to take the airfield and break the American lines. Unbeknownst to the Japanese, the Marines were in far greater strength on the ridge than they had assumed. That was primarily due to Lt. Colonel Edson who, deducing that an attack would come from this ridge, requested permission to bivouac his forces there for the night.
Mission Objective: The mission ends if at the end of any game turn the Japanese control four Mission Objective Points (MOPs), or either side exceeds their Casualty Differential Limit, or the mission ends per MSR 11.
Forces:
- Americans at start: Able Marine Co., (14 steps) and Baker Marine Co., 3rd Plt., (5 steps) supported by five MG sections, two 60mm mortar sections (A & B) and one 81mm mortar platoon [24 steps]
- Reinforcements: Baker Marine Co., 1st Plt. supported by one MG section [7 steps] [31 steps total]
- Japanese: 1st Infantry Co., (18 steps) and 2nd Infantry Co., (16 steps) supported by two MG sections and one 81mm mortar section [36 steps]
Initiative DRM: Japanese +2 [see MSR 8].
Casualty Differential Limit: American [5]; Japanese [10] see [20.5]
Coordination DRM: American (+3); Japanese (+1)
Disposition of Forces:
- American: Set up first on any hill hex north of hex row J. Any units setting up north of the line E3 – H4 – H10 – E12 may set up Hidden.
- Japanese: Are the attackers and have the Initiative and Coordination for both companies on the first game turn. One Co. sets up Hidden on or south of the line J1 – J10. The other Co. sets up Hidden on or southwest of a line running from hex J11 to F13.
Mission Special Rules:
- The first 30 minutes of the mission occur at night, followed by Twilight [17.0].
- Hill levels are x2.
- Half hexes along the east and west board edge are not in play except for hex F13.
- All American units are Elite.
- The Americans may use Illumination [17.4].
- The American mortars are not available on the first game turn even though they begin play in the Mortar Support Available Box. The mortar platoon may be requested by units of either company. All American mortars recover on a die roll ≤ 5.
- In addition to Withdrawing/Retreating toward an FBE, any unit whether American or Japanese, may Withdraw or Retreat toward a friendly controlled objective.
- Units of an American platoon cannot leave their starting hex nor can the American reinforcements enter play until released. An American platoon's units are released once any of its units have been assaulted. In addition, the American player makes a die roll at the beginning of any game turn when either the Japanese control two objectives, or the Times Lapse is > 20 minutes. If the die roll ≤ 5, any non-released platoons and reinforcements are released and immediately available. The American reinforcements enter play in hex A2 or A12. On the game turn the American reinforcements enter play, the following changes occur immediately: a) The Japanese Initiative DRM is reduced to +1 and American's is increased to +2; and b) the Japanese 81mm mortar section is removed play.
- The Japanese mortar section begins play in the Mortar Support Pending Box and may be called by either company once available. In addition, the Japanese may conduct two MFAs (81mm sections) against any two hexes on the map using the normal Mortar Fire Procedure [11.4.5]. These must be used during the first game turn and cannot be extended.
- In this mission, an objective is controlled if it is void of enemy units and is garrisoned. To garrison a 1 MOP Hill, the Americans must have at least one combat unit in the objective hex, while the Japanese must have all remaining units of any single platoon (excluding any Ad Hoc or Support units) in or adjacent to the objective hex. To garrison the 2 MOP Ridge, the Americans must have three or more combat units in Ridge hexes, while the Japanese must have all remaining units of any single platoon (less any Ad Hoc or Support units) in Ridge hexes.
Victory Points: Each single Objective Hill hex (hexes E2, H3, and F11) is worth 1 (MOP). The level 4 Ridge objective running from H6 to H10 is worth 2 MOP.
Victory Level: The Japanese win if at the end of any game turn they control four MOPs, or the side controlling three MOPs at mission end wins the mission. Otherwise it is a draw.
Mission 41: Tanks on Mantanikau!
By Christian Snyder
23 October 1942: The morning peace was shattered by the rumble of tanks from the Japanese Independent Tank Company attacking down the coast toward the mouth of the Mantanikau River. Over the next 24 hours, the Japanese would fight fiercely to push the Marine perimeter around Lunga Point back to Henderson Airfield. At the disposal of the Marines were some of the first self-propelled anti-tank vehicles, M3 GMC Halftracks with a 75mm gun. These would prove ineffective the following month in Africa but, here in the Solomons, were quite effective against the weak Japanese tanks.
Mission Objective: The mission ends if at the end of any game turn the Japanese control three of the four objectives (MSR 1), or either side exceeds their Casualty Differential Limit, or the Final Score is ≥ 76.
Forces:
- American at start: Able Marine Co., (11 steps) and one Tank Destroyer Plt., (three M3 GMC Halftracks) supported by three MG sections, one 37mm AT Gun, two LATW, one 81mm mortar section, and one 60mm mortar section. [18 steps]
- Reinforcements: Baker Marine Co., 1st Plt. supported by one MG section, and one LATW. [7 steps] [25 total steps]
- Japanese: 1st Infantry Co. (18 steps), 1st Tank Co., 1st Plt. (2 Ha-Go tanks) and 2nd Plt. supported by two MG sections and one 81mm mortar section. [26 steps]
Initiative DRM: Japanese +2
Casualty Differential Limit: American [4]; Japanese [10] [see 20.5]
Coordination DRM: American (+3), Japanese (+1)
Disposition of Forces:
- American at start: Set up first Hidden. No more than three steps of nonvehicular combat units may set up east of the river. All other units must set up within three hexes of hex C4 or A10 in sector 33.
- American Reinforcements: Arrive in accordance with MSR 7.
- Japanese: Are the attackers, set up Hidden in any hex in sector 33 west of hex row H, and have the Initiative and Coordination at start.
Mission Special Rules:
- Objectives: a) Hexes D4, C4, and B4 in sector 33; b) Hexes I10, I11, and J10 in sector 28; c) the bridge in in sector 28; and d) Hex B11 in sector 28.
- Although hexes G12, F11, and E12 in sector 28 are Jungle, in this mission they cover a shallow sandbar across the mount of the river that is passable by all units. It costs AFVs 2 MP, Halftracks 4 MP, and non-vehicular units 1½ MP to enter each hex.
- The half hexes along the south board edge are not in play except for F0 in both sectors 28 and 33.
- All American non-vehicular units are Elite.
- All the American mortars recover on a die roll ≤ 6.
- The three M3 GMC Tank Destroyers are not support units but instead, activate as a Tank Destroyer Platoon.
- American Reinforcements: The American player makes a die roll if at the beginning of any turn Time Lapse is ≥ 45 minutes. If the die roll ≤ 5 the reinforcements are immediately available and enter at hex F0, A2, or A12 (randomly selected) in sector 28.
Victory Level:
- 0 – 65 Japanese Victory
- 66 – 75 Draw
- 76+ American Victory
Mission 42: Northern Landing Force
By Christian Snyder
20 July 43: Advance on Bairoko Harbor, New Georgia. On July 13th the Northern Landing Force lost its blocking position on the Bairoko-Munda Trail just south of Bairoko. On July 20th, Marine Commander Col. Liversedge, Naval Academy Olympian and two-time Navy Cross winner, sent a force to capture the port of Bairoko. This force, comprised of Marine Raiders and Army regulars moved quickly to attack the dug-in Japanese that are defending just south of Bairoko.
Mission Objective: The mission ends if at the end of any game turn the Americans control both Observation Posts (hex J7 in sector 29 and G11 in sector 30), and there are no Japanese combat units on the road running from hex F0 in sector 29 to hex F0 in sector 32, or either side exceeds their Casualty Differential Limit, or the Final Score is ≥ 76.
Forces:
- American: Able Marine Co., (16 steps) supported by two MG sections, one FT section and one 60mm mortar section. Easy Infantry Co., (16 steps) supported by two MG sections, one LATW section, and one 81mm mortar platoon. [36 steps]
- Japanese: 2nd Infantry Co. (20 steps) supported by two MG Fortified positions, five MG sections, five mines [MSR 5] and two 81mm mortar sections. [27 steps]
Initiative DRM: American +3
Casualty Differential Limit: American [5]; Japanese [10] [see 20.5]
Coordination DRM: US Marines (+3), Japanese (+1)
Disposition of Forces:
- Japanese: Sets up first Hidden except for the FPs. The two FPs, one in hex J7 in sector 29 and the other in hex G11 in sector 30 set up Concealed. One infantry platoon must set up in each sector and at least four steps of combat units must set up within one hex of hex F4 in sector 29 and hex G7 in sector 30. The MG sections set up in any sector with no more than two MG in a single sector. No Japanese unit can set up within three hexes of hex F0 in sector 29 or hex K2 in sector 30.
- American: Are the attackers and have the initiative at start. Able Marine Co. enters on the road in hex F0 of sector 29. Easy Infantry Co. enters on the road in hex K2 in sector 30.
Mission Special Rules:
- Hill levels are x2 except for Hex J7 in sector 29, which is a level 4 Hill.
- Both sides found the New Georgia jungle extremely difficult to pass through. For this mission non-vehicular units are limited to one hex when maneuvering from one jungle hex into another jungle hex unless along a road or path. Prior to the maneuver the controlling player must first state the units attempting the maneuver and hex to be entered and then make a die roll. [EXC: An exit die roll is not required to Assault into an adjacent jungle hex, enter a non-jungle hex or when Withdrawing or Retreating]. If the die roll is ≤ 7, all units attempting the maneuver must enter the hex. Otherwise, they temporarily become lost, remain in their hex, and are marked activated. This die roll does not trigger a reaction.
- Withdrawing units end their Withdrawal in the first jungle hex entered and Retreating units in the second jungle hex entered unless Withdrawing or Retreating along a road or path.
- Japanese Mortar Support: The Japanese FOs for the two 81mm sections are permanently located in their assigned Observation Post. The FO for section A is in hex J7 in sector 29 and the FO for section B is in hex G11 in sector 30. An MFA request for a mortar section is limited to its corresponding FO marker and can be conducted in Reaction only. An FO cannot request an MFA against the hex it occupies. Once a hex containing an OP is controlled by the Americans, the corresponding FO is removed from play and mortar support from that mortar section is no longer available. Japanese Mortar Support recovers on a die roll ≤ 5 and cannot be extended.
- Japanese mines: Mines may only be placed in Jungle Road and/or Path hexes. A maximum of three mine counters may be placed in a sector and cannot be placed within three hexes of another mine, hex K2 in sector 30, or hex F0 in sector 29. Mines do not affect the Americans control of the road running from hex F0 in sector 29 to hex F0 in sector 32.
- The Japanese FPs in hexes J7 and G11 have a 360° field of fire.
- All Marine units are Elite.
- American mortars receive a -1 DRM to their Recovery die rolls.
- American Air Support: At start, a single Marine platoon leader is secretly selected as the FO for Air Support. Only the selected platoon leader may request Air Support. Air Support is limited to game turns in which the American player has the Initiative. Each air attack consists of two +3 MDRM markers. A die roll is made at the time of the Air Support request. If the die roll is > 3, Air Support is not available that game turn. If the die roll is ≤ 3, the American player specifies the target hex in LOS of the selected platoon leader, makes an accuracy die roll for each MDRM marker, and places them, applying any applicable die roll modifiers [11.4.6] in the corresponding hex. Both hexes containing the MDRM markers are treated as Primary Impact hexes. If the target hex contains an FP, the FP is destroyed if the die roll, +3 is > 10.
Victory Level:
- 0 – 65 American Victory
- 66 – 75 Draw
- 76+ Japanese Victory