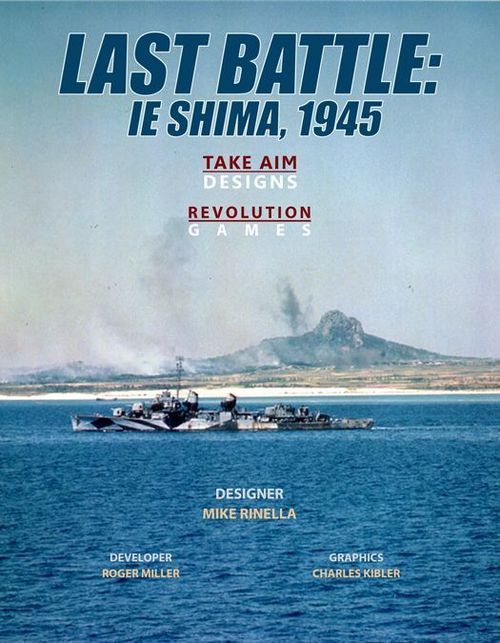
Last Battle: Ie Shima, 1945
Last Battle: Ie Shima, 1945 Rulebook
Table of Contents
Table of Contents
- 1.0 Introduction
- 2.0 Components
- 3.0 The Map
- 4.0 Playing Pieces
- 5.0 Prepare for Play
- 6.0 Sequence of Play
- 7.0 Stacking and Control
- 8.0 Impulses
- 9.0 Weather
- 10.0 Movement
- 11.0 Combat
- 12.0 Bombardment
- 13.0 Attrition and Retreat
- 14.0 Refit
- 15.0 The Advantage
- 16.0 April 16th Special Rules
- 17.0 Victory Conditions
- 18.0 Side Determination
- 19.0 Advanced Game
- 20.0 Optional Rules
- 21.0 The Extended Game
- 22.0 Index and Glossary
1.0 Introduction
A. Last Battle: Ie Shima, 1945 is a two-player game that simulates Operation Indispensable, the American invasion of the Japanese island of Ie Shima (Iejima), April 16-22, 1945. One player commands the attacking American forces and the other player commands the defending Japanese forces.
B. In reading these rules, if any capitalized term or abbreviation confuses you, refer to the Index and Glossary at the end of this rulebook. The numerical references found therein and throughout these rules should be ignored during first reading and used only later to refer to related sections for greater clarity.
2.0 Components
2.1 In General
A. Last Battle includes the following components:
- One 17" by 22" map
- One sheet of 5/8" die-cut counters
- This rule booklet
B. If any of the supplied parts are missing or damaged, write to: TAKE AIM DESIGNS, 130 Point of Woods Drive, Albany, NY 12203 USA, ATTN: LAST BATTLE.
C. Or email at: [email protected]
D. If you have any difficulty interpreting the rules you have several options. Go to the TAKE AIM DESIGNS and LAST BATTLE discussion folders at www.consimworld.com and ask your question there. Or send an email to the electronic mail address above. A last option would be to send a letter by ground mail to the street address above. Questions sent by ground mail should include a self-addressed, stamped envelope to receive a reply.
E. Regardless of how you forward your questions please phrase them so as to be answered with a simple yes or no, or at most a single sentence. Questions about historical interpretations, design theory or design intent will be answered at the designer's discretion.
2.2 Dice
Two six-sided dice are required to play Last Battle. It will speed play if both players each have two dice. The notation dr means one die and DR two dice.
3.0 The Map
The map sheet depicts the island of Ie Shima where the Indispensable campaign took place from April 16-22, 1945. The scale is approximately 1 inch = 275 yards.
3.1 Map Areas
The map is divided into 16 numbered locations hereafter called Areas. Two Areas are adjacent to each other if they share a common boundary and units could move directly from one to another. All Areas are considered Japanese-controlled at the start of the game.
3.1.1 Identifiers
Each Area on the map contains an Identifier divided into two halves. The top half contains a number for identification purposes (from 1 to 16).
3.1.2 Terrain
Areas have one of two terrain types: Clear or Urban. Clear Areas have a circle Identifier. Urban Areas have a square Identifier.
3.1.3 Area Terrain Effects Modifier
The bottom half of each Identifier contains that Area's Terrain Effects Modifier (TEM, from +1 to +4). This modifier is used in resolving attacks against units in that Area (11.4.3C).
3.1.4 Boundaries
Areas are separated from each other by solid black lines.
3.2 Beach Approach Box
A. Each of the three invasion beaches is connected to a Beach Approach Box, where assaulting American units are placed at the start of the game.
B. US reinforcements are also placed in these boxes during the Reinforcement Phase while awaiting landing in adjacent areas.
C. Beach Approach Boxes are considered Areas for purposes of US activation, US and Japanese movement, and US retreat.
D. A Beach Approach Box may not be entered, attacked or retreated into by Japanese units or bombarded by the Japanese Artillery Bombardment marker.
3.3 Japanese Special Units Box
A. The Japanese Special Units Box on the map is used to hold Japanese Special Units (5.3.2) until they are committed by the Japanese side.
B. The Japanese Special Units Box is considered an Area for purposes of Japanese activation, movement, and combat.
C. The Japanese Special Units Box may not be entered or attacked by American units or bombarded by the American Air, Artillery, or Naval Bombardment markers.
3.4 Turn Track
The Turn Track (TT) printed on the map is used to note the current turn. At the end of each turn, advance the Turn marker one space to the next sequential number on the TT.
3.5 Impulse Track
The Impulse Track is printed on the map and is used to record the current Impulse of a turn. The Impulse marker is placed in the space corresponding to the current Impulse.
3.6 Victory Point Track
The Victory Point Track is used to record the number of Victory Points (VPs) controlled by the US.
3.7 Marker Holding Boxes
The map contains boxes to hold the Advantage marker, American Air, Artillery and Naval Bombardment markers, and Advanced Game Units.
4.0 Playing Pieces
Included in the game are die-cut playing pieces called units, representing the various military formations that fought in the campaign, as well as several markers that assist in game play.
4.1 Unit Coloring
American units are green with black lettering. Japanese units are pale tan with red lettering.
4.2 Unit Types
4.2.1 In General
There are two basic types of units: Infantry and Japanese Special Units. The front side represents a full-strength unit while the reverse side (with a stripe) represents a reduced-strength unit.
4.2.2 Japanese Special Units
A. Japan has three types of Special Units: IE (civilians), MG (machine gun nests), and Pillboxes.
B. Pillboxes may not move, retreat, or attack.
4.3 Unit Information
All units have information printed on them to identify the unit and indicate its strength and well as its movement capability. The name of each unit is printed in the middle of the counter. The front side is full-strength; the back is reduced-strength. Some units (Japanese Major Igawa, American journalist Ernie Pyle) are Historical Figure markers; Victory Point markers come in ones and tens.
4.3.1 Combat Value/Movement Allowance
Each unit has two numbers below its name. The first is the unit's Combat Value (CV) and the second is the unit's Movement Allowance (MA).
4.3.2 Parent Organization
Each unit has a Parent Organization. This serves to identify the unit for historical purposes and as an aid for communicating moves during on-line play.
4.3.3 Unit Size and Organization
A. The units comprising both the regular army units of the attacking American 77th Infantry Division and the defending Japanese forces were primarily companies of varying sizes.
B. The Japanese Special Units represent groupings of armed civilians, pill boxes and machine gun nests of varying numbers.
4.4 Markers
Markers represent non-combat units and are used to record various game information. The markers are: Control, Turn, Impulse, Advantage, Air Bombardment, Artillery Bombardment, Naval Bombardment, Kamikaze Bombardment, US Armor Support, US Artillery Support, Rubble, and Japanese Satchel Charges.
4.4.1 Control Markers
Control markers are placed in Areas to indicate which side controls them, US and Japanese.
4.4.2 Turn Marker
The Turn marker indicates the current turn on the TT.
4.4.3 Impulse Marker
The Impulse marker indicates the current Impulse on the Impulse Track, and the current state of the Weather (9.3).
4.4.4 Advantage Marker
A. The Advantage marker is an abstract reflection of an edge that one side temporarily possesses due to factors such as morale, position, surprise, leadership, intelligence, and/or fate.
B. The side controlling the Advantage may use it to gain certain benefits (15.0).
4.4.5 Bombardment
A. There are three types of bombardment markers: Air, Artillery, and Naval. These are not units: they do not move on the map nor can they control an Area.
B. They are kept in their Bombardment Displays and flipped to their Used side after use. A bombardment marker only has an Attack Factor, used in a Bombardment Impulse (12.1). The reverse side indicates only that it has been used and is not available for another bombardment in the current turn.
4.4.6 Victory Point
The Victory Point markers are used to record the US current VP total.
4.5 Advanced Game Markers
These markers are used with game's Advanced Rules (19.0).
4.5.1 Kamikaze Bombardment
This is a special Japanese Bombardment marker.
4.5.2 Support (US Armor and Artillery)
These markers represent tanks of the US 706th Tank Battalion and the artillery of the US 304th Artillery Battalion present on Ie Shima.
4.5.3 Rubble
This marker may be placed in an Urban Area as a result of Combat Resolution.
4.5.4 Japanese Satchel Charges
This marker represents a Japanese attack made with large numbers of improvised explosive devices.
4.5.5 Historical Figures
These markers are used with the game's Optional Rule (20.0). They represent the historical figures of Major Masashi Igawa and journalist Ernie Pyle.
5.0 Prepare for Play
5.1 The Basic Game
5.1.1 In General
A. The Basic Game is four turns long and covers the first four days of the invasion from April 16-19, 1945.
B. Players wishing to play a longer campaign should refer to the Extended Game rules (21.0).
5.1.2 Choosing Sides
Each player should secretly record which side they wish to play: US or Japan. If opposite sides are chosen play begins immediately. If, however, both players wish to play the same side they should bid (18.1) to play the preferred side.
5.2 Marker Placement
A. Place the Turn marker in the April 16th space on the TT.
B. Place the Impulse marker in the 1 space of the Impulse track, Clear side up.
C. Place both side's Artillery Bombardment markers as well as the American Air and Naval Bombardment markers in their holding boxes printed on the map.
D. If playing with Advanced Game rules 19.1 and 19.4, the Japanese Kamikaze and Satchel Charge markers are also placed in their holding box printed on the map.
E. Place the Advantage marker in its holding box printed on the map, US side up (to show US possession of the Advantage).
F. Place both Victory Point markers in the 0 space of the Victory Point Track.
G. The Ernie Pyle and Major Igawa HQ markers are only used if incorporating Optional Rule 20.0.
H. Place a Control marker, Japanese side facing up, in every Area.
Design Note: To reduce map clutter if the players wish, they may place a Control marker in American-controlled Areas and treat Areas without a control marker as Japanese-controlled.
5.3 Unit Setup
A. Each side places its initial units in the Beach Approach Boxes and Areas listed below.
B. All units begin play with their full-strength side faceup.
5.3.1 American Setup
American units set up in the following locations:
5.3.1.1 306th Regiment
All set up in a Beach Approach Box with a green dot.
| Bn/Regt | Companies |
|---|---|
| 1/306 | A, B, C, D |
| 2/306 | E, F, G, H |
| 3/306 | I, K, L, M |
5.3.1.2 305th Regiment
All set up in a Beach Approach Box with a blue dot.
| Bn/Regt | Companies |
|---|---|
| 1/305 | A, B, C, D |
| 3/305 | I, K, L, M |
5.3.2 Japanese Setup
Japanese units set up in the following locations:
5.3.2.1 44th Independent Mixed Brigade
2nd Infantry Unit/1st Battalion. All set up in Areas 15 and/or 16: 2/1A, 2/1B, 2/1C, 2/1D
5.3.2.2 50th SEI (Specially Established Infantry)
All set up in any Urban Area: SEI-A, SEI-B, SEI-C, SEI-D
5.3.2.3 Labor Battalion
All set up in any Area: Labor-A, Labor-B, Labor-C, Labor-D
5.3.2.4 Japanese Special Units
All set up in the Special Units Box.
| Type | Units |
|---|---|
| Pillbox | A, B, C, D |
| MG | A, B, C, D |
| IE | A, B, C, D |
6.0 Sequence of Play
Each turn represents one full day of combat and comprises four phases and a number of impulses (mini-turns).
6.1 Phases
6.1.1 In General
The phases of a turn are: Reinforcements Phase, Daylight Phase, Night Phase, Refit Phase, and End Phase.
6.1.2 First Turn
The April 16th turn begins with the Japanese Impulse 1; skip the preceding Reinforcements Phase.
6.2 Reinforcement Phase
Reinforcements are placed during the Reinforcement Phase. Japan always goes first, followed by the US.
6.2.1 Japan
A. Japan makes a DR and halves the result (fractions rounded down). Up to that number of Japanese Special Units previously eliminated may return to play at full-strength.
B. Japan places any returning units into the Japanese Special Units Box.
6.2.2 United States
A. The units of the US 2/307 and 3/307 battalions (units with a brown dot in their upper right hand corner) enter play on April 17th. These units must be placed in the Beach Approach Box with the same brown dot.
B. If playing with Advanced Game rule 19.2, place the American Artillery Support marker in its holding box on April 17th and the American Tank Support marker is placed in its holding box on April 18th.
6.3 Daylight Phase
6.3.1 In General
A. Each side may take one action during each Impulse (8.0), then advance the Impulse marker to the next space on the Impulse Track.
B. Japan always goes first, followed by the US.
6.3.2 Sunset DR
A. During the American half of each Impulse, the first American DR made for any purpose also serves as the Sunset DR. If the US does not make a DR during its impulse, make a Sunset DR at the end of that impulse. Japan never makes a Sunset DR.
B. If the Sunset DR is greater than or equal to the Impulse number, move the Impulse marker to the next space on the Impulse Track (3.5). If the Impulse marker moves off the Impulse Track the Daylight Phase ends.
C. If the Sunset DR is exactly equal to the Impulse number there is a Weather Change (9.3).
D. If the Sunset DR is less than the current Impulse number, the Daylight Phase ends.
6.4 Night Phase
A. Japan may activate MG and IE units in the Special Units Box. Activation during this phase gives these units additional movement and combat capabilities (10.2.3).
B. If there are no MG or IE units present in the Special Units Box Japan may choose a single Area on the map to activate for an Assault Impulse.
6.5 Refit Phase
A. Japan spends its available Replacement Points (RPs, 14.4).
B. The US then spends its available RPs.
6.6 End Phase
Determine if the US has won an Automatic Victory (17.1).
A. If not, return the Impulse marker to the 1 space on the Impulse Track. Advance the Game Turn marker to the next space on the TT, Clear side up.
B. Flip over any Air, Artillery, and Naval markers in the holding boxes from their Used side so as to be available again.
C. If the game has reached the End Phase of April 19th, determine who has won the game (17.2). The game is now over unless playing the Extended Game (21.0).
7.0 Stacking and Control
7.1 Stacking
A. Each side may have a maximum of eight units per Area. Exception: Beach Approach Boxes and the Japanese Special Units Box do not have a stacking limit.
B. Control and other markers do not count against stacking limits.
C. Units may not move into, attack into, or end a retreat in an Area already stacked to the maximum. They may, however, retreat through a fully-stacked Area (13.2.1).
D. Although most areas are large enough to display all of the units within, stacking all of a side's full-strength and reduced-strength units in separate piles may be done to conserve space.
E. Either side may freely examine the other's stacks at any time.
7.2 Control
A. Each Area is always controlled by one side or the other.
B. Control changes when one side has a unit in a Vacant (7.4) Area that is controlled by the enemy.
C. Control of an Area may be gained during movement without stopping to end an Impulse in that Area.
D. In addition, control of an area may change at the end of the Daylight Phase as a result of an Area being Out of Supply (14.2).
E. Control is shown by flipping the control marker to its US or Japanese-Controlled side, as is appropriate.
7.3 Contested
An Area is considered Contested if it contains units of both sides. Contesting an Area that is controlled by the enemy does not alter control of that Area.
7.4 Vacant
An Area is Vacant if it contains no enemy units, regardless of control or the presence of friendly units.
7.5 Free
An Area is Free if it is Vacant and under friendly control.
8.0 Impulses
A. Most of the game is played during the Daylight Phase, consisting of an unknown number of Impulses.
B. Japan performs one Impulse and then the US performs one Impulse.
C. After each side performs one impulse, advance the Impulse marker one space on the Impulse Track.
D. The active side during an impulse is called the attacker, and the opponent is the defender.
E. No enemy unit may move during a friendly impulse except to retreat as a result of Combat Resolution (11.4).
8.1 Types of Impulses
There are four types of Impulse:
- Assault
- Bombardment
- Regroup
- Pass
8.1.1 The Assault Impulse
A. The attacker chooses an Area to be the Active Area.
B. US units in a Beach Approach Box, and Japanese units in the Japanese Special Units Box, are considered to be in an Area for purposes of Assault Impulse activation.
C. Units in the selected Area may move and/or attack during that Assault Impulse.
8.1.2 The Bombardment Impulse
The attacker selects one Area to bombard with an Air, Artillery, or Naval Bombardment marker.
8.1.3 The Regroup Impulse
A. The attacker may activate every friendly unit on the map and move them one Area.
B. Units beginning the impulse in the same Area do not have to move to the same destination; they may split up and move to different destinations.
C. Units that Regroup may not enter an enemy-controlled or enemy-occupied Area.
D. Units within a Contested Area may not Regroup into another Contested Area, even if friendly-controlled.
E. Japanese Pillbox units may not Regroup.
8.1.4 The Pass Impulse
A. The attacker may elect to take no action at all during the Impulse, though the US must still make a Sunset DR if it is possible to end the Daylight Phase.
B. If both sides pass on consecutive impulses, the Daylight Phase ends at the conclusion of the second Pass Impulse.
8.2 Legalities and Errors
A. Neither side may change its move once a DR/dr has been made, or the opponent has declared any action (including a Pass Impulse) it will take during its Impulse.
B. An illegal move/attack's results are valid if the opponent does not challenge them prior to completing its next impulse.
9.0 Weather
There are two types of weather in the game: Clear and Rain. At the start of each turn the weather is Clear.
9.1 Clear Weather
A. Play proceeds normally.
B. Air Support modifiers for American Attack and Defense Values (11.4.2D, 11.4.3D) are applied during any Clear Weather Impulse.
9.2 Rain
The following changes are in effect during Rain:
A. The US Air Bombardment marker may not be used during a Rain Weather Impulse (12.2).
B. US units suffer a -1 penalty to their MA (4.3.1).
C. US units do not receive the Air Support modifier to their Attack Value (11.4.2D) or Defense Value (11.4.3D) during a Rain Weather Impulse.
9.3 Weather Changes
A. If the US's Sunset DR (6.3.1) equals the current Impulse number, the weather changes (from Clear to Rain, or from Rain to Clear) during the next Japanese Impulse. Exception: The Weather may not change during a bombardment by an American Air, Artillery or Naval Support marker during a Bombardment Impulse (8.1.2).
B. Record the Weather Change by flipping the Impulse marker on the Impulse Track. The new weather status remains in effect until the End Phase of the current turn, or until the US's Sunset DR again equals the current Impulse number. In the latter case the weather changes yet again, and the Impulse marker is flipped once more.
10.0 Movement
10.1 Mechanics of Movement
10.1.1 In General
A. During an Assault Impulse, the attacker chooses one Area to be the Active Area.
B. Units move one at a time. A unit may move from an Area to an adjacent Area, the number of Areas entered during movement being limited by the MA of the moving unit.
C. At any point during the Assault Impulse, units that began this impulse in the Active Area, or enter an Area with enemy units, may attack (11.0) enemy units within the same Area.
10.1.2 Area Activation
All of the units in an Area may move/attack if the attacker has chosen that Area to be its Active Area. Units in the activated Area may move and/or attack until there are no units left to perform an action.
10.2 Movement Costs
A. Movement requires the expenditure of Movement Points (MPs) during an Impulse. A unit may continue to move into adjacent areas until it either lacks enough MPs to enter another Area or it enters an Area occupied by an enemy unit, where it must stop.
B. Movement into an Area incurs the following MP costs (use only the one that applies):
| MPs | Area Entered |
|---|---|
| 1 | Vacant |
| 2 | Vacant adjacent to an enemy unit |
| 3 | Area containing only reduced-strength enemy units |
| 4 | Area containing a full-strength enemy unit |
| All | Japanese-Controlled Area from a Beach Approach Box |
| All | US-Controlled Area from the Japanese Special Units Box |
C. If the Active Area is Contested, friendly units may exit the Area at normal MP costs, so long as the first Area they enter is Free.
D. If a unit has not yet expended any MPs in the Impulse, and lacks sufficient MPs to enter an adjacent Area that it is not otherwise prohibited from entering, it may enter that Area by expending its entire MA.
E. If the attacker wishes to resolve combat within a Contested Area, no movement takes place within the Contested Area. The attacker simply announces the intention to attack and performs the steps listed under Combat Resolution (11.4).
10.2.1 Multiple Area Destinations
A. Units starting in an Active Area may move to and/or attack into different areas during the same Assault Impulse.
B. Attacks made into different Areas do not have to be designated in advance. The attacker may wait for the results of a move/attack before announcing a later move/attack into another Area in the same Impulse by other units starting in the Active Area.
C. Once an Area is attacked, no other units may move into that Area during the same Impulse.
D. Units that begin movement in the same Area do not have to end their movement in the same Area, nor do all units moving during an impulse have to move simultaneously.
10.2.2 Japanese Special Units Movement: Daylight Phase
A. Up to four units may move directly from the Japanese Special Units Box to an Area on the map per Daylight Phase impulse. Only one unit may be placed per Area.
B. Pillbox units may only be placed during the Daylight Phase, and may only be placed into supplied Japanese-controlled Areas.
C. MG and IE units placed during the Daylight Phase may only be placed in Japanese-controlled Areas and may take no further action that impulse.
10.2.3 Japanese Special Units Movement: Night Phase
A. Japanese MG and IE units moving from the Special Units Box to an Area on the map during the Night Phase have additional capabilities. Up to four units may move directly from the Japanese Special Units Box to an Area on the map per Night Phase. Only one unit may be placed per Area.
B. MG and IE units placed during the Night Phase may be placed in any Area, including a US-controlled, non-contested Area. Mandatory Attack rules apply (11.1).
C. Unless required to conduct a Mandatory Attack, Japan may elect to take no further action, or activate just the newly placed MG or IE unit for movement and/or combat, or activate all of the non-Pillbox units in that Area for movement and/or combat.
D. Movement from the Special Units Box to the map during the Night Phase is done one unit at a time. Any movement and/or combat resolution made as a result of a single unit being placed must be completed before any subsequent unit placement, movement, and/or combat resolution.
10.3 Movement Restrictions
The following situations restrict movement:
10.3.1 Overstacking
A. Units may not move into a fully-stacked Area (7.1).
B. Units may retreat through a fully-stacked Area as a result of Combat Resolution (13.2.1).
10.3.2 Exiting a Contested Area
Units within a Contested Area must first move to a Free Area before entering either another Contested Area or an enemy-controlled Vacant Area.
11.0 Combat
A. Only units that begin an impulse in the Active Area may attack. An attack incurs no additional MP cost beyond that for entering an enemy-occupied Area.
B. If the Active Area was already contested at the beginning of the Impulse the units may either exit the Area or attack.
C. All defending units in an Area being attacked can potentially be affected by the combat results of that attack. An attack is resolved only after all units have entered the attacked Area in that impulse. Other units starting in the Active Area not involved in the attack may move, but no additional units may enter the Area being attacked during the current impulse once the attack is resolved.
11.1 Mandatory Attacks
A. Friendly units must make a Mandatory Attack when they enter an enemy-occupied Area that was not Contested at the beginning of the current Impulse.
B. If a Mandatory Attack results in a Repulse (11.4.4) all participating units must retreat (13.2).
11.2 Optional Attacks
Unless required to conduct a Mandatory Attack, the attacker may attack with some, all, or none of its units that entered the Area. When attacking, at least one unit must attack.
11.3 Contested Area
If the Active Area is already Contested at the start of the impulse, all, some or none of the units starting in that Area may attack. If the attacker loses the attack, the attacking units do not retreat and must remain within the Active Area.
11.4 Combat Resolution
A. Attacks are resolved by comparing the Attack Value (AV) of the attacking unit(s) plus a DR (the Attack Total or AT) against the Defense Value (DV) of the defending units(s) plus a DR (the Defense Total or DT).
B. Combat is resolved in the following order:
- Attacker designates the Lead Attacking Unit (LAU).
- Defender designates the Lead Defending Unit (LDU).
- Satchel Charge Call; dr made (Advanced Game, 19.4)
- Artillery Support Call; dr made (Advanced Game, 19.2)*
- Tank Support Call; dr made (Advanced Game, 19.2)**
- Tabulate final Attack Value and Defense Value
- Roll dice (11.4.1) and compute results (11.4.4)
* Once per impulse beginning April 17th the US may make one Artillery Support Call. ** Once per impulse beginning April 18th the US may make one Tank Support Call.
11.4.1 Dice
When resolving combat each side makes a DR.
11.4.2 Attack Value
The Attack Value is equal to the Combat Value of the LAU, plus the adjustments below:
| Adj | Condition |
|---|---|
| +1 | per additional full-strength unit participating in the attack |
| +1/2 | per additional reduced-strength unit participating in the attack (drop fractions) |
| +1 | per battalion Integrity Bonus* |
| +1 | Air Support if US assaults in Clear Weather |
| +1 | Successful Artillery Call (19.2.1) by the US |
| +2 | Successful Tank Support Call (19.2.1) by the US |
| +4 | Successful Satchel Charge Call (19.4.1) by Japan |
* when all four units of a single infantry battalion participate in the same attack
Play Note: The Combat Value of Japanese Pillbox units is marked with an asterisk to indicate they may not contribute to the Attack Value. Rules 11.4.2E, F, and G are used only if playing the Advanced Game (19.0).
11.4.3 Defense Value
The DV is equal to the Combat Value of the LDU, plus the adjustments below:
| Adj | Condition |
|---|---|
| +1 | per unit in addition to the LDU in the defending Area |
| +X | for the TEM (+1 to +4) of the Area being attacked |
| +2 | Air Support if Japanese assault in Clear Weather during the Daylight Phase |
| +1 | Urban Area containing Rubble marker (19.3) |
11.4.4 Computing Results
The result of the attack depends on the difference between the Attack Total (AT) and the Defense Total (DT).
11.4.4.1 Repulse
A. If the AT < DT, the attacker was repulsed and there is no effect on the defender's units. Flip all attacking units to their reduced-strength side if currently full-strength; if already reduced, they are eliminated.
B. Retreat is required in cases of Mandatory Attack (11.1).
11.4.4.2 Stalemate
A. If the AT = DT, flip the LAU to its reduced-strength side if currently full-strength; if already reduced, it is eliminated.
B. Attacking units making a Mandatory Attack (11.1) may not retreat. Defending units may retreat optionally (13.2.3).
C. There is no effect on defending units.
11.4.4.3 Success
A. If the AT > DT, flip the LAU to its reduced side if currently full-strength; if already reduced, it is eliminated.
B. The defender must absorb Attrition Points (APs, 13.1) equal to the difference between the AT and DT. The first AP must be absorbed by the LDU.
12.0 Bombardment
12.1 Bombardment Impulse
12.1.1 In General
A. In a Bombardment Impulse, the attacker activates an Area to be the Target Area.
B. Unlike an Assault Impulse, there is no movement. The Impulse marker does not advance on the Impulse Track during an American Bombardment Impulse.
C. The Daylight Phase may still end, however, if the Sunset DR is less than the current Impulse number. The next action is a Japanese Impulse.
12.1.2 Bombardment Declaration
A. The US may bombard with any one of its Air, Artillery, or Naval Bombardment markers.
B. Japan may bombard with its Artillery Bombardment marker.
C. Place the marker into the Target Area. After Bombardment Resolution (12.5), flip the marker to its Used side and return it to the appropriate bombardment display to show it cannot attack again this turn.
12.2 Air
The American Air Bombardment marker may make an Air Bombardment against any Area on the map. Exception: The American Air Bombardment marker may not be used during Rain Weather (9.2).
12.3 Artillery
A US or Japanese Artillery Bombardment marker may make an Artillery Bombardment against any Area on the map. Exception: A US Beach Approach Box (3.2) may not be selected as the Target Area of a Japanese Artillery Bombardment.
12.4 Naval
The US Naval Bombardment marker may make a Naval Bombardment against any Area on the map. Exception: A Naval Bombardment may not be made against a Contested Urban Area.
12.5 Bombardment Resolution
The attacker chooses one enemy unit in the Target Area as the Primary Target. The Primary Target must take the first AP inflicted, if any.
12.6 Bombardment Attack Value
The AV is the Attack Factor of the attacking Bombardment marker.
12.7 Bombardment Defense Value
A. The DV is the sum of:
- The TEM of the Target Area
- +1 if the Target Area contains a Rubble marker (19.3).
B. The CV of the defending unit(s) is not relevant to bombardment resolution.
C. To resolve a Bombardment, the attacker makes a DR, which is added to the Bombardment AV to form the AT, and the defender makes a DR which is added to the Bombardment DV to form the DT. If the AT is greater than the DT, the defender must take APs (13.1) equal to the difference between the AT and DT.
13.0 Attrition and Retreat
13.1 Attrition Points
A. To satisfy losses suffered as a result of an Assault or Bombardment, the defender removes APs from its units in the defending Area.
B. The first APs must be taken by the LDU or the Primary Target.
C. The defender distributes the remaining AP(s) as desired. Excess APs are ignored.
D. AP may be taken in any combination, except that the LDU or Primary Target must suffer the first AP and that exact losses must be applied whenever possible. Thus, a full-strength unit cannot be eliminated to save a reduced-strength unit if only 2 APs have to be applied.
E. The defender removes APs from an attack as follows:
| APs | Condition |
|---|---|
| 3 | per full-strength unit eliminated |
| 1 | per full-strength unit that flips to reduced-strength |
| 2 | per reduced-strength unit eliminated |
| 1 | per reduced-strength unit that retreats |
13.2 Retreats
The attacker or defender may be required to retreat as a result of combat. Attacking units may only retreat into the Area from which they entered the attacked Area. Exception: Fully-Stacked Areas; see 13.2.2 to determine which Area they retreat to.
13.2.1 Retreat Procedure
Units must retreat one at a time to determine if the Area becomes fully-stacked. If it does, subsequent units must continue their retreat to another Area that is not fully-stacked. In this event, both the attacker and defender must follow the Retreat Priorities to determine the second (or more) Areas to which they must retreat.
13.2.2 Retreat Priorities
If there is more than one Area to which units may retreat the units must retreat based on the following set of priorities:
- A Free Area adjacent to the fewest enemy-controlled Areas.
- A friendly-controlled, Contested Area.
- An enemy-controlled, Contested Area.
- Fully-Stacked Area.
13.2.3 Voluntary Retreat
Some or all of the defenders in an Area being attacked may voluntarily retreat after Combat Resolution, even if the attacker suffered a Stalemate or Repulse result. The LDU does not have to be among the units that retreat.
13.2.4 Retreat Elimination
A unit is eliminated when unable to retreat, such as it is a Pillbox, or per the Retreat Priorities (13.2.2) such as having to retreat off the map into the East China Sea, or ending in a fully-stacked Area.
14.0 Refit
Units can suffer attrition and elimination through Combat Resolution during the Daylight Phase. During the Refit Phase they may recover.
14.1 Refit Phase
Japan conducts its Refit Phase first, followed by the US.
14.2 Vacant Area Control
A Vacant Area that is enemy-controlled becomes friendly-controlled at the beginning of the Refit Phase if it is unable to trace a supply line to a friendly Supply Source.
14.3 Tracing Supply
A. Units wishing to Refit must be able to trace a supply line to a Supply Source.
- Beach Approach Boxes are American Supply Sources.
- Area 16 (Mount Gusuku) is the Japanese Supply source.
B. Units unable to trace supply may not Refit. There are no additional penalties for being unable to trace a supply line.
C. The supply line path may not enter an enemy-controlled Area. It may pass through a friendly-controlled Area contested by enemy units.
D. A Vacant Area under enemy-control still blocks supply.
14.4 Replacement Points
A. Japan receives 1 RP per Refit Phase so long as it controls Area 16 (Mount Gusuku).
B. On April 16th, the US receives 1 RP for the Beach Approach Box adjacent to Area 1 and 1 RP for the Beach Approach Box adjacent to Area 2.
C. Beginning April 17th and for the rest of the game, the US also receives 2 RPs for the Beach Approach Box adjacent to Area 5 and 14.
D. If Areas 1 or 2, or both Areas 5 and 14, are Japanese-controlled at the start of the Refit Phase, only those US units contesting an Area adjacent to a Beach Approach Box may trace supply to the adjacent Beach Approach Box.
E. Either side may receive 1 extra RP during its Refit Phase by spending the Advantage (15.1.3).
14.5 Replacement Costs
RPs may be spent in the following manner.
14.5.1 Eligibility
US and Japanese units must be able to trace a supply line (14.3) to be eligible to take replacements.
14.5.2 Uses
A. 1 RP may be spent to:
- Flip up to two reduced-strength units on the map to full-strength
- Rebuild an eliminated unit at reduced-strength
B. These are the only replacement options. Eliminated units may not be rebuilt at full-strength.
14.5.3 Rebuilt American Units
Eliminated American units may be placed in any supplied US-Controlled Area.
14.5.4 Rebuilt Japanese Units
Eliminated Japanese units may be placed in any supplied Japanese-Controlled Area.
14.6 Accumulation
Any RPs remaining at the end of the Refit Phase are lost. They do not accumulate from turn to turn.
15.0 The Advantage
A. At the start of each impulse, one side always has possession of the Advantage. This is indicated by the Advantage marker with the side of the controlling side faceup in its holding box printed on the map.
B. The US starts the game controlling the Advantage.
C. Control of the Advantage changes through voluntary use by the side possessing it.
15.1 Voluntary Use
During the Reinforcement Phase, the Advantage may be used to declare:
15.1.1 Automatic Reinforcements
Instead of making a dr, Japan may spend the Advantage to receive up to six Special Units of its choice.
15.1.2 Combat Reroll
A. During the Daylight Phase, the Advantage may be used to declare a Combat Reroll. The side controlling the Advantage may use it once per Impulse to force a reroll of any one Assault Impulse Combat Resolution (11.4) or Bombardment Impulse Bombardment Resolution (12.5), before any subsequent action takes place. Exception: Artillery, Tank, and Satchel Charge calls may not be rerolled.
B. There is no guarantee that the reroll will be better; it might even be worse.
C. If the Advantage is used to reroll any DR which would have served as the American Sunset DR, the rerolled DR becomes the effective Sunset DR.
15.1.3 Increased Replacements
During the Refit Phase, the Advantage may also be used to declare increased replacements. One extra RP is received (14.4).
15.2 Advantage Shift
After the Advantage is used, it belongs to neither side until the end of the current phase or impulse, at which time it becomes the property of the side that did not use it.
16.0 April 16th Special Rules
16.1 Reinforcements
There is no Reinforcement Phase on April 16th.
16.2 Movement
The US may activate both Beach Approach Boxes containing units simultaneously during any American Impulse of April 16th.
17.0 Victory Conditions
17.1 Automatic Victory
The US wins an Automatic Victory if at the end of any Impulse every Area on the map contains a US control marker.
17.2 American Operational Victory
17.2.1 Procedure
A. At the end of April 19th, count the number of Victory Point Areas controlled by the US.
B. Japanese Areas have the following VP values:
| VPs | Area(s) |
|---|---|
| 3 | 15, 16 |
| 2 | 11, 12, 13, 14 |
| 1 | 4* |
* controlled during the End Phase of the April 16 Turn (only)
C. At the end of April 19th, count the number of reduced and eliminated US units and subtract 1 VP per combination of five reduced and/or eliminated US units.
D. The US wins if it has at least 10 VPs. Otherwise, Japan wins.
E. Japan does not receive VPs. Victory depends solely on the US VP total unless the US achieves an Automatic Victory (17.1).
17.2.2 Contested Areas Victory Point
The US receives one additional VP if it contests (not controls) both Area 15 (Bloody Ridge) and Area 16 (Mount Gusuku) at the end of the game.
18.0 Side Determination
18.1 In General
If both players wish to play the same side (5.1.2), this rule is used to decide which side each player commands and to compensate for either player's perceptions regarding the relative chances of each side.
18.2 Bids
A. Each player submits a secret, written bid to command the Allies. The high bid receives the Allied side with the bid (ranging from -10 to +10) used to modify the Japanese Special Units DR during the Reinforcement Phase (6.2.1). Treat modified results of less than 2 as 2 and greater than 12 as 12.
B. Resolve tie bids by making a dr with the high roller receiving their preferred side.
C. Victory conditions remain unchanged.
19.0 Advanced Game
A. If players are already familiar with the Basic Game (5.1) or already have experience playing Area-Impulse games, it is recommended that these additional rules be incorporated into play.
B. Kamikaze, Artillery, Tank, and Satchel Charge markers are marked with an asterisk because they are not used in the Basic Game.
19.1 Kamikaze Attack
A. During setup Japan receives a Kamikaze Air Bombardment marker. Place the marker in its holding box printed on the map.
B. The Kamikaze marker is a special Bombardment marker with a Combat Value of 4. Japan may declare a Bombardment Impulse and select either an unused American Naval Bombardment marker or a Beach Approach Box as its Primary Target. These are the only uses for the Kamikaze marker; it may not attack anything else.
C. The DV of the American Naval Bombardment marker for purposes of a Kamikaze Attack is 6 and the DV of a Beach Approach Box is also 6. There are no modifiers.
D. If the Japanese bombardment was a success and inflicts at least one AP, one of two things happens. If American Naval Bombardment marker was the Primary Target, flip it to its Used side; it is no longer available that turn.
- If a Beach Approach Box was the Primary Target, the US receives one less RP during their next Refit Phase.
- The Japanese Kamikaze marker is returned to its display box and flipped to its Used side whether or not its bombardment is successful and is no longer available that turn.
E. Flip the Kamikaze marker back to its available side along with other bombardment markers during the End Phase of the turn (6.6).
19.2 Artillery and Tank Support
The American 304th Artillery Battalion marker becomes available during the Reinforcement Phase of April 17th, and the US 706th Tank Battalion marker becomes available during the Reinforcement Phase of April 18th. Place each marker in its holding box printed on the map once it becomes available.
19.2.1 Support Placement
A. The US has the option to make one Artillery Support Call and/or one Tank Support Call per Impulse to modify an American AV. The call for support may be made in any Area where Combat Resolution (11.4) is taking place.
B. Place the marker in the desired Area Used side faceup.
C. The US may make a call for both Artillery and Tank Support in the same Area, or Artillery Support Call in one Area and a Tank Support Call in another Area.
D. Artillery and Tank Support markers may not attack by themselves.
E. The US makes a separate dr for each call.
| Roll | Result |
|---|---|
| 1-3 | Support is not available. |
| 4-6 | Support is available. |
F. Apply the following DRMs:
| DRM | Condition |
|---|---|
| -1 | Tank Support Call made in an Urban Area (square identifier) |
| -1 | Tank Support Call made during Rain Weather (9.2) |
G. If the Support Call is not successful nothing happens.
H. If the Support Call is successful, place that Support marker into the Area where combat is being resolved.
I. After combat is resolved flip the Support marker from the map back to its available side and return it to its holding box printed on the map.
19.2.2 Combat Value
A. A successful call for Artillery Support adds +1 to the US AV (11.4.2E) when resolving combat.
B. A successful call for Tank Support adds +2 to the US AV (11.4.2F) when resolving combat.
19.3 Rubble
Rubble markers may only be placed in Urban Areas.
19.3.1 Rubble Creation
A. Rubble may be created during either an Assault Impulse or a Bombardment Impulse. If the attacker's DR, plus the Area's TEM, is greater than 11, place a Rubble marker in that Area.
B. Once placed, Rubble may not be removed for the rest of the game.
19.3.2 Rubble Effects
Rubble has the following effects:
19.3.2.1 Movement
Units must immediately stop and move no further that Impulse upon entering any Area containing a Rubble marker.
19.3.2.2 Combat
Rubble increases the DV of an Area by +1 (11.4.3E, 12.7B).
19.4 Japanese Satchel Charges
During initial marker setup (5.2), place the Japanese Satchel marker in its holding box.
19.4.1 Satchel Charge Placement
A. Japan has the option to make one Satchel Charge Call in any Area where a Japanese Attack is taking place. The Satchel Charge marker may not attack on its own.
B. Japan makes a dr.
| Roll | Result |
|---|---|
| 1-4 | Satchel Charge Support is not available. |
| 5-6 | Satchel Charge Support is available. |
C. Apply the following DRMs:
| DRM | Condition |
|---|---|
| +1 | Satchel Charge Call made during Rain Weather |
| +1 | Satchel Charge Call made during Japanese Night Phase |
19.4.2 Combat Value
A successful Satchel Charge Call adds +4 to the Japanese AV (11.4.2G) when resolving combat.
20.0 Optional Rules
20.1 Historical Figures
A. During initial marker setup, place the Ernie Pyle and Major Igawa markers in the April 16th box of the TT.
B. Once per turn, both sides may place their marker in any Area where Combat Resolution (11.4) is taking place, adding a +1 to the final AV.
C. Placement occurs after any die rolls made for Artillery, Tank, or Satchel Charge placement. Placement is automatic; no dr is required.
20.2 Historical Figure Death
A. If the final Attacker and Defender Combat Resolution DR are identical, flip the marker to its KIA side. It remains in the Area it was placed into, eliminated, for the rest of the game.
B. Otherwise return the marker to the TT and place it in the space for the following turn.
21.0 The Extended Game
Those wishing to extend play beyond April 19th may agree to the following variations.
21.1 April 19th Victory Check
If the US has not won an Automatic or Operational Victory by the End Phase of April 19th, play continues. The US must win an Automatic Victory by the last Impulse of April 22nd, otherwise Japan wins.
21.2 American Naval Withdrawal
The American Naval Bombardment marker is permanently removed from play during the April 19th End Phase.
22.0 Index and Glossary
| Term | Meaning/Abbreviation/Section(s) |
|---|---|
| Active Area | The Area which the attacker has selected to conduct either an Assault or Non-Assault Impulse. |
| Adjacent | Areas that share a common boundary are adjacent. |
| Advanced Game | 19.0. |
| Advantage | The temporary edge one side has over the other, yielding certain benefits to the owner when spent; 15. |
| Air Bombardment | 12.2. |
| Area | Any of the 16 irregularly shaped spaces on the map, used to regulate movement and combat; 3.1. |
| Artillery | 12.3. |
| Assault Impulse | A declared impulse during which the attacker may move and attack. |
| Attack Total (AT) | The sum of the Attack Value and a DR. |
| Attack Value (AV) | 11.4.2. |