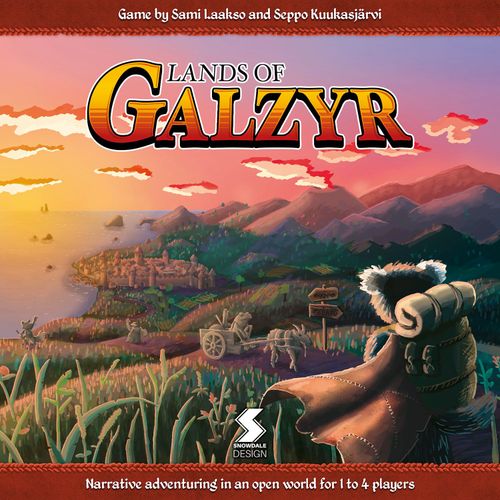
Lands of Galzyr
Lands of Galzyr Rulebook
Table of Contents
Table of Contents
Game overview
Lands of Galzyr is a story-driven adventure game where you explore a lively, open, and adventure-filled world. As an adventurer, your goal is to earn prestige, which represents your renown in Galzyr and among your peers. This is achieved by completing quests and performing noteworthy feats.
Thanks to a saving mechanism, the game world is persistent, meaning that in the next game you continue your adventures right where you left off. This also means your actions can have consequences that follow you to the next game and beyond.
Play competitively or co-operatively
When playing with 2 or more players, you will choose whether to play competitively or co-operatively at the start of each game. Either way, the game mechanics stay the same, but the experience is drastically different. We recommend trying both to see which one you like more.
Solo games function like co-operative games.
Digital storybook
The game uses a digital storybook called the Book of Adventures, which you can access at stories.daimyria.fi. It is a web application that can be used online or alternatively downloaded and then used without internet connection.
The storybook stores no information during or between games. Your progress is tracked and saved with the physical components.
In each of your turns in the game, you will choose an available scene and play it using the Book of Adventures. Each scene is a dynamic story in which you make decisions and attempt to use your skills to succeed in different challenges.
While you play a scene, the person reading it from the book is called the story master.
If you have not already, you should now read the separate welcome letter! It will guide you through assembling some of the game's components before your first game.
Backstory
You can read about different aspects of the game world below to learn more about the setting.
The exciting world of animalfolks
In the world of Daimyria, intelligent animalfolks have risen to build civilisations, each with their own defining traits and unique cultures. There are reckless polecats, scheming magpies, enthusiastic turtles, and many other colourful folks with their own attitudes towards life.
In the current Age of Trade, animalfolks are more interconnected than ever before. The discovery of steam power and other great inventions have transformed society, easing travel and supercharging industry. This newfound prosperity has brought stability and co-operation, as well as unprecedented prestige to capable merchants. However, even amidst all that, some folks have never lost their love for adventure.
Meet the adventurers
Four adventurers, each from different corners of the world, have made their way to Galzyr. Each one starts their first game with a unique quest that tells the story of their arrival and the challenges that await them.
The adventurers' backgrounds give them different strengths and weaknesses at the start, but you decide the direction they go and the skills they'll hone. However, each adventurer has their own unique once-per-game ability that is not available to anyone else.
- Bumir is a tough-as-nails polecat who is no stranger to adventures; he's been on one for decades. A fearless, wandering soul, he is always after the next forgotten ruin or buried treasure that catches his eye. His latest find has led him to Galzyr, the home region he left behind a long time ago.
- Mor is a boisterous frilled lizard from Australia who loves nothing more than a good story. Sociable to a fault, he lives for the thrills of hearing others' tales and talking their ears off in turn. But he has never forgotten where his passion originates from and has journeyed to Galzyr to find the very source.
- Aysala is a resourceful kingfisher whose disposition and keen instincts have led her into and out of quite some trouble. Growing up an orphan in the streets of her hometown in Europe, she learned to rely on and trust only herself. That is, until a stranger showed her a way out — and offered a new start in Galzyr.
- Keridai is a scholarly newt keen on uncovering the mysteries of the world. Yearning for something to challenge her immense cognitive abilities, she typically follows trails of breadcrumbs left in ancient manuscripts. However, a curious request has lured her away from her books in the Middle East and into Galzyr.
What's going on in Lands of Galzyr?
Over the years, many seekers of adventure have set their sights on Galzyr, a diverse region by the Black Sea where Europe and Asia meet. And Galzyr has only one thing to say in response: they've come to the right place. Being a polecat territory, it is a place where boldness and risk-taking are held in high regard, and fame naturally follows those who brave the unknown and leave their mark on the world.
Whether or not Bumir, Mor, Aysala, and Keridai can make it in these strange and tumultuous lands remains to be seen. Where their adventures take them, and should they work together or not, is all up to you.
Adventurers
The game's four adventurers are introduced above. You can play a different one from game to game, and different players can drop in and out between games, but we recommend you stick to the same adventurer every time you play. That way you can continue your story and experience the consequences of your actions.
Each adventurer has their own adventurer board, which you use to keep track of your skill marks, inventory, and gold. Whenever you receive or spend gold, rotate the gold dial on your board accordingly. The maximum amount of gold you can have is 20, and your gold is saved between games just like your cards. An adventurer starts their first game with 10 gold.
Each adventurer also has a special ability, which you can use once in each game. These are the adventurer status cards #000 (Bumir), #000 (Mor), #000 (Aysala), and #000 (Keridai) — the card matching your adventurer's icon.
The adventurer board shows the adventurer's name, icon, and animalfolk; their tags; the gold dial (starting at 10); a save effect ("Take X gold from the library"); the skill marks; and the inventory. Each adventurer also has an adventurer figure and a prestige token.
Skills and skill marks
There are 6 different skills in the game that form the skill circle on your adventurer board: Thievery, Might, Survival, Knowledge, Communication, and Perception. Each skill represents a different facet of your adventurer's abilities, and adjacent skills have synergy with each other. You will use the skills to tackle various challenges you come across on your adventures.
The skills are:
- Thievery — Take advantage of the dextrous and cunning arts.
- Might — Resolve problems with strength and martial ability.
- Survival — Persevere over obstacles and thrive outdoors.
- Knowledge — Rely on your memory and intelligence.
- Communication — Persuade others with your words and presence.
- Perception — Stay vigilant and discover the unseen.
Each adventurer is better prepared for some challenges than others. This preparedness is represented by the skill marks on your adventurer board. You always have a total of 4 skill marks, and each skill can have up to 2 marks.
During the game, you will have opportunities to swap your skill marks for different ones, helping you adjust to upcoming challenges or your preferred playstyle.
Skill checks
When you face a challenge, you often have to perform a skill check by rolling dice. The five base skill dice are your baseline, and while you can succeed with them, harder checks are exceedingly difficult without additional help.
Your skill marks grant you access to the corresponding advanced skill dice. Compared to the base skill dice, these are vastly superior for their appropriate skill and good for the adjacent skills as well.
Additionally, items found during your adventures, among other things, can help you in skill checks.
Cards
This section goes over the different card types. To avoid spoilers, most cards shown in the rulebook do not appear in the actual game.
All card effects are mandatory unless stated otherwise. In case of rule conflicts, the text on the cards overrides this rulebook.
Cards in play are kept faceup. The quest and event cards are handled differently, explained in detail in their own sections.
Many cards as well as the Book of Adventures use bolded cyan keywords, which are explained at the end of this rulebook.
Card trays
While not in play, cards are kept in the two card trays, where the dividers and the cards behind them form different sections:
- The library is the largest and most often used section.
- The vault is a less often used temporary storage.
- The save slots are used to preserve the state of the adventurers (Bumir, Mor, Aysala, Keridai) and world (global) between games.
- The quest slot holds only quest cards and is explained later.
All cards in the library and vault are kept in numerical order (unlike in other sections). If multiple cards have the same number, their relative order does not matter.
To browse the trays easily, keep card numbers facing forward and up. The game tells you when to take cards from the different sections of the trays or place cards into them. When you do so, try to only look at the card numbers.
A card with a specific number can be taken from the trays in a few different ways:
- Random (e.g. "Random 805"): Take 1 random card with the indicated number.
- Any (e.g. "813"): Take any 1 card with the indicated number (either there is only one of them or they are all identical).
- Matching icon (e.g. "827"): Take the card whose icon matches the active player's adventurer icon (shown on their adventurer board).
Please be careful and read the instructions closely when you manage the card trays. Taking a wrong card or placing a card in the wrong spot can have far-reaching unintended consequences.
Quest cards and quest slot
Quest cards provide scenes which you can complete for rewards, specifically being the best way to earn prestige. You can gain quests in various ways, including the noticeboard, which always has a few you can pick up. Keep the quests you gain in your hand.
While on the noticeboard, the public side of the quest card should be facing upwards. When a quest is in your hand, you can read its private side and ignore its public side. If you want to, you can show the private side of any of your quests to any other player.
A quest card has: a card type, card name, card number, description, effects, and abandon effects on its private side; and a card name, pickup location, description, and effects on its public side.
You can pick up and also abandon quests during your turn as long as you are not in the middle of a scene.
- To pick up a quest, your adventurer figure must be at the pickup location shown on the quest card's public side.
- To abandon a quest, resolve its abandon effects on its private side. You can have a maximum of 3 quest cards. If you ever have 4 or more, you must abandon quests until you are down to 3.
The quest slot holds upcoming quests. Whenever the noticeboard has 2 or fewer quests, immediately fill it back to 3 from the front of the quest slot but avoid looking at the private sides of the cards.
When quest cards are placed to the quest slot, they are placed to the back of the slot.
Item cards
Item cards provide various effects, which are usually used during skill checks. Sometimes to use the effect, you have to discard the item, returning it to the library.
Each item also has a gold value, which is used when the item is bought or sold, and tags, which can affect a scene in various ways.
You can have a maximum of 3 items in your inventory, located below your adventurer board. If you ever have 4 or more, you must discard down to 3. Before discarding excess items, you can still use any effects that can be used at any time.
During your turn, you may freely discard items from your inventory, even if you have room for all of them.
Companion cards
During your adventures, you may find companions who will temporarily join you. They are represented by companion cards, and how long they stay with you depends on the companion.
You can have as many companions as you can find. Keep your companions near your adventurer board. Companions have tags as well.
Adventurer status cards
Adventurer status cards are various physical, mental, and other states you can temporarily have during the game.
You can have any number of different statuses, but you cannot have multiple copies of the same one. If you would gain a status you already have, treat it as if you just gained it again (such as resetting any timed effects). Keep your statuses near your adventurer board.
Adventurer statuses can have tags as well.
Local status cards
Various short-term incidents can take place in Galzyr. These are represented by local status cards placed on the game board.
A local status card always affects, and can be accessed from, some space on the game board. The space is specified when the card is brought into play. Keep the card's top left corner pointed to that space.
Global status cards
Global status cards have effects that can affect all adventurers and the entire game. When one comes into play, place it next to other global statuses within everyone's view.
Event cards
Event cards list shorter scenes with different prerequisites. Event cards in play are kept facedown in the event deck.
When you take an event, the story master draws an event card from the top of the event deck and selects the first scene from the top whose prerequisite is met.
The scene always says where to place the drawn event card afterwards.
Location cards
The 12 location cards form the 8 locations on the game board, offering scenes that you can take when you are at that location.
Each location has a name on the board and is treated as a single space consisting of 1 to 3 cards. Location numbers, terrain icons, and available scenes on those cards are shared within the location.
Both the game board and location cards are two-sided (summer and winter), so make sure to always use the appropriate side of each.
Timed effects and calendar
Cards can have blue timer boxes, whose effects are resolved after a certain number of rounds. You keep track of the rounds using the day token on the calendar at the bottom of the game board.
When a card with a timer box enters play, place any unused timer token on the calendar's day slot as many days forward from the day token as the number shown on the timer box. If there are already tokens on that slot, place the new one on top. Place the token's pair on the number in the timer box.
The effect is resolved when the day token reaches the timer token. The effect may also be delayed or hastened, moving the timer token further or closer to the day token but never past it. The days loop from Sunday to the next row's Monday.
When a card with a timer box is removed from play, remove its timer tokens from the card and the calendar.
Game setup
- Place the card trays holding the library, vault, quest slot, and save slots within everyone's reach.
- Each player chooses an adventurer and takes all cards from their adventurer's save slot but keeps their cards aside until step 11.
- Take all cards from the global save slot and sort them by card type. They will be set up next.
- If there are 2 or more players, choose whether you want to play competitively or co-operatively. Place the global status cards faceup within everyone's view. Read the cards now, as some of them affect the setup. (Timer tokens will be placed in step 10.)
- Place the game board in the middle of the playing area, showing either the summer or winter side according to the month global status card. Place the location cards and any local status cards on the game board on their appropriate places.
- Place the event cards facedown within everyone's reach to form the event deck. The event deck is not shuffled during setup.
- Place the quest cards public side up in a row within everyone's reach to form the noticeboard. For each quest on the noticeboard, place a on the corresponding pickup location on the game board. Place the remaining quest tokens near the noticeboard. Whenever the noticeboard's contents change, update the quest token locations to match the noticeboard.
Adventure phase
In the adventure phase, each player takes one turn in clockwise order, starting with the player who has the starting player token. The player currently taking a turn is called the active player. During your turn, you first move and then resolve a story scene.
On your turn, while not resolving a scene, you may do any of the following any number of times (even if you have moves left or at the end of your turn):
- Trade with other players if your figures are on the same space. While trading, both of you may give and exchange gold and items. You must agree to the trade before executing it. Any promises about future trades or actions are not binding.
- Pick up quests from the noticeboard if your figure is at the quest's pickup location. Immediately fill the noticeboard back to 3 quests from the front of the quest slot.
- Voluntarily abandon any of your quests.
Ignore the public side of the quests in your hand. If you ever have 4 or more quests, you must abandon quests until you are down to 3. Whenever the noticeboard's contents change, remember to update the quest token locations to match the noticeboard.
Round overview
- Adventure phase — Each player takes a turn.
- Travel — Move your figure up to 2 spaces.
- Story — Resolve a scene.
- Calendar phase — Advance to the next day.
1. Travel
To travel, move your adventurer figure up to 2 times to an adjacent space on the game board connected by a route. This number can be modified by the movement keyword. Remember that you can trade gold and items and pick up quests even between your moves. If your figure is off the game board for any reason, you cannot move.
Each location is a single space even if it consists of two or more location cards. Each space can hold any number of adventurer figures.
To measure the distance between two spaces, determine the least number of moves needed to travel from one to the other.
Co-op travel mode: If you want to make it easier to travel together in co-operative play, you can instead resolve a shared travel phase where everyone resolves their moves freely. This phase is considered to be everyone's turn. Afterwards, each player resolves a scene as normal. This makes certain skill checks easier by allowing you to partner more regularly, so we recommend also using the challenge mode if you like to travel together a lot.
2. Story
After travelling, you must begin and resolve a single scene, which the story master will read to you.
Choosing a scene
First, check if any scenes available to you are mandatory, marked with a lightning bolt icon. If yes, you must choose one of them.
If you do not have any mandatory scenes, you can pick the scene yourself from multiple available sources:
- Quest card you have (you can tell the scene number to the story master without showing the card)
- Adventurer status card you have
- Companion card you have
- Location card with your figure
- Local status card attached to the space with your figure
- Event card from the top of the event deck
To choose a scene, you must meet any prerequisite it may have, shown in its scene box. Usually the prerequisite specifies where your adventurer figure must be on the game board.
If you cannot choose anything else, or do not want to, you can begin a scene from an event card. If you do so, the story master draws one from the top of the event deck, privately looks at it, and selects the first scene from the top whose prerequisite is met. The story master keeps the drawn event card for the duration of the scene. The scene always says where to place the card afterwards.
Each scene has a unique four-digit scene number. Card numbers have only three digits.
Book of Adventures
The Book of Adventures is a web application that you can use on any device with a modern internet browser. We recommend a tablet or a phone, as those are easier to pass around. Feel free to use multiple devices if you want, but make sure each device shows the correct month and day at all times.
Go to stories.daimyria.fi with each device you want to use. You can also download the book so you can use it even without internet access. The instructions for that can be found in the book itself.
Each scene in the book is a story that the story master reads to the active player. In solo games those are the same person, but otherwise the story master should be another player as listed below:
- 2 players: the other player
- 3 players: the player to the right of the active player
- 4 players: the player opposite to the active player
As the story master, you do not make any decisions during the scene. Your role is to present the story to the active player and resolve the actions the book tells you to do, such as taking cards from the library.
The book also includes Extras: an introductory short story, a fun trivia quiz, and spoiler-free examples of how the book works.
Reading a scene
The story master selects the chosen scene in the Book of Adventures and reads it aloud. They should specify when they read story, effects, or different options along with associated skill checks, difficulties, and gold costs.
The effects in the book must be resolved as completely as possible. Different effects affect different players as indicated by these icons:
- Active player
- Partner (if there is one — explained under Partner)
- Everyone
Texts written in turquoise are an exception and are meant exclusively for the story master. These do not have to be read aloud but instead only resolved by the story master.
The story master often presents you with several options, and you must choose one to proceed. If you want, the story master can also show the options to you. To choose an option with a gold cost, you must spend the listed amount. The story master then selects your chosen option and continues reading. Options often have skill checks, which are explained next.
Questions
At times, the Book of Adventures asks a question. You must answer them truthfully, the story master selecting the appropriate answer. However, the story master answers turquoise questions secretly.
Questions often give you new options, most commonly from having a certain tag. These special options have a starry effect, and the story master should specify if one is available. If you choose one (or it is the only one available), you cannot voluntarily discard the card that gave you the option before or during that option.
Skill checks
Options often involve skill checks, using one of the 6 skills with multiple possible outcomes. Your performance in the check determines which outcome you will have.
Skill checks have 4 difficulty ratings: easy, medium, hard, and unknown. Each of them requires a different number of successes. While these numbers are the minimum needed to avoid failure, there are usually even better outcomes if you manage to get a higher number of successes!
| Difficulty | Easy | Medium | Hard | Unknown |
|---|---|---|---|---|
| Successes required | 1 | 2 | 3 | ? |
A skill icon on a die represents a success for that skill. Advanced skill dice have double successes too.
To perform a skill check, take 5 base skill dice to form your dice pool. Each skill mark on your adventurer board lets you swap one base skill die for a corresponding advanced skill die. Generally, you want to use advanced skill dice of the tested skill and those adjacent to it.
Then roll all dice in your dice pool. After the roll, you may once reroll all dice in your dice pool.
Your item, companion, and adventurer status card effects influence skill checks. They can be used before or after rolling or rerolling all dice in your dice pool. Each applicable effect can be used once per skill check.
A star represents success in the current skill check. A broken star represents failure and reduces the number of successes. The total number of successes cannot go below 0.
You may use an effect inside a brown verb box only if one of its verbs appears in the option you chose. Purple verb boxes are mandatory if you chose a matching option.
After you have resolved the skill check, do not touch the dice until the next check or until the scene ends. The story master reveals the outcomes of the check in secret, counts the successes you got, and selects the first matching outcome from the left.
The story master then continues to read the story aloud and resolve any possible effects like before until you reach the end of the scene.
Skill check summary
- Create your dice pool
- Roll dice
- Reroll all dice (optional)
You may use your card effects at any time during the skill check. To resolve: select the chosen option; reveal outcomes after resolving the skill check; select the leftmost matching outcome; then read the story and resolve all possible effects in the outcome.
Partner
If a scene has a handshake icon, you can resolve it by yourself as normal or with a single partner. Having a partner can make you more likely to succeed, but the partner will also receive rewards if you do.
To begin the scene together with you, another player must be on the same space and agree. This does not count as a turn for the partner.
Remember that you can still only begin scenes available to you. You cannot begin scenes from other players' cards. You must meet any prerequisites the scene has by yourself.
You make all the decisions during the scene while your partner may at any point choose to give you access to any of the following possessions. You may use them as if they were yours until the end of the scene:
- Any skill marks
- Any items
- Any companions
- Any adventurer statuses
- Any amount of gold
- Any tags on their adventurer board
In skill checks, the maximum number of each advanced skill die is limited to 2, just like when resolving a scene without a partner.
You may also trade gold and items with your partner at any time during the scene.
Challenge mode: If you want the game to be more challenging, when playing with the co-op travel mode for example, you can enable the challenge mode in the storybook settings. It makes the skill checks more difficult in scenes where you can have a partner. The minimum number of successes required in these challenge skill checks is raised by one, as shown below.
| Difficulty | Easy | Medium | Hard | Unknown |
|---|---|---|---|---|
| Regular skill check | 1 | 2 | 3 | ? |
| Challenge skill check | 2 | 3 | 4 | ? |
Calendar phase
After all players have taken a turn, it is time for the calendar phase. Move the day token to the next day on the calendar, and advance to the next day in the Book of Adventures as well.
If there are timer tokens on the new day slot, resolve their associated timed effects one by one starting with the topmost token.
Now you are ready to start a new round. The player with the starting player token begins a new adventure phase by taking their turn. The starting player token stays with the same player the whole game.
Game end
The game ends after a predetermined number of rounds. This round limit depends on the player count as shown below and on the Discord and Harmony global status cards.
| Player count | 1 | 2 | 3 | 4+ |
|---|---|---|---|---|
| Rounds | 8 | 7 | 6 | 5 |
Competitive game
If you play competitively, the player with the most prestige at the end of the game is the winner. If two or more players are tied for first place, they share the victory.
When the game ends, begin scene #0150 as shown on the Discord global status card. The winner is the active player during the scene. If there are multiple winners, treat all of them as active players.
Solo or co-operative game
If you play solo or co-operatively, the total amount of prestige you earn determines how successful you are.
When the game ends, begin scene #0200 as shown on the Harmony global status card. Discuss and decide together who was the most valuable player or made the most memorable plays during the game. That player should be the one to read the scene aloud.
Saving the game
Once the game is over, you must perform the following steps to save the state of the adventurers and game world. These same instructions can also be found in the Book of Adventures.
In Lands of Galzyr, your actions have consequences that follow you from one game to the next. Thus the game has to be packed back into the game box in a specific way.
Note that the cards in save slots do not have to be in numerical order.
- Remove all timer tokens from the calendar and from cards without resolving their timed effects.
- Resolve all save effects on the adventurer boards and cards in play:
- Adventurer boards
- Items
- Companions
- Adventurer statuses
- Local statuses
- Global statuses
- Locations
If a card has a save effect, it is always at the bottom of the card.
Follow the appropriate steps below depending on whether you want to continue playing later or to start a new game right away.
Pack the game into the box
Make sure to perform steps 1 and 2 first.
- Place each adventurer's cards to that adventurer's own save slot:
- Quests
- Items
- Companions
- Adventurer statuses
- Place all remaining cards to the global save slot:
- Quests from the noticeboard
- Local statuses
- Global statuses
- The event deck
- Locations
- Pack all components into the game box, making sure not to adjust the gold dials or skill marks on the adventurer boards.
Continue playing
Make sure to perform steps 1 and 2 first.
- Take all cards from the global save slot.
- Place all global status cards faceup and read them.
- If needed, flip the game board and location cards.
- Place any local status cards on their appropriate places.
- Reset each player's prestige to 0.
- Randomise the starting day using the Book of Adventures, and adjust the day token.
- Place timer tokens for each timed effect, placing the tokens for the adventurers' cards last.
- Randomise the starting player and place your figures on location cards in clockwise order, possibly picking up quests.
Resetting the game
Lands of Galzyr is designed to be played as an ongoing experience where your choices echo in the following games. However, it is possible to reset the game to its original state. You can also reset just individual adventurers if, for example, a new player joins the game and would like to start with a clean slate.
You can reset only between games when all cards are in the trays.
If you have one or more expansions, you have to follow the reset instructions in their booklets instead.
Reset an adventurer
- Take all cards from the chosen adventurer's save slot. Resolve abandon effects of all quests. Note that the noticeboard and the event deck are currently in the global save slot in case any effects put cards in those. Place the rest of the cards to the library.
- Take all cards with the adventurer's icon (next to the card number) from the global save slot and other adventurers' save slots. Read the cards, resolve all save effects on them, and then place the cards to the library.
- Move cards #000 and #111 with the adventurer's icon from the library to their save slot.
- Set the adventurer's gold to 10.
- Reset the adventurer's skill marks as shown on the adventurer board diagrams (Bumir, Mor, Aysala, Keridai each have a specific starting arrangement).
- If you are resetting Mor, and card #296 is not already in the vault, move it there (from the library or any adventurer's save slot).
- If you are resetting Aysala, and card #297 is not already in the vault, move it there (from the library or any adventurer's save slot).
Reset the whole game
- Move all cards to the library:
- From the vault
- From the quest slot
- From all save slots
- Roll the 12-sided die, and move the card with the rolled number from the library to the global save slot.
- Take cards #064 – #089 (26 in total) from the library. Shuffle the 12 event cards before placing all 26 cards to the global save slot.
- Take cards #127 – #148 (22 in total) from the library, shuffle them, and place them to the quest slot.
- Move the 3 frontmost cards from the quest slot to the global save slot.
- Take cards #296 – #299 (8 in total) from the library and place them to the vault.
- Reset all adventurers by performing steps 3, 4, and 5 in the previous section for each of them.
Keywords
Abandon — To abandon a quest, resolve the effects listed at the bottom of the card. You may abandon quests voluntarily during your turn while you are not resolving a scene.
Delay — To delay a timed effect, move its timer token further from the day token as many days as specified, on top of any previously placed tokens. Delaying always refers to the timed effect on the same card unless stated otherwise.
Discard — When a card gets discarded, return it to the library. If a card has multiple effects which require discarding the card, only one of those effects can be resolved. Discarding always refers to the card it is written on.
Hasten — To hasten a timed effect, move its timer token closer to the day token as many days as specified, on top of any previously placed tokens. If the timer token reaches the day token, resolve the timed effect immediately. Hastening always refers to the timed effect on the same card unless stated otherwise.
Movement — Movement modifies the number of spaces you can move while you travel. This number can never go below 0.
Iconography
Skills and verbs
- Thievery, Might, Survival, Knowledge, Communication, Perception — the 6 skills.
- Success in a skill check (a star).
- Failure, reducing the total number of successes (a broken star).
- Verb (brown box) — You can use the effect in a verb box if one of its verbs appears in the chosen option.
- Verb (purple box) — You must use the effect in a mandatory verb box if one of its verbs appears in the chosen option.
- Skill marks grant the use of advanced skill dice.
Card types
Item, Quest, Local status, Adventurer status, Companion, Event, Global status.
Terrain
Grassland, Hill, Settlement, Forest, Mountain, Pier.
Adventurers
Bumir, Aysala, Noko & Umi (in an expansion), Mor, Keridai, Yamej (in an expansion).
Storybook effects
- Book of Adventures effects that affect only the active player.
- Book of Adventures effects that affect only the partner.
- Book of Adventures effects that affect everyone.
Miscellaneous
- The scene number is used to find the right scene in the Book of Adventures.
- You must choose a mandatory scene if you have one available.
- In scenes marked with the partner icon, another player may help you as your partner if your adventurer figures are on the same space.
- Cards and adventurer boards have tags, used in the Book of Adventures.
- Abandon (quest).
- Card.
- When asked to take a card with the adventurer icon, take the one matching the active player's adventurer.
- Most cards are kept in the library, in numerical order.
- Some cards are kept temporarily in the vault, in numerical order.
- Global save slot.
- Save effects are resolved at the end of the game.
- Gold.
- A skill die (all 6-sided dice).
- The 12-sided die.
- Location number.