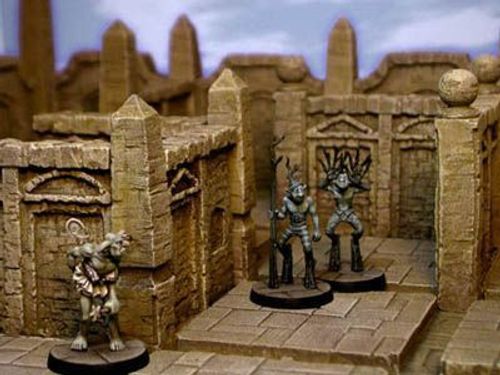
Labyrintus
Labyrintus Rulebook
Table of Contents
Table of Contents
The Labyrinth
The Labyrintus board is made up of a grid of 7x7 tiles. Each tile is quartered into 4 spaces which are used for the movement of miniatures. For example a move of '4' would mean counting 4 of these quarter spaces.
Outer Walls
The four outer sides each contain one doorway. These outer walls and doorways never move during a game.
Inner Walls
The inner walls are made up of 36 pillared walls and 10 fill walls.
- The pillared walls stand in the gutters between the tiles with the pillar in the intersection.
- The fill walls have no pillar and can be placed in the gutters between two pillars.
- The gutters have no effect on game play and may be moved or fought across freely.
The Dice
Labyrintus players each have 4 special turn dice (TD) and 4 ordinary six sided dice (D6).
- The special turn dice have six sides, two sides with a square indicating a wall and four sides with dots indicating a move.
- The D6 dice have six sides with number from 1 to 6.
How to Win
To win a game of Labyrintus, you must be the first player to get four miniatures through the labyrinth board. Each player controls a team of four miniatures. Each player is assigned an Entry Door, their Exit Door is the door opposite. The winner is the first player to get all four of their miniatures through the Labyrinth from door to door.
Setting Up
Set up the 4 outer sides. Each must contain one door. All four sides must have the same configuration of pieces.
Set up the inner labyrinth any way you wish using all 36 interior pillared walls.
The 10 fill walls are used once play has commenced. They have no special significance other than to fit in a space between two pillars.
Starting
All miniatures start off the board.
Roll a D6 dice to determine who goes first.
Ending the Game
Make sure that even when a player 'wins' by getting all four of their miniatures off the board that the final turn round has been completed to ensure all players have had an equal amount of turns. The remaining players may continue to play to determine second, third etc. if they wish.
Entering and Exiting the Labyrinth
A miniature may enter the Labyrinth by moving from the outside of the Labyrinth onto either of the two spaces touching their entrance doorway at the beginning of its turn. A miniature may exit the Labyrinth from either of the squares touching their exit doorway. Once a miniature has moved through the exit it cannot enter again.
Movement of Miniatures and Walls
To move your miniatures through the labyrinth, roll four special turn dice and look at the result.
Wall: A square indicates a wall. Each square rolled allows a player to add OR remove any one of the inner Walls; either one of the Pillared Walls or Fill Walls. The outside walls and doorways can never be moved. The walls may be added or removed from anywhere on the board regardless of the proximity of miniatures.
Move: Dots indicate a move. One move allows a player to move any one of their miniatures up to four quarter square spaces. Miniatures do not have to move the full four spaces. They may choose not to move at all.
Miniatures may not move diagonally or through other miniatures or walls.
Distribution of Moves
The Dot dice can be allocated among a player's miniatures anyway they like. A player may choose to allocate up to four Dot dice to one miniature allowing the miniature to move up to sixteen spaces. However one Dot dice cannot be split between two miniatures, it cannot be used to move two different miniatures two squares each. To keep track of what dice have been used in a turn it is helpful to actually remove them as they are used.
Once a miniature stops moving in order to fight or is blocked by a wall its move ends. To move again the miniature will need to be allocated another move dice.
For example: A miniature moves three spaces and meets an enemy. The miniature challenges the enemy and wins. The player decides to continue moving the winning miniature. The player must use another move dice to do this even though the figure only moved three spaces.
Move example: If a player rolls their four turn dice and gets a result of one square and three dots they could add or remove one inner wall and choose one of the following move combinations:
- Move 3 miniatures up to four quarter squares each.
- Move 1 miniature up to four quarter squares and another miniature up to eight quarter squares.
- Move 1 miniature up to 12 quarter squares.
Call and Encourage
Each player always rolls four Turn Dice no matter how many miniatures they have in play. This represents the miniatures off the board calling and encouraging their teammates.
Combat
Miniatures may challenge each other to combat. This is done during a player's turn by moving into a square adjacent to an enemy miniature and placing the models in contact. Players may not attack diagonally or through walls.
Attacking
The attacker rolls one attack dice (D6) and shows the defender the result. The defender then attempts to roll equal or more than the attack value. If the defender is successful, both miniatures remain where they are. The attacking miniature may not make any further move or action this turn.
If the defender fails to roll equal to or more than the attacker's result, the defender is sent back to the beginning. Place the defeated miniature off the board beside their entrance door. They may restart and enter in their next turn.
Ganging Up
Miniatures may attack and defend in groups. To do this the attacking miniature must also be in contact with one or more miniatures from its own team. To attack as a group 1x D6 is thrown for each friendly miniature in contact and the highest roll is chosen. The defending miniature rolls 1x D6. If the result is lower than the attacker's the defending miniature is removed.
Likewise, defending miniatures may be assisted by members of their own team. 1x D6 is thrown for each defending model in contact with the miniature being attacked and the highest roll chosen. This effect is cumulative. (if it helps, think of the miniatures like magnets).
For example: 4 miniatures from a team all standing in a line will get to throw 4 attack dice even if only one of them is in contact with the enemy.
Version 1.3 Additional Rules
Dice Saving
If one or more special turn dice are not used during a player's turn, that player may choose to save the result of the unused dice and not re-roll it in their next turn.
Directional Combat
Every miniature may only attack once per turn.
Miniatures may only attack in the direction they are facing.
If a miniature is attacked from the sides or rear it may defend itself as normal.
If a miniature is attacked from the front and defends itself successfully it may make immediately make a counter attack against the original attacker.
Optional Special Abilities (Experimental)
The following abilities are optional and experimental, from the designer's "Labyrintus Special Abilities 1.1". They have received only minimal play testing. Players may try them out or invent new ones. They are not part of the base rules above.
1. Leap Frog
One miniature during its movement may leap over a team mate in an adjacent square as long as the space on the other side in unoccupied. This counts as a free move in addition to any normal moves. No miniature may end its move in an occupied space. As long as a miniature can trace a 'miniature, space, miniature, space' path, it may leap frog over multiple miniatures in one turn.
NB. In play testing this ability was a good way to speed up play.
2. Boost
Two miniatures may assist a team mate to climb over a wall if there is an empty space directly on the other side. The assisting miniatures must be standing on the two spaces alongside a single wall. The climbing miniature moves as normal counting the assisting miniatures as two 'steps' to get over the wall.
3. Blast
A miniature may make a ranged attack against any enemy directly along a straight line of quarter squares. If there are any miniatures or walls blocking this line the attack may not be made. The attack is made by throwing 1 x D6. The targeted miniature may defend as usual. If the attack is successful the targeted miniature is blasted backwards until it is stopped by a wall, or another miniature. It is then placed next to the obstruction facing in a direction of the attacker's choosing.
NB. Using this ability will slow down the game.
4. Hold
A miniature ending its move next to a wall may 'hold' it for one turn. Turn the miniature to face the wall its holding. If a wall is being held, it may only be removed by spending an extra wall dice; one dice for the wall plus one extra per holding miniature. More than one miniature may attempt to hold the same wall. A holding miniature can defend itself as usual but may not participate in attacks.
Combat Examples
The following worked examples are from the designer's "Labyrintus Appendix 1.1 Combat Example". The diagrams showing miniature positions are not reproduced; each example is described by its text below, with the miniatures labelled A to E.
Example 1
It is the blue player's turn. Miniature 'C' attacks 'A'. Because 'C' is in contact with team mate 'D', 'C' rolls 2d6 and chooses the highest roll. 'A' is only able to throw one d6 in defence because 'A' is not in contact with 'B'.
Example 2
It is the red player's turn. 'A' and 'B' want to attack 'C'. They can only do this one at a time as neither are in contact with friendly models. 'A' rolls 1xd6 to attack. 'C' rolls 2d6 to defend and chooses the highest score because it is in contact with 'D'. If 'A's attack fails, 'B' may also attack 'C' using the same process.
Example 3
It is the blue player's turn. 'D' attacks 'A'. 'D' throws 3d6 and chooses the highest score because it is in contact with 'C' and 'E'. 'A' throws 2d6 to defend and chooses the highest score because it is in contact with 'B'. 'A's defence is successful but it is still the blue players turn and they are able to attack 'A' again using 'E'. 'E' also gets to throw 3d6 because it is assisted by 'C' and 'D'. The blue player has positioned their miniatures to maximum advantage.
Example 4
It is the red player's turn. 'A' attacks 'D' throwing 1d6. 'D' rolls 4d6 in defence and chooses the highest score because 'D' is in contact with 'E', 'C' and 'B'.