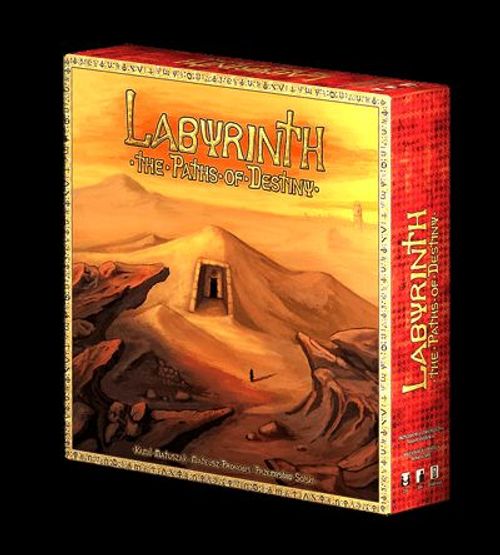
Labyrinth: The Paths of Destiny (2011)
Labyrinth: The Paths of Destiny (2011) Rulebook
Table of Contents
Table of Contents
- I. Game elements
- II. Preparing the game
- III. Objective of the game
- IV. Basics of the game
- Rules – The key
- Rules – Life points
- Rules – Character
- Rules – The definition of the corridor
- V. Detailed action description
- Rules – Making a move
- Rules – Jumping down, coming down and climbing up a bridge
- Players encounter and fight
- Movement and Guard encounter
- Stun points and rest
- Using and regenerating fate crystals
- VI. Comments on character skills
I. Game elements
Fig. 1. 6 frame fragments (creating an empty space to build the labyrinth board)
Fig. 2. 6 hexagonal key fields
Fig. 3. 1 hexagonal central field of the labyrinth
Fig. 4. 30 hexagonal board fields
Fig. 5. 57 trap tokens
Fig. 6. 6 key tokens
Fig. 7. 6 fate crystal tokens
Fig. 8. 24 life points token
Fig. 9. 12 stun tokens
Fig. 10. 3 adrenaline tokens (for the Female Archer)
Fig. 11. 6 blessing tokens (for the Monk)
Fig. 12. 6 curse tokens (for the Witch)
Fig. 13. 12 Guard movement cards
Fig. 14. 10 character cards
Fig. 15. 10 character skills cards
Other elements: 2 dice, 10 character pieces (12 holders – 1 spare item), 1 Guard piece, an instruction manual, a Trap Table, 4 cards with the summary of rules, 3 empty traps.
II. Preparing the game
Fig. 16. Example of a ready to use game board for 2 players
Traps placed face-down. Board fields pile. Guard cards pile.
- Join the board frames fragments together (fig. 1).
- Place the central field (fig. 3) in the middle, add 6 key fields (fig. 2) to the start fields.
- Place one key token (fig. 6) at each key field.
- Shuffle the remaining board fields and place them face-down by the board.
- Mix the trap tokens (fig. 5) and place them face-down by the board.
- Shuffle the Guard cards (fig. 13) and place them face-down by the board.
- Put the Guard piece at the central field (fig. 3).
- Draw or choose the character cards (fig. 14) – (If you are playing for the first time, we advise you to skip this step in order to familiarize with the game).
- Put the player pieces at the start fields (marked ), located at the board frame.
- Each player receives 4 life points (fig. 8) and 1 fate crystal (fig. 7).
Note: If there are 2 players – choose your start fields – the person, who begins the game, is the second to choose; if there are 3 players – keep equal distances between the start fields (a player – a vacant field – a player); if there are 4 players – place 2 players next to each other keeping a distance between the two pairs; if there are 5 players – draw, who is the first to choose the start field.
- Before beginning the game, each player throws 2 dices. The person, whose score is the highest, begins the game. Then the game goes on clockwise.
III. Objective of the game
The objective of the game is getting the key and reaching the central field of the labyrinth with it. However, none of the players may take the key lying directly next to his start field.
The aim of the game can be achieved by: constructing roads to the key and the central field, avoiding the Guards and traps, tricking other players and fighting with them. There is no freedom for the defeated!
IV. Basics of the game
Each player has 2 actions at his disposal during one round. He may use them in any way (e.g. build the board field twice or build 1 board field and make 1 move, etc.). The actions have to be chosen from the following list:
For 1 action you may (optionally):
- Build: take a labyrinth board field, look at it and add to another board field.
- Set a trap: take trap token and without looking at it place it in any corridor not occupied by another player or trap.
- Make a move: move your piece along the corridor from one field to the next.
- Attack another player (standing in the same corridor): the fight is resolved by throwing two dice and subtracting the number of life points already lost from the result. The defeated player loses one life point (each player may launch one additional attack when he encounters another player, not losing any actions).
- Move the Guard (only once per your round): draw the Guard card and follow the instructions on it.
- Rest: put aside the stun token received during the game.
- Jump down from the bridge: move from a corridor with the bridge to a corridor under the bridge at the same board field. In order to check, whether the jump was successful, throw one die (4, 5, 6 – the jump was successful; 1, 2, 3 – the jump was unsuccessful: you lose 2 life points and receive 1 stun point).
For 2 actions you may (optionally):
- Come down from the bridge (the safe version of jumping down): move from a corridor with the bridge to a corridor under the bridge at the same board field.
- Climb up the bridge: move from the corridor under the bridge to the corridor with the bridge at the same board field.
- Regenerate the fate crystal: bring it back to the game, if it was used before.
Without using actions you may:
-
Use the fate crystal: if you sacrifice the fate crystal, you may throw a die or dice once more (the entire throw has to be repeated). The fate crystal token has to be turned face-down, you cannot use it again, until it is regenerated.
-
Lift a key: take it, unless you face some obstacles (first you have to pass the Guard, cross the traps, fight with another player).
Note: If you have only 1 spare action left in the given round, you cannot do anything which would cost you 2 actions (there is no possibility to use 3 actions and later subtract 1 action from the subsequent round).
Rules – The key
- Each player may have any number of keys.
- No player may take the key lying directly next to his start field, unless the key was already picked up by another player and then lost in some way.
- A player may take the key only after overcoming all obstacles in the given corridor (in the following order: the Guard, a trap, other players).
Rules – Life points
- A player, who loses all life points, returns to his start field.
- If a player had one or more keys at the time of losing all life points, he returns to his start field, leaving 1 key in the place where he lost his last life point (if the player has more keys, he keeps the rest of them).
- When a player is back at his start field, he retrieves all lost life points immediately; if he has stun tokens, he puts them aside; his fate crystal does not regenerate.
Rules – Character
- You have to play with the chosen / drawn character till the end of the game.
- The character and its skills must be visible to other players.
- You cannot make use of the character's skills, if it is standing at the start field.
- You may make use of the character's skills under certain conditions.
- The character's skills prevail over the rules listed in the instruction manual (e.g. the Head Hunter may place the second trap in the same corridor, which is not possible otherwise).
Rules – The definition of the corridor
Corridor – is the area on the given board field, joined by common roads.
For example: the board field in fig. 17 is all a corridor, in fig. 18 it contains 2 corridors (1 at the top, 1 at the bottom), while in fig. 19 it contains as many as 3 corridors (1 at the top, 1 at the bottom, 1 next to them).
Fig. 17. Fig. 18. Fig. 19.
V. Detailed action description
Building
Building means taking 1 board field (which costs 1 action), showing it to the other players and placing it in such a way that:
-
the uncovered board field adheres with at least one edge to another board field (the central field is also a board field).
-
each player has an opportunity to build at least one way to the central field of the labyrinth and the key.
Note: While determining, whether a player may get to the key and the central field, the bridges are considered to be an ordinary way. They are marked with the colour of wood (fig. 19, 20).
Making a move
Making a move means moving your piece from one board field to the other (which costs 1 action), if their corridors are connected with each other (fig. 20).
Fig. 20. An example of making a move from one field to the other, in case when they are connected with each other.
Rules – Making a move
- A character may not enter the start field of another character.
- A character may enter the central field of the labyrinth, nevertheless cannot win unless having a key.
If a move ends in:
-
a vacant corridor – then nothing happens.
-
a corridor, where there is the Guard, a trap, another player or a key, then a player should:
- check, how his encounter with the Guard ended (see p. 10).
- check, whether he managed to avoid a trap (see p. 8).
- determine, whether there will be a fight with another player (see p. 9).
Having overcome the obstacles, a player may lift the key, if there is one in the given corridor.
Note: Pictures on the board fields, e.g. a hidden ball or a golden battle axe, are only a graphical element and do not affect the course of the game. Sand streaming into a corridor neither blocks the piece from moving, nor is a passage to another corridor.
Rules – Jumping down, coming down and climbing up a bridge
A character standing in a corridor with the bridge (marked with a wooden balustrade – fig. 18, 19) has the following options:
- if he is inside it, he may – for the price of 1 action – risk jumping from the bridge to the corridor below (fig. 21).
- if he is inside it, he may – for the price of 2 actions – come down safely from the bridge to the corridor below (fig. 21).
- if he is under it, he may – for the price of 2 actions – climb from the corridor under the bridge onto the bridge (fig. 22).
Fig. 21. Fig. 22.
While doing these actions, the character remains on the same board field (the only thing he does is change the corridor).
If you intend to jump down / come down or climb up, inform other players about it.
If you jump down from the bridge – throw a die:
- the result 1, 2 or 3 means you failed – the player loses 2 life points and receives 1 stun point.
- the result 4, 5 or 6 means you won – the risky jump down went really well (the player receives +1 to the dice throw during the potential fight taking place right after the jump down).
If you climb up the bridge, where another player stands, he is the one who receives +1 to the dice throw during the potential fight.
If you jump down, come down or climb up the bridge, where there is the Guard, a trap, another player or a key, then the order of resolving events is the same, as during an ordinary move.
Note: Traps may work in a different way depending on whether you jump down / come down or climb up the bridge. It is described in details in the Table of Traps.
Note: A player, who climbs up, comes down or jumps down from the bridge, ignores the door traps, because he leaves the corridor, where such a trap is located.
Setting and crossing traps
Setting a trap means drawing a trap token (which costs 1 action) and placing it face-down in one chosen corridor. You must not look at the traps.
Below there are examples or correctly set traps, including their range marked red (fig. 23, 24, 25).
Fig. 23. Fig. 24. Fig. 25.
Rules of setting traps:
-
In one corridor there may be only one trap.
-
You cannot set a trap in a corridor, where another player stands.
-
You cannot set a trap at the central field or at the start fields.
-
A trap can be placed on the key field, however, a player leaving a start field ignores it.
-
Once a trap is set, it remains in the corridor till the end of the game.
-
A trap affects every player, who steps on it.
Note: Traps with red background activate once a player steps on them. Only the door traps (with orange background and stone frame) do not activate when a player enters the field, but when he tries to leave the given corridor.
Rules of crossing traps:
-
When you enter a corridor with a trap – uncover it (unless it was done before).
-
Check its mechanism in the Table of Traps.
Transcriber's note: the Table of Traps is a separate printed component that is not part of the instruction PDF this text was transcribed from, so its entries are not reproduced here. The rulebook refers to it wherever a trap's effect depends on the entry direction.
-
Each trap is labelled with a number indicating its level of difficulty. Numbers in brackets indicate the level of difficulty of the given trap after the first unsuccessful attempt to cross it.
-
Throw 2 dice:
- the result is higher than or equal to the given number – nothing happens.
- the result is lower than the given number – a player falls into a trap.
Note: If a player lost all life points, and he had a key – he leaves the key in the place, where he lost his last life point.
Note: Traps may work in a different way depending on whether a player enters a corridor from another one, climbs up the bridge or jumps down / comes down from it (see the Table of Traps).
Players encounter and fight
An encounter takes place each time one player enters a corridor, where there is another player.
If a player enters a corridor, where there is another player, who has a stun point, then:
- he may take away his key (not losing an action for it);
- may deprive him of all life points and take away the key (at the price of 1 action);
- these actions may be undertaken after passing the Guard and the traps.
Rules – 2 players encounter each other in one corridor:
- The player, who was in the corridor as the first one, may attack the player coming in (it is when the first fight takes place).
- Independent of the first player's decision, the player, who is coming in, may attack the former one as well (it is when the first fight takes place, in case the first player did not decide to attack, or the second fight, if the first one was initiated before by the first player).
- These attacks do not cost players an action.
- Players do not have to attack each other – in such a case nothing happens.
- Each subsequent attack costs 1 action.
Rules – 2 players fight with each other in one corridor:
- Each player throws 2 dice.
- Each combat participant subtracts the number of the already lost life points from the dice throw result.
- The player having a higher result wins. The defeated player loses 1 life point.
- If the scores are equal – nothing happens, the fight remains unresolved.
Rules – many players encounter each other in one corridor:
- When there are many players in one corridor and another player enters it, then each person declares whether he wants to attack, and if so, then whom.
- The player entering a corridor declares, whether he wants to attack and if so, whom. Each of the players standing in the corridor (apart from the one, who was chosen), also declare whether they want to attack or not the chosen player.
- These attacks do not cost the players an action. Each next attack costs 1 action.
- If 2 or more players chose the same attack target, they form a group.
Rules – many players fight in one corridor:
- Each player who does not belong to a group, throws 2 dice and subtracts the number of lost life points from the result.
- If there are 2 players in one group, they throw 3 dice and subtract the number of lost life points (individually) from their throw results (for 3 players – throw 4 dice, for 4 players – throw 5 dice, for 5 players – throw 6 dice).
- The player or group, who has a higher result, wins. The defeated player or each member of the defeated group loses 1 life point.
- If the results are equal, nothing happens – the fight remains unresolved.
Rules – meeting the players on the central field:
If a player entering the central field loses the fight, he has to go back to the field he came from (the same rules are applied as during an ordinary move).
Movement and Guard encounter
Moving the Guard means taking one Guard movement card (the first from the top, it costs 1 action). The card should be shown to all players, after which you can immediately make a move in accordance with the instruction on the card (you cannot resign from completing part of the instruction or the entire one).
The symbols on the Guard movement cards:
-
One footprint – make 1 move with the Guard.
-
Two footprints – make 2 moves with the Guard.
-
Three footprints – make 3 moves with the Guard.
-
Sun-burst symbol – the Guard comes back to the central field.
-
Crescent moon symbol – the Guard falls asleep.
-
Crossed-out X symbol – the Guard does not move and stays on the same field.
Note: All used Guard movement cards should be put aside. After using all of them, they should be shuffled.
Note: In one round you may take the Guard movement card once only.
The rules of moving the Guard are the same, as in case of any other character.
When the Guard moves:
- He is resistant to traps – he ignores them.
- He does not jump, does not come down from bridges, does not climb up on them – he moves only along the corridors.
- IMPORTANT: You cannot move the Guard to the same corridor which he came from during the round of the previous player!
- If the Guard comes to the end of the corridor, and he has to make the next move – he can exceptionally come back to the same corridor which he came from.
- If the Guard enters a corridor, where there is a player, they meet each other.
Encounter of the Guard and a player:
- Each player, who meets the Guard, throws 2 dice.
- If the throw result is lower than 12 – the player comes back to his start field. The result equal to 12 means that the player stays in the same corridor.
- When a player stands in the corridor with the Guard (i.e. he didn't have to come back to the start field), and another player takes the Guard movement card, then the Guard ignores the player standing in the same corridor.
- If a player has the key and came back to his start field – he keeps it.
When the Guard sleeps:
- You can pass him without any consequences.
- In order to wake him up, you should take the Guard movement card. In such a case this card does not serve any other purpose apart from waking the Guard up.
- When the Guard wakes up and there is a player standing in his field – they meet each other.
Stun points and rest
A player receives stun points:
- after an unsuccessful jump down from the bridge,
- in consequence of activating some of the traps,
- under influence of some characters' skills.
A player, who received at least 1 stun point:
- Cannot perform any other actions apart from getting rid of the stun point (by resting).
- In order to get rid of 1 stun point, a player needs to rest, which costs him 1 action.
- Cannot make use of any skills his character has.
- May have his key stolen by another character, who is in the same corridor.
- May be killed by another character (which costs 1 action), who is in the same corridor.
- If the Guard enters the corridor, where there is a player having a stun point – the player immediately returns to his start field.
Using and regenerating fate crystals
- Each player begins the game with 1 fate crystal (he cannot have more of them).
- There is no way in which the fate crystal can be taken away from another player.
- You can use your fate crystal any time.
- The fate crystal allows a player to repeat one dice throw (the used token should be turned face-down and cannot be used again, until regenerated).
- The throw, which was repeated thanks to the fate crystal, is not a new throw (e.g. if the character was cursed, after using the fate crystal the curse still affects the character's dice throw).
- Using some of the characters' skills requires using the fate crystal at the same time.
- Regenerating the fate crystal costs 2 actions.
- The fate crystal does not regenerate during the comeback to the start field.
VI. Comments on character skills
Architect:
- Correction: You may also rotate the board field you stand on, on condition there is no other player apart from you.
Assassin:
- Climbing: You may fall down or try to jump down from a bridge in order to receive a +1 bonus to the dice throw.
- Time Loop: After using the third skill, other players (if you were e.g. attacking them) also come back to the previous state.
Illusionist:
- Spreading Illusion: Nobody may place traps on the board fields you left face-down.
- Spreading Illusion: If the Guard enters the covered board field, you have to uncover it.
- Mystification: The presence of the Guard does not stop you from swapping places of the traps in the given corridor.
Head Hunter:
- Entrapment: When any player crosses a corridor with two traps, he uncovers both of them; he has to pass the turn-back traps at the beginning, others – as he likes (apart from the door traps which he has to pass when he tries to leave the given corridor).
Female Archer:
- Adrenaline: You keep the adrenaline tokens when you come back to the start field. You may have the maximum number of them (which is 3).
- Shot: If two or more players are in the corridors within the shooting range, you can shoot both of them (each of them throws dice behind himself).
- Shot: This skill does not work, if you are under the influence of stun.
Monk:
- Prayer: If you moved another player to the corridor, where there is the Guard, a trap or another player, the player you moved bears standard consequences.
Mistress of Golems:
- Enslavement: If you make a player, who was transformed into the Guard, fall asleep, using the Guard card (crescent moon symbol), he receives 1 stun point. If a sun-burst symbol appears, transfer him to the central field of the labyrinth. If the transformed player encounters the Guard, he ignores him.
- Enslavement: If a player transformed into the Guard meets another player, the latter loses a key.
- Domination: Having a key you still have a bonus to use during a fight on the central field.
Sword Master:
- Whirling Blades: You attack twice, also during an encounter (both attacks are free).
Thief:
- Theft: You may try to steal the key before declaring attacks.
- Disarming Traps: The presence of the Guard does not prevent you from disarming a trap in that corridor.
Witch:
- Curse: The curses accumulate (you may have e.g. -3 to your dice throw).
- Dark Enlivening: You cannot move the trap to the corridor, where there are already two traps.
- Misfortune Rite: Activating a door trap does not bring any results.
- Misfortune Rite: If a witch activates a turn-back trap, she is to decide where the character will go.