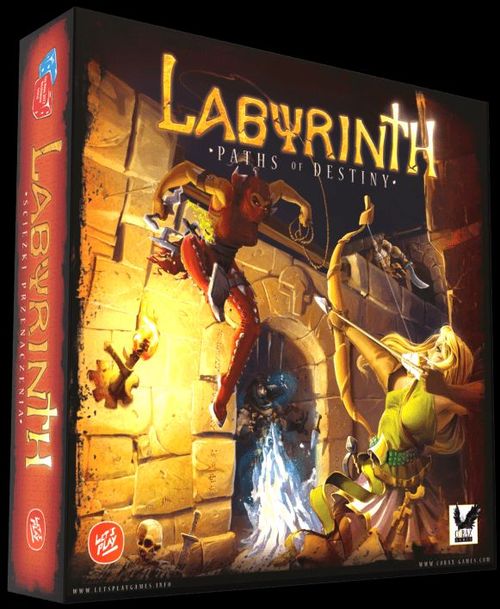
Labyrinth: Paths of Destiny (Third Edition)
Labyrinth: Paths of Destiny (Third Edition) Rulebook
Table of Contents
Table of Contents
Goal of the Game
The goal of the game is to collect a key from one of other players' key spaces (you cannot take the key from the key space in front of our own starting space) and to reach the center of the Labyrinth. The winner is the player, whose character has at least 1 key token and is the only character present on the central space during his turn.
Box Contents
- Rulebook
- 6 Frame Pieces (A)
- 37 Space Tiles, including:
- 1 Central Space (C)
- 6 Key Spaces (D)
- 30 Normal Spaces (G)
- 12 Golem Movement Cards (K)
- 15 Character Cards (M)
- 15 kart postaci (M)
- 30 Character Ability Cards (15 cards for the language version you use) (J)
- 48 Event Cards (12 cards for the language version you use - they should be separated) (L)
- 146 Tokens, including:
- 6 Key Tokens (F)
- 8 Crystals of Fate (O)
- 12 Stun Tokens (P)
- 15 Item Tokens (I)
- 60 Trap Tokens (H)
- 21 Character Ability Tokens (R)
- a) 1 x Living Armor
- b) 3 x Hellfire
- c) 3 x Chaos Portal
- d) 2 x Tornado
- e) 3 x Seal
- f) 3 x Curse
- g) 3 x Faith
- h) 3 x Consecration
- 24 Life Tokens (N)
Game Setup
Before your first game carefully remove tokens and markers from their frames. Slide character markers and the Golem marker into plastic stands and then perform the following steps:
- Connect all 6 Frame Pieces into one hexagon. Together they form the Board Frame (A) containing 6 Starting Spaces (B).
- Place the Central Space Tile (C) in the center of the hexagon. Place 1 Key Space Tile (D) next to each starting space. Place the Golem Marker (E) on the central space.
- Place 1 Key Token (F) on each key space.
- Shuffle all remaining Normal Space Tiles and form them into a face-down stack. This stack is the Labyrinth Pool (G).
- Shuffle Trap Tokens face-down and place them near the game board. They form the Trap Pool (H).
- Shuffle Item Tokens face-down and place them near the game board. They form the Item Pool (I).
- Shuffle Golem Movement Cards and place them face-down near the game board. They form the Golem Movement Deck (K).
- Find 12 Event Cards for the language version you wish to use. Return the remaining cards into the box. Take all Event Cards and find the Annihilation event card. Then shuffle all remaining event cards and place them face-down on the Annihilation card. Together they form the Event Deck (L).
- Choose your Character Cards (M) either randomly or according to your preferences. Use numbers shown on your character cards to the matching Character Ability Cards in the language version you wish to use (J). Each player takes any corresponding Character Ability Tokens and places them along with his character card in front of himself.
- Each player takes 4 Life Tokens (N) and 1 Crystal of Fate (O) and places them with active sides up in front of himself.
- Place character markers on starting spaces depending on the number of players as shown in the diagram on page 3. (The player-count diagram on page 3 is an image and is not reproduced.)
- Place Stun Tokens near the game board. They form the Common Pool (P).
- Then place the Labyrinth Chart: Traps and Items and the Labyrinth Chart: Rules Reference near the game board. They feature different language version, so use the one you prefer.
- Randomly choose the First Player by rolling 2 dice – the person who rolls the highest result begins the game. Then players proceed in clockwise order around the table.
Important: the game setup for 2 players differs from the one described above. See page 15.
Playing the Game
The game is divided into players' turns. During his turn a player has 2 Actions, which he can spend like resources. Actions are used to perform different Activities.
Some activities require a player to spend 1 action, while others cost 2 actions. Moreover, there are also free activities.
Actions cannot be saved for future turns nor spent partially in case of activities that cost 2 actions.
IMPORTANT! The player who is currently resolving his turn is called the Active Player. Only the active player can spend actions to perform activities.
Activities for 1 Action
- Build: the active player takes the top space tile from the Labyrinth pool, examines it and places it on the game board. Then he places trap tokens and item tokens on this tile (if necessary). See page 5.
- Move: the active player moves his character marker along one corridor to a corridor from an adjacent space of the game board. Then he explores it (i.e. checks what can be found there). See page 6.
- Risky Jump from / on a Bridge: the active player makes a Jump Check. If this check is successful, his character descends or ascends a bridge. See page 7.
- Rest: the active player discards one stun token he currently has. See page 8.
- Attack: the active player makes his character attack another character (or characters), whose character marker is on the same corridor. See page 8.
- Set a Trap: the active player randomly draws a face-down trap token from the trap pool and places it on any corridor without looking at it. See page 9.
- Move the Golem: the active player draws the top card from the Golem movement deck and resolves it based on its symbols. Important: this activity can be performed only once per turn. See page 9.
- Trigger an Event: the active player draws the top card from the event deck, introduces it into the game and resolves its game text. Important: this activity can be performed only once per turn. See page 10.
Activities for 2 Actions
- Safe Jump from / on a Bridge: the active player makes his character descend or ascend a bridge. See page 11.
- Activate a Crystal of Fate: the active player turns his Crystal of Fate token to its active side. See page 11.
Activities for 0 Actions (Free)
- Use a Crystal of Fate: any player can use his Crystal of Fate at any time to reroll his check. Additionally, some character abilities require a player to use his Crystal of Fate. See page 11.
- Pick up a Key and/or an Item: the active player can pick up any number of key tokens and/or item tokens from the corridor with his character marker. See page 11.
- Exchange Items: the active player who has no free slots for items (as he already has 2 items) can exchange one of his item tokens for a new item token he is currently picking up. He places the exchanged item token on the corridor with his character marker. See page 11.
- Free Attack: if one character enters a corridor occupied by another character, 1 free attack can occur as a result of this activity. See page 12.
IMPORTANT! The very first activity in the game performed by any player must be moving from a player's starting space to the key space adjacent to this starting space.
Activities in Detail
Build
Cost: 1 Action
The active player takes the top space tile from the Labyrinth pool and examines it. Then he places it face-up on the game board in a chosen place according to the rules described below:
- At least one edge of the tile must adhere to any other space tile already on the game board.
- Building the tile cannot result in closing the last corridor that leads to the central space.
- Building the tile cannot result in closing the last corridor that leads to a given key space.
IMPORTANT! When determining if a player can enter or leave a given space, you should consider all corridors and bridges.
After building a space tile, the active player checks if there are any icons on this space:
- Trap Icon: the active player randomly draws 1 trap token from the trap pool and places it face-down (without looking at it) on the corridor with a trap icon.
- Item Icon (Chest): the active player randomly draws 1 item token from the item pool and places it face-up on the corridor with an item icon. Then he finds the corresponding item in the Labyrinth Chart: Traps and Items and reads its abilities aloud to all players.
Important! If any ability or effect causes a space tile to be removed from the game board, such tile should be placed at the bottom of the Labyrinth pool. Any item tokens and trap tokens from this tile are returned to their respective pools. Any character ability tokens are returned to players. It is forbidden to destroy a space tile with a key token on it.
Space Tile Description
Icons on a space tile: 1. Corridor, 2. Corridor with a bridge, 3. Corridor under a bridge, 4. Trap icon, 5. CHEST – Item icon, 6. Key icon, 7. Central space icon.
Important! A CORRIDOR is an area on a given space tile of the board formed of connected, unbroken paths. For example, the space tile on the diagram X displays one corridor, the space tile on the diagram Y displays 2 different corridors (one leading above and one below), while the space tile on the diagram Z displays 3 different corridors (one above, one below and one to the side).
Corridors on two different space tiles that are adjacent to each other (i.e. any corridors that are next to each other and that form one unbroken path) enable characters to move. Paths on the same space tile are not considered adjacent corridors (even if they are connected with a bridge) – only corridors of different space tiles can be considered adjacent.
Types of Spaces
In the game there are four different types of spaces:
- Central Space: the Golem starts the game on this space. Additionally, players have to reach this space in order to win.
- Starting Spaces: players' characters start the game on these spaces.
- Key Spaces: key tokens should be placed on these spaces at the beginning of the game.
- Normal Spaces: these spaces represent corridors, passages and bridges of the Labyrinth.
IMPORTANT: no ability nor any game rule can move or destroy any space tiles except for normal space tiles. Ex. the Architect character cannot use his Rebuild ability to destroy the central space, any key space or any starting space set in one of frame pieces.
- If a player occupies a starting space, his first activity must be moving.
- If the Golem is on the key space in front of a player's starting space when this player wants to leave his starting space, this player must keep moving the Golem until the Golem leaves the key space (see page 9).
- Whenever a player leaves his starting space and enters a key space with a trap on it, he ignores this trap.
IMPORTANT! Players' characters cannot enter starting spaces of other characters.
Move
Cost: 1 Action
The active player moves his character marker from one corridor to the same corridor on an adjacent space tile.
Once the active player ends his move, he checks (explores) the new corridor, resolving any encounters in the following order:
- Character Ability Tokens: if there are any character ability tokens on the new corridor, the active player resolves their effects. The active player chooses the order in which they are resolved.
- The Golem: if the new corridor is occupied by the Golem marker, the active player resolves an encounter with the Golem (see page 9).
- Trap Token: if there is any trap token on the new corridor, the active player reveals it (if it is face-down). Then he tries to avoid this trap (see page 12).
- Characters: if any character (or characters) occupies the new corridor, one free attack can occur (see page 12).
- Other Tokens: if there are any key tokens and/or item tokens on the new corridor, the active player can pick them up and, in case of an item token, he can exchange it if he is already carrying more than 2 item tokens (see pages 11 and 14).
IMPORTANT! The active player cannot pick up the key token from the key space adjacent to his starting space unless this key token was dropped by another character.
Risky Jump From/On a Bridge
Cost: 1 Action
The active player can only perform this activity if his character marker occupies a corridor with a bridge or under a bridge. The active player makes a Jump Check by rolling 2 dice. The Jump Check is successful if the sum of both dice results equals 8 or more. Otherwise, the Jump Check is failed.
Depending of the Jump Check result, the active player should determine the outcome of this activity:
- Successful Jump from a Bridge: the active player moves his character token from a corridor with a bridge to a corridor under this bridge on the same space. Then he explores the new corridor as if he has just moved (see page 7).
- Failed Jump from a Bridge: the active player moves his character token from a corridor with a bridge to a corridor under this bridge on the same space. Next he loses 2 Life and then takes 1 stun token. Finally, if he still has any Life left, he explores the new corridor, but he cannot pick up any tokens until he rests in order to discard the stun token.
- Successful Jump on a Bridge: the active player moves his character token from a corridor under a bridge to a corridor with this bridge on the same space. Then he explores the new corridor as if he has just moved (see page 7).
- Failed Jump on a Bridge: the active player remains on the same corridor (he fell down when trying to jump). He loses 2 Life and then takes 1 stun token. Finally, if he still has any Life left, he explores the new corridor, but he cannot pick up any tokens until he rests in order to discard the stun token.
Stun
A character can have any number of stun tokens. If a character has at least 1 stun token, he or she can only perform the Rest activity until all stun tokens are discarded.
IMPORTANT: a stunned character automatically loses all combats without rolling any Combat Checks.
Rest
Cost: 1 Action
The active player discards 1 stun token and returns it to the common pool.
IMPORTANT! If a player has any stun tokens, he must keep performing this activity until he discards all stun tokens. He cannot perform any other (not even free) activity except the Rest activity.
Attack
Cost: 1 Action
The active player's character marker must be on the same corridor with at least one other character marker. The active player declares, which character he attacks and then a combat occurs.
Only 2 characters can participate in a combat. Each of these characters makes a Combat Check.
Combat Check
The attacking player rolls 2 dice and sums both dice results. Then the attacked player rolls 2 dice and sums both dice results. Finally, players compare their final results.
The player with higher result wins the combat. In case of a tie, both Combat Checks should be repeated until the combat is resolved in favor of one of the players.
The defeated character loses 1 Life – its controlling player turns one active Life token to its inactive side. If that was the character's last Life, this character dies.
IMPORTANT: in some situations a free attack can occur. One instance is when the active player moves and after his move he can perform a free attack against each character on his new corridor. Alternatively, if he foregoes this opportunity, he can be attacked by any characters on his corridor as part of the Free Attack activity (see page 12).
Icons: Life token – active / Life token – inactive.
Character's Death
Each character starts with 4 active Life tokens. After a player loses his last Life he:
- Immediately drops 1 key token on his corridor.
- If the player has no key tokens, he must drop 1 item token (if he has more than 1 item token, he chooses which item to drop). If he has no key tokens or item tokens, he drops no tokens.
The player takes his character token and places it on his starting space, where his character is immediately resurrected – the player regains all Life and turns all his Life tokens to their active sides.
IMPORTANT: the dying character's Crystal of Fate token is not dropped, but if it was inactive, it is not activated on the starting space.
Set a Trap
Cost: 1 Action
The active player randomly draws 1 trap token from the trap pool. Then he places it face-down on a corridor of any space tile without looking at this token.
- Trap tokens cannot be placed on corridors occupied by other characters.
- Trap tokens cannot be placed on the central space nor on any starting spaces.
- There can be up to 1 trap token on one corridor.
IMPORTANT 1: you should carefully consider, how corridors pass under bridges. On some tiles the same corridor passes under a bridge and can be mistakenly considered as two different corridors.
IMPORTANT 2: you should remember that a trap is set on a single corridor, not on the whole space. I.e. on a single space tile there can be as many trap tokens as there are separate corridors.
IMPORTANT 3: once placed, a trap token stays on a given corridor until the end of the game. It affects each character that enters a given corridor – including the character who originally set this trap.
Rules for trap tokens can be found on page 12 and in the Labyrinth Chart.
Move the Golem
Cost: 1 Action (once per turn)
The active player draws the top card from the Golem movement deck, shows it to other players and resolves its effects based on symbols from the card. Then he discards it to a separate pile. When the Golem movement deck is exhausted, players should shuffle the discarded cards and reuse them to form a new Golem movement deck.
Golem movement cards feature the following symbols:
- Move 1-3 (footprints symbol): the active player moves the Golem the indicated number of spaces (1, 2 or 3 spaces) in a direction of his choice.
- Idle (symbol 2): the Golem does not move.
- Central Space (symbol 3): the active player takes the Golem and places it on the central space.
The Golem moves in a very similar way to characters, with the following exceptions:
- The active player must move the Golem as many times as shown on the card drawn.
- The Golem moves only through corridors – it never uses bridges to descend or ascend to a different corridor.
- The Golem ignores all tokens placed on corridors, including trap tokens.
- The active player cannot move the Golem back to the corridor, from which the Golem moved during the previous player's turn. The only exception to this is a situation when the Golem enters a dead-end corridor, but the card forces it to keep moving. In that case, he "bounces off" this dead-end corridor and continues moving on opposite direction.
IMPORTANT: when moving the Golem you should only take into consideration the player taking his turn right before the active player. If that player did not perform the Move the Golem activity, the active player can freely move the Golem.
Golem Check
If the Golem marker ever occupies the same corridor as a character (or characters') marker, each player on this corridor must make a Golem Check.
To make the Golem Check a player rolls 2 dice. The Golem Check is successful if results of the test is 12 or more (it could be greater than 12 because of some characters skill). Otherwise, the Golem Check is failed – the player's character marker is returned to his starting space.
Trigger an Event
Cost: 1 Action (once per turn)
The active player draws the top card from the event deck. He reads its game text aloud and then resolves its effects. Each event card features two effects:
- One-time Effect: this effect is only resolved by the active player.
- Long-lasting Effect: this effect affects all characters from the moment this event card is drawn to the moment when a new event card is introduced into the game. The active player can place the event card on the central space so that everyone is reminded of its long-lasting effects.
Event Card Description
Example event card "Plague" (1. Event name, 2. One-time effect, 3. Long-lasting effect): "Choose a character: this character's Crystal of Fate becomes inactive. Characters cannot have more than 2 Life (if they have more, it decreases to 2)."
IMPORTANT! The last card in the event deck is the Annihilation card. Once introduced into the game, its effects last until the end of the game. After the Annihilation event card has been drawn and resolved, players can no longer trigger any events.
Example of Triggering an Event
Michael playing the Swordmaster decides to trigger an event. He draws Terror. First, he must resolve its one-time effect (described in the upper part of the card) i.e. he must choose a character who will lose 1 Life. He chooses Ann playing the Golem Mistress. Ann turns one of her Life tokens to its inactive side.
Then Michael places the event card on the central space and introduces into the game its long-lasting effect (described in the lower part of the card) – starting from now no character can use his or her character abilities (any abilities already in the game are still active). This effect will stay in the game until someone triggers a new event and replaces Terror with a different event card.
Safe Jump From/On a Bridge
Cost: 2 Actions
The active player's character marker must occupy a corridor with a bridge or under a bridge:
- Jump from a Bridge: the active player moves his character token from a corridor with a bridge to a corridor under this bridge on the same space. Then he explores the new corridor as if he has just moved (see page 7).
- Jump on a Bridge: the active player moves his character token from a corridor under a bridge to a corridor with this bridge on the same space. Then he explores the new corridor as if he has just moved (see page 7).
Activate a Crystal of Fate
Cost: 2 Actions
The active player turns his inactive Crystal of Fate token to its active side. From now on the Crystal of Fate can be used by the player.
Icons: Crystal of Fate – active / Crystal of Fate – inactive.
Use a Crystal of Fate
Cost: 0 Actions
Any player can use his Crystal of Fate to reroll any check or use his character ability (if a given ability requires it). This activity can be performed at any point of the game. A player's Crystal of Fate token must be active in order to be used by this player. After using it the player turns the token to its inactive side to mark that the Crystal of Fate has been used. The Crystal of Fate can be used to do the following:
- Rerolling Checks: if a player is not satisfied with the dice roll he has just made, he can reroll the dice. He ignores the previous result and counts only the new result. The player cannot decide to take the previous result once he rerolls his dice.
IMPORTANT: the Trap Check is unique as it often requires a player to make 2 or more dice rolls. In that case, rerolling a check means repeating all rolls required by a given trap – even the successful ones.
- Character Abilities: some character abilities require a player to use his or her Crystal of Fate along with other conditions, like spending an action, in order to use a given ability. Such abilities are described in detail on their corresponding character cards.
Pick Up a Key and/or an Item
Cost: 0 Actions
The active player can pick up a key token and/or an item token, with the following limitations:
- Only the active player can pick up tokens (i.e. he can do it only during his turn). He performs this activity in step 5 of the corridor exploration (see page 7).
- The active player can only pick up tokens from the corridor occupied by his character.
- The active player can pick up any number of tokens during his turn.
IMPORTANT! Players cannot pick up any tokens as a result of resolving effects of a trap (i.e. when a player is moved or placed by a trap) or when they are pushed or placed on a space with tokens after losing combat.
IMPORTANT! No player can pick up the key token from the key space adjacent to his starting space. The only exception is a situation when another character drops his key token on a given player's key space.
Carrying Limitations
Each character can carry any number of key tokens and up to 2 item tokens.
Exchange Items
Cost: 0 Actions
The active player can exchange item tokens, with the following limitations:
- Only the active player can exchange items (i.e. he can do it only during his turn). If the active player enters a new corridor, he performs this activity in step 5 of the corridor exploration (see page 6).
- The active player can exchange items only when picking up other items – he cannot voluntarily discard any item in his possession.
- The active player can exchange each item only once per turn and only if he has other item to exchange it for.
- Players cannot directly exchange items between their characters.
Any tokens picked up from the game board should be placed next to a character's Life tokens so that they are visible to all players.
When the active player exchanges an item, he places the exchanged item token (the one he no longer wishes to carry) on his corridor.
Free Attack
Cost: 0 Actions
Free Attack is an activity that is almost identical to the Attack activity, with the following exceptions:
- Free attack can occur when a character moves or is placed.
- The active player who is currently moving has a priority to resolve combat with any number of characters from the corridor he has just entered. If he foregoes this opportunity, he can be attacked by any of these characters only as part of the Free Attack activity.
- If more than one player wants to attack the active player, players should randomly choose the order of attacks.
- Free attacks can only occur between a character entering a space and a character (or characters) already occupying this space – characters that have not moved cannot attack each other.
- A pair of characters can resolve up to 1 combat for one instance of a character's movement or placement.
Detailed rules of combat resolution can be found on pages 8 and 13.
Other Rules
Traps
Trap tokens appear on the game board:
- As a result of building a space tile with a trap icon.
- As a result of setting a trap.
- As a result of character abilities and effects.
If a character enters a corridor containing a trap token, he or she must do the following:
- Reveal the trap token (if face-down).
- Check the trap's effects in the Labyrinth Chart.
- Make a Trap Check; if this check is failed, the character resolves the trap's effects as described in the Labyrinth Chart.
IMPORTANT 1: some traps require more than one dice roll.
IMPORTANT 2: only 1 trap token can be placed on 1 corridor. The token's effects affect only the corridor where it the token is placed.
IMPORTANT 3: any player moving from his starting space to the key space adjacent to his starting space ignores the trap token placed on the key space (if any).
Trap Description
All traps are described in detail in the Labyrinth Chart. Each trap shows:
- Trap name
- Number of rolls
- Trap difficulty level
- Trap effects
Example trap shown on the rules page: "Poisoned Spears (Number of Rolls: 3 x Difficulty: 8+) – Choose: lose 1 Life or take 1 stun token for each failed roll."
IMPORTANT: if any effect or ability enables a player to take a Trap Check again (ex. the player uses his Crystal of Fate to reroll the check), it affects all rolls connected with a given trap. I.e. in case of traps requiring a player to roll more than once, he must reroll all his rolls (even the successful ones).
Trap Checks
In order to make a Trap Check, a player rolls 2 dice as many times as indicated by the Number of Rolls shown on a given trap token (see the Labyrinth Chart). The player sums both results of his dice and if this sum is equal to or higher than the Trap Difficulty Level, his character manages to avoid some part of harmful effects of this trap.
Advanced Combat
Basic rules describing attacks and combat can be found on pages 8 and 12. Additionally, there are some more advanced concepts connected with resolving combat:
- If any player wishes to use his Crystal of Fate to reroll his Combat Check, he decides about it after both players have made their Combat Checks.
- If the combat is taking place on the central space, apart from other consequences of losing a combat the defeated character is pushed out from the central space. The winner of the combat decides, which direction his opponent is pushed out. Being pushed out is treated as moving (i.e. the defeated character must explore the corridor on which he is pushed).
IMPORTANT: the defeated character cannot pick up or exchange any key tokens and/or item tokens while exploring the new corridor.
Examples of Resolving Combat
There are two characters on the same corridor: Christopher (the Swordmaster) and Robert (the Warlock). Ann (the War Sister) enters this corridor. She decides to make her free attack (connected with moving) against Christopher. A combat begins. First, Ann makes her Combat Check (rolling 6+2=8), then Christopher does the same (rolling 6). Christopher's character has a +3 bonus to all Combat Checks, so he gets a total result of 9. However, Ann uses her Fury ability (losing 1 Life) to add +2 to her Combat Check – this way she gets 10 and wins! Normally, Christopher would just lose 1 Life, but because of Ann's Dismember ability he loses all his Life points (he turns all 4 Life tokens to their inactive side) and dies. Christopher drops his key token on the corridor, where his character died, takes his Swordmaster marker and places it on his starting space. Then he immediately regains 4 Life. Now Ann could attack Robert, but decides not to. As a result of her decision Robert could make a free attack against Ann, but seeing what happens to people who mess with Battle Sisters, he resigns. Ann can pick up the key token dropped by Christopher's character.
Roger's Golem Mistress occupies the central space. Keith's Paladin enters this space during his turn and a combat occurs. Keith rolls 9 and Roger rolls 8, but his Domination ability enables him to add +1 to his Combat Check result. It is a tie, so both Combat Checks must be repeated until one character wins. This time Keith rolls 12, while Roger rolls 10 and loses the combat despite his Golem Mistress's +1 bonus. Keith pushes Roger out from the central space on a chosen corridor. Roger must explore this corridor and as a result he triggers a trap – a Trap Check is in order! Meanwhile Keith stays alone on the central space and because he has a key token and his turn still lasts, he wins the game!
Losing and Gaining Life
If rules mention losing a certain number of Life points, a player turns the required number of Life tokens from their active sides to their inactive sides.
If rules mention gaining a certain number of Life points, a player turns the required number of Life tokens from their inactive sides to their active sides.
Changing Characters
If a player's character changes, the player should consider the following:
- The state of his Life tokens remains unchanged.
- The state of his Crystal of Fate and his stun tokens remains unchanged.
- The character keeps all key tokens and/or item tokens (if any).
- Tokens and effects connected with the previous character remain active on the game board, but the new character cannot benefit from them (unless the character's card says otherwise).
- The character takes all corresponding character ability tokens except the ones already on the game board (if any).
IMPORTANT: in case of the ability of the Illusionist (after he changes into another character), any character entering a face-down space tile or revealing it with the Golem decides how this space tile should be oriented.
Once the character's change is resolved, the game resumes.
Items
Items are powerful, magic artifacts that can be found inside the Labyrinth. Each item is represented by an item token and features an ability that may be used by the player who finds a given item. The item's ability is described in the Labyrinth Chart: Traps and Items. Each character can carry up to 2 item tokens at the same time. Once picked up, items cannot be discarded voluntarily – only exchanged (see page 12).
Item Description
- Item token
- Item name
- Item ability
Example items shown on the rules page: "Scepter of Control" (When you encounter the Golem, you can spend a Life to ignore its effects.) and "Heart of the Abyss" (After you lose all Life, this item is treated as 1 additional Life.)
Limited Game Components
Players are limited to the components found inside the box except for the following:
- If all stun tokens are depleted, they can be replaced with coins or other suitable markers.
- If the Golem movement deck is exhausted, players should shuffle the discarded Golem movement cards and reuse them to form a new Golem movement deck.
- Trap tokens and space tiles removed from the game board are returned to their pools. Trap tokens should be shuffled into their pool while space tiles should be placed at the bottom of the stack.
Characters and Markers
If any rules or abilities refer to markers, they affect character markers and the Golem marker. If they refer to characters, they do not affect the Golem as the Golem is not a character.
Optional Rules
2-Player Game Variant
In a 2-player game the rules should be changed as follows:
- The following characters cannot be used: the Golem Mistress, the Arch-priestess.
- The central space tile is placed differently – the game board setup should be performed based on the diagram below.
- Players place their character markers as shown below.
(The 2-player board diagram and marker placement appear only as a picture on page 15 of the rulebook and are not reproduced here.)