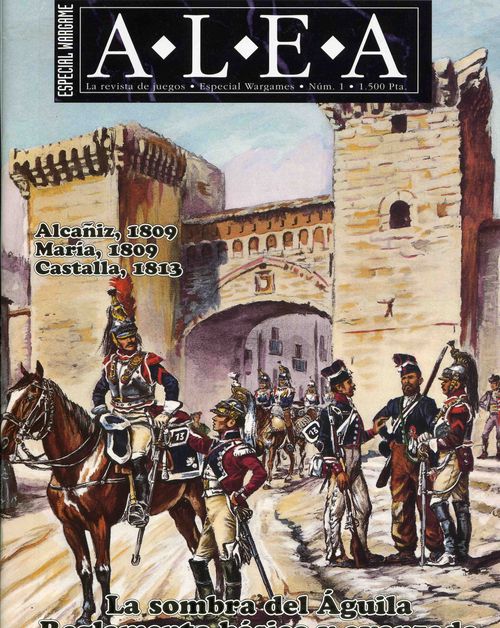
La sombra del aguila
La sombra del aguila Rulebook
Table of Contents
Table of Contents
- Standard Rules
- Figures
- Exclusive Rules
- Charts and Tables (Standard Rules)
- Basic Rules
Standard Rules
1. Game equipment
The game contains maps, charts, counters, and these rules. Players must supply a standard six sided die (not included).
1.1 The maps
The maps represent the terrain over which the battles were fought. The terrain is superimposed with a hexagonal grid to facilitate movement and to regulate combat.
1.2 Tables and charts
Various charts and tables are included in the game, including Formation change costs, movement factors, terrain effects, fire and shock combat, morale, demoralization, and orders.
1.3 Counters
The counters represent the military units and leaders that took part in the battles. Leaders represent their historic counterparts, while combat units represent one battalion of infantry, one regiment of cavalry, or one battery of artillery. See figures 1 and 2.
1.3.1 Explanation of the counters
Each of the units contains the following:
- Historical identification: name of the battalion or regiment (example: 39 Lin.2 would be the 2nd battalion of the 39th Line infantry regiment).
- Type: see figure 1.
- Superior organization: Division or brigade to which the unit belongs.
- Combat factor: Each point usually represents 100 men or 1 piece of artillery.
- Morale: a subjective rating based on the effectiveness of the unit (including type of equipment, training, experience, etc.).
- Command factor: The capacity of the leader to influence units under his command (those with the same Historical identification). Overall commanders may command any units under their command.
- Unit class: Dots signify the unit class (one dot means light, two dots means medium, three dots means heavy) for cavalry and artillery; A coronet on an infantry unit symbolizes special light infantry type and one dot symbolizes special shock infantry.
2. Sequence of play
Each turn consists of the following phases:
- A. Orders (from the beginning of the second turn). Each player must announce any intentions to change orders for units subordinate to a general, then resolve according to the orders rules.
- B. French phase
- French movement. The French player moves his units according to the rules governing movement, stacking, command, and zones of control.
- Spanish defensive fire. The Spanish/Allied player resolves fire combat.
- French offensive fire. The French player resolves fire combat.
- French shock combat. The French player resolves shock combat, and conduct movement after combat.
- C. Spanish/Allied phase
- Spanish movement
- French defensive fire
- Spanish offensive fire
- Spanish shock combat
- D. Reorganization. Both players attempt to reorganize units.
- E. End of turn. Advance the turn marker one space.
3. Orders
Each player must have his commanders give orders to subordinate leaders (usually divisional generals), which allows them the ability to perform certain actions in a given turn (like movement and combat).
Types of orders:
- A. Without orders. Units may not move, except to move closer towards their leader. May not initiate combat. Defend and defensive fire normally. An individual unit may also be without orders.
- B. Attack. Units are not obligated to move, but if they do, they must end the turn closer to enemy units. At least two units of the command must intend to have combat (fire or shock) if at all possible.
- C. Harassment (Skirmish). If a unit moves, it must not end its move more than 3 hexes away from an enemy unit. Fire and shock combat are normal.
- D. Maneuver. May move freely, but not closer than 5 hexes to any enemy unit. Those units in command may move an extra 2 movement points (extra 3 movement if along a road).
- E. Defend. Units may not move, except to reoccupy a position that was lost, or to reestablish contact with a supporting unit that is in an enemy Zone of Control.
- F. Retreat. Units adjacent to enemy units may withdraw; aside from this, movement is not mandatory.
Artillery units are considered independent and do not need orders. Orders should be recorded on the photocopied sheet labeled "Orders sheet." Orders may be changed during the orders phase of any turn, but this change is never automatic and is usually limited. Orders should be kept secret from the other player. Players should use a pencil to record current orders on the orders charts. Players should make photocopies of these prior to play.
Changing orders
The player wishing to change orders of a command counts the distance from the leader to his superior commander. Take the number of hexes and divide by the command divider given in the scenario instructions. This number, or greater, must be rolled on one die roll in order to change the current orders. The commander must not move during a turn when he attempts to change orders. If unable to change orders, units must continue to operate under their existing orders.
4. Formations
Infantry and artillery units have several formations available to them, which affects their abilities in movement and combat. Units may change their formation status based on the movement point costs listed on the formation change table. Units may change formation more than once per turn, provided they have sufficient movement points available.
4.1 Infantry
Infantry has the following formations:
- Normal: no marker needed. Units move and fire normally.
- Square: units with a morale of D or better may form a square, and is shown by placing a "Cuadro" marker on top. Units in a square may not move. Squares may only form in clear terrain.
- Guerrilla: light infantry may assume a light skirmish formation, and is shown by placing a "Guerrilla" marker next to the parent unit. A Guerrilla marker may be placed up to 4 hexes away, as long as the unit has sufficient strength points. A unit in Guerrilla formation is assumed to have an equal number of strength points in each hex (see Figure 5). The minimum number of points per hex is 2, the maximum is 4. (For example, a unit with 5 strength points may occupy two hexes). Any "extra" strength points are assumed to be in the parent unit hex. Losses are allocated equally among the various hexes.
4.2 Artillery
Artillery has the following formations:
- Unlimbered: no marker needed. May fire normally, but may not move.
- Limbered: units are marked with a "Tiro" marker to show they are eligible to move. Units may not fire. Units may change formation once per turn if they have sufficient movement points.
5. Facing
Units are required to maintain a clear facing. Units face the vertex between two hexes. (See figure 4 for example of front, flank, and rear). Units may change facing prior to movement without penalty. To change facing during movement costs one additional movement point. One movement point is paid for each such hexside changed. Leaders are the only units not required to maintain facing. All units stacked together must have the same facing. Units that advance after combat may change facing freely, with no movement point cost.
Exceptions: Leaders, disorganized units, units in square or guerrilla formation, and units with maneuver orders do not need a facing.
6. Stacking
More than one unit may occupy a hex, as long as they belong to the same side. Except for combat calculations, players may not examine opposing stacks. In theory, stacking within a hex is unlimited, but there are restrictions for fire, shock combat, and movement. Stacked units are better targets for enemy artillery fire.
Exceptions:
- Infantry in square: 18 strength points or 3 units in addition to any artillery. This limit applies at the end of movement.
- Units with maneuver orders: 8 strength points and 4 strength points of cavalry. This limit applies only to units with maneuver orders, and they may stack with units that do not have maneuver orders.
- Forest and buildings: 18 strength points at any time.
- Allied units: Spanish and British units may not stack.
7. Movement
Each unit type possesses its own movement allowance. Units must move through continuous hexes, not skipping over any. Units may not accumulate movement points from turn to turn, or from unit to unit. Zones of control, stacking, and orders limit movement as well. Movement point costs are cumulative, and may never be exceeded. Units are never forced to move voluntarily. Units move through their "front" hex sides, except for disordered units and leaders.
Restrictions:
Units may not pass through a frontal or rear hexside containing 8 of more points of units. They may do so if it is a flank hexside they are passing through. The order in which units are moved does not matter except for leaders, who must move after all units assigned to their command have moved.
8. Zones of Control
Units have a Zone of Control (ZOC) that extends into their frontal and flank hexes.
8.1 Effects on movement
Units that are allowed to enter an enemy ZOC (by their orders) pay 1 extra movement point to enter a ZOC. Units must stop if they enter a frontal ZOC of an enemy unit. Units may leave enemy ZOC's at the beginning of their movement, and this costs no additional movement points. The moving unit must, however, pass a morale check to do so. It is permitted to move directly from one enemy ZOC to another.
8.2 Effects on combat
ZOC's affect combat. See 10. Fire and 11. Shock.
8.3 Exceptions
Hexes containing trees and buildings block enemy ZOC's. Units in such hexes possess regular ZOC's which extend into adjacent hexes, unless those are trees or buildings.
9. Command
Units are in command if they can trace a command radius of hexes to their leader. The length of this radius is given in the exclusive rules. The length is calculated by the counting the number of hexes between the leader and the unit, not counting either hex.
Tracing the line of command: The path must not enter or pass through:
- Hexes occupied by enemy units.
- Hexes occupied by their ZOC's. (but friendly units block enemy ZOC's for purposes of calculating command radius).
Effects of command on ZOC's: Only units that are in command may enter or leave enemy ZOC's.
10. Fire combat
In both phases (defensive and offensive) units may fire. The procedures are the same in both.
10.1 Infantry
Infantry fire into adjacent hexes:
- A maximum of 6 strength points per hex may fire.
- The firing unit(s) must be placed on top of the stack (if they are stacked).
- Fire directed into a stack affects the top unit(s) first, with extra losses placed on units lower in the stack only if the top unit(s) are eliminated.
- Fire from various hexes may be combined against a target hex. Total the firing factors, consult the Fire Table, and roll the die.
- Units in square may fire as shown in Figure 7. Three adjacent hexes may have no more than half of the units fire strength directed into them.
10.2 Artillery
A maximum of 3 artillery units may fire from a hex.
The strength points fired depend on the range:
- At adjacent targets, the fire factor is normal (printed).
- At a 2 hex range, the fire value is increased by 50% (so an 8 fires as a 12, for example).
- At 3 or more hexes, the fire value is halved (so an 8 fires as a 4, for example).
Units that fire should be placed on the top of the stack, if stacked. Several units may combine their fire at a target, but each units fire factor is indivisible, and may not be split.
If 2 or more artillery units fire at a target, and would apply different modifiers, they still fire combined, using the most favorable modifier for the attacking units.
Defensive fire is resolved only against adjacent targets (even for artillery). When counting ranges, count the target hex but not the firing hex. Ranges for offensive artillery are:
- Light artillery: 4 hexes
- Medium artillery: 5 hexes
- Heavy artillery: 6 hexes
Infantry fire may not be combined with artillery fire during offensive fire. It may be during defensive fire. In order to fire offensively, the artillery must be able to trace a clear Line of Fire (LOF) to the target hex. When counting artillery, count the target hex but not the firing unit hex. When artillery fires against a stack containing more than two units, results are calculated against each unit in the stack individually (although only one die roll is made). When combining fire of units, use the best modifier for the attackers.
10.2.1 Line of Fire (LOF)
Buildings, trees, and friendly units (not enemy units) block a line of fire. If a LOF falls exactly along a hexside, and one hex is clear while one is blocked, the LOF is considered clear (see figure 8). A crest hexside blocks LOF if it is exactly in between the firing unit and the target, or closer to the target than to the firing unit. Otherwise, the crest hexside does not block LOF. An obstacle does not block if it would be lower than both firing and the target unit.
10.3 Fire Procedure
- Total all of the firing points, taking into account all modifiers
- Find the appropriate column on the fire table
- Roll one die
- Apply the results
11. Shock combat
Shock combat may occur between adjacent units. It is not mandatory, but if units decide to attack, all units adjacent to the attacking unit(s) must be attacked. The defenders may not refuse shock combat, except for cavalry and infantry in guerrilla formation, which may retreat one hex if attacked by enemy infantry (not cavalry). In order to exercise this retreat option, the cavalry or guerrilla may not have fired in the previous fire phase (defensive fire). The attacking units may not participate in other combats that phase.
Restrictions:
- Units may not attack or be attacked more than once per turn.
- Units deployed as guerrillas, and stacked, are placed at the bottom of a stack for shock combat purposes.
- If they attack, units must attack those units that they fired at in the offensive fire phase.
- Units may only attack units situated in their frontal hexes.
- A maximum of 24 combat points may attack or defend in a single hex.
- A maximum of 18 combat points may attack across a single hexside.
- Units in a stack attack and defend as a stack, but must follow the above restrictions.
- Units may not split their combat strengths.
- Artillery units may not shock attack, and defend with 1/3 their normal strength against shock attacks.
- Units in a square may not initiate shock combat.
- The attacker determines the order of shock combat.
Procedure:
- Total the combat factors, and determine an attacker/defender odds ratio. Round down in favor of the defender.
- Consult the Shock Combat Table, and roll one die. Modify the roll for the effect of leaders, orders, and morale.
- Apply the results immediately, before proceeding to the next combat.
Restrictions:
- Odds of less than 1-4 are not allowed. Odds of 5-1 or greater are resolved as 5-1.
Cavalry charges
Attacking cavalry may announce that they are charging. They have their combat factor doubled. To be eligible, they must have moved not more than 2 hexes in the movement phase, and must pass a morale check. A disorganized (D) result has no effect, except that the unit may not participate in shock combat that phase. A rout (R) result does apply. Charges may only be attempted through clear terrain, and not across bridges, rivers, arroyos, fords, or against squares.
12. Movement after combat
Retreats are applied immediately as a result of shock combat. Units in a stack may retreat into different hexes. If a unit retreats into an enemy ZOC, it loses one strength point (applies to each unit) and the unit(s) are disorganized. If the retreat result was a 2, then the unit(s) must retreat that number of hexes away from the combat hex. Retreats may be into or through friendly units, but those units must make a morale check. Units may not retreat off the map. If unable to retreat, they are eliminated.
Advances are possible as a result of shock combat. Each time a hex becomes vacant as a result of combat, the victorious units (attacker or defender) may advance. Only the vacated hex may be occupied (no further, regardless of the number of hexes retreated by the losing units). Only units that participated in a combat may advance.
Advances and retreats are performed by the player owning the units involved.
13. Terrain
Terrain effects are given on the Terrain Effects Chart (TEC). When a unit strength is divided, retain fractions (a "5" halved would be a "2.5").
14. Morale and organization
Units that are face up with no markers are considered to be in good order. Units that are disorganized are turned over.. Units that are routed are marked with a D marker. Each time a unit is required to make a morale check, consult the Morale Table and roll a die.
14.1 Effects of disorganization
Disorganized movement is normal but may not enter an enemy ZOC. Must exit an enemy ZOC if they suffer another combat result (such as another disorganization). Their fire and shock values are halved.
14.2 Effects of rout
When routed, must move 2 hexes immediately away from combat. During regular phases, must move their full movement allowances towards their base hex (see exclusive rules). They may not enter enemy ZOC's, and must retreat if they find themselves in one and suffer any adverse combat result, as above. If attacked in shock combat, they are automatically attacked at 5-1 odds, with no adverse effect on the attackers whatever.
14.3 Reorganization
During the appropriate phase, each unit not in good order makes a morale roll on the Morale Table in an attempt to recover. Add one to the attempt if the unit is in an enemy ZOC.
15. Leaders
Leaders are not considered combat units, and have no combat strength, do not affect stacking, and have no ZOC. They are not affected by enemy ZOC's. Leaders moving pay 1 mp per hex, regardless of terrain. Leaders without order do not move. Leaders may affect shock combat.
Leaders affect morale rolls of units they are stacked with. Leaders affect their own commands (only), except for the Commander in Chief, who may affect any and all units on a side. While affecting a morale roll, a leader with no rating is considered to be a "1."
15.1 Elimination
If a unit of stack containing a leader suffers an adverse result as a result of shock combat (and the leader was used to modify the combat), roll one die. On a roll of "6" the leader has become a casualty. Turn the counter over to its replacement side (the lower value). A leader may never fall below a "0.".
16. Demoralization
Units that are eliminated, routed, or disorganized count against the overall morale of the parent unit. When a division or brigade reaches its demoralization level, the units of that command are adversely affected. All units in that command suffer a morale degradation of one level (so that an A is now a B, etc.). If the disorganized and routed units recover their morale, the morale of the parent command improves. The command may have its morale state fluctuate over the course of the game, as units recover from disorganization and rout.
17. Victory conditions
In general, victory depends on inflicting losses and causing demoralization of enemy commands, as well as geographical objectives. See the exclusive rules.
The level of victory (or defeat) is measured by comparing the number of demoralized commands:
- 1 group less than the enemy (Marginal victory)
- 2 groups less than the enemy (Tactical victory)
- 3 groups (or more) less than the enemy (Strategic victory)
18. Set up
Consult the exclusive scenario rules. Those rules may include variant set ups, different from the historical set up.
Figures
Captions for the figures sheet, as printed.
There are nine figures on the figures sheet. Below are their captions.
Figure 1. Types of Units and markers.
- Comandante en Jefe = Commander in chief
- Comandante = Leader
- Infanteria = Infantry
- Infanteria ligera = Light infantry
- Infanteria de choque = Heavy shock infantry
- Caballeria ligera = Light cavalry
- Caballeria pesada = Heavy cavalry
- Artilleria ligera = Light artillery
- Artilleria media = Medium artillery
- Artilleria pesada = Heavy artillery
- Artilleria a caballo = Horse artillery
- Marcadores = markers
- "D" = Disorganized (flip unit over)
- Cuadro = Square
- Bajas = Loss marker
- Guerrilla = Guerrilla (skirmish) marker
- Tiro Art. = Limbered artillery
- Turno = Turn marker
- D = Unidad en derrota = Rout marker
Figure 2.
- Comandantes = Leaders
- Unidades bajo su mando = Units under his command
- Factor de mando = Command number
- Unidades combatientes = Combat units
- Identificación histórica = Historical I.D.
- Unidad superior = Parent unit
- Clase de unidad = Unit class (if light, a horn is shown) (If shock infantry, a dot is present)
- Tipo de unidad = Unit type (infantry is shown)
- Grado de moral = Morale grade
- Factor de combate = Combat factor
Figure 3. Suchet wishes to change Laval's orders, so must trace a line of command, which may not pass through enemy units or their ZOC's. The number of hexes is then divided by the command range number (see the command rules).
Figure 4. ZdC para... = Shows ZOC and facing of infantry unit. Shows front (frente), flanks (flanco), and rear (retaguardia).
Figure 5. Set up in guerrilla formation. It costs 1 mp to extend in guerrilla formation to hex A, and 3 mp to extend to hex C. The unit could reform in hex A at a cost of 3 mp (1 mp to reform, and 2 to move) or in hex B at a cost of 4 mp (1 mp to reform, and 3 to move). A ZOC extends into each frontal hex (all around).
Figure 6. Movement and stacking. The example assumes that "C" has 8 or more combat points, with "A" moving to hex F, passing through B and C. It could not pass through the frontal hexsides of B or C.
Figure 7. Assignment of fire points by units in a square. The example assumes the square contains a total of 13 fire points. The example on the left is legal. (3 adjacent hexes may not have more than 50% of the total fire strength).
Figure 8. Line of fire for the artillery unit. It may fire at units B and D, but not E. Ficha amiga = friendly unit.
Figure 9. Example of shock combat. Hex A has 2 infantry units. Unit E is an infantry unit, as are B, C, and D. The stack in A attacks B and D as one attack, while E must attack C (since A has chosen to attack).
Exclusive Rules
Alcañiz 1809
1. Duration
The scenario lasts 24 turns, and begins with the French phase of Turn 1.
1.1 Game scale
Each hex represents approximately 250 meters across, and each turn represents 30 minutes of time.
3. Orders
Initial orders are:
- Spanish: all have defense orders
- French: all have maneuver orders
Changing orders:
- Spanish orders divider number is 3. Blake may attempt to change orders once per turn.
- French orders divider number is 5. Suchet may attempt to change orders 3 times per turn.
14.3 Reorganization
- Spanish: base hexes are any hexes of Alcañiz
- French: base hex D, on the road to Hijar
15. Leaders
Radius of command is:
- Spanish: 3 hexes
- French: 3 hexes
- Suchet: 6 hexes
16. Demoralization
Consult the tables.
17. Victory conditions
In addition to the regular rules, there is one French objective: If the French occupy or have a ZOC into hex E (the bridge at Alcañiz), the Spanish demoralization levels are affected (see the demoralization table).
18. Set up
Spanish:
- Roca and units in Hex C
- Lazán and units within 2 hexes of hex B
- Areizaga and units within 3 hexes of hex A
- Ibarrola and units in any hexes south of hex C
- Artillery may set up anywhere on the map.
French:
- Enter during the movement phase of turn 1, in any order at hex D (the road to Hijar).
Errata Alcañiz 1809
- French units: The units marked 114 Line/1 and 114 Line/2 are assigned to Harispe.
María 1809
1. Duration
The scenario lasts 18 turns, and begins with the French phase of turn 1. Turns 9 and 10 are considered to be rainstorms (actually hailstorm), with no combat allowed, and no movement allowed except along a road.
1.1 Game scale
Each hex represents approximately 250 meters across. Each turn represents 30 minutes of real time.
3. Orders
Initial orders are:
- Spanish: all have defense orders
- French: all have defense orders
Changing orders:
- Spanish orders divider number is 3. Blake may attempt to change orders once per turn.
- French orders divider number is 5. Suchet may attempt to change orders 3 times per turn.
14.3 Reorganization
- Spanish: base hex K, on the road to María.
- French: base hex L, on the road to Zaragoza.
15. Leaders
Radius of command is:
- Spanish: 3 hexes
- French: 4 hexes
- Suchet: 6 hexes
16. Demoralization
Consult the tables.
17. Victory conditions
In addition to the regular rules, each side has one objective:
- If the Spanish occupy or have a ZOC into hex L (on the road to Zaragoza), the French demoralization levels are affected (see the demoralization table).
- If the French occupy or have a ZOC into hex M (the road bridge at María), the Spanish demoralization levels are affected (see the demoralization table).
18. Set up
French:
- Independent infantry: between the hexes marked A (inclusive)
- Polish Lancer unit: Hex B
- Wathier and units: between the hexes marked D (inclusive)
- Fabre, Harispe, and units: between the hexes marked C (inclusive)
- Habert and units: Hex E
- Laval and units (only if the variants are used)
- Reinforcements: Robert and units enter turn 10 at Hex L, on the road to Zaragoza.
Spanish:
- Roca and units: between any of the hexes marked F (inclusive)
- Cavalry: between the hexes marked G (inclusive)
- Lazán and units: between any of the hexes marked H (inclusive)
- Creagh and units: between the hexes marked J (inclusive)
- Areizaga and units (only if the variants are used)
Both sides artillery units may set up within two hexes of any set up hex of their respective sides, on or behind their own "front lines."
18.1 Optional variants for María 1809
After playing the scenario, players may wish to experiment with the following variants, which may also be used to balance the skill levels between players.
- A. Areizaga intervenes. At the beginning of turn 6, the Spanish player rolls a die. If he rolls a 6, then the units of Areizaga appear as reinforcements at hex K, on the road to María. Each turn they have not appeared, add one to the roll (so on turn 7 they appear on a roll of 5 or 6, etc.).
- B. Robert is delayed. The units of Robert appear using the same procedure as above, but begin rolling on turn 10.
- C. Fabre is delayed. Two battalions of the 114th Line begin the game on any hex of the road running from Muela to Zaragoza (hex A5 to J1).
- D. Laval intervenes. The units of Laval enter on hex, the road to Zaragoza, on turn 12 or after, rolling as do Areizaga and Robert.
Errata - María 1809
- Reinforcements always enter the map with maneuver orders.
- French units: The artillery unit assigned to Robert is actually an independent unit.
- Spanish units: Infantry units America 2 and America 3 are marked as C morale, but should be marked as D morale.
Castalla 1813
1. Duration
The scenario lasts 18 turns, and begins with the French phase of turn 1.
1.1 Game scale
Each hex represents approximately 250 meters across. Each turn represents 30 minutes of real time.
3. Orders
Initial orders are:
- Allied: all have defense orders
- French: all have maneuver orders
Changing orders:
- Allied orders divider number is 3. Murray may attempt to change orders once per odd-numbered turn beginning with turn 5 (turns 5, 7, 9, etc.). Additionally, the Allied player may roll for individual initiative once per turn for any one leader; on a roll of 6 the leader may change orders. The cavalry is considered independent.
- French orders divider number is 5. Suchet may attempt to change orders 3 times per turn, beginning with turn 2.
10. Fire
British infantry with a morale or B or C has a +1 modifier to the fire die roll. This is noted on the Fire table modifiers list.
14.3 Reorganization
- Allied: base hexes F, on the roads to Petrel, Tibi, and Ibi.
- French: base hex G, on the road to Biar y Villena.
15. Leaders
Radius of command is 4 hexes for all leaders.
16. Demoralization
Consult the tables.
17. Victory conditions
In addition to the regular rules, each side has one objective:
- If the French occupy or control the castle at Castalla, the Spanish demoralization levels are affected (see the demoralization table).
- If the Allies occupy or control hex G (on the road to Biar y Villena), the French demoralization levels are affected (see the demoralization table).
18. Set up
French:
- Set up all units within 3 hexes of hex G, no more than 20 points per hex.
Allies:
- Whittingham and units: within 3 hexes of hex A
- Adam and units: within 2 hexes of hex B
- Mackenzie and units: within 3 hexes of hex C
- Clinton and units: within 3 hexes of hex E
- Roche and units: 3 units within 2 hexes of hex D, and 2 units within 1 hex of the castle at Castalla.
- Cavalry: within 2 hexes of hex D
- Artillery sets up anywhere on the map.
Errata - Castalla 1813
- The French cavalry units function as independent units for command and orders, but are subordinate to General Boussard for combat and reorganization.
- British units: Medium artillery units 6RA3 and 7RA6 should be light artillery.
- Spanish units: The reverse side of the General Roche counter should be a 0, not a 1.
Charts and Tables (Standard Rules)
Movement factors
| Unit type | French | Spanish and Allied |
|---|---|---|
| Infantry | 4 | 3 |
| Guerrilla formation | 5 | 5 |
| Artillery | 3 | 3 |
| Horse artillery | 5 | - |
| Light and medium cavalry | 7 | 6 |
| Heavy cavalry | 6 | - |
| Leaders | 8 | 6 |
Costs to change formation
Infantry:
| From | To Normal | To Square | To Guerrilla |
|---|---|---|---|
| Normal | - | 1 | 0* |
| Square | 2 | - | 1* |
| Guerrilla | 1* | 1 | - |
These costs are in addition to normal movement costs, such as 1 mp per hex to deploy into or out of guerrilla formation.
* Add the terrain cost of the square being occupied by the counter.
Artillery pays 1 mp to limber, and 2 mp to deploy (unlimber).
Terrain Effects Chart (TEC)
| Terrain | Infantry (movement) | Cavalry (movement) | Artillery (movement) | Fire: defender is in... | Shock: defender in or across |
|---|---|---|---|---|---|
| Clear | 1 | 1 | 1 | - | - |
| Buildings | 2 (D) | 3 (D) | 1 (E) | A | A |
| Trees | 1 | 2 | P (H) | A | C |
| Castle | 3 | P | P | B | B |
- P = Prohibited
- A = Attacker reduced to 1/2
- B = Attacker's fire reduced to 1/3
- C = Attacker reduced to 2/3
- D = Only costs 1 mp if under maneuver orders and no other units in the hex
- E = May not deploy in hex
- F = No additional cost if under maneuver orders
- G = Check line of sight
- H = Only along roads
- J = Only effects units with movement orders
- * In the María scenario: these thickets were especially difficult to move through, especially for artillery. After turn 10, an artillery unit that has moved across a slope hexside into a thicket must roll one die. It must roll a 5 or a 6 to be able to continue moving, or it becomes immobilized. After becoming immobilized, it must roll a 6 to move out, and is captured if the hex is entered by an enemy unit.
Terrain effects are cumulative: for example, a unit attempting shock combat across an arroyo and moderate slope hexside is at 1/3 strength (2/3 x 1/2).
Fire Table
Points firing across the top (1 to 12), roll one die down the side.
| Roll | 1 | 2 | 3 | 4 | 5 | 6 | 7 | 8 | 9 | 10 | 11 | 12 |
|---|---|---|---|---|---|---|---|---|---|---|---|---|
| >1 | - | - | - | - | - | - | - | - | - | - | - | - |
| 2 | - | - | - | - | - |
If more than 12 points fire, use the 12 column and resolve again with the remainder (in effect, fire is resolved twice).
* If the attacker is receiving fire from a defender, the attacker ignores the R result.
Modifiers:
- Defender in square +2
- Fire in flank +2
- Fire against guerrilla -2
- Against deployed artillery -1
- Light artillery -1
- Heavy artillery +1
- Morale A or B +1
- Morale E or F -1
- British infantry with morale of B or C +1
If artillery and more than 2 hexes: -1 for 3rd unit in same stack, -1 for 4th unit in same stack. Plus all terrain effects.
Fire results:
- R = unit must retreat 1 or 2 hexes, at the option of the owning player. Any other units in the hex must check morale.
- M = unit must make a morale check. If it fails, all other units in the hex must check morale.
- D = (only if during defensive fire) unit is not allowed to attempt shock combat. This is also the result if a unit takes 2 or more hits. It may still fire normally.
- 1, 2, 3 = unit takes that number of hits.
Shock combat table
Attacker/defender odds ratio across the top, roll one die down the side.
| Roll | 1-4 | 1-3 | 1-2 | 1-1 | 3-2 | 2-1 | 3-1 | 4-1 | 5-1 |
|---|---|---|---|---|---|---|---|---|---|
| >1 | AL | AL | A2 | A2 | A2 | A1 | A1 | - | BL |
| 2 | AL | A2 | A2 | A1 | A1 | A1 | - | BL | D1 |
| 3 | A2 |
Modifiers:
- +? Leader present in hex
- +? Differences in Morale grades (A vs C would be a 2 modifier)
- +1 Attacker has attack orders
- -1 Attacker has defend orders
- +1 Heavy cavalry present (but not against squares or other heavy cavalry)
- -2 Cavalry against a square
- +1 Infantry (not guerrilla) against a square
- +1 Shock troops attacking
Plus all terrain effects.
Results:
- AL = Attacker loss. Place a strength point loss under the attacking unit. If more than one attacking unit, the attacker chooses.
- DL = Defender loss. Place a strength point loss under the defending unit. If more than one defending unit, the defender chooses.
- BL = Both take a loss.
- A1, A2 = Attacker retreats that number of hexes and checks morale.
- D1 = Defender retreats one hex. (No morale check)
- D2 = Defender retreats two hexes and checks morale.
Morale table
Morale of unit across the top, roll one die down the side.
| Roll | A | B | C | D | E | F |
|---|---|---|---|---|---|---|
| >0 | D | R | R | R | R | R |
| 1 | - | D | D | R | R | R |
| 2 | - | - | D | D | D | R |
| 3 | - | - | - |
- - = No effect (returns to normal morale)
- D = Disorganized (Place a D marker)
- R = Rout (Flip unit over)
Modifiers:
- +? Leader in hex (a 0 is considered a 1)
- +1 if in building, trees, town, castle
- -1 if in enemy ZOC (if attempting to reorganize)
- -1 if unit is routed
- -1 for each strength point lost
If attempting to reorganize, count only successful results: - means they recover morale one level, with a routed unit becoming disorganized, and a disorganized unit regaining good order.
Demoralization levels
Spanish/Allied and French demoralization points for each division. The starred column is used only when the condition noted below the table applies.
Alcañiz
| Spanish/Allied division | Leader | Points | Points (*) |
|---|---|---|---|
| I | Lazán | 7 | 5* |
| II | Areizaga | 12 | 9* |
| III | Roca | 18 | 12* |
| C | Ibarrola | 2 | 2* |
| French division | Leader | Points |
|---|---|---|
| I | Fabre | 12 |
| II | Harispe | 10 |
| C | Wathier | 4 |
* Use this column if the French occupy or have a ZOC into hex E.
María
| Spanish/Allied division | Leader | Points | Points (*) |
|---|---|---|---|
| I | Roca | 20 | 14* |
| II | Lazán | 21 | 14* |
| V | Creagh | 10 | 6* |
| C | O'Donoju | 2 | 1* |
| A | Areizaga | 20 | 14* |
| French division | Leader | Points | Points (**) |
|---|---|---|---|
| I | Habert | 12 | 9** |
| II | Harispe | 10 | 7** |
| III | Fabre | 14 | 10** |
| R | Robert | 16 | 11** |
| C | Wathier | 4 | 4** |
| L | Laval | 10 | 10** |
* Use this column if the French occupy or control hex M (the road bridge to María). ** Use this column if the Spanish occupy or control hex L (the road to Zaragoza).
Castalla
| Spanish/Allied division | Leader | Points | Points (*) |
|---|---|---|---|
| I | Adam | 6 | 4* |
| II | Clinton | 20 | 16* |
| III | Mackenzie | 18 | 14* |
| IV | Whittingham | 20 | 16* |
| V | Roche | 18 | 14* |
| - | Cavalry | - | - |
| French division | Leader | Points | Points (**) |
|---|---|---|---|
| I | Robert | 22 | 18** |
| II | Harispe | 19 | 15** |
| III | Habert | 13 | 10** |
| C | Boussard | 9 | 9** |
* Use this column if the French occupy the castle. ** Use this column if the Allies occupy hex G (the road from Biar to Villena).
Orders record
Players will want to photocopy this record prior to play.
- NO = No orders
- AT = Attack
- SK = Skirmish/Harassment
- MA = Maneuver
- DF = Defend
- RT = Retreat
Alcañiz, María and Castalla each have an orders record table listing the Spanish/Allied divisions and French divisions (with leaders as in the demoralization levels above, but without points) and a blank Orders column for each division.
Basic Rules
1. Introduction
The Shadow of the Eagle Basic rules were designed in response to the requests for a simpler game system. The designers demonstrated these in a mega-campaign of Medellín 1809 at Divermania '94 in Barcelona. These rules may be used completely independently of the advanced rules, except that players should still refer to figures 1, 2, 3, 8, and 9.
2. Game equipment
The Basic game uses the same components as the Advanced game, except that players do not need the leader counters or any markers (except for the turn indicator).
2.1 Maps
The maps represent the terrain over which the battle was fought. A hexgrid has been superimposed to regulate movement and combat.
2.2 Tables
Players must use the Basic game tables. These include Movement factors, Reorganization, Terrain effects, and Combat (which is resolved on a single table). These tables are explained in the Basic rules.
2.3 Counters
The counters represent the units that fought in the battles. The various types and values of infantry, artillery, and cavalry are explained in Figures 1 and 2.
3. Sequence of play
The game consists of alternating player turns as noted below:
- A. French phase
- Movement. The French player moves any of his units, following the rules for movement, stacking, and ZOC (zones of control).
- Combat. The French player resolves his combats, including any advance after combat.
- B. Spanish phase
- Movement. The Spanish player moves any of his units, following the rules for movement, stacking, and ZOC (zones of control).
- Combat. The Spanish player resolves his combats, including any advance after combat.
- C. Reorganization. Both players may attempt to reorganize their disrupted units.
- D. Advance the turn marker, and begin a new turn.
4. Stacking
Up to three units may occupy the same hex, as long as they are from the same side. Units from opposing sides may never stack together. The stacking limits apply at the end of each movement phase, and during all of the combat phase. If the stacking limit is violated, the owning player must remove the excess units (his choice). Neither player may examine an opponents stack, except during the combat phase when determining the odds ratio.
5. Movement
Each unit has a distinct movement allowance, which is listed on the Movement Allowance table. This allowance is expressed in term of movement points (mp's). This is the number of movement points available to the unit each turn. Movement points may never be accumulated from turn to turn, nor transferred to another unit. Units move from hex to hex, paying a specific cost to enter each hex. These costs are listed on the Terrain Effects Chart (TEC).
Restrictions:
Zones of control and stacking may limit the movement of a unit. Units may never exceed their movement allowance during a turn. All movement point costs are cumulative. Movement is voluntary, and units may only move during their own friendly movement phase (and as a result of combat, as dictated by the Combat Results table (CRT)). Units may not exit the map, except to fulfill specific victory conditions.
6. Zones of Control
Zone of Control (ZOC) is the phrase used to describe the six hexes that surround each unit (or stack). Units never exert a ZOC into a hex that they could not move into.
6.1 Effects on movement
Each unit must pay one additional movement point (1mp) to enter an enemy ZOC, and may move no further than that turn once they have done so. Units may freely leave an enemy ZOC at the beginning of their movement phase, without additional cost. Units may move directly from one ZOC to another (but then must cease movement).
6.2 Effects on combat
See rule 7.
7. Combat
Combat may occur when enemy and friendly units or stacks are adjacent and in each other's ZOC's. Combat is voluntary, except that if a unit or stack attacks an enemy unit, all enemy units that the attacking unit is adjacent to must also be attacked. This requirement may lead to a series of attacks being necessary, if the first attack is desired. Exception: see Rule 8, Bombardment.
Restrictions: A unit may not attack more than once per turn. The attacking player decides the distribution and order of the attacks. Units in a hex may attack into different hexes. A stack of units defends as a stack (one total defense value). All units attacking a hex are combined into one attack. If multiple units from different hexes are attacking a single hex, it is considered a shock attack, not a bombardment.
7.1 Procedure
- The attacker and defender total the combat values of their involved units, taking into account all combat modifiers, and calculate the odds ratio of attacker to defender. Round down in favor of the defender (Example: 11 attacking factors to 4 defending factors is 11-4 which rounds down to 2-1).
- Roll one die on the Combat Results table (CRT) and apply the results immediately, before proceeding to the next combat.
Restrictions: Attacks of odds greater than 5-1 are treated as 5-1. Odds of less than 1-4 are not permitted.
7.2 Combination attack
If the attacking force consists of all three unit types (infantry, cavalry, and artillery) then the attacking force has its combat value doubled. In this case, the artillery does not have to be adjacent (it is considered to be bombarding), but must be within range (see Rule 8, Bombardment).
8. Bombardment
Artillery units may attack (bombard) enemy units from up to 5 hexes away (count the defending hex, but not the artillery unit's hex). Artillery units attacking in this manner are said to be bombarding, and are not affected by the combat results. Artillery units may also attack adjacent units, and in this case are affected by the results. Bombardment may be used to satisfy the requirements of Rule 7 (that all units be attacked).
8.1 Line of sight/line of fire
Buildings, trees, and friendly units (not enemy units) block a line of fire. If a LOF falls exactly along a hexside, and one hex is clear while one is blocked, the LOF is considered clear (see figure 8). A crest hexside blocks LOF if it is exactly in between the firing unit and the target, or closer to the target than to the firing unit. Otherwise, the crest hexside does not block LOF. An obstacle does not block if it would be lower than both firing and the target unit.
9. Movement after combat
Retreats
Retreats dictated by combat results are conducted immediately. Units stacked may retreat into different hexes if desired. It is permitted to retreat into an enemy ZOC, but the unit(s) must become disorganized if they do so, and continue to retreat until they reach a hex free of enemy ZOC's. Units may retreat in violation of the stacking limit, but the overstack must be corrected by displacing the existing units into another hex (a chain reaction may occur).
Advance
If the opposing hex is vacated by enemy unit(s), one (and only one) victorious unit may advance and occupy the vacated hex. This option is available to the victorious player, whether they are attacker or defender. The option to advance must be exercised immediately, before proceeding to the next combat.
10. Terrain
Players should consult the Terrain Effects chart (TEC) for the effects of the various terrain types. Terrain effects are cumulative. Players should retain fractions when calculations are made (Example: Halving a 5 results in 2 1/2).
11. Disorganization and Reorganization
When a unit becomes disorganized it is flipped over to its reverse side. Disorganization has no effect on movement, but the unit may not enter enemy ZOC's. Its combat factor is reduced to half, and if attacked by enemy cavalry any adverse result eliminates the disorganized unit.
11.1 Reorganization
In the Reorganization phase, each player may attempt to reorganize his disorganized units. The units may not be in an enemy ZOC to attempt reorganization. Roll one die for each unit, and consult the Reorganization table.
12. Victory conditions
Each player counts the number of strength points lost during a game. Cavalry points count double. The level of victory depends on the difference in losses between players. Any difference of 10 points or less is considered a draw.
13. Set up
As per the general rules.
14. Scenario rules
14.1 Duration
Alcañiz is 18 turns long, and begins with the French phase of turn 1.
María is 14 turns long, and begins with the French phase of turn 1. Turns 9 and 10 are thunderstorms: no combat is allowed, and only road movement is allowed.
Castalla is 14 turns long, and begins with the French phase of turn 1.
14.2 Scale
In each game, a hex represents 250 meters and a turn is 45 minutes of real time.
14.3 Reorganization
As per the general rules.
Note: The color scheme used on the maps for mountains has no effect on movement, and is included only to show which hexes are at different levels.
Basic Rules charts and tables
Terrain Effects chart (TEC)
| Terrain | Movement | Combat |
|---|---|---|
| Clear | 1 | - |
| Buildings | 2 | x2 |
| Woods | 2 | x 1 1/2 |
| Castle | +1 | x2 |
| River | +1 | x 1/2 |
| Arroyo | - | x 3/4 |
| Moderate slope | Up +1, Down - | Up x 3/4, Down - |
| Steep slope | Up +2, Down +1 | Up x 1/2, Down - |
| Cliff |
Movement allowances
| Unit | French | Spanish/Allied |
|---|---|---|
| Infantry | 5 | 4 |
| Light Cavalry | 9 | 8 |
| Medium or Heavy Cavalry | 7 | 7 |
| Artillery | 4 | 3 |
| Horse Artillery | 6 | 5 |
Reorganization table
Find unit morale across the top, roll one die.
| Die roll | A | B | C | D | E | F |
|---|---|---|---|---|---|---|
| 1 | No | No | No | No | No | No |
| 2 | Yes | No | No | No | No | No |
| 3 | Yes | Yes | No | No | No | No |
| 4 | Yes | Yes | Yes |
Modifiers: +1 in Buildings, Woods, or Castle.
No = unit is still disorganized (remains inverted). Yes = unit is reorganized (flip over to front).
Combat results table (CRT)
Find odds column along the top, roll one die.
| Die roll | 1-4 | 1-3 | 1-2 | 1-1 | 2-1 | 3-1 | 4-1 | 5-1 |
|---|---|---|---|---|---|---|---|---|
| -1 | Ae | Ae | Ae | Ad | Ar | Ar | - | Ex |
| 2 | Ae | Ae | Ad | Ar | Ar | - | Ex | Dr |
| 3 | Ae | Ad | Ar | Ar |
Modifiers: Difference in morale grades: - or + for each level (the most favorable). For example, if a B morale unit attacks a D morale unit, it receives a +2 die roll modifier.
Results:
- A affects the attacker, D affects the defender
- d = all units are disorganized. They may voluntarily retreat.
- r = all units must retreat.
- e = one unit is eliminated.
- - = no effect.
- Ex: exchange. One defending unit is eliminated, and one attacking unit or equal or greater value is eliminated (if possible).
Attacks of greater than 5-1 are treated as 5-1. Attacks at less than 1-4 are not allowed. If forced to attack at less than 1-4, though, resolve as if 1-4.