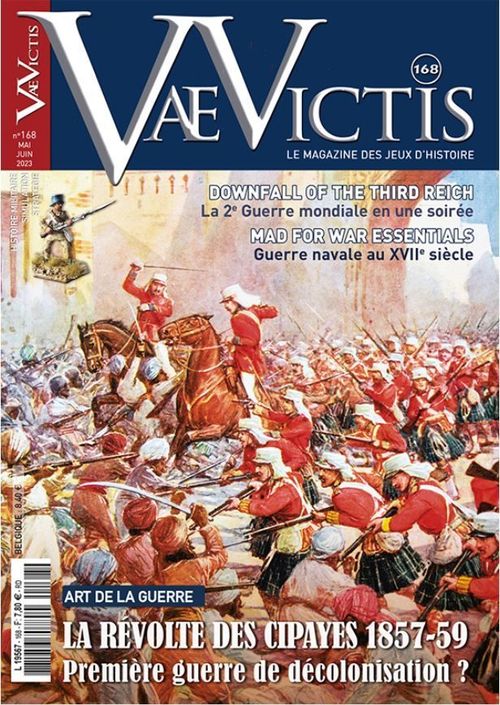
La Révolte des Cipayes 1857-1858
La Révolte des Cipayes 1857-1858 Rulebook
Table of Contents
Table of Contents
1 - Components
There are three types of counters: units, historical figures (rebel commanders and British generals) and markers.
There are two camps. The rebel player controls the mutineer Sepoys (green). The British player controls the British (pink).
1.1 - Units
The counters represent regiments or the equivalent. There are three types of units: infantry, cavalry and artillery. Each unit represents three or four infantry battalions, one or two cavalry regiments, and one or two batteries. From here on, we will use the general term "units" to designate without distinction.
Although they are not units, strictly speaking, the Civilians and Badmashes counters ("riffraff", nickname given by the British to the irregular militia that supported the rebels) will be considered in the same way.
They may be:
- indigenous infantry units: BNI for Bengal Native Infantry, Oudh for Oudh Irregular Infantry, or Punjab for Punjab Irregular Force;
- Gurkhas units;
- or Bengal Lancers: BLC for Bengal Light Cavalry.
The front side represents the unit loyal to the British and the back represents the revolted side. Each side of the counter indicates the unit's identification and its combat value and, on the front, the city in which it must be placed at the beginning of the game and the rebellion threshold for the Gurkhas (see 5). The indigenous units only have one strength step: they are destroyed if they suffer a loss. The cavalry (BLC) has a star which indicates its special capacity in combat (see 8.5).
1.1.2 - The British Units
They may be European infantry or cavalry units, identified by the abbreviation of their original regiment name (see appendix).
Historical note: concerning the cavalry, Hodson's Horse and Multani Horse are technically indigenous units, but their loyalty to the crown in any ordeal assimilates them into the British units.
The front side of the counter represents the unit at full strength and the back in its disorganised state. Each side displays the unit's identification, combat value; the front side shows the city in which the units must be placed at the beginning of the game.
1.1.2 - Reinforcement Units
During the game, players may draw, from the events counters, infantry or cavalry units that they may use as reinforcements (marked with a red R on the front).
The rebel player may also deploy Badmashes when he plays a "rebellion" event (see 4) or contingents raised by independent or semi-independent states supporting the mutineers (Kotah, Jhansi, Judpur).
Finally, the two players may recover siege artillery (for the effects, see 8.6 and 9.2).
The private contingents, artillery and Badmashes units only have one strength step and are revealed after the first loss in the same way as the indigenous units.
Note: the Naval Brigade unit counts as both an infantry unit and a heavy artillery battery and has two strength steps.
Once deployed, these units function in the same way as the units initially positioned on the map.
1.2 - Historical Figures
The front side of the British general and rebel commander counters indicate their identity, their initiative value and their command value (the number of units they may command). The Rani of Jhansi, Campbell and Nicholson may be deployed on the table once drawn.
Under the name of each historical figure, there are two values and the location where they are positioned or appear. The first value is the initiative value (the number of AP he may use freely each turn) and the second is the command value (the number of units he can command); some also have a Tactical bonus (ex: Rani of Jhansi = +1).
1.3 - Markers
There are five types of markers:
-
The "Turn" marker which tracks the game's progression,
-
Victory Point (VP) markers to be placed on the VP track.
-
"Events/Reinforcements" counters (27 for each camp) to be drawn at the beginning of each turn. The events counters display one of three possible types of events on the front side - Rebellions, Stratagems or Tactical Bonuses - and the activation point (AP) value on the back.
Important: when the player uses a counter, he chooses whether to play the event or the AP but not both.
- Only the rebel player has "Badmashes" Rebellion counters; their specific use is described in 5.1.
- The Stratagem counters may be played as the players choose and their effects are described in 11.3.1 (for the rebel player) and 11.3.2 (for the British player).
- Tactical bonus counters may be played during the combat phase beginning with the defender.
- Reinforcements counters may be deployed as reinforcements during the Rebellion phase (for the rebel player) or the Reinforcements phase (for the British player).
- The British player has specific reinforcements counters that have no AP value on the back (replaced by the characteristics of the disorganised unit).
- The Events/Reinforcements counters may be kept hidden from the adversary from one turn to the next without limit. One may keep AP or an event for a future turn. Once used, they are immediately discarded.
-
The Rebellion markers indicate the revolting cities; their back side indicates a quelled Rebellion since a city cannot rebel twice during the game. This also simplifies the calculation of VP at the end of the game.
-
The Civilian markers indicate the civilians besieged by the Sepoys. They are turned over (Massacre!) if the civilians have been massacred. The British player can recover the Massacre! counters under certain circumstances (see 8.11).
1.4 - The Map
The map represents the region of northern India where the majority of the campaign took place.
Historical note: an important campaign also took place in the centre of India, but it is not taken into consideration for this game as the two operations were relatively independent.
The map is divided into four provinces: Bengal; Oudh; Northwestern Province (NWP); Rohilkhand (Roh.) and an independent city (Shimla). Each province is subdivided into zones.
- These zones have a principal city, called a "territory" in the rules.
- These zones have a fortified city, called a "city" in the rules.
Punjab and Nepal are Deployment zones and do not comprise a territory. These zones are neutral and can neither be controlled nor rebel. Units may be deployed there but cannot move there voluntarily.
Important. The British units may retreat there after combat if there are no other territories or cities available for the retreat (see 8.7). A rebel unit that is forced to retreat there is destroyed.
Rivers and a road (the "Grand Trunk Road") are also represented. The localities indicated on the map have no effect on movement.
A rebellion value is associated with each province (Examples: 5 for Bengal and 1 for Shimla). This value may be replaced with an "auto" note, signifying that if there is a rebellion event 0 that corresponds to the concerned territory, the Sepoy units present in the territories of the province automatically rebel.
The rebel commanders and British generals have boxes to stock the units stacked with them.
The turn counter represents 6 game turns (each turn lasts 2 months). The two blue spaces correspond to the monsoon season.
2 - Set-Up
After choosing sides, the players set up the map and the units front side up on the indicated territories or cities. Each player puts his events and reinforcement counters in an opaque container.
The rebel player begins the game with the counters Badmashes-NWP and Badmashes-Oudh in hand; the British player begins without any counters in hand. The cursor is placed on the first turn (May/June 1857).
The players will need ten six-sided dice (called d6); one is used for random draws and the others are used to indicate the fortification values in the besieged cities (see 5 and 9).
3 - Sequence of Play
Each game turn represents two months and is broken down into the following phases:
1 - Initiative Phase (see 4)
2 - Rebellion Phase (see 5)
The rebel player draws four events counters (only two on the first turn) and may play rebellion/Badmashes counters. He may also play reinforcement counters.
Note: there may come a time when the rebel player has no more events counters to draw (especially on the last turn of the game); in this case he must play the counters he still has in hand.
3 - Reinforcements Phase
The British player draws four events counters and may play several reinforcement counters. He immediately places on the map any reinforcements on Calcutta or Punjab.
Note: the same holds for the British player as for the rebel player (see note 2 above).
4 - Operations Phase for player A
Possible combats.
5 - Operations Phase for player B
Possible combats.
6 - Siege Phase
The players resolve sieges beginning with those of player A then those of player B.
7 - End of the turn
Check the instant victory conditions (see 10), otherwise move the turn counter forward one space.
4 - Initiative
On the first turn, the rebel player has the initiative (player A) and plays his operations phase first. Starting with the second turn (July/August), the players each roll 1d6 and add this result to the sum of the tactical bonuses of their generals deployed on the map. The player with the greater value wins the initiative (player A) and plays first. In the case of a tie, the player who had the initiative on the previous turn keeps it. The players may place the turn counter on the phase corresponding to the player who has the initiative as a reminder.
The player whose turn it is to carry out operations and resolve the battles he initiated is called the in-phase player.
5 - Rebellion Phase
The rebel player draws four events counters (only two on the first turn) and can then play Rebellion/Badmashes counters.
5.1 - Rebellion
The Rebellion/Badmashes counters indicate in which provinces the rebel player may organise a rebellion (here, Bengal) if he plays the event and not the AP.
He then rolls 1d6 for each city of the province that rebels. If the die roll value is less than or equal to the rebellion value of the province, the city rebels. The cities of Oudh and Rohikland rebel automatically.
Place a "Rebellion" marker on the city. A city may only rebel once per game (but it may be retaken after having been pacified).
Special rule: Calcutta never rebels but may be taken and occupied by rebel units.
The indigenous troops (NI and NC) in garrison in a rebelling city automatically mutiny; the Gurkhas mutiny on a d6 roll of 1 or 2.
When a unit mutinies, turn its counter over to its rebellion (green) side.
5.2 - Impact on Civilians
The rebel player then rolls 1d6 for each city that has revolted.
- On a roll of 1-4 a unit of British civilians appears in the city where it is besieged behind fortifications (2 fortification points to indicate with 1d6).
- On a roll of 5-6, the civilians have been massacred. The rebel player is awarded 2 VP and a "Massacre!" marker is placed on the city.
If there are still loyal indigenous units or British units in a revolting city (even if there are no rebel troops there), they must retreat to a territory free of rebel troops, or they find themselves besieged in the company of civilians if they have survived.
5.3 - The Badmashes
The front of the events counter corresponds to a unit of Badmashes that the rebel player may place on any territory or city in the revolted province and that corresponds to the name indicated on the counter. If the province has already revolted or if all the cities have already been taken by the rebels, the rebel player may place them on the territory or city where Bahadur Shah is located. If he is eliminated, the counter may only be used for its AP value; turn it to its back side to indicate this.
Note: if the Badmashes counter "au choix" (player's choice) is played, it follows the same rules and must be placed on the chosen province or with Bahadur Shah.
5.4 - Deployment of Nana Sahib and Tatya Tope
These two commanders are deployed independently to the cities or territories of Oudh, rebel player's choice, when this province mutinies.
5.5 - Deployment of Bahadur Shah
If Delhi rebels, Bahadur Shah is placed on top. He cannot change columns but can be moved to a column commanded by another rebel commander.
5.6 - Deployment of Rani of Jhansi
Rani must be deployed at Jhansi during the rebellion phase. When the rebel player deploys him, he may retrieve from the pile of events counters two units of his choice (private forces [Kotah, Jhansi, Judpur] or artillery) that can deploy to Jhansi with him.
5.7 - Deployment of the Indigenous Reinforcement Units
The 2nd and 3rd Punjab and the 26th BNI may be deployed as reinforcements to Punjab by the rebels or the British. The first player who chooses to deploy one of these units positions it in Punjab. His adversary can then only use the corresponding event counter in his colour as an additional AP.
Notes: for example, we might see the 2nd Punjab combat for the rebels while the 3rd Punjab and the 26th BNI remain loyal to the crown. If rebel and British units are together in Punjab, there is no combat (see 1.4). The units deployed to Punjab that enter onto the map cannot return there.
6 - Reinforcements Phase
The British player draws four counters and may then play one or more reinforcement counters.
6.1 - Deployment of Reinforcements
The reinforcements are placed in Calcutta or in Punjab. If Calcutta is occupied by the rebels, the British player must wait to retake control of this city before bringing in his planned reinforcements.
6.2 - Deployment of Campbell
When the British player deploys Campbell, he may retrieve from the pile two reinforcement units of his choice that can deploy to Calcutta with him.
6.3 - Deployment of Nicholson
When the British player deploys Nicholson, he may retrieve from the pile of events counters two reinforcement units of his choice among the 2nd, 3rd Punjab, 26th BNI or Royal Artillery that can deploy to Punjab with him.
6.4 - Deployment of Indigenous Units as Renforcements
See 5.7.
7 - Operations Phases
Each player carries out his operations phase beginning with player A.
7.1 - Activation
Each general has the same number of activation points as his initiative value (number on the left). He may increase his number of activation points (AP) by using Event/Activation counters. If these markers are used in this way, they are then discarded and can no longer be used for their event or reinforcement capacity.
Each activation point may be used to carry out one of the following actions:
- move, or
- enter into contact with the enemy.
A general whose army comprises only cavalry corps has one additional AP. Isolated units have only one AP and must spend Activation counters if the player wants to give them more (see 7.2.1).
The AP of an Event counter whose value is +2 or +3 may be shared among several columns/historical figures.
7.2 - Movements
The connections are only used for movement. Units (or historical figures) must be placed in a Deployment zone, a territory or a city on the map.
Cost of Movement
To move a unit or a column one connection the cost is as follows:
- Full connection (Grand Trunk Road) = 0 AP (1 AP during the monsoon months)
- Dotted connection = 1 AP
- Crossing a river during the monsoon: +1 AP
- Entering into contact with the enemy or a territory controlled by the enemy: +1 AP, unless a cavalry unit is present in the column (see 7.2.2)
Examples: a British column moves from Calcutta to Cawnpore on turn 1 (May/June). This movement is free if all the cities and territories located on the Grand Trunk Road between the two cities are controlled by the British. On the other hand, during the monsoon on turn 2 or 3 (July/August or September/October), the cost for the same movement becomes 7 AP (5 connections + 2 rivers). If Cawnpore is in the rebels' hands, the cost will be +1 additional AP, regardless of the season, to enter into contact unless the column has at least one cavalry unit. If the rebel player played the event counter "Flooding rivers (Rivières en crue)" during a rebellion phase in monsoon season, the movement cannot exceed Hazaribagh.
7.2.1 - Movement of Columns
A group of units, whether or not it is commanded by a historical figure, is called a column.
A column without a historical figure cannot exceed 4 units.
A historical figure may use his full initiative value and add up to +3 points by using Event/Activation markers for movement.
Isolated units or columns with no historical figure receive 1 free AP per turn. Columns comprised solely of cavalry units receive 1 additional AP.
If the player wants a unit to leave a historical figure to which it is allocated, he removes it from the column and places it on the map. This movement consumes the AP allocated to the isolated unit for the turn. If the player wants to move it further, he must spend the AP from an event counter.
A unit may not leave a historical figure after he has been activated. On the other hand, a unit may rejoin a historical figure before or after he has been activated.
A player may leave units belonging to a historical figure in a zone when he leaves it or absorb them during his movement if this does not cause him to exceed the number of units he may command.
These actions do not lead to the consommation of additional activation points.
7.2.2 - Entering into Contact with the Enemy
When a column enters a territory that contains enemy units or that is controlled by the enemy (i.e. a city in rebellion for the British or a city in a quelled rebellion for the rebel player), he is considered to enter into contact with the enemy.
Entering into contact with the enemy costs 1 additional AP unless the column has a cavalry unit.
Game note: consider keeping this AP if you want to be able to combat.
7.3 - Bahadur Shah
The last Mughal has no initiative points and he cannot move on his own. However, he can accompany a column if it is commanded by another general.
7.4 - Mistrust of the Natives
The British generals cannot recruit indigenous units to their columns during the first turn (May/June 1857).
7.5 - Rebellion
If a rebel commander or column is alone in a city that has never rebelled, he may attempt to get it to join the rebellion.
The rebel player rolls 1d6 and the city rebels if the result is less than its initiative value.
The rebellion only concerns that city and does not lead to the appearance of Badmashes units.
If a column of non-recruited, loyal indigenous units finds itself in this city, these units rebel in the same conditions as in a rebellion phase. This type of rebellion does not generate civilian units; they are considered to have fled before the arrival of the rebel column. As a reminder, place a "Rebellion!" marker if there isn't one already.
8 - The Battles
Battles take place after the movement phase. Battles arise in all territories or cities in which a column comes into contact (see 7.2.2) with a non-disorganised enemy column. The in-phase player - who initiated the battle - is called the attacker; his adversary is the defender.
The attacker chooses the order of resolution of the battles if there are several during the same phase.
The non in-phase player has two options: he may choose to take his troops out of the city so that it becomes neutral (or in rebellion in the case of the rebel player, or occupied by British troops or civilians for the British player); or he may choose to combat.
If a column enters a territory occupied by an enemy historical figure that is not accompanied by a troop, the controlling player must roll 1d6; if the die roll value is less than or equal to the initiative value of the historical figure, he flees to an adjacent territory free of enemy troops. If this is not possible, or the die roll result is greater than the historical figure's initiative value, he is eliminated.
8.1 - The Battles
The players position their units and any historical figure present facing each other. They cannot have more than one column with or without a historical figure participate in a battle.
They can reorganise their order of battle before the battle, but the number of combatting units may not exceed four or the tactical value of the commanding historical figure.
Besieged historical figures and their troops cannot participate in the combats.
Each battle progresses according to a strict and unalterable order:
- Withdrawal
- Tactical bonus
- Combat
- Rout/Retreat
- Calculation of VP
8.2 - Withdrawal
An independent cavalry unit or a column comprised solely of cavalry units and with an axis of retreat toward a free territory or city may choose to withdraw there.
8.3 - Use of Events Counters
The players may play one or more Tactical Bonus counters (see 11.3). They must be played at the beginning of the battle beginning with the defender and their effects last until the end of the battle. They are then discarded.
8.4 - The Combat
The two players tally the combat values of the infantry and cavalry units present. They then calculate the strength ratio (from 1/3 to 3/1), possibly modified by a Tactical bonus. The attacker rolls 1d6 - potentially modified by tactical bonus/penalties - and reads the result on the battle table (8.5) which indicates the number of step losses for each camp for the phase.
8.5 - Battle Table
See the map and page 12.
XAR = the attacker loses X strength steps and withdraws to his territory of origin.
XDR = the defender loses X strength steps and withdraws or takes refuge behind remparts.
If the column that causes its adversary to withdraw has more cavalry combat factors than the column that withdraws, it inflicts an additional step loss after the subtraction of losses (see 8.8).
8.6 - Tactical Bonus/Penalty
Certain historical figures and certain events counters provide tactical bonuses during the battle's combat phase. They are played beginning with the defender (see 8.3).
The attacker (the in-phase player) adds up his tactical bonuses and subtracts those of his adversary. The final result will be added to (or subtracted from) the d6 roll result.
8.7 - Result of the Battle
8.7.1 - Rout
If one camp has no more units, he is routed and loses the battle.
8.7.2 - Retreat
The player who suffers the R result must retreat. He has two options:
- He may choose to take refuge in the city that is neutral, in rebellion for the rebel player, or occupied by British troops or civilians for the British player.
- If the combat took place in a neutral city zone - in rebellion for the rebel player or occupied by British troops or civilians for the British player -, he may choose to have his units take refuge in the city.
- He may choose to retreat. The retreat movement must take place in an adjacent zone free of enemy troops. If this movement is blocked by the presence of enemy troops, the units and historical figures are eliminated. If the defender routs, he cannot do so toward any zone in which the attacker has entered into contact with him. If there are no other zones possibles, the troops are eliminated.
- Retreating to Punjab or Nepal is prohibited.
8.8 - Pursuit
If the column that forces its adversary to retreat has more cavalry combat factors than the retreating column, after subtracting the losses, it inflicts an additional step loss.
8.9 - Fate of the Historical Figures
If all of the units of a rebel commander or a British general are destroyed, he is eliminated.
8.10 - Calculation of VP
The battle's victor (after rout or retreat) wins 1 VP.
8.11 - Murderous Fury
The first British column to enter a city where a civilian massacre has been perpetrated (see 9) takes the massacre counter to place it on the column. During the first battle after the discovery of the massacre, the column receives a +1 bonus on the die roll (it is polite for the player to exclaim "Remember ----(name of the city where the massacre was perpetrated)!"). Regardless of the result of the battle, the counter is removed afterward and the effect ends until another massacre is discovered.
9 - Sieges
9.1 - Overview
Once both movement phases have been carried out and the various encounters have been resolved, the players begin the siege phase.
The city is protected by fortifications with an initial value = 2 defence points (indicated on the map).
The players may use the dice to indicate the number of fortification points on the spaces of the cities in question (or write them down on a sheet of paper).
9.2 - Methods
For each besieged city, the besieger determines the strength ratio between the besieging units and the besieged units (including any civilians). The defender and the besieger may play a Siege Bonus, beginning with the defender.
If this number is greater than or equal to 2/3, he then crosses the column corresponding to this value with the line corresponding to the 1d6 roll on the Siege Table (9.3). The result is the number of fortification points that are destroyed.
If one or more artillery units participate in the siege, the besieging player adds their tactical bonuses to the die roll result.
If the defender has no more fortification points, the besieged units are removed from the game. If there were any civilian units, they are massacred and removed from the game. The rebel player receives 2 VP and a Massacre counter is placed on the city.
If this was a rebel city besieged by the British, the rebellion is put down in this city and the corresponding counter is turned over (to its quelled rebellion side).
As long as the siege continues, the lost fortification points may only be recovered with events counters. On the other hand, if the besiegers lift the siege for any reason, the lost fortification points are immediately augmented to their maximum value of 2.
9.3 - Siege Table
See map and page 12.
9.4 - Attrition
At the end of each turn, if there are any besieged units, other than civilians, in a city, the concerned player rolls 1d6; on a "1" one of the units loses a strength step.
9.5 - Cities Without Defence
If the city is in rebellion and has no units to defend it, the revolt is put down as soon as a British column enters the territory (turn the rebellion counter over), but the column must interrupt its movement for the rest of the turn.
9.6 - Lifted Sieges
If a British column lifts the siege of a city, the player wins 1 VP. If the city also had a civilian unit, it is saved and removed from the game and the British player is awarded 1 additional VP. If the column had suffered losses, the player may turn to its front side one unit having suffered a loss. This action is only possible on the turn in which the civilian unit was saved.
10 - Victory
10.1 - Immediate Victory
The rebel player wins total victory if he controls both Calcutta and Delhi at the end of any turn. The British player wins total victory if he controls all the cities on the map at the end of any turn.
10.2 - Victory at the End of the Game
The players tally their victory points. A territory is considered controlled if it is only controlled by non-besieged troops of one player.
If the difference is greater than 5 VP, it's a marginal victory; if it is greater than 10 VP it's a total victory.
-
Rebel player VP:
- 2 VP per civilian massacre
- 1 VP per military victory
- 2 VP per British general killed
- 2 VP per British unit completely destroyed in combat/siege.
- Last turn:
- 1 VP per controlled city
- 5 VP each for control of Delhi or Calcutta
- 1 VP per alive commander (except Bahadur Shah)
- 5 VP for Bahadur Shah
- 1 VP per other territory linked to the Grand Trunk Road that is controlled
-
British player VP
- 1 VP per lifted siege
- 1 VP per saved civilian population
- 1 VP per military victory
- Last turn
- 1 VP per controlled city
- 5 VP each for control of Delhi or Calcutta
- 1 VP per other territory linked to the Grand Trunk Road that is controlled
11 - Appendices
11.1 - Deployment of Units
11.1.1 - Indigenous Units
Reminder. BNI: Bengal Native Infantry, Oudh: Oudh Irregular Infantry, Punjab: Punjab Irregular Force, BLC: Bengal Light Cavalry.
- 7th Oudh: Lucknow
- 13th BNI: Lucknow
- 71st BNI: Lucknow
- 53rd BNI: Cawnpore
- 1st BNI: Cawnpore
- 56th BNI: Cawnpore
- 2nd BLC: Cawnpore
- 28th BNI: Calcutta
- 11th BNI: Meerut
- 20th BNI: Meerut
- 4th BNI: Gwalior
- 9th BNI: Gwalior
- 38th BNI: Delhi
- 54th BNI: Delhi
- 74th BNI: Delhi
- 36th BNI: Ambala
- Gurkhas: Nepal
- 3rd BLC: Meerut
Reinforcements
- These units are placed in the pile and are deployed to the indicated zone during the reinforcements phase.
- 26th BNI: Punjab
- 2nd Punjab: Delhi
- 3rd Punjab: Delhi
- These units are placed in the pile and are deployed, as the player chooses, during the rebellion phase.
- Kotah Contingent
- Judpur Contingent
- Jhansi Contingent
- These units are placed in the pile and can be deployed to any non-besieged column during the reinforcements phase.
- Artillery (x 2).
11.1.2 - British Units
Reminder. RF: Foot regiment, HI: Highlanders, Dr.G.: Dragoon Guards, Lanc: Lancers
- 10th RF: Allahabad
- 60th Foot Regiment: Meerut
- 32nd RF: Lucknow
- 37th RF: Calcutta
- 78th HI: Calcutta
- 1st Madras: Calcutta
- 6th Dr.G. (Carabiniers): Meerut
- 9th Lanc. (Queen's Royal): Ambala
- Hodson's Horse: Simla
Reinforcements
- These units are placed in the pile and are deployed to the indicated zone during the reinforcements phase.
- 24th RF: Punjab
- Multani: Punjab
- 91th RF: Calcutta
- 90th LI: Calcutta
- 8th RF: Calcutta
- 53rd RF: Calcutta
- Naval Brigade (Nav Bgd): Calcutta
- Reminder: this unit counts as both infantry and as artillery when it is in good order.
- 92nd HI: Calcutta
- 93th HI: Calcutta
- 2nd Dr G.: Calcutta
- This unit is placed in the pile and may be deployed to any non-besieged column during the reinforcements phase.
- Royal Artillery
11.2 - Historical Figure Counters
11.2.1 - Rebel Commanders
Dhundu Pant alias Nânâ Sâhib: Oudh (see 5.4)
Tantya Tope: Oudh (see 5.4)
Muhammad Bahâdur Shâh: Delhi (see 5.5)
Reinforcements
Placed in the pile and deployed to the indicated zone during the reinforcements phase
Lakshmî Bai, Rani de Jhansi: Jhansi.
11.2.2 - British Generals
Brigadier-General Sir Henry Havelock: Allahabad
Reinforcements
Placed in the pile and deployed to the indicated zone during the reinforcements phase.
Brigadier-General John Nicholson: Punjab
Lieutenant-General Sir Colin Campbell: Calcutta
11.3 - Effects of the Events Counters
The phase during which the various bonuses and stratagems can be played is indicated in parentheses.
11.3.1 - Rebels
1- Cholera (x 2) Stratagem (Rebellion Phase). The rebel player chooses a British general; he dies from cholera on a 1d6 result of 1.
2- Flooding rivers Stratagem (Rebellion Phase) playable only during the monsoon months. The monsoon causes the rivers and streams to flood, making them uncrossable.
3- Thugs Stratagem (Rebellion Phase). Thugs infiltrate the British camp. The rebel player chooses a British general; he is assassinated on 1d6 = 1-2.
4- Tiger hunt Stratagem (Rebellion Phase). An officer decides to organise a tiger hunt and gets lost. The rebel player chooses a British column that cannot move this turn.
5- Agent provocateur - Secret agent (x 2) Stratagem (Rebellion Phase). The rebel player chooses an indigenous unit that has remained loyal to the British. It mutinies on 1d6 = 1-3 (1d6 = 1-2 for a Gurkha unit).
6- The last Mughal Tactical bonus (Battle Phase). Shift the strength ratio one column in the rebel player's favour in a city/territory where Bahadur Shah is present.
7- Sapping (x 2) Siege bonus (Siege Phase). The rebel player chooses a city in which British units are under siege. The besieged lost 1 fortification point. If their fortification levels falls to 0, the siege is over and the British units are massacred (see 9.2).
8- Ghazis (x 2) Tactical bonus (Battle Phase). The participation of Ghazi troops (fanatical Muslim warriors) gives a tactical bonus of +2 to the rebel player.
11.3.2 - British
1- Orgy Stratagem (Reinforcements Phase). A rebel commander decides to organise an orgy. The British player chooses a rebel column that will be unable to move during this turn.
2- Quarrel over precedence Stratagem (Reinforcements Phase). The rebel commanders quarrel over who should command. The British player chooses a rebel column that cannot move this turn.
3- Tactical Intuition (x 2) Tactical bonus (Battle Phase). Shift the strength ratio one column in the British player's favour.
4- Henry Kavanagh, VC Tactical bonus (Battle Phase). A British officer is awarded the Victoria Cross for slipping between enemy lines and guiding a rescue column toward a besieged city. The British player may replace the result of a battle led against a rebel troop that besieges a city with a DR result.
5- Hodson network Siege Bonus (Siege Phase). Captain Hodson's British spies identify a flaw in the rebels' defence of a city. The British player adds +1 to the die roll result for a siege.
6- Persuasive officers Stratagem (Reinforcements Phase). Using proven managerial methods such as summary executions, British officers shake the determination of a rebel unit. The British player chooses a city that just revolted. He rolls 1d6 for each indigenous unit. The unit will not mutiny on a result of 5-6.
7- Royal Engineers (x 2) Stratagem (Reinforcements Phase). The British player chooses a city where British units are under siege. The besieged recover 1 fortification point.
8- Bring on the Tartan! Tactical bonus (Battle Phase). The British player receives a tactical bonus of +2 if a Highlander unit participates in the combat.
9- Khalsa Ji! Tactical bonus (Battle Phase). The British player receives a tactical bonus of +2 if a Multani Horse, Hodson's Horse or Punjab Native Infantry unit participates in the combat.