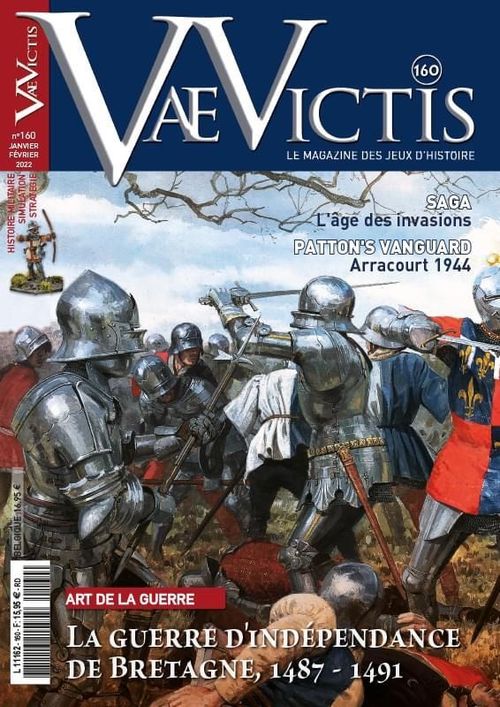
La guerre d'indépendance de Bretagne (1487-1491)
La guerre d'indépendance de Bretagne (1487-1491) Rulebook
Table of Contents
Table of Contents
- 1. Presentation of the Game
- 2. Abbreviations and Definition
- 3. Counters
- 4. Objectives
- 5. Strategic Map
- 6. Sequence of Play
- 7. Reinforcements and Replacements
- 8. Strategic Movement
- 9. Fatigue and Desertion
- 10. Combat
- 11. Diplomacy
- 12. Determination of Victory
- 13. Set Up and Specific Rules
- Example of Strategic Movement
- Example of Siege
- Example of Major Battle
- Example of Cursor Movement on the Alliances Table
1. Presentation of the Game
The French-Breton War (Breton War of Independence) simulates the conflict between the Kingdom of France and the Duchy of Brittany. The war ended with the defeat of the Bretons and the marriage of Duchess Anne and the French King Charles VIII, sealing the kingdom's annexation of the duchy. This game is part of the series L'or et l'acier (1) (Gold and Steel) which plays the campaigns of the end of the 15th and beginning of the 16th centuries at the strategic and tactical levels. A combattant counter represents 1500 to 2000 foot soldiers and 750 to 1000 cavaliers on the front side and half as many on the back side. An artillery counter represents about one hundred cannon of all types.
The game is played in 13 rounds. Each round represents a season (spring, summer, autumn); the winter round is not played.
In this game, the French face off against the Bretons whose great lords range from treasonous to loyal.
(1): The Burgundian Wars, 1474-1477 VaeVictis n°115, The War of the Public Weal 1465 VaeVictis n°123, Cortès and the Conquest of Mexico 1519-1521 VaeVictis n°137, Marignan 1515 Ludifolie.
2. Abbreviations and Definition
Army: One or more stacked units, supervised by a commander whose counter is placed on top of the unit or stack.
Commander: a named political and/or military figure is a historic commander on the front of the counter and an anonymous commander on the back.
Garrison: a stack of one or more units that benefits from the protection of a fortress. By default, a stack in a zone with a fortress is always a garrison. If a commander is present with a stack, its counter must be placed under the stack to distinguish the garrison from an army.
Active player/inactive player: the player with the game phase is called active (attacker or besieger), the player who is not in his game phase is called inactive (defender or besieged).
TC: Tactical capacity, a characteristic of the commander indicating the number of tactical markers he may use on the battlefield.
D6: a six-sided die.
Range of Fire (RF): used for the resolution of fire during major battles.
Combat Factor (CF): represents the combative value of the troop.
LR: Line of Retreat, tactical zone allowing for withdrawal from a combat.
SP: Strength Point: a unit on its back side has 2 SP, and a unit on its front side has 1 SP. The artillery and militia only have 1 SP. The back side has the colours of the opposing side which indicates that it has been captured following combat. The CF on the back may be different from that on the front.
Movement capacity: limit of movement points (MP) that can be used to carry out movement.
Movement point (MP): used to move on the strategical and tactical maps.
RP: Recruitment Point.
VP: Victory Points.
R&R: Reinforcements and Replacements.
xD6: x is the number of rolls for a six-sided die.
FV: Fortress Value.
SZ: Strategic zone on the strategic map.
TZ: Tactical zone on the tactical map.
3. Counters
Coats of Arms
Note: Alain d'Albret is closely linked to the Duchy of Brittany; he is the son of Catherine of Rohan and husband of Françoise of Châtillon which provides him with potential claims to the Duchy of Brittany.
Units
A combatting unit is characterised by six parameters:
- A coat of arms for nationality
- Type of combattant
- Range of fire expressed in number of TZ (the shooter's TZ is not counted).
- Cost in recruitment points expressed in RP
- Colour code for nationality
- Combat factor
- Movement capacity in MP
Combattant types:
- Ab: Arbalétrier - crossbowmen
- Ar: Archers
- Ca: Cannon (all calibres)
- Co: Couleuvrinier (fire arm)
- Cm: Medium cavalier (Coutilier, Brigandiniers)
- Gd: Gendarme (Heavy cavalier, Man-at-Arms cavalier)
- Hb: Hallebardier, Vougier, Billmen
- Mi: Militia
- Pi: Pikemen (Swiss, Lansquenet)
Commanders
A commander is characterised by five parameters:
- Movement capacity expressed in MP used on the strategic and tactical maps.
- Tactical capacity TC
- Rank is expressed by 1, 2 or 3 stars (the more stars, the higher the rank).
- The front side is a named historical commander and the back is an anonymous commander (numbered 1, 2, etc.) or a replacement historical commander.
4. Objectives
Victory is determined on the final game round.
The players obtain VP by controlling strategic zones (SZ), by winning battles and sieges, through eliminated enemy units and by having allied commanders in their camp. Each scenario specifies the victory conditions in terms of VP.
5. Strategic Map
The strategic map is composed of strategic zones (SZ) characterised by a maximum of five parameters:
- an identification number;
- a movement cost; by default, each movement by an army in a SZ costs 1 MP; the cost is 2 MP if there is a mountain symbol present;
- an objective SZ (the objective is indicated by a star)
- a fortress value (FV) of 1, 2 or 3 points.
A SZ may be controlled or disputed:
- It is controlled when:
- a control marker is placed in the objective SZ;
- Only one camp - army or garrison - physically occupies the SZ
- A SZ is part of an ally's territory.
- A SZ is part of the national territory of a camp.
- It is disputed when two camps occupy this same SZ during a siege or a battle.
Control of an objective SZ: the SZ control marker with the colours of the camp is placed in this SZ either at the end of a victorious combat or after having been the last unit to pass through or stop in this SZ, potentially leaving a garrison there. The presence of combat units is not necessary to control the objective SZ.
When a camp controls a SZ, it benefits from its FV and its VP.
6. Sequence of Play
French phase
- Reinforcements & Replacements (see 7.)
- Strategic movement (see 8.)
- Fatigue and desertion (see 9.)
- Combat resolution (see 10.)
- Siege resolution (see 10.)
Breton phase
- Reinforcements & Replacements (see 7.)
- Strategic movement (see 8.)
- Fatigue and desertion (see 9.)
- Combat resolution (see 10.)
- Siege resolution (see 10.)
Shared administrative phase
- At the end of the round, move the time marker forward one space.
- Remove the English counters on the Autumn round.
- Victory is determined at the end of the last round of the game (see 12.)
7. Reinforcements and Replacements
7.1 Reinforcements
The number of units that arrive as reinforcements is limited by the number of counters available. There cannot be more than three counters of each ally (England, Spain & Gascogny, Swiss Confederation) or six counters (German Holy Roman Empire) on the map. There are two ways to bring units into game during play: reinforcements and replacements. A reinforcement is a unit or a commander that enters into play for the first time. A reinforcement intervenes:
- when it is indicated on the time scale/round counter;
- when the conditions are met for an exceptional reinforcement (see scenario).
- When RP are spent to purchase reinforcements.
When a reinforcement is available, it is placed according to the instructions in the scenario in the corresponding SZ during the Reinforcements & Replacements Phase.
If there is no specific indication, the reinforcement is positioned in the form of an army or garrison, as the owner chooses in a SZ he controls.
When a reinforcement's arrival SZ is controlled by the enemy due to the presence of an army or a garrison, the reinforcement is held off until the following round and at that point enters the game in an SZ adjacent to the SZ initially intended, or in the latter if it frees up.
A control marker is enough to block the arrival of a reinforcement in the SZ initially intended or in an adjacent SZ. The reinforcement may not enter the game until the SZ is controlled by the reinforcement's camp.
7.2 Replacements
1.1. Overview
A replacement is a previously eliminated unit or a commander that returns to play via the Reserve located on the game help. The number and the type of units available are limited to the counters previously eliminated and to the RP available during this round.
Special cases
- Cannon: a cannon counter that is captured by the enemy camp during a combat (battle or siege) is immediately turned over to the side displaying its new camp. It is then considered as a unit of this camp and may be employed for combat and replacement like any other unit of its new owner.
- Historical commander (nominative): unless otherwise indicated in the specific rules, the back side of a historical commander counter represents a standard commander.
1.2. Calculation of RP
Number of RP (2) available: they are determined for each camp by rolling 1D6 for each new game round. The number of D6 and the modifiers are indicated in the scenario. RP that are not spent during a round are forfeited.
(2): RP represent soldiers as well as the money to recruit and equip them.
Purchasing replacements
RP are used to "buy" units at full or reduced strength; the cost is indicated in RP on each counter. RP may be spent to bring to full strength a diminished unit already present on the map. The cost corresponds to the difference between the front side at full strength and the back side at reduced strength.
The active player may buy units from his camp or his allies'.
Placement
Placement of units and commanders as replacements: Replacements are deployed by the active player to SZ bearing the coat of arms of the purchased unit. It is prohibited to place a unit in an SZ controlled by the enemy.
Player's choose the placement in an SZ as either an army or a garrison if the commander is already present or was just placed there. Placement is not considered as a movement for fatigue and desertion.
8. Strategic Movement
Overview
Only commanders with units (i.e. an army) may carry out strategic movements. Units may not move on their own on the strategic map.
A commander may move alone at the same price as if he were accompanied by an army.
An army must complete its movement before the player can move on to other movement.
It is not permitted for a unit to begin its movement with one commander and finish it with another.
Each unit may only move once per round. It is therefore not permitted to take back a unit that has already moved, whether a garrison or an army.
Procedure
An army's movement capacity corresponds to the movement capacity of its army commander, indicated in MP (commander with the highest rank present, located on top of the stack). The army is moved from one SZ to another by paying 1 MP (clear terrain) or 2 MP (mountain, forest) to enter the SZ. One may only move from an SZ to an adjacent SZ or one with a connection. An army in an SZ may separate, without surcharge in MP, into as many armies as commanders are present to carry out various strategic movements. Several armies from the same camp that meet up in the same SZ are consolidated in the form of a single stack, garrison or army with the highest-ranking commander.
At no extra cost in MP, an army that carries out a movement may leave or pick up on the way units of a garrison or another army if the latter has not already carried out its movement.
A garrison may be transformed into an army by placing its commander on the top of the stack and spending 2 PM; this is considered a movement for fatigue and desertion. On the other hand, an army may be transformed into a garrison freely by placing the commander at the bottom of the stack.
An army that enters an occupied enemy SZ stops its movement. A siege or battle marker is immediately placed there, as appropriate (10.1). If the enemy SZ is unoccupied, the army may continue its movement and place a control marker, if need be.
Commanders and subordination: all commanders of the same camp, regardless of their nationality, may command all the allied units of this camp.
9. Fatigue and Desertion
Armies and garrisons may be diminished by fatigue and desertion. It is required for each stack to check if SP have been lost, regardless of whether it performed movement during the previous movement sequence.
The number of SP of a stack comprising an army or a garrison is used to determine the column on the Fatigue and Desertion Table.
Proceed as follows: roll 1D6 adding any modifiers (all cumulative), cross the result of the modified die roll with the determined column. The indicated number corresponds to the losses in SP to be eliminated, as the owner chooses. The eliminated units are placed in his camp's Reserve on the game help.
10. Combat
Overview
Combat ensues when units from the opposing camps are in the same SZ. If both camps have armies, this is a battle. If one of the camps has a fortress with or without a garrison, it is a siege. In the latter case, if a commander is present in the garrison, it is possible to combat as an army in a battle (as the inactive player chooses).
For each disputed SZ, place a siege or battle marker, then resolve the combats - battles then sieges - in the desired order.
Major battles and sieges are resolved on the Tactical Map.
Minor battle procedure
For any battle strictly involving fewer than 10 SP for either camp (thus not bestowing VP; see 12), the battle is resolved quickly, in a single round, with no deployment on the tactical map.
Battle resolution procedure:
- Establish a ratio between the CF of the attacker and the defender.
- Roll 1D6.
- Consult the result on the Combat Table.
- End of the battle
No modifiers are used. A result that corresponds to a retreat (R) outside of a TZ is replaced by a retreat outside of the battle's SZ.
Battles involving more than 10 SP on either side and sieges are resolved on the tactical map.
3. Major battle procedure
- The Tactical map is dedicated to tactical movements and combats and is divided into two equivalent parts for each of the camps, or five TZ; left wing, right wing, 1st line, 2nd line, 3rd line, and a LR for units that retreat after a tactical movement to leave the battlefield. The conditions for combat are:
- a melee between units located in two TZ connected by a dotted line;
- shots are carried out between two TZ within fire range.
Deployment
Beginning with the defender, each player deploys to the five TZ on his side of the tactical map, with the following constraint: at least one third of the SP must be deployed to the TZ 1st line.
The army commander is placed freely and must be visible (highest ranking commander or the commander chosen by the player in the case of a tie).
Determination of random events for the battle
The active player rolls 1D6 and checks its result on the Random Events Table. The consequences of each random event are valid for all the combat turns of this battle.
The specifics of each event and its consequences are described below:
1-Treason (a) (Trahison): these events only apply to the active player. All present units of a power allied with the active player whose marker is in the doubt zone on the Alliances Table do not combat (b). They are immediately placed in the LR zone (these SP are counted in the 10 SP to determine the allocation of VP during a battle). No redeployment may be carried out. If this event causes the retreat of the whole army of a camp present on the tactical map, it's a victory for the enemy camp and eligible for VP if the conditions are met.
2-Weapons on the ground (c) (Armes aux Pieds): according to the saying "No money, no Swiss", there is a risk that the mercenary units won't fight if they aren't paid. For each camp, roll 1D6; divide the result by two and round down to the nearest whole number and place this number of mercenary counters (English, German, Spanish & Gascon, Swiss) in the LR zone of their camp. They do not fight. If the Breton commanders Rieux or Albret are present at the battle, the event Weapons on the ground is replaced by Treason. This result only concerns the Breton camp and is ignored if Rieux and Albret are in the same TZ as Duke François or Duchess Anne of Brittany.
3-Jacquerie (Peasant revolt): each player rolls 1D6. Divide the result by 2 (rounded up) and place that number of Breton militia counters - for each of the camps - in the Reserve of their respective camp. If no militia counter participates in the battle, consider this event as Nothing. Ignore any surplus if the result is greater than the number of counters to remove.
4-Nothing (Rien): no random event.
5-Unmanned wing (Aile Dégarnie): the defender (inactive player) is surprised by the attack and one of his wings has no units present. Roll 1D6. For an even result, move the present units to the left wing in a central line, as the owning player chooses. For an odd result, move the present units to the right wing in a central line, as the owning player chooses. If there is no unit in the wing designated by the 1D6 result, ignore this event. This event is not transferable from one wing to the other.
6-Rain (Pluie): This event applies to both camps. Fire by firearms is not possible - cannon (Ca) and couleuvriniers (Co). These units may only combat by melee. The RF of the archers (Ar) is reduced from 3 to 2. The RF of the arbalétriers (Ab) does not change.
(a) This only concerns the allied troops present for the battle. Once the battle is over, the power that drew the random event remains allied with the camp with which it began the battle. The random event is considered a passing episode that is quickly resolved diplomatically. It is possible that the random event occurs even though the designated allied power is the only one represented on the tactical map.
(b) Choice of the allied power: if several allies are eligible for this event, the ally whose units amount to the fewest SP is the only one concerned. If there is a tie, the higher D6 roll determines which power is implicated.
(c) At the end of the battle, these counters return to the army of their camp. If the army is eliminated, these counters are placed in their camp's Reserve.
3.1. Choice of Tactical markers
3.1.1. Overview
Each camp has tactical markers that may or may not be specific to the camp. Tactical markers may only be used once per battle during a determined combat round. Only the tactical markers ditch (fossé) and fence (palissade) are useable during all the combat rounds. Since they are prepared elements, if they are used they MUST be revealed during the first combat round.
Presentation of markers
Applicable to fire
- Battery: useable by each cannon counter of the camp. The losses inflicted on the enemy camp for each shot are doubled (d) but the fence marker cancels this effect.
- Harassment: useable for each shot by the arbalétriers of the camp. The losses inflicted on the enemy camp for each shot are doubled (d).
- Fence (Palissade): useable only if an infantry unit is present during the deployment. This marker, positioned in a TZ, cancels (e) the effect of a rain of arrows or harassment tactical marker for each shot unless it's a shot from the rear or on the flanks. The effect of this marker is valid for all the rounds of the battle for this TZ.
- Rain of arrows (Pluie de flèches): useable for each shot involving archers of the camp. The marker rain of arrows doubles the losses (d), even if the random event rain is drawn.
Applicable to melee
- Cavalry charge: useable for a melee involving at least one unit of men at arms (Gd, Cm). The defender's losses are doubled. If the attacker suffers losses, they must be absorbed first by the units that enabled this marker to be played.
- Clash among pikemen (Choc entre piquiers): useable for a melee involving at least one unit of piquiers from each camp. The losses inflicted on each camp are doubled and are allocated first to the piquiers then as the players choose. If two identical Clash among pikemen markers are revealed and used by the two camps, the losses are not quadrupled, just doubled.
- Unseating (Démonte) (f): useable in a melee involving at least one unit of men at arms (Gd, Cm) of the camp. The CF of each Gd and Cm unit present in the TZ that benefits from this marker is increased by a modifier of +1. If the attacker suffers losses, they must be first allocated to these units.
- Ditch (Fossé): useable only if an infantry unit is present during the deployment. This marker, positioned in a TZ cancels the effect of a charge tactical marker except for an attack from the rear or on the flanks (see the modifiers of the tactical advantage). The effect of this marker is valid for all the rounds of battle for this TZ.
- Cut and Thrust (Taille et estoc): useable for a combat involving Hb. This marker cancels the effect of the Clash among pikemen tactical marker. Modifier of +1 against the medium cavalry (Cm).
Applicable for fire or melee
- Combination of the two tactical markers Ditch and Fence (in addition to the individual effects): only for the units in the TZ in which these markers are placed. This makes it possible to cancel a result R (retreat) and to reduce the losses by 1 SP. The effect of these coupled markers is valid for all the rounds of battle for this TZ.
(d) This result only applies to the targeted unit. If it suffers a loss of 1 SP x 2 and it has 2 SP it is eliminated. If it suffers a loss of 1 SP x 2 and it only has 1 SP left, it is eliminated. The extra loss is not allocated to another unit.
(e) The loss of 1 SP is applied without being doubled.
(f) The Bretons borrowed this method from the English and the Hundred Years War.
Choice of tactical markers
Each player secretly chooses a number of markers less than or equal to the TC of his army commander. He places them face down near the army commander for use during the combat rounds.
Combat Rounds
A battle is fought in one or several rounds. Each round is divided into sequences during which actions are executed: fire, melee, counter-attacks and tactical movements.
The active player must attack on the first round. At the end of this round, the attacker keeps the initiative to continue or stop the combat. All combat rounds that are begun must be completed.
Tactical choice
During this tactical sequence, the defender announces how many tactical markers, among those selected, he will use for this round, then the attacker does the same. Each player may use 0 to 2 tactical markers per round. The markers chosen for a round are revealed and used during this combat round - fire, melee, counter-attacks and tactical movements -, then discarded with the exception of the ditch and fence markers which are kept for the duration of the combats.
The markers that are selected but not used during the round are kept for another combat round and are placed face down on the tactical map, near an army commander.
Fire
Only units with a non-zero range of fire (RF) are able to shoot. Beginning with the active player, the players alternate their shots - one of the attacker's units and one of the defender's. A unit's RF is determined from the TZ it occupies (of his camp or the enemy camp if it is conquered). A shooter with a RF of 1 that is located in his 1st line or on one of his wings can fire on both wings and the 1st line of the enemy camp. In the same position, a unit with a RF of 2 can also fire on the 2nd enemy line, and so on.
The fire is all-out: the TZ of the unit that fires does not have to be linked to the TZ of the targeted unit; it must simply be within firing range. The same unit can be the target of several shots.
Fire procedure:
Before shooting, the attacker and defender simultaneously reveal their tactical markers chosen for the fire, where necessary. If one player chooses not to play, this does not prohibit the other from doing so. A marker is valid for all the fire of this combat round.
- The attacker chooses a target in a TZ located in the RF of the firing unit (see the tactical map). If the result is less than or equal to the shooter's CF, the shot is successful and 1 SP is removed from the targeted unit. This effect may be modified by the tactical marker. If the result is greater than the shooter's CF, the shot is a failure
- The defender then does the same.
- The players alternate their fire in this way. If a camp still has units that can fire and his opponent does not, he has them shoot one after another until they have all fired.
- On a result of 1, a historical commander present in the targeted TZ can be eliminated: roll 1D6 for each commander present in the targeted TZ. On a result of 1, the commander is eliminated and placed in his camp's Reserve. He may return to the game as an anonymous commander during the R&R sequence, unless otherwise specified in the rules.
Melee
Melee procedure:
A single TZ of the inactive player can be attacked in a melee per combat round.
- The active player indicates the enemy TZ that is attacked and its TZ that participates in the attack. These TZ must be adjacent (linked by a dotted line).
- The tactical markers chosen for the melee are revealed simultaneously by the players, except in the case of an exit from a siege. The tactical markers may be kept and revealed during a counter-attack.
- The total CF of all the attacking units (including those that fired) is divided by the total CF of all the units of the attacked TZ. The attacker/defender ratio obtained is reduced to a ratio of 1/2, 1/1, 3/2, 2/1, etc. rounded in the defender's favour. Ex.: 9/10 becomes 2/3 on the Combat Table.
- The attacking player checks whether he has a tactical advantage that provides a modifier (this modifier only benefits the attacker when he attacks from a conquered enemy TZ), as follows:
- +1: attack from the 1st or 2nd line toward the enemy 2nd or 3rd line respectively (i.e.: the enemy line is broken).
- +2: attack from one of the two wings toward any enemy central line (i.e.: flank attack) or from a central line toward a wing on the same side.
- +3: attack from the 2nd or 3rd line toward the enemy 1st or 2nd line respectively (i.e: rear attack).
The attacker rolls 1D6, to which he adds any tactical advantage modifier. On the Combat table, he crosses the modified result with the column that corresponds to the established ratio.
Combat results
- 1, 2, 3...: This result gives the losses in SP for the attacker/defender. These losses are to be allocated as the owner chooses among the units of the TZ, barring any specifications regarding the tactical markers.
- The elimination of SP occurs before determining a retreat (in the case of a 3R result, for example). For a siege, the FV losses are recorded with the cursor on the Siege Table.
- R: indicates an obligatory retreat toward an adjacent TZ for a battle and an exit for a siege. For a siege - without exit - this result is ignored by the besieger and the besieged.
Note: Cannon cannot retreat even if they have a non-zero movement capacity. They are either taken by the adversary who advances in the TZ after a melee, or are eliminated, as the attacker chooses.
- The elimination of cannon after a retreat does not count to fulfil a loss of 1 SP.
A retreat takes place by placing the units on a line located behind and adjacent to the TZ of origin (the retreat from the 3rd line or from a wing occurs toward the LR). If retreat from a TZ is impossible (presence of enemy units), the troops remain in place and suffer an additional loss of 1 SP (one counter is diminished, player's choice).
Advance after combat: after the evacuation of the TZ by retreat or elimination of enemy units, the victor may advance all or part of his units that participated in this combat in the TZ that is left free, except for the cannon.
*: a historic commander can be eliminated. Roll 1D6 for each commander present in the concerned TZ. On a result of 1, the commander is eliminated and placed in the Reserve of eliminated units. He can return to the game as a standard commander - except where otherwise indicated in the specific rules (see 13.1) - during the R&R sequence.
Elimination of a historic commander
-
If the highest ranking historic commander of an ally is eliminated, this allied power is considered neutralised. Its units and commanders are immediately removed from the game and the alliance cursor is placed at the centre of the Alliances Table, granting the indicated VP.
-
If the army commander whose TC was used to determine the number of tactical markers allocated is eliminated, he is immediately replaced during the combat round by the historic or anonymous commander ranked just below him, present on the map. In the case of equivalent ranks, the choice is made by their owner.
The number of tactical markers remaining must not exceed the TC of the new army commander. The excess is eliminated, as the owning player chooses.
A new army commander does not choose new markers, he keeps those that were selected minus those that have already been used, as his TC allows.
-
If a historic or anonymous commander finds himself alone in a TZ after the elimination of his units:
- During a battle - during a random event or after combat -, he is immediately placed in the closest TZ in terms of movement cost containing units of his camp, including the LR. If no units of his camp are present in the five TZ of the tactical map, he is eliminated.
- During a siege, he is placed in an adjacent SZ controlled by his camp, otherwise he is eliminated.
-
An eliminated commander is placed in the Reserve and may return the following round during his camp's R&R sequence, without spending RP, in the form indicated on the back of his counter (anonymous commander or historic successor). His positioning follows the same rule as that of a unit.
-
If the army finds itself without a commander, it loses the battle and the remaining units retreat according to 10.5.1
3.1.5. Counter-attack
The inactive player may initiate his own melee (a counterattack, without fire sequence) under certain conditions, from any TZ, even the one that was just attacked, toward any eligible TZ of the adverse camp, including the TZ from which he was just attacked.
The conditions are as follows:
The inactive player must possess at least one commander in the TZ chosen for the counter-attack.
The 1D6 roll result must be less than or equal to the TC of the commander, otherwise the counter-attack does not occur. If the result allows, carry out a melee according to the rules of section 10.3.4.3. In this case, the inactive player is considered the Attacker and the active player is considered the Defender. An advance after combat is possible for the camp that counter-attacks.
Tactical markers may be revealed by the two camps during this sequence, before the die roll. These markers are lost for the two camps if the counter-attack does not occur.
Only one counter-attack may be attempted per combat round. Once it has been attempted, regardless of the result, move on to the following sequences of tactical movements.
Tactical movements
These movements occur in addition to the advance after combat. Players, starting with the active player, may move an unlimited number or commanders and x units (at full or reduced strength), where x is less than or equal to the TC of the army commander.
The movement takes place by spending the necessary MP, indicated on the dotted lines connecting the TZ, to penetrate the TZ of its camp or of the enemy camp if it doesn't contain enemy units.
It is prohibited to penetrate a TZ that contains enemy units, except if they are cannon, (which are then captured and turned to their back side or eliminated, as the player chooses).
A unit that spends MP to enter the LR is placed in an adjacent SZ at the end of the battle, according to the rules explained in 10.5.1.
End of the combat round
At the end of the combat round, the active player has the option to fall back or to continue with the combat
- If the player decides to continue with the combat, begin a new, complete combat round starting with the tactical choices sequence (see 10.3.4.1);
- If the player decides to retreat, the inactive player may immediately counter-attack (without a test) without using a tactical marker, only if he has troops able to attack one of the active player's TZ with a tactical advantage bonus (i.e. he has units positioned in the enemy's part of the tactical map, and therefore is in a good position to counter-attack). Then, the battle ends, regardless of the result of the counter-attack.
3.5. End of the battle
The battle ends as soon as:
- all the units of a camp are eliminated;
- all the units of a camp have retreated beyond the battlefield to their LR;
- the units of one camp are left without a commander (historical or anonymous);
- the active player decides to end the combat
Proceed with the verifications of the battle consequences (see 10.5).
Siege procedure
3.6. Determination of the number of siege rounds
The 1D6 roll indicates the number of siege rounds.
Move the siege round cursor on the track on the Siege Table.
3.7. Deployment
- There is no deployment if there are no units in garrison.
- If a garrison is present, all the units of the besieged and the besieger are deployed to their respective side on the tactical map: TZ second line for the besieged and TZ first line for the besieger. The TZ of the 1st line of the besieged is left free to resolve a possible exit.
No random event is determined for the resolution of a siege.
3.3. Artillery fire
The active player carries out his artillery fire:
- The FV cursor is placed on the space corresponding to the FV of the fortress on the Siege Table counter.
- He rolls 1D6 per artillery unit: the roll is successful if the result is less than or equal to the artillery unit's CF.
- Each success reduces the FV by 1 for the resolution of the assault. A FV can never be negative; the cursor is placed at minimum on 0.
- Move the FV cursor on the Siege Table track to record each successful cannon shot.
Then, the following sequences in order:
Assault
- Attack Factor = total CF of all the besieger's units (4).
- Defence Factor = total CF of all the units of the besieger (4) + modified FV (reduced by one or more successful shots).
- Determine the simplified Attack Factor/Defence Factor ratio in the form 1/2, 1/1, 3/2, 2/1 etc, rounding in the defender's favour. This ratio indicates the reference column on the Combat Table;
- On the Combat Table shift x columns to the left, where x is the FV modified after the successful artillery fire;
- No tactical marker is used;
- The inactive player rolls 1D6 and applies the results according to 10.3.4.4. An R result for the besieged or the besieger is ignored, except for an exit.
- The SP losses are applied first to the garrison then to the FV. A fortress is seized when these two values are zero.
(4) Tally the cavalry's CF - it is unseated and acts like a temporary infantry - and the artillery CF - also including the small calibre guns for close combats.
Sortie
The inactive player (besieged) has the option of carrying out a single sortie attempt per combat round. Once the attempt has been made, regardless of the result, move on to the following sequence.
The exit conditions are as follows:
- A commander must be present among the besieged
- The 1D6 roll result must be less than or equal to the TC of the commander that leads the exit, otherwise the exit does not take place. If the result allows, carry out a melee according to 10.3.4.3, but with the following special features:
- The besieged player's choice of a number of units (except artillery) and the commander whose TC was used to determine the exit must be placed in the 1st line TZ of the the tactical map;
- No tactical marker is used.
- The inactive player (besieged) is considered as the attacker and the active player (besieger), as the defender.
- Advance after combat is not possible for either side. If there are only artillery unit(s) remaining in the besieger's TZ (the one that defends during the exit) and there are still besieged units remaining (the one attacking during the exit), the latter has the option to eliminate them or to bring them back to the fortress; in this case, turn the counters over to the side of their new owner.
- An R result for the besieger eliminates one artillery counter. An R result for the besieged simply puts an end to an exit.
- Move the siege round cursor down one space on the Siege Table track.
- The fortress's modified FV is kept for the following round(s). As soon as the siege is over, due to the retreat of the besieger or to the fortress being seized, the fortress goes back to its original FV (indicated on the map) (3).
- Remove the Siege and Garrison markers.
(3) The fortress is considered to be back in working order.
3.6. Continue or lift the siege?
If the result of the assault or the exit leads to neither the elimination of the besieged nor that of the besieger, the active player has the option of continuing a complete siege round - respecting the number of siege rounds determined by the D6 - or ending the siege and pulling his army back to a SZ according to 10.5.1.
Consequences of the battle or siege
Retreat of the defeated
Once the battle is over, the army that voluntarily ended the combat or that has all its units in its LR retreats to an adjacent SZ free of enemy units. If the army retreats to an enemy SZ (national territory or with a control marker from this nation), the retreating army reduces all its surviving units by 1 SP (those that are already reduced are eliminated). It is possible that the retreating army takes control of a SZ.
The besieger remains in his SZ if he has eliminated all the besieged units or leaves the SZ if he voluntarily stops the siege or after the final siege round and must then retreat to an adjacent SZ.
An army that retreats into a SZ that already contains an army or garrison of its own camp is immediately added to it and remains in this same form, army or garrison. If no other unit is present, the army may remain in this form or become a garrison, as the player chooses.
An army that cannot retreat is eliminated.
Control of the SZ
If the active player is victorious, he takes control of the SZ, in the form of an army or garrison, as he chooses.
Following combat
The active player carries out the following combat (battle or siege). The combat sequence ends after all the combats and sieges have been resolved.
Note: the besieger stopping the siege voluntarily or after a retreat has no bearing on diplomacy.
11. Diplomacy
Each ally has an alliance cursor that moves along the Alliances Table, ranging from indestructible (indéfectible) alliance to one camp to the other, passing through an intermediary zone of doubt. In the latter situation, the random events weapons on the ground (armes aux pieds), treason, peasant revolt (jacquerie) can apply before a combat. An ally's cursor is moved after a combat even if none of its units participated in the combat. (5).
Each battle/siege that is won by a camp (and eligible for VP) moves the alliance cursor of each of the enemy's allies one space toward the victor's camp. This does not apply to the cursors of the allies that are not yet in play.
-
An ally goes from one camp to the other without passing through a neutrality phase.
-
When an ally passes over to the adverse camp (according to the scenario), if its counters (units and commanders) are stacked with counters of its former camp, they are immediately placed in any SZ controlled by its new camp on the side (front or back) with the appropriate colours. A commander who changes camp takes only his units with him (one Mi counter for Rohan, Laval and Rieux and one Spanish Pi counter and two Gascon Co and Ab counters for Albret (front) or commander 4 (back).
The Spanish and Gascon mercenaries remain true to their commander Albret (or commander 4) if he changes camp. The other mercenaries are not concerned.
(5) A defeat of a principal power is consequential enough in terms of loss of prestige and credit for an allied minor power to disengage itself from the alliance.
12. Determination of Victory
The VP are indicated on the VP tally scale marked from 0 to 9, by positioning the VP cursor on the appropriate number. From 0-9 VP, use the x1 counter of the VP cursor; for 10 VP or more, use the +10 counter and place it on the number corresponding to the unit.
Victory points are attributed for each of the following actions:
- Major battle won involving at least 10 SP for each camp: +2 VP to the victor.
- Siege won by the besieger or the besieged (in the case that the besieger is eliminated or retreats) in a SZ with a FV=2: +2 VP, in a SZ with FV=3: +3 VP. No VP are awarded for a FV=1.
- Diplomatic cursors: 4 VP on the last round for each diplomatic cursor present in a camp.
- Gendarmes: 1 VP for every unit of enemy Gendarmes eliminated.
- Target SZ: 1 VP for each controlled zone counter on the last round of the game.
The victor is the player with the greater level of victory. There are three levels of victory:
- Crushing victory - 20 or more VP. France: King Charles VIII marries Duchess Anne of Brittany, adds Brittany to the kingdom and can turn toward Italy for new adventures. Brittany: Duchess Anne marries Maximilien I of Austria; France is attacked from the rear ...
- Decisive victory - 15 to 19 VP. France: the threat of Brittany going to the Habsburgs through an alliance is temporarily postponed. Brittany: Duchess Anne is yet to be married and is of interest to all the courts of Europe; Brittany settles her score with the seditious lords...
- Marginal victory - 10 to 14 VP. A short term truce is declared but satisfies neither side; a new confrontation is to come.
- If both players are eligible for the same level of victory, even with a different number of VP, the game is a tie.
- A player always has the option of stopping the game if he feels he has no chance of winning.
13. Set Up and Specific Rules
Time round marker: place the marker on the time track/round counter on Spring 1487.
Duration: 13 rounds. Start: spring 1487 - End: spring 1491.
VP cursors: place each camp's cursor on 0 on the VP tally track. The front side corresponds to the units (0 - 9), the back corresponds to 10 plus the units (10 - 19).
Alliances Table: place the diplomatic cursors Albret, Laval, Rieux, Rohan in the designated spaces on the Alliances Table.
SZ control markers: a control marker of the Duchy of Brittany is placed in SZ #1, #10, #12, #17, #24, #36 and #38. A control marker of the kingdom of France is placed in SZ #21 and #37.
Reinforcements: There is no Replacements sequence in Round 1, only a Reinforcements sequence.
-
Mercenary reinforcements: they are determined during each spring round (1, 4, 7, 10, 13) on the Reinforcements Table. The French player rolls 1D6 for the Swiss reinforcements, the Breton player rolls 1D6 for the English, German, Spanish, and Gascon reinforcements. Commanders Scales (English) and Albret (Gascon & Spanish) accompany the reinforcements from their country during their initial arrival.
-
The D6 result must be greater than or equal to the value indicated to recruit this number of counters (the type of combattants is up to the player). He must then spend the necessary RP.
For the Breton camp, the counters are placed at will in the port SZ #1 (Brest), #9 (Quimper), #26 (Saint-Malo), #23 (Guérande), #24 (Nantes); on the spring round for an odd result and on the summer round for an even result.
For the French camp, the counters are placed with any French army.
-
Removal of English counters*: at the end of each year (Rounds 3, 6, 9, 12) during the mutual Administrative phase, all the English counters (units and commanders) are removed from the map, wherever they are. They may return to the game on the following round during the R&R sequence.
* The Rennes treaty signed between the Duchy and England stipulates that 6.000 men are provided from mid February to the beginning of November, each year, with the salary and support of the troop at Brittany's expense.
Recruitment: any counter not present on the map at the beginning of the game may be recruited by spending RP, respecting the number of counters available.
The Breton camp benefits from supplementary and random RP each spring round:
- R&R of the Breton militia: the Breton camp recruits as many Breton militiamen as it can (number of RP and available counters). The French camp can only recruit Breton militia to their service within the limits of the RP of the SZ belonging to their allies and the available counters with their allies' coat-of-arms.
Strategic movement: The Loire River is always crossable without penalty.
- No militia (Breton or French, those of commanders Laval, Rieux Rohan) may leave Brittany (see border on the map). If they are required to retreat with an army, they are eliminated. They may only be placed in R&R in the SZ that are part of Brittany.
- Maritime movement: each round, maritime movement may be carried out by the Bretons and their allies only - in addition to their strategic land movement -, from any SZ with a coastline toward any other coastline SZ. Thus, 2 SP and commanders - without limit - may carry out this movement before or after a strategic land movement. There is no calculation of fatigue and desertion for a maritime movement on its own. Land movement followed by maritime movement is subject to fatigue and desertion determination.
Replacement Points (RP):
- Brittany: 2D6 per game round. Rounds 1 and 4: 1D6 additional. Rounds 7, 10, 13: 2D6 additional. Modifiers: -1 for each D6 for each French army present in Brittany.
- France: 4D6 per game round. Modifiers: -2 for each D6 for each Breton army present in France.
Units: for the militia (Mi) or the commanders, the indications are the owning camp (Brittany or France), then the concerned ally (Laval, Rohan, Rieu - there is no militia for Albret).
Placement of the French and their allies.
Note: counters that are not placed on the map at the beginning of the game are placed in the Reserve and may be recruited or may arrive as reinforcements during a R&R sequence. The remaining cannon counter is placed in the French Reserve.
- SZ #45: commanders Trémoille, Laval (France), Rohan (France), Beaudricourt, Saint-André, Balzac, 2 x Gd, 2 x Cm, 2 x Ca, 4 x Ar, 1 x Co.
- SZ #37: 1 x Mi Laval (France)
- SZ #21: 1 x Mi Rohan (France)
Placement of the Bretons and their allies.
- SZ #22: commanders François II of Brittany, Rieux (Brittany), Orléans, 1 x Gd, 1 x Cm, 1 x Ca, 3 x Ar, 3 x Mi (Brittany).
- SZ #36: commander Roumillé, 1 x Ar.
- SZ #24: 1 x Mi (Brittany).
- SZ #32: 1 x Mi Rieu (Brittany).
- NZ #38: 1 x Mi (Brittany).
- End of the rules -
Example of Strategic Movement
The French army is commanded by Trémoille who has the highest rank (3 stars vs 2 stars for Beaudricourt). The army's movement capacity corresponds to that of its commander and so 3 MP are spent to cross strategic zones 44, 43 and end in zone 38 to prepare the siege of Rennes. During the movement, the two counters Ar and Co are added to the army.
After the movement, the player determines any losses on the Fatigue and Desertion Table for the entire army; this corresponds to 20 SP (nine counters @ 2 SP and two Ca counters @ 1 SP). Use the column [20 - 29 SP]. This is a summer round and no mountain zones are crossed; there is no D6 modifier. The D6 roll result is 5; the player must eliminate 2 SP, and he chooses to eliminate an Ar counter at full strength.
Example of Siege
The 1 D6 roll indicates the number of siege rounds; it's a 2. The Siege marker is placed on space 2 of the Siege Table located on the strategic map. The Breton Mi counter is placed in the ZT 2nd line on the Breton side of the tactical map and the whole French army is deployed to the ZT 1st line on the other side. The FV cursor (identified as Garnison) is placed on the space that corresponds to the FV of the fortress on the Siege Table scale: 2. The siege begins with the fire of the two Ca; the two D6 rolls are 2 and 5. A single roll is a success because the result is less than the CF of the cannon (3). The FV cursor is moved to space 1.
For the assault resolution, the Attack Factor (AF) corresponds to the sum of all the Combat Factors (CF) of the besieger's units, including the Ca, Gd and Cm, for an AF = 28. The Defence Factor (DF) corresponds to the modified FV and the CF of the besieged unit, for DF = 4. The ratio is 28/4, giving the reference column ≥3/1, which requires a 1 column shift to the left for the remaining FV=1. The column to resolve the attack is therefore 2/1. The D6 roll result is 3 for a result of 0/3R. The besieger has no losses and the besieged loses 3 SP; he eliminates the Mi counter for 2 SP, ignores the R, then allocates the other SP to be eliminated to the FV that is already modified by the successful Ca fire; it goes from 1 to 0, the fortress is taken by the French, the Siege and Garrison cursors are removed. Rennes' FV returns to its original value of 2 for the following sieges.
Example of Major Battle
The Breton is the active player. Two enemy armies are located in the same SZ, each with more than 10 SP (the French army has 12 SP and the Breton army has 11 VP - the Mi and Ca counters only have one SP -, and so this is a major battle. The victor will be awarded 2 VP. One third of each army must be deployed to the TZ 1st line on its side of the Tactical map. The D6 roll is a 1 and determines the random event Treason. This concerns an ally of the Breton camp in the zone of doubt on the Alliances Table; Rieux and his unit of Mi are placed in the LR zone.
Each player secretly chooses his tactical markers according to the TC of his commander: four markers for the French (Charge x 2, Battery, Rain of Arrows [Pluie de flèches]), and two for the Breton (Ditch and Unseating [Fossé and Démonte]).
The Breton player takes his two tactical markers - the maximum to be used in one round - which he will reveal for the melee. The French player does the same and reveals his Battery marker. The Breton camp initiates fire with the English Ar in the 1st line targeting the French Gd opposite them with a RF of 1; the D6 roll result is 2, less than the CF of 3, and therefore a success. The French Gd immediately lose one SP. The French then fire with their Ca on the Breton Gd with a RF of 2; the result is 3, equal to the Ca's CF, and therefore a success. The Breton Gd loses 2 SP because the Battery marker doubles the losses of the target. The shots are alternated; the Breton fires at a RF of 3 on the Ar in the French 2nd line; the result is 5 which is greater than the shooter's CF and therefore a failure. The French player does the same with his Ar and targets the English Ar; the D6 roll result is 6, therefore a failure. The shooters of each camp have carried out all their fire and so the fire sequence is complete.
Diagram 2 (not reproduced)
Melee
The Breton reveals his tactical marker Fossé (Ditch) which he places in his 1st line. The French player reveals his marker Charge. The attacked zone is the French 1st line. The strength ratio is 10 for the Breton (sum of the CF = 9 + 1 for the Démonte (Unseating) marker for the Cm) against 11 for the French for a ratio in the defender's favour of 2/3. The D6 roll is 4; 1 SP is eliminated on either side, with priority to the Breton Cm that benefitted from the Unseating marker. The French player eliminates a Mi counter to cover the loss of 1 SP. The inactive player (French) has the option of counter-attacking from the 1st line if Trémouille passes a test; the result of the D6 is 5 which is greater than the TC of 4. The Breton carries out a tactical movement (François's CT allows him to move a maximum of 2 counters) to his Ar in the 2nd line (which has 2 MP) in order to occupy the left wing (at a cost of 2 MP) and prevent the French player from entering.
This is the end of the 1st combat round. The Breton decides to withdraw from the battlefield. The French may not counter-attack at this point because he has no units in the Breton camp with an attack bonus.
Example of Cursor Movement on the Alliances Table
The French camp has earned 6 VP:
- 2 VP for winning a major battle.
- 2 VP for the successful siege of Rennes.
- 2 additional VP for eliminating the 2 SP of the Breton Gd
The Breton camp has earned 1 VP:
- 1 VP for eliminating 1 SP of the French Gd.
All the alliance cursors are moved 2 spaces toward the French side, except Rohan and Laval who are already in the position farthest to the right. Rieux moves over to the French camp.