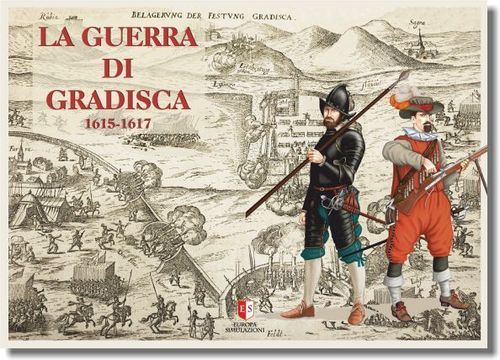
La Guerra di Gradisca 1615-1617
La Guerra di Gradisca 1615-1617 Rulebook
Table of Contents
Table of Contents
- 1. Introduction
- 2. Game components
- 3. Game Scale
- 4. How to play
- 5. Activating units and playing cards
- 6. Movement
- 7. Combat
- 8. Special units
- 9. Stacking
- 10. Forts
- 11. Fortified Towns
- 12. The Cards
- 13. End of the Game and Victory Points
- Advanced Rules
- Errata and Clarifications (Europa Simulazioni, 08/08/2025)
1. Introduction
The War of Gradisca 1615-1617 is a historical simulation game designed for two players (or two teams). Players control the units on the map, tackling and trying to solve all the problems faced by the general commanders of the era, their historic counterparts, and trying to achieve the victory conditions.
2. Game components
2.1 Game Units
The game units are divided into Commanders and Combat Units.
Commanders represent themselves and their personal guards. They have a Leadership Value on the bottom right of the counter.
Combat units are divided into the following types and are distinguished by the type of icon represented on their counter:
- Infantry: "Cernide", Militia, Mercenaries (equipped with Arquebuses, Muskets, Pikes)
- Light Cavalry (indicated by an "L" at the bottom right on the counter): mainly Cappelletti and other horse riders
- Medium Cavalry: "Corazze"
- Heavy cavalry: heavily armoured Men-at-arms
- Guastatori (i.e.: Engineers)
- Artillery (including the personnel, called at that time "Bombardieri")
All combat units have a fire value printed on the bottom left. For Engineers it is in square brackets []. The artillery also displays a star *. Commanders and combat units have a colored strip at the top of their counter identifying the Corps (or Command) they belong to. Each type of combat unit has peculiar features explained below.
The back side of many combat units is the "Disorganized" side (Rule 7.2). Some Commanders have a replacement Commander on their back (Rule 7.2). The background of the Austrian units it is white, for the Venetian units it is red, for the Dutch units (allied to the Venetians) it is orange.
The game also features different types of markers. The use of these markers in the game is explained in this rules booklet. There are markers for many activities: Forts, Level of fortification, Corps Marker, etc.
2.2 Cards
The game contains a deck of 36 cards that are used to generate special game events and assist players' actions. The use of the cards is explained at Rule 12.
2.3 The map
The map is divided into areas. Each area is characterized by the type of terrain present. There are areas of: Open ground, Difficult terrain (indicated by a yellow triangle), Fortified town (indicated by the symbol of a castle), Fortress.
The Fortress areas share thicker boundaries with other areas, the Fortress walls. Some boundaries between adjacent areas are impassable and are marked with an "X" on the map. Other boundaries are colored in blue (some of them have bridges); these are rivers and have no special meaning in the basic rules. Two areas are considered adjacent if they share a boundary, not a vertex.
Areas are used to regulate the movement of troops. Only their boundaries and the type of terrain are important for this purpose, the background of each zone is only reported for historical-geographic interest.
The geographic term "Istria" on the cards or in the rules refers to the two areas "Capo d'Istria" and "Pirano" on the map.
2.4 The Time Line
The time line is printed on the map ("Turno di Giuoco") and it is used to mark the progress of the game turns and the end of the game. The map also displays all the tables and boxes you need to play, explained in the following sections of this rulebook.
3. Game Scale
Each game turn represents a period of 2 months.
Each combat unit represents a variable number between 500 and 1000 foot soldiers; about 300 cavalrymen; an artillery train; a group of engineers.
4. How to play
Sort all units according to the Corps they belong to (colored band at the top), then put the "Command" markers of each Corps in play in an opaque container, following the indications on the Scenario Instructions card (see).
During the game, remove from play the "Command" markers of the Corps that do not have units on the map and put into play those whose units enter the map (eg for Reinforcements).
Place the Game Turn marker on the starting position (Sept.-Oct. 1615) of the time line (on the map) and the End of game marker on the final position. The number of game turns to play can be modified by playing certain cards.
Place the units of the various Corps on the map according to the Scenario Instructions (see). The remaining units go to the respective flags of the two armies printed on the map, subdivided by Command (colored band at the top).
Set aside cards labeled with "1617", mix the remaining cards and distribute four (4) face down cards to each player. The remaining cards are arranged in the deck, face down.
Place the Victory Points marker for each player, ones and tens, on their track on the map ("Punti Vittoria").
The game consists of a sequence of consecutive turns where players activate their Commands and perform military actions using their own units and optionally playing cards.
4.1 Sequence of play
Every turn consists of the following steps:
a) A Command marker is randomly drawn from the opaque container (see Rule 5)
b) Units of the selected Command are activated and/or cards are played
- At this stage, the opponent can play in turn cards, under the conditions written on the cards themselves
The drawn Command marker is then placed on the map in the section "Played Commands" ("Comandi giocati")
c) The sequence from step a) is repeated until all Command markers have been drawn
d) When all Command markers have finished, check if some area has combat units in excess (Rule 9), and then move the current turn marker to the next box on the Time Line.
e) If the Game Turn marker has gone beyond the End of Game marker, the game is finished and Victory Points are counted for both players to determine the winner. Otherwise all Command markers are placed again in the container and a new Game Turn begins from Step a).
The game is anyway finished at the conclusion of Turn Mar.-Apr. 1618.
5. Activating units and playing cards
When a Command marker is extracted the owning player can:
- Play up to two cards and activate the units of the selected Command in any one zone only
- Draw a card from the deck and do not activate any units or play cards. Each player may never have more than four (4) cards in their hand. If it happens, he must discard one of his choice (first draw, then discard). A player can only discard one card when he has four cards in hand.
Furthermore, if the Command has a Commander in play:
- The owning player can play up to one (1) card and activate the units of the selected Command in a number of areas equal to the Commander's Leadership Value
Played cards form the deck of discarded cards. When players have finished all the cards from the deck, they take the discarded cards, mix them and reform the deck. Playing a card is not mandatory, if not when explicitly stated on the card itself (see Rule 12). Cards with the "Remove when used" note do not end up with the discarded cards: they are permanently removed from the game.
To activate any units, select an area containing one or more units of the selected Command. All of the units belonging to the selected Command present in the area can activate (the others cannot). This is done for all areas involved, one area at a time.
When units have finished their operations, place the selected Command marker on the map, in the section "Played Commands" ("Comandi giocati"): all units of the Command are considered "Activated".
5.1 Activating units
When any unit in a zone is activated, it can do any one of the following operations:
- Move into adjacent areas and eventually enter areas containing enemy units. This last action immediately initiates a Field Combat
- Bombarding adjacent Fortress areas (only Artillery units)
- Bombarding units in adjacent areas (only besieged Artillery units) or through a Breach
- Mining or Counter-mining operations on Fortresses ("Guastatori" units only)
- Build Forts ("Guastatori" units only)
- Recover from Disorganization
Mark units with an "Activated" marker ("Attivato"), when it can be useful to remind that.
[Errata: Rule 5.1 point b) — the only cards that can be played during an activation by the opponent player are cards #20 and #28. The opponent player can play any of them at any time he sees fit during the active player's activation. These are at all effects "Response cards".]
6. Movement
All the units have a maximum movement allowance expressed in areas:
- Infantry and Engineers: 3 areas
- Artillery: 2 areas
- Cavalry (all types) and Commanders: 5 areas
All units move from area to adjacent area, usually consuming 1 point of their movement capacity, up to but not beyond their maximum movement capacity. Every difficult terrain area you enter consumes two (2) points of movement allowance. You can not cross any impassable boundary. It is not allowed to pass though a crossing among areas (a vertex).
Each time a unit enters an area containing enemy units, it must stop and can go no further for that turn.
Units can move individually or as stacks of units. If they move as stacks, the movement allowance of the stack is the lowest value of the movement capacity of the units that make up the stack. Friendly units along the way can not be collected during movement. Units in a moving stack can be left behind in the crossed areas.
Commanders, "Guastatori" and Artillery units cannot enter an area containing enemy units, unless accompanied by friendly combat units. If a combat unit enters or is in an area containing one or more Commanders alone, these are eliminated from the game.
No unit can normally enters a Fortress area occupied by enemy units, unless there is already a Breach in the Wall.
Units in a Fortress area can exit it, even if they enter an area occupied by enemy units. No unit can ever cross an impassable boundary (indicated with an "X" on the map) or the Adriatic Sea. All units exiting the map, either voluntarily or involuntarily, are eliminated.
7. Combat
Combat may take one of these forms:
- Field Combat (rule 7.1): Each time one or more activated units enter an area occupied by enemy combat units
- Artillery bombardment against enemy Fortresses (rule 7.4.1) or against besieging units or through a Breach (rule 7.4.2)
- Mining and counter-mining of Fortress' walls by Engineers (rules 7.5 and 7.6)
7.1 Field Combat
In a Field Combat, the attacking player's combat units (the one whose units have entered the opponent's area), and those of the defending player fire one against the other.
All Commanders and attacking combat units fire, as well as all Commanders and all combat units defending (the latter regardless of their Corps). Exception: Engineers can not fire in a Field Combat, but they can absorb enemy fire.
To resolve a field combat roll a die for each unit and compare it with the fire value (or Leadership value in the case of a Commander) of the unit.
If the die roll is less than or equal to the fire value of the unit, the unit hits (it is said has provoked a "hit"). All dice rolls are considered simultaneous. The attacker must consider the effects of Forts and Fortified Towns. These effects are cumulative.
The owning player decides which of his units suffer the effects of the opposing hits as he wishes. If all enemy units are eliminated, hits in excess are lost.
See Rule 7.2 for the effects of hits on units.
Commanders can not absorb enemy hits. However, after the dice rolls, each side that has suffered at least one hit has to check on the survival of each of its Commanders in the combat area. Roll a die: if the value is 1 or 2, the Commander is a casualty (see section 7.2)
Once both players have applied the fire results, if either side has annihilated the other, it may remain in the occupied area. Otherwise, the player who has suffered more hits must retreat to an adjacent area (Rule 7.3). In the case of an equal number of hits, the attacker must retreat.
7.2 Disorganization and recovery
When a combat unit suffers a hit, it is not removed from the game but turned back on its "Disorganized" side. Combat Units that do not have a "Disorganized" side are eliminated from the game after the first hit. Commanders who are casualties are turned to their back side to be replaced by their replacement Commander, if it exists. Otherwise, they are eliminated from the game. The Replacement Commander may appear in the same area or in another area, containing friendly units, as the owning player wishes.
A Disorganized unit has a reduced combat capacity, but keeps other functions intact. If a Disorganized unit receives another hit, the unit is permanently removed from the game.
Eliminated units are set aside in a dedicated box on the map, do not mix them with reinforcement units.
Combat units can recover from disorganization and return to their front, good order side during their next activation (Rule 5.1).
7.3 Retreat
In a Field Combat, the side that has absorbed more hits (subtracted missed hits due to Forts or Fortified Towns, see rules 10 and 11), or the attacker if the absorbed hits are equal, has been defeated and must retreat to any one adjacent area. Note: Commanders casualties are never considered "Hits".
Retreat can not take place into areas containing enemy units or through impassable boundaries. Attacking units must always retreat into the area from which they entered the combat. If a unit has to retreat and cannot, it is removed from the game.
A force that is attacked within a Fortress (through a Breach) may decide to take an additional hit instead of retreating out of the Fortress. In this case, the attacker will retreat.
7.4 Bombardment
Artillery units can be used as any other combat unit in a Field Combat. Furthermore, Artillery units can bombard Fortresses or enemy units, but they can never participate in a Field Combat though a Breach.
If there are one or more Engineer units in the area from which the Artillery unit fires, the firing Artillery unit uses the fire value printed on the counter. Otherwise it has a fire value of 1 (one). With a die roll of 6 (six), they are always eliminated [the cannons of the time easily "sboccavano" [literally, broke their mouths, Ed.N.]].
7.4.1 Fortress Bombardment
An activated Artillery unit can bombard an adjacent Fortress area [Fire is actually against the Fortress' walls]. If the die roll is successful, the Fortress' Level of fortification of the boundary adjacent to the unit is decreased by one (the starting level is printed on the map). When a Fortress' Level of fortification reaches zero (0), a Breach is created on that boundary and from this moment on, a player can enter the enemy Fortress area by that boundary to perform a Field Combat against the enemy units that are in the Fortress itself.
The current Level of a Fortification of each side of a Fortress, when different than that on the map, is indicated by a properly numbered marker placed on that part of the wall. It can never go under zero (Breach).
7.4.2 Bombardment of besieging units or though a Breach
Activated Artillery Units occupying a Fortress area can fire on enemy units in adjacent areas. [Errata: "adjacent area" should read "adjacent Fortress area".] Artillery units can also fire through a Breach against enemy units in an adjacent area, and in this case their Fire Value is reduced by 1. All the units in the area receiving fire can not fire in turn, but they do not have to retreat if any unit absorbs a center, even if they can do it if they want.
The side that has suffered at least one hit has to make a check on the survival of each of its Commanders in the combat area (see rule 7.2).
7.5 Mining fortresses
"Guastatori" units activated in an area adjacent to a Fortress may try to mine the boundary (wall) of the Fortress. Roll a die for each "Guastatori" unit and if this is less than or equal to the "Guastatori" fire value, a mine is placed. Mark the side of the mined fortress with a special marker ("Mina"). You can place more than one mine on the same side of a Fortress.
In a subsequent activation of units in the area, a "Guastatori" unit can try to make explode a mine (you cannot have a mine explode in the same Game Turn that it is positioned). Roll a die for each pair of Guastatori-Mina. If the die roll is 1, 2 or 3, the mine explodes and a Breach is created. If the die roll is six, the mine is lost and it is removed from the map. With 4 o 5, no effect.
If, at anytime, the area adjacent to the Fortress boundary with mines is vacated by combat units, all mine markers are immediately removed.
7.6 Counter-mining
"Guastatori" units activated inside a Fortress may attempt to counter-mine the boundary of the adjacent Fortress, if it contains mines. Roll a die for each unit and if this is less than or equal to the fire value of the "Guastatori" unit, a mine is removed from the map.
7.7 Fortress reconstruction
"Guastatori" units activated inside a Fortress may attempt to rebuild an adjacent boundary featuring a Fortress Level marker. Roll a die for each "Guastatori" unit, and if this is less than or equal to the "Guastatori" fire value, a Fortress Level is restored (up to the maximum printed on the map).
8. Special units
8.1 Commanders and Guastatori
Commanders and Guastatori units cannot enter an area containing enemy units and are eliminated by enemy units who are in the area they occupy, unless accompanied by other friendly units.
Commanders can help in fighting (Rule 7.1) and in handling large Corps (Rule 5).
Guastatori units have special abilities: Mining (Rule 7.5), Counter-mine (Rule 7.6), Fortress reconstruction (Rule 7.7), Forts building (Rule 10).
8.2 Infantry
Some infantry units have two fire values separated by a "/". The left one is used when the unit attacks, the one on the right when it defends.
8.3 Cernide
"Cernide" units (CER) [conscripted units of the time] are eliminated if they receive a hit in a field combat or as a result of an artillery bombardment.
9. Stacking
There is no limit to the number of units that can occupy an area during a game turn. However, at the end of the turn, in any area where there are more than six (6) infantry or cavalry units (all other units do not count), the number of infantry or cavalry units beyond six (6) is equal to the number of units in good order which are immediately "Disorganized". If all the units in the area should be disorganized, there is no further effect.
10. Forts
When a "Guastatori" unit is activated, it can spend all of its Movement Allowance to build a Fort in an area without enemy combat units.
The Fort's effect is to decrease by one the hits made by enemy units attacking the area, with any applicable form of combat. Only one Fort marker can be present in a given zone at the same time.
It is possible to build a Fort in an area with a Fortified Town (Rule 11) and their effects add up. It is not possible to build a Fort inside a Fortress.
The number of Fort markers in the game is deliberately limited for each player. Once a player has placed all his Fort markers on the map, he can not place any more.
A Fort is destroyed and the marker removed from the game, if combat units enter a zone with a Fort alone or win a Field Combat in the area. The removed Forts can not be recovered, they are eliminated from the game.
11. Fortified Towns
The areas marked by the symbol of a castle are Fortified Towns and they guarantee units that defend in them the same benefits as Forts (see Rule 10).
A Fortified Town is destroyed and its effects vanishes for the rest of the game if enemy units win a Field Combat in the area. Use a Breach marker to mark the destroyed Fortified Town.
If there is a Fort in a Fortified Town area, and the units defending it are defeated in a Field Combat, only the Fort is destroyed.
12. The Cards
Cards included in the game are used to generate random events and assist players in warfare operations.
Follow the instructions written on the card, paying attention to the conditions (temporal or otherwise) for playing it. The card lists instructions that apply only to one or both of the players. If not specified, the card effects apply to the player of the card.
Some cards display the word "MANDATORY". These cards can not be held in hand or discarded and, subject to the limits described in these rules, must be played at the first opportunity, even if it has adverse effects on you.
If a player has a Mandatory card in his hand, he cannot draw any card, but he must perform an action allowing him to play the Mandatory card. This action must the first thing the player does during his Command activation.
Mandatory Cards with the words "Only after the date ...", are mandatory only after the given date. At or before that date they cannot be played, but they can be discarded. If a player has more than one Mandatory Card in hand, he is only required to play one of them and he may decide which one to play.
Some cards have the words "REMOVE IF USED". These cards once played are permanently removed from the game and can no longer be played.
Some cards have the word "1617". At the first game turn of 1617, the "1617" cards are shuffled and placed, face down, over the deck (discarded cards remain out of the deck).
Respecting the above directives, cards can be played before or after the activation of units, unless special directives are written on the cards itself.
When a card causes a unit to enter the map that belongs to a Command that is not already on the map, place the corresponding "Command" marker on the map (on the "Comandi Giocati" track): it will be placed in the container and will be available for extraction from the next turn.
When a card implies entering units in an area when enemy units are present, a Field Combat will follow. If the attacking units are defeated and must retreat, they are eliminated from the game.
Units caused to enter the map by a card are normally taken from the reinforcements (which stay on the flag of each army, on the map), unless differently stated on the card
Note: the word "unit" on the cards must always be interpreted as "combat unit".
13. End of the Game and Victory Points
At the instant when the Game Turn marker goes beyond the End of Game marker during the game turn, the game immediately ends and Victory Points are counted.
Victory Points are accumulated by players during the game with the play of some cards and through "Booty" ("Bottino") markers.
Victory Points are marked with the appropriate markers on a table on the map ("Punti Vittoria").
At the beginning of the game, each player receives some booty markers that are placed, face down and unseen, in certain areas of the map indicated in the Scenario Instructions (see).
When a player enters one of the areas with an opponent's booty marker, he uncovers the marker. If a "?" appears, roll a die and the result is the amount of VP (Victory Points) earned. If a number appears, that is the number of VP earned.
[Errata: Rule 13, fifth sentence, must be updated like this: "When a player's unit(s) enters an area free of enemy units (or is in such an area after a successful field combat) with an opponent's booty marker, the marker is unconvered and removed from the map." Clarification: booty markers are placed randomly, hidden, and no player can look at any of them; no one knows anything of them at start.]
Also at the end of the game, the Austrian player gains the following points if his units occupy:
- PALMA: 20 VP
- UDINE: 10 VP
And the Venetian player gains the following points if his units occupy:
- GRADISCA: 10 VP
- GORITIA: 10 VP
- TRIESTE: 10 VP
At the end of the game, the player who accumulates more Victory Points is the winner. A draw is possible.
Advanced Rules
Advanced rules introduce greater historicity, at the cost of a slight increase in complexity. Players are definitely encouraged to try the game with the advanced rules after mastering the basic game.
14. Movement
In the Advanced Games, in the following cases units are not obliged to stop when entering areas with enemy units: see Rule 23 "Raids" and Rule 25.2 "Light Cavalry Incursion".
15. Rivers
The light-blue colored boundaries between adjacent areas are river boundaries.
Rivers without a bridge are impassable for Artillery units and the Camp (Rule 24), during retreat (rule 7.3), for the purpose of tracing line of supply (Rule 21) and command span (Rule 16). They can be crossed during movement (except Artillery units and the Camp), but a unit uses all its movement allowance to do this. Line of supply and Command span can be traced though a River with a bridge with no penalty. A retreat can occur through a River with a bridge.
16. Command Span
When a Command marker is extracted, you can play up to a card and activate the units of the selected Corps on a number of areas equal to the Leadership value of the Corps Commander, if any (Base Rule 5).
In the advanced game, to be activated in this way an area must be within the Corps commander's command span, equal to 2 areas from the area where the Commander is located (one intervening area at most). The route of the zone from the commander to the unit must not cross impassable boundaries, nor areas containing enemy units.
17. Commanders in Field Combat
When a Commander accompanied by friendly units enters an area containing enemy units, a Field Combat (Rule 7.1) does not immediately occur. Instead, the Commander can activate friendly units (both Commanders and Combat Units) not already activated, in numbers equal to his Leadership Value, in areas within his command span (see Rule 16). The path of areas from the Commander to these units must not cross impassable boundaries nor areas containing enemy units.
Units so activated may belong also to different Corps than the Commander's one. Units activated in this way can no longer be activated in a future activation of their Corps in the same Game Turn. Mark these units as "Activated" ("Attivato"). Commanders activated in this manner cannot activate other units. All activated units, if they move, must have a movement capacity sufficient to reach the Combat area.
[Errata: if the army morale is in the "Yellow" section (Rule 22), commanders can NOT pull additional units into the combat. Units so "recalled" move and pay terrain costs normally; Command Span is two areas.]
18. Field Combat
If both players have a number of combat units in the battle equal to or greater than six (6), the battle may be fought in multiple rounds. Otherwise the battle proceeds as in the basic game (Rule 7.1). Players need to keep track of how many hits each player inflicts on his opponent.
- Fight a combat round (Rule 7.1) and apply the results, applying the terrain effects
- If the number of hits actually suffered is equal for the two players, continue with another round (point 1.) only if both players want it. Otherwise the combat is over (go to step 4. below)
- If a player wins the round, i.e. he inflicts more hits than his opponent, he can choose whether to continue with another combat round (step 1) or finish the battle (step 4. below)
- The combat is over. If the total number of suffered hits is equal for both sides, the attacker has to withdraw; otherwise the side who suffered more hits has lost the battle and must retreat.
19. Terrain effects on Combat
19.1 Difficult terrain
Difficult terrain has negative effects on the attacker in a field combat. All attacking units with a Fire Value of 3 or more are reduced by one (1). All terrain effects are cumulative.
[Errata: the reduction to Fire values due to Difficult terrain applies to attacking Commanders too.]
19.2 Forts
In the Advanced Game, up to three Fort markers can be built in the same area and their effects are cumulative. [Errata: Forts (Advanced Game): only 2 per area, not 3.] A Command may build only one Fort per zone, in a given activation.
If combat units enter an area with enemy Forts only or win a Field Combat in the area, they have the option of destroying all enemy Forts or convert part of or all enemy Forts into friendly (destroying those Forts which are not converted). Turn the converted Forts on the side with the color of the player occupying the area.
As an additional action, when a "Guastatori" unit is activated, it can spend all of its Movement Allowance to destroy a friendly Fort in the area where it is activated (normally to avoid the Fort to be taken by the enemy).
20. Recovery
Combat units recover from disorganization and are turned on their good order side in their next activation if they are supplied (Rule 20).
Out of Supply units (Rule 20) cannot recover from disorganization.
21. Supply
A unit is supplied if it is in an area where it is possible to trace an uninterrupted sequence of areas, called a Line of Supply, from the unit to its own Supply Source (there are however, Exceptions, see below).
Tracing the sequence of areas, one cannot cross impassable boundaries, rivers without bridges or areas with enemy units.
Each player has his own Supply Sources areas, which are marked with a special symbol on the map and are differentiated by color.
The presence or absence of a line of supply is checked only at the start of the activation of any units in an area.
Exceptions:
- The Venetian player can supply by sea one (only) area bordering the Adriatic Sea ("Mare Adriatico") per Game Turn. Place the provided marker in the chosen area at the beginning of each Game Turn. Units in this area are supplied and have Attack Supply (see Rule 21.1) for the Game Turn
- Units in an area with its own Supply Source are always supplied
- If Gradisca is occupied by Austrian units, it is considered supplied even without a valid Line of Supply, if Austrian units occupy the "Rubia" area. [Errata: should read: "... if supplied Austrian units occupy the "Rubia" area."]
A unit with no valid line of supply is said to be "Out of Supply" and it is marked with an "Out of Supply" ("Fuori Rifornimento") marker. The marker is removed if the unit is in supply on its next activation.
Out of supply Commanders have their Leadership Value reduced to 1 for all purposes.
All out of supply combat units have their Movement Allowance reduced by 1 and cannot recover from disorganization (Rule 20).
Some game events may require units to be supplied. If a supply card is played and the Camp has been eliminated or there is no valid line of supply for the Camp, the supplies are lost and the Army Morale drops, otherwise it rises as indicated on the card.
21.1 Attack Supply
Note: offensive military operations required a remarkable food and supply depot near the active units.
Units intending to do the following operations must have attack supply in the area where they are activated: Field Combat (Rule 7.1), or Raid (Rule 23), with three or more combat units, Fortress Bombardment (Rule 7.4.1), Mining the fortresses (Rule 7.5), Building Forts (Rule 10).
Units "recalled" by a Commander (see Rule 17) are not required to have Attack Supply.
A unit has attack supply if it is in area from where a Line of Supply, not longer than three areas (Difficult terrain areas count 2 areas), can be traced from the unit to the Camp (Rule 24) (excluding the area where the unit is, but including the area with the Camp), and from the Camp, through a line of any length, to its own Supply Source.
Exception: Austrian units in Trieste area and either side's units in any Fortress are exempted from the above rule and they can always do any operation, regardless of attack supply.
22. Army morale
Each army in the game has a morale value that can change during the game with events and the play of some cards.
The initial morale value of each army is given in the Scenario Instructions (see) and the current morale value is marked on the map with a special marker.
The Army morale can go up with Raids (Rule 22); it goes down with the passage of time and the play of some cards. Following the play of certain cards (supplies), it can go up or down.
When it is written on the time line (Morale -1) the morale of each army drops by one.
When the Army morale is High (green on the track), there are no effects.
When the Army morale is Medium (yellow), each Command can activate units in a single area.
When the Army morale is Low (red), no unit can receive Attack Supply (Rule 21.1), each Command can activate units in a single area, you can never enter an area with enemy units and you cannot play more than one card per activation.
The Army Morale can never be less than 1 or higher than 9.
23. Raids
One or more activated infantry or cavalry units can declare a Raid ("Razzia") at the moment they enter a non Fortress area. The area can also contain enemy units and in this case units are not compelled to stop in the area if, at the end of the Raid, they have enough remaining movement allowance to exit. Every Raid attempt, regardless of the result, subtracts one from the movement allowance of each unit (see Rule 6).
Roll a die:
- if the natural die-roll result is one (1), the Raid has been successful;
- if the natural die-roll result is six (6), the Raid fails, all the units that tried it are Disorganized and they can no longer move for the rest of the turn;
- otherwise, if the die roll is less than or equal to the number of units that attempted the Raid, it has been successful. In this case, modify the die-roll result by +1 for each enemy unit or Fort present in the area
If the Raid has been successful, remove any Out of supply Markers on raiders, raise raiders' Army Morale by one, and place a Raid marker ("Razzia") in the area. The area can no longer be raided for the current year. Remove all raid markers at the end of the last round of the current year.
If the Raid succeeds in an area where the enemy Camp is present, the raiders' Army Morale raises by +2.
Within the limits written above, any number of Raid attempts can be tried in the same (or different) area, for each Command activation.
Regardless of the Raid's outcome, if both players have units in the area at the end of the Raid, a Field Combat will follow.
The Venetian player's area of possible raids include: the areas on the map with a green background to the east of Gradisca (basically the Contado di Gorizia, the whole Carso and Istria), Tarvis, the adjacent areas of the river Lisonzo and V.Natisone. The Austrian player can raid all eligible areas with a name on the map west of Gradisca; in addition, Sagrado, Monfalcone, Muggia.
[Errata/clarification, replacing the wording above: "The Venetian player's area of possible raids include: the areas on the map with a green background to the east of Gradisca (basically the Contado di Gorizia, the whole Carso and Istria), Tarvis, the areas adjacent to the river Lisonzo and [the area] V.Natisone. The Austrian player can raid all areas with a name on the map west of Gradisca; in addition, Sagrado, Monfalcone, Muggia." (Muggia can be raided by either side). If the raid is not successful but doesn't fail, units can keep moving/raiding. The only case that units must stop is when a six is rolled, that is the Raid fails.]
24. The Camp
Each army has a counter called "the Camp", whose purpose is to allow Attack Supply (Rule 21.1).
The Camp can move only one area per turn, when any unit(s) of any Command is activated in the area where the Camp is located. It does not affect the stacking of combat units or combat. The Camp can never enter a Fortress area. Turn the Camp counter upside down after it is moved.
If the Camp is the last unit that remains in an area after a field combat or is the only unit in an area where an enemy force enters, it is eliminated: decrease by one (1) the Army Morale, at the first and any subsequent game turn during which the Camp is not in play. It reappears as a reinforcement in a subsequent turn in any area with its own Supply Source, provided there are friendly units in the area, during the activation of units of any Command (at the owning player's choice).
[Errata: the Camp cannot retreat from a Field Battle.]
25. Special Units
Some types of units have special features:
25.1 Cavalry
All Cavalry units in Jan.-Febr. ("Genn.-Febb.") game turns each year have a reduced movement allowance of 3 areas [Note: Cavalry was very sensitive to winter weather].
25.2 Light Cavalry
Light Cavalry units (indicated by an "L" at the bottom right) are not required to stop if they enter alone in an area occupied by enemy units. Conversely, after entering such an area and attacking it, they may retreat from the area from which entered, if they have a sufficient remaining movement allowance. [Errata: "...they may retreat from the area from which entered,..." should read "... they may retreat TO the area ..."] In this type of combat the defender can not fire. A Light cavalry unit can execute this type of combat a number of times per activation, provided it has enough movement allowance, but not more than one time against a single area.
25.3 Light Cavalry and Raids
A Light Cavalry unit performing a Raid (Rule 23) unit is automatically disorganized (they are lost in continuous looting).
26. The Cards
Mandatory Cards with the "Only after the date ..." note are mandatory only after the indicated date.
In the advanced game, before or at the specified date, cards of this type bringing in reinforcements (indicated by a "R" on the card) cannot be discarded and, if any of these cards are played, the reinforcements listed on the card must be placed on the Time Line in the game turn box corresponding to the date on the card (positioning game turn) to form a group. At the beginning of each turn after the positioning game turn, roll a die for each of the reinforcement groups on the Time Line. If the result is less than or equal to the difference, in game turns, between the current game turn and the positioning game turn, the reinforcement group is placed where the card indicates.
[Errata: the "indicated" date is that written on the card.]
Errata and Clarifications (Europa Simulazioni, 08/08/2025)
Published by the game's publisher as a separate document; reproduced here.
Errata
- Rule 13, fifth sentence, must be updated like this: "When a player's unit(s) enters an area free of enemy units (or is in such an area after a successful field combat) with an opponent's booty marker, the marker is unconvered and removed from the map."
- Forts (Advanced Game): Only 2 per area, not 3
- Card 11: the text should refer to card 31, not 36
- Card 24: read: "... Half (rounded up) of the units in good order in the areas are Disorganized, owning player's choice."
- Card 22: This card is not mandatory, while the other restrictions ("Play only after..." and "Remove when used") are maintained. Furthermore, add +2 VP to the Austrian player (AUS: +2).
- Card 36: This card is not mandatory. Add +2 VP to the Austrian player (AUS: +2). Add the restriction "Remove when used". The card may not be played if Palma is occupied by Austrian units.
Variant rule
Card #22 San Marco! was a later addition to the design, when we realized that the Austrians were too strong to beat for the Venetians (!). In case you feel that, on the contrary, the Venetians have the edge, use the following variant rule: Card #22 must not considered "Mandatory", while the other restrictions ("Play only after..." and "Remove when used") are maintained. Furthermore, add +2 VP to the Austrian player.
Clarifications
- Rule 5.1 point b): the only cards that can be played during an activation by the opponent player are cards #20 and #28. The opponent player can play any of them at any time he sees fit during the active player's activation [Old hands note: these are at all effects "Response cards"]
- Rule 7.4.2: second sentence of 7.4.2: the "adjacent area" should read "adjacent Fortress area"
- Rule 13: Booty markers are placed randomly, hidden, and no player can look at any of them; no one knows nothing of them at start, in few words
- Rule 19.1: reduction to Fire values due to Difficult terrain does apply to attacking Commanders too
- Rule 21: should read: '... if supplied Austrian units occupy the "Rubia" area'.
- Rule 22 Army Morale: If in the "Yellow" section, can commanders still pull additional units into the combat (rule 17)? NO!
- Rule 23: if the raid is not successful but doesn't fail, units can keep moving/raiding. The only case that units must stop is when a six is rolled, that is the Raid fails.
- Rule 24 The Camp: the Camp cannot retreat from a Field Battle.
- Rule 25.2: "...they may retreat from the area from which entered,..." should read as "... they may retreat TO the area ..."
- Rule 26: the "indicated" date is that written on the card.
Questions and answers
- Card #36 "Venezia vuole la vittoria", the three units that have to be placed in Palma, should be taken from the units on map, correct? — This is explained in Rule 12, penultimate sentence: "Units caused to enter the map by a card are normally taken from the reinforcements (which stay on the flag of each army, on the map), unless differently stated on the card." Apply strictly this rule.
- 7.4.1 Fortress bombardment. It is written that some markers are used to upgrade the Level of a Fortress. But I do not think there are any such markers. — They are the ones with a number in a circle and a fortress destroyed in the background. They are used when the Fortress is damaged or rebuilt.
- 7.4.1 Fortress bombardment. If there is more than one unit, do they fire all of them? And if for example you give 2 hits the level of the side of the Fortress will decrease by 2 instead of 1? — Yes and yes.
- 7.4 Bombardment. Do the "Guastatori" and the Artillery units work together ONLY when they are inside a Fortress to Bombard the besiegers (7.4.2)? — No, always, every time they fire. Note: when an Artillery unit is not accompanied by a Guastatori unit, its Fire Value is 1.
- The card No. 1 "Expedition to Istria" has red color around No. 1. Does it mean something? — Yes, it is one of the four cards that the Venetian player must have in his hands at the beginning of the game. So at the beginning of the game the Ven. must have card nr.1 + three other cards drawn from the deck [See the Scenario Instructions].
-
- Fortified Towns. In case of a Field Combat the defender benefits from 1 hit less (if there is a Fort - 2 hits). But if the defender is eliminated or is forced to retreat the fortified town is destroyed? — Yes, if there is no Fort. Otherwise only the Fort [See Rule 11, last sentence]
-
- Recovery: Does this allow a recovered unit to also move/raid? Or does this automatic recovery complete their turn? — No. Basic Rule 5.1 is still in effect: "When any unit in a zone is activated, it can do any one of the following operations: ... * Recover from Disorganization". So a unit which recovers cannot do anything else.
-
- Raids (Locations): Can only named areas be raided? — No. The English rules need in effect a little rewording: "The Venetian player's area of possible raids include: the areas on the map with a green background to the east of Gradisca (basically the Contado di Gorizia, the whole Carso and Istria), Tarvis, the areas adjacent to the river Lisonzo and [the area] V.Natisone. The Austrian player can raid all areas with a name on the map west of Gradisca; in addition, Sagrado, Monfalcone, Muggia." (Muggia can be raided by either side).