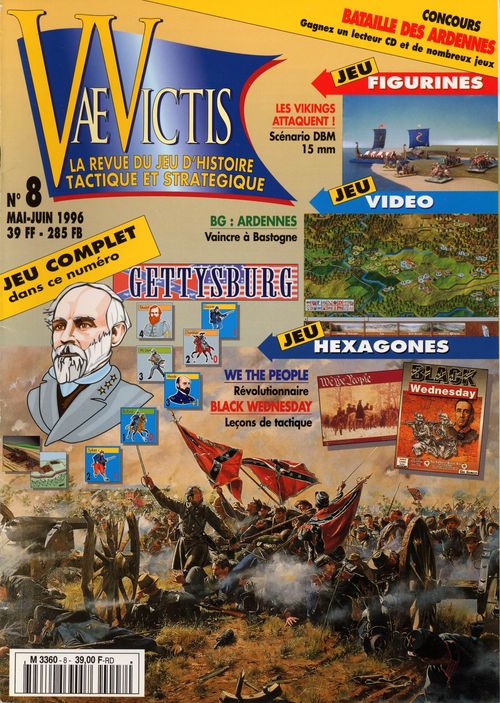
La Campagne de Gettysburg, 1863
La Campagne de Gettysburg, 1863 Rulebook
Table of Contents
Table of Contents
0 General Rule
This game requires a 6 sided die (noted 1d6). Transcriber note: the source writes this as "ld6" throughout; it is read here as 1d6. The term 'strength points' describes the base strength (infantry or cavalry) of each unit, as indicated on the roster. The term 'combat points' describes the sum of the modified troop and artillery points, calculated per combat.
0.1 Terrain
The map represents the region in which the campaign of Gettysburg was fought. The boxes are connected by movement lines that have been superimposed on the map to regulate the movement and combat of the units.
0.2 Game Scales
A game turn represents two days of real time. One troop point of infantry represents about 1,000 men, one cavalry point 750 men, one artillery point about 16 cannon. The distance separating each box of the map represents about 4 to 5 km.
0.3 Average Tactical Value
When, in the game, the tactical value of several units must be taken into account (reconnaissance, combat), the players take the average of the tactical values of the involved units, always rounding down. The tactical value of a unit represents the command ability of the division or corps leader and the quality of the troops.
1 Units And Leaders
1.1 Combat Units
The units represent the different formations that participated in the Gettysburg campaign. For the Confederate side, the infantry is represented at divisional level and the cavalry at brigade level. The Union units, however, are represented at corps level for infantry and the cavalry division. The players also have a number of detachments (units of small size) that offers a little more flexibility in deployment.
The combat units (including the detachments, see 6.1) counters have on the front the flag of their side and on the back a play information (see diagram 1 above).
The number of strength points in each unit is noted on a roster (on the back of the board of counters, which should be photocopied before cutting up) that permits the recording of losses incurred by the units.
1.2 Leaders
Each player has leaders that represent:
- General Lee and his four corps commanders for the Confederate player, and
- Generals Hooker, Meade and the cavalry corps commander of the Union player.
These leaders are represented by counters with, on the back, a portrait and their various ratings (see diagram 2).
2 Sequence Of Play
A game is played over a fixed number of game-turns depending on the scenario. Each turn has the following sequence of play.
A Event Phase
The players determine the following events, in the indicated order (see 3):
- weather for the turn;
- possible replacement of Hooker;
- first player determination;
- possible entry of the Army of the Potomac;
- possible entry of Stuart's corps.
B First player Turn
1 Administrative Phase
The player places available decoys on the map then inverts the units uncovered in the previous turn and regroups his units under the Force markers (see 7.2). He checks the lines of communication of his different leaders and units (see 4.5). Finally, the player throws 1d6 and adds the command value of his General in chief in order to get the number of command points available for this turn (see 4.6).
2 Movement phase
The player uses his command points to activate his units. The player moves his units, creates detachments or reattaches them, constructs defences, conducts cavalry reconnaissances and engineering operations, in the desired order (see 5 and 6).
The opposing player may attempt to react to these actions (see 6.5). The units making a forced march check possible losses to stragglers, then stationary units seek to recover stragglers (see 5.4).
3 'Marching To The Sound Of The Guns'
Units of the non-phasing player which are one or two PM from a box with a Battle marker may be moved to enter that box at the non-phasing player's discretion.
4 Combat Phase
Combat occurs between hostile units in the same box. A Battle marker is left in any boxes occupied by both sides at the end of this phase.
C Second player Turn
The phases 1 to 4 are repeated for the second player, the roles being reversed.
The game turn is now ended, the Turn marker is advanced one place.
3 Events
3.1 Resolution of the weather
At the beginning of each turn, the Confederate player throws 1d6 in order to determine the weather. On a result of 6, it rains for that turn. The player places the rain marker on the turn track.
Effects of the rain:
- the number of movement points (PM) of each unit is reduced by 1.
- the crossing of a river at a ford is forbidden (the connection becomes impassable).
- the crossing of a creek (small water course) via a ford costs + 1 PM.
3.2 Replacement of Hooker
Starting turn 4 (28 June), the Union player throws a die: on a result of 4, 5 or 6. Hooker is replaced. On each subsequent turn, 1 is added to the dieroll. As soon as Meade is appointed, the Hooker counter is withdrawn from the game and replaced by the Meade counter.
3.3 Selecting the first player
As long as Hooker commands the Army of the Potomac, the Confederate player decides if he wants to be the first or the second player of this turn. When Meade is in charge, the Confederate player throws 1d6: from 1 to 5, he chooses; with a 6, the Union player chooses who starts.
3.4 Arrival of the Army of the Potomac and of Stuart
Starting with turn 1 (22 June), the Union player throws the die and consults the Army of the Potomac entry table.
Starting Turn 3 (26 June), the Confederate player throws one dice, and consults the J.E.B. Stuart entry table.
This phase is skipped if option 1 of rule 9.1 is in force.
If Stuart or the Army of the Potomac enters, they are placed on the map at the beginning of the administrative phase of the corresponding player (see rule 9.1).
4 Organisation and Command
4.1 General Rule
In order to function to the maximum of their potential, units must be in command range of their leaders, that is to say trace a line of communication ("LdC") to them. The organisation of the two armies is noticeably different as detailed below and in the organisation chart on the roster sheet.
4.2 The Army Of Union Virginia (CSA)
The Confederate army is commanded by Robert E. Lee with, under his direct command, three infantry corps commanders and a cavalry corps commander, who themselves control divisions and brigades. Lee may directly control one division or one brigade without passing command via his corps commanders.
4.3 The Army Of The Potomac (USA)
The Union army is commanded by Joe Hooker (or George G. Meade after the replacement of Hooker) and has under his direct command seven infantry corps, one corps of reserve artillery and a cavalry corps commander who may control the cavalry divisions. Hooker could be in charge of the cavalry divisions directly.
4.4 Death of the leaders
For simplicity, the leaders can never be killed or captured (where this happens, at the worse, they would be replaced by someone of equivalent value). A leader counter alone in a box with the enemy is merely moved to stack with the nearest friendly unit.
4.5 Line of Communication
An infantry unit must be capable of tracing a line of communication (LdC) towards his corps commander or his general in chief for the Confederate, or toward his general in chief for the Union. A Confederate commander corps must be capable of tracing a LdC to Lee.
This line of communication cannot exceed six movement points and must not be blocked by the presence of hostile units in boxes that it crosses.
This LdC is not affected by the terrain that is in the boxes, nor by the presence of decoys, BUT it cannot cross impassable terrain.
4.6 Command Points (PC)
In order to activate his units, a player spends the command points obtained at the beginning of each turn (1d6 + value of command of general in chief). Once the PC is expended for the unit or the stack of units (recorded with the PC counter on the track), they may carry out the actions desired by the player. There are no restrictions to the actions that could be undertaken by a unit or a stack of units, other than it its movement allowance. In other words, activating a unit or a stack of units costs 1 PC but performing actions with this active unit or stack costs only their movement points.
Commanding a unit or a stack that has a valid LdC costs 1 PC.
Commanding a unit or a stack that does not have a valid LdC costs 2 PC.
Commanding a Confederate general or Pleasanton (Union) is free of charge if he has a valid LdC. Otherwise, the cost is 1 PC.
Note: the Confederate corps commanders give a flexibility advantage to the Confederate player.
4.7 Out of command units
An out of command unit, that is to say that does not have a valid LdC, is limited in its actions:
- if it does not have a valid LdC to any leader: it cannot forced march. If it fights, it can only select the tactical options Skirmish, Retreat in Order, or Retire (see 8.2).
- if it has a valid LdC to its leader who does not have a LdC to his general in chief: then the tactical options General Assault and Hold may not be chosen (see 8.2).
5 Movement
Each type of troop has a certain number of movement points (PM) which are not shown on the counters. These allowances are:
- Leaders: 6 PM
- Infantry, artillery and wagons: 4 PM
- Cavalry: 6 PM
5.1 General Rule
The boxes on the map are joined by different types of connections. Units must pay the cost in movement points for each type of connection in order to move from box to box. These costs are listed on the terrain effects table.
Two boxes are adjacent if they are joined by a passable connection.
A unit may spend all or part of its movement points but may never accumulate them from one turn to another.
During the movement phase, a player may move all or part of his units, individually or stacked together.
Movement is executed unit by unit or stack by stack, in the order decided by the player.
The movement of an unit or of a stack of given units must be ended before the movement of another begins.
5.2 Limitations on movement
When an unit or a stack of units enters a box where there are hostile units (which are not decoys) its movement stops for this turn.
An unit that begins its turn in a box occupied by the enemy could only leave this box if a leader is present. In this case, the player must score lower or equal to the value of command of this leader on 1d6.
5.3 Stacking
Stacking is unlimited within a box. However, no more than:
- two infantry corps + one cavalry division (for the Union), and
- three divisions + two brigades of cavalry (for the Confederate)
can move together as a stack during movement. The decoys and leaders do not count in these limits.
When a stack moves, it does so at the speed of the slowest unit.
Units moving as a stack must all have the same start box and a stack may not drop-off units in the boxes through which it moves. In other words, a stack being moved must have the same units at arrival as on departure.
If a complete stack makes a forced march (see 5.4), the losses in stragglers are then determined for each unit of the stack.
If a stack of units separates into several new stacks at the beginning of a movement phase, then each new stack must receive one (or two in some cases) PC in order to be activated.
5.4 Forced marches and stragglers
A unit that possesses a LdC to its immediate leader may undertake a forced march. This permits increased movement: + 2 PM. The unit risks losing some men on the road and becoming fatigued in case of combat.
As soon as the movement of a unit having made a forced march is ended, the player throws a die and consults the forced march table to determine the number of stragglers and deserters. Each unit of a stack that makes a forced march must test separately.
A unit that does not move for one complete turn (that is, without reaction movement nor March To The Sound Of The Guns) recovers one troop point automatically, two if the player throws a 5 or 6.
A unit that made a forced march and that finishes its movement in an box occupied by the enemy receives a Fatigue marker: its combat points are divided by two. The Fatigue marker is withdrawn at the end of the turn.
5.5 Rail Transportation
The units of the Union player may be moved by train. To this end, they must spend 2 PM and be on a railway box. Movement by rail can be combined, in any order, with normal movement (but not forced march), provided the capacity of PM of the units is not exceeded. To this end, it could enter a station, using regular movement, then go by rail. The unit can then move eight railroad connections in the turn.
Rail movement is limited to one corps per turn (in total).
A unit can always move along a rail connection, using regular movement expending 2 PM per connection.
6 Actions
Each unit may, during the movement phase, perform actions by spending movement points. Movements and actions may be executed in any order, up to the limit of the PM. For their part, the units of the opposing player can also attempt to react to some movements.
6.1 Creation of detachments
Each of the players may create detachments, representing units smaller than those in play. At the beginning of the movement phase of an unit, the player marks off the strength points that he detaches from that unit on his roster and assigns them to a detachment. This detachment is directly subordinate to the same leader as its unit of origin. The player notes on the roster the name of the source unit and places the detachment counter in the same box.
In order to reattach a detachment, the reverse operation is done under the same conditions, the source unit and its detachment must be in the same box at the beginning of the movement phase and not committed in a battle.
Creating a detachment costs 1 PM to the source unit and to the detachment.
An unit could not form a detachment unless if its tactical value is equal or superior to the one of the detachment.
6.2 Trenches
A unit that does not move for one complete turn could construct entrenchments. A stack of units that digs trenches does so for each unit of the stack. The procedure is as follows: at the beginning of his movement phase, an "Entrenchment under Construction" marker is placed on the unit. If, during its movement phase as well as during the opposing movement phase that follows, the unit does not move (that is to say that it does not perform Reaction Movement or Marching To The Sound Of Cannon), the marker is reversed then onto its "Entrenchment" face at the beginning of the following movement phase.
An entrenchment remains effective while the unit that constructed it remains in the box. At the moment a unit quits this box, its marker is removed.
Entrenchments may not be exchanged between units. A decoy unit may not construct entrenchments, unless with a real unit. The two units may then construct defences.
Entrenchments double the strength points of a unit in defence.
6.3 Cavalry Reconnaissance
An unit or a stack of cavalry units may use reconnaissance movement into a box containing solely hostile units. The unit or the stack moves to the box, the player reveals the cavalry unit then and declares his intention of proceeding to reconnaissance.
If the hostile player has no cavalry in the box, the reconnaissance succeeds and the player throws the die on the Reconnaissance Table in order to determine how many enemy units are revealed, as a function of the cavalry strength points.
If the enemy player possesses a cavalry unit(s), he reveals them and one compares the strength points of the units making the reconnaissance and those forming the screen. If this difference is nil or negative, the reconnaissance automatically fails. If the difference is positive, the player throws one die and consults the result on the Reconnaissance Table, on the corresponding column to the difference in strength points.
If a reconnaissance succeeds and that there is at least one decoy present in the box, then the decoy is eliminated.
Modifiers:
- tactical value of the reconnoitring units or difference between the tactical value of the units making the reconnaissance and those forming the screen;
- modifier for Stuart if he is present: + 1
Retreat after reconnaissance
At the end of a reconnaissance, the player owner may move back the unit or the stack of cavalry units from the box controlled by the enemy in order to avoid combat. The player throws 1d6 for each cavalry unit that moves back (the Confederate player subtracts 1 on the die):
- with enemy cavalry units present: on a score of die of 4, 5 or 6, the unit loses 1 CP.
- no opposing cavalry: on a score of 5 or 6, the unit loses 1 CP.
The unit moves back to its box of origin.
Retreat before combat
A cavalry unit in a box entered by a hostile unit can, during the combat phase, move back before this combat. The procedure is the same that described previously for retreat. The unit could not move back to the box from which the enemy unit has just moved.
6.4 Engineering operations
Destruction and repair of bridges
A force of at least 4 infantry strength points may destroy a bridge on a connection linked to its box. The unit or stack expends 2 PMs.
If an enemy unit is present in the box on the other side of the bridge the destruction costs 3 PMs. A "destroyed bridge" marker is placed. A destroyed bridge impairs the movement and LdC using that connection.
In a similar way, a force of at least 4 infantry strength points may repair a destroyed bridge. The unit uses all of its PMs. If an enemy unit is on the other side of the connection, the bridge may not be repaired.
Destruction and repair of railways
A force of at least 3 points (infantry or cavalry) may destroy a station or a railway in its box. Place a 'destroyed railway or station' marker.
A force of at least 4 infantry points may repair a station or railway in its box, by spending 2 PMs.
Note: the station symbol in a box on the map indicates a victory objective.
Important: any engineering operations may not take place from a box also occupied by enemy forces.
6.5 Actions and Reaction
During the movement phase, the units of the non-phasing player may react within certain limits and under certain conditions.
When a unit or stack enters an adjacent box, during its movement, one unit or a stack may attempt to react. To do this, the owning player throws one dice, and must score equal or lower to the highest ranked leader's command value in the box (or the tactical value of the largest unit present, if no leader is present).
If the unit or stack does not have a LdC to his direct leader or CinC, add 1 to the roll.
If the test is passed, the unit(s) may:
- intercept the enemy units, entering their box. The movement of the intercepted unit(s) are ended.
- retreat one box. The enemy unit(s) may continue movement normally.
It is possible to have multiple reaction attempts, during a turn, but only one unit or stack may react to the movement of each enemy unit or stack.
Add 1 to the dice for a reaction attempt, if the connection between interceptor and intercepted costs 2 PMs.
7 Decoys and Forces
7.1 Decoy markers
The players have both decoy infantry and cavalry markers. The markers move in an identical fashion to real unit but with no cost in PCs. The player may announce the 'false' expenditure of a PC to his opponent. The decoys may not undertake any other movement actions, but may 'entrench' (see above).
All decoys are revealed in the following fashion:
- if there are only decoys in a box and an opposing unit finishes its movement or achieves an interception in the box;
- if there are only decoys in a box that prevents the opponent from tracing a LdC between units and their leader (and there is no alternative LdC);
- as soon as a battle occurs in a box;
- if there is a reconnaissance against a box that contains only decoys.
At the beginning of his administrative phase, the player replaces the decoys that were previously uncovered, on the map, in any box(es) of his choice already containing friendly counters.
7.2 Force counters
Each player may use Force markers to hide the value of a stack. At the start of his turn, a player may replace a stack of units with a Force marker. The units are placed in the corresponding box, on the play aid, out of view of the opposing player. The units that make up a force are revealed normally.
8 Combat
Combat takes place in boxes occupied by units of both sides. The active player resolves combat in any order he desires. He is considered to be the attacker: the inactive player is the defender. Combat is mandatory.
Transcriber note: the combat table, the terrain and fortification effects on strength points, and the combat duration table are referred to in this section but are not included in the source text.
8.1 Procedure
The following procedure is used for all battles.
- The players select a tactic secretly, and reveal them simultaneously, before decoys are revealed.
- For ease of play, for important battles, the players may use the battle boxes, placing a battle marker in the box concerned. They then calculate the combat points of the involved forces.
- Each player consults the combat table, using his combat points to select the column.
- Each player throws 1d6 and applies modifiers. The result is the number of strength points lost by the opposing player. Losses are applied simultaneously.
- If a player has selected Retreat In Order or Retire, he carries out movement. If troops of both sides remain in the box at the end of combat, the battle marker stays in the box.
8.2 Tactical Options
At the beginning of combat, each player chose one tactic secretly:
- for the attacker: General Assault, Limited Assault or Skirmish.
- for the defender: Hold, Retreat in Order or Retire.
Once the tactics are revealed, the players consult the combat duration table to discover how many rounds this combats lasts and the loss multiplier that applies to the two sides.
8.3 Calculation of the combat points
The choice of the assigned tactics may affect strength points and the artillery combat points. The multiplier, according to the tactic, is indicated on the table. In addition, the number of strength points depends also on terrain, entrenched positions and fatigue (see the table). Each player determines the total of his combat points accordingly, rounding the fractions up.
8.4 Resolution of combat
Each player throws the dice, consulting the relevant column on the combat table, and applies the relevant modifiers. The result is the number of enemy strength points lost.
Losses, rounded up in case of fractions, are shared out equally between involved units. One may only eliminate a unit where there remain undistributed losses. The player adjusts the roster sheet accordingly.
8.5 Die roll modifiers
Certain modifiers apply in the following cases:
- Flank attack: An attacker may benefit from a bonus if at least two units or stacks enter a box on two different movement lines, in the same turn.
- Defender encircled: this applies to surrounded units unable to Retreat (rule 8.6).
- Difference in tactical values: the players take the difference between the average tactical values of the attacker and of defender. The player with the highest average adds the result (the difference) to his die, the other player subtracts it. Example: units with an average tactical value of 2 attack a defender with an average of 4. The difference is 2: the attacker subtracts 2, the defender adds 2.
8.6 Testing for Retreat
At the end of a round of combat, as soon as a force incurs at least 20% casualties based on its initial strength (not modified and without artillery), it has to test its morale. The player throws 1d6 and must throw equal or less than the average tactical value. For this test only, the result is modified by the tactical bonus of a leader in the box.
If the test is failed, the force must retreat one box, which must be free of enemy units, via a traversable connection, and not via the route the attacker took. If there is no such free box, the force remains in position and is marked with an 'encircled' marker. Retreat is possible into a box with only enemy cavalry, but the force losses one step (from the unit of the player's choice).
A force or unit encircled suffers a negative modifier in combat whilst the marker is present.
An encircled force removes its marker at the moment in which it could make a Retreat movement or when it could leave the box normally.
8.7 Retreat after combat
At the end of the battle (after the number of rounds arising from the tactical choice), a defender choosing the tactic Retreat In Order or Retire must move back, even if his adversary failed a morale check and must also move back.
If none of the players are obliged to retreat, they may do so voluntarily: if the two players wish to move back their forces, the one possessing, in order, the best leader rating or the best average tactical value, may choose to retreat first or second. The choice of moving back or not in these cases is decided simultaneously revealing one of the Retreat markers (in the case of retreat).
8.8 Winner and loser
If retreating was as the result of a tactical choice, the battle is a minor victory for the non-retreating player.
If retreat is caused by a failed test and the strength of the stack that retreated is lower than, or equal to, 20 strength points (infantry + cavalry), the battle is a minor victory.
If the strength of the retreating force is greater than 20 strength points, this is a major victory.
If both two forces move back (voluntarily or not), neither side scores.
9 Optional Rules
9.1 Arrival of Stuart
At the start of the game, the Confederate player choices an option for Stuart. Option 2 is the (default) historical option.
Lee does not send Stuart on his raid into the rear of the army of the Potomac: in that case, Stuart and his 3 brigades are in play at the start of each scenario.
Stuart goes on his raid and is separated from Lee. In that case, at the end of turn 3, the Confederate player throws one dice to see if Stuart appears on the map: on a score of 5 or 6, Stuart enters the game. Add 1 for with each subsequent turn.
When Stuart appears, the Confederate player determines, with 1d6, the placement box. 1-2: Z1, 3-4: Z2, 5-6: Z3. If the box is occupied by Union units, Stuart is placed in the box to the east of it. The player could decide to place Stuart more to the east, in this case, his entry is retarded by one turn and he is placed in O. If the three boxes Z1, Z2 and Z3 are occupied by Union units, Stuart enters in O with a one turn delay.
For each turn, after turn 3, in which Stuart is not on the board, the Confederate gains 1 point of victory.
9.2 Ammunition Supply (optional rule)
In order to be able to fight a battle with full efficiency, the troops must be supplied with ammunition. To this end, the players may use the five Wagon Train markers. Units incapable of tracing a valid LdC of 4 PM to an unexhausted Wagon Train undergoes the following penalties:
- in attack, they cannot select the option General Assault;
- in defence, they cannot chose Hold.
A Wagon Train can supply all the units capable of tracing a LdC to it.
At the end of each combat, the Wagon Train stock may exhausted. After each combat with at least 8 combat points, the player throws one dice:
- if the combat lasted 2 rounds, the Wagon Train is flipped on a roll of 5 or 6
- if the combat lasted one round, a 6 expends the Wagon Train.
An empty Confederate Wagon Train is removed from the game.
The Union player can resupply his Wagon Trains from depots at Harpers Ferry. For this to happen, the Wagon Train must trace a LdC of 4 PMs to the depot at the end of the turn.
The munitions depot functions like a Wagon Train and all Union units that can trace a LdC of 4 PMs are considered supplied. The depot is destroyed if Harpers Ferry falls to the Confederates.
If either a cavalry or infantry unit enters a box with an enemy Wagon Train alone, that Wagon Train is captured and replaced with a friendly Wagon Train.
9.3 Solitaire play
All the movement rules apply. Decoys and reconnaissance are not used.
At the start of the turn, throw for PCs as normal. As soon as an unit or a stack of units is active, a die is thrown, according to the type of units (infantry or cavalry) in the stack, for calculate the number of PM actually available:
- Units that have a valid LdC with a leader (even though himself does not have of valid LdC with his general in chief) throws 1d6 -1 for the infantry, the artillery, and the Wagon Trains and 1d6 + 2 for the cavalry.
- the units with no LdC throw 1d6-2 for infantry, artillery and wagons and 1d6 for cavalry.
- leaders throw 1d6+2 if they have a LdC to their CinC, and 1d6 +1 if he does not.
Each unit has at least 1 PM.
All the rules concerning the LdC remain valid.
Scenarios
General Rule
The Reserve Union Artillery counter (Tyler) must always be stacked with a unit of infantry. The Decoys, Force Markers (and the Wagon Trains) are placed by each player in secret at the start of play, with friendly units.
A locality is controlled as soon as an unit or a stack of units of at least 4 strength points spend 2 PM in the box. Control markers are used to indicate controlled locations. On the map, the flags indicate the objectives for each side.
Scenario 1: 28 June to 7 July
This scenario begins on turn 4 and finishes at the end of turn 8.
Placement of the Confederate units
- Lee, Longstreet, Hood, McLaws, Pickett: Chambersburg (A)
- Ewell, Johnson, Rodes: Carlisle (B)
- Early: York (C)
- Hill, Anderson, Heth, Pender: Fayetteville (D)
- Jenkins: Mechanicsburg (E)
- Stuart's cavalry corps: (Z3) or historical option (see 9.1.2)
- Jones, Robertson: Greencastle (G)
- Imboden: (H)
Placement of the Union units
- Meade, Sickles, Sykes, Sedgwick, Tyler: Frederick (I)
- Hancock: Frederick Junction (J)
- Reynolds, Howard: (K)
- Slocum: Knoxville (L)
- Pleasanton, Kilpatrick: (M)
- Buford: Boonsboro (N)
- Gregg: (Y1)
- Kelly: (P) entrenched
- Elliot: Harpers Ferry (R) entrenched
- Militia: Harrisburg (X)
Victory Conditions.
The Confederate player scores points of victory as soon as he controls the following localities:
- Harrisburg: 3 points
- Hanover, Littlestown, Taneytown: 1 point
- Westminster: 2 points
The Confederate player scores a point for every following destroyed train station (even though they are repaired subsequently):
- York Haven, Hanover Junction, Sykesville, Beacham's Station and two points for Frederick Junction. If the Union player destroys the Harrisburg bridge, the Confederate player gets two points.
If the Confederate player controls Gettysburg at the end of the game, he scores five points (it is necessary that the Gettysburg box to have had Confederate control established and no Union unit is in it at the end of the game).
Finally, for each three strength points destroyed from Union units (combat losses only), score one point.
The Union player scores 1 point for the following cities that he controls: Sharpsburg. Williamsport and Hagerstown.
For each two points of eliminated Confederate strength points the Union player scores 1 point.
Both players
For each major victory won, a player scores 5 points. For each minor victory won, a player scores 1 point.
At the end of the game, one takes the difference of the Confederate and Union total. If this difference is:
- superior by 26 points: Confederate major victory;
- between 16 and 26 points: Confederate minor victory;
- between 10 and 15 points: Undecided campaign;
- less than 10 points: failure of the Confederate invasion (historical result).
Scenario 2: 22 June to 13 July
This scenario lasts 11 turns.
Placement of Confederate units
At start of play
- Ewell, Johnson, Early: Sharpsburg (U)
- Rodes: (T)
- Jenkins: (S)
On the second turn
- Lee, Longstreet, Pickett, McLaws, Hood: place on (F)
- Hill, Pender, Anderson, Heth: placed on Shepherdstown (V)
- Stuart enters turn 2 at F or V (or a combination of the two), if the non historical option is chosen.
On 4th turn
- Imboden: placed on (H)
- Jones, Robertson: placed at Williamsport (W)
Union placement
- Elliot: Harpers Ferry (R)
- Kelly: (P)
- Militia: Harrisburg (X)
The arrival on the map of the army of the Potomac (AoP) is random and in two wings. On turn 1, the Union player throws the die, if he gets 5 or 6, he places the first wing of the AoP on the map, and the following turn the second wing. Add 1 to the dice for each turn after the first until the AoP enters. When a wing enters it is placed in either Y1 or Y2.
- First wing: Reynolds, Sickles, Howard, Kilpatrick.
- Second wing: Hooker, Pleasanton, Hancock, Sykes, Slocum, Sedgwick, Tyler, Buford, Gregg.
Victory conditions:
The Confederate player earns victory points for the following locations:
- Greencastle, Waynesboro, Chambersburg, Shippensburg, Newville, Carlisle, Mechanicsburg, Littlestown, Taneytown: 1 point per location
- Gettysburg: 2 points
- York, Hanover, Westminster: 3 points
- Harrisburg, Harpers Ferry: 4 points per location
For each station destroyed:
- York Haven, Hanover Junction, Sykesville: 1 point
- Beachams Station, Frederick Junction: 2 points
- If the Harrisburg bridge is destroyed: 2 points
- For each three strength points killed: 1 point
For the Union player, the following cities:
- Sharpsburg, Williamsport, Hagerstown, Harpers Ferry: 1 point
- Gettysburg, Westminster: 2 points
- For each 2 Confederate strength points lost: 1 point
Both players
Major victory: 5 points. Minor victory: 1 point.
Subtract the totals (Confederate less Union). If the difference is:
-
30: major Confederate victory
- between 20 and 30: minor Confederate victory
- between 10 and 19 points: indecisive campaign
- less than 10: Confederate invasion defeated
Clarifications and Map Errata
- The letter indicating the placement box of Jenkins cavalry (scenario 2) has mysteriously disappeared. Jenkins is placed in the box just above Hagerstown on the lower right of the map. In addition the town of Frederick is not a Union objective despite the presence of a flag.
- 4.2 The militia and the Harper's Ferry garrison are considered always in command, nevertheless if the latter leave Harper's Ferry, they pass under the control of the Army of the Potomac, with all the consequences that follow from that. The Harrisburg militia may not move during the game.
- 5.3 The Artillery Corps counts as an infantry corps for stacking. The Harper's Ferry units count as a division of cavalry.
- 5.4 The recovery of strength points of stragglers may only occur in the turn following the forced march. It does not cost PC to recover stragglers. A forced march is possible in the rain, the PM bonus is 2-1= 1 PM.
- 6.4 The repair of a wrecked bridge is not possible in the rain.
- 8.4 If an attack is made from several different boxes and in different conditions, the modifiers least favourable to the attackers are used. The malus of -1 for units having suffered losses applies in all combats where this unit takes part, the factor is cumulative with those of other units. [What??]
- 8.6 A unit which leaves the map under retreat is eliminated, but only counts as half-value for victory purposes.
- 9.2 The wagons follow the LdC rules and cost PC to move just as with other units. A Wagon Train counts as a Union corps or a Confederate division for stacking.
Transcriber note: the bracketed "[What??]" is the source's own annotation and is kept as printed.
Example of Combat
A Confederate Player Turn
At the end of the movement phase the units are placed as follows:
- South: at Heidelsburg: Early, Johnson, Rodes, and Ewell; at Gettysburg: Anderson.
- North: at Gettysburg: Buford; on the green box on Fairfield Pike: Reynolds and Howard.
During the combat phase, the Confederate Player attacks Buford with Anderson.
1 Choice of Tactics
Unaware of his opponents strength the South chooses Skirmish, and the North chooses Hold because he wishes to retain control of the town.
2 Calculation of Combat Points
The players reveal their units and calculate the losses.
- South: One artillery at half value (Skirmish in defensive terrain) + 8 Strength Points (on the roster) for a total of 9.
- North: 5 strength points on the roster at half value (cavalry in defensive terrain) = 3 combat points.
3 Calculation of modifiers
- South: the difference in tactical values (two to one) gives +1 but Defender in Defensive Terrain gives a shift of one column to the left.
- North: one column to the right for the defensive terrain, plus one to the dice for the Hold option and -1 for the difference in tactical value, for a final modifier of 0.
Skirmish and Hold give a one round combat, with half losses.
4 Combat Resolution
- South: with 9 strength points less one column, the South uses the 4-6 column. The player scores a 4 modified to 5 and does not inflict any losses.
- North: with 3 strength points plus a column, the Union player uses the 4-6 column. He scores a 6 and causes one loss. The loss is halved by the tactical choice but rounded up to one. The Confederate player adjusts his roster.
Because neither side must retreat a Battle marker is placed on Gettysburg.
B. Union Player Turn
Movement Phase: the Union player moves Reynolds and Howard into Gettysburg.
March to the Sound of The Guns Phase: Ewell and his three divisions move into Gettysburg (2 PM).
1 Choice of tactics
The North choose Limited Assault and the South Hold. The combat will last two rounds, losses will not be adjusted.
2 Calculation of Combat Points
- South: 15 points of artillery (5x3=15) + 27 Strength Points (Anderson has a loss) = a total of 42.
- North: 2 points of artillery and 24 strength points = 26 combat points.
3 Calculation of modifiers
- South: a column to the right (defensive terrain) +1 for Tactic, +1 for the presence of Ewell (Tactical Bonus), but -1 for the difference in tactical values for a total of +1.
- North: one column to the left for the defensive terrain, +1 for the difference in tactical value.
4 Combat Resolution
- South: with 42 strength points plus one column, the South uses the 61-80 column. The player scores a 4 modified to 5 and inflicts 4 losses on the North.
- North: with 27 strength points less a column, the Union player uses the 16-21 column. He inflicts a loss of 2 strength points on the South.
The North cross two losses off Reynolds and 1 off Howard and Buford, the South removes a box from Rodes and Johnson.
Second Round
The South now has 40 SPs and the North 22. The modifiers remain the same. The South inflicts 3 losses, and the North one. The south remove one from Early, the North from each of their units.
At the end of the combat the Union losses exceed 20% of its original strength (20% of 24=5) they must test for retreat. They score 3 which is less than the best tactical value present (Reynolds 4). The Union Player stays in Gettysburg, the Confederate side is marked with a Battle marker.