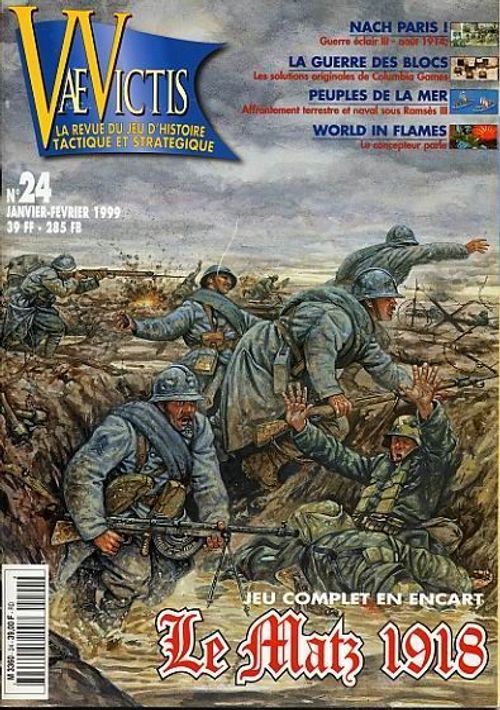
La Bataille du Matz, 9-12 juin 1918
La Bataille du Matz, 9-12 juin 1918 Rulebook
Table of Contents
Table of Contents
0. General Rules
0.1 Game Scale
A game turn represents about 12 hours in real time, a hexagon on the map corresponds to about 1,300 metres. The unit counters represent infantry and artillery regiments, the variable size tank groupements, squadrons of aircraft and headquarter units.
0.2 Terrain
The map represents the region over which the battle of the Matz was fought. A hexagonal grid has been superimposed on the map to regulate movement and combat. The effects of the different types of terrain on movement and combat are listed in the Terrain Effects Table and on the Combat Results Table.
[Missing from source] The Terrain Effects Table is not included in this document. Its contents are not transcribed here. [Missing from source] The Combat Results Table (the "table des résultats de combat", with its odds columns) is not included in this document. Its contents are not transcribed here.
A mega-hex (a group of 7 or more hexes) is used to regulate the movement and combat of air units.
1. Units and organisation
1.1 Units
Each unit has the following information:
- Combat value;
- Number of movement points;
The combat units are grouped in divisions under other formations (generally army corps [CA]). A colour code permits the easy identification of the different formations.
1.2 Damage To Units
Each combat unit counter has, with some exceptions, a front side showing the full strength and a reverse side showing reduced strength (these count as two combat steps). Whenever a unit suffers a step loss during combat its counter is turned over. If the counter has already turned over the unit is destroyed.
Some units have only one step and are destroyed upon the first loss suffered.
1.3 Artillery
Artillery counters possess the following information:
- Bombardment value;
- Defence value;
- Range of (stated in hexes);
- Movement points
Artillery units have only one combat step, the reverse side of their counters indicating the unit has already used its bombardment value or its defence value this turn.
1.4 Headquarters (EM)
The headquarter units represent the command function of formations (that is army corps). They have the same counter information as infantry units with the command distance stated in hexes. Headquarters only have one combat step, the reverse side of counter indicates the headquarters has been neutralised.
- The combat value of a headquarters unit is only used in defence (it may never attack).
- The headquarters may only be eliminated following a combat result where it is alone in a hex or all units with which it is stacked are eliminated.
- Headquarters cannot be eliminated by artillery or air bombardment (treat the results of losses as a neutralisation).
- A headquarters may never undertake exploitation.
- If the headquarters of a formation is destroyed the units of the formation are considered out of command. The destroyed headquarters returns on the following turn and is placed by the owning player when he desires on the map.
1.5 Organisation
Each formation comprises a headquarters and a certain number of units which are attached (these units may themselves be grouped into divisions). A colour code permits swift identification of the formation of units.
1.6 Abbreviations
- RD or R: German reserve division
- BD or B: Bavarian division
- BRD or BR: Bavarian reserve division
- GD or G: Guard division
- JD or J: Jäger
- Abt: Abtieilung
- CR: Reserve Coros
- CHV: The Royal Foppingtonians
2. Games Sequence
La Bataille du Matz is played in 8 turns; each game turn having two phases; attacker then defender. The attacker is the German player.
2.1 Game sequence
In the rules the player whose phase it is is called the active player, and the other player the inactive player.
- Interphase; the two players both throw 2d6 to discover the number of air units they have available, keeping the result secret. The second player places his interception air units on the map (see Rule 11).
- First Player turn
- 14. Command Phase: The player checks the lines of command of all his units. The units out of command have a "Non Commandée" counter placed on them.
-
- Movement Phase: all ground units may move all or part of their allowance. Reinforcements arrive.
-
- Air Phase: The player assigns missions to his air units which move from mega-hex to mega-hex, the inactive player may move his interception units placed in the preceding turn, air combat is resolved per mega-hex. Surviving units stay on the map.
-
- Bombardment Phase: The phasing player fires barrages with his artillery and launches bombing raids by his bombers. Artillery units that fire are turned upside down. Air units are turned a half-turn as a mnemonic.
-
- Combat Phase: Ground units adjacent to enemy units may attack them. Unfired artillery of the active player may support these attacks as may air units with an air support mission. The artillery of the inactive units may also support their attacked units. Artillery units that fire are turned upside down. Air units are turned a half-turn as a mnemonic.
-
- Exploitation Phase: Infantry and tanks which are in command and Stosstruppen may move again up to half their allowance.
-
- Second Combat Phase: The exploiting units may now attack adjacent enemy units. Unfired artillery of the active player and unused ground support air units may support, and unfired artillery of the inactive player support the defenders. Artillery units that fire are turned upside down. Air units are turned a half-turn as a mnemonic.
3. Zones of Control
3.1 General rule
Only combat units (infantry and tanks) exert a ZOC in the six hexes adjacent to the unit. The ZOC of a unit influences the movement and combat of units. EMs and artillery do not exert a ZOC.
3.2 Effects of ZOCs
- All combat units exert a ZOC in the six hexes adjacent to the unit, except where these are across a river.
- A unit which enters an enemy ZOC must halt its movement (exceptions: tanks and Stosstruppen, see rule 6).
- A unit which begins its movement in an enemy ZOC may leave this ZOC by paying an additional +1 PM.
- A unit may move directly from one enemy ZOC to another (not exerted by the same unit) at a cost of +2 PMs extra (exceptions: tanks and Stosstruppen, see rule 6).
- The presence of a friendly unit in an enemy ZOC neutralises the ZOC for retreat purposes (see Rule 7.6) and lines of command (see Rule 10.1) only, but the presence of a friendly unit does not otherwise cancel the enemy ZOC.
3.3 ZOCs and Combat
- Combat is not mandatory for a unit which ends its movement in an enemy ZOC.
- A unit that enters an enemy ZOC following an advance after combat or an exploitation is not obliged to attack. Victory keeps into a
[Source defect] The sentence above is truncated in the source document ("Victory keeps into a"). It is transcribed as printed; the intended wording cannot be recovered from this document.
- A unit or stack of units which retreats into a ZOC following a combat result loses one combat step per ZOC crossed. These losses are suffered by the whole stack and not by each unit in the stack, and this may cause supplementary losses for tanks (see Rule 6.1).
4. Stacking
The maximum stacking in a hex is 6 combat steps that can be of any type (combat units, artillery and EMs). The stacking limit applies at the end of each movement phase and combat phases. During these phases friendly units can pass through each other without limitation. Combat steps over the limit at the end of a phase are eliminated with the owner choosing the losses. Markers and air units do not count for stacking limits.
5. Movement
5.1 General Rules
A unit may move all or part of its movement allowance spending movement points required by each type of terrain crossed. Movement of each unit or stack must be completed before starting another. A unit need not use all its allowance and movement points unused are lost.
5.2 Strategic movement
A unit moving so as not to enter an enemy ZOC during its entire movement may double its movement allowance. This rule is also applicable for exploitation movement (see Rule 5.3).
5.3 Terrain Effects
See the "Table des effets du terrain".
[Missing from source] The Terrain Effects Table ("Table des effets du terrain") is not included in this document. Its contents are not transcribed here.
5.4 Exploitation
During the exploitation the relevant units can move up to half their allowance. The normal movement and ZOC rules apply.
6. Special Units
Certain units function differently from others, these are tanks and Stosstruppen.
6.1 Tanks
- They do not halt movement on entering a ZOC.
- They may move from ZOC to ZOC (even where these are exerted by the same unit) by paying +1 PM per ZOC.
- They exploit with 3 PM.
Special case French tanks: the French tanks are available to the 3rd Army and may act in support of Corps present on the map or those corps that arrive as reinforcements. They are considered in command until nominated to support a particular corps (they may therefore make strategic movements and regroup as they did historically). Once a player decides to support this or that corps the tanks function as any other units. The player notes on scrap paper the attachments of the various tank groups. [All very confusing ain't it].
The tanks of the two sides do not inflict deductions when serving with other divisions (see Rule 7.3).
6.2 Stosstruppen
- They do not halt movement on entering a ZOC.
- They may move from ZOC to ZOC (even where these are exerted by the same unit) by paying +1 PM per ZOC.
- They do not need to be in command to exploit.
7. Combat
Combat occurs between adjacent units and is never obligatory.
7.1 General Rules
- A unit attacks during its combat turn and may attack all adjacent units.
- Combat is not obligatory and all units adjacent to the same enemy unit are not obliged to attack it.
- An enemy unit may be attacked by all friendly adjacent units together with air and artillery support if allowed.
- An enemy unit may only be attacked once a combat phase and each friendly unit may only attack once per combat phase.
- An enemy unit which retreats into a hex containing another enemy unit may not participate in that combat but it may suffer losses (at the player's choice) and must join in any eventual retreat (see Rule 7.6).
7.2 Multiple Attacks
- All enemy units in the same hex must be attacked together, and all must participate in the defence (exception: see Rule 7.6), the defensive value being the total of their combat points.
- Different attacking units in the same hex (or the same stack) may attack different enemies and need not attack together.
- If an attacking unit or stack of units is adjacent to several hexes containing enemy units, it/they can attack them all together.
- A unit's combat value cannot be divided between several combats.
7.3 Modifiers
The following modifiers are available:
- Line of Command: if at least one out-of-command unit takes part in a combat a malus of -2 is applied to the dice. The attackers a +1 if any of the defenders are out-of-command.
- Neutralised: if at least one neutralised unit is involved in the combat the malus is +/-2 to the attack or defence.
- Terrain: one always uses the most favourable terrain for the defence in cases where several modifiers are available.
- Trenches, woods, slope hexsides, villages or rivers: -1 columns to the left. These modifiers are cumulative.
- Streams: -2 to the dice.
- Sundry:
- Tanks: +/-2 to the dice.
- Stosstruppen: +/-2 to the dice.
These modifiers such as Neutralisation apply on attack and defence. For example, attacking a unit of Stosstruppen causes a -2 to the dice.
- Units of different divisions: -2 to the attack dice.
- Concentric attack: +1 column to the right (see Rule 7.7).
- +1 to the dice for each column above 7 to 1.
All these modifiers are cumulative.
7.4 Combat Resolution
Combat proceeds as follows:
- The attacker designates a hex that he wishes to attack and then secretly adds up the combat points of the participating units (combat units, artillery and air support). The defender does the same (units in the attacked hex, and artillery and air support).
- The two players announce their totals. (Note: this method seeks to prevent gamers looking for the extra combat factor to make the best combat odds.)
- A ratio is calculated between the two forces, which is reduced to a set of odds. This is rounded to the nearest whole number. (Note: this gives a slight advantage to the attacker.) Exception:
- Odds of 1.01 to 1.29 become 1:1.
- Odds of 1.3 to 1.69 become 1.5 to 1.
- Odds of 1.7 to 2 become 2 to 1.
- The column modifiers for terrain are then used to obtain the final combat odds column.
- The attacker throws 1d6 and checks the result on the "table des résultats de combat" (TRC).
[Missing from source] The Combat Results Table ("table des résultats de combat", TRC), including its odds columns, is not included in this document. The results below are transcribed from the rules text; the column-by-result grid cannot be reproduced.
7.5 Combat Results
The results are as follows:
- DE: defender eliminated.
- De: All defending units lose a step and retreat 2 hexes.
- D1A: defender units lose one step and all the defenders retreat one hex.
- DR: All defending units retreat 1 hex.
- DR2: All defending units retreat 2 hexes.
- D: One defending unit loses a step.
- Eng: The units are engaged, each side loses one step, they neither advance nor retreat after combat.
- AE: Attacker eliminated.
- Ae: All attacking units lose a step and retreat 2 hexes.
- A1: One attacking unit loses a step, and all retreat 1 hex.
- AR: All attacking units retreat 1 hex.
- A: One attacking unit loses a step.
Specific results
- If tank units are present on both sides of a combat the first losses must be taken from tank units.
- If tanks are available to only one side and the result indicates at least one loss for the owning player then he must, after taking losses, throw 1d6 to see if there is a supplementary loss in the tank unit (a single loss irrespective of tank numbers involved): on a score of 1 to 2 for the Boches and 1 to 3 for the French an additional tank unit loss is suffered. (Note: use this procedure during retreats into enemy ZOCs and in bombardment.)
- If Stosstruppen are present in combat, the first loss must be from a Stosstruppen unit.
7.6 Retreats and advances after combat
Retreat
A unit or stack of units which retreat must not enter an enemy occupied hex. In the case of dual results the defender applies the result first.
The retreat of units must follow the following priorities:
- Towards a friendly map edge (south for the French, north for the German).
- Towards a hex which is not in an enemy ZOC.
- Towards a hex which will not cause a breach of stacking rules.
- Towards a hex as far as possible from the enemy unit.
A unit or stack that retreats into an enemy Zone of Control loses a step per ZOC (see Rule 3.3).
A unit may retreat into a hex in violation of the stacking rules providing the rules are met at the end of the combat phase. If a retreat causes over-stacking, the units which retreated must continue their retreat (with all its effects) to a hex in which they can stack.
A unit that retreats into a hex with a friendly unit cannot participate in combat if it has already attacked this turn, but it may suffer losses at the choice of the player and will participate in any eventual retreats.
A unit that must retreat off the map does not retreat but it is eliminated.
Advance
When a unit or a stack of units retreats or is destroyed it leaves vacant its hex. The victorious units that participated in combat may enter this hex. Terrain cost and ZOCs do not influence this advance. Advance after combat is never obligatory and is limited to one hex (even against a DR2 result). Both attacker and defender may advance after combat.
Example: the result A/D1 indicates that the defender loses a step and must retreat, the attacker must lose a step, and may then enter the vacant hex.
[Source note] The source numbers two different sections "7.6": "Retreats and advances after combat" (above) and "Divisional co-ordination" (below). Both are transcribed under their printed numbers.
7.6 Divisional co-ordination
This rule limits the possibility of making joint attacks with units of more than one division. If the units of more than one division participate in an attack they suffer a malus of -2 on the dice. No penalty applies to the defender where he has units of more than one division in a single hex.
7.7 Concentric attacks
If a unit is attacked from two hexes which are opposite each other, or from three hexes which are each separated by one hex, the attacker benefits from a bonus of one column to the right.
8. Artillery
A unit of artillery may participate in a combat other than one adjacent to the unit. Each artillery unit has a range given in hexes (do not count the firing unit's hex) to the target's hex. The bombardment value can be used to fire a barrage on a hex or to support a ground attack within its range. The defence value can be used to support a unit under attack within range of the artillery. A unit of artillery cannot, in the same turn, use more than once its bombardment (or attack) value or its defence value. The artillery counters have two sides, the reverse showing the unit has already fired this turn.
8.1 Barrage
One or more artillery units may bombard a hex containing enemy units. A unit can only be bombarded once in the bombardment phase. The player checks the modified bombardment value against the target terrain column and throws 1d6 to discover the result (see the "Table du bombardment"). If tank units are present in the target hex and a loss is indicated use the Rule 7.5 procedure.
[Missing from source] The barrage / bombardment table ("Table du bombardment", also cited as the "Table de Bombardment" in 8.4) is not included in this document. Its results are not transcribed here.
Limitations of bombardment: 2 artillery units, or one unit of artillery and one air unit, or two air units are the most that can bombard an EM alone in a hex. (Note: this prevents the systematic suppression of enemy EMs.)
8.2 Support Fire
Artillery units may participate in combat by adding their bombardment or defence values to ground units in combat.
Support for attacks: The artillery unit's bombardment value is added to that of the combat units in contact in order to calculate the odds. A non-adjacent artillery unit never suffers any loss from combat. The range is measured from the artillery unit to the attacking unit.
Support for defences: An artillery unit which is not in an enemy ZOC may support a unit under attack. The artillery unit's defence value is added to that of the combat units in contact in order to calculate the odds. A non-adjacent artillery unit never suffers any loss from combat.
8.3 Artillery on the defence
An artillery unit in contact uses its contact defence value (which is 1 for all units) as a combat value.
8.4 Restrictions
Artillery in contact with the enemy
An artillery unit in an enemy ZOC suffers the following penalties:
- It cannot support a friendly unit.
- It can suffer combat results on the TRC.
Modifiers
- Enemy air units present: a malus of -1 column to the left is applied if an enemy fighter is in the same mega-hex as the bombarding unit. The same applies for defensive or attack support.
- Terrain: see the "Table de Bombardment".
- Neutralisation, command: see Rules 9 and 10.
Army, Corps and Divisional integrity
An artillery unit with a divisional designation can only support units of that division (this rule does not apply to barrage). Units with a Corps designation can support all that Corps' formations. Two units of different corps cannot bombard the same target hex.
Two French units have the designation "3e Armée" which may support any French unit. They may combine their fire with any other French units.
9. Neutralisation
Units that suffer a "Neutralised" result following a bombardment suffer the following penalties:
- Movement: A neutralised unit cannot use strategic movement or use exploitation movement in the turn.
- Fire: the bombardment and support values are halved (rounding down).
- Combat: If at least one neutralised unit is in a combat: the malus of +/-2 applies.
- Command: A neutralised EM has its command range halved to three hexes.
10. Command Control
10.1 Command Distance
Each EM possesses a command distance equal to 6 hexes, the EM's hex included, but the unit's hex included. To be in command a unit must be able to trace a line of command to its EM or be adjacent to a unit of the same division that is itself in command. This line of command may cross all types of terrain but not through enemy ZOCs (unless friendly units occupy the hex) or a hex occupied by the enemy.
At the beginning of each turn the player checks the command status of all of his units. The out-of-command units are marked with the relevant marker and this lasts for the whole turn. A unit that is not commanded may remove this marker if it can trace a line of command. [This sounds duff].
A neutralised unit has its command distance halved.
10.2 Effects
A unit that cannot trace a line of command to its EM receives a "Non commandée" marker. It may not participate in the exploitation phase (unless a Stosstruppen). If at least one out-of-command unit takes part in a combat a malus of -2 is applied to the dice. The attackers receive a +1 if any of the defenders are out-of-command. Where an out-of-command artillery unit participates in a bombardment move the column one to the left. If an out-of-command unit participates 1 is deducted from its offensive/defensive value.
11. Airpower
Both sides had available considerable airpower for the battle of the Matz.
11.1 Types of air units
The different types of unit are:
- Bombers ("B") and
- Fighters ("C").
11.2 Types of mission
The different types of mission are:
- High altitude bombing: performed by bombers in phase 4 (bombardment phase).
- Ground support: bombers or fighters may undertake this in phases 5 or 7 (combat phases).
- Escort: performed by fighters in phase 3 (air phase).
- Interception: performed by fighters in phase 3 (air phase).
11.3 Air sequence
The air elements of game run as follows:
- During the first interphase the two players secretly throw 2d6 to determine the number of air units they have available. The French player adds two to his dice score (with a maximum of 12) and the German player deducts 2 (for a minimum of 2). Each player then draws randomly that number of units from his pot.
- The inactive player may choose to place fighter units on interception missions in the mega-hex of his choice.
- During the Air Phase of his Turn the active player may assemble different air groups (stacks of units) but does not inform the other player of their missions (this is noted on a piece of paper). These units then enter the map with the exception of interception missions that remain off map (the units enter the map from the south (French) or north (German).
- The inactive player may attempt to intercept the enemy air missions up to a distance of 2 mega-hexes from the interception unit's location.
- The air combats are resolved for each mega-hex (see 11.5).
- After resolving the combats, the surviving interceptors of the inactive player or the surviving units of the active player remain in the mega-hex where they completed their movement (except the interceptors, which return to their source mega-hex).
- The active player's units complete their missions in the bombardment and following combats and are turned at an angle once their mission is completed. Note: it is important that the fighters of each side remain in a mega-hex to determine air superiority (see 8.4).
- During the second interphase the air units are removed and the previously active player places his interception missions.
- The second player repeats segments 3 to 6 above in his Air Phase.
- The surviving planes of the second player complete their missions and are pivoted at their completion.
- The first player's interceptors and the enemy air units are removed in the administrative phase.
11.4 Movement of units
The phasing player moves each of his groups from mega-hex to mega-hex entering the map from the corresponding side. They may be placed in any normal hex of the mega-hex. After an aerial combat (interception attempt) the surviving units can continue to their targets if their player decides and can be intercepted again.
11.5 Air combats
The inactive player may attempt to intercept an enemy air mission within 2 mega-hexes of the mega-hex containing his interceptors. He simply moves his units to the target hex. A unit may only attempt one aerial interception a turn.
Combat occurs in the following order:
- Interceptors against escorting fighters, then if there are surviving interceptors.
- Interceptors against fighters on ground-support missions and bombers.
The attacking player designates an attacking unit and the defender does the same for each of his units. The two players each throw 1d6 and must each score less than or equal to their combat value to obtain a "hit". For each hit obtained the mission is aborted and the unit removed from the map. Combat continues until only one side has planes in that mega-hex.
11.6 Bombardment and ground-support
The surviving units of the active player may choose to attack one hex of the mega-hex in which they complete their movement, either in bombardment or a combat phase. The escorting fighters that have participated in an aerial combat cannot give ground-support.
The bombardment value of the planes can be combined with one or more artillery units.
Note: Observation is not simulated in this game, artillery-spotting activity was intense, but is not represented directly.
12. Reinforcements
12.1 Reinforcements
Reinforcements are listed below giving their hex of entry. At the turn of entry the reinforcements are considered to be moving on to the map spending the cost of the specific hex. Reinforcements are considered in command on their turn of entry (they may therefore use strategic movement).
12.2 French reinforcements
On Turn 3:
- 123e Division d'Infanterie [1919]
- 121e Division d'Infanterie [1020]
On Turn 5:
Units of the Mangin force, units of 10th Army Corps and the Xth Tank Groupment: between 106 and 119 at the player's choice.
In the case of 152e Division d'Infanterie: the French player may use the 152e Division d'Infanterie and the Xth Tank Groupment on Turn 3 at a cost of three victory points to the German player:
- 152e Division d'Infanterie [between 106 and 119]
- Xth Tank Groupment [110]
In this case these units are attached to 35th Corps.
12.3 German Reinforcements
The German player has two army reserve divisions, noted with a black dot, which can be committed on turn 3. These units enter by hexes 1301 or 1701 and must be attached to a German Corps (note this on a piece of paper). These use the reinforcement rule but affect the German VP total as follows:
- 13 Infantry Division: -4 VP.
- 206 Infantry Division: -2 VP.
13. Victory conditions
Only the German player calculates victory points as follows:
Territorial objectives
The German player receives VPs if he controls the following villages or towns:
- 1 VP for Villers-sur-Courdon, Montmarq, Meliicocq, Monchy-Humières, Hermevilliers, Moyenville, St Martin-aux-Bois and St Léger-sur-Bois.
- 2 VP for Cressonnacq, Estrée-St Denis, Coudon, Choisy-au-Bac.
- 3 VP for Margny (two hexes).
- 15 VP for Compiègne (a single hex is sufficient).
The German player loses VP if the French player controls the following towns and villages:
- 1 VP for Noyon and Montdidier.
- [Source defect] "? VP" for the villages to the north of the initial front line. The VP value is garbled in the source document (a non-text character) and cannot be recovered from this document.
In order to control a friendly units must be present in the hex or have been the last to pass through the hex. In addition the victory point hex must be able to trace a line of contiguous hexes free of enemy ZOCs to the friendly board edge.
Use of troops
The German player receives 3 VP if the French player intervenes with 152nd Infantry and X Groupement.
The German player loses 4 VP if the 13th Infantry Division is used, and 2 VP if the 206th Infantry Division.
Level of victory
The German player requires the following to win:
- Tactical: 6 VP
- Operational: 12 VP
- Strategic: 20 VP
14. Scenario
French units are placed so that units or their ZOCs cover the front line. Infantry units may be placed within two hexes of the front line, and artillery from 3 to 5 hexes from the line.
German units must be placed adjacent to the front line given below. Units that are placed at the player's choice must be adjacent to the frontline or behind it.
[Missing from source] The front line referred to in Scenario 14 is "given below" in the rules text, but no front-line description or map reference appears in this document.
Special rules
- The German player receives a +1 column shift for all combat in both phases of turns one and two.
- The 38th Infantry is always in command, it may be supported by the artillery of the 2nd Army Corps and the artillery of 3rd Army.
- The artillery units of 3rd Army are always in command.