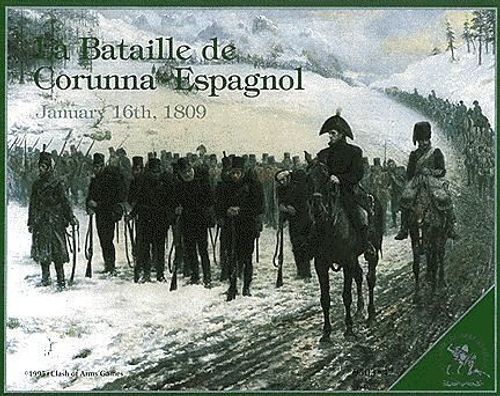
La Bataille de Corunna-Espagnol
La Bataille de Corunna-Espagnol Rulebook
Table of Contents
Table of Contents
Part 1: Corunna Exclusive Rules
All rules herein take precedence over any rules in the series rules which they may contradict.
Rules marked with an eagle or are shaded with a grey background apply only to players using the Règlements de l'An XXX.
NOTE: All references to Artillery Ammunition Wagons (AAW), artillery ricochet fire and cavalry skirmishers apply only to players using the Règlement de l'An XXX.
1.0 INTRODUCTION
La Bataille de Corunna-Espagnol is a tactical Napoleonic game of Soult's battles of the 15th and 16th January 1809 against General Moore. Moore had decided that, politically, he could not evacuate Spain without a fight and chose a line of hills two miles outside the walls of Corunna. Moore was mortally wounded during the battle and buried on the town ramparts. After blowing up or destroying all the supplies they had landed for the Spanish, the British left for England with the Royal Navy, General Alcedo surrendered Corunna and joined the French.
2.0 RULES QUESTIONS
Send questions or comments to the following address:
Clash of Arms Games
1804 Hoffmansville Road
PO Box 212
Sassamansville, PA. 19472-0212
Or email us at: [email protected]
"Attention: Rules Questions Corunna"
Or check the La Bataille forum at Consimworld: http://www.consimworld.com.
3.0 GAME COMPONENTS
A complete game of La Bataille de Corunna-Espagnol includes the following components:
- Two 34" x 22" maps
- A lot of counters
- One Series Rules book
- One Exclusive Rules Book
- Charts and tables
- Two organizational displays
- Game Turn Record Track
- Terrain Effects Chart
4.0 TERRAIN
4.1 Streams, Fords
4.1.1 Streams: Cavalry may not Charge, Mêlée, or Pursue across a stream hexside. They may however move across a stream hexside.
4.1.2 Fords: As an exception to the general rule about roads / trails negating terrain effects for units in Road Column, cavalry and artillery must still pay an additional cost to cross a ford.
4.2 Sea and Rio Mero
Only naval vessels may move into or through this type of terrain.
4.2.1 British non-naval vessels may move through this terrain only when stacked with (carried by) a naval transport.
4.2.2 Embarking or disembarking from a naval transport may only be done in the Port hexes of Corunna (see evacuation rule E9.9).
4.2.3 Naval transports may leave or re-enter the map by expending half their movement allowance.
4.3 Coasts
Terrain containing land and sea together is coast terrain.
4.3.1 Coastal hexes are considered to be land, with the appropriate terrain being that in the land portion of the hex.
4.3.2 Naval vessels may not enter coastal hexes (including ports).
4.4 Slopes
4.4.1 Infantry defending against Assaults exclusively from infantry units assaulting up slope hexsides receive a +6 Roll to Stand dice roll modifier.
4.4.2 Infantry defending against Charges exclusively from cavalry units charging up slope hexsides receive a +9 Roll to Stand dice roll modifier.
4.4.3 Infantry units assaulting up a slope suffer a -6 modifier to their Roll to Close dice roll.
4.5 Ports
There are six hexes in Corunna with docks which represent the Corunna Port.
4.5.1 These are the only hexes where British land units may embark and disembark from naval transports. Transports may enter hexes with Breakwaters in them.
4.5.2 Port hexes are considered town hexes for combat, stacking, and movement, when not embarking on a naval transport.
4.6 Dwellings
There are three different types of dwellings.
4.6.1 Line of Sight: Dwelling hexes block Line of Sight.
4.6.2 Cavalry Charge: Cavalry which Charge units in a Dwelling hex suffer the usual Mêlée modifier for charging units in General Order terrain. Cavalry may not Pursue retreating units into Dwelling hexes. The Pursuit stops at the Dwelling edge.
4.6.3 Stacking: Dwelling hexes require formed units, (i.e. those not in Skirmish Order, Disorder or PGD), to enter General Order upon entering.
4.6.4 Villages: There are no additional rules affecting villages.
4.6.5 Towns: Units assaulting units in a town hex modify their Roll to Close dice roll by -6. Units in a town hex defending against an Assault modify their Roll to Stand dice roll by +6.
4.7 The Castles
The Castillo de San Diego and the Shore Fortification in Santa Lucia are Special Structures.
4.7.1 Line of Sight: Special Structures block Line of Sight.
4.7.2 Zones of Influence: Zones of Influence do not extend into Special Structure hexes.
4.7.3 Movement: Only infantry may deploy in a Special Structure hex. Cavalry, artillery and AAWs may not enter a Special Structure hex.
4.7.4 Stacking: Up to 6 increments or 1 battalion of infantry may stack in a Special Structure hex. Units may voluntarily stack in a Special Structure without the presence of a friendly leader.
4.7.4.1 Regimental Presentation: Infantry units in Regimental Presentation with more than 6 increments, and which have battalion counters, must break down into battalions before entering a Special Structure hex. The battalions entering may total no more than 6 increments. These rules apply for all forms of movement voluntary or involuntary.
4.7.5 Formation: A unit in a Special Structure has all around facing. A unit deployed in a Special Structure is always considered as if in General Order as long as it is in good order (not Disordered or PGD). No unit may be deployed in a Special Structure and in some other hex.
4.7.6 Fire Combat: Regardless of the size of defending forces, a maximum of 6 increments of infantry may be used to fire from a Special Structure.
4.7.7 Assault: Only infantry may Assault a Special Structure hex (that is Cavalry may neither Charge nor Mêlée units in Special Structures). Only 6 increments may Assault or defend a Special Structure hex. Regardless of the size of the forces, only six parts of the attacking or defending forces may be used for attack or defense.
4.7.7.1 Roll to Stand: Units in Special Structures automatically Stand when assaulted. They must still roll the dice, however, to determine if they deliver effective Defensive Fire and receive any Defensive Shifts, but do not Disorder for failure to stand.
4.7.7.2 Sapeurs: Sapeurs stacked with infantry in an Assault on a Special Structure hex will cause a one column shift in their favor on the Assault et Mêlée Chart. They must be part of the Assault to cause this column shift, but they are not required to be the top unit in the stack.
4.7.7.3 Advance after Assault: Assaulting infantry that succeed in advancing after combat, immediately Disorder. However, the French Sapeur Battalion, and any units stacked with it, are not disordered when advancing after Assault.
4.7.8 Morale: Units in a Special Structure add +6 to Morale Check dice rolls.
4.8 Fortifications (Ramparts)
The hexes that contain Fortifications (the Corunna town walls) have the following effects. A Gate is where the road passes through a Fortification hexside.
4.8.1 Fortifications block Line of Sight. Artillery may only fire at the hexes immediately behind the Fortification hexside. The hexes behind the Fortification are considered clear terrain.
4.8.2 Voluntary Movement: Cavalry and artillery may only cross rampart hexsides via the Gates. Infantry units may not voluntarily move or Assault across rampart hexsides into an enemy occupied hex, except via the Gate(s). Infantry units may only cross an occupied Gate hex as a result of a successful Assault on the hex.
4.8.2.1 Infantry units may cross an unoccupied Fortification hexside if they begin their movement adjacent and it ends this move still adjacent to the same Fortification hexside, but having crossed to the other side. Infantry units, other than the French Sapeur battalion, crossing an unoccupied Fortification hexside end their movement in Disorder, but do not become PGD if already in Disorder.
4.8.3 Involuntary Movement: Cavalry or artillery units which are forced to Rout, Recoil or Displace across a rampart hexside surrender and are removed from play. Infantry units which are forced to Recoil or Displace across a rampart hexside become PGD and Rout. Infantry units may perform Rout movement across a rampart hexside paying 4 MPs to do so.
4.8.4 Charge: Cavalry may not Charge through or across a Fortification hexside (even the Gate). Nor may they Pursue units which retreat across a Fortification hexside. The Pursuit stops at the town wall.
4.8.5 Assaulting a Gate: Units assaulting a Gate modify their Roll to Close dice roll by -15 for the worse, except for the French Sapeur battalion and any units stacked with it. The Mêlée Value of defending units is increased by 50% when assaulted through a Gate. Assaulting infantry that succeed in advancing after combat, immediately disorder. The French Sapeur battalion, and any units stacked with it, are not disordered.
4.9 General Order
The following terrain requires formed units to enter General Order when entering (mobs remain in Mobs formation):
- Villages
- Towns
- The Castle
4.10 Terminus Hex
For the purposes of Administrative March, any Port hex of Corunna is a Terminus Hex for British MUs only.
4.11 Depots
4.11.1 French: Any road off the southern map edge.
4.11.2 Allies: Any road leading to Corunna.
4.12 Terrain and Artillery Ricochet
Artillery fire which targets the following hexes terminates in them. Ricochet fire may bounce into, but not through the following hexes:
- Dwelling Hexes
- Fortifications
NOTE: Artillery Ricochet only applies to the Règlements de l'An XXX.
4.12.1 Slopes and Artillery Ricochet: Artillery Ricochet terminates where it meets an upslope. Where Artillery Ricochet meets a down slope hexside, the slopes creates a one hex shadow over which the shot will pass with no effect before continuing along the shot path.
5.0 COMMAND
The Organization and Display Charts reveal the command structure of the armies. Refer to them as necessary.
5.1 French
5.1.1 Command Points: The French receive one Command Point for Soult.
5.1.2 MU Size: The largest MU which the French may create is a Corps d'armée. Soult may therefore use his CP to form an MU with his entire corps of three infantry divisions or any one of the three cavalry divisons. Soult does not need to be Activated to form a corps sized MU.
5.1.3 Command Span: Soult has a modified Command Span from the series rules. He has a Command Span of 12 hexes to each cavalry division leader and a Command Span of 8 hexes to each of his infantry division leaders.
5.1.4 Corps Assets: The Sapeur Battalion and the II Corps Artillery are II Corps Assets and may be attached to any of the divisions of the II Corps per the usual series rule.
5.1.5 Leader Casualties: The following leaders may not be replaced: Soult, ADC II Corps.
5.1.5.1 Marshal Soult: If Soult is killed or wounded or if he is forced to Step Down, the French II Corps is disbanded until he returns to play or is allowed to Step Up to his command role. While the II Corps is disbanded the infantry division leaders may attempt to form a MU through initiative in the same manner as cavalry leaders except using their Infantry Mêlée Bonus as their initiative rating. If the leader has a split bonus then use the Attack value as the initiative rating.
5.1.6 Marshal Soult in a Tactical Role: Marshal Soult may not move to within 3 hexes of an enemy unit. If an enemy unit moves within 3 hexes of the Marshal, at the next possible opportunity he must move to be at least 3 hexes away.
5.1.7 Light Cavalry Leaders: The following cavalry leaders may roll for initiative to form their own MU. Lorge (1e), LaHoussaye (2e), Franceschi (LC)
NOTE: This is allowed even though the Divisions contain Dragoon Regiments.
5.1.8 French Divisional Markers: These counters are only used to indicate that a French Division is In Command and are superfluous with the Règlements. Players may ignore them if they wish or use them as a reminder of command status as follows. During the Command Tracing Phase, mark division leaders which have been determined to be In Command with their Division Colours.
5.2 British
5.2.1 Command Points: When Moore is acting as Army Commander he either may either:
- generate a CP which may be used to form a MU with any British Division leader, regardless of the distance to Moore, AND create a MU with any Brigade Color with which he is currently stacked or;
- perform his "ride" where he activates Brigade Colours to form MUs.
In addition Hardinge may fly to a Brigade Color to form an MU.
Designers Note: General Anstruther died of dysentery on the 14th of January, Colonel Beckwith as senior regimental commander is assumed to be acting as brigade commander.
5.2.2 MU Size: The largest MU the British may form is a Division.
5.2.3 Moore's Ride: During the Command Point Phase of the Command Segment the Moore counter moves and activates Brigade Colours to form MUs. Every Brigade Color the Moore counter contacts during this move is activated for this turn (and this turn only) and constitutes a MU. During this "ride" the Moore counter:
- May move his entire Movement Potential.
- Must spend 1 MP in the hex with each Brigade Color so activated (this is in addition to the movement point cost of the hex itself).
- May contact as many Brigade Colours as his Movement Potential allows.
The Moore counter may only move up to half his printed Movement Potential in the Maneuver Segment of turns in which he moved during the Command Segment.
5.2.4 Moore's ADC: In addition to the Brigade Colours so activated Hardinge may activate a Brigade Color. To do so he must:
- Begin the Command Segment stacked with the Moore counter.
- He may "fly" to any on Brigade Color on the map (that is, he has unlimited Movement Potential in this movement.) Just pick him up and move him to the Brigade Colours he is to form a MU with.
- He must remain stacked with the Brigade Color he activates throughout the turn of his activation. This activation lasts a single turn.
Although Hardinge may "fly" to Brigade Colours, he must move back to the Moore counter, paying the normal movement point costs for hexes he passes through, if the British-Spanish player subsequently wishes to use him again to activate a Brigade Color.
5.2.5 Army Assets: The RHA batteries and the 15th Dragoons may be attached to any British Brigade as an Army Asset.
5.2.6 Leader Casualties: The following leaders may not be replaced: Moore, Hardinge.
5.2.7 Wounded or Killed British Division Leaders: Sir John Moore must Step Down to fill the role of any killed or wounded Divisional Leader for the length of their absence. In doing so he becomes a Divisional Leader and operates in his first mode where he generates a CP AND creates an MU with a Brigade Color with which he is stacked. However when activating Brigade Colours with which he is stacked, he may only form MUs with the Division's Brigades whose leader he replaced. Hardinge may still "fly" to Brigade Colours.
5.2.8 Sir John Moore Wounded or Killed: If Sir John Moore is killed or wounded then the British Army functions without an Army Leader. While Moore is absent the British Division Leaders may roll for initiative in the same manner as light cavalry leaders using their Infantry Mêlée Bonus as their initiative rating. If the leader has a split bonus then use the Attack value as the initiative rating.
Historical Note: General Baird was wounded and General Moore was commanding his Division when he was mortally wounded.
5.2.9 The Royal Navy: All Transports and Ships of the Line are always In Command. Naval units move at the conclusion of the Maneuver Segment after all other MUs and Actions Chits have been played.
5.2.10 British Brigade Colors:
NOTE: These counters are to reflect the chain of command only
5.2.10.1 Stacking: These counters have no effect on enemy or friendly units. Brigade Colours must be stacked with a battalion of their brigade at all times, except when moving to another unit in the brigade, and have the same Movement Potential of the units with which they are stacked. If this unit is forced to Disorder (or Rout) then the colours will automatically fly to the nearest unit of that brigade in good order (if available).
5.2.10.2 Capture: They cannot be eliminated from play, but may be captured if the unit they are stacked with is eliminated due to a surrender result on the Assault et Mêlée Chart, or if the unit is eliminated as a result of Mêlée and the enemy unit occupies the contested hex. A captured color breaks the chain of command for all units in that brigade. Units of Brigades that have had their Colours captured must Regroup to a Corunna Terminus Hex as if regrouping to their leader. They must embark on a transport as soon as possible. All movement by units without Brigade Colours is performed during the Regroup Chit. Units without Brigade Colours fire and defend normally.
5.2.11 British Brigade Leaders – Optional: Treat the Brigade Colors as Brigade leaders with a Command Span of 3 and Infantry Mêlée Rating of 2 and Morale Bonus Rating of 2. Alternatively, players may print and cut their own Brigade leader counters downloaded from the website. When a Division size MU is formed the MU may consist of all subordinate Brigade leaders within the Division leader's Command Span of 3 hexes and the Brigade leader's units who are In Command.
5.3 Spanish
Designers Note: The Spanish Forces consist of the volunteer militia of Corunna.
5.3.1 Command Points: The Spanish receive One Command Point for Alcedo. The Command Point may only be used for units which are within the town walls of Corunna.
5.3.2 MU Size: Only Spanish units which are adjacent or stacked with Alcedo may be part of a MU he creates.
5.3.3 Leader Casualties: If Alcedo is killed or wounded, all Spanish units are Out of Command and may not be part of a MU while he is absent.
5.3.4 Alcedo: Alcedo's ratings can only be used to effect the Morale and Mêlée Value of Spanish units.
6.0 SPECIAL RULES
6.1 Scenario Reinforcements
When reinforcements are directed to be deployed during the Reinforcement Chit the arriving reinforcements may not be placed in an enemy Zone of Influence. If the reinforcements are unable to comply with this rule displace them until they can be placed on the map and outside of enemy Zones of Influence.
6.2 Cavalry Skirmish Order
Even though there is a row for cavalry skirmishers on the Fire Defense Chart and a column on the Movment Chart, this applies only to players using the Règlements de l'An XXX.
6.3 Cavalry Charge
Designers Note: The ground on which the battle was fought was extremely rocky and cut up by stone walls, making it highly unsuitable for cavalry. Aside from the movement costs given in the Movement Chart, the following limitations apply.
6.3.1 Cavalry Morale Checks for initiating a Reaction or Opportunity Charge, are modified by a minus six (for the worse).
6.3.2 Charge Length: Cavalry does not receive the doubling of Mêlée Value for charging three hexes in a straight line.
NOTE: Reaction Charges and 6.3.2 only apply to the Règlements de l'An XXX.
6.4 Spanish Mob (Coruña Militia)
Coruña Militia units are marked by parentheses around their Increment Value on the counter front.
Designers Note: The Spanish Infantry had received no training before the battle.
6.4.1 Formation: They are in Mob formation unless in Disorder or Rout.
6.4.2 Facing: A Mob has all round facing (six front hexsides).
6.4.3 Stacking: Spanish Mobs may not stack with any British units. British leaders stacked with Spanish units do not apply their modifiers to these units.
6.4.4 Fire Attacks: Mobs cannot conduct Fire Attacks of any kind.
6.4.5 Cavalry: Mobs may not form Square. They must attempt to stand when charged by cavalry. Cavalry that Mêlées a Mob multiplies its Mêlée Value by 1/2.
6.5 British Light Companies
Even though they are not marked British light companies are considered to have one increment. They are treated as infantry in all respects except as noted below.
6.5.1 Fire Combat: They use their Printed Fire Value when deployed in Skirmish Order. Their Fire Value is halved at 2 hex range, unless armed with Rifles. When deployed in Line, Column or Square they use the Fire Multiple noted on the Fire Effects Chart. When in Disorder they use the Fire Multiple of Column halved.
6.5.2 Mêlée Value: The Mêlée Value of each Light Company is 3.
6.5.3 Morale: Light companies have the same Morale rating as their parent unit.
6.5.4 Special Light Companies: Light companies of the 1st Guards, 43rd, 52nd, 95th are marked with a star. These units have the ability to reconstitute their light company in the event that it is destroyed. If the light company from one of these units is eliminated immediately place the company counter on top of its parent battalion, deducting the casualty from the battalion instead. If the parent battalion has only one increment remaining and the light company is eliminated remove the light company from play instead of replacing it.
6.6 Rifle Troops
Designers Note: The 95th Rifles was armed with the Baker Rifle and specialized in sniping at ememy officers.
6.6.1 Britsh Rifle Battalions and Companies that make a Fire Attack will cause a leader casualty on a natural 61-66.
6.6.2 No French Artillery Battery may unlimber with two hexes of a Rifle unit.
6.6.3 The 95th Rifles may deploy a second Light Company at the cost of 1 increment and may replace both companies as above.
6.7 British Brigade Column
If all battalions of a Brigade begin the Command Segment deployed in Road Column, on the same road/trail and adjacent to one another, with their Brigade Color stacked with the lead battalion, then the Brigade is automatically considered In Command, and may be given an Administrative March Order at no cost in CPs.
6.8 Dismounted Dragoons
Designers Note: General LaHoussaye realized the futility of deploying cavalry in rough terrain cut up by stone walls. He ordered his dragoons to fight dismounted (à la Frederick the Great). Some small corrections are needed to allow for the fact that cavalry SP's are 50 men and infantry SP's 100 men.
6.8.1 Dismounted dragoon counters are provided for each French dragoon regiment. Dismounted dragoons are treated as Ligne Infantry.
6.8.2 Stacking: Dismounted dragoon Increments count as 1/2 of a regular infantry Increment. For example, 6 dismounted Dragoon Increments are counted as 3 infantry Increments. The two to one ratio is used for all rules involving stacking, for example firing from Line or number of Increments required to form Square.
6.8.3 Formation: To deploy into dismounted formation the dragoon unit must not be in an enemy Zone of Influence and pay a cost of six cavalry movement points. To remount the dragoon unit must pay its entire Movement Potential.
6.8.4 Maneuver: The Movement Potential of dismounted dragoons is their printed MP divided by two, rounding down. Dismounted dragoons pay the same movement costs as infantry battalions.
6.8.5 Morale: Disordered or PGD dragoons maintain their mounted or dismounted status.
6.8.6 Fire Combat: When in line, 8 dismounted dragoon Increments may fire from a hex.
6.8.7 Assault: Dismounted dragoons may Assault. The Mêlée Value of dismounted dragoons is halved.
6.8.8 Losses: Dragoons that are dismounted suffer double losses when casualties are inflicted for any reason. That is when a loss of 1 Increment is called for the dismounted dragoon unit suffers two losses.
6.9 The Royal Navy
Designers Note: Commodore Samuel Hood should not be confused with his more famous relation Admiral Samuel Hood.
Designers Note: Twelve ships-of-the-line were escorting the nearly one hundred transports destined to pick up the remains of General Moore's Army at Corunna. These ships took no part in the battles, although they could have if the French had got close on the 16th. To reflect this, the British Player is able to call on the Royal Navy using the following rule.
6.9.1 At any time a French unit is within 10 hexes of the Castille de San Diego, or the village of Santa Lucia, the British player rolls to determine what naval support will be received. This roll is made immediately when the above condition is met. This roll is only made once per game unless directed by the Naval Commitment Chart. The roll is made on the Naval Commitment Chart applying any modifiers to the die roll. The results are as follows:
- Abandonment: Commodore Hood decides that the harbor is in danger and sorties the fleet, leaving the Britsh Army to fight on alone. The British Player cannot use evacuation conditions (E9.9).
- Anchor: The warships remain at anchor. There is no Royal Navy support, but the fleet stands ready to embark the troops. Transports may still move to the embarkation hexes. Re-roll on the next hour on the Naval Commitment Chart.
- Contrary Winds: The fleet does not have the wind and cannot make sail. There is no Royal Navy support, but the fleet stands ready to embark the troops. Transports may embark units, but may not move. Re-roll on the next hour on the Naval Commitment Chart.
- Minor Support: Commodore Hood decides to allow a squadron to support the army. Roll one die and halve it (rounding up) to determine the number of ships-of-the-line tasked to support the army. Ships-of-the-line to support the army are selected randomly. Transports move normally.
- Major Support: Commodore Hood decides to allow the fleet to support the army. Roll one die to determine the number of ships-of-the-line tasked to support the army. The British Player may select the ships-of-the-line to support the army. Transports move normally.
6.10 Naval Transports
If evacuation is declared, naval transports may perform the following special movement to carry the British Army off the map.
6.10.1 Embarking and Disembarking: The Corunna Port hexes are the only areas where units may embark or disembark from naval transports. To embark on a naval transport, units spend the movement point cost and are stacked on the naval transport. See the Loading row on the Movement Chart. Units stacked on the transport have boarded. Naval transports must be adjacent to the port hex containing the units intending to embark. Naval transports expend half their movement value when embarking or disembarking land units.
6.10.2 Leaving and Entering the Map: A naval transports uses half its movement allowance to exit or enter the map.
6.10.2.1 Once a loaded transport has exited the map it may re-enter the following turn in an unloaded condition at the cost of half its movement allowance.
6.10.2.2 Only naval transports may re-enter the map.
6.10.2.3 British Army units which are unloaded off map are considered evacuated for the special victory conditions (E9.9)
6.11 Ship to Shore Action
6.11.1 Ships as Targets: Ships can be the target of land artillery only.
6.11.1.1 There is no ricochet for firing at ships.
6.11.1.2 Ships have a Fire Defence and have an incremental strength which can be lost.
6.11.1.3 A ship which loses half its strength must immediately move to exit the map and cannot return.
6.11.1.4 Any roll of a natual 66, may cause extreme damage. Roll another die, a roll of 6 causes a magazine explosion; 1-5 causes no additional effect. A magazine explosion eliminates the ship.
6.11.1.5 Losses reduce the fire capabilities of the ships-of-the-line proportionally.
6.11.2 Fire Attacks by Ships: Ships can use their Fire Value to attack enemy land units within range.
6.11.2.1 Ships have only medium and long range for fire purposes.
6.11.2.2 Ships have an unlimited supply of ammunition.
6.11.2.3 There is no ricochet for naval fire.
6.11.2.4 Ship counters can be read as if they are artillery batteries.
6.12 Artillery Ammunition
Normal artillery ammunition resupply rules apply to both the British and French field artillery units.
NOTE: Artillery Ammunition only applies to the Règlements de l'An XXX.
7.0 Scenario 1: La Bataille De Piedralonga
7.1 Introduction
The initial engagement between the British 2nd Division and the Advanced Guard of the French IInd Corps.
7.2 Time
January 15th, beginning with the 11:00am turn, ending with the 3:00pm turn.
7.3 Command
French: The French receive one CP.
Allies: The British receive one CP.
7.4 Starting Positions
British: Setup first, within 5 hexes of the village of Piedralonga.
- 2nd Division Staff
- Lieutenant General Sir John Hope
- 2nd Division, 4th Brigade
- Major General Rowland Hill (colours)
- 1st Battalion, 2nd Foot, Queen's Regiment
- Light Company, 1st Battalion, 2nd Foot, Queen's Regiment
- 1st Battalion, 5th Foot, Northumberland Regiment
- Light Company, 1st Battalion, 5th Foot, Northumberland Regiment
- 2nd Battalion, 14th Foot, Buckinghamshire Regiment
- Light Company, 2nd Battalion, 14th Foot, Buckinghamshire Regiment
- 1st Battalion, 32nd Foot, Cornwall Regiment
- Light Company, 1st Battalion, 32nd Foot, Cornwall Regiment
- 2nd Division, 5th Brigade
- Major General James Leith (colours)
- 1st Battalion, 51st Foot, 2nd Yorkshire Light Infantry
- Light Company, 1st Battalion, 51st Foot, 2nd Yorkshire Light Infantry
- 2nd Battalion, 59th Foot, 2nd Nottinghamshire Regiment
- Light Company, 2nd Battalion, 59th Foot, 2nd Nottinghamshire Regiment
- 1st Battalion, 76th Hindoostan Regiment of Foot
- Light Company, 1st Battalion, 76th Hindoostan Regiment of Foot
French: Setup second, with 3 hexes of Portazgo.
- Cavalerie Légère
- Général de Division Jean Franceschi
- 22e Chasseurs à Cheval
- 1re Régiment de Hussards
- Hanovarian Régiment de Chasseurs à Cheval
- 8e Régiment de Dragons
7.5 Boundary
Use only the south map and those parts east of the village of Elvina and south of the village of Eiris.
7.6 Reinforcements
French: 11:00am Enter from the southern map edge on the road.
- II Corps, 3e Division
- Général de Division Henri Francois Delaborde
- 17e Régiment d'infanterie légère (1st, 2nd, 3rd Btns)
- 70e Régiment d'infanterie de ligne (1st, 2nd, 3rd, 4th Btns)
- 86e Régiment d'infanterie de ligne (1st, 2nd, 3rd Btns)
- 1re Bataillon, 4e Régiment d'infanterie Suisse
- Delaborde Artillerie à Pied
British: 12:20pm Enter from the north on the road.
- 2nd Division, 6th Brigade
- Brigadier General Catlin Crauford (colours)
- 1st Battalion, 36th Foot, Herefordshire Regiment
- Light Company, 1st Battalion, 36th Foot, Herefordshire Regiment
- 1st Battalion, 71st Highland Light Infantry
- Light Company, 1st Battalion, 71st Highland Light Infantry
- 1st Battalion, 92nd Highland Regiment
- Light Company, 1st Battalion, 92nd Highland Regiment
7.7 Victory
British Victory: Deprive the French from claiming victory.
French Victory: Have uncontested control of the village of Piedralonga by the end of the scenario.
No higher levels of victory are possible.
8.0 Scenario 2: La Bataille Des Porte Des Corunna
8.1 Introduction
A fictional battle that pits the British Rear Guard and the populous of Corunna against the French II Corps for control of the Port of Corunna.
8.2 Time
January 18th, beginning with the 7:00am turn, ending with the 12:00pm turn.
8.3 Command
French: Soult receives a CP.
Allies: The British receive one CP. Alcedo receives one CP as per E5.3.
8.4 Starting Positions
Allied: Setup first. Within the Town of Corunna (or on its walls).
- Coruña Militia
- General de Voluntarios Hernando Alcedo, Mayor of Coruña
- Batallón de Voluntarios (1st, 2nd, 3rd, 4th, 5th Bons)
- 3rd Division Staff
- Lieutenant General Alexander Mackenzie Fraser
- 3rd Division, 7th Brigade
- Major General William Carr Beresford (colours)
- 1st Battalion, 6th Foot, 1st Warwickshire Regiment
- Light Company, 1st Battalion, 6th Foot, 1st Warwickshire Regiment
- 1st Battalion, 9th Foot, East Norfolk Regiment
- Light Company, 1st Battalion, 9th Foot, East Norfolk Regiment
- 2nd Battalion, 23rd Royal Welch Fusiliers
- Light Company, 2nd Battalion, 23rd Royal Welch Fusiliers
- 2nd Battalion, 43rd Monmouthshire Regiment
- Light Company, 2nd Battalion, 43rd Monmouthshire Regiment
French: Setup second, within 5 hexes of the village of Santa Lucia.
- II Corps, 3e Division
- Général de Division Henri Francois Delaborde
- 17e Régiment d'infanterie légère (1st, 2nd, 3rd Btns)
- 70e Régiment d'infanterie de ligne (1st, 2nd, 3rd, 4th Btns)
- 86e Régiment d'infanterie de ligne (1st, 2nd, 3rd Btns)
- 1re Battalion, 4e Régiment d'infanterie Suisse
- Delaborde Artillerie à Pied
French: Setup second, within 10 hexes of the southern map edge.
- II Corps, 1re Division
- Général de Division Pierre Victor Merle
- 2e Régiment d'infanterie légère (1st, 2nd, 3rd Btns)
- 4e Régiment d'infanterie légère (1st, 2nd, 3rd, 4th Btns)
- 15e Régiment d'infanterie de ligne (1st, 2nd, 3rd Btns)
- 36e Régiment d'infanterie de ligne (1st, 2nd, 3rd Btns)
- Merle Artillerie à Pied
French: Setup second, within the village of Oza (on the road).
- II Corps Staff and Assets
- Maréchal de l'Empire Nicolas Jean de Dieu Soult, Duc de Dalmatia
- ADC II Corps
- 2e Bataillon, 1re Régiment de Sapeurs
- 1re Artillerie à Pied, II Corps
- 2e Artillerie à Pied, II Corps
- 1re Artillerie à Cheval, II Corps
8.5 Boundary
Use only the north (Corunna) map.
8.6 Reinforcements
None.
8.7 Victory
Allied Victory: Deprive the French from claiming victory.
French Victory: Capture at least half of the town hexes of Corunna (there are 39 town hexes, excluding the 6 port hexes).
No higher levels of victory are possible.
9.0 Scenario 3: La Bataille Des Corunna
9.1 Introduction
This is the main battle scenario.
9.2 Time
January 16th, beginning with the 12:20pm turn, ending with the 7:20pm turn.
9.3 Command
Command as per E5.0.
9.4 Starting Positions
French: Setup second, within 1 hex of the village of Piedralonga.
- II Corps, 3e Division
- Général de Division Henri Francois Delaborde
- 17e Régiment d'infanterie légère (1st, 2nd, 3rd Btns)
- 70e Régiment d'infanterie de ligne (1st, 2nd, 3rd, 4th Btns)
- 86e Régiment d'infanterie de ligne (1st, 2nd, 3rd Btns)
- 1re Bataillon, 4e Régiment d'infanterie Suisse
- Delaborde Artillerie à Pied
French: Setup second, within 12 hexes of the Numeral II.
- II Corps Staff and Assets
- Maréchal de l'Empire Nicolas Jean de Dieu Soult, Duc de Dalmatia
- ADC II Corps
- 2e Bataillon, 1re Regiment de Sapeurs
- 1re Artillerie à Pied, II Corps
- 2e Artillerie à Pied, II Corps
- 1re Artillerie à Cheval, II Corps
- II Corps, 1re Division
- Général de Division Pierre Victor Merle
- 2e Régiment d'infanterie légère (1st, 2nd, 3rd Btns)
- 4e Régiment d'infanterie légère (1st, 2nd, 3rd, 4th Btns)
- 15e Régiment d'infanterie de ligne (1st, 2nd, 3rd Btns)
- 36e Régiment d'infanterie de ligne (1st, 2nd, 3rd Btns)
- Merle Artillerie à Pied
British: Setup first, within 4 hexes of A.
- 2nd Division Staff
- Lieutenant General Sir John Hope
- 2nd Division, 4th Brigade
- Major General Rowland Hill (colours)
- 1st Battalion, 2nd Foot, Queen's Royal Regiment
- Light Company, 1st Battalion, 2nd Foot, Queen's Royal Regiment
- 1st Battalion, 5th Foot, Northumberland Regiment
- Light Company, 1st Battalion, 5th Foot, Northumberland Regiment
- 2nd Battalion, 14th Foot, Buckinghamshire Regiment
- Light Company, 2nd Battalion, 14th Foot, Buckinghamshire Regiment
- 1st Battalion, 32nd Foot, Cornwall Regiment
- Light Company, 1st Battalion, 32nd Foot, Cornwall Regiment
- 2nd Division, 5th Brigade
- Major General James Leith (colours)
- 1st Battalion, 51st Foot, 2nd Yorkshire Light Infantry
- Light Company, 1st Battalion, 51st Foot, 2nd Yorkshire Light Infantry
- 2nd Battalion, 59th Foot, 2nd Nottinghamshire Regiment
- Light Company, 2nd Battalion, 59th Foot, 2nd Nottinghamshire Regiment
- 1st Battalion, 76th Hindoostan Regiment of Foot
- Light Company, 1st Battalion, 76th Hindoostan Regiment of Foot
British: Setup first, within 3 hexes of the Village of Passage.
- 2nd Division, 6th Brigade
- Brigadier General Catlin Crauford (colours)
- 1st Battalion, 36th Foot, Herefordshire Regiment
- Light Company, 1st Battalion, 36th Foot, Herefordshire Regiment
- 1st Battalion, 71st Highland Light Infantry
- Light Company, 1st Battalion, 71st Highland Light Infantry
- 1st Battalion, 92nd Highland Regiment
- Light Company, 1st Battalion, 92nd Highland Regiment
British: Setup first, at the Village of Eiris (within 3 hexes of B).
- Part Expeditionary Force Staff and Assets
- Lieutenant-General Sir John Moore, KB
- Army ADC Captain Henry Hardinge
- RHA Troop B, Dowman
- 1st Squadron, 15th The King's Regiment of Light Dragoons
- 1st Division Staff
- Lieutenant General Sir David Baird
- 1st Division, 1st Guards Brigade
- Major General Henry Warde (colours)
- 1st Battalion, 1st Foot Guards (2 half-battalions)
- 2nd Battalion, 1st Foot Guards (2 half-battalions)
- 1st Division, 2nd Brigade
- Major General Lord William Bentinck (colours)
- 1st Battalion, 4th Foot, King's Own Regiment
- Light Company, 1st Battalion, 4th Foot, King's Own Regiment
- 1st Battalion, 42nd Highland, Royal Highland Regiment
- Light Company, 1st Battalion, 42nd Highland, Royal Highland Regiment
- 1st Battalion, 50th Foot, West Kent Regiment
- Light Company, 1st Battalion, 50th Foot, West Kent Regiment
- 1st Division, 3rd Brigade
- Major General Coote Manningham (colours)
- 3rd Battalion, 1st Foot, Royal Regiment
British: Setup first, within 10 hexes of Santa Lucia, west of the Corunna - Piedralonga Road.
- Reserve Divison
- Lieutenant General Edward Paget
- Reserve Divison, 9th Brigade
- Brigadier General Robert Anstruther (colours), Lieutenant-Colonel Thomas Sydney Beckwith (acting)
- 1st Battalion, 20th Foot, East Devonshire Regiment
- Light Company, 1st Battalion, 20th Foot, East Devonshire Regiment
- 1st Battalion, 52nd Oxfordshire Light Infantry
- Light Company, 1st Battalion, 52nd Oxfordshire Light Infantry
- 1st Battalion, 95th Rifles
- Light Companies, 1st Battalion, 95th Rifles
- Reserve Divison, 10th Brigade
- Brigadier General Moore Disney (colours)
- 1st Battalion, 28th Foot, North Gloucestershire Regiment
- Light Company, 1st Battalion, 28th Foot, North Gloucestershire Regiment
- 1st Battalion, 91st Foot, Argyllshire Highlanders
- Light Company, 1st Battalion, 91st Foot, Argyllshire Highlanders
- Attached from Expeditionary Force Assets
- RHA Troop C, Evelin
British: Setup first, Within 10 hexes of the fortifications of Corunna (but outside them).
- 3rd Division Staff
- Lieutenant General Alexander Mackenzie Fraser
- 3rd Division, 7th Brigade
- Major General William Carr Beresford (colours)
- 1st Battalion, 6th Foot, 1st Warwickshire Regiment
- Light Company, 1st Battalion, 6th Foot, 1st Warwickshire Regiment
- 1st Battalion, 9th Foot, East Norfolk Regiment
- Light Company, 1st Battalion, 9th Foot, East Norfolk Regiment
- 2nd Battalion, 23rd Royal Welch Fusiliers
- Light Company, 2nd Battalion, 23rd Royal Welch Fusiliers
- 2nd Battalion, 43rd Monmothshire Regiment
- Light Company, 2nd Battalion, 43rd Monmothshire Regiment
- 3rd Division, 8th Brigade
- Brigadier General Henry Fane (colours)
- 1st battalion, 38th Foot, 1st Staffordshire Regiment
- Light Company, 1st battalion, 38th Foot, 1st Staffordshire Regiment
- 1st Battalion, 79th Cameron Highlanders
- Light Company, 1st Battalion, 79th Cameron Highlanders
- 1st Battalion, 82nd Foot, Prince of Wales's Volunteers
- Light Company, 1st Battalion, 82nd Foot, Prince of Wales's Volunteers
British: Setup first, within 2 hexes of Corunna, in full sea hexes.
- Royal Navy
- Designer's Note: Commadore Sir Samuel Hood, KCB is present on HMS Victory.
- SOL HMS Victory
- SOL HMS Barfleur
- SOL HMS Pompey
- SOL HMS Eagle
- SOL HMS Mars
- SOL HMS Belleraphon
- Transport HMS Guye
- Transport HMS Dispatch
- Transport HMS Smallbridge
- Transport HMS Allience
- Transport HMS Isle
- Transport HMS India
- Transport HMS Freeport
- Transport HMS Caen
- Transport HMS Carrack
- Transport HMS Cyclops
Spanish: Setup first, within the fortifications of Corunna.
- Coruña Militia
- General de Voluntarios Hernando Alcedo, Mayor of Coruña
- Batallón de Voluntarios (1st, 2nd, 3rd, 4th, 5th Bons)
9.5 Boundary
Use both maps.
9.6 Reinforcements
French: Enter the map at 12:20pm within 6 hexes of Numeral III.
- II Corps, 2e Division
- Général de Division Julien Auguste Mermet
- 31e Régiment d'infanterie légère (1st, 2nd, 3rd, 4th Btns)
- 47e Régiment d'infanterie de ligne (1st, 2nd, 3rd, 4th Btns)
- 122e Régiment d'infanterie de ligne (1st, 2nd, 3rd, 4th Btns)
- 2e Régiment d'infanterie Suisse (1st, 2nd Btns)
- 1re Bataillon, 3e Régiment d'infanterie Suisse
- Mermet Artillery à Pied
French: Enter the map at 1:00pm within 3 hexes of Numeral IV.
- 2e Dragon Division
- Général de Division Francis Gomer Charles de LaHoussaye
- 17e Régiment de Dragons
- 18e Régiment de Dragons
- 19e Régiment de Dragons
- 27e Régiment de Dragons
French: Enter the map at 1:20pm within 6 hexes of Numeral V.
- Cavalerie Légère
- Général de Division Jean Franceschi
- 22e Chasseurs a'Cheval
- 1re Régiment de Hussards
- Hanovarian Régiment de Chasseurs à Cheval
- 8e Régiment de Dragons
French: 2:00pm at Portazgo (enter along the southern map edge on the road).
- 1re Dragon Division
- Général de Division Jean Thomas Guillaume Lorge
- 13e Régiment de Dragons
- 15e Régiment de Dragons
- 22e Régiment de Dragons
- 25e Régiment de Dragons
9.7 Optional Reinforcement Entry
The arrival of all French Divisions may vary according to the wishes of the French Player. He must however subscribe to the following guidelines:
-
No more than one division may enter at any one numeral per turn, and;
-
No part of one division may enter at any numeral different from any other part of the division, and;
-
No division may enter prior to the turn indicated by the numeral (for example, no unit may enter at numeral III prior to turn 3), and;
-
A division must enter the game map on the first turn at Portazgo.
-
Lorge's Cavalry Division must enter at Portazgo as indicated above, and;
-
French artillery treat all numerals greater than II as game-hours rather than game-turns, and;
EXAMPLE: Any artillery that would enter at numeral IV would not enter until the 2:00PM game turn – the 11AM turn being the first game hour.
-
Begin the scenario one hour earlier.
9.8 Victory
British Victory: Place the French II Corps on Morale Level 2, while maintaining a line of retreat to Corunna clear of French units and their Zones of Influence.
British Overwelming: Place the French II Corps on Morale Level 3, while maintaining a line of retreat to Corunna clear of French units and their Zones of Influence.
British Decisive: No decisive victory can be claimed due to the absence of Emperor Napoleon I.
French Victory: Place the British Army on Morale Level 2 and kill or capture Sir John Moore, while depriving the British Army from any victory.
French Overwelming: Place the British Army on Morale Level 3 and control the heights of the Castillo de San Diego.
French Decisive: Capture and have control of all the Port Hexes of Corunna by the end of the 7:20pm turn.
9.9 Evacuation Victory
At any time during the game, the British Player may declare an evacuation, as long as the British Army is on Morale Level 2 or lower.
9.9.1 The British Player must notify the French Player that the evacuation has begun. The British Player designates one Division as the Rearguard and informs the French Player which division was so designated.
9.9.2 The evacuation is done by moving units to be evacuated to the six Corunna Port hexes and embarking them on naval transports.
9.9.3 Once this embarkation has begun all units not designated as the Rearguard can only move towards the town of Corunna. Units may move around French units blocking their path to Corunna.
9.9.4 British units are evacuated by loading onto transports and moving off the map. Spanish units cannot be evacuated.
9.9.5 Units loaded onto transports, but not off the map at the end of the 7:20pm turn are considered evacuated for victory purposes.
9.9.6 Units sunk in transit are considered eliminated.
British Victory: If the British Player has evacuated 60% or more of his surviving British battalions.
Draw: If the British Player has evacuated 40-59% or more of his surviving British battalions.
French Victory: If the British Player has evacuated less than 40% or more of his surviving British battalions.
EXAMPLE: The British Army starts with 31 battalions. If the British Player declares evacuation after losing 10 battalions, the British Player would have to evacuate 12 battalions to claim victory (12 x 60% =12).
Part 2: Corunna Exclusive Charts
Fire Effects Chart
| French | Line | Column | Square | General Order | Skirmish |
|---|---|---|---|---|---|
| Ligne, Sapeurs, Suisse | x3 | PRINTED | x3 | PRINTED | NP |
| Légère | x3 | PRINTED | x3 | PRINTED | x4 |
| Dismounted Dragoons (2) | x1 | PRINTED | x1 | PRINTED | NP |
| British | Line | Column | Square | General Order | Skirmish |
|---|---|---|---|---|---|
| Guard, Foot & Fusiliers | x4 | PRINTED | x4 | PRINTED | NP |
| Light Battalions | x4 | PRINTED | x4 | PRINTED | NP |
| 95th Rifles (1) | x5 | PRINTED | x5 | PRINTED | NP |
| Light Companies | x4 | x4 | x4 | x4 | PRINTED |
- Rifle Armed units are not halved at 2 hex range.
- Up to 8 Increments of dismounted dragoons may fire from a hex.
NOTE: Spanish Mob units may not make Fire Attacks.
Fire Defense Chart (1)
| Type | Formation | Clear | Village (2) | Town (2) | Special Structure (2, 3) | Sea |
|---|---|---|---|---|---|---|
| Infantry | Column/Road Column | 6 | ||||
| Infantry | Spanish Mob | 6 | 16 | 16 | 20 | |
| Infantry | Line | 9 | ||||
| Infantry | Square | 6 (4) |
- See also Fire Defense Modifier Chart in series rules.
- Entering these hexes requires formed units to enter General Order.
- Artillery does not receive the Point Blank Range benefit and uses its Long Range Fire Value for Fire Attacks against Special Structures. Infantry Fire Attacks against Special Structures are halved.
- Reduced to 4 if more than 9 increments in the hex. Dismounted dragoons divide their Increments by 2, rounding down.
- Artillery in Disorder is either unlimbered or limbered for the purposes of this chart.
- Use whenever infantry and artillery stacked together are the target of a Fire Attack.
- Cavalry Skirmish Order only applies to players using the Règlements de l'An XXX.
Movement Chart
| Terrain | Infantry (1) | Cavalry (1) | Artillery | Infantry Skirmisher Companies (2) | Leaders |
|---|---|---|---|---|---|
| Clear | 1 | 2 | 2 | 1 | 1 |
| Village (3) | 2 | 3 | 2 | 1 | 1 |
| Town or Port (3) | 3 | 4 | 3 | 2 | 1 |
| Special Structure (3, 4) | 3 | NP | NP | 2 | 1 |
- Infantry battalions in Skirmish Order and cavalry in Skirmish Order pay the cost of terrain for infantry and cavalry respectively.
- Infantry companies in Skirmish Order use this column.
- Entering this terrain requires formed units to enter General Order.
- Includes the Castillo de San Diego and the Shore Fortification in Santa Lucia.
- Roads and trails negate the movement cost of the terrain they cross provided the hexes are connected by a road or trail and the units are in Road Column.
- Cost is in addition to the cost of the other terrain in the hex being entered and is only applied when crossing the terrain feature.
- Cavalry is only permitted in these hexes if in Skirmish Order. In Skirmish Order they use the value to the right of the slash to cross a Wall or a Sunken Road.
- Cavalry and artillery may only cross the Rampart through the gate. See E4.8.
NOTE: Naval vessels pay 2 MP to enter a Sea or Port hex. They may not enter Coast hexes.
NOTE: Cavalry in Skirmish Order only applies to players using Le Règlement de l'An XXX.
Square Formation Chart
| French | Square | Disorder | Rout |
|---|---|---|---|
| 4 Hexes | 11-55 | 56-66 | - |
| 3 Hexes | 11-45 | 46-61 | 62-66 |
| 2 Hexes | 11-42 | 43-53 | 54-66 |
| Adjacent | 11-35 | - | 36-66 |
| British | Square | Disorder | Rout |
|---|---|---|---|
| 4 Hexes | 11-61 | 62-66 | - |
| 3 Hexes | 11-53 | 54-64 | 65-66 |
| 2 Hexes | 11-45 | 46-61 | 62-66 |
| Adjacent | 11-41 | - | 42-66 |
Applicable to all:
| Condition | Modifier |
|---|---|
| Personality in the hex | -6 |
| Square Check triggered by light cavalry | +3 |
| Square Check triggered by lancers | +6 |
| If the stack forming Square is in Line formation | +3 |
| If in the Charge Zone of a Grand Charge. Applies only to the Règlements de l'An XXX | +6 |
Stacking Chart
| Clear | Town / Village | Special Structures (6) | |
|---|---|---|---|
| Infantry | Any 1 Regiment, 18 Column, Line, Square (1, 2); 3 Skirmish | Any 1 battalion, 8 General Order (1, 2); 3 Skirmish | Any 1 Battalion, 6 General Order |
| Cavalry (7) | Any 1 Regiment, 18 Column (3), Line (1, 2); 18 Skirmish | Any 1 Regiment, 8 General Order | Not Permitted (5) |
| Artillery (4) | 3 Limbered; 3 Unlimbered; 1/6 Combined | Any 1 battery, 1/6 Combined | Not Permitted (5) |
- For infantry battalions in Skirmish Order in two hexes with more than 6 increments, the extra increments (greater than 3/hex) are ignored. Cavalry units in Skirmish Order, regardless of increments, are always deployed in two hexes. References to units in two hexes apply only to the Règlements de l'An XXX.
- Units in Skirmish Order may move through other units or have other units move through them, but they may never remain stacked with other units.
- For the Règlement de l'An XXX only 4 increments of cavalry may stack per hex while in Column of Companies formation.
- When stacked with infantry, one Increment of artillery is equal to 6 Increments of infantry.
- Cavalry and artillery may traverse these hex types at the cost indicated if the hexsides they enter and exit from are crossed by a road or trail, but may not remain in this hex type at the end of their movement.
- Includes the Castillo de San Diego and the Shore Fortification in Santa Lucia.
- Two Increments of dismounted dragoons count as 1 Increment of infantry for stacking purposes.
NOTE: Only one ship may stack in a Sea or Port hex.
Depot Locations
French: The road off the southern map edge.
British: Any road that connects to Corunna.
Naval Commitment Chart
At any time a French unit is within 10 hexes of the Castille de San Diego, or the village of Santa Lucia, the British player rolls to determine what naval support will be received. Any action needed to activate the fleet will be determined by this roll.
| Result | Die Roll |
|---|---|
| Abandonment: Commodore Hood decides that the harbor is in danger and sorties the fleet, leaving the Britsh Army to fight on alone. The British Player cannot use evacuation conditions (E9.9). | 11-16 |
| Anchor: The warships remain at anchor. There is no Royal Navy support, but the fleet stands ready to embark the troops. Transports may still move to the embarkation hexes. Re-roll on the next hour on the Naval Commitment Chart. | 21-36 |
| Contrary Winds: The fleet does not have the wind and cannot make sail. There is no Royal Navy support, but the fleet stands ready to embark the troops. Transports may embark units, but may not move. Re-roll on the next hour on the Naval Commitment Chart. | 41-46 |
| Minor Support: Commodore Hood decides to allow a squadron to support the army. Roll one die and halve it (rounding up) to determine the number of ships-of-the-line tasked to support the army. Ships-of-the-line to support the army are selected randomly. Transports move normally. | 51-62 |
| Major Support: Commodore Hood decides to allow the fleet to support the army. Roll one die to determine the number of ships-of-the-line tasked to support the army. The British Player may select the ships-of-the-line to support the army. Transports move normally. | 63-66 |
| Condition | Modifier |
|---|---|
| Evacuation Declared | +9 |
| General Moore in Corunna | +3 |
| French Artillery on Point Castillo de San Diego | -6 |
| Death of General Moore | -9 |
NOTE: Results from the Naval Commitment Chart superseded all other actions.
If British Evacuation has been declared and the Naval Commitment Chart roll is abandonment then the evacuation immediately ceases and regular scenario victory conditions apply. British units not designated as the Rearguard return to having freedom of movement. Any units embarked on naval transports leave with the fleet and are not considered eliminated for morale purposes.
Cavalry Recall Chart
| Nationality | Success |
|---|---|
| French | 1-4 |
| British | 1-2 |
| Hanoverian | 1-3 |
| Condition | Modifier |
|---|---|
| If stacked with a leader with a cavalry Mêlée Bonus | -1 |
| If stacked with a Cavalry Leader of Special Ability | -2 |
Artillery Limbering Chart
| French | Limbers |
|---|---|
| Foot | 1-3 |
| Horse | 1-5 |
| British | Limbers |
|---|---|
| Horse | 1-4 |
| Condition | Modifier |
|---|---|
| If stacked with a leader with an artillery bonus | -1 |
| If stacked with General Moore or Maréchal Soult | -2 |
Additional Roll to Close Modifiers
| Condition | Modifier |
|---|---|
| If the assaulting stack is assaulting a town hex (E4.6.5) | -6 |
| If the assaulting stack is assaulting up a normal slope (E4.4.3) | -6 |
| If the assaulting stack is assaulting a Gate hexside (E4.8.5) | -15 |
Additional Roll to Stand Modifiers
| Condition | Modifier |
|---|---|
| If defending in a town hex (E4.6.5) | +6 |
| If the target of an Assault exclusively up slope hexsides (E4.4.1) | -6 |
| If the target of a Charge by units charging exclusively up slope hexsides (E.4.4.2) | +9 |
Additional Melee Modifiers
| Condition | Modifier |
|---|---|
| If the target of an Assault exclusively across Gate hexsides (E4.8) | Disorder |
| Cavalry charging a Mob (E6.4.5) | x1/2 |
| If the unit is dismounted dragoons (E6.8) | x1/2 |
Additional Morale Modifiers
| Condition | Modifier |
|---|---|
| If in a Special Structure (E4.7.8) | +6 |
| Cavalry attempting a Reaction Charge or Opportunity Charge Morale Check (E6.3) | -6 |
Cavalry Skirmisher Harassment (12.10.7)
| Terrain Type | Defense Factor |
|---|---|
| Clear | 2 |
Modifiers to basic Defense Factor:
| Condition | Modifier |
|---|---|
| Units is Cavalry Skirmishers | +1 |
| Unit is Retreating Before Combat | +2 |
| Unit is conducting Involuntary Movment | +1 |
Embarkation Chart (E6.10)
| Unit Loading | MP Cost |
|---|---|
| Infantry or Leader | 5 |
| Cavalry | 7 |
| Artillery | 6 |
NOTE: Naval vessels expend 1/2 of their MP to load. A transport may carry any 1 battalion or 8 Increments of infantry, 2 Increments of artillery or 4 Increments of cavalry.
Order of Battle
Key: CP = Generates a Command Point; Army Asset; Corps Asset; Leader not Replaceable; Artillery Leader of Special Ability; Cavalry Leader of Special Ability. (Symbols are not reproduced in the text; see the printed chart.)
II Corps (French)
- Soult (CP); ADC: Soult
- 1 x 1er Sapeur
- Corps Reserve Artillerie: II/1 AaP; II/2 AaP; II/1 AaC
- 1er Division (Merle): 3 x 2e Légère; 4 x 4e Légère; 3 x 15e Ligne; 3 x 36e Ligne; M AaP
- 2e Division (Mermet): 4 x 31e Légère; 4 x 47e Ligne; 4 x 122e Ligne; 2 x 2e Suisse; 1 x 3e Suisse; M AaP
- 3e Division (Delaborde): 3 x 17e Légère; 4 x 70e Ligne; 3 x 86e Ligne; 1 x 4e Suisse; D AaP
- Cavalerie Légère Division (Franceschi): 22e Chasseurs à Cheval; 1re Hussards; Hanovarian CaC; 8e Dragons
- 1re Dragon Division (Lorge): 13e, 15e, 22e, 25e Dragons
- 2e Dragon Division (LaHoussaye): 17e, 18e, 19e, 27e Dragons
British Army
- Moore (CP var); ADC: Hardinge
- RHA Battery Evelin; RHA Battery Dowman; 15th Light Dragoons
- 1st Division (Baird)
- 1st Guards Brigade (Warde): 2 x 1st Foot Guards & Lt Coy
- 2nd Brigade (Bentinck): 1 x each of 4th Foot & Lt Co, 42nd High. & Lt Co, 50th Foot & Lt Co
- 3rd Brigade (Manningham): 1 x each of 1st Foot & Lt Co, 26th Foot & Lt Co, 81st Foot & Lt Co
- 2nd Division (Hope)
- 4th Brigade (Hill): 1 x each of 2nd Foot & Lt Co, 5th Foot & Lt Co, 14th Foot & Lt Co, 32nd Foot & Lt Co
- 5th Brigade (Leith): 1 x each of 51st Foot & Lt Co, 59th Foot & Lt Co, 76th Foot & Lt Co
- 6th Brigade (Catlin Crauford): 1 x each of 36th Foot & Lt Co, 71st High. & Lt Co, 92nd High. & Lt Co
- 3rd Division (Fraser)
- 7th Brigade (Beresford): 1 x each of 6th Foot & Lt Co, 9th Foot & Lt Co, 23rd Fus. & Lt Co, 43rd Lt. & Lt Co
- 8th Brigade (Fane): 1 x each of 38th Foot & Lt Co, 79th High. & Lt Co, 82nd Foot & Lt Co
- Reserve Division (Paget)
- 9th Brigade (Beckwith): 1 x each of 20th Foot & Lt Co, 52nd Lt & Lt Co, 95th Rifle & Lt Co
- 10th Brigade (Disney): 1 x each of 28th Foot & Lt Co, 91st Foot & Lt Co
- Corunna Militia: Alcedo (CP); 5 x Volunteers
- Royal Navy (Hood): 6 x SOL; 10 x Transports