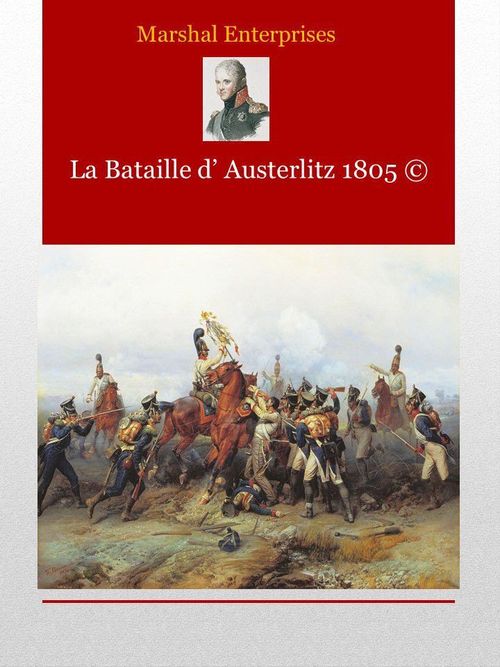
La Bataille d'Austerlitz 1805
La Bataille d'Austerlitz 1805 Rulebook
Table of Contents
Table of Contents
- 1.0 Introduction
- 2.0 Rules Questions
- 3.0 Game Components
- 4.0 Counter Amendments
- 5.0 Terrain
- 6.0 Command
- 7.0 Special Rules
- 8.0 Scenario Setup Instructions
- 9.0 Scenario 1: Kienmeyer's Dawn Attack
- 10.0 Scenario 2: Friant's Stand on the Goldbach
- 11.0 Scenario 3: Doctorov's Second Bid
- 12.0 Scenario 4: Scare' Nom de Dieu, Forward!
- 13.0 Scenario 5: Hollabrunn Refought
- 14.0 Scenario 6: "For God, Russia and The Czar"
- 15.0 Scenario 7: Bagration Escapes
- 16.0 Scenario 8: Soult's Encirclement
- 17.0 Scenario 9: Battle by Scenarios
- 18.0 Scenario 10: Historical Battle (Largely Historical)
- 19.0 Scenario 11: Optional Deployment - La Bataille d'Austerlitz
- Charts (2nd Edition)
1.0 Introduction
La Bataille d'Austerlitz is a tactical Napoleonic game of Napoleon's battle of the 2nd of December with the Coalition forces which ended the 1805 campaign.
2.0 Rules Questions
Send questions or comments to the following address:
[The address itself does not appear in the source's text layer.]
Or check the La Bataille forums on Consimworld: http://www.consimworld.com or on http://boardgamegeek.com.
3.0 Game Components
A complete game of La Bataille d'Austerlitz includes the following components:
- Six 22" x 34" maps
- A lot of counters
- Series Rules books
- One Exclusive Rules Book
- Charts
- Game Turn Record Track
- Terrain Effects Chart
4.0 Counter Amendments
NOTE: The following additional leader counters are required to play the game. Download the leader counters from the website (http://labataille.us).
Both Kienmayer and Bagration showed exception flexibility in their formations. In the case of Kienmayer this is the flexibility Austrian Border Divisions had displayed since the Seven Years War, mixed Brigades of Grenz, Jäger & Light Cavalry at all levels (in Danzig we see this at battalion level). In the case of Bagration it is a continuation of the tactics he employed at Schöngraben, the ability to deploy & control a very loose formation to conceal his commands strengths and weaknesses.
4.1 Austrian
- Add brigade leader Carneville (Lt/AG) 0-12 -/2/-/2
- Add brigade leader Stutterheim (Cav/AG) 0-15 -/2/-/2
4.2 Russian
- Add brigade leader Kamensky II (Bde/AG) 0-10 2/-/-/2
- Add brigade leader Engelhardt (Bde/AG) 0-10 1/-/-/1
- Add brigade leader Voropaitzky (Cav/AG) 0-12 -/1/-/2
5.0 Terrain
Frozen streams, swamps and lakes (Whatever calendar you are using, it is winter)
5.1 Earthworks: Santon Redoubt
Designer's NOTE: On Napoleon's orders a redoubt was built on top of Santon Hill and the east face of the hill was scarped to improved the field of fire and prevent a direct assault.
Designer's NOTE: For the most part the earthworks were relatively small and do not occupy the entire hex. Indeed in many cases not all the troops and guns positioned at the earthworks could fit inside and were deployed beside or behind. In addition the earthworks were relatively short in height and numerous shot and shell passed over. Also, keep in mind the earthworks are not unassailable bastions of defense. Without an active defender mounting counterattacks and sending in reinforcements they are merely piles of dirt.
5.1.1 There are two earthworks constructed on the top of the Santon Height. There are two French (Austrian 3#) batteries of Position which occupy the earthworks. They are unlimbered at the start of the game, they may not limber, move or change facing.
5.1.2 The earthworks hex has 2 front hexsides and 4 rear. Fire defence of the earthworks thru the front hexsides are 10 and thru the rear are 6. Units may move to enter the earthworks hex only thru a rear hexside as it is treated as a clear terrain hex move. Note: A melee assault is the only way to enter an earthwork thru the front hex sides.
5.1.3 A single infantry battalion may enter thru the rear of the earthworks either defensively to stack with and support the batterie, or a single enemy battalion may assault the earthwork to take it. The batterie may only fire through the front hexside of the earthwork.
5.1.4 Melee thru a front hexside is minus 12 to the attackers' pre melee morale check and any assaulting infantry is halved in melee. When assaulting thru a rear hexside the attack is made as if it was into a clear terrain hex.
5.1.5 Artillery Ammunition: French Artillery in the Santon Redoubt does not consume ammunition. [Ammunition rules apply only to players using the Règlement de l'An XXX, per the sheet's NOTE.]
5.2 Bridges and Fords
All the streams are frozen so bridges and fords have no effect.
5.3 Slopes
Designer's NOTE: The terrain on which Austerlitz was fought consisted on a series of mainly marshy valleys (well frozen) surrounding the Pratzen plateau, most of the slopes to the plateau were steep enough to cause formed units problems.
5.3.1 Charge: Cavalry may not Charge, and hence may not Mêlée, units across slope hexsides. Nor may cavalry pursue retreating units across slope hexsides.
5.3.2 Assault: Infantry defending against assaults exclusively from units assaulting up slope hexsides receive a +3 Roll to Stand modifier. Infantry units assaulting up a slope suffer a -3 modifier to their Roll to Close.
5.4 Special Structures (Schloss)
5.4.1 The Schloss has limited access and stacking. Only infantry may enter the Schloss hex. Therein the Infantry may only adopt either general order or skirmish order.
5.4.2 Only infantry may assault the Schloss. Artillery and infantry may fire at it.
5.4.3 Infantry defending within the Schloss hex does not check morale as a defender in the pre melee morale process.
5.4.4 Infantry defending does not make a morale check due to combat a la Feu.
5.4.5 Additionally a DD result does not cause a defender to retreat; it does cause the defender to lose an increment. The unit does have to check morale as a result of the DD.
5.4.6 Fire defence for infantry in the Schloss is 14
5.4.7 Combat a la Melee – this position is made of substantial stone walls and limited access. Therefore, the defender has an advantage unless Sappers breakdown the thick, wooden entrance.
5.4.8 After calculating the odds, roll one dice. A roll of a one and the Sappers breakdown the door. In this case there is no defensive melee modifier. A roll of two, three, four, five or six and the defenders melee value is multiplied by 1.5.
5.4.9 Only infantry units have Sappers. (NOT Egerskii or 6. Battalion)
5.4.10 Attackers who occupy the Schloss after combat, must remain in the hex for one complete turn before gaining the defensive advantage of 1.5 times their melee value.
5.5 Marsh
5.5.1 These areas are frozen and treated as clear terrain for all purposes with the exception of Fire Defence. Fire Defence is a special case when any unit on a Frozen Lake hex will have a fire defence of 4 for Artillery or combined artillery and infantry fire.
5.5.2 There is an additional movement cost for moving across a stream hexside, even though it is frozen. Attacking across a stream reduces the melee of the attacker because of the stream slopes (x.66 – see melee value modifiers)
5.5.3 When a unit is fired upon on any lake, a roll of 65 or 66 indicates the ice has broken. Roll one die, the result indicates the number of increments lost. The Lake remains frozen however.
5.6 Pheasantry (Fasanerie)
The Pheasantry was an area of shooting sport for aristocrats. Shooting birds in this location is considered poaching and will be dealt with harshly.
5.6.1 There is one anomaly associated with the Pheasantry. Although artillery may not enter a Forest or an Orchard hex type, if the hex is within walls of the Pheasantry one unlimbered artillery unit may prolong across the wall and into a Forest or Orchard hex.
5.6.2 Artillery within the Pheasantry may not stack with other combat units.
5.6.3 Unlimbered artillery in the Pheasantry which is attacked by fire across the Pheasantry wall has a fire defence of 16
5.6.4 Once an artillery battery has unlimbered and prolonged across the wall and into the Pheasantry, it may not move again for the rest of the day.
5.6.5 Infantry which melees across the wall is halved and minus 12 for pre melee morale checks.
5.6.6 Cavalry may not charge into, out of, or thru any hex of the Pheasantry.
5.7 Vineyard (Weintrauben)
The vineyard is planted in neat rows to facilitate the growing, care and harvesting of the grapes. As such, travel through rows is difficult for any formation. It is difficult to deploy troops in the vineyard. Historically the vineyards played an important part in the battle.
5.8 Cavalry
- Cavalry must be in skirmish order or in general order.
- Only three increments are available from each regiment for melee from a single hex.
- There are no charges in the vineyard. Cavalry may charge into the vineyard. The cavalry regiment is subject to the movement costs and three increments per regiment for melee calculations.
- The tirailleur a' cheval rules with regards to slowing infantry movement do not apply in the vineyard.
5.8.1 Infantry
- Infantry is in general order or skirmish order. No other formations are possible.
- No regiments may enter or move through the vineyard, only battalions.
- Only three increments per battalion per hex are used for all fire and melee calculations.
- Units in general order use the value printed on the counter. Skirmishers use up to three increments per hex. Melee factors will be a fraction of the total while in the vineyard.
- When a vineyard stands as a single hex, the battalion entering is assumed to be exclusively in the vineyard hex. There is a Zone d' Influence into and out of the hex. Only three increments can fire out or defend in a vineyard hex.
5.8.2 Artillery
- Not allowed to enter.
- If an artillery battery is forced into or routs into the vineyard, it is eliminated.
- The vineyard does not block line of sight when firing into a vineyard hex. It does block fire through the hex.
5.8.3 Vineyard Combat a la Melee
Combat is based on a maximum of three increments per battalion or cav. regiment.
5.8.4 Line of Sight
You can only see the adjacent hex when in the vineyard.
5.9 General Order
The following terrain requires formed units to enter General Order when entering:
- Sokolnitz Castle
- Woods and Pheasantry
- Village and Chapel
5.10 Depots
5.10.1 French: Any road leading off the west map edge.
5.10.2 Coalition: Any road leading off the east map edge.
5.11 Terrain and Artillery Ricochet
Artillery fire that targets the following hexes terminates in them. Ricochet fire may bounce into, but not through the following hexes.
- The Santon Redoubt
- Wood hexes
- Pheasantry hexes
- Sokolnitz castle
- Upslope hexsides
- Villages
NOTE: Artillery Ricochet only applies to the Règlements de l'An XXX.
6.0 Command
The Organization and Display Charts reveal the command structure of the armies. Refer to them as necessary.
6.1 Coalition Brigade Leaders
Brigade leaders are included in the Advanced Guard(s). Brigade leaders add an extra step in the chain of command. Brigade leaders may form an MU consisting of the units of their brigade within their Command Span. Brigade leaders have a Command Span of 3 hexes. For a unit of a brigade to be In Command it must be within the brigade leader's Command Span. For a brigade leader to be In Command he must be within the Command Span of his division leader and thereby be eligible to form part of a larger MU. As with the component divisions of a corps, brigades may form part of a division sized MU consisting of all of his constituent brigade leaders within his Command Span and all units within their respective brigade leader's Command Span. A division leader does not need to be "Activated" to form a division sized MU consisting of multiple brigades and they may do so for a cost of one CP. Brigade leaders may not attach army or corps assets to their MU.
6.2 Cavalry Brigade Leaders
Some French infantry corps also have cavalry brigades attached. The cavalry brigade leaders are In Command if they are within 6 hexes of their Corps leader and may be part of a Corps sized MU provided the corps leader is activated. Light cavalry may roll for initiative to form their own CP.
6.3 French
NOTE: 1e Division / III Corps is considered part of the V Corps.
6.3.1 Command Points: The French receive one Command Point for Napoléon, Bernadotte, Davout, Soult, Lannes, Murat, Bessières for a total of 7 Command Points.
6.3.2 Static Positions: There are two French Static Positions. The zones are Telnitz (Village and two hexes around on all sides), and Sokolnitz (Village, Castle & Pheasantry and the areas between). Refer to the series rules for the effects of Static Positions.
6.3.3 MU Size: The largest MU the French may create is a Corps d'armée.
6.3.4 Napoléon: Napoleon is not allowed to assume the Movement Potential of units with which he is stacked as in the series rules.
6.3.5 Leader Casualties: The following leaders may not be replaced: Bernadotte, Davout, Soult, Lannes, Murat, Bessières.
6.3.6 Organization: Napoléon reserved the command of his Garde for himself. The Garde may only be commiteed when at least one French Corps and one Coalition Corps are on Level 1. As such la Garde is made up of three separate elements:
- Vielle Garde
- Cavalerie de la Garde
- Artillerie de la Garde
6.3.7 Artillery: The Artillerie de la Garde may be attached to other MUs as army assets or may form part of Grand Battery MU as outlined below. The Vielle Garde, and Cavalerie de la Garde, are treated as separate command formations. They cannot form as a single MU, but instead must form separate MUs.
6.3.7.1 Bessières: Bessières may lead either the Vielle Garde or Cavalerie de la Garde, any Imperial Staff ADC may lead the other element.
6.3.8 Leaders of Special Ability:
- Artillery: Napoléon, Songis
- NOTE: Maréchal de l'Empire: Bernadotte, Berthier, Bessières, Davout, Lannes, Murat, Soult provide a modifier to artillery limbering only.
- Cavalry: Murat, Bessières, Rapp
- NOTE: Rapp may only command Guard Cavalry.
6.3.9 Light Cavalry Leaders: The following light cavalry leaders may roll for initiative to form their own MU. Milhaud (LC/I), Fauconnet (LC/IV), Margaron (LC/V), Kellerman (LC/CR)
6.4 Coalition Forces
The Coalition command structure reflects the problems and benefits of merging three armies, as well as too many royal leaders: A Czar, an Emperor and at least 5 Royal Princes.
NOTE: Do not confuse Prince Moritz Lichenstein (Advanced Guard cavalry) with Prince Johann Lichenstein commander of the 5th column.
6.4.1 Command Points: The Coalition forces receive One Command Point each for Tsar, Kaiser + v. Schwarzenberg, Buxhowden, Kutusov, (Johann) Lichenstein, Bagration and Constatine for a total of 7 Command Points.
6.4.2 The Kaiser must be stacked with v. Schwarzenberg to issue an CP.
6.4.3 MU Size: The largest MU the Coalition forces may form is a Column or one of the Advance Guard Divisions under Bagration and Kienmeyer.
6.4.4 Kutuzov: The IV Kolonne consists of a Russian Division and two Austrian Brigades, ir may be activated as a mini-Korps.
6.4.5 Bagration: Bagration's Division MU may include any of his brigades that are within his Command Span (infantry brigades, cavalry brigades, plus attached Cossacks).
6.4.6 Kienmeyer: Kienmayer's Advanced Guard Division MU may include all his brigades that are within his Command Span.
6.4.7 Czar Alexander, Emperor Francis & Kutuzov are not allowed to assume the Movement Potential of units with which they are stacked as in the series rules.
6.4.8 The two Austrian Linie Divisions (Rottermund & Jursbek) have only Brigade command radius reflecting their recent formation (mostly from 6. Bataillons).
6.4.9 Leader Casualties: The following leaders may not be replaced: Czar Alexander, Emperor Francis, Kutuzov, Buxhowden, Kollwrat, Bagration and Constatine.
6.4.10 Leaders of Special Ability:
- Cavalry: Prince Johann Lichenstein
- Artillery: None
6.4.11 Light Cavalry Leaders: The following light cavalry leaders may roll for initiative to form their own MU. Stutterheim(AG), Czaplitz(AG), Voropaitzky(AG), Wittgenstein (AG), Graf v. Nostiz(AG)
7.0 Special Rules
7.1 Grand Batteries
Artillery Leaders of Special Ability may, at the usual cost of one CP, form an MU consisting of all artillery batteries and their AAW's, if used, regardless of higher unit affiliation, within a span of three hexes. That is the artillery leader has a Command Span of three hexes. A Grand Battery MU functions just as any other MU. That is they may move, limber and unlimber when their chit is pulled. The Grand Battery need not retain its organization from turn to turn. Batteries may be attached and detached at the moment of MU creation. Players should keep track of which units form part of this MU when the MU is created.
[Grand Charges and AAWs apply only to players using the Règlement de l'An XXX, per the sheet's NOTE.]
7.2 The Old Guard
For purposes of all rules involving the Old Guard, the following 4 battalions are considered to be part of the Old Guard.
- Régiment de grenadiers à pied de la Garde (2 btn.)
- Régiment de chasseurs à pied de la Garde (2 btn.)
7.3 Imperial Guard Marching Band
If a French combat unit attempts to recover good morale within 4 hexes of the Imperial Guard Marching Band, add 6 to the die roll. If the Band routs it is eliminated. The Band has no fire combat potential.
7.4 Oudinot's Elite Battalions
The French combined elite companies which form the 1ere Grenadier Division of the Reserve. They were assembled by combining 4 regimental elite companies into ad hoc battalions for the campaign. Général de Division Oudinot leads these battalions, which deserved elite status in 1807/1809.
All of the combat formations in the First Division of the V Corps are Oudinot's Elite Battalions.
- These combat formations may skirmish.
- They are separate from the rest of the V Corps for morale.
- They are not part of the V Corps for command.
7.5 Cossacks
The Russian Cossaque Regiments that are present in the game are irregular cavalry. Based upon that premise please apply the following series of adjustments to their use and interaction with other units within the structure of the game.
7.5.1 The Cossaques will check morale whenever an infantry formation which is not disordered or an artillery unit fires at the Cossaque. It does not require the result of a casualty to force the morale check. In addition if the Cossaque suffers a casualty due to the fire it routs.
7.5.2 Further Cossacks may not charge infantry that is in good order from any orientation, or unlimbered artillery into a front hexside of the enemy.
7.5.3 Cossaques have a different movement rates for various terrain types than other Cavalry.
7.5.4 This rule is ignored by the Russian Guard Cossaque which is considered a regular combat unit. They do receive the benefits of being Cossacks for Retreat Before Charge.
7.6 Napoléon, Czar Alexander and Emperor Francis
7.6.1 If an enemy unit enters the same hex as Napoléon, Czar Alexander or Emperor Francis the respective leader is immediately captured.
7.6.2 If Napoléon is captured the Coalition is immediately granted a Decisive Victory.
7.6.3 If Czar Alexander is captured, wounded or killed all Russian combat formations with 15 hexes must make a Morale Check, with a -12 modifier. The Russian units within 16-30 hexes of the location must make a Morale Check, with a -6 modifer. All other Russian formations must make a Morale Check. This happens every turn until the Archduke Constatine arrives in the hex of the fallen Czar and takes command.
7.7 Fog (scenario 10)
Due to the fog of the early morning (starting with the 8:00 and ending with the 9:40 turn)
- Artillery may not target hexes beyond 5 hexes.
- There is no 2 hex range for skirmishers.
7.8 Armored Cavalry
All French Cuirassier regiments are wearing armor. All other French cavalry units are not wearing armor. Austrian Cuirassier are wearing armor. No Russian cavalry are wearing armor.
NOTE: The Russians did not reintroduce the cuirass to their cuirassier regiments until 1812.
7.9 Elite Infantry Troops
Well trained and experienced infantry troops were able to refrain from firing until it had its most devastating impact. This rule reflects the discipline of elite troops and their ability to hold fire to the critical moment of an assault.
7.9.1 Elite infantry troops are defined as those with a printed morale, without modification, of 11 through 16.
7.9.2 The effect is that all the attacking units in this case suffer a minus to the roll to close check. The exact minus is determined based on the morale of the defending unit. A 15 or 16 morale is minus 6, a 13 or 14 minus 9, a 11 or 12 is a minus 12. These minus values are applied as modifiers to the attacker's morale.
7.9.3 When an Elite unit attacks, the opposite is true all the defending units are impacted utilizing the relationship identified above.
7.9.4 When an Elite unit is the attacker against an elite unit, this rule does not apply. In the event of an Elite vs an Elite, the attacker has the standard modifiers apply.
7.10 Russian Dragoner Ability
The Russian Dragoons had a demonstrated ability to fight as more than a mounted wave of assault troops. The Russian Dragoons have a "Sk" on the top of the specific side of their counter.
7.10.1 This value permits them to adopt an infantry type skirmish mode in 2 hexes. When they are sitting on a hex side with their specific side facing up, a Dragoon Regiment of 6 increments or less will assume to have 2 increments in each of the two hexes. A Dragoon Regiment of 7 increments or larger will assume to have 3 increments in each of the two hexes. The Dragoon has a fire value equal to 2 factors per increment. Combine all factors which are firing on a single target hex.
7.10.2 This is not a "cavalry skirmisher" formation as defined in the Cavalry Tirailleurs.
7.10.3 For all fire aspects the unit is assumed to be infantry in skirmish order. The dragoon unit may not charge, reaction charge, opportunity charge, or melee in any fashion. If an enemy cavalry unit charges the dragoon, or attempts to melee the dragoon, the Russian checks his morale, at the moment of contact. If successful, the Russian Dragoon then may retreat up to his movement value away from the enemy, and at the end of this movement assumes a column formation. If unsuccessful the Russian Dragoon will rout its full movement away from the enemy.
7.10.4 This special ability may only be used when the Dragoon is in either clear or pine forest terrain.
7.11 Russian Egerskii (Jägers)
7.11.1 Russian Egerskii deployed into the buildings unlike their Infantry counterparts. Therefore Russian Egerskii in a village (not hamlet – single building) hex must be in Skirmish Order, never General Order. The entire unit deploys into the number of built-up hexes detailed by the phasing player, a maximum of 3 per hex. They have no rear or flank hexsides while in the village or town. The Egerskii however do count for stacking.
7.11.2 However Russian units that move through the town or village will not be over-stacked as a result of the Egerskii.
7.12 Scenario Reinforcements
When reinforcements are to be deployed during the Reinforcement Chit the arriving reinforcements may not be placed in an enemy Zone of Influence. If the reinforcements are unable to comply with this rule displace them towards the friendly depot until the can be placed on the map and outside of enemy Zones of Influence.
7.13 Cavalry Skirmish Order
Even though there is a row for cavalry skirmishers on the Fire Defense Chart, this applies only to players using the Règlements de l'An XXX.
7.14 Artillery Ammunition
Artillery may be resupplied normally as per the series rules.
[Artillery ammunition rules apply only to players using the Règlement de l'An XXX, per the sheet's NOTE.]
8.0 Scenario Setup Instructions
Rather than provide long narratives regarding start and entry location, especially in an area without many towns or villages, these maps were provided for each scenario. Each map indicates a rectangle for set-up usually using the commander's name to designate the units, Sometimes the unit name is given. If a leader is mentioned, his aides should also start there too. Reinforcements if any, are also identified at an edge of the map. This is where the troops enter. Consult the written scenario for the exact time. Sometimes reinforcements have variable entry times.
The coloured rectangles designate the starting location. If the "box" extends into a portion of another hex, you may use that hex also. The scenarios may be interconnected and not independent. Thus the entry or entry time will depend on another scenario. Many of the troops moved between many maps, like Soult. Depending on the results of another scenario troops may be late, depleted or not arrive all.
Maps for Scenarios #1, #3 and #2 are provided to scale on the disk. It is possible to print these and use the instead of the map.
9.0 Scenario 1: Kienmeyer's Dawn Attack
9.1 Introduction
A short scenario to learn some infantry tactics, fighting in the village, hamlets and vineyards.
9.2 Time
Beginning with the 8:00am turn and ending with the 9:20am turn.
9.3 Command
French: The French have a local command defence zone based on Telnitz. Any unit within 2 hexes of Telnitz village is in command.
Austrians: FML Michael Kienmayer von Odenburg commands the Österreich AG Division, he is always in command.
French units rout to the west and Coalition to the east boundary. If they leave the boundary, the units still roll to recover. If they have a successful morale roll, the unit waits one turn and then enters on their respective boundary.
9.4 Starting Positions
French, any hex of Telnitz. Any battalion may occupy a vineyard and clear terrain hex (As along as at least three increments are in each.) The French receive 5 blank counters: one each to cover units and two to stack in any village or vineyard. The French place the counters secretly. When the Austrians assault the hex with a covered unit, the blank is removed.
- Part of 3e Division, IV Corps
- 3e Ligne Régiment (1ere, 2e & 3e btns)
Austrians, start at the edge, no charges first turn.
- Part of Advance Guard (Österreich), Left Wing
- FML Michael Kienmayer von Odenburg
-
- Grenz Szekler Regt (1. & 2. btns)
-
- Grenz Szekler Regt (1. & 2. btns)
- 1/7. Grenz Broder Btn
- Austrian Reitende Batterien (two)
-
- Husaren, Hesse-Homburg
-
- Husaren, Szekler
9.5 Boundary
Use Set-up Map #1
9.6 Reinforcements
Reinforcements (see map) 08:00 from the southern border, - no charges first turn
- 2e Division / III Corps d'Armée (part)
- 108e Ligne Régiment (1ere & 2e btns)
- 15e Légère Régiment (1ere btn only)
- Attached from 4e Dragoons / Reserve Cavalerie
- 1ere Dragoon Régiment
9.7 Victory
Austrian: Hold any two hexes of Telnitz at the end of the scenario
French: Prevent an Austrian Victory
10.0 Scenario 2: Friant's Stand on the Goldbach
10.1 Introduction
This scenario starts with a very few troops present on the battlefield but quickly escalates into a major struggle. The village of Sokolnitz will exchange hands many times as the infantry of each side slugs it out.
10.2 Time
Beginning with the 9:00am turn and ending with the 11:40am turn.
10.3 Command
10.3.1 French: IV Corps occupies the Static Position consisting of the village of Sokolnitz, the castle and the Pheasantry, and the area between. Davout receives a CP each turn, even when offmap, this may only be used by Friant.
10.3.2 Russian: Langeron & Prebshevsky each receive one CP each turn.
10.4 Starting Positions
French, Schloss
- Part of 3e Division, IV Corps
- Tirailleurs du Po
French, Pheasantry
- Part of 3e Division, IV Corps
- Tirailleurs de Corse
French, Sokolnitz
- Part of 3e Division, IV Corps
- 26e Légère Régiment (2e btn only)
- 13e Co/5e Artillerie à Pied
- Attached Légère Cavalerie / IV Corps d'Armée
- 11e Chasseurs a' Cheval
- 26e Chasseurs a' Cheval
Coalition
- II. Kolonne (part)
- Generalmajor A. Langeron
- 8th Egerskii Regt (1st, 2nd & 3rd btns only)
- Vyborg Musketeer Regt (1st, 2nd and 3rd btns)
- Kursk Musketeer Regt (1st, 2nd and 3rd btns)
- Perm & Ryazan Musketeer and Fangoria Grenadier Regiments, Isajew Cossaque and a light battery are not present
- Russian Light Batteries (two)
- St. Petersberg Dragoner
- NOTE: The 8th Eger Regiment is considered to be an Asset attached to Langeron's Column for the duration of the scenario.
- III. Kolonne (part)
- Generalmajor I. Przybyczewsky
- 8th Egerskii Regt (1st btn only) see note above
- Galitz Musketeer Regt (1st, 2nd and 3rd btns)
- Butrsk Musketeer Regt (1st, 2nd and 3rd btns)
- Azov & Podolsk Musketeer Regiments and the Gardjew Cossaque are not present
- Russian Light Batteries (two)
10.5 Boundary
Use Set-up Map #2
10.6 Reinforcements (see map)
09:20 French
- 2e Division / III Corps d'Armée (part)
- 15e Légère Régiment (2e btn only)
10:00: Starting with the 10:00am turn, a die roll is required for each regiment. A roll of 4-6 the regiment enters. With each subsequent turn a +1 is added to the die roll. This process continues until all regiments have entered. Général de Division Friant enters with the first regiment. Maréchal d'Empire Davout enters with the last.
- III Corps d'Armée Staff
- Marshal d'Empire Louis Nicolas Davout
- Aide de Camp Général de Brigade Fournier
- 2e Division / III Corps d'Armée (part)
- Général de Division Louis Friant
- 33e Ligne Régiment (1ere & 2e btns)
- 48e Ligne Régiment (1ere & 2e btns)
- 111e Ligne Régiment (1ere & 2e btns)
- 108e Ligne & 1/15e Légère Régiment are in scenario 1
- 2/15e Légère arrived at 09:20
- 2e Co/7e Artillerie à Pied
9:00 Coalition
- III. Kolonne (part)
- 7th Egerskii Regt (2nd & 3rd btns only)
- Narva Musketeer Regt (1st, 2nd and 3rd btns)
10.7 Victory
Coalition Marginal: Hold all hexes of Sokolnitz, the Schloss and three Pheasantry hexes at the end of the scenario
Coalition Tactical: Push all French units beyond the scenario borders
French Marginal: Hold any one hex of Sokolnitz at the end of the scenario
French Tactical: Place either Langeron or Przybyczewsky's Column on a morale level
11.0 Scenario 3: Doctorov's Second Bid
11.1 Introduction
The Coalition attempts, a second time, to storm the village and occupy the other side of the Goldbach.
11.2 Time
Beginning with the 9:40am turn and ending with the 12:00noon turn.
11.3 Command
French: Legrand occupies the Static Position of the village of Telnitz. Bourcier receive s a CP each turn he is on the map. Fauconnet can role for initiative as a light cavalry leader (even with the 25th dragons attached).
Coalition: FML Baron v. Kienmayer & Generalmajor Doktorov each receive a CP every turn. Kienmeyer and Doctorov are at Morale Level 1 for the first 2 hours.
11.4 Starting Positions
Empire of the French
Any hex of Telnitz. Any battalion may occupy a vineyard hex and a clear hex.
- 3e Division / IV Corps d'Armée (Part)
- 3e Ligne Régiment (1ere, 2e & 3e btns) minus 3 increments
- 2e Division / III Corps d'Armée (part)
- 108e Ligne Régiment (1ere & 2e btns) minus 1 increments
- 15e Légère Régiment (1ere btn only)
Coalition
- Avant Garde (Österreich) (part)
- FML Michael Kienmayer von Odenburg
-
- Grenz Szekler Regt has been routed
-
- Grenz Szekler Regt (1. & 2. Btns) minus 6 increments, PGD
- 1/7. Grenz Broder Btn minus 3 increments, PGD
-
- Husaren, Hesse-Homburg, no charges first turn
-
- Husaren Szekler, no charges first turn
- I. Colonne (part)
- 1/7th Egerskii Battalion
11.5 Boundary
Use Set-up Map #1
11.6 Reinforcements
09:40 French
- 2e Division / III Corps d'Armée (part)
- Aide de Camp Général de Brigade Fournier
- 26e Légère Régiment (2e btn only)
- 4e Dragon Division / Reserve Cavalerie
- Général de Division Francois Antoine Louis Bourcier
- 1ere Dragoon Régiment is resting
- 15e Dragoon Régiment
- 17e Dragoon Régiment
- 25e Dragoon Régiment
- 27e Dragoon Régiment
09:40 Russian
- I. Kolonne (part) on Level 1
- New Ingremanland Musketeer Regiment (1st, 2nd & 3rd btns)
10:00 Russian
- I. Kolonne (part) on Level 1
- Generalmajor Dmitri Doktorov
- MG v. Chilebowski (attached from Links Staff)
- Moscow Musketeer Regt (1st, 2nd & 3rd btns)
- Yaroslav Musketeer Regt (1st, 2nd & 3rd btns)
- Kiev Grenadier Regt (1st, 2nd & 3rd btns)
- Yaroslav, Vladimir, Bryansk & Vyatka Musketeer Regiments are not present
- Russian Light Batteries (three)
11.7 Victory
Coalition Tactical: Eliminate 60% of all French Units in this scenario
Coalition Marginal: Hold all hexes of Telnitz
French Marginal: Attack the village with any five combat units on the 11:00, 11:20 or 11:40 turn
French Tactical: Hold any hex of Telnitz at the end of the scenario
12.0 Scenario 4: Scare' Nom de Dieu, Forward!
12.1 Introduction
Launching themselves into the void of the Coalition Centre the divisions of Maréchal d'Empire Soult's Corps race to divide the enemy in two. This scenario will test your ability to decide between caution and audacity as the situation continually changes. Can you launch the decisive counterstroke, under the eyes of the Tsar?
12.2 Time
Beginning with the 8:00am turn and ending with the 12:00noon turn.
12.3 Command
French: Soult, Bernadotte (from offsite). Soult may create an IV Corps MU.
Coalition: Tsar, Kutusov. The IV Kolonne acts as a Corps of two Austrian and one Russian Divisions. Kutusov may create a "Corps" MU.
French units rout to the west and Coalition to the east boundary. If they leave the boundary, the units still roll to recover. If they have a successful morale roll, the unit waits one turn and then enters on their respective boundary.
12.3.1 Orders Rule
In order to move the Infantry Regiments of Miloradovich, his Aide must ride to each of the Regiments and stop for the remainder of the turn. The next turn that regiment rolls one dice. A roll of 1-2 and the Regiment may move. A roll of 3-6 it may not move this turn. For each successive turn subtract one from the die roll to move. The next turn the Aide rides to the next Russian Regiment and repeats the process. This applies to the Little Russia, Asperon and Smolensk Regiments. In order to move the infantry of Jursbek or Rottermund, Generalmajor Dolgorski or Generalmajor Winzingerode (you may use both) must ride to the Division and stop for the rest of the turn. The next turn the regiment rolls one dice. A roll of 1-3 and the regiment may move. A roll of 4-6 it may not move this turn. You may pick two independent Austrian Battalions in lieu of a regiment. For each successive turn subtract one from the die roll to move.
12.4 Starting Positions
Empire of the French
- 1ere Division / IV Corps d'Armée
- Général de Division Louis Vincent Le Blond de St. Hilaire
- 10e Légère Régiment (1ere & 2e btns)
- 14e Ligne Régiment (1ere & 2e btns)
- 36e Ligne Régiment (1ere & 2e btns)
- 43e Ligne Régiment (1ere & 2e btns)
- 55e Ligne Régiment (1ere & 2e btns)
- IV Corps d'Armée Assets (part)
- 12e Co/5e Artillerie à Pied
- 13e Co/5e Artillerie à Pied
- Attached from Légère Cavalerie / IV Corps d'Armée
- 8e Hussard
- 2e Division / IV Corps d'Armée
- Général de Division Dominique Joseph Rene Vandamme
- 24e Légère Régiment (1ere & 2e btns)
- 46e Ligne Régiment (1ere & 2e btns)
- 57e Ligne Régiment (1ere & 2e btns) "Le Terrible"
- 4e Ligne Régiment (1ere & 2e btns)
- 28e Ligne Régiment (1ere & 2e btns)
- IV Corps Assets (part)
- 14e Co/5e Artillerie à Pied
- 17e Co/5e Artillerie à Pied
Coalition
- Zenter (Pratzen) & escort from the IV Kolonne
- FM Count Mikhail Hilarionovich Golenischev-Kutusov
- Smolensk Musketeer Regt (1st, 2nd and 3rd btns)
- IV Kolonne (part)
- Generalmajor Count M.A. Miloradovich
- Generalmajor v. Weyrother (attached from Zenter Staff)
- Novgorod Musketeer Regt (1st, 2nd and 3rd btns)
- Russian Light Batteries (two)
- Russian Position Battery
The remaining Infantry Regiments of Miloradovich are located on the map. They must be ordered to change direction and move back towards Soult's attack.
- Little Russia Grenadiers Regt (1st, 2nd and 3rd btns)
- Apsheron Musketeer Regt (1st, 2nd and 3rd btns)
On the Height
- Armee der Dritten Koalition Staff (part) & escort
- Tsar Alexander
- Generalmajor Winzingerode
- Generalmajor Dolgorski
- Garde Cossaque
The Tsar must remain within 3 hexes of this position. If the Tsar moves, all Russian units subtract three from any morale foe the entire scenario. If the Tsar leaves the scenario, all Russian Morale subtracts six from the roll for the entire scenario.
Blasowitz
- Detached from Life Guard Infantry
- Life-Garde Egerskii battalion
12.5 Boundary
Use the two Centre Maps – see set-ups
12.6 Reinforcements
09:00 French
- Légère Cavalerie / I Corps d'Armée see map. If used here cannot be used in Scenario 5
- Général de Division Francois Etienne Kellerman
- 2e Hussard
- 5e Hussard
- 4e Hussard
- 5e Chasseur à Cheval
10:20 French
- 2e Division / I Corps d'Armée (part)
- Général de Division Jean Baptiste Drouet
- 27e Légère Régiment (1ere, 2e & 3e btns)
- 94e Ligne Régiment (1ere, 2e & 3e btns)
- The 95e Ligne is elsewhere
- 2e Co/8e Artillerie a' Pied
09:00 Roll to move each of the Coalition Regiments (see Orders Rule)
- Division Rottermund
- Generalmajor v. Rottermund
-
- Dragoner
- Wien Jägers
-
- Infantry Regt Salzburg (1., 2., 3., 4., 5. & 6. Btns)
- 6/20. Infantry Regt Kaunitz
- 6/24. Infantry Regt Auesberg
- Austrian Battalion Batteries (two)
- Austrian Position Battery
- Division Jursbek (Jurcik)
- Generalmajor Franz von Jursbek
- 6/1. Infantry Regt Kaiser
- 2/9. Infantry Regt Czartoyski
- 6/55. Infantry Regt Reuess-Greitz
- 3/38. Infantry Regt Wurttemberg
- 3/58. Infantry Regt Beaulieu
- 6/49. Infantry Regt Kerpen
- 4/29. Infantry Regt Lindenau
- 6/40. Infantry Regt
- Austrian Battalion Artillery (two)
10:20 Western Edge
- II Kolonne (Part)
- Generalmajor A. Langeron
- Vyborg Musketeer Regt (1st, 2nd and 3rd btns)
- Perm Musketeer Regt (1st, 2nd and 3rd btns)
- Ryazan Musketeer Regt (1st, 2nd and 3rd btns)
- 8th Egerskii, Kursk Musketeer and Fangoria Grenadier Regiments, Isajew Cossaque, St. Petersberg Dragoner and the light batteries are not present
12.7 Victory
Coalition Decisive: Place Soult's corps on Level Two. (2 battalions from 3e/IV are routed).
Coalition Tactical: Prevent the French Tactical
Coalition Marginal: Prevent the French Marginal
French Marginal: Hold all the hexes of Pratze and of Stare Vinohrady, at the end of the scenario
French Tactical: Hold all the hexes of Pratze, Blaskowitz and all hexes of Stare Vinohrady at the scenario
French Decisive: Kill or Capture the Tsar
13.0 Scenario 5: Hollabrunn Refought
13.1 Introduction
This scenario is an action on a large plain between the advance guard of one army and the rear of another. Are you a master of defence?
13.2 Time
Beginning with the 9:00am turn and ending with the 12:00noon turn.
13.3 Command
French: Lannes and Murat each receive a CP every turn. Kellerman may roll for Light Cavalry Initiative. Napoleon is resting.
Coalition: Bagration receives a CP every turn. Wittgenstein and Tschaplitz may roll for Light Cavalry Initiative.
13.3.1 Russian Ergerskii (Jäger) Versteckt Counters
As he proved at Schöngraben, Prince Bagration was very skilful at concealing the disposition of troops on his defensive lines. Although these Russian Jäger were of average ability, their placement made it difficult to ascertain the Ergerskii's exact numbers and concentration.
At the start of the scenario, the Coalition Player may deploy 10 Russian Versteckt Counters that serve as a source of confusion regarding their exact deployment. They represent 5 real units and 5 misidentified units. These counters are placed on the map and they will be revealed upon one of three actions; If the Versteckt Counter is fired upon by infantry or artillery and suffers a casualty, is meleed or is charged by cavalry ( at the point of contact) the counter is revealed. When the counter is revealed it is either replaced with the actual combat unit it designates or it will be removed from play.
Versteckt counters have a movement value of 8 and a fire defence of 11.
During the Coalition Fire Phases all Versteckt counters which would normally be able to make a fire attack on an enemy formation will make a 1 to 1 attack and the result will be applied to the French formation. This includes the loss of increments, leader causalities and morale checks.
13.4 Starting Positions
Empire of the French
- V Corps d'Armée Staff
- Maréchal d'Empire Jean Lannes
- Aide de Camp Général de Brigade Compans
- Légère Cavalerie V Corps d'Armée
- Général de Brigade Anne Trelliard
- 9e Hussard
- 10e Hussard
- 13e Chasseurs à Cheval
- 21e Chasseurs à Cheval
- 3e Division / V Corps d'Armée
- Général de Division Louis Gabriel Suchet
- 17e Légère Régiment (1ere & 2e btns)
- 34e Ligne Régiment (1ere, 2e & 3e btns)
- 40e Ligne Régiment (1ere & 2e btns)
- 64e Ligne Régiment (1ere & 2e btns)
- 88e Ligne Régiment (1ere & 2e btns)
- 15e Co/5e Artillerie à Pied
- 16e Co/5e Artillerie à Pied
- 1ere Division / III Corps d'Armée
- Général de Division Marie Francois Auguste Caffarelli du Falga
- 17e Ligne Régiment (1ere & 2e btns)
- 30e Ligne Régiment (1ere & 2e btns)
- 51e Ligne Régiment (1ere & 2e btns)
- 61e Ligne Régiment (1ere & 2e btns)
- 13e Légère Régiment (1ere & 2e btns)
At the Santon
- Napoleon
- 1ere 3# Captured Austrian Foot Batterie
- 2e 3# Captured Austrian Foot Batterie
Within one hex of Stanton (may not move unless attacked)
- Garde
- Garde Band
- Chasseurs a' Cheval de la Garde
- Mamelucs
Coalition
- Rechts
- Generalmajor Prince Peter I. Bagration
- Generalmajor Wittgentein
- Avant Garde Division
- Generalmajor Dolgoruki
- Generalmajor Count Nikolai Mikailovich Kamensky II
- Generalmajor Anton Jevstafieovich Engelhardt
- Generalmajor Voropaitzky
- 5th Egerskii Regt (1st, 2nd & 3rd btns)
- 6th Egerskii Regt (1st & 2nd btns)
- Archangel Musketeer Regt (1st, 2nd & 3rd btns)
- Pskov Musketeer Regt (1st, 2nd & 3rd btns)
- Old Ingremanland Musketeer Regt (1st, 2nd & 3rd btns)
- Tsarina Cuirassier
- Tver Dragoner
- Pavlovgrad Huszaren
- Mariopol Huszaren
- Horse Artillery Battery
- Foot Batteries (two)
- Cossaque Brigade
- Generalmajor Czaplitz
- Kiselev Cossaque
- Kharusmkov Cossaque
- Malachow Cossaque
- Uvarov Cavalry Division
- Generallieutenant Uvarov
13.5 Boundary
Use Attachment Map
13.6 Reinforcements
9:40 Route de Brun
- 1ere Grosse Cavalerie Division / Cavalerie Reserve
- Général de Division Etienne Nansouty
- 1ere Carabinier
- 2e Carabinier
- 2e Cuirassier
- 9e Cuirassier
- 3e Cuirassier
- 12e Cuirassier
10:00 Route de Brun
- 2e Dragoon Division / Cavalerie Reserve
- Général de Division Frederic Henri Walther
- 3e Dragoon Régiment
- 6e Dragoon Régiment
- 10e Dragoon Régiment
- 11e Dragoon Régiment
- 13e Dragoon Régiment
- 22e Dragoon Régiment
9:40 Austrian
If used in this Scenario may not be used in Scenario 6 – see entry on Map
- Coalition Cavaliere Reserve
- FML Prince J. v Liechtenstein
- Hohenlohe Cavaliere Division
- FML v. Hohenlohe
-
- Kürassier Nassau
-
- Kürassier Lothringer
-
- Kürassier Kaiser
- Attached Coalition Cavaliere Reserve Assets
- Austrian Reitende Batterie (two)
13.7 Victory
Coalition Decisive: Place I Corps on morale level one
Coalition Tactical: Hold all hexes of Holubitz, Krug or Posoritz by the end of the scenario
Coalition Marginal: Hold any hexes of Holubitz, Krug and Posoritz by the end of the scenario
French Marginal: Place Bagration on Level One at the end of the scenario
French Tactical: Hold all hexes of Holubitz, Krug and Posoritz by the end of the scenario
French Decisive: Place Bagration on Level Two at the end of the scenario
14.0 Scenario 6: "For God, Russia and The Czar"
14.1 Introduction
With the Coalition centre captured and their Russian and Austrian line troops in disorder, Grand Duke Constantine leads the Imperial Lifeguard to the attack. For those who have been waiting to fight Guard on Garde this is the scenario for you. Who will take the Mamelucs and turn the tide?
14.2 Time
Beginning with the 12:00pm turn and ending with the 4:00pm turn. The Coalition moves first! Then the 12:20 turn.
14.3 Command
French: Vandamme (Soult), Drouet (Bernadotte), Bessières and Napoleon each receive a CP every turn.
Austrian: Constantine and Moritz Lichenstein (if present) each receive a CP every turn.
If Napoleon moves from the hilltop, all French units are plus 12 for morale. Staff Officers may leave with no penalty.
14.4 Starting Positions
Empire of the French
On the high ground of Stare Vinohrady, Must be in column
- 2e Division / IV Corps (part)
- 4e Ligne Régiment (1ere & 2e btns)
- 24e Légère Régiment (1ere & 2e btns)
- La Grand Armée Staff
- Emperor Napoleon I
- Maréchal d'Empire Berthier
- Général de Brigade Guillaume Mathieu Dumas
- Général de Brigade Bertrand
- Général de Division Savary
- Général de Division Georges Mouton
- Général de Division Songis
- Rapp is leading the Guard Cavalry
Within 1 hex of Napoleon
- Imperial Guard
- Général de Brigade Hulin
- Grenadiers à Pied Régiment (1e & 2e btns)
- Chasseurs à Pied Régiment (1e & 2e btns)
- Grenadiers à Pied of the Royal Italienne Garde
- Chasseurs à Pied of the Royal Italienne Garde
- Guard Band is not present
- 2e Division / IV Corps (part) Minus 5 increments
- Général de Division Dominique Joseph Rene Vandamme
- 57e Ligne Régiment (1ere & 2e btns) "Le Terrible"
- 46e Ligne Régiment (1ere & 2e btns)
- 12e Co/5e Artillerie à Pied
- 13e Co/5e Artillerie à Pied
- 2e Division / I Corps (part)
- Général de Division Jean Baptiste Drouet
- 95e Ligne Régiment (1ere, 2e & 3e btns)
- 27e Légère Régiment (1ere, 2e & 3e btns)
- 2e Co/8e Artillerie à Pied
- Garde Légère Cavalerie Brigade
- Général de Division Rapp
- Chasseur a Cheval de la Garde
- Mameluc
- Garde Grosse Cavalerie Brigade
- Maréchal d'Empire Besseriers
The artillery must be to Prazte by 15:40 or it cannot be used in scenario 8
- 1ere Batterie de la Garde à Cheval
- 2e Batterie de la Garde à Cheval
- Batterie à Cheval of the Royal Italienne Garde
- Légère Cavalerie Brigade / I Corps
- If used here cannot be used in scenario 7
- Kellerman may have sustained losses in scenario Four and Five (otherwise minus 6 increments)
- Général de Division Francois Etienne Kellerman
- 2e Hussard
- 5e Hussard
- 4e Hussard
- 5e Chasseur à Cheval
Coalition
- Life Guard Cavalry / V Kolonne
- Generalmajor Kologrivov
- Garde Huszaren
- Garde Cossaque
- Russian Chevalier Garde
- Garde du Corps
- Attached from V Kolonne Assets
- Garde Horse Artillery batterie
At Blaskowitz
- Garde Jäger
- V Kolonne (part)
- Grand Duke Konstantine Pavlovich
- Generalmajor Depreradovich
- Semenovsky Garde Regt (1st & 2nd btns)
- Prebragensky Garde Regt (1st & 2nd btns)
- Ismailovsky Garde Regt (2nd btn only)
- Life Guard Artillery Battery
- 1st Life Guard Light Artillery Battery
- 2nd Life Guard Light Artillery Battery
- Division Jursbek
On Morale One, Check Morale for each before moving the first time. If they pass they can move each turn
- Generalmajor Franz von Jursbek
- 3/38. Infantry Regt Wurttemberg
- 3/58. Infantry Regt Beaulieu (less 2 increments)
- 6/49. Infantry Regt Kerpen (less 2 increments)
- 4/29. Infantry Regt Lindenau (less 2 increments)
- Austrian Battalion Artillery (two)
14.5 Boundary
Use Two Centre Maps – see set-up with boundary near Pratze
14.6 Reinforcements
13:20 Austrian
- Coalition Cavaliere Reserve
- If used in this Scenario may not be used in Scenario 5
- FML Prince J. v Liechtenstein
- Hohenloe Cavaliere Division
- FML v. Hohenlohe
-
- Kürassier Nassau
-
- Kürassier Lothringer
-
- Kürassier Kaiser
- Austrian Reitende Batterien (two)
Campaign game note: If Vandamme's Division cannot exit by 14:00 it may not be used then in scenario 8. The elements of Vandamme that do reach the exit by 14:00 may be used in Scenario 8. If these units exit between 14:20 and 16:00, they would enter Scenario 8 two turns later.
14.7 Victory
Coalition Decisive: Kill or capture Napoleon or Eliminate 30 increments of the French Guard
Coalition Tactical: Eliminate 35 increments of the French Guard
Coalition Marginal: Eliminate 20 increments of the French Guard
15.0 Scenario 7: Bagration Escapes
15.1 Introduction
The French need to be aggressive there are only 7 turns!
15.2 Time
Beginning with the 14:00pm turn and ending with the 16:00pm turn.
15.3 Command
French: Lannes and Murat each receive a CP every turn.
Russians: Bagration receives a CP every turn.
15.4 Starting Positions
Empire of the French
- V Corps d'Armée Staff
- Maréchal d'Empire Jean Lannes
- Aide de Camp Général de Brigade Compans
- Légère Cavalerie / V Corps d'Armée (less 3 increments)
- Général de Brigade Anne Trelliard
- 9e Hussard
- 10e Hussard
- 13e Chasseurs à Cheval
- 21e Chasseurs à Cheval
- 3e Division / V Corps d'Armée (less 5 increments & 3 bataillions routed)
- Général de Division Louis Gabriel Suchet
- 17e Légère Régiment (1ere & 2e btns)
- 34e Ligne Régiment (1ere, 2e & 3e btns)
- 40e Ligne Régiment (1ere & 2e btns)
- 64e Ligne Régiment (1ere & 2e btns)
- 88e Ligne Régiment (1ere & 2e btns)
- 15e Co/5e Artillerie à Pied
- 16e Co/5e Artillerie à Pied
- 1ere Division, III Corps d'Armée (less 8 increments & 3 bataillions routed)
- Général de Division Marie Francois Auguste Caffarelli du Falga
- 17e Ligne Régiment (1ere & 2e btns)
- 30e Ligne Régiment (1ere & 2e btns)
- 51e Ligne Régiment (1ere & 2e btns)
- 61e Ligne Régiment (1ere & 2e btns)
Coalition
- Avant Garde of the Coalition Armee
- Generalmajor Prince Peter I. Bagration
- Generalmajor Wittgentein
- Avant Garde Division (minus 10 increments)
- Generalmajor Dolgoruki
- Generalmajor Count Nikolai Mikailovich Kamensky II
- Generalmajor Anton Jevstafieovich Engelhardt
- Generalmajor Voropaitzky
- 5th Egerskii Regt (1st, 2nd & 3rd Btns)
- 6th Egerskii Regt (1st & 2nd Btns)
- Archangel Musketeer Regt (1st, 2nd & 3rd Btns)
- Pskov Musketeer Regt (1st, 2nd & 3rd Btns)
- Old Ingremanland Musketeer Regt (1st, 2nd & 3rd Btns)
- Tsarina Cuirassier
- Tver Dragoner
- Pavlovgrad Huszaren
- Mariopol Huszaren
- Horse Artillery Battery
- Russian Light Batteries (two)
- Cossaque Brigade (minus 2 increments)
- Generalmajor Czaplitz
- Kiselev Cossaque
- Kharusmkov Cossaque
- Malachow Cossaque
- Russian Cavalry Reserve (minus 10 increments)
Note: Nansouty and the rest of Uvarov's Cavalry are facing across a bridge (off map)
15.5 Boundary
Same Two Maps as Scenario Five – see set-up
15.6 Reinforcements
None
15.7 Victory
Coalition Tactical: Exit 20 increments of the map at the Route d' Olmutz on the last turn of the scenario
Coalition Marginal: Prevent a French Marginal Victory
French Marginal: Hold the exit road hexes for the Route d' Olmutz and the Route d' Austerlitz
French Tactical: Exit 25 cavalry increments off the map at the Route d' Olmutz and 25 infantry increments off the map at the Route d' Austerlitz
French Decisive: Place Bagration on Morale Level Three
16.0 Scenario 8: Soult's Encirclement
16.1 Introduction
The only decisive battles; are battles of total destruction. As Soult you must trap and capture the complete left wing of the Coalition. Don't get too bold of too timid. If you are playing through the scenarios, Some of Soult's troops might not arrive on time.
16.2 Time
Beginning with the 12:00pm turn and ending with the 16:00pm turn.
16.3 Command
French: Soult and Davout have CPs at all times.
Coalition: the Czar (offmap) and Buxhowden give CPs at all times.
16.4 Starting Positions
The Coalition Sets-up first, then the French.
Empire of the French
- 2e Division / III Corps d'Armée (minus 14 increments)
- Général de Division Louis Friant
- 15e Légère Régiment (1ere & 2e btns)
- 33e Ligne Régiment (1ere & 2e btns)
- 48e Ligne Régiment (1ere & 2e btns)
- 108e Ligne Régiment (1ere & 2e btns)
- 111e Ligne Régiment (1ere & 2e btns)
- 2e Co/7e Artillerie à Pied
- 4e Dragoon Division (minus six increments)
- Général de Division Francois Antoine Louis Bourcier
- 1ere Dragoon Régiment is with the III Corps
- 15e Dragoon Régiment
- 17e Dragoon Régiment
- 25e Dragoon Régiment
- 27e Dragoon Régiment
- IV Corps Légère Cavalerie
- Général de Brigade Pierre Margaron
- 8e Hussard
- 11e Chasseurs à Cheval
- 26e Chasseurs à Cheval
- 3e Division / IV Corps d'Armée (part) (minus 5 increments) at Kobelnitz
- Général de Division Claude Juste Alexandre Legrand
- 18e Ligne Régiment (1ere & 2e btns)
- 75e Ligne Régiment (1ere & 2e btns)
Coalition
- Links Staff
- with any unit except Langeron
- General of Infantry Buxhowden
- MG v. Chilebowski
- I. Kolonne
- within two hexes of Telnitz Morale Level One (minus 9 increments)
- Generalmajor Dmitri Doktorov
- 7th Egerskii Regt (1st btn only)
- New Ingremanland Musketeer Regt (1st, 2nd & 3rd btns)
- Yaroslav Musketeer Regt (1st & 2nd btns)
- Vladimir Musketeer Regt (1st, 2nd & 3rd btns)
- Bryansk Musketeer Regt (1st, 2nd & 3rd btns)
- Vyatka Musketeer Regt (1st, 2nd & 3rd btns)
- Moscow Musketeer Regt (1st, 2nd & 3rd btns)
- Kiev Grenadier Regt (1st, 2nd & 3rd btns)
- Denisov Cossaque
- Russian Light Batteries (three)
- Russian Position Batteries (two)
- Avant-garde
- in the forest West of Telnitz (minus 10 increments)
- FML Michael Kienmayer von Odenburg
-
- Grenz Broder Regt (1. Btn only)
-
- Grenz Szekler Regt (1. & 2. Btns)
16.5 Boundary
South Maps
16.6 Reinforcements
12:20 French
- 1e Division / IV Corps d'Armée (minus 8 increments)
- Général de Division Louis Vincent Le Blond de St. Hilaire
- 43e Ligne Régiment (1ere & 2e btns)
- 55e Ligne Régiment (1ere & 2e btns)
- 1e Division / IV Corps d'Armée (minus 6 increments)
- 10e Légère Régiment (1ere & 2e btns)
- 14e Ligne Régiment (1ere & 2e btns)
- 36e Ligne Régiment (1ere & 2e btns)
13:00 French
- 3e Dragoon Division / Cavalerie Reserve
- Général de Brigade Boye
- 5e Dragoon Régiment
- 8e Dragoon Régiment
- 12e Dragoon Régiment
- 9e Dragoon Régiment
- 16e Dragoon Régiment
- 21e Dragoon Régiment
13:00 French
- 2e Division / IV Corps d'Armée (part)
- Général de Division Dominique Joseph Rene Vandamme
- 28e Ligne Régiment (1e btn only)
- 14e Co/5e Artillerie à Pied
14:00 French or whenever they arrive from scenario 6
- 2e Division / IV Corps d'Armée (part) (minus 9 increments)
- 46e Ligne Régiment (1ere & 2e btns)
- 57e Ligne Régiment (1ere & 2e btns) "Le Terrible"
- 4e Ligne Régiment (1ere & 2e btns)
- 24e Légère Régiment (1ere & 2e btns)
14:20 French (vandamme entry)
- 1ere Batterie de la Garde à Cheval
16.7 Victory
Coalition Decisive: The Russian and Austrians must exit 75 increments off the Eastern Map
Coalition Tactical: The Russian and Austrians must exit 75 increments off the Southern Map Edge
Coalition Marginal: The Russian and Austrians must exit 60 increments off the Southern Map Edge or hold Augezd
French Marginal: Capture all hexes of Telnitz, Sokolnitz, Schloss and Pheasantry at the end of the scenario
French Tactical: Place II and III Kolonne on Morale Level Three at the end of the scenario
French Decisive: Prevent any of the Russian Victory Conditions
The Coalition must exit beyond the red dotted lines to the South or to the East
17.0 Scenario 9: Battle by Scenarios
17.1 Introduction
This allows the players to complete the Battle of Austerlitz by playing manageable scenarios. Use this table to identify the points for each scenario. The French victors are positive points and then subtract the Coalition Points. It is possible for the players to have lesser or greater victories within a scenario. At the conclusion all up all of the points and determine the overall winner.
| Scenario | France Decisive | France Tactical | France Marginal | Coalition Decisive (minus) | Coalition Tactical (minus) | Coalition Marginal (minus) |
|---|---|---|---|---|---|---|
| Scenario One – Kienmayer's Dawn Attack | 4 | 3 | 1 | 4 | 3 | 1 |
| Scenario Two – Friant's Stand on the Goldbach | 4 | 3 | 1 | 4 | 3 | 1 |
| Scenario Three – Doktorov's Second Bid | – | 3 | 1 | – | 3 | 1 |
| Scenario Four – Scare' Nom De Dieu, Forward! |
6 to -4 is a draw
18.0 Scenario 10: Historical Battle (Largely Historical)
18.1 Introduction
This represents the historical battle with all the various troops in their actual starting positions.
18.2 Time
Beginning with the 8:00am turn and ending with the 16:00pm turn.
Due to the fog of the early morning (starting with 08:00 and ending with 09:40 turn) artillery line of sight is only out to five hexes from the battery and there is no two hex range for skirmishers.
18.3 Command
18.3.1 French: See rule E6.3
18.3.2 Coalition: See rule E6.4.
Tsar Rule (Optional): The Tsar's influence and the complications of the command structure were responsible for some formations inability to move decisively in the initial hours of the battle. Therefore beginning with 08:00 turn and ending with the 09:40 turn roll for each Kolonne. A roll of 1 or 2 and every combat unit and leader in that column subtracts three from their movement.
18.4 Starting Positions
- All associated artillery, aides and leaders begin the game with the formation to which they are named in the order of battle.
- The Coalition Sets-up first, then the French
- See leader names or Kolonne numbers for start location or entry on set-up maps.
At Zenter
- Coalition Staff
- Alexander I, Tsar of all the Russias
- Generalmajor Dolgorski
- Generalmajor Winzingerode
- Generallieutenant Muller-Zakomelski
- Franz I Kaiser von Österreich, Franz II Erwählter Römischer Kaiser
- Generallieutenant Prinz v. Schwarzenberg
Links Staff with either Kolonne I, II or III
- Links Staff
- General of Infantry Buxhowden
- MG v. Chilebowski
- Advant Garde
- FML Michael Kienmayer von Odenburg
- Generalmajor Karl Folliot de Carneville
- Generalmajor Baron Karl Stutterheim
-
- Grenz Broder Regt (1. Btn only)
-
- Grenz Szekler Regt (1. & 2. Btns)
-
- Grenz Szekler Regt (1. & 2. Btns)
-
- Chevaux-leger O'Reilly
- Austrian Reitende Batterien (two)
- Generalmajor Graf v. Nostiz
-
- Uhlanen Schwarzenberg
-
- Huszaren Hesse -Homburg
-
- Huszaren Szekler
Within 10 hexes of the Santon
- La Grande Armée Staff
- Emperor Napoleon I
- Maréchal d'Empire Berthier
- Général de Brigade Guillaume Mathieu Dumas
- Général de Brigade Bertrand
- Général de Division Savary
- Général de Division Georges Mouton
- Général de Division Songis
- Général de Division Jean Rapp
- Légère Cavalerie / I Corps d'Armée
- Général de Division Francois Etienne Kellerman
- 2e Hussard
- 5e Hussard
- 4e Hussard
- 5e Chasseur à Cheval
With Napoleon
- IV Corps d'Armée Staff
- Maréchal d'Empire Jean de Dieu Soult
- Aide de Camp Général de Brigade Salligny
- 1ere Division / IV Corps d'Armée
- Général de Division Louis Vincent Le Blond de St. Hilaire
- 10e Légère Régiment (1ere & 2e btns)
- 14e Ligne Régiment (1ere & 2e btns)
- 36e Ligne Régiment (1ere & 2e btns)
- 43e Ligne Régiment (1ere & 2e btns)
- 55e Ligne Régiment (1ere & 2e btns)
- 12e Co/5e Artillerie à Pied
- 13e Co/5e Artillerie à Pied
- 2e Division / IV Corps d'Armée
- Général de Division Dominique Joseph Rene Vandamme
- 24e Légère Régiment (1ere & 2e btns)
- 46e Ligne Régiment (1ere & 2e btns)
- 57e Ligne Régiment (1ere & 2e btns) "Le Terrible"
- 4e Ligne Régiment (1ere & 2e btns)
- 28e Ligne Régiment (1ere & 2e btns)
- 14e Co/5e Artillerie à Pied
within 6 hexes of Koblenitz
- 3e Division / IV Corps d'Armée (part)
- Général de Division Claude Juste Alexandre Legrand
- 18e Ligne Régiment (1ere & 2e btns)
- 75e Ligne Régiment (1ere & 2e btns)
- 26e Légère Régiment (1ree & 2e btns)
- 17e Co/5e Artillerie à Pied
- 3e Division / IV Corps d'Armée (part)
- 3e Ligne Régiment (1ere, 2e & 3e btns) in Telnitz
- Corse Bataillon in the Pheasantry
- Po Bataillon in Sokolnitz Schloss
- IV Corps Légère Cavalerie
- Général de Brigade Pierre Margaron
- 8e Hussard
- 11e Chasseurs à Cheval
- 26e Chasseurs à Cheval
- 4e Co/5e Artillerie à Cheval
- V Corps d'Armée Staff
- Maréchal d'Empire Jean Lannes
- Aide de Camp Général de Brigade Compans
- Légère Cavalerie / V Corps d'Armée
- Général de Brigade Anne Trelliard
- 9e Hussard
- 10e Hussard
- 13e Chasseurs à Cheval
- 21e Chasseurs à Cheval
On the Santon
- Grand Parc d'Artillerie du Santon
- 1ere 3# Captured Austrian Foot Batterie
- 2e 3# Captured Austrian Foot Batterie
18.5 Boundary
All 6 maps.
18.6 Reinforcements
09:00 Coalition: at Col. V
- V Kolonne
- Grand Duke Konstantine Pavlovich
- Generalmajor Depreradovich
- Lieb-Garde Artillery
- Life Guard Artillery Battery
- 1st Life Guard Light Artillery Battery
- 2nd Life Guard Light Artillery Battery
- Garde Horse Artillery battery
- Life Garde Infantry
- Generallieutenant Maliutin
- Life-Garde Egerskii battalion
- Semenovsky Garde Regt (1st & 2nd btns)
- Prebragensky Garde Regt (1st & 2nd btns)
- Ismailovsky Garde Regt (1st & 2nd btns)
- Life-Garde Grenadiers Regt (1st, 2nd & 3rd btns)
- Life Garde Cavalry
- Generalmajor Kologrivov
- Garde Huszaren
- Garde Cossaque
- Russian Chevalier Garde
- Garde du Corps
- Coalition Cavaliere Reserve
- FML Prince J. v Liechtenstein
- Austrian Reitende Batterien
- Austrian Reitende Batterien
08:00 French enters the map at 9:00am at Davout
Starting with the 09:00 turn, a die is rolled for each regiment. A roll of 4-6 and the regiment enters. With each subsequent turn a plus one is added to the die-roll. This process continues until all regiments have entered. Général de Division Bourcier enters with the first regiment. All regiments that enter are considered tired.
- 4e Dragoon Division
- Général de Division Francois Antoine Louis Bourcier
- 1ere Dragoon Régiment is with the III Corps
- 15e Dragoon Régiment
- 17e Dragoon Régiment
- 25e Dragoon Régiment
- 27e Dragoon Régiment
08:00 enters the map at Davout
Starting with the 08:40 turn, a die is rolled for each regiment. A roll of 4-6 and the regiment enters. With each subsequent turn a plus one is added to the die-roll. This process continues until all regiments have entered. Général de Division Friant enters with the first regiment, Maréchal d'Empire Davout, Aide and Artillerie enter with the last.
- III Corps d'Armée Staff
- Maréchal d'Empire Louis Nicolas Davout
- Aide de Camp Général de Brigade Fournier
- 2e Division / III Corps d'Armée
- Général de Division Louis Friant
- 33e Ligne Régiment (1ere & 2e btns)
- 48e Ligne Régiment (1ere & 2e btns)
- 111e Ligne Régiment (1ere & 2e btns)
- 108e Ligne Régiment (1ere & 2e btns)
- 15e Légère Régiment (1ere & 2e btns)
- 2e Co/7e Artillerie à Pied
- Attached from the 4e Dragoon Division
- 1ere Dragoon Régiment
8:20 French: Route de Brun
- 3e Division / V Corps d'Armée
- Général de Division Louis Gabriel Suchet
- 17e Légère Régiment (1ere & 2e btns)
- 34e Ligne Régiment (1ere, 2e & 3e btns)
- 40e Ligne Régiment (1ere & 2e btns)
- 64e Ligne Régiment (1ere & 2e btns)
- 88e Ligne Régiment (1ere & 2e btns)
- 15e Co/5e Artillerie à Pied
- 16e Co/5e Artillerie à Pied
8:40 French: Route de Brun
- 1ere Division/ III Corps d'Armée
- Général de Division Marie Francois Auguste Caffarelli du Falga
- 17e Ligne Régiment (1ere & 2e btns)
- 30e Ligne Régiment (1ere & 2e btns)
- 51e Ligne Régiment (1ere & 2e btns)
- 61e Ligne Régiment (1ere & 2e btns)
- 13e Légère Régiment (1ere & 2e btns)
- 1ere Co/7e Artillerie à Pied
9:00 French: at Rivau
- 1ere Division / I Corps d'Armée
- Général de Division Oliver Rivaud de la Raffiniere
- 8e Ligne Régiment (1ere, 2e & 3e btns)
- 45e Ligne Régiment (1ere, 2e & 3e btns)
- 54e Ligne Régiment (1ere, 2e & 3e btns)
- 1ere Co/8e Artillerie à Pied
- 2e Co/3e Artillerie à Cheval
9:00 French: at Boye
- 3e Dragoon Division / Cavalerie Reserve
- Général de Brigade Boye
- 5e Dragoon Régiment
- 8e Dragoon Régiment
- 12e Dragoon Régiment
- 9e Dragoon Régiment
- 16e Dragoon Régiment
- 21e Dragoon Régiment
9:40 French: Route de Brun
- 1ere Grosse Cavalerie Division / Cavalerie Reserve
- Général de division Etienne Nansouty
- 1ere Carabinier
- 2e Carabinier
- 2e Cuirassier
- 9e Cuirassier
- 3e Cuirassier
- 12e Cuirassier
- Attached from Cavalerie Reserve
- 4e Co/2e Artillerie à Cheval
9:40 French at Rivau
- 2e Division / I Corps d'Armée
- Général de Division Jean Baptiste Drouet
- 27e Légère Régiment (1ere, 2e & 3e btns)
- 94e Ligne Régiment (1ere, 2e & 3e btns)
- 95e Ligne Régiment (1ere, 2e & 3e btns)
- 2e Co/8e Artillerie a' Pied
09:40 French Route de Brun
- Garde Impériale
- Maréchal d'Empire Jean Baptiste Bessières
- Aide de Camp Général de Brigade Roussel
- 1ere Batterie de la Garde à Cheval
- 2e Batterie de la Garde à Cheval
- Batterie à Cheval of the Royal Italienne Garde
- Marching Band ♪
10:00 French at Rivau
- I Corps d'Armée Staff
- Maréchal d'Empire Jean Baptiste Bernadotte
- Aide de Camp Général de Brigade Berthier
10:00 French Route de Brun
- 2e Dragoon Division / Cavalerie Reserve
- Général de Division Frederic Henri Walther
- 3e Dragoon Régiment
- 6e Dragoon Régiment
- 10e Dragoon Régiment
- 11e Dragoon Régiment
- 13e Dragoon Régiment
- 22e Dragoon Régiment
- Attached from Cavalerie Reserve
- 2e Co/2e Artillerie à Cheval
10:00 French at Rivau
- Garde impériale Infanterie
- Général de Brigade Hulin
- Grenadiers à Pied Régiment (1e & 2e btns)
- Chasseurs à Pied Régiment (1e & 2e btns)
- Grenadiers à Pied of the Royal Italienne Garde
- Chasseurs à Pied of the Royal Italienne Garde
10:20 French Route de Brun
- 2e Division, V Corps d'Armée (séparer)
- Général de Division Nicolas Charles Oudinot
- Général de Division Géraud Christophe Michel Duroc
- 1ere Grenadier Régiment (13e & 58e btns)
- 2e Grenadier Régiment (9e & 81e btns)
- 3e Grenadier Régiment (2e & 3e btns)
- 4e Grenadier Régiment (28e & 31e btns)
- 5e Grenadier Régiment (12e & 15e btns)
- 1ere Co/1ere Artillerie à Pied
10:20 French at Rivau
- Garde impériale Cavalaire
- Général de Brigade Ordener
- Chasseur a Cheval de la Garde
- Mameluc
- Grenadier a Cheval de la Garde
18.7 Victory
This scenario has a matrix of conditions to determine the overall victory conditions.
The Coalition must capture objectives end of the 11:00 turn. Should the coalition occupy any of these objectives by the end of the 11:00 turn, they are awarded the points. The Coalition need not hold the objective through the 11:00am turn just occupy it once.
| Objective | Value | Objective | Value |
|---|---|---|---|
| Telnitz | 3 | Puntowitz | 2 |
| Sokolnitz | 3 | Santon | 3 |
| Schloss | 2 | Bosenitz | 2 |
| Pheasantry | 2 | Siwitz | 2 |
| Kobelnitz | 2 | Jirzikowitz | 2 |
| Exit 15 increments off the map on the Route de Brunn hex | 5 |
The Coalition is awarded 2 points for each Morale level reached by a French Corps / Divisions at any time in the game. Points are only awarded once per level.
- Guard Division
- V Corps Lannes
- Oudinot Division
- 2e Division, III Corps Friant
- I Corps Bernadotte
- Garde Band
- IV Corps Soult
The French receive points for placing the Coalition columns on a morale level. At the conclusion of the battle, for each column that reaches a Morale Level the French will be awarded: 1 point for Level 1, 2 points for Level 2 and 4 points for Level 3. The Coalition columns are:-
- I Doktorov
- II Langeron
- III Pryzbyczewsky
- IV Kollowrath/ Miloradovich
- V Life Guard
- AG Bagration
The French receive points if they hold any of the following towns / villages at the games conclusion. Occupy / Hold means hold all of the hexes of the position or place.
| Objective | Value | Objective | Value |
|---|---|---|---|
| Pratze | 3 | Augezd | 2 |
| Posoritz | 2 | Blasowitz | 2 |
| Exit 15 increments of the map on the Route d' Austerlitz | 3 |
Leader Losses
| Event | Result |
|---|---|
| If the Tsar is killed or captured | The French receive an additional 5 points |
| If Kaiser Franz is killed or captured | The French receive 3 additional points |
| If Napoleon is killed or captured | The Coalition wins decisively |
At the conclusion of the game all the French points are tallied and the Coalition points are subtracted from that total. Victory is determined as Point Totals.
| Result | Point total |
|---|---|
| French Decisive | 17 or above |
| French Substantial | 14 to 16 |
| French Marginal | 11 to 13 |
| Draw | 9 or 10 |
| Coalition Marginal | 7 or 8 |
| Coalition Substantial | 5 or 6 |
| Coalition Decisive | 4 or below |
19.0 Scenario 11: Optional Deployment - La Bataille d'Austerlitz
19.1 Introduction
Due to the early morning fog, this deployment is done at the same time and secretly. After the historic deployments:
19.2 Starting Positions
The French may redeploy up to eight divisions which begin on the map. (Use the division leader counter with a blank on top)
The Coalition may redeploy up to four columns. (Use a Kolonne leader counter with a blank on top)
Then each side reveals.
None of the redeployed may be any closer to the enemy that their historic start location.
There is no change to the time and locations troops enter the map. The start and completion time remain the same. The victory conditions
[The source text ends at "The victory conditions" as printed; the sentence is incomplete in the original.]
This set-up variation will ensure each game is a fresh and unique challenge each time it is played.
Charts (2nd Edition)
Fire Effects Table
| Unit | Type | Column | Line | Carre | General | Skirmish |
|---|---|---|---|---|---|---|
| Russian | Musketeer | Printed | x2 | x2 | Printed | |
| Russian | Egerskii | Printed | x2 | x2 | Printed | x3 |
| Russian | Grenadier | Printed | x3 | x3 | Printed | |
| Russian | Guard Jäger | Printed |
Column headers as printed: Column, Line, Carre, General, Skirmish.
1/ See special rules
2/ Chasseurs Only
- Bataillon Austrians were recently raised from depot units. The main army had been destroyed at ULM.
Fire Defence Chart
| Unit / Formation | Clear | Frozen Lake *8 | Pine Forest / Orchard | Pheasantry | Hamlet | Village | Santon Redoubt | Pheasantry Wall | Vineyard | Schloss |
|---|---|---|---|---|---|---|---|---|---|---|
| Infantry Column | 6 | 4 | ||||||||
| Infantry Line *3 | 9 | 4 |
*1 2 less than infantry alone unless in carre
*2 Versteckt Counters (Bagration) are 11 until "discovered"
*3 Formations fired upon thru the flank have a fire defence of 5. Formations fired upon thru a rear are normal
*4 Formations add 1 to the Fire Attack die roll for every increment in a target hex, over 9.
*5 Formations in Road March have a fire defence of 4.
*6 10 front / 6 rear
*7 Artillery may be unlimbered in the Pheasantry. But it must unlimber outside and then prolong across the wall
*8 Artillery fire and a roll of 65 or 66 indicates the ice has broken. Roll one die, the result indicates the number of increments lost.
Movement Chart
| Terrain | Infantry | Cavalry | Cossaque | Artillery | Leaders |
|---|---|---|---|---|---|
| Clear | 1 | 1 | 1 | 1 | 1 |
| Hamlet / Village / Town *1 *3 | 3 | 3 | 3 | 3 | 2 |
| Pine Forest / Orchard *1 | 2 | 5 | 3 | NP | 2 |
| Garden | 2 | 2 | 2 | 4 | 2 |
| Vineyard *2 |
*1 Due to the light density of these villages and hamlets, zone d' influence do exist into an out of this and other general order terrain. Cavalry units attacking into general order terrain use the 1/3 of the combat value. There are no charges into villages, forests, swamps, hamlets, schloss or orchards
*2 The Vineyards have their own set of specific rules.
*3 A hamlet is a single, isolated village hex. Very few improved roads existed in Moravia
*4 A lake hex has all blue or partially blue shading within the hex body, not just at the boundary.
*5 Road March through a Hamlet, Village is 2 mp per hex
Stacking Chart
| Terrain | Infantry *1 | Cavalry *12 | Artillery | Combined |
|---|---|---|---|---|
| Clear / Frozen Lake | 1 Regiment or 18 Increments | 1 Regiment or 18 Increments | 6 Increments | 12 Infantry & 1 Battery |
| Hamlet / Village | 1 Battalion | 1 Regiment | 1 Battery | 1 Infantry Battalion & 1 Battery |
| Pine Forest / Orchard | 1 Battalion | 1 Regiment | NP | NP |
| Pheasantry | 1 Battalion | 1 Regiment | 1 Battery | NP |
| Santon Redoubt | 1 Battalion | NP |
*1 Road 4 Increments in Road March
*2 For the Règlement de l'An XXX only 4 increments of cavalry may stack per hex while in Column of Companies formation.
*3 For infantry battalions in Skirmish Order in two hexes with more than 6 increments, the extra increments (greater than 3/hex) are ignored. Cavalry units in Skirmish Order, regardless of increments, are always deployed in two hexes. References to units in two hexes apply only to the Règlements de l'An XXX.
Square Formation Table
French
| Formation | Movement Points | Carre | Disorder | Rout |
|---|---|---|---|---|
| Column | 4 | 11-66 | ||
| Column | 3 | 11-66 | ||
| Column | 2 | 11-43 | 44-61 | 62-66 |
| Column | 1 | 11-31 | 32-54 | 55-66 |
| Line | 4 | 11-64 | 65-66 | |
Personalities subtract 6 from the die roll if present in the hex: -6
- Légère: -3
- Oudinot's Grenadier & Voltigeurs: -3
- Guard Battalions: -6
- Italians: +2
Russian
| Formation | Movement Points | Carre | Disorder | Rout |
|---|---|---|---|---|
| Column | 4 | 11-55 | 56-64 | 65-66 |
| Column | 3 | 11-42 | 43-56 | 61-66 |
| Column | 2 | 11-26 | 31-46 | 51-66 |
| Column | 1 | 11-22 | 23-52 | 53-66 |
| Line | 4 | 11-66 |
Russian Personalities subtract their morale from the die roll if present in the hex: -? (limit -6)
- Russian Grenadiers: -3
- Russian Guard: -6
- Egerskii: +3
Austrians
| Formation | Movement Points | Carre | Disorder | Rout |
|---|---|---|---|---|
| Column | 4 | 11-56 | 61-63 | 64-66 |
| Column | 3 | 11-46 | 51-56 | 61-66 |
| Column | 2 | 11-36 | 41-53 | 54-66 |
| Column | 1 | 11-26 | 31-46 | 51-66 |
| Line | 4 | 11-64 | 65-66 |
Austrian Personalities subtract their moral from the die roll if present in the hex: -?
Austrian 6. Linie Battalions may not attempt to form Carre during the enemy Charge Phase: NP
- If Cavalry is Light: ADD 3 to the die roll (+3)
- If Cavalry is Lance Armed: ADD 6 to die roll (+6)
- If defender is on morale level: ADD to the die roll 3 for each level (+3 / level)
Depot Locations
French: Any road leading off the west map edge.
Coalition: Any road leading off the east map edge.
Maps Layout
Top row: Sokolnitz, Puntowitz, Santon. Bottom row: Telnitz, Pratze, Holubitz. (North is at the right edge of the layout.)
Cavalry Recall Chart
| Army / Type | Recall roll |
|---|---|
| French | 2-6 |
| Russian Light | 3-6 |
| Russian Heavy | 2-6 |
| Russian Cossaques | 5-6 |
| Austrian Light | 2-6 |
| Austrian Heavy | 2-6 |
- Personalities who have a cavalry modifier: +1
- Cavalry Leaders of Special Ability: +2
Artillery Limbering Chart
| Battery | Limber roll |
|---|---|
| Russian Horse Battery | 4-6 |
| Russian Light Battery | 5-6 |
| Russian Position Battery | 6 |
| Russian Guard Battery | 3-6 |
| Austrian Brigade Batterie | 4-6 |
| Austrian Kavalrie Batterie | 4-6 |
| Austrian Position Battery | 5-6 |
| French Batterie de la Guard | Automatic |
| French Batterie á Cheval | 2-6 |
| French Batterie á Pied | 4-6 |
| French Allied Batterie | 5-6 |
- Leaders with an artillery bonus: +1
- French Maréchals, Bagration, and Docturov: +1
- Artillery Leaders; Songis and Muller-Zakomelski: +2
- Napoleon: +3
Additional Roll to Close Modifiers
- Attacker is assaulting up a slope: -3
- Attacker is assaulting across a stream: -3
- Defender is in Square: +6
- Infantry which melees across the wall: -12
- Melee thru a Santon front hexside: -12
Additional Roll to Stand Modifiers
- Attacker is assaulting up a slope: +3
- Attacker is assaulting across a stream: +3
- Defender is in Line: -3
- Austrian Defenders in Line: +3
- Infantry defending within the Schloss hex does not check morale as a defender in the pre melee morale process.
Additional Melee Modifiers
- Cavalry Attacker across a stream hexside: .66
- Infantry Attackers vs Defender in Carre: 1.5
- Infantry Attacking across a Stream hexside: .66
- Infantry which melees across the wall is halved: .5
- Melee thru a front hexside of Santon redoubt i [entry truncated in the source]: .5
Additional Morale Modifiers
- French unit within 4 hexes of the Imperial Guard Band (E7.3): +6
Cavalry Skirmisher Harassment (12.10.7)
- Clear, Swamp: 2
- Units is Cavalry Skirmishers: +1
- Unit is Retreating Before Combat: +2
- Unit is conducting Involuntary Movment: +1
Fog Effects Chart
- Due to the fog of the early morning, starting with 08:00 and ending with 09:40 turn.
- Artillery line of sight is only out to five hexes from the battery.
- No two hex range for skirmishers.