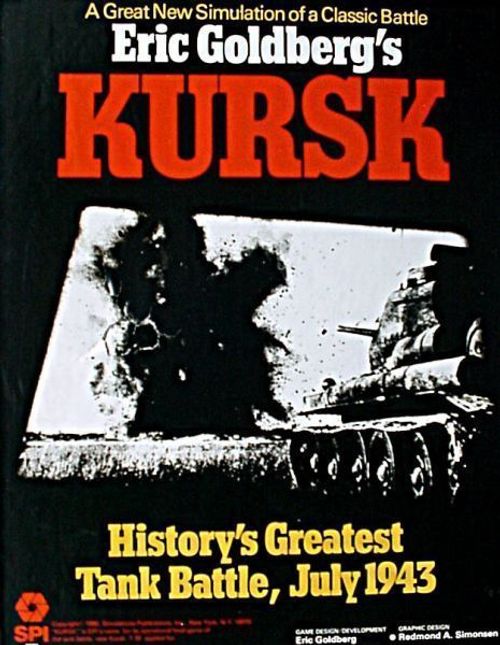
Kursk: History's Greatest Tank Battle, July 1943
Kursk: History's Greatest Tank Battle, July 1943 Rulebook
Table of Contents
Table of Contents
- How the Rules Are Organized
- [1.0] INTRODUCTION
- [2.0] GENERAL COURSE OF PLAY
- [3.0] GAME EQUIPMENT
- [4.0] SEQUENCE OF PLAY
- [5.0] MOVEMENT
- [6.0] OVERRUN
- [7.0] STACKING
- [8.0] ZONES OF CONTROL
- [9.0] COMBAT
- [10.0] UNIT MODES
- [11.0] HEADQUARTERS: Source of Supply and Communication
- [12.0] REPLACEMENT OF STEPS
- [13.0] ANTI-TANK AND ARTILLERY
- [14.0] UNIT BREAKDOWN AND RECOMBINATION
- [15.0] SOVIET PARTISANS
- [16.0] OPTIONAL RULES
- [17.0] AIR WARFARE (Optional Rule)
- [18.0] SCENARIO ORGANIZATION
- [19.0] VON MANSTEIN'S PLAN: The German General Staff Plan, 1 May 1943
- [20.0] HITLER'S PLAN The Battle of Kursk, 4 July 1943
- [21.0] THE BEGINNING OF THE END: The Soviet Summer Counteroffensive, 1 August 1943
- [22.0] UNIT MANIFEST/ORDER OF BATTLE
- DESIGNER'S NOTES
- PLAYER'S NOTES
- WARNING TO EXPERIENCED GAMERS
- A NOTE ON TACTICS
How the Rules Are Organized
The rules of this SPI simulation game are organized in a format known as the Case System. This system of organization divides the rules into Major Sections (each of which deals with an important aspect of play). These Sections are numbered sequentially as well as being named. Each of these Major Sections is introduced by a General Rule, which briefly describes the subject of the Section. Many times this General Rule is followed by a Procedure which describes the basic action the Player will take when using the rules in that Section. Finally, the bulk of each Major Section consists of Cases. These are the specific, detailed rules that actually regulate play. Each of these Cases is also numbered. The numbering follows a logical system based upon the number of the Major Section of which the Cases are a part. A Case with the number 6.5, for example, is the fifth Primary Case of the sixth Major Section of the rules. Many times these Primary Cases are further subdivided into Secondary Cases. A Secondary Case is recognizable by the fact that it has two digits to the right of its decimal point. Each Major Section can have as many as nine Primary Cases and each Primary Case can have as many as nine Secondary Cases. The numbering system is meant as an organizational aid. Using it, Players can always easily tell where a Case is located in the rules. As a further aid, an outline of the Major Sections and Primary Cases is given at the beginning of the rules.
The number [6.53] would be the number of the third Secondary Case of the fifth Primary Case of the sixth Major Section of the Rules.
How to Learn to Play the Game: Familiarize yourself with all of the components. Read all of the General Rules and Procedures and read the titles of the Primary Cases. Set up the game for play (after reading the pertinent Section) and play a trial game against yourself referring to the rules only when you have a question. This procedure may take you a few hours, but it is the fastest and most entertaining way to learn the rules, short of having a friend teach them to you. You should not attempt to learn the rules word-for-word. Memorizing all that detail is a task of which few of us are capable. SPI rules are written to be as complete as possible -- they're not designed to be memorized. The Case numbering system makes it easy to look up rules when you are in doubt. Absorbing the rules in this manner (as you play) is a much better approach to game mastery than attempting to study them as if cramming for a test.
[1.0] INTRODUCTION
Three battles decided the fate of the Third Reich. The battle of Stalingrad shattered the myth of German invincibility. The Battle of the Bulge allowed the Soviets to capture Berlin and dominate Eastern Europe. The battle of Kursk signalled a shift in the balance of power; the German dream of world domination was crushed in the largest battle the world has ever known.
Kursk is recognized as a battle that should never have taken place. The Soviets, well entrenched in prepared positions, possessed tremendous numerical superiority and complete information of German plans. The German General Staff was unaware of the latter fact, but still recommended against a July attack. Adolf Hitler would not be gainsaid, however, and so ordered the attack which was to ruin the finest fighting force of World War II on 4 July 1943.
Kursk is an operational-level simulation game of this crucial struggle. Three separate scenarios portray various aspects of the Kursk operation. The first scenario postulates a May attack, which is generally perceived by most historians to have been the optimum date for a German offensive. The second simulates the historical German July offensive. The last represents the Soviet August counteroffensive, which swept the defeated German forces before the inexorable push of the Siberian armies.
[2.0] GENERAL COURSE OF PLAY
Kursk is played in a series of Game-Turns. The number of total Game-Turns is determined by the scenario being played. A complete Game-Turn consists of an optional Joint Air Warfare Phase, a German Player-Turn, a Soviet Player-Turn and a Game-Turn Indication Phase. The following synopsis of events within a Game-Turn is provided to help players assimilate the rules more easily.
The Players set up their units.
After choosing which scenario will be played, the Players sort the units by their Indicator Letters. Each Player deploys his headquarters units in the appropriate hexes given in the scenario listings; the Players then deploy all units that begin the scenario on map. Units that do not begin on the map might enter play as reinforcements; consult the scenario rules.
Both Players may attempt interception; if either succeeds, air warfare results.
If the Players are using the optional air warfare rules, either or both of them may attempt to intercept Enemy Air Points with their own Air Points. If a Player successfully intercepts Enemy Air Points, air warfare is resolved. Air Points may be aborted (prevented from being used later in the Game-Turn) or eliminated.
The German Player determines the mode for each of his headquarters for the ensuing Game-Turn.
All of a headquarters' subordinate units are in that headquarters' mode. Units due as reinforcements are placed on the appropriate hexes.
The German Player moves his units.
Before the German Player moves a unit, he must determine whether that unit is in or out of supply and/or communication. A unit which is out of supply and/or communication may be moved only half its normal Movement Allowance.
The German Player may move as many of his units as he wishes. Each unit may be moved up to a specified maximum number of hexes, which depends on the particular unit's Movement Allowance, its mode, and the terrain in the hexes through which it passes. Any reinforcements due the German Player must be moved. Should the German Player move any unit into a hex which is adjacent to a hex containing a Soviet (Enemy) unit, he cannot move that unit any further (unless he is going to conduct an overrun), as he has moved that unit into an Enemy Zone of Control. If one of the German Player's units begins movement in an Enemy Zone of Control, that unit must either be disengaged or used to conduct an overrun. A unit may not reenter an Enemy Zone of Control during the Phase in which it disengages. When moving units, the German Player may overrun Soviet units. Any unit or stack of units in Mobile Mode may attempt overrun, at a cost of three additional Movement Points. The overrun is successful if the Soviet units are either eliminated or retreated from their hex; the German Player may continue to move the overrunning units up to their full Movement Allowance. If a unit unsuccessfully attempts overrun, it must cease movement for the Phase.
The Soviet Player uses his anti-tank units to engage in combat with attacking units.
After the German Player has declared his intention to attack a particular stack of Soviet units, the Soviet Player may use any anti-tank units in that stack against the attacking units.
The German Player attacks with his units.
After the German Player has moved all units he can move or wishes to move, he may resolve any combats which he chooses to initiate. He may have any of his units attack Soviet units which are in hexes adjacent to his own units. He is not forced to initiate any attacks.
After the Soviet Player has resolved any combats between his anti-tank units and attacking German units, the German Player determines whether any of his attacking units are out of supply. Any attacking units which are out of supply attack at half their printed Attack Strength.
The German Player totals the Attack Strengths of his attacking units, and the Soviet Player totals the defending units' Steps. The German Player determines whether any factors such as terrain, Air Points, defender's supply status, or artillery units will cause a column shift. After determining the column to be used, the German player rolls the die and refers to the Combat Results Table. The die-roll is modified for the defender's total Steps, and then the modified die-roll is cross-referenced with the appropriate column to determine the combat result.
The result obtained on the Combat Results Table must be applied first to the defending (Soviet) units, and then to the attacking units. Depending on the affected units' mode, each Player will have the option to retreat his units or to take Step losses from them. If the Soviet units' hex is left vacant, the German Player may advance the victorious units into that hex. He then proceeds to resolve his other attacks, one by one, in any order he chooses, until he has resolved all attacks he has initiated.
The German Player may attack again with his units in Assault Mode.
Such attacks are resolved exactly as described in the preceding paragraph.
The German Player moves his units again.
After all attacks have been resolved, the German Player may move his armor, mechanized, and headquarters units a second time, up to their full Movement Allowance. Movement for these units is conducted exactly as described in the previous paragraph concerning movement.
The German Player removes Disruption markers from his units.
The German Player re-organizes his units.
The German Player may replace Steps lost by his units in combat with replacement Steps due him. He may place units into or remove them from independent command. He may also break down infantry divisions into Kampfgruppen and recombine Kampfgruppen into infantry divisions.
The Soviet Player places partisan units in play. Any inoperative partisan units become operative.
The Soviet Player takes the rest of his Player-Turn.
The Soviet Player moves his units, conducts his attacks, etc., in the same manner and sequence as the German Player. Note; The German Player's headquarters units possess Anti-Tank and Artillery Points; the German Player possesses no anti-tank and artillery units, per se.
When the Soviet Player-Turn is over, one Game-Turn has passed. The next Game-Turn starts with either interception or the German Player's mode determinations.
IN SUMMARY
The preceding sequence is followed for a set number of Game-Turns (depending on the scenario), after which Players may evaluate their performances against the standards set by the victory conditions.
While playing the first few Game-Turns, Players may wish to keep an eye on the Sequence of Play (4.0). This outlines the distinct order in which each Player may perform various game actions during his Player-Turn.
[3.0] GAME EQUIPMENT
[3.1] THE GAME-MAP
The 22” x 34” game-map portrays the area in central Russia in which Operation Zitadelle (the German code-word for Kursk) was projected to take place. It includes all terrain significant to the battle of Kursk. It also displays the Terrain Key, the Turn Record Track and the Victory Point Record Track.
A hexagonal grid is superimposed over the terrain features in order to regularize movement and clarify the positioning of the playing pieces. Each hexagon (or hex) on the map has its own four-digit identity number.
To make the map lie flat, back-fold it against the creases. Small pieces of masking tape may be used at the corners of the map to hold it taut.
[3.11] Appearance of Entrenchments
The Germans dug many entrenchments and emplaced fortifications between 4 July and 1 August. The Soviets did the same between 1 May and 4 July. Therefore, two sets of entrenchment symbols are given for each nationality: German May, July and August entrenchments and German August entrenchments; and Soviet May, July and August entrenchments and Soviet July and August entrenchments. Players must make sure that they are using the entrenchments appropriate to the scenario they are playing only.
[3.12] Entry Hex Codes
The following entry hex codes are used to remind Players of which hexes reinforcing units enter the map:
M: May (see 19.51 and 19.61)
J: July (see 20.51 and 20.61)
A: August (see 21.51 and 21.61)
NOR: Northern off-map reserve (see 19.62, 20.62, and 21.62)
SOR: Southern off-map reserve (see 19.62, 20.62, and 21.62).
[3.13] German Army and Soviet Front Boundaries
The boundaries delineated on the map have no effect on play, but — when combined with the Order of Battle (22.0) — they allow the Players to deploy units absolutely historically for each of the three scenarios. The boundaries represent the actual sector boundaries used by the respective armies during the Kursk campaign.
[3.2] CHARTS AND TABLES
Various charts and tables are provided for the Players in order to summarize important information necessary to play.
The Terrain Effects Chart [5.7] lists the movement costs for all terrain, and the effects of terrain on combat.
The Combat Results Table [9.91] is used to resolve all combat.
The Step Die-Roll Modifier Table [9.92] lists the addition or subtraction to the die-roll per number of Steps in a defending stack.
The Combat Modifiers Table [9.93] lists all non-terrain modifiers which cause a column shift in combat.
The Summary of Unit Mode Effects [10.2] summarizes unit mode effects on movement, overrun, combat, and retreat.
The Air Warfare Results Table [17.3] is used whenever Enemy Air Points are intercepted.
The Indicator Letters Key [18.19] allows players to deploy units at the correct Step Value for each scenario from reading the faces of the individual counters.
The Miscellaneous Information Table [18.5] provides a handy reference of important rules during play.
[3.3] THE PLAYING PIECES
The cardboard playing pieces represent the military units which took part or could have taken part in the actual battle. The numbers and symbols on each playing piece are evaluations of the strength, staying power, movement capability, and size of the unit represented by that playing piece, in addition to specifying the unit's type and designation. These playing pieces are referred to as units throughout the rules.
[3.31] How to Read the Units
(The printed manual illustrates this with counter diagrams, which cannot be reproduced here. The labelled parts of each diagram are: for a German infantry division, front and back: Unit Designation, Unit Size, Unit Type, Movement Allowance, Attack Strength, Indicator Letter, Step Value, and Headquarters Subordination; for a German headquarters unit: Headquarters Designation, Army Subordination, Headquarters Size, Artillery Point Value, Anti-Tank Point Value, Attack Strength, Step Value and Movement Allowance; for a Soviet artillery unit: Gun Type, Artillery Point Value, Movement Allowance and Level Value.)
Counter Errata: The Soviet 6th and 31st Tank Corps (of the 1st Tank Army, Voronezh Front) are armor units. Ignore the unit symbol on the front of their counters. The German 332nd Infantry Division (of the 52nd Corps, 4th Panzer Army) should have a Movement Allowance of 5 on its front face.
Unit designations are the historical identity codes of the units. Each combat unit has either one or two identity codes: if a unit has two codes, the code that is in larger print indicates to which headquarters the unit is subordinated. If a unit has one code, that code indicates to which headquarters the unit is subordinated (unless otherwise indicated in the scenario rules). If a headquarters has two codes, the code following the slash indicates the headquarters to which it is subordinated; a headquarters with only one code is not subordinate to any formation represented in the game.
Unit size symbols are as follows: XXXXX = front; XXXX = army; XXX = corps; XX = division; X = brigade; and III = regiment.
[3.32] Summary of Unit Types
Many units are represented by more than one counter (each showing the unit at different Step Values).
(The printed manual shows a counter diagram for each unit type. The types shown are: German units: Headquarters (army, corps), Panzer Division, Panzer Grenadier Division, Infantry Division, Infantry Brigade, Heavy Tank Destroyer, Kampfgruppen (KG), Propaganda/Security. Soviet units: Artillery, Anti-Tank, Headquarters, Tank Corps, Mechanized Corps, Rifle Corps, Air Landing Rifle Corps, Motorized Rifle Division, Rifle Division, Rifle Division (Untried), Rifle Division (Breakdown), Fortified Area, Partisan (Inoperative / Operative). Markers: Air Point, Independent Command, Alternate Subordination, Victory Point, Assault Mode, Static Mode, Disrupted, Reduced Attack Strength/Step Value (-2/-1 and -4/-2), Game-Turn.)
[3.33] Unit Color Coding
The military unit counters are color-coded by the front or army to which the unit belongs for ease of set-up. Note that there are some differences in the August scenario (see 21.2 and 21.3).
Note: Units with a stripe across the lower portion of the counter may move during the Mechanized Movement Phase.
[3.4] GAME TERMINOLOGY
Anti-tank, Artillery Point Value: The relative strength of guns contained within a unit.
Armored, Mechanized Unit: The term "armor and mechanized unit" includes German panzer, panzergrenadier, heavy tank destroyer, Soviet tank and mechanized units.
Attack Strength: The relative strength of a unit when attacking.
Combat Unit: Any unit with an Attack Strength greater than zero.
Enemy: Any unit owned by the opposing Player is termed Enemy to all of the Player's units.
Friendly: All of one Player's units are Friendly to each other.
Infantry Unit: The term "infantry unit" includes headquarters, German infantry, (propaganda/) security, Kampfgruppen, Soviet (motorized, breakdown and untried) rifle and fortified area units.
Movement Allowance: The maximum number of Movement Points a unit may expend during a Movement Phase.
Step Value: The relative staying power of a unit during battle.
[3.5] GAME SCALE
[3.51] Map
Each hex represents 6.25 miles (or 10 kilometers) of terrain from hexside to hexside.
[3.52] German Units
Reinforced Panzergrenadier Division: 18-20,000 men, 150-200 tanks
Panzer Division: 13-14,000 men, 80-120 tanks
Panzergrenadier Division: 12,000 men, 0-40 tanks
Infantry Division (old style): 13-15,000 men Infantry Division (new style): 9-12,000 men Headquarters: 1,000-2,500 men
Heavy Tank Destroyer Regiment: 6-800 men, 90 vehicles
Security Division: 6-10,000 men,
2-6,000 collaborationist Russians Hungarian Light Division: 4-6,000 men
[3.53] Soviet Units
Tank Corps: 10-12,000 men, 140-200 tanks Mechanized Corps:
12-15,000 men, 180-220 tanks
Rifle Division: 10,000 men
Rifle Corps: 35-40,000 men
Headquarters: 1,000-2,500 men
Artillery Division (represented by more than one unit in game): 10,000 men, 250 tubes
[3.54] Time
Each Game-Turn represents two days.
[3.6] PARTS INVENTORY
A complete copy of Kursk should include:
1 22” x34" game-map
1 200 die-cut counter-sheet
1 400 die-cut counter-sheet
1 28 page rules folder (includes charts and tables)
Soviet Deployment Display
German Deployment Display
6-sided die
Game box
If any of these parts are damaged or missing, fill out the enclosed Complaint Card and return it to SPI with the appropriate items indicated on the card. Note: The process used in the manufacture of the die-cut counters used in SPI games sometimes results in colors from one counter overlapping the color of other neighboring counters, or in the slightly off-center printing of the letters and/or numbers on a counter. SPI cannot replace counters displaying these minor manufacturing inaccuracies. Only counters that are illegible can be replaced by SPI.
[4.0] SEQUENCE OF PLAY
CASES
[4.1] THE GAME-TURN
Kursk is played in Game-Turns. Each Game-Turn consists of two Player-Turns. The Player executing his part of the turn is referred to as the Phasing Player; the other Player is the non-Phasing Player. Each Game-Turn proceeds in the strict order outlined in Case 4.2.
[4.2] GAME-TURN SEQUENCE OUTLINE
A. JOINT AIR WARFARE PHASE (Optional)
If either Player wishes to initiate air warfare, the appropriate Player rolls for interception of Enemy Air Points. Should interception succeed, air warfare is resolved. If interception fails, play proceeds to the German Player-Turn. Air Points which survive air warfare may be used to affect combat.
B. GERMAN PLAYER-TURN
- Administrative Phase
Reinforcements scheduled to arrive this Game-Turn are placed on the map by the Phasing Player. The Phasing Player chooses in which mode he will place each of his headquarters until his next Administrative Phase.
- Movement Phase
The Phasing Player must check the supply and communication status of each unit at the beginning of its movement, before the unit expends any Movement Points. Each Friendly unit may be moved any direction to the limit of its Movement Allowance, providing all such movement is legal per the rules for movement, communication, and supply. The Phasing Player may conduct overruns with units in Mobile Mode.
- Combat Phase
Gun Segment. The non-Phasing Player may use his anti-tank units to engage in combat with attacking units.
First Combat Segment. Friendly units may attack Enemy units according to the rules governing combat. Supply for both the attacking and defending units is judged at the instant of combat. The Phasing Player may allocate Air Points offensively, and the non-Phasing Player may allocate Air Points defensively.
Second Combat Segment. Friendly units in Assault Mode may attack Enemy units for a second time according to the rules governing combat. Such units may or may not have attacked during the first Segment. Supply is again judged at the instant of combat. Unused Air Points may be allocated by both Players.
- Mechanized Movement Phase
Each Friendly headquarters, armor or mechanized unit may move up to the limit of its Movement Allowance, as described in Phase 2 (the Movement Phase).
- Disruption Removal Phase
The Phasing Player removes Disruption markers from his disrupted units.
- Organization Phase
The Phasing Player may replace lost Steps with Replacement Steps. Units may be placed into or removed from independent command. Units may also be broken down or recombined.
C. SOVIET PLAYER-TURN
The Soviet Player repeats Phases 1 through 6 in Phases 7 through 12, becoming the Phasing Player, while the German Player becomes the non-Phasing Player. Exceptions are noted after the specific Phase name.
- Administrative Phase
The Phasing Player may place partisan units previously eliminated or due him on the map. Any previously inoperative partisan units become operative.
-
Movement Phase
-
Combat Phase
Gun Segment
First Combat Segment.
Second Combat Segment.
A Soviet unit must be in communication to attack during both Segments.
-
Mechanized Movement Phase
-
Disruption Removal Phase
-
Organization Phase
D. GAME-TURN INDICATION PHASE
Either Player advances the Game-Turn marker one space on the Game-Turn Record Track to indicate the passage of one Game-Turn. Play proceeds to the next Game-Turn, or, at the conclusion of a scenario, the Players' performances are assessed in light of the victory conditions.
[5.0] MOVEMENT
GENERAL RULE
Movement occurs during both Movement Phases of each Player-Turn. During the first Movement Phase, the Phasing Player may move some, none, or all of his units. He may move units by rail only during this Phase. During the Mechanized Movement Phase, the Phasing Player may move mechanized and armor units in either Assault or Mobile Mode and headquarters units. Units in Mobile Mode may attempt to overrun in the course of movement. Disrupted units may not move during either Phase.
PROCEDURE:
A Movement (Point) Allowance is printed on each unit counter. This Movement Allowance is used during both Movement Phases. A unit's Movement Allowance may be modified by its supply or communication status (see 11.5) and its mode (see 10.0). Units may be moved individually or in stacks; the Player moves units hex by hex, paying Movement Points according to the terrain in each hex (Exception: See 5.3). As a unit enters a hex, the Player subtracts the Movement Points necessary from the unit's Movement Allowance. Once the unit has no Movement Points remaining, or is unable to expend any remaining Movement Points, the Player must cease moving the unit. Note that Enemy Zones of Control (see 8.0) inhibit movement.
CASES:
[5.1] EXPENDING MOVEMENT POINTS
[5.11] A Player may expend as many Movement Points as he desires when moving a given unit, provided that unit's Movement Allowance is not exceeded in the process. Movement Points may not be saved from one Phase or Game-Turn to another, nor may they be transferred from one unit to another.
[5.12] The cost to enter a clear terrain hex is one Movement Point. Other types of terrain require more or less than one Movement Point to enter. Crossing certain hexsides requires the expenditure of Movement Points. A complete list of terrain Movement Point costs is provided on the Terrain Effects Chart (5.7).
[5.13] When a unit enters a hex through a road hexside, it pays only one-half of a Movement Point, regardless of the type of terrain entered. The presence of a road in a hex has no effect on movement into that hex through a non-road hexside.
[5.14] Units must also expend Movement Points to disengage (see 8.3) or to conduct overruns (see 6.0).
[5.2] MOVEMENT INHIBITIONS AND PROHIBITIONS
[5.21] Only the Phasing Player may move units during a given Movement Phase (i.e., the non-Phasing Player may not move his units).
[5.22] A unit which exits an Enemy Zone of Control may not enter an Enemy-controlled hex during the same Phase (Exception: See 5.5).
[5.23] A unit may always move at least one hex during a Movement Phase, unless (1) in doing so, it would violate Case 5.22, or (2) it is prohibited from moving in that Phase (e.g., a disrupted unit).
[5.24] As long as a unit is moving only one hex during a Movement Phase, it may disengage or perform one overrun (Exception: See 11.53), regardless of total Movement Point cost.
[5.25] A Friendly unit which moves out of an Enemy-controlled hex must expend the necessary Movement Points to disengage or execute overrun.
[5.26] Friendly units do not affect the movement of other Friendly units (see, however, 6.17). A Friendly unit may not enter a hex containing an Enemy unit, except during an overrun. Zones of Control (see 8.0) exerted by a Friendly unit do not affect the movement of other Friendly units. A unit which moves into an Enemy-controlled hex cannot move further in that Phase (Exception: See 6.0).
[5.27] A unit unable to trace a line of communication and/or supply to the appropriate headquarters unit (see 11.5) may expend only one-half its Movement Allowance (rounding down for fractions) during the ensuing Movement Phase.
[5.28] Combat as described in Section 9.0 may not be performed during movement. Overruns, which are a combination of movement and combat, may be executed in either Movement Phase.
[5.29] A unit's Movement Allowance may be affected by its mode. Refer to the Summary of Unit Mode Effects (10.2) to determine whether the Movement Allowance should be modified due to the unit's mode.
[5.3] RAIL MOVEMENT
During the first Movement Phase, the Phasing Player may move up to five units (but see 5.37) by rail movement. When utilizing rail movement, a unit moves from hex to adjacent hex along a railroad line, ignoring all terrain in the hex except the railroad.
[5.31] A unit may move by rail movement only if it begins the Movement Phase in a non-Enemy-controlled railroad hex. A unit that moves by rail may not enter an Enemy Zone of Control.
[5.32] A German unit may move by rail movement only through hexes which are on the German side of the scenario start line; a Soviet unit may move by rail movement only through hexes which are on the Soviet side of the scenario start line.
[5.33] A unit that moves by rail may move a maximum of 20 hexes per Turn along single-track railroad lines, a maximum of 25 hexes per Turn along any combination of single-track and double-track railroad lines, and a maximum of 30 hexes per Turn exclusively along double-track railroad lines.
[5.34] Rail and non-rail movement may not be combined by a unit in a Movement Phase.
[5.35] Units not moving by rail derive no movement benefit when moving along railroad lines.
[5.36] Disrupted units or units in Assault Mode may not move by rail.
[5.37] For the purposes of rail movement only, a mechanized, headquarters or armor unit counts as two units against the five unit limit per Game-Turn
[5.38] No more than two units (as per 5.37) may: enter a given single-track railroad hex while moving by rail during a Game-Turn.
[5.39] No more than four units (per 5.37) may enter a given double-track railroad hex while moving by rail during a Game-Turn.
[5.4] EFFECT OF UNIT MODE ON MOVEMENT
[5.41] The Movement Allowance of a unit in Assault or Static Mode is halved (rounding down). Should the unit be in Assault or Static Mode and be out of supply and/or communication, its Movement Allowance is quartered (rounding down).
[5.42] A unit in Static Mode may not move during the Mechanized Movement Phase.
[5.43] A disrupted unit may not move.
[5.5] GERMAN INFILTRATION MOVEMENT
A German unit which begins the first Movement Phase in an Enemy-controlled hex may move directly into another Enemy-controlled hex (Exceptions: see the following Cases and 8.27). The German unit expends its entire Movement Allowance for the Phase, regardless of the terrain of the hex into which it moves.
[5.51] A German unit may not infiltrate (i.e., move directly from one Enemy-controlled hex to another) through an Enemy dragontooth or river hexside.
[5.52] A German unit must be in supply and in communication to infiltrate.
[5.53] A German unit may not infiltrate during the Mechanized Movement Phase.
[5.54] Infiltration movement is not limited by the lack of sufficient Movement Points, per Case 5.23.
[5.55] A German unit must begin the Movement Phase adjacent to or stacked with another combat unit to infiltrate.
[5.56] A Soviet unit may never infiltrate.
[5.6] SPECIAL TERRAIN RULES
[5.61] If a hex contains more than one terrain type, the single greatest Movement Point cost is in effect, but all defensive column shifts are cumulative.
[5.62] Any hex containing the dragontooth symbol (see the Terrain Key) is an entrenchment hex. If a unit is attacked exclusively through a Friendly dragontooth hexside, the unit receives a column shift of one to the left in addition to the entrenchment column shift.
[5.63] If a unit is on the "up" side of a depression hexside (see illustration 1), and is attacked exclusively through such a hexside(s), it receives a column shift of one to the left.
[5.64] Villages have no effect on play. They are included solely for historical interest.
[5.65] A unit may not move across or attack through a lake hexside, unless a road crosses that hexside.
[5.7] TERRAIN EFFECTS CHART
(see charts and tables)
[6.0] OVERRUN
GENERAL RULE
The Phasing Player may move a unit or stack of units into an Enemy-occupied hex in an attempt to overrun the Enemy unit(s). An overrunning unit must be in Mobile Mode; overruns must be executed in a Movement Phase. A successful overrun results in either the elimination or retreat of Enemy units. Successful overrunning units must occupy the hex formerly occupied by the Enemy unit(s); such overrunning units may continue movement if they have Movement Points remaining. Units which unsuccessfully attempt overrun must cease movement for the Phase. A successful overrun is defined as the occupation of the hex in which the overrun took place, regardless of losses to the attacking units.
PROCEDURE:
Units executing overrun expend three Movement Points in addition to the terrain cost for entering the overrun hex. The Phasing Player totals the Attack Strengths of the overrunning units, and then applies any relevant combat modifiers (including the two-column shift to the left for overrun). An "attack" is then resolved using the normal combat procedure and rules (see 9.0).
CASES:
[6.1] CONDITIONS FOR OVERRUN
[6.11] Only units in Mobile Mode and in communication may overrun. The total strength of units initiating overrun must be at least six Strength Points before column shifts.
[6.12] Overruns may be conducted by the Phasing Player in his first Movement Phase or his Mechanized Movement Phase. Overruns may not be executed during the Combat Phase.
[6.13] Supply for a unit executing overrun is judged at the beginning of that unit's movement and at the instant of overrun, before it expends any Movement Points.
[6.14] An overrun may be executed only against one or more Enemy units stacked in a single hex. There are no multi-hex overruns. All units in an overrunning stack must begin their movement stacked together (though they may end their movement in separate hexes, if Movement Allowances and the result of the overrun permit).
[6.15] There is no limit to the number of overruns which may be executed against a given Enemy unit in a Friendly Movement Phase. Overruns: may not be initiated against Enemy units across a major river hexside.
[6.16] A unit may make as many overruns as its Movement Allowance permits, provided it follows all rules of movement in doing so. Enemy Zones of Control are ignored by overrunning units until that overrun is resolved.
[6.17] All units in the hex in which an overrun is initiated must participate in that overrun.
[6.18] Headquarters units may stack and move with overrunning units, but they do not contribute to the Attack Strength of the overrunning units. Headquarters units moving with overrunning units are the last units to take losses as a result of overrun. Headquarters units moving with overrunning units still pay the additional three Movement Point cost to overrun, and are subject to all other restrictions concerning overrunning units.
[6.19] Overrun is considered movement, and so a unit (or stack) may overrun an adjacent Enemy unit(s) as its only movement for the Phase (see Case 5.23), regardless of the total Movement Point cost to enter the hex and perform the overrun.
[6.2] RESOLUTION OF OVERRUN
Overrunning units may never retreat more than one hex (see 6.23). All combat results in excess of one must be taken as Step losses.
[6.21] All losses incurred by overrunning units are removed immediately after the defending Player satisfies his combat result.
[6.22] Step losses do not in and of themselves cause failure of an overrun; only occupation of the overrun hex determines success of an overrun.
[6.23] Should an overrun attack fail to dislodge or eliminate the Enemy unit(s) from the overrun hex, the units executing the overrun may not be moved any further in that Movement Phase. The overrunning units in this case retreat to either the hex from which the overrun was initiated or a hex adjacent to it (see 9.78).
[6.24] Should an overrun attack result in the elimination or retreat of all defending units, the overrunning units must occupy the vacated hex. The Phasing Player may continue to move each successful overrunning unit which possesses any remaining Movement Points. The unit may ignore the Zone of Control of the unit(s) it has just overrun for the duration of the Movement Phase, but may not disengage from the Zone of Control of another Enemy unit.
[6.25] Units defending against an overrun may not advance after combat, even when the overrunning units are eliminated.
[6.3] DISRUPTION
[6.31] A defending unit which retreats as a result of an overrun (see 9.7) is immediately disrupted (except artillery). Place a Disruption marker on the affected unit. An overrunning unit is never disrupted.
[6.32] Disruption occurs as a result of overrun. A unit may not be disrupted as a result of normal combat (Exception: 21.45).
[6.33] A disrupted unit may not move or attack as long as it is disrupted. A disrupted unit does exert a Zone of Control. A unit defending while disrupted is penalized for its condition. See the Summary of Unit Mode Effects (10.2).
[6.34] A disrupted unit is not affected by additional disruption in any way. Combat is resolved in the same fashion for a disrupted and a non-disrupted unit.
[6.35] Disruption markers are removed during the first Friendly Disruption Removal Phase after a given unit is disrupted.
[7.0] STACKING
GENERAL RULE
A Player may never have more than six Stacking Points of units in the same hex during any Phase but the Movement Phase. During the Movement Phase, any number of Friendly units may move through a given hex.
CASES:
[7.1] STACKING POINT VALUES
[7.11] A Soviet corps has a Stacking Point value of three.
[7.12] Division, Kampfgruppen, and headquarters units have a Stacking Point value of two.
[7.13] Partisan, anti-tank and artillery units have a Stacking Point value of zero (but see 7.23).
[7.14] All other units (e.g., regiments, fortified areas) have a Stacking Point value of one.
[7.2] RESTRICTIONS ON STACKING
[7.21] Units may never violate the stacking limit during retreat after combat (see 9.7). If all retreat routes are blocked by fully stacked hexes, the unit(s) must take Step losses in lieu of retreat.
[7.22] If, at any point during the Game-Turn other than the Friendly Player's Movement Phase, a hex containing Friendly units is found to be overstacked, the Friendly Player must eliminate units until the stacking restrictions are satisfied.
[7.23] In addition to other units, there may be a maximum of one Soviet anti-tank and one Soviet artillery unit in a Soviet-occupied hex.
[7.24] Units in different modes may be stacked together. However, they may be penalized for this stacking (see 9.45).
[7.25] A unit's Stacking Point value is always the same, regardless of how many Steps the unit may have lost.
[8.0] ZONES OF CONTROL
GENERAL RULE
The six hexes immediately adjacent to the hex a unit occupies constitute the Zone of Control (hereinafter ZOC) of that unit; such ZOCs inhibit Enemy movement. An Enemy unit must cease movement upon entering a Friendly-controlled hex, except when initiating overrun. In order to leave a Friendly-controlled hex, an Enemy unit must expend Movement Points; this is known as disengagement (see 8.3), Friendly ZOCs affect Enemy Lines of Supply (see 11.2) and retreats (see 9.7).
CASES:
[8.1] WHEN ZONES OF CONTROL ARE EXERTED
[8.11] All combat (see 3.4) and. German headquarters units exert a ZOC. Other units (e.g., anti-tank) do not exert a ZOC at any time.
[8.12] ZOCs do not extend across major river hexsides or into city hexes.
[8.13] Optional Rule. If a combat or headquarters unit is out of supply and/or communication for more than one full Game-Turn (i.e., from the conclusion of a Phase to the beginning of the corresponding Phase of the next turn), that unit ceases to exert a ZOC.
Designer's Note: This rule is highly recommended for use in play, as it was employed extensively during playtesting. However, players may find it difficult to keep track of the status of individual units.
[8.2] EFFECTS OF ZONES OF CONTROL
[8.21] A unit entering an Enemy-controlled hex must cease movement for the Phase, unless it initiates an overrun.
[8.22] There is no additional Movement Point cost to move a Friendly unit into an Enemy ZOC.
[8.23] Friendly units may leave Enemy ZOCs as a result of combat. They may also leave by disengagement, but only if they do not enter an Enemy-controlled or occupied hex during that Phase (Exceptions: See 5.5 and 6.0).
[8.24] Friendly ZOCs never affect other Friendly units. There is no additional effect if more than one Friendly ZOC is exerted into the same hex.
[8.25] Friendly units (but not Friendly ZOCs) negate Enemy ZOCs for the purposes of tracing supply (see Case 11.2) and retreats (see Case 9.7). Friendly units do not negate Enemy ZOCs for the purposes of movement.
[8.26] Enemy ZOCs do not affect Friendly lines of communication.
[8.27] A Friendly unit may not enter an Enemy-controlled hex that is controlled by an Enemy unit which is adjacent to at least one major river hexside, if the Friendly unit moves-directly across a major river hexside into that hex: Friendly units negate Enemy ZOCs exerted into their hex for this purpose. See illustration 2 below.
[8.3] DISENGAGEMENT
A unit that begins a Movement Phase in an Enemy-controlled hex may leave that hex by disengaging.
[8.31] Whenever a unit moves out of an Enemy ZOC, it is disengaging (Exceptions: See 5.5 and 6.0). The act of disengagement costs two Movement Points, in addition to the terrain cost of entering the new hex.
[8.32] A unit which disengages in a given Movement Phase may not enter an Enemy-controlled hex during that Movement Phase (Exceptions: See 5.5 and 6.0).
[8.33] An overrunning unit does not pay disengagement costs.
[9.0] COMBAT
GENERAL RULE
A Friendly unit adjacent to an Enemy unit during, the Friendly Combat Phase may initiate combat, subject to mode restrictions. Overrun is a combination of movement and combat initiated during the Movement Phase (see 6.0).
Combat is affected by combat modifiers. Combat modifiers include terrain, overrun, and unit mode (see Table 9.93, Combat Modifiers). A combat modifier causes a column shift (i.e., the column used on the Combat Results Table is to the left or right of the one which would be used in the absence of modifiers).
The use of artillery units defensively applies a strength modifier. A strength modifier is subtracted from the Attack Strength of the attacking units. Anti-tank units engage in combat with attacking units before those units may attack the other defending units.
Defensive capability is measured in Steps, rather than by the assignment of Strength Points. The total number of Steps in a defending stack creates a die-roll modifier. The die-roll modifier is combined with the combat die-roll to determine the combat result (see Table 9.92, Step Die-Roll Modifiers).
As a result of combat, units may be forced to either retreat or take Step losses (lose Steps). A unit's mode strictly limits the number of hexes the unit may retreat (see the Summary of Unit Mode Effects, 10.2), but does not restrict the number of Step losses it may take. The Phasing Player is always referred to as the attacking player, while the non-Phasing Player is always referred to as the defending player.
PROCEDURE:
The attacking Player announces all attacks, indicating which Friendly units are participating in that attack and which Enemy unit or stack of units is the target of that attack.
If a defending stack contains an anti-tank unit, the defending Player immediately resolves a combat with the attacking units, per Case 13.2.
Total the number of attacking Strength Points (i.e., the Attack Strength values of all attacking units) being applied in a single combat against a given defender, and subtract the artillery strength modifier (if any). The result is the net Attack Strength.
Find the appropriate column on the Combat Results Table (9.91) corresponding to the net Attack Strength. Apply any relevant combat modifiers; the total net column shift is then counted off on the Combat Results Table. Example: If the net Attack Strength is 45, the attacking Player would consult the 43-49 column of the Combat Results Table. However, if there were a net column shift of two to the left, the combat would be resolved on the 29-35 column.
The attacking Player next consults the Step Die-Roll Modifier Table (9.92). Unlike many other wargames, Kursk does not utilize the concept of Defense Strength. Instead, the defending units use their total Step Value to influence the combat. The total Steps in the defending stack will create a die-roll modifier. The attacking player rolls the die, combines the result with the die-roll modifier, and obtains the combat result.
The combat result must be satisfied first by the defending Player, and then by the attacking Player. See Explanation of Combat Results, Case 9.4.
CASES:
[9.1] RESTRICTIONS ON COMBAT
[9.11] Only units in Assault or Mobile Mode and German headquarters may initiate attack; anti-tank units may attack, but only in response to Enemy attack (see 13.2). Soviet headquarters, artillery, disrupted units and units in Static Mode may not attack (though artillery can barrage; see 13.0).
[9.12] A unit may initiate attack only during the Friendly Combat Phase (but see 6.0, Overrun); an anti-tank unit may attack only during the Enemy Combat or Movement Phase. An attacking unit may attack any one adjacent hex containing Enemy units.
[9.13] Units in Mobile Mode may attack only during the first Combat Segment of the Friendly Combat Phase; units in Assault Mode may attack in both the first and second Combat Segments.
[9.14] Attacking is voluntary; units are never compelled to attack. Not every unit adjacent to an Enemy unit need participate in an attack. A Friendly unit not involved in an attack on an Enemy unit is never affected by the result of that attack.
[9.15] An Enemy stack may be attacked by as many units as can be brought to bear against it by the attacking Player from the six adjacent hexes.
[9.16] Units may attack only once per Combat Segment. No Enemy unit may be attacked more than once per Combat Segment.
[9.17] In order for a Soviet unit to attack, it must be in communication (see 11.5) with the headquarters to which it is subordinated (see 11.1).
[9.2] MULTIPLE UNIT COMBAT
[9.21] All units in a hex are attacked as an integral whole. Each unit in an attacked stack contributes its Steps in defense, forming a total Step Value for the defending hex (Exception: see 9.77). A defending Player may not withhold units in an attacked stack from the defense.
[9.22] Not all units in a stack containing attacking units need attack. Thus, when some units in a stack are attacking a given hex, other units in the stack could be attacking Enemy units in other hexes, or not attacking at all.
[9.23] A unit (or units attacking together) adjacent to more than one Enemy-occupied hex may attack only the unit(s) in one of the Enemy-occupied hexes.
[9.24] A unit's current Attack Strength or Step Value is unitary; neither value may be divided by the owning Player for either attack or defense purposes.
[9.3] RESTRICTIONS ON COMBAT RESOLUTION
[9.31] The attacking stack must total at least six attack Strength Points before column shift; otherwise the attack is prohibited.
[9.32] The effects of terrain are cumulative. Add the column shifts for all terrain in the hex and on the intervening hexside(s) together to determine the net terrain column shift (Exception: See 9.33).
[9.33] If units attack from more than one hex across different hexside terrain types, the hexside with the /east column shift is in effect (e.g., if at least one of the intervening hexsides is a clear hexside, then there is no column shift).
[9.34] Column shifts are combined to yield a net column shift. There is no arbitrary limit to the number of columns an individual combat calculation may be shifted to the left or the right.
[9.35] If, due to artillery strength modifier, the adjusted Attack Strength becomes 1 through 5, the attack is resolved on the 1-5 column (but may be changed due to column shift). If the adjusted Attack Strength becomes 0 or less, the attack is resolved on the 0 or less column (which again may be changed due to column shift).
[9.36] Net column shifts to the left which would theoretically require the modified Attack Strength to go below the 0 or less column are resolved on that column. Net column shifts to the right which would theoretically require the modified Attack Strength to go above the 72 or more column are resolved on that column.
[9.37] Anti-tank and artillery units never add to the Step Value of a stack: If artillery and/or anti-tank units are alone in a hex (i.e., not stacked with a combat or headquarters units), they may be eliminated by an Enemy unit by either paying the Movement Point cost to overrun (for units in Mobile Mode only) or by attacking in the Combat Phase. In either case, the anti-tank and/or artillery unit(s) is eliminated at no loss to the attacker. All other rules of combat apply.
[9.38] Headquarters have an intrinsic single Step which is always added to the total Step Value of the defending stack.
Designer's Note: Players will note that the 72 or more column repeats the 64-71 column. This gives massed formations an added edge before column shifts take effect.
[9.4] EXPLANATION OF COMBAT RESULTS
[9.41] Each combat result is presented as two numbers separated by a slash or "m". The number on the left is the result for the attacker, the slash or "m" indicates whether the attacker's and defender's modes affect the combat result, and the number to the right is the result for the defender.
[9.42] When resolving combat, the defending Player must satisfy his combat result before the attacking Player is required to satisfy his combat result.
[9.43] A result of "-" indicates no effect upon the units in question. A number (e.g., 2) indicates the affected stack must take a combination of Step losses and hexes retreated up to the specified number. A Player is restricted as to how many hexes he may retreat a given unit by the mode the unit is in (see the Summary of Unit Mode Effects, 10.2). The Player may retreat his units up to the limit printed on the summary; he must take the remainder of the result (if any) in Step losses.
[9.44] A Player may satisfy a combat result by any combination of Step losses and hexes retreated he chooses, subject to the limitation on hexes retreated and on stacking. The taking of losses is affected by the presence of Enemy artillery or anti-tank units (see 13.15 and 13.29).
[9.45] If units in an attacking or defending stack are in more than one mode, the opposing Player chooses which of those modes he wishes to consider the entire stack to be in for the purposes of that combat, before that combat is resolved.
[9.46] One Step loss is taken each time a unit counter is replaced by the counter with a Step Value one lower than the replaced counter, when a counter is flipped over to a one lower Step Value, when a –2/–1 marker is placed on the unit, when a –2/–1 marker is flipped over to the –4/–2 side, or when a Soviet division counter is flipped over (see 9.5). A unit with a 1 Step Value satisfies a Step loss by being removed from play.
[9.47] A combat result containing a slash (/) is resolved as in the preceding Cases. A combat result containing an "m" means that one is added to the result for both the attacker and the defender ("-" becomes 1, 1 becomes 2, etc.) if and only if the attacker is in Assault Mode and the defender is in Static Mode. The “m” also means that one is subtracted from the result for both the attacker and the defender (-remains ~, 1 becomes , etc.) if and only if both the attacking and defending units are in Mobile Mode.
[9.5] UNIT SUBSTITUTION
[9.51] If a unit has a counter face for each of its Steps (generally armor, mechanized, and understrength infantry), then even-numbered Steps are printed on its front face and odd-numbered Steps are printed on its reverse face. When such a unit has an even number of Steps and loses a Step, the counter is flipped over to the reverse side. When such a unit has an odd number of Steps and loses a Step, its counter is replaced by the counter of the next lowest value, front face up (unless, of course, the unit has only one Step remaining, in which case it is removed from play).
[9.52] Each non-Guards Soviet rifle division has a ? in place of a unit designation on its front face. Flipping such a unit over counts as one Step loss, regardless of the values on the back face. If the Step Value on the back face is zero, the unit is immediately removed from play.
[9.53] Most German infantry divisions and Soviet rifle corps have non-consecutive Steps on their two counter faces. Should a full-strength infantry unit lose one Step, a –2/–1 marker is placed on the unit. The unit's Attack Strength is considered reduced by 2, and its Step Value by 1. If the same unit loses a second Step, the –2/–1 marker is flipped over to its –4/–2 face if the unit is a five-Step unit, or the unit flipped over to its back face if the unit is not a five-Step unit (and the –2/–1 marker is removed). Example: A Soviet 10-5-4 rifle corps takes one Step loss. A –2/–1 marker is placed on the unit, and it is treated as if it were an 8-4-4. If the same unit takes another Step loss, the marker is flipped over to the –4/–2 face, and the unit is treated as if it were a 6-3-4 unit. Finally, if the same unit loses another Step, the marker is removed and the unit is flipped over to its 4-2-4 face.
[9.6] SPECIAL UNIT COMBAT RESOLUTION
[9.61] Step losses are never taken from anti-tank and artillery units.
[9.62] Losses are not taken from a headquarters unit until all other units in the hex are eliminated.
[9.63] A headquarters unit is eliminated when it takes one Step loss. Unlike other units, an eliminated headquarters unit may be brought back into play (see 12.14).
[9.64] An anti-tank unit is eliminated if (1) its hex is entered by an overrunning Enemy combat unit while it is not stacked with combat units, (2) the combat unit(s) with which the anti-tank unit is stacked are eliminated or retreat from the hex in which they are stacked, or (3) the anti-tank unit suffers Level (see 9.65) losses equal to its current level (see also 13.2).
[9.65] Artillery, like anti-tank units, have Levels, which operate in a manner similar to Steps. They are eliminated if the condition of (1) of Case 9.64 is satisfied, and they lose one Level per hex that they are retreated with other units. Example: A stack containing an artillery unit retreats two hexes; the artillery unit loses two Levels.
[9.66] If a headquarters unit is alone in a hex, or is stacked with other headquarters units only, and is attacked, the owning Player treats the headquarters as if it were in Mobile Mode when consulting the Summary of Unit Mode Effects (10.2).
[9.7] RETREATS
Retreat is not considered movement.
[9.71] Units may only retreat as many hexes as they are allowed by their mode per the Summary of Unit Mode Effects (10.2).
[9.72] Each hex a unit retreats satisfies the equivalent of one Step of a combat result. If a unit cannot retreat, or the owning Player chooses not to retreat it any further, the remainder of the combat result must be taken in Step losses.
[9.73] Retreats are always conducted by the owning Player. Units stacked together need not be retreated together.
[9.74] Retreats must be executed to move the retreating unit as far away from the hex in which it was attacked as possible. Example: A unit is retreated three hexes. Optimally, the shortest route from the hex in which it ends its retreat to the hex from which it was retreated is three hexes.
[9.75] A retreating unit must, if possible, be retreated into a vacant hex. (Exception: A unit may be retreated into a Friendly-occupied major city hex instead of a vacant hex.) If no vacant hex is available, a unit may be retreated into or through a Friendly-occupied hex. Units may not be retreated into or through a hex in violation of stacking restrictions; see 7.21.
[9.76] Units may not be retreated into an Enemy-controlled hex (Exception: 9.78) unless a Friendly unit is present in such a hex.
[9.77] If a unit is retreated into a Friendly-occupied hex which is subsequently attacked in the same Combat Segment, the retreated unit does not contribute its Step Value to the defense (which is an exception to Case 9.21). The unit may not be used to satisfy a combat result incurred in that attack; if the stack is retreated or eliminated, the previously retreated unit(s) is eliminated.
[9.78] A unit defending against an overrun and choosing to retreat may not retreat into the hex from which the overrun was initiated, or into the two hexes adjacent to that hex. Overrunning units must retreat into the hex from which overrun was initiated or into one of the two hexes adjacent to both the hex from which the overrun was initiated and the hex of overrun (see illustration).
Illustration 3
S= Soviet unit G=German unit The German unit can retreat to any hex marked G;'' the Soviet to any hex marked “ge
[9.79] A unit may not retreat across a major river hexside.
[9.8] ADVANCE AFTER COMBAT
[9.81] Whenever an Enemy unit is retreated or eliminated, it will leave a path of hexes called the path of retreat. Any Friendly units may advance along the path of retreat up to the full number of hexes the Enemy units retreat (Exception: 9.82).
[9.82] A unit entering an Enemy entrenchment hex occupied at the beginning of the Segment by the retreating unit(s) may advance no further. A unit may not advance into an Enemy-occupied hex.
[9.83] The path of retreat for an eliminated unit is the hex it occupied when eliminated, plus any adjacent hex, chosen by the attacking Player.
[9.84] The option to advance after combat must be exercised immediately after the combat resolution, before any other combat is resolved.
[9.85] Advancing units may ignore Enemy ZOCs when entering the hex formerly occupied by the retreated or eliminated unit(s).
[9.86] Units owned by the non-Phasing Player which advance after combat may not be attacked again during the Segment in which they advance.
[9.87] Advance after combat does not apply to overrun.
[9.88] Units may advance if they have taken Step losses, but not if they have retreated.
[9.89] An advance across a major river hexside is permitted, even if the advancing unit enters an Enemy ZOC in the process.
[9.9] COMBAT TABLES
(see charts and tables)
[9.91] Combat Results Table
[9.92] Step Die-Roll Modifiers Table
[9.93] Combat Modifiers Table
[10.0] UNIT MODES
COMMENTARY
Three modes reflect different postures in which a Player may employ his units.
Assault: Units in Assault Mode are engaged in a full-scale attack upon the enemy; such units are attempting to take the enemy position despite expected heavy losses.
Mobile: Units in Mobile Mode are capable of moving at the practical maximum movement speed if necessary. The units in this mode are extremely flexible in combat: they can assume offensive or defensive posture where required. This is the "standard" mode of units.
Static: Units in Static Mode are prepared to defend their positions from all assaults. Thus, the units sacrifice a good deal of mobility preparing rudimentary entrenchments (if they are not already present) and/or defensive positions.
GENERAL RULE:
Every unit must be in one of three modes at all times. A unit's mode is identical to the mode of its headquarters, even while the unit is out of communication and/or supply.
CASES:
[10.1] RESTRICTIONS ON MODES
[10.11] If a unit's headquarters is eliminated, not yet in play, or disrupted, the unit may not change mode unless placed in independent command (see 11.11).
[10.12] During the Administrative Phase of the Player-Turn, a Player may freely change the mode of all his headquarters to any of the other two modes (or remain in the same mode).
[10.13] A headquarters' subordinated units are in Mobile Mode if a Mode marker has not been placed on the headquarters unit, in Static Mode if a Static Mode marker is placed on the headquarters unit, and in Assault Mode if an Assault Mode marker is placed on the headquarters unit.
[10.14] Headquarters, anti-tank, artillery and partisan units are never affected by mode; their capabilities are always the same. See Case 9.66.
[10.15] A headquarters, anti-tank, artillery or partisan unit does not affect, per se, the mode of units with which it is stacked (so the provisions of Case 9.45 do not apply because of the presence of such a unit).
[10.16] A unit does not become disrupted because its headquarters is disrupted.
[10.17] A disrupted unit is treated as if it is in "disrupted mode" (when consulting the Summary of Unit Mode Effects), though technically it remains in the same mode as its headquarters. When the disrupted marker is removed, the unit is once again in the same mode as its headquarters.
[10.18] Units in independent command are not considered subordinated to any headquarters, and are always in Mobile Mode.
[10.19] Unit mode affects movement, combat, overrun capability and retreat (see the Summary of Unit Mode Effects).
[10.2] SUMMARY OF UNIT MODE EFFECTS
(see charts and tables)
[11.0] HEADQUARTERS: Source of Supply and Communication
COMMENTARY:
Staff and logistical organization were two key factors in deciding the battle of Kursk. The Germans had superior capabilities in both areas, but the Soviets were much improved from their abysmal showings of the previous two years. The Soviet numerical superiority needed only to be channelled properly to erase the German edge. It was this improvement, plus the tenacity of the individual Soviet soldier, that won the battle of Kursk for the Soviet Union.
GENERAL RULE:
As mentioned in Section 10.0, headquarters determine the mode for all units under their command. Headquarters also determine whether a unit is in supply and/or communication. A unit may be supplied only by its own headquarters or by its headquarters' immediately superior (or parent) headquarters. A unit out of supply is penalized in both movement and combat. A German or Soviet unit out of communication is penalized in movement; Soviet units out of communication may not attack.
PROCEDURES:
The Phasing Player determines at the instant of movement the supply and communication status of each individual unit; he determines the supply status of all units involved in a combat at the instant of that combat.
CASES:
[11.1] UNIT SUBORDINATION TO HEADQUARTERS
Generally, units are controlled by the headquarters with the designation identical to the unit's.
This designation is always the larger-type letters and/or numbers on the counter (see 3.31). The smaller-type numbers (or letters) are the individual unit designations (if any).
[11.11] Each Player is allowed to place several of his units in independent command. Only non-headquarters units may be placed in independent command. Denote a unit in independent command by placing an Independent Command marker on the unit during the Administrative Phase.
[11.12] A unit's subordination may be changed to that of a headquarters within communication range during the Organization Phase. If a unit is subordinated to a headquarters other than its original headquarters, the unit is said to be in alternate subordination; place an Alternate Subordination marker on the unit. Units in alternate subordination count against the independent command limitation (see 11.14). Once a unit becomes resubordinated to its original headquarters, remove the Independent Command marker.
[11.13] Units in independent command are always in Mobile Mode. Such units may not attack or initiate overrun, and defend in Mobile Mode if attacked. Units in alternate subordination are in the same mode as their current headquarters.
[11.14] The German Player may place up to nine of his units in independent command (but see 15.4); the Soviet Player may place up to five of his units in independent command. Note that German Kampfgruppen count against the independent command limit (see 14.13).
[11.15] No unit may begin a scenario in independent command (Exception: See 19.44) or alternate subordination.
[11.16] Anti-tank and artillery units are never subordinate to headquarters; they are not affected by subordination in any way. Thus, all supply and communication restrictions do not apply to anti-tank and artillery units.
[11.17] Those headquarters not subordinate to any other headquarters (front headquarters for the Soviets; army headquarters for the Germans) are not affected by subordination in any way; they are considered the sources of subordination.
[11.18] If there is more than one unit in the defending stack, and either 1) all units are in independent command, alternate subordination or are breakdown units, or 2) at least one unit in the stack is in independent command, alternate subordination or is a breakdown unit and the other units in the stack are subordinate to the same headquarters, the attacker gains a one column shift to the right. Example: If Soviet units attack a German stack containing a unit in independent command, a unit directly subordinate to 9th Army headquarters, and a third unit subordinate to 47th Panzer Corps HQ, a shift of one to the right would result.
[11.19] If there is more than one unit in the defending stack, and at least two units not in independent command or alternate subordination in that stack are subordinate to different corps or army headquarters, or to a separate army or front headquarters, the attacker gains a two column shift to the right. This Case supercedes Case 11.18. Example: If Soviet units attack a German stack containing a unit subordinate to 47th Panzer Corps, a two column shift to the right would result if that unit were stacked with either a unit subordinate to 2nd Army headquarters or 2nd SS Panzer Corps headquarters, but not if the other unit were subordinate to 9th Army headquarters.
[11.2] LINE OF SUPPLY
A Line of Supply is a path of consecutive adjacent hexes. A Line of Supply may not be traced through an Enemy-controlled hex unless the hex is occupied by a Friendly unit; a Line of Supply may never be traced through an Enemy-occupied hex. The length of a Line of Supply varies by unit (see 11.3).
[11.3] DETERMINATION OF SUPPLY
For a unit to be in supply, it must be able to trace a Line of Supply to its headquarters, which must in turn be able to trace a Line of Supply to a Friendly supply source. Alternately, a combat unit or headquarters may trace to a Friendly mapedge road or railroad hex.
[11.31] The Line of Supply for all units except headquarters may be up to seven hexes in length. The Line of Supply for a headquarters unit may be up to eight hexes in length.
[11.32] To be in supply, a combat unit must be able to trace a Line of Supply to its headquarters or to a road or railroad hex on the Friendly mapedge (west for the Germans, east for the Soviets). A headquarters unit must be able'to trace a Line of Supply to a Friendly supply source or to a road or railroad hex on the Friendly mapedge. Such a road or railroad hex may not be Enemy-occupied, nor may it be an Enemy-controlled hex unless a Friendly unit occupies the hex.
[11.33] If a unit's headquarters is not in play, that unit may trace a Line of Supply to its headquarters' parent headquarters.
[11.34] If a headquarters unit is disrupted or out of supply, all subordinate non-headquarters units may not trace to that headquarters for supply. A disrupted headquarters may trace supply for itself only if such a unit is attacked.
[11.35] A Soviet supply source is defined as any road or railroad hex from which a path of contiguous road or railroad hexes can be traced to a road or railroad hex leading off the east edge of the map (Exception: See 11.37), which is always a hex number ending in either xx33 or xx34. Such a path must consist of a single unbroken line of railroad or road hexes running from supply source to mapedge. When tracing this line, the Player may switch from road to railroad (or vice-versa) up to twice (but may only switch if the road and railroad are in the same hex). No road or railroad hex between the mapedge and the supply source (inclusive) may be Enemy-occupied or Enemy-controlled, unless that hex is Friendly-occupied (which negates the Enemy ZOC for these purposes).
[11.36] A German supply source is defined as any road or railroad hex from which a path of contiguous road or railroad hexes can be traced to a road or railroad hex leading off the west edge of the map (Exception: See 11.37), which is always a hex number ending in xx01. All other provisions of Case 11.35 apply to German supply sources.
[11.37] Supply may be traced through a railroad hex only on the Friendly side of the scenario start line; supply may be traced through any road hex, regardless of position.
[11.38] An overrunning unit's Line of Supply is traced from the hex adjacent to the defending unit in which the overrun was initiated.
[11.4] DETERMINATION OF COMMUNICATION
A Line of Communication is defined as a path of consecutive, adjacent hexes not exceeding seven hexes in length.
[11.41] For a unit to be in communication, the owning Player must be able to trace a Line of Communication to that unit's immediately superior (henceforth controlling) headquarters at the instant of movement or combat. If that headquarters is not in play (because it has been eliminated or is due as a reinforcement), the Line of Communication may be traced to the headquarters immediately superior to the absent headquarters.
[11.42] A non-headquarters unit is out of communication if its controlling headquarters is disrupted.
[11.43] Enemy units and/or ZOCs do not in any way affect a Friendly Line of Communication.
[11.5] EFFECT OF LACK OF SUPPLY AND/OR COMMUNICATIONS ON UNITS
[11.51] A unit's communication and supply status is judged at the beginning of that unit's movement — before any Movement Points are expended — for the entire Game-Turn.
[11.52] Any unit out of communication and/or supply at the instant of movement has its Movement Allowance halved (rounded down).
[11.53] A unit which is out of communication may not execute overrun.
[11.54] Supply also affects combat. Supply status is again judged at the instant of combat (whether overrun or regular combat).
[11.55] If an attacking unit is out of supply at the instant of combat, its Attack Strength is halved (rounded down). A stack has its total combined Attack Strength halved.
[11.56] If at least one unit in a defending stack is out of supply, the attacking Player gains a column shift of two to the right.
[11.57] A unit is never eliminated solely for being out of supply. A unit may remain out of supply indefinitely.
[11.58] Units in independent command are always in communication and trace supply as a headquarters unit does (but retain a seven hex Line of Supply).
[11.59] Artillery and anti-tank units trace supply as do units in independent command. An artillery unit which is out of supply may not barrage, but may suppress Attack Strength Points. An anti-tank unit which is out of supply may not engage in combat.
GR/ADK 42/ADK AD Kempf XXX XXX XXX 10 [Ha}12 3 6 6 4 2-1-8 1-1-8 1-1-8
[11.6] OPTIONAL COMMAND SYSTEM
Every headquarters within a German army or Soviet front may act as the headquarters for any unit subordinate to a headquarters of that army or front. Example: A unit subordinate to Group Raus headquarters could trace supply and communication to Group Raus, 42nd Army Corps or Army Detachment Kempf headquarters.
Player's Note: This rule allows players unfamiliar with the Order of Battle to speed play greatly, but the realism of the game will suffer.
[12.0] REPLACEMENT OF STEPS
GENERAL RULE
Each Player receives an allotment of replacement Steps during his Friendly Organization Phase. This number is derived from the scenario listings and repeated on the Game-Turn Record Track. Replacement Steps are used to offset lost Steps (due to combat) during the Organization Phase. Replacement of Steps is denoted by replacing the unit counter (or flipping it over) with the counter of the next highest Step.
PROCEDURE:
When a player receives his replacement Step allotment at the beginning of an Organization Phase, he records it on a piece of scrap paper. Whenever a replacement Step is expended, the player must record the change on the scrap paper. For each replacement Step expended, a unit may be upgraded by a Step.
CASES:
[12.1] RESTRICTIONS ON REPLACEMENT OF STEPS
[12.11] Replacement Steps may be accumulated from Game-Turn to Game-Turn, and there is no limit to the number of replacement Steps that may be expended in a given Organization Phase.
[12.12] A unit may only be upgraded to the highest printed Step on any of its counters.
Note: A unit not at full strength could be upgraded to a Step above the number at which the unit started the scenario.
[12.13] There is no limit to the number of replacement Steps which may be expended ona single unit, provided Case 12.12 is observed.
[12.14] When using a replacement Step to recreate an eliminated headquarters, the unit is placed on any hex on the Friendly mapedge during the Organization Phase. The unit may be moved normally during the next Game-Turn.
[12.15] A unit must be in supply at the instant a replacement Step is allocated to it.
[12.16] Replacement Steps may never be used to upgrade eliminated combat, artillery or anti-tank units.
[12.17] Neither Player receives replacement Steps on the last Game-Turn of a scenario.
[12.2] SOVIET REPLACEMENT STEP LIMITATION
Soviet units in a German Zone of Control may not receive replacement Steps.
Designer's Note: German replacement Steps represent independent battalions which were thrust directly into front-line combat during the battle. These battalions were used to shore up units which had suffered significant attrition or battle fatigue. The Soviet replacement Steps represent the masses of green troops which were rushed to the area of the battle. These fresh levies took a while to be assimilated into a veteran combat unit.
[13.0] ANTI-TANK AND ARTILLERY
COMMENTARY
The German and Soviet doctrines for assigning anti-tank guns and artillery pieces differed. The Germans attached their heavy guns directly to headquarters, while the Soviets organized their guns into independent units. The Germans manufactured superior guns, but the Soviets had an overwhelming quantitative edge.
GENERAL RULE:
Soviet anti-tank and artillery capability is represented by anti-tank and artillery units. German anti-tank and artillery capability is represented by values printed on the headquarters counters, Artillery Points suppress attacking Strength Points, and are twice as effective against infantry as they are against armor. Anti-tank Points engage in combat with attacking units before those units can resolve combat against other defending units in the hex. Artillery or anti-tank Points may be used whenever a stack containing such a gun unit, or containing German units eligible for Anti-Tank or Artillery Point support, is attacked or overrun. Soviet gun units may fire defensively only at units attacking their stack.
CASES:
[13.1] SOVIET ARTILLERY UNITS
[13.11] Artillery units affect combat with their Strength Modifier, which is equal to their total Artillery Points. Artillery units primarily affect infantry units, and secondarily affect armored, mechanized, and headquarters units.
[13.12] If infantry units participate in an attack against a stack containing an artillery unit, then the full value (of the Strength Modifier) of the artillery unit is subtracted from the Attack Strength of those infantry units.
Example: Fifty German attack Strength Points, composed equally of 25 infantry and 25 armor Strength Points, attack a Soviet stack containing a 6 value artillery unit; the modified Attack Strength becomes 44 (25 armor plus 19 infantry).
[13.13] If only units that are secondarily affected by artillery attack a stack containing an artillery unit, then half the value of the artillery unit is subtracted from the Attack Strength of the stack.
Example: Thirty German armor Strength Points attack a Soviet stack containing a 6 value artillery unit, and have their Attack Strength reduced by three (one-half of six) to 27.
[13.14] When an attacking stack contains infantry units, but not in sufficient Strength Points to cover the full value of the artillery unit(s), deduct the total Strength Points of the primarily affected unit. Then, with the artillery value left over, subtract half the remainder from the units secondarily affected, rounding down.
Example: A German stack consisting of 24 armor Strength Points and 6 infantry Strength Points (for a total of 30) attacks a Soviet stack containing an artillery unit worth 10. The 6 infantry Strength Points are negated, and the four remaining Artillery Points are halved to two to reduce the armor Strength Points (and thus the total Attack Strength) to 22.
[13.15] Whenever a stack containing infantry units takes Step losses (see 9.4) as a result of combat against a stack containing defending artillery, the Step losses must be taken from infantry units before any Step losses may be taken from secondarily affected units. Step losses may be taken from units which are suppressed (and thus possibly not contributing at all to the Attack Strength).
[13.16] The defending Player may choose not to use an artillery unit, but may not withhold any Artillery Points of an artillery unit he does use. The value printed on the artillery counter is unitary.
[13.17] An artillery unit may contribute its Strength Modifier to defense at four separate times during the Game-Turn: during either Enemy Movement Phase (as many times as an overrun is attempted against its stack); once during the First Combat Segment; and once during the Second Combat Segment.
[13.18] The presence of an anti-tank unit has no effect on any artillery unit in the stack, and vice-versa.
[13.19] An artillery unit that is not stacked with a Friendly headquarters or combat unit and is attacked or overrun by a German combat unit(s) may not use its Strength Modifier against the attacking unit(s). The unit is eliminated, as per Case 9.37.
[13.2] SOVIET ANTI-TANK UNITS
Anti-tank units engage in combat with attacking units during the Gun Segment or immediately before a regular attack in the Second Combat Segment. Anti-tank units may inflict Step losses on attacking unit(s) before regular combat is resolved.
[13.21] Anti-tank units are more effective against armored and mechanized units than against infantry and headquarters units. For the purposes of this rule, a stack is considered to be armored or mechanized if it contains at least one of these units, and infantry or headquarters only if the entire stack is composed of such units.
[13.22] Whenever a defending stack contains an anti-tank unit, the defending Player may conduct an attack upon the Phasing Player's units before the "main" combat is conducted. This combat is resolved just as normal combat is (see the procedure for Section 9.0), with all relevant combat modifiers taken into account.
[13.23] The anti-tank unit(s) attacks with an Attack Strength equal to its Anti-Tank Points. If the total points are less than six, the anti-tank unit(s) attacks using the 1-5 column (exception to Case 9.31).
[13.24] If the attacking stack is composed entirely of infantry and/or headquarters units, the column used is shifted one to the left in addition to all other combat modifiers.
[13.25] Any combat result against the Phasing Player's units must be taken as Step losses, while any combat result against the anti-tank units must be taken in Levels (see Case 9.64).
[13.26] During the Gun Segment, a result affecting an anti-tank unit is halved (rounding up). During the Movement Phase (if the anti-tank unit's stack should be overrun), any result against the anti-tank unit is applied as printed.
[13.27] An anti-tank unit may engage in combat with Enemy units at three separate times: during either Movement Phase (as many times as an overrun is attempted against its stack), and once during the Gun or Second Combat Segment.
[13.28] An anti-tank unit that is not stacked with a Friendly headquarters or combat unit and is attacked or overrun by a German combat unit(s) may not fire against the attacking unit(s). The unit is eliminated, as per Case 9.37.
[13.29] Step losses taken in combat with anti-tank units must be taken from armor and mechanized units. Only if no such units remain in the attacking stack may losses be taken from other types of units.
GvE 55/2 Pz XXX XXX 0 5 0 0-1-8 1-1-8
[13.3] GERMAN ANTI-TANK AND ARTILLERY
German anti-tank and artillery values are assigned to the individual headquarters units. Headquarters without anti-tank or artillery values do not possess Anti-Tank or Artillery Points.
Procedure:
The Soviet Player announces that he is attacking a German stack, but does not reveal which units are attacking (though the German Player can certainly take an educated guess). The German Player may allocate as many Anti-Tank or Artillery Points as he wishes (to the limit of the headquarters' total), accounting for each point on a piece of scrap paper, or in his head. The German Player then resolves the anti-tank attack.
[13.31] The German Player may dispense Anti-Tank and Artillery Points only to units stacked with or adjacent to the dispensing headquarters. There is no limit to the number of points that may be assigned from a given headquarters to any one combat.
[13.32] For a given headquarters to assign points to a combat, at least one unit directly subordinated to that headquarters must be in the defending stack.
[13.33] A headquarters' quota of Anti-Tank and Artillery Points is for an entire Phase. Thus, points used in the First Combat Segment could not be used in the Second Combat Segment.
[13.34] A headquarters may dispense Anti-Tank and Artillery Points only during the Movement Phases (in case of overrun) and during the Combat Phase.
[13.35] Artillery Points are used as if an artillery unit with points equal to those assigned is in the defending stack, using all provisions of Case 13.1. When an odd amount of points are dispensed to defend against an attacking stack composed of secondarily affected units, the Artillery Points are halved, rounding down.
[13.36] Anti-Tank Points are used as if an anti-tank unit with points equal to those assigned is in the defending stack. All provisions of Case 13.2 apply, except that Anti-Tank Points are never lost when they engage in combat with attacking units (exception to Case 13.25).
[13.37] Eliminated headquarters lose their anti-tank and/or artillery values. Replaced headquarters must be flipped over to note that the unit no longer possesses anti-tank or artillery values.
[13.38] If a headquarters unit, not stacked with a Friendly combat unit, is attacked by a Soviet combat unit, it may not use its anti-tank and artillery values during that Phase. However, if the Soviet Player neglects to attack the unit before it can dispense its points to defending German units in an adjacent hex, then the German Player may use its anti-tank and artillery values.
[13.4] SOVIET ARTILLERY BARRAGE
Soviet artillery units may be used to barrage German units in conjunction with Soviet combat unit attacks.
[13.41] An artillery unit may barrage only during the First Combat Segment. Each unit may barrage once during that Segment.
[13.42] An artillery unit may not barrage unless there is at least one Friendly combat unit attacking the target unit(s). There is no limitation on the number of artillery units that may attack a given target unit(s) other than the stacking limit and the number of available adjacent hexes.
[13.43] An artillery unit must be in a hex adjacent to that of the target unit(s) to be able to deliver a barrage. It need not be stacked with other Friendly units.
[13.44] The Soviet Player gains a shift of one to the right for each Level of barraging Soviet artillery. Thus, an artillery unit of Level Three would cause a shift of three to the right. This shift is cumulative with all other combat modifiers.
[13.45] An artillery unit may barrage and contribute its Strength Modifier to defense in the same Game-Turn. The use of an artillery unit in one capacity in no way impairs its ability to operate in the other.
[13.5] GERMAN ARTILLERY BARRAGE
German Artillery Points may be used to barrage Soviet units in conjunction with German combat unit attacks.
[13.51] An Artillery Point may be used to barrage only during the First Combat Segment. Each point may be used to barrage once during that Segment.
[13.52] A headquarters may not allocate Artillery Points to barrage unless at least two (or all) of the combat units currently subordinated to it are attacking the target of the barrage.
[13.53] A headquarters unit may not attack in a Phase in which it barrages.
[13.54] A headquarters unit may be up to two hexes away from that of the target unit(s) to be able to deliver a barrage. The German Player may split up a headquarters' Artillery Points into as many separate barrages as he wishes, but may only barrage a particular unit once per Phase.
[13.55] The German Player adds one to the Attack Strength of units being supported by barrage for each Artillery Point allocated to that barrage. There is no limit to the number of Artillery Points that may be allocated to a particular combat.
[13.56] An Artillery Point may be used to barrage and to suppress Soviet Strength Points in the same Game-Turn. The use of an Artillery Point in one capacity in no way impairs its ability to operate in another.
[13.6] COUNTERBATTERY FIRE (Optional Rule)
Friendly Artillery Points or units may be used to counteract or diminish the effectiveness of Enemy Anti-Tank and Artillery Points.
[13.61] German Artillery Points may be dispensed by owning headquarters if those headquarters are adjacent to or stacked with German combat units under barrage during an Enemy Combat Phase. Each Artillery Point dispensed negates one Enemy Artillery Point; if a Soviet unit's effective Artillery Points fall below the amount for a given Level, it operates as if it were of the next lowest Level (see also 13.44).
Example: A Soviet artillery unit with 10 Artillery Points is reduced to 5 by German counterbattery fire. Since a Soviet unit of Level Two has 8 Artillery Points, the unit is operating at Level One.
[13.62] German Artillery Points may also be used to negate Soviet Anti-Tank Points during the Gun Segment, or Soviet Artillery Points during the Combat Segments, if the dispensing headquarters is stacked with or adjacent to affected attacking combat units. Each Artillery Point dispensed negates one Enemy Anti-Tank or Artillery Point.
[13.63] If all of an anti-tank unit's Anti-Tank Points have been negated by counterbattery fire, the unit may not engage in combat with the attacking units.
[13.64] Soviet artillery units may use their total Artillery Points for counterbattery fire if they are stacked with affected attacking combat units. All other provisions of Cases 13.62 and 13.63 apply to Soviet counterbattery fire.
[13.65] An Artillery Point or unit may not be used to barrage or suppress Enemy units in the same Phase it is used to perform counterbattery fire.
[14.0] UNIT BREAKDOWN AND RECOMBINATION
COMMENTARY
Nineteen forty-three was a year of decision for the Soviet Union. For two years, the Red Army had averted defeat only because of great numerical superiority and the brutal Russian weather. Inflexibility at the command level had led to staggering losses during previous Wehrmacht offensives. To win the war, it became necessary to organize the Soviet military into an offensive tool, and to upgrade the morale of the individual Soviet soldier. The battle of Kursk was the first time that the Soviets were able to parcel their units out effectively (interchanging them between corps and divisions); the aftermath of the battle proved to the soldiers that they could beat the Germans.
GENERAL RULE:
Either Player may break down units not in Enemy-controlled hexes during the Friendly Organization Phase. Either Player may recombine previously broken-down units which are stacked in a non-Enemy-controlled hex into their parent unit during the Friendly Organization Phase. No units begin the game broken down; however, the owning Player may freely break down any and all eligible units during his set-up.
[14.1] GERMAN KAMPFGRUPPEN
German infantry divisions can be broken down into Kampfgruppen. Kampfgruppen were ad hoc formations composed of men and equipment retrieved from heavily attrited units which were no longer battleworthy. Generally, Kampfgruppen were slightly larger than regiment-sized, but individual units varied greatly.
[14.11] The German Player may break down four-Step infantry division units (only) into two Kampfgruppen each before beginning play or during the Organization Phase.
[14.12] The German Player may break down a maximum of two divisions per corps, and an overall maximum of thirteen divisions at any one time. Thus, there may never be more than twenty-six Kampfgruppen in play.
[14.13] The German independent command limit (see 11.14) is reduced by one for every three Kampfgruppen (or fraction thereof) in play. Thus, if all Kampfgruppen are in play, the German Player may not place any units in independent command.
[14.14] A unit must be in communication during the Organization Phase to be broken down. Such a unit may be out of supply or in an Enemy-controlled hex.
[14.15] Kampfgruppen behave identically to other units once in play.
[14.16] Units without the infantry symbol [infantry symbol] may not be broken down.
[14.17] A Kampfgruppen unit remains subordinate to its original unit's headquarters. Players may wish to remind themselves of a Kampfgruppen unit's subordination through the use of colored blank markers, or some other mnemonics.
[14.18] Kampfgruppen units may be placed in independent command.
[14.2] RECOMBINING GERMAN UNITS
Two Kampfgruppen stacked together may be recombined into an infantry division during the Organizational Phase.
[14.21] Kampfgruppen must be adjacent to their headquarters unit to be recombined.
[14.22] If Kampfgruppen have suffered losses since breakdown, the unit into which they are recombined must be placed at the Step corresponding to the total Steps in the two Kampfgruppen units.
[14.23] Recombined Kampfgruppen have their counters replaced by a counter of an infantry division subordinate to their corps (of the owning Player's choice).
[14.24] A single Kampfgruppen unit's counter may not be replaced by the equivalent Step counter of the original unit. Note: The elimination of a Kampfgruppen unit does not prevent its "twin" unit from recombining with another Kampfgruppen unit of the same subordination.
[14.25] A Kampfgruppen unit in independent command may be recombined with any other Kampfgruppen unit. The resulting division must be of the other unit's subordination, unless that unit is also in independent command, in which case the recombined unit may be of any subordination.
[14.26] An eliminated unit may be brought back into play via recombination.
[14.3] SOVIET UNIT BREAKDOWN AND RECOMBINATION
[14.31] The Soviet Player may break down rifle (infantry) corps units into three infantry divisions each during the Organization Phase.
[14.32] A Soviet unit must be in communication and not in an Enemy Zone of Control to be broken down or recombined. The unit(s) need not be in supply.
[14.33] A broken down unit is replaced by three infantry divisions with the identical front subordination. If there are not enough units remaining, the unit may not break down. Thus, the countermix is an absolute limitation on the number of Soviet units that may be broken down.
[14.34] Soviet units may begin the game broken down. Armor, mechanized and headquarters units may never be broken down.
[14.35] Two or three divisions (of the same or independent subordination; see 14.25) may be recombined into a Soviet corps. The German Player takes all out of play corps (whether eliminated or substituted for) of the appropriate front (except those due as reinforcements) and places them in an opaque container. The Soviet Player draws one at random, substituting it for the two or three divisions. The corps' Steps are equal to one less than the total of the divisions' Steps.
[14.36] Soviet divisions in independent command may be recombined into a corps of any front.
[14.37] See Case 14.26.
[15.0] SOVIET PARTISANS
GENERAL RULE
The Soviet Player receives partisan units beginning with the Administrative Phase of his first Game-Turn. The Soviet Player may place these units on road and railroad hexes behind German lines in an attempt to cut German Lines of Supply.
PROCEDURE:
During the Administrative Phase, the Soviet Player may place any available partisan units on any non-Enemy-controlled or occupied road or railroad hex. He may also flip over partisan units already in play to indicate that they are operative.
CASES:
[15.1] RESTRICTIONS ON PLACEMENT OF SOVIET PARTISAN UNITS
[15.11] The Soviet Player may place partisan units due him in any road or railroad hex which is not occupied or controlled by a German unit.
[15.12] The Soviet Player must place any new partisan units inoperative side up.
[15.13] A partisan unit may be placed in a hex occupied or controlled by a Soviet combat or headquarters unit, or, for that matter, behind Soviet lines.
[15.2] EFFECTS OF PARTISAN UNITS
[15.21] An inoperative partisan unit has no effect on play (Exception: See 15.25), though it occupies a road or railroad hex.
[15.22] A Soviet partisan unit becomes operative if it remains in play for one full Game-Turn. During the Soviet Player's next Administrative Phase, the partisan unit is flipped over to its operative side.
[15.23] An operative partisan unit prevents the tracing of supply along the road or railroad hex it occupies. Such a unit does not exert a Zone of Control.
[15.24] A partisan unit, whether operative or inoperative, may not move.
[15.25] A German unit may eliminate a partisan unit by moving into the hex that the partisan unit occupies. A German unit may not use rail movement to move into a partisan unit-occupied hex but may move by rail into a railroad hex adjacent to a partisan unit (since a partisan unit does not exert a ZOC).
[15.26] Player's Note: Since supply is not determined until the instant of movement, it behooves the German Player to eliminate as many partisan units as possible before moving any of his front-line units.
[15.3] WHEN PARTISAN UNITS ENTER PLAY
[15.31] The Soviet Player receives three partisan units during his first Administrative Phase of the May scenario, one partisan unit during his first Administrative Phase of the July scenario, and five partisan units during his first Administrative Phase of the August scenario.
[15.32] The Soviet Player receives one partisan unit on each of his succeeding Administrative Phases, up to the limits specified in Case 15.33.
[15.33] The Soviet Player may have a maximum of six partisan units during the May scenario, a maximum of four partisan units during the July scenario, and a maximum of seven partisan units during the August scenario.
[15.34] The Soviet Player may bring eliminated partisan units back into play during his Administrative Phase following their elimination.
[15.4] RELEASE OF SECURITY UNITS
Each partisan unit in play allows the German Player to place one Hungarian, collaborationist Russian, or German security unit in independent command.
[15.41] A released unit does not count against the German Player's independent command limit.
[15.42] If a partisan unit is eliminated, the corresponding security unit will cease to be in independent command at the end of that Phase.
[15.43] The designations of the five security units are: (Hungarian) 1 Sec, 102 Lt, 103 Lt, (collaborationist Russian) Mil, and (German) 213S.
[16.0] OPTIONAL RULES
CASES
[16.1] LIMITED INTELLIGENCE
A Player may not look through any of his opponent's stacks, except during combat or overrun. However, if there seem to be units in excess of the stacking limit in a given hex, the opposing Player may request that the owning Player show him units which do not count toward the stacking limit (to prove there is no overstacking). Player's Note: The use of this rule will greatly speed play.
[16.2] DISENGAGEMENT IN ENTRENCHMENTS
A unit in a Friendly entrenchment hex may disengage at no extra Movement Point cost; a unit in an
Enemy entrenchment hex may disengage by expending an extra Movement Point (instead of the normal two Movement Point cost; see 8.31).
[16.3] SS CORPS INTEGRITY
If all three units of the SS Panzer Corps attack together, the German Player is granted an additional one column shift to the right.
[17.0] AIR WARFARE (Optional Rule)
GENERAL RULE:
If the Players opt to use the air warfare rules, each receives the Air Points printed in the scenario listings on a per Turn basis. Air Points may be used in air warfare, or to cause column shifts in combat.
PROCEDURE:
Interception
At the beginning of the Joint Air Warfare Phase, the German and the Soviet Player must declare whether they wish to intercept the other's Air Points. The Soviet Player must declare his intention first. The intercepting Player then attempts to intercept the Enemy Air Points with any or all of his Air Points. If only one Player is attempting to intercept, he must roll a 1 or a 2 to intercept the Enemy Air Points successfully (but see 17.11). If both Players are attempting to intercept, the German Player must roll a 1 through 5 for interception to occur.
Air Warfare
The Player who has intercepted the Enemy Air Points totals his intercepting Air Points, and consults the corresponding column on the Air Warfare Results Table (17.3). He then rolls the die, and notes the result. The intercepted Player then totals his Air Points (ignoring the result achieved by the intercepting Player), and consults the corresponding column on the Air Warfare Results Table. The die is rolled, the result is immediately applied to the intercepting Player's Air Points, and the result achieved earlier against the intercepted Player is applied to his Air Points.
If both Players have succeeded in interception, the above procedure is followed for both sides before any losses are taken, and losses for each interception are cumulative. Players should note the number of Air Points assigned to interception. Losses should be taken against these points first.
CASES:
[17.1] INTERCEPTION
[17.11] A Player may subtract one from his interception die-roll for every Air Point over three he commits to interception. However, a roll of six always causes interception to fail.
[17.12] Air warfare may not occur unless one Player has successfully intercepted the other's Air Points.
[17.13] Air Points used to intercept (whether or not they succeed) may only be used for attack, during the owning Player's Combat Phase (see 17.22). Such Air Points may not be used defensively.
[17.14] The results of air warfare are applied simultaneously, even though the intercepting Player rolls first on the Air Warfare Results Table.
[17.2] AIR POINTS IN GROUND COMBAT
Each Player may allocate his Air Points to cause a column shift in combat.
[17.21] Either or both Players may allocate a maximum of two Air Points to a combat, before any combat calculations are performed.
[17.22] The attacker must decide whether he wishes to allocate an Air Point(s) to the combat before the defender does. If the attacker wishes to use an Air Point(s), he places an Air Point marker(s) on the Enemy unit(s); if he does not wish to, he announces this. The defender may then allocate Air Points which did not attempt interception.
[17.23] The allocation of an Air Point to a given combat shifts the column used one to the left if allocated by the defender; one to the right if used by the attacker. Air Point column shifts are simply added to any other column shifts occurring in the combat.
[17.24] A Player may allocate his Air Points either on attack or on defense (Exception: See 17.13). As an Air Point is used, it is removed from play for that Turn. An Air Point may never be used more than once in a given Game-Turn for combat.
[17.25] Air Points may not be used to affect overruns.
[17.26] An Air Point may affect ground combat only once in a Game-Turn.
[17.3] AIR WARFARE RESULTS TABLE
(see charts and tables)
[18.0] SCENARIO ORGANIZATION
COMMENTARY
After the reader has familiarized himself with the mechanics of Kursk, he is ready to proceed with the play of the game. There are three scenarios provided: one covering the historical July attack, the second dealing with a possible May offensive by the Germans (which most historians believe was the optimal time for launching an attack), and finally the Soviet August counteroffensive. If players are interested in the historical lessons of the battle of Kursk, they should try the July scenario; if players are interested in scenarios in which the attacker is significantly stronger than the defender, the May or August scenarios are recommended.
GENERAL RULE:
Each scenario is presented as a discrete game. Within the individual scenario will be the force listings (i.e., the units which begin the game in play), the reserves and reinforcements, the special rules and victory conditions. It is suggested that each Player sort the units he owns by corps or front on his Deployment Display. This will greatly facilitate set-up and play of the scenario.
CASES:
[18.1] INITIAL DEPLOYMENT (Set-Up)
[18.11] After all units have been sorted by front, corps or army, the Players place their headquarters in the corresponding hexes indicated in the scenario listings.
[18.12] Units must be set up in communication and in supply. At the beginning of all scenarios, all German units must be set up west of the appropriate start line, and all Soviet units must be set up east of that start line.
[18.13] Both Players are required to set up their units so that every front-line hex is either (1) occupied by a Friendly unit, or (2) in the Zone of Control of a Friendly unit in a front-line hex. The only other deployment restriction is imposed upon reserve units (see 18.14).
[18.14] Soviet reserve units are deployed within one hex of their controlling (i.e., immediately superior) headquarters.
[18.15] Each Player may choose the mode of his headquarters units as he sets up each of those units.
[18.16] Each non-headquarters combat unit has at least one Indicator Letter on at least one of its counter faces. An Indicator Letter informs the players of two pieces of information: what Step Value the unit sets up at in a particular scenario, and whether the unit begins on or off map. If an Indicator Letter corresponds to the scenario being played on the Indicator Letters Key (18.19), then the unit will be deployed with that counter face up. If the Indicator Letter informs the player that the unit is off-map at the beginning of the scenario, the unit cannot enter play except as a reinforcement. The appropriate Step Value of units offmap at the beginning of each scenario is provided for historical interest whenever possible.
[18.17] If the Indicator Letter is to the /eft of the unit's Step Value, the unit is set up at that Step. If the Indicator Letter is to the right of that unit's Step Value, place a "–2/–1" marker on that unit, and it is considered to have two less Attack Strength and one less Step than printed on its counter face (see 9.53).
[18.18] The Unit Manifest/Order of Battle may at first seem at variance with the unit counters themselves. Many units are listed as being present (in the Order of Battle) in a particular army or front for a scenario in which their counters do not have them as present. All of these units were units being rebuilt at that particular time, and would not have been effective in battle. Note: If any discrepancy exists between the counters and the Unit Manifest/Order of Battle, the individual counters take precedence.
[18.19] Indicator Letters Key
(see charts and tables)
[18.2] REINFORCEMENTS
[18.21] Reinforcements will either be listed as entering on a particular hex, or the owning Player will be given a choice of hexes. A reinforcing unit is placed on the mapedge adjacent to its entry hex during the Friendly Administrative Phase.
[18.22] Reinforcing units must move onto the map during their scheduled turn of entry.
[18.23] A reinforcing unit must be in Mobile Mode.
[18.24] Units may move onto the map using road or railroad movement.
[18.25] If a unit is using railroad movement when entering the map, its entry hex is the first hex it moves through for the turn (see 5.33).
[18.26] If a unit is not using railroad movement when entering the map, the units in the first stack pay the full Movement Point cost for the entry hex, and units in each succeeding reinforcing stack to enter that hex pay an additional Movement Point for each reinforcing unit in front of it; thus, the third reinforcing unit in a given hex during a turn would pay the terrain cost plus two Movement Points to enter the hex.
[18.27] A reinforcing unit which does not have its headquarters in play must remain in Mobile Mode. The unit is assumed to be in communication during the turn of entry, and is in supply as long as it can trace a Line of Supply to a Friendly mapedge road or railroad hex. The owning Player may place such a unit in independent command.
[18.28] Some units are conditional reinforcements. These units will enter play only if a requirement listed in the reinforcement Case of the scenario is met at any point in the Game-Turn. The owning Player may choose in which order he brings in conditional reinforcing units if he must spread their arrival over more than one turn. No more than one condition that allows a player to bring on conditional reinforcing units may be considered fulfilled at any one time; if criteria for more than one has been met, the player to whom reinforcements are due must choose which condition will trigger the conditional reinforcements.
[18.29] Reinforcing units enter at the Step indicated by the appropriate Indicator Letter (see 18.16).
[18.3] SOVIET RESERVES
Before the Soviet Player may move or attack with a reserve unit, the reserve unit must be activated.
[18.31] Reserve units are activated formation by formation. If one unit in an army or subordinated to a front HQ is activated, the rest of the units in that army or subordinated to that front HQ are activated.
[18.32] A reserve unit is activated if it is attacked by a German unit.
[18.33] The Soviet Player may expend one Victory Point (i.e., grant a Victory Point to the German Player) to activate a reserve formation. The Soviet Player is limited in the number of reserve formations he may activate by the following Cases. The Soviet Player must announce his decision to activate any reserve formations during his Administrative Phase, and must immediately determine the mode of all such formations.
[18.34] The Soviet Player may activate a maximum of three reserve formations during the Friendly Administrative Phase of any Game-Turn during the May and August scenarios (note there are only two reserve formations during August).
[18.35] In the July scenario, the Soviet Player may activate a maximum of five reserve formations during his Administrative Phase of Game-Turn One, a maximum of four reserve formations during Game-Turn Two, and a maximum of three: reserve formations during any succeeding Game-Turns of that scenario.
[18.36] Reserve formations activated by German attack (see 18.32) do not count against the maximums detailed in Cases 18.34 and 18.35.
[18.37] Beginning with the turn after a reserve formation has been activated, the German Player will be awarded one Victory Point for that formation during his Organization Phase until the conclusion of the seventh Game-Turn of the scenario being played. Therefore, it behooves the Soviet Player to activate as many reserve formations as possible on the eighth and ninth Game-Turns, if the scenario goes that far. Note: The German Player is not awarded a Victory Point for a reserve formation on the Game-Turn a German unit attacks that formation and activates it.
[18.38] Reserve units are always in Static Mode (Exception: See 18.39) until they are activated. Once activated, a unit may never be placed in reserve again.
[18.39] In the May and July scenarios, anti-tank and artillery units will also be assigned to reserve formation headquarters as reserve units. They are only attached to the formation as long as they remain in reserve.
[18.4] VICTORY CONDITIONS
After the last Game-Turn of play has been concluded, the Players may wish to evaluate their performance in light of the victory conditions.
[18.41] Players are awarded Victory Points for eliminating Enemy units, for controlling territorial objectives, and (for the German Player) for activated reserve armies. A list of Victory Point awards may be found in Case 18.48.
[18.42] Units are eliminated (for Victory Point purposes) when they are removed from play due to combat results, or if the unit is out of communication or supply at the conclusion of play (Exceptions: See 18.43 and 18.44).
[18.43] If a headquarters unit is eliminated and not replaced (see 12.14), and its units have no superior headquarters to which lines of supply and communication may be traced (see 11.41), then each unit may trace supply and communication as if the unit itself were a headquarters (i.e., 8 hex line of supply) to determine whether the unit is considered eliminated for Victory Point purposes.
[18.44] If a unit's controlling headquarters is disrupted at the conclusion of play, the unit traces to the headquarters as if the headquarters were not disrupted to determine whether the unit is considered eliminated for Victory Point purposes.
[18.45] When Victory Points are awarded for control of a territorial objective (either a city, entrenchment or railroad hex), control is determined by one of the following three criteria, in order:
1, The Player's unit occupies the hex;
-
The Player was the last to move a unit through the hex; or
-
The hex was never moved through by a unit, but the hex is on the Player's side of the start line.
If a unit is occupying the hex, then that unit must be in communication as per Case 11.4. If there are no units in the hex (and the Player fulfills either criterion 2 or 3), the Player must be able to trace a contiguous line of road and/or railroad hexes uninterrupted by Enemy units and ZOCs from the hex to the Friendly mapedge in order for him to control that hex.
[18.46] Twelve Victory Point hexes have an award for the German Player followed by an asterisk (*). The German Player may receive one award only for each group of six contiguous hexes, regardless of the number of those hexes his units capture. Example: If German units captured hexes 2316, 2319 and 2321, the German Player would receive 5 Victory Points. If German units captured hexes 2317, 3224 and 3225, the German Player would receive 10 Victory Points.
[18.47] Players total the Victory Points due them, and then subtract the Soviet total from the German total. A schedule in the victory conditions Case for each scenario will inform the Players of who has won, and the level of victory for that Player.
[18.48] Victory Point Awards
-
Certain road, railroad and city hexes are Victory Point hexes. A Victory Point hex can be identified by two numbers separated by a slash. The number on the left side of the slash is the German Victory Point award for control of the hex; the number on the right of the slash is the Soviet Victory Point award for control of the hex.
-
Victory Points are also awarded for eliminating Enemy units, or reducing the number of Steps in certain units. Consult the following schedules to determine the number of Victory Points due each Player by reason of Enemy casualties.
German Player
- Per Soviet rifle corps not in play*: 1 VP
- Per Soviet tank or mechanized corps eliminated: 2 VP
- Per Soviet headquarters eliminated†: 3 VP
- Per Soviet off-map combined arms reserve army activated (see 20.62, for example): 2 VP
- Per Soviet off-map reserve tank army activated (see 20.62, for example): 4 VP
See also Cases 18.33 and 18.37
Soviet Player
- Per German four-Step infantry division not in play*: 1 VP
- Per German panzer or panzer grenadier unit eliminated: 3 VP
- Per two (2) Steps of German panzer or panzer grenadier unit eliminated (in addition to the award listed above)†: 1 VP
- Per German headquarters eliminated†: 2 VP
* If such units have been broken down, the owning Player may consider all Kampfgruppen or divisions in play to be combined (even if they are not in the same hex[es]) to prevent the opposing player from gaining the Victory Point award. Excess breakdown units (i.e., those Kampfgruppen and divisions remaining after combination'') do not affect Victory Point awards in any way.
† If the unit or Steps are replaced during the course of play, the unit is treated exactly as if it had not lost Steps or been eliminated.
[18.49] Players may wish to use the Victory Point Record Track to reduce bookkeeping necessary at the conclusion of play. Players are cautioned to be extremely conscientious about adding and subtracting Victory Points at the proper times, or their record of Victory Points will become wildly inaccurate very quickly. It is also recommended that the players keep track of the Victory Points due them individually, rather than keep a grand running total (German total minus Soviet total).
[18.5] MISCELLANEOUS INFORMATION TABLE
(see charts and tables)
Important: The May and July start lines are defined by those hexsides common to both a German and a Soviet entrenchment. The August start line differs from these two to the north of the Kursk salient; the rest of the August start line is identical to that of May and July.
[19.0] VON MANSTEIN'S PLAN: The German General Staff Plan, 1 May 1943
COMMENTARY:
The German offensive in July of 1943 was a poorly conceived and executed operation. The Soviets had more troops, extensive well-placed fortified lines and access to the German plans. Over thirty-five years of perspective allows modern-day historians to point to Kursk as one of the classic military blunders of World War II.
The German General Staff also recognized the folly of a July attack, and requested a May offensive. Adolf Hitler would not allow the assault until many of the new Panther tanks were ready for battle. Meanwhile, the Soviet Siberian reinforcements were streaming in from the east. While the Red Army's total strength increased, the troops in the front lines remained essentially unchanged for two months.
If the opposing front lines remained the same, not so the reserves. The effective Soviet troop strength increased by upwards of 75%, while only a trickle of tanks reached the German reserve. Soviet strategy changed from one of cautious defense to a plan for a summer offensive. The Germans were masters at mobile defense, and so the Soviets hoped that the Germans would waste their mobile (usually panzer) troops in an attack upon the entrenched Red Army. Hitler played directly into their hands, allowing the subsequent counteroffensive to advance unimpeded by the best of the German defensive units.
The following scenario postulates the use of the German General Staff proposal. Field Marshal Erich von Manstein was the main proponent of the German May offensive, and unsuccessfully argued for such an attack throughout the spring. Historians generally agree that if the Germans had reduced the Kursk salient (which a May offensive might have done), the Germans would almost certainly have prolonged the Eastern Front war for another year.
CASES:
[19.1] SCENARIO PARAMETERS
Recommended Number of Players: 2 or 3 (Two German, one Soviet)
Game Length: 9 Game-Turns
Solitaire Playability: Fair
[19.2] GERMAN INITIAL DEPLOYMENT
All German headquarters are set up on the appropriate hexes listed below. Then, German units are deployed within the restrictions of Case 18.1.
56th Panzer Corps/4th Army Sector: 5614; 55th Army Corps/2nd Panzer Army Sector: 5414; 53rd Army Corps/2nd Panzer Army Sector: 5020; 35th Army Corps/2nd Panzer Army Sector: 4227; 46th Panzer Corps/9th Army Sector: 3917; 41st Panzer Corps/9th Army Sector: 3824; 47th Panzer Corps/9th Army Sector: 3820; 23rd Army Corps/9th Army Sector: 3723; 20th Army Corps/9th Army Sector: 3811; Group von Esebeck (Army Group Center Reserve): 3922; 13th Army Corps/2nd Army Sector: 2909; 7th Army Corps/2nd Army Sector: 2110; 52nd Army Corps/4th Panzer Army Sector: 1613; Group Raus/Army Detachment Kempf Sector: 1318; 42nd Army Corps/Army Detachment Kempf Sector: 1017; and 57th Panzer Corps/ 1st Panzer Army Sector: 0113.
The 48th Panzer, 3rd Panzer and 2nd SS Panzer Corps headquarters may be set up anywhere north of the Kharkov (10xx) hexrow (exclusive) and south of the Belgorod (15xx) hexrow (exclusive) on the German side of the front line.
The seven German sector headquarters (4th Army, 2nd Panzer Army, 9th Army, 2nd Army, 4th Panzer Army, Army Detachment Kempf and 1st Panzer Army) may be set up anywhere within their respective sector boundaries no more than five hexes away from the frontline.
[19.3] SOVIET INITIAL DEPLOYMENT
All Soviet headquarters are set up on the appropriate hexes listed below. Designations marked with an asterisk (*) denote a reserve headquarters (see 18.14 and 18.3). All units set up within the restrictions of Case 18.1.
10th Combined Arms Army/West Front: 5719; 50th Combined Arms Army/West Front: 5522; 11th Guards Combined Arms Army/West Front: 5225; West Front HQ: 5923; 61st Combined Arms Army/Bryansk Front: 4729; 3rd Combined Arms Army/Bryansk Front: 4432; 63rd Combined Arms Army/Bryansk Front: 3831; *Bryansk Front HQ: 4633; 48th Combined Arms Army/Central Front: 3428; 13th Combined Arms Army/ Central Front: 3326; 70th Combined Arms Army/Central Front: 3323; *2nd Tank Army/ Central Front: 3119; 65th Combined Arms Army/Central Front: 3517; 60th Combined Arms Army/Central Front: 3014; *Central Front HQ: 3333; 38th Combined Arms Army/ Voronezh Front: 2312; 40th Combined Arms Army/Voronezh Front: 2116; 6th Guards Combined Arms Army/Voronezh Front: 2120; *1st Tank Army/Voronezh Front: 2518; 7th Guards Combined Arms Army/Voronezh Front: 1422; *69th Combined Arms Army/ Voronezh Front: 1829; Voronezh Front HQ: 2423; *5th Guards Combined Arms Army/ Steppe Front: 0829; *27th Combined Arms Army/Steppe Front: 0533; *53rd Combined Arms Army/Steppe Front: 0232; 57th Combined Arms Army/Southwest Front: 0821; 6th Combined Arms Army/Southwest Front: 0518; 1st Guards Combined Arms Army/ Southwest Front: 0221; *Southwest Front HQ: 0424; and 15 anti-tank and 15 artillery units (see 19.42).
[19.4] SPECIAL RULES
[19.41] The Soviet Player deploys his headquarters and then his units according to Cases 18.1 and 19.3. When he is finished, the German Player deploys his headquarters and then his units according to Cases 18.1 and 19.2. Finally, the Soviet Player deploys his anti-tank and artillery units in any hexes on the Soviet side of the front line.
[19.42] The German Player takes all anti-tank and artillery counters, and removes five 10-3-4 artillery units and five 10-3-4 anti-tank units. The German Player then places all remaining counters face down in two separate piles (anti-tank and artillery). The Soviet Player then picks fifteen anti-tank and fifteen artillery units (without looking at the fronts of the counters) and deploys his units. The front face of each Soviet anti-tank or artillery unit is first revealed to both players when the German Player conducts an attack against units stacked with an anti-tank or artillery unit.
[19.43] If the SS Wiking Division enters play (as a reinforcement), the unit must be in independent command, as it has no superior headquarters. Of course, the unit counts against the German limit on units in independent command (see Case 11.14).
[19.44] The German Player may place up to four units in independent command before the start of play.
[19.45] After the procedure described in Case 19.42 has been performed, the Soviet Player places nine of the twenty remaining anti-tank and artillery units under the reserve headquarters. One artillery or anti-tank unit must be placed under each reserve headquarters. The Soviet Player may determine how many of each type of gun unit he wishes to deploy in reserve (he could, for example, take exclusively artillery units). Again, the front face of these units is not revealed until the German Player initiates combat against a stack containing such a unit.
[19.5] GERMAN REINFORCEMENTS
[19.51] Reinforcing Units
Turn 3: 3rd Panzer Division enters at either 2501 or 2901, 36th Infantry Division enters at 0907.
Turn 4: 20th Panzer Grenadier Division enters at either 4701 or 5401.
[19.52] Conditional Reinforcements
-
If a German unit occupies Lgov (2916), one of the following units may enter during each of the four succeeding Game-Turns.
-
If a German unit is within two hexes of Kursk (2821), two of the following units may enter during each of the two succeeding Game-Turns.
-
19th Panzer Division: 4701; 23rd Panzer Division: 1107; SS Wiking Division: 0115; or 16th Panzer Grenadier Division 1107.
[19.53] Replacement Steps
Turn 1: 1
Turns 2 through 4: 2
Turn 5: 3
Turns 6 and 7: 2
Turn 8: 1
Turn 9: 0
[19.6] SOVIET REINFORCEMENTS
[19.61] Reinforcing Units
Turn 4: Steppe Front HQ (and all subordinate units) enters at either 1233 or 1734.
[19.62] Conditional Reinforcements
The appropriate number of Soviet off-map reserve headquarters (and all subordinate units) may enter the map on the Game-Turn following the fulfillment of one of the following conditions.
-
One Soviet HQ if at least one German unit enters a trigger hex. No additional conditional reinforcements are triggered regardless of the number of German units which pass through trigger hexes or the number of trigger hexes passed through.
-
Two Soviet HQs if a German unit occupies Lgov (2916).
-
Three Soviet HQs if a German unit occupies Kursk (2821).
-
One Soviet HQ from the northern off-map reserve if a German unit occupies one or more of Livny (3333), Belev (4827) or Sukhinichi (5423).
-
One Soviet HQ from the southern off-map reserve if a German unit occupies one or more of Kupyansk (0424), Korocha (1624) or Oboyan (2320).
-
Northern off-map reserve: 3rd Guards Tank Army, 4th Tank Army, 4th Guards Combined Arms Army, 11th Combined Arms Army and 21st Combined Arms Army.
-
Southern off-map reserve: 5th Guards Tank Army, 8th Guards Combined Arms Army and 47th Combined Arms Army.
-
The Soviet Player may choose any one of the entry hexes listed for the appropriate reserve, but a headquarters and all subordinate units must enter through the same hex. Northern off-map reserve: 4534, 4734, 5233 or 5933. Southern off-map reserve: 0124, 0127, 0132 or 1233.
[19.63] Replacement Steps
Turn 1: 0
Turns 2 through 5: 1
Turns 6 through 8: 2
Turn 9: 0
[19.7] AIR POINTS
If the Players are using the air warfare optional rule (17.0), the German Player receives four Air Points at the beginning of play and the Soviet Player two. These Air Points may be used every turn unless eliminated.
[19.8] LEVELS OF VICTORY
The Players calculate the net Victory Point total using Case 18.4, and compare the result to the schedule below.
- German Strategic Victory: 101 or greater
- German Tactical Victory: 71 to 100
- Draw: 61 to 70
- Soviet Tactical Victory: 36 to 60
- Soviet Strategic Victory: 35 or less
[20.0] HITLER'S PLAN The Battle of Kursk, 4 July 1943
HISTORICAL COMMENTARY:
The Russian summer was fast waning when Adolf Hitler authorized Operation Zitadelle (Citadel), the Kursk offensive. Fresh in the minds of all associated with the German military was the debacle of 1941, which was brought on by the late time of year in which the Germans attacked. The July attack was again too late, but not for reasons connected with the weather.
The arrival of the Soviet eastern (Siberian) armies reinforced an already strong front line. More importantly, the construction of extensive lines of fortifications behind existing entrenchments allowed the Soviet command tremendous defensive flexibility. These two factors were to contribute greatly in defeating the Germans.
Despite warnings of Soviet preparations, the Fuehrer was determined to show the Soviets that his army was still supreme. The magnitude of this error was to become horribly apparent to the German General Staff during the battle, but July 1st saw the German eastern front army girding for its last and greatest major assault.
In the south, the panzer spearhead hit the 6th and 7th Guards Armies, In the north, parts of the 48th and 70th Armies and the full 13th Army bore the brunt of the attack. The northern thrust was perfectly anticipated by the Soviet planners, and proceeded to go absolutely nowhere; it was unusual in that the German commander, Field Marshal Model, experienced a rare failure. It must be said that Soviet intelligence had apprised the front-line commanders of his every move, but the German strategy of committing units piecemeal also foredoomed the attacks to failure. The wily von Manstein did smash through to the third line of defense in the south, but the Soviet reserves were able to stop his troops by sheer weight of numbers. Though it was touch and go in the south for a few hours while the Soviets hastily redeployed reserves to that area, the battle was effectively lost when it began.
This scenario is a simulation of that momentous battle, and as such is weighted slightly against the Germans. However, to ensure play balance, some Soviet uncertainty as to German plans is assumed.
CASES:
[20.1] SCENARIO PARAMETERS
Recommended Number of Players: 2 or 4 (Two German, Two Soviet)
Game Length: 7 Game-Turns
Solitaire Playability: Excellent
[20.2] GERMAN INITIAL DEPLOYMENT
All German headquarters are set up on the appropriate hexes listed below. Then, German units are deployed within the restrictions of Case 18.1.
56th Panzer Corps/4th Army Sector: 5614; 55th Army Corps/2nd Panzer Army Sector: 5414; 53rd Army Corps/2nd Panzer Army Sector: 5020; 35th Army Corps/2nd Panzer Army Sector: 4227; 46th Panzer Corps/9th Army Sector: 3917; 41st Panzer Corps/9th Army Sector: 3824; 47th Panzer Corps/ 9th Army Sector: 3820; 23rd Army Corps/9th Army Sector: 3723; 20th Army Corps/9th Army Sector: 3811; Group von Esebeck (Army Group Center Reserve:) 3922; 13th Army Corps/2nd Army Sector: 2909; 7th Army Corps/2nd Army Sector: 2110; 52nd Army Corps/4th Panzer Army: 1613; 48th Panzer Corps/4th Panzer Army: 1517; 2nd SS Panzer Corps (Army Group South Reserve): 1314; 3rd Panzer Corps (Army Group South Reserve): 1215; Group Raus/Army Detachment Kempf Sector: 1318; 42nd Army Corps/ Army Detachment Kempf Sector: 1017; and 57th Panzer Corps/ 1st Panzer Army Sector: 0115.
The seven German sector headquarters (4th Army, 2nd Panzer Army, 9th Army, 2nd Army, 4th Panzer Army, Army Detachment Kempf and Ist
Panzer Army) may be set up anywhere within their respective sector boundaries no more than five hexes away from the frontline.
[20.3] SOVIET INITIAL DEPLOYMENT
Soviet headquarters are set up on the appropriate hexes listed below. Designations marked with an asterisk (*) denote a reserve headquarters (see Cases 18.14 and 18.3). All units set up within the restrictions of Case 18.1.
10th Combined Arms Army/West Front: 5719; 50th Combined Arms Army/West Front: 5522; 11th Guards Combined Arms Army/West Front: 5225; West Front HQ: 5923; 61st Combined Arms Army/Bryansk Front: 4729; 3rd Combined Arms Army/Bryansk Front: 4432; 63rd Combined Arms Army/Bryansk Front: 3831; *Bryansk Front HQ: 4633; 48th Combined Arms Army/ Central Front: 3428; 13th Combined Arms Army/Central Front: 3326; 70th Combined Arms Army/Central Front: 3323; *2nd Tank Army/ Central Front: 3119; 65th Combined Arms Army/ Central Front: 3517; 60th Combined Arms Army/ Central Front: 3014; *Central Front HQ: 3333; 38th Combined Arms Army/Voronezh Front: 2312; 40th Combined Arms Army/Voronezh Front: 2116; 6th Guards Combined Arms Army/ Voronezh Front: 2120; *1st Tank Army/Voronezh Front: 2518; 7th Guards Combined Arms Army/ Voronezh Front; 1422; *69th Combined Arms Army/Voronezh Front: 1829; Voronezh Front HQ: 2423; *5th Guards Combined Arms Army/ Steppe Front: 0829; *27th Combined Arms Army/ Steppe Front: 0533; *53rd Combined Arms Army/Steppe Front: 0232; 57th Combined Arms Army/Southwest Front: 0821; 6th Combined, Arms Army/Southwest Front: 0518; 1st Guards Combined Arms Army/Southwest Front: 0221; *Southwest Front HQ: 0424; and 25 anti-tank and 25 artillery units.
[20.4] SPECIAL RULES
[20.41] The Soviet and German Players alternate deploying their units exactly as described in Case 19.41.
[20.42] The Soviet Player deploys his anti-tank and artillery units on his side of the front line. He places his units face up (though he may set up his anti-tank and artillery units stacked with other units to hide their values from the German Player).
[20.43] The first four anti-tank and five artillery units removed from play must be placed in the same hex as a reserve headquarters. The Soviet Player may choose with which headquarters each unit is placed as it is removed and put back into play. Such units become activated when the headquarters with which they are stacked becomes activated; if that headquarters is already activated, so is the unit.
[20.44] If the SS Wiking Division enters play, Case 19.43 is in effect.
[20.5] GERMAN REINFORCEMENTS
[20.51] Reinforcing Unit
Turn 3: 19th Panzer Division enters at 2301.
[20.52] Conditional Reinforcements
-
If a German unit occupies Lgov (2916), one of the following units may enter during each of the four succeeding Game-Turns.
-
If a German unit is within two hexes of Kursk (2821), two of the following units may enter during each of the two succeeding Game-Turns.
-
17th Panzer Division: 4701; 23rd Panzer Division: 1107; SS Wiking Division: 0115; or 16th Panzer Grenadier Division: 1107.
[20.53] Replacement Steps
Turns 1 through 3: 3
Turn 4: 4
Turns 5 and 6: 3
Turn 7: 0
[20.6] SOVIET REINFORCEMENTS (printed as "[20.61]" in the source)
[20.61] Reinforcing Units
Turn 2: 5th Guards Tank Army and all subordinate units enter at either 1233 or 4534.
Turn 4: Steppe Front HQ and all subordinate units enter at either 1233 or 1734.
[20.62] Conditional Reinforcements
The appropriate number of Soviet off-map reserve headquarters (and all subordinate units) may enter the map on the Game-Turn following the fulfillment of one of the following conditions.
-
One Soviet HQ if at least one German unit enters a trigger hex. No additional conditional reinforcements are triggered regardless of the number of German units which pass through trigger hexes or the number of trigger hexes passed through.
-
Two Soviet HQs if a German unit occupies Lgov (2916).
-
Three Soviet HQs if a German unit occupies Kursk (2821).
-
One Soviet HQ from the northern off-map reserve if a German unit occupies one or more of Livny (3333), Belev (4827) or Sukhinichi (5423).
-
One Soviet HQ from the southern off-map reserve if a German unit occupies one or more of Kupyansk (0424), Korocha (1624) or Oboyan (2320).
-
Northern off-map reserve: 3rd Guards Tank Army, 4th Tank Army, 4th Guards Combined Arms Army, 11th Combined Arms Army and 21st Combined Arms Army.
-
Southern off-map reserve: 8th Guards Combined Arms Army and 47th Combined Arms Army.
-
The Soviet Player may choose any one of the entry hexes listed for the appropriate reserve, but a headquarters and all subordinate units must enter through the same hex. Northern off-map reserve: 4534, 4734, 5233 or 5933. Southern off-map reserve: 0124, 0127, 0132 or 1233.
[20.63] Historical Note
The 3rd Guards Tank Army, listed as part of the northern off-map reserve in Case 20.62, arrived as a reinforcement during the latter part of Game-Turn 7 to the beginning of what would be Game-Turn 8. It is included in the northern off-map reserve because the Soviets would certainly have rushed it to the Kursk salient in the event of a breakthrough.
[20.64] Replacement Steps
Turns 1 through 6: 2
Turn 7: 0
[20.7] AIR POINTS
If the Players are using the air warfare optional rule (see Section 17.0), the German Player receives two Air Points on the first turn and the Soviet Player none. Beginning with Game-Turn Two, the German Player receives five Air Points (total) and the Soviet Player four (total). These Air Points may be used every subsequent turn unless eliminated.
Historical Note: The Soviet Air Force began the Kursk campaign with numerical superiority in planes. A disastrous first day air duel allowed the Germans to reduce considerably the number of available Soviet planes with minimal loss to the Luftwaffe.
[20.8] LEVELS OF VICTORY
The Players calculate the net Victory Point total using Case 18.4, and compare the result to the schedule below.
- German Strategic Victory: 91 or greater
- German Tactical Victory: 51 to 90
- Draw: 41 to 50
- Soviet Tactical Victory: 6 to 40
- Soviet Strategic Victory: 5 or less
Historical Note: These victory conditions assume that the German Player is attempting to perform up to German General Staff expectations. If the German Player wishes to live up to the Fuehrer's expectations (the stated goal of the offensive), he will not win unless the net Victory Point total is greater than 190 Victory Points.
[21.0] THE BEGINNING OF THE END: The Soviet Summer Counteroffensive, 1 August 1943
HISTORICAL COMMENTARY:
The German July offensive ground to a halt in late July. The northern attack had been foiled by the Soviet High Command, to the point that the Germans were not even making a pretense of attack. The southern pincer had made some inroads on the Soviet defenses, but the remaining offensive strength in the armies deployed there was insufficient to push any further. The German command was tacitly admitting defeat, but they had no choice — the state of affairs was obvious even to the casual observer.
Come the first of August, the Soviet preparations for a late summer offensive had reached fruition, The Soviet decision-makers, who throughout the war overestimated the enemy whenever planning strategically, had been worried about the strength of the German armies. However, after the bulk of the Wehrmacht's finest troops had been exhausted during July, the Soviets were confident of victory and ready to roll. The Siberian armies, which had been streaming westward ever since late May, crashed into the war-weary front-line German units — and discovered little resistance. Though the Germans regrouped somewhat, the Soviets had begun an inexorable push toward the west. The Germans did retreat into secure positions well behind the Kursk front line.
The war would continue for almost another two years, but the failure of the attack at Kursk signalled the death of the finest military machine of the first half of the twentieth century.
CASES:
[21.1] SCENARIO PARAMETERS
Recommended Number of Players: 2 or 3 (One German, Two Soviet)
Game Length: 8 Game-Turns
Solitaire Playability: Moderate
[21.2] GERMAN INITIAL DEPLOYMENT
German headquarters are set up on the appropriate hexes listed below. Then, German units are deployed within the restrictions of Case 18.1. Important Note: The 41st Panzer Corps was resubordinated between the July offensive and the August counteroffensive. Its new subordination is italicized.
56th Panzer Corps/4th Army Sector: 5614; 55th Army Corps/2nd Panzer Army Sector: 5414; 53rd Army Corps/2nd Panzer Army Sector: 5118; 35th Army Corps/2nd Panzer Army Sector: 4418; 41st Panzer Corps/2nd Panzer Army Sector: 4124; 23rd Army Corps/9th Army Sector: 3922; 47th Panzer Corps/9th Army Sector: 4019; 46th Panzer Corps/9th Army Sector: 4016; 20th Army Corps/ 9th Army Sector: 3911; Group von Esebeck (Army Group Center Reserve): 4016; 13th Army Corps/ 2nd Army Sector: 3109; 7th Army Corps/2nd Army Sector: 2110; 52nd Army Corps/Army Detachment Kempf Sector: 1613; 48th Panzer Corps/ 4th Panzer Army Sector: 1315; Group Raus/4th Panzer Army Sector: 1318; 42nd Panzer Army Corps/Army Detachment Kempf Sector: 1017; and 57th Panzer Corps/1st Panzer Army Sector: 0115.
The seven German sector headquarters (4th Army, 2nd Panzer Army, 9th Army, 2nd Army, 4th Panzer Army, Army Detachment Kempf and 1st Panzer Army) may be set up anywhere within their respective sector boundaries no more than four hexes away from the front line.
Note: See 21.47.
[21.3] SOVIET INITIAL DEPLOYMENT
Soviet headquarters are set up on the appropriate hexes listed below. Designations marked with an asterisk (*) denote a reserve headquarters (see 18.14 and 18.3). All units set up within the restrictions of Case 18.1. Important Note: Some of the Soviet headquarters are not subordinate to the same front that they were in May and July. All such headquarters have their August subordination italicized (which is different than that printed on the HQ counter).
10th Combined Arms Army/West Front: 5719; 50th Combined Arms Army/West Front: 5423; *West Front HQ: 5224; 11th Combined Arms Army/Bryansk Front: 5022; 4th Tank Army/ Bryansk Front: 5023; 11th Guards Combined Arms Army/Bryansk Front: 4822; 61st Combined Arms Army/Bryansk Front: 4625; 3rd Guards Tank Army/Bryansk Front: 4128; 3rd Combined Arms Army/Bryansk Front: 4427; 63rd Combined Arms Army/Bryansk Front: 4129; Bryansk Front HQ: 4627; 48th Combined Arms Army/ Central Front: 3726; 13th Combined Arms Army/ Central Front: 3523; 2nd Tank Army/Central Front: 3524; 70th Combined Arms Army/Central Front: 3320; 65th Combined Arms Army/Central Front: 3517; 60th Combined Arms Army/Central Front: 3014; Central Front HQ: 3124; 38th Combined Arms Army/Voronezh Front: 2312; 40th Combined Arms Army/Voronezh Front: 2114; 27th Combined Arms Army/Voronezh Front: 2115; 1st Tank Army/Voronezh Front: 2016; 6th Guards Combined Arms Army/Voronezh Front: 2018; 5th Guard Combined Arms Army/Voronezh Front: 2019; 5th Guards Tank Army/ Voronezh Front: 1920; Voronezh Front HQ: 2320; 69th Combined Arms Army/Steppe Front: 1722; 53rd Combined Arms Army/Steppe Front: 1622; 7th Guards Combined Arms Army/Steppe Front: 1222; Steppe Front HQ: 1624; 57th Combined Arms Army/Southwest Front: 0821; 6th Combined Arms Army/Southwest Front: 0518; 1st Guards Combined Arms Army/Southwest Front: 0221; *Southwest Front HQ: 0424; and 17 anti-tank and 22 artillery units.
[21.4] SPECIAL RULES
[21.41] The German Player deploys his units according to Cases 18.1 and 21.2. The Soviet Player then deploys his units according to Cases 18.1 and 21.3. The Soviet Player must place at least twenty-five of his anti-tank and artillery units in front line entrenchment hexes.
[21.42] The Soviet Player deploys his anti-tank and artillery units face up.
[21.43] The German Player-Turn is skipped on Game-Turn One. If the Players are using the air warfare optional rule, play proceeds directly from the Joint Air Warfare Phase to the Soviet Player-Turn; if not, play begins with the Soviet Player-Turn.
[21.44] During Game-Turn One only, each Soviet attack gains an additional column shift of two to the right if there is at least one artillery unit barraging the defending unit(s), and a shift of one to the right if there is not.
[21.45] During Game-Turn One only, any German unit that retreats more than one hex is disrupted at the end of that retreat.
[21.46] For the duration of the scenario subtract one from every combat result affecting a Soviet stack in supply (only one unit in a stack need be out of supply for that stack to be considered out of supply).
[21.47] All units subordinated to the German 2nd SS Panzer Corps headquarters are now considered to be subordinated to the 3rd Panzer Corps headquarters, which arrives on Game-Turn Four (see 21.51).
Historical Note: The 2nd SS Panzer Corps HQ was sent to the Italian theater of war in late July, and did not return to the Eastern Front for the Soviet counteroffensive.
[21.48] The German Player may execute as many unmodified attacks as the number of the Game-Turn (Example: On Game-Turn Four, four unmodified German attacks could be made). As many units as may be brought to bear on the defending stack may participate in a single unmodified stack. If the German Player wishes to execute any attacks over his unmodified attack limit, he must apply a column shift of four to the left in addition to all other shifts.
[21.49] The SS Wiking unit must be set up adjacent to or stacked with a German army headquarters unit. It must be placed in alternate subordination for it to attack, etc.
[21.5] GERMAN REINFORCEMENTS
[21.51] Reinforcing Units
Turn 4: 3rd Panzer Corps HQ, Das Reich SS and Totenkopf SS Panzer Grenadier Divisions enter at either 0907 or 1107.
[21.52] Conditional Reinforcements
-
If the German Player grants five Victory Points to the Soviet Player, the following units may enter play on any the following Game-Turn. However, none of these units may enter before Game-Turn 3.
-
17th Panzer Division: 4701; 23rd Panzer Division: 1107; and 16th Panzer Grenadier Division: 1107.
[21.53] Replacement Steps
Turn 1: 0
Turn 2: 1
Turns 3 through 6: 2
Turn 7: 1
Turn 8: 0
[21.6] SOVIET REINFORCEMENTS
[21.61] Reinforcing Units
None.
[21.62] Conditional Reinforcements
-
If the Soviet Player grants four Victory Points to the German Player, one of the following headquarters and all subordinate units may enter play on the following Game-Turn.
-
No more than one HQ (and all subordinate units) may enter play during a given turn.
-
Northern off-map reserve: 4th Guards Combined Arms Army and 21st Combined Arms Army.
-
Southern off-map reserve: 47th Combined Arms Army
-
The Soviet Player may choose any one of the entry hexes listed for the appropriate reserve, but a headquarters and all subordinate units must enter through the same hex. Northern off-map reserve: 4534, 4734, 5233 or 5933. Southern off-map reserve: 0124, 0127, 0132 or 1233.
[21.63] Replacement Steps
Turns 1 and 2: 3
Turns 3 through 7: 2
Turn 8: 0
[21.7] AIR POINTS
If the Players are using the air warfare optional rule (Section 17.0), the German Player receives five Air Points at the beginning of play and the Soviet Player six. The Soviet total is reduced by two on Game-Turn Two; the German total is reduced by one on Game-Turn Four. These Air Points may be used every turn unless eliminated.
[21.8] LEVELS OF VICTORY
German Strategic Victory: Avoid Soviet victory, and control Orel, Belgorod and Kharkov plus any Victory Point hex controlled by the Soviet Player at the beginning of the scenario.
German Tactical Victory: Avoid Soviet victory, and control either Orel or Belgorod, and Kharkov.
Draw: None of the German or Soviet victory conditions are fulfilled.
Soviet Tactical Victory: –47 to –69 (per 18.4)
Soviet Strategic Victory: –70 or greater (per 18.4)
[22.0] UNIT MANIFEST/ORDER OF BATTLE
COMMENT:
Historians have been unable to compile complete Orders of Battle for the Eastern Front due to the Soviet government's reluctance to make its records on the matter public. Recently, however, information has been released to the West in conjunction with an effort to "educate bourgeois" historians. Thus, a good researcher with a command of the Russian language can upgrade the previously suspect Soviet OBs. A good German OB can be compiled from captured German records, including the Lage Ost maps, which have been used for wargame OBs many times. Richard Gould, an archivist at the National Archives, assembled the following OB from which the unit designations for the game were taken.
Players are provided with the army (for the Germans) or front (for the Soviets) sector in which each unit was positioned at the start of the three scenarios. These sectors are portrayed on the map for those who are interested in either deploying an exactly historical starting position at Kursk, or for those who are curious. Players will note that there are a few slight differences between individual unit deployments and the scenario set-up rules; these can be corrected by increasing the independent command limits at the start of play and allowing units to be set up in independent command. Be forewarned, however, that Players will have to decrease the independent command limits on the following turns, and restrict each other heavily as to which units may be placed in independent command. All but the most fanatic simulationist will find the minimal distortions caused by the game's streamlined independent command mechanic worthwhile.
GENERAL RULE:
The ensuing Order of Battle is divided into four sections: German units that appear in the countermix, Soviet units that appear in the countermix, German units that do not appear in the countermix, and Soviet units that do not appear in the countermix. Each unit not in the countermix was either considered for action at Kursk by the appropriate High Command, or is represented by replacement Steps (due to small unit size). If Players wish to make up counters for units not present in the countermix, they should use existing units of the same type as guideline (if any).
Each unit's location is coded by either a letter, a Roman numeral, or an Arabic numeral.
-
If a unit's location is indicated by a letter, the unit begins that scenario in play if and only if a counter is provided for it, unless
- The unit is German, and its letter code is either "H" or "J," or
- The unit is Soviet, and its letter code is "F," or
- The unit's letter code is "Y" or "Z."
Note: Most of the units that meet one of the first two conditions will appear in play, but some are immediately off-map.
-
If a unit's location is indicated by a Roman numeral, it is located in a holding area off the map (and might arrive as a reinforcement if and only if a counter is provided for it).
-
If a unit's location is indicated by an Arabic numeral, the unit is in a communications area or zone. The entire Eastern Front has been divided, for convenience, into communications areas and zones. If:
- The unit's communications area or zone name is printed in regular type below, the unit is located somewhere else on the Eastern Front (and will arrive as a reinforcement if and only if a counter is provided for it and the scenario rules list its entry into play).
- The unit's communications area or zone name is printed in italic type below, the unit is located in play if and only if a unit counter is provided for it, or is immediately off-map.
KEY TO GERMAN CODES
- A: 4th Army Sector
- B: 2nd Panzer Army Sector
- C: 9th Army Sector
- D: 2nd Army Sector
- E: 4th Panzer Army Sector
- F: Army Detachment Kempf Sector
- G: 1st Panzer Army Sector
- H: Army Group Center Reserve
- J: Army Group South Reserve
- Y: Other Theater of War not yet formed
- Z: In Transit (to battle area)
- I: Smolensk Region Holding Area
- II: Donets Basin Holding Area
- III: Kuban Region Holding Area
- 1: Leningrad Communications Area
- 2: Vitebsk Communications Zone
- 3: Smolensk Communications Zone
- 4: Baltic Communications Area
- 5: Orsha Communications Zone
- 6: Western Byelorussia Communication Area
- 7: Mogilev Communications Zone
- 8: Minsk Communications Zone
- 9: Zhlobin Communications Zone
- 10: Gomel Communications Zone
- 11: Chernigov Communications Zone
- 12: Nezhin Communications Zone
- 13: Lubny Communications Zone
KEY TO SOVIET CODES
- A: West Front Sector
- B: Bryansk Front Sector
- C: Central Front Sector
- D: Voronezh Front Sector
- E: Southwest Front Sector
- F: Steppe Front/Military District Sector
- I: Smolensk Region Holding Area
- II: Donets Basin Holding Area
- III: Kuban Region Holding Area
- 1: Kalinin Communications Zone
- 2: Vyazma Communications Zone
- 3: Moscow Communications Zone
- 4: Kaluga Communications Zone
- 5: Tula Communications Zone
- 6: Ryazan Communications Zone
- 7: Michurinsk Communications Zone
- 8: Kursk Communications Zone
- 9: Kastornoye Communications Zone
- 10: Voronezh Communications Zone
- 11: Rossosh Communications Zone
- 12: Voroshilovgrad Communications Zone
- 13: Rostov Communications Zone
- 14: Tikhoretsk/Kropatkin Communications Zone
- 15: Mar'ino Communications Zone
- 16: Stary Oskol Communications Zone
In the printed manual the unit names in the tables below are set in italic type; the column headings 5/1, 7/4 and 8/1 give the location code for the May, July and August scenarios respectively.
German Units Represented by Counters
Panzer Divisions
| Unit | 5/1 | 7/4 | 8/1 |
|---|---|---|---|
| 2nd | H | H | H |
| 3rd | II | J | II |
| 4th | H | H | H |
| 5th | H | H | B |
| 6th | J | J | J |
| 7th | J | J | J |
| 8th | I | I |
Reinforced Panzer Grenadier Divisions
| Unit | 5/1 | 7/4 | 8/1 |
|---|---|---|---|
| Grossdeutschland | J | J | C |
| Leibstandarte SS Adolf Hitler | J | J | Y |
| Das Reich SS | J | J | II |
| Totenkopf SS | J | J | II |
| Wiking SS | II | II | J |
Assault Infantry Division
| Unit | 5/1 | 7/4 | 8/1 |
|---|---|---|---|
| 78 Sturm | H | C | B |
Panzer Grenadier Divisions
| Unit | 5/1 | 7/4 | 8/1 |
|---|---|---|---|
| 10th | H | H | B |
| 16th | II | II | II |
| 20th | I | B | B |
| 25th | B | B | H |
Infantry Divisions (old style)
| Unit | 5/1 | 7/4 | 8/1 |
|---|---|---|---|
| 15th | G | G | G |
| 68th | D | D | D |
| 95th | I | I | B |
| 106th | J | F | F |
| 161st | F | F | F |
| 167th | E | E | E |
| 168th | 13 | F |
Infantry Divisions
| Unit | 5/1 | 7/4 | 8/1 |
|---|---|---|---|
| 6th | Y | H | C |
| 7th | H | H | C |
| 26th | D | D | B |
| 31st | A | H | C |
| 34th | B | B | B |
| 36th | I | H | H |
| 39th | F | F |
Static Infantry Division
| Unit | 5/1 | 7/4 | 8/1 |
|---|---|---|---|
| 707th | H | H | B |
Heavy Tank Destroyer Battalions
| Unit | 5/1 | 7/4 | 8/1 |
|---|---|---|---|
| 653rd | Y | H | H |
| 654th | Y | H | H |
Hungarian Light Infantry Divisions
| Unit | 5/1 | 7/4 | 8/1 |
|---|---|---|---|
| 102nd | H | H | 10 |
| 103rd | H | H | H |
Hungarian Security Division
| Unit | 5/1 | 7/4 | 8/1 |
|---|---|---|---|
| 1st | H | H | H |
Collaborationist Russian Security Brigade
| Unit | 5/1 | 7/4 | 8/1 |
|---|---|---|---|
| Militia | H | I | I |
Security Division
| Unit | 5/1 | 7/4 | 8/1 |
|---|---|---|---|
| 221st | 16 | 16 | 16 |
Light Infantry Brigade
| Unit | 5/1 | 7/4 | 8/1 |
|---|---|---|---|
| Gruppe von Manteuffel (also known as Jaeger) | C | C | H |
Panzer Corps Headquarters
| Unit | 5/1 | 7/4 | 8/1 |
|---|---|---|---|
| 2nd SS | J | J | Y |
| 3rd | J | J | II |
| 41st | C | C | B |
| 46th | C | C | C |
| 47th | C | C | C |
| 48th | E | E | E |
| 56th | A | A |
Army Corps Headquarters
| Unit | 5/1 | 7/4 | 8/1 |
|---|---|---|---|
| 7th | D | D | D |
| 13th | D | D | D |
| 20th | C | C | C |
| 23rd | C | C | C |
| 35th | B | B | B |
| 42nd | F | F | F |
| 52nd | E | E |
Soviet Units Represented By Counters
Tank Corps
| Unit | 5/1 | 7/4 | 8/1 |
|---|---|---|---|
| 1st | I | I | B |
| 1st Gds | B | B | B |
| 2nd | E | E | D |
| 2nd Gds | D | D | F |
| 3rd | C | C | C |
| 4th Gds | 10 | 10 | D |
| 5th Gds | D | D |
Mechanized Corps
| Unit | 5/1 | 7/4 | 8/1 |
|---|---|---|---|
| 1st | 1 | 1 | F |
| 1st Gds | F | F | F |
| 2nd Gds | 10 | 10 | 8 |
| 2nd | 5 | 5 | B |
| 3rd | D | D | D |
| 3rd Gds | 10 | 10 | 15 |
| 5th Gds | 11 |
Rifle Corps
| Unit | 5/1 | 7/4 | 8/1 |
|---|---|---|---|
| 15th | C | C | C |
| 23rd | 11 | 11 | 16 |
| 24th | C | C | C |
| 25th | B | B | B |
| 26th | E | E | II |
| 28th | C | C | C |
| 29th | C | C |
Guards Rifle Corps
| Unit | 5/1 | 7/4 | 8/1 |
|---|---|---|---|
| 4th Gds | E | E | E |
| 6th Gds | E | E | E |
| 8th Gds | A | A | B |
| 9th Gds | B | B | B |
| 16th Gds | A | A | B |
| 17th Gds | C | C | C |
| 18th Gds | C |
Motorized Rifle Division
| Unit | 5/1 | 7/4 | 8/1 |
|---|---|---|---|
| 8th NKVD | 8 | 8 | 8 |
Rifle Divisions
| Unit | 5/1 | 7/4 | 8/1 |
|---|---|---|---|
| 1st Gds | A | A | A |
| 16th Lithuanian | C | C | C |
| 41st | B | B | B |
| 49th | A | A | A |
| 60th | C | C | C |
| 69th | C | C | C |
| 71st | F |
Fortified Areas
| Unit | 5/1 | 7/4 | 8/1 |
|---|---|---|---|
| 119th | C | C | C |
| 153rd | 5 | 5 | B |
| 154th | 5 | 5 | C |
| 160th | C | C | C |
| 161st | C | C | C |
Combined Arms Army Headquarters
| Unit | 5/1 | 7/4 | 8/1 |
|---|---|---|---|
| 1st Gds | E | E | E |
| 3rd | B | B | B |
| 4th Gds | 5 | 5 | 8 |
| 5th Gds | F | F | D |
| 6th | E | E | E |
| 6th Gds | D | D | D |
| 7th Gds | D | D |
Tank Army Headquarters
| Unit | 5/1 | 7/4 | 8/1 |
|---|---|---|---|
| 1st | D | D | D |
| 2nd | C | C | C |
| 3rd Gds | 3 | 3 | B |
| 4th | 2 | 2 | B |
| 5th Gds | 4 | 4 | D |
Partisan Brigades
2nd Borovitschev; Kalashnikov; Molotov; Smert Nemezkyn Okkupantum; Stalin; Voroshilov; Za Rodino
German Units not Represented By Counters
Panzer Division
| Unit | 5/1 | 7/4 | 8/1 |
|---|---|---|---|
| 13th | III | III | 7 |
Cavalry Division
| Unit | 5/1 | 7/4 | 8/1 |
|---|---|---|---|
| SS Kavallerie | 4 | 6 | 13 |
Panzer Grenadier Division
| Unit | 5/1 | 7/4 | 8/1 |
|---|---|---|---|
| 18th | 1 | 1 | 3 |
Infantry Division (New Style)
| Unit | 5/1 | 7/4 | 8/1 |
|---|---|---|---|
| 113th | Y | Y | Z |
Security Divisions
| Unit | 5/1 | 7/4 | 8/1 |
|---|---|---|---|
| 203rd | 9 | 9 | 9 |
| 213th | 8 | 8 | 8 |
| 286th | 5 | 5 | 5 |
| 454th | 14 | 14 | 14 |
Field Training Divisions
| Unit | 5/1 | 7/4 | 8/1 |
|---|---|---|---|
| 153rd | 15 | 15 | 15 |
| 390th | 7 | 7 | 7 |
| 391st | 2 | 2 | 2 |
Motorized Infantry Brigade
| Unit | 5/1 | 7/4 | 8/1 |
|---|---|---|---|
| 1st SS | 8 | 8 | 8 |
Security Brigade
| Unit | 5/1 | 7/4 | 8/1 |
|---|---|---|---|
| 17th zbV | H | H | H |
Rocket Projector Brigades
| Unit | 5/1 | 7/4 | 8/1 |
|---|---|---|---|
| 1st | J | J | J |
| 3rd | J | J | II |
Heavy Tank Battalions-Tigers
| Unit | 5/1 | 7/4 | 8/1 |
|---|---|---|---|
| 503rd | J | J | J |
| 505th | H | H | H |
Tank Battalions-Panther
| Unit | 5/1 | 7/4 | 8/1 |
|---|---|---|---|
| 51st | Y | J | B |
| 52nd | Y | Z | J |
| III/Grossdeutschland | Y | Z | 6 |
| SS Panther | Y | Y | Z |
Assault Tank Battalion
| Unit | 5/1 | 7/4 | 8/1 |
|---|---|---|---|
| 216th Sturm | Y | H | H |
Dive Bomber Aviation Wings
| Unit | 5/1 | 7/4 | 8/1 |
|---|---|---|---|
| 1st | H | H | H |
| 2nd | J | J | J |
| 3rd | H | H | H |
| 77th | J | J | J |
Ground Assault Aviation Wing
| Unit | 5/1 | 7/4 | 8/1 |
|---|---|---|---|
| 1st | J | J | J |
Hungarian Light Infantry Division
| Unit | 5/1 | 7/4 | 8/1 |
|---|---|---|---|
| 105th | 12 | 12 | 12 |
Hungarian Security Division
| Unit | 5/1 | 7/4 | 8/1 |
|---|---|---|---|
| 201st | 11 | 11 | 11 |
Soviet Units not Represented by Counters
Tank Corps
| Unit | 5/1 | 7/4 | 8/1 |
|---|---|---|---|
| 3rd Gds | I | I | I |
| 5th | 2 | 2 | 2 |
| 8th | 3 | 3 | 3 |
Mechanized Corps
| Unit | 5/1 | 7/4 | 8/1 |
|---|---|---|---|
| 4th Gds | II | II | II |
| 5th | II | II | II |
| 7th | 3 | 3 | 3 |
| 8th | 3 | 3 | 3 |
| 9th | 5 | 5 | 5 |
| 14th | 3 | 3 | 3 |
Cavalry Corps
| Unit | 5/1 | 7/4 | 8/1 |
|---|---|---|---|
| 1st Gds | 5 | 5 | I |
| 2nd Gds | I | I | I |
| 3rd Gds | I | I | I |
| 4th | 10 | 10 | 9 |
| 5th Gds | 11 | 11 | II |
| 6th Gds | 7 | 7 | 2 |
| 7th Gds | 11 |
Rifle Corps
| Unit | 5/1 | 7/4 | 8/1 |
|---|---|---|---|
| 9th | 14 | 14 | 14 |
| 34th | 13 | 13 | 13 |
| 35th | 3 | 3 | 3 |
| 46th | 6 | 6 | 6 |
| 73rd | 1 | 1 | 1 |
| 78th | 1 | 1 | 1 |
Guards Rifle Corps
| Unit | 5/1 | 7/4 | 8/1 |
|---|---|---|---|
| 1st Gds | 12 | 12 | II |
| 10th Gds | 13 | 13 | 13 |
| 13th Gds | 12 | 12 | II |
| 15th Gds | I | I | I |
| 34th Gds | 13 | 13 | 13 |
Breakthrough Artillery Divisions
| Unit | 5/1 | 7/4 | 8/1 |
|---|---|---|---|
| 1st Gds | C | C | C |
| 2nd Gds | I | I | B |
| 3rd | I | I | B |
| 5th | C | C | C |
| 5th Gds | I | I | I |
| 6th | 5 | 5 | A |
| 7th | I | I |
Guards Mortar Divisions
| Unit | 5/1 | 7/4 | 8/1 |
|---|---|---|---|
| 1st Gds | I | I | I |
| 2nd Gds | 3 | 3 | 3 |
| 4th Gds | 5 | 5 | D |
| 5th Gds | C | C | C |
Fortified Areas
| Unit | 5/1 | 7/4 | 8/1 |
|---|---|---|---|
| 115th | 3 | 3 | I |
Assault Pioneer Brigades
| Unit | 5/1 | 7/4 | 8/1 |
|---|---|---|---|
| 2nd | 3 | 3 | D |
| 6th | D | D | D |
| 8th | 3 | 3 | B |
| 11th | 5 | 5 | II |
| 14th | F | F | F |
Ground Assault Aviation Corps
| Unit | 5/1 | 7/4 | 8/1 |
|---|---|---|---|
| 1st | D | D | D |
| 2nd | A | A | A |
| 3rd | B | B | B |
| 5th | D | D | D |
| 7th | 2 | 2 | 2 |
Ground Assault Aviation Divisions
| Unit | 5/1 | 7/4 | 8/1 |
|---|---|---|---|
| 1st Aviation Army Sturmovik | A | A | A |
| 2nd Aviation Army Sturmovik | D | D | D |
| 5th Aviation Army Sturmovik | F | F | F |
| 15th Aviation Army Sturmovik | B | B | B |
| 16th Aviation Army Sturmovik | C | C | C |
| 17th Aviation Army Sturmovik | E | E | E |
Combined Arms Army Headquarters
| Unit | 5/1 | 7/4 | 8/1 |
|---|---|---|---|
| 2nd Gds | 6 | 6 | II |
| 46th | 13 | 13 | 13 |
| 52nd | 1 | 1 | 1 |
Partisan Brigades (not represented by counters)
3rd Partisan Division; Chapeyev; Dantsenko; Duka; Bytosh; Orlov; Panasenko; Romaschin
Partisan Regiment
56th Special
Partisan Battalions
Glebov; Piskun; Shiryatino; Simonov
DESIGNER'S NOTES
Kursk is a game project with a long and varied history. Since work began on Kursk, the original designer left SPI before he was able to complete his end, the research in use was discovered to be erroneous, and a new game system was substituted for the PGG (Panzergruppe Guderian) system. A chronicle of the progress and regress of Kursk may be found in issues of Strategy and Tactics and MOVES magazines published in 1979.
Game System: When the game was initially feedbacked in S&T, the proposal described an operational-level treatment of the battle using the PGG system. There are, however, certain requirements for a battle if the PGG system is to be used. Kursk was not a typical World War II battle, and testing determined that the PGG system was inappropriate. Further experimentation proved that a PGG game could be done on the southern pincer, but considerable tinkering would be required (the major problem was that the German player would have eleven mobile units to cover forty-three hexrows — the Germans could not do what they did historically, let alone achieve their objective). Perhaps someone will do a PGG system game on an aspect of the battle of Kursk, but the current game assumes that the people who approved the game wanted an overview of the battle, rather than an isolated portion. With that assumption, a different system was required for the game.
Research: The original research was taken off the Lage Ost maps, which were captured at the end of the war. These provide an excellent source for a German Order of Battle, but are weak on terrain analysis and very weak on Soviet Order of Battle (at this juncture in time, the Germans would place Soviet armies on the map if they discovered more than one refugee in a particular area). I was lucky enough to be offered considerable assistance by a National Archivist who could read Russian and had already made a study of the battle. Much of the credit for the accuracy of the map and order of battle go to Richard Gould, whose patience with me and familiarity with the appropriate sources were equal to the task. He provided me with so much information that I was forced to delete some pertinent material.
Movement: The basic movement rules are familiar to any veteran player of wargames. The rail movement rules limit the number of units the players can transport from any one given area at a time. Historically, the Soviets were not able to rail the entire Southwest Front to the salient — this situation is reproduced in the game. When units were pulled out of the front line, they were either attrited away to uselessness or fatigued, requiring a period of rest to become combat effective once again. The disengagement rules prevent players from using units ahistorically. The infiltration rules reflect the German capabilities at the time. The playtesters prefer to believe that those rules simulate the German armored unit which disguised itself as a Soviet unit.
Combat: The Kursk battle differs in many respects from its contemporaries. The mobility of armored and mechanized units and the fluidity of the front line were severely curtailed by conditions unique to Kursk. First, the defensive positions were generally situated in excellent protective terrain. Second, the entrenchments dug for the battle were far more extensive than any such network since the days of the Great War (World War I). The Soviet Siberian reinforcements managed an incredible amount of spadework between May and July; just take a look at the map. This combination of events reduced the tactical options available to division and brigade commanders considerably. The Kursk combat system encourages the massing of powerful formations and rates units defensively by their staying power. The Combat Results Table is attritional in nature; players cannot escape casualties except at the extreme ranges. The system may be unsubtle, but it portrays combat as it occurred at Kursk. The results obtained in combat are generally similar to those found in other games of the era, but their application is different, because of the Step and retreat limitations mechanisms.
Modes: The modes force the players to make strategic decisions before movement and combat, rather than at the instant of either. Kursk was won and lost on such decisions; there is no reason the players should escape from the responsibilities which faced the historical commanders. The headquarters, anti-tank and artillery units are exempted from mode considerations because their use was fairly straightforward.
Supply, Communication and Subordination: When individual units are organized into cohesive formations, players of a simulation of that event should be encouraged to use those units together. Though subordination rules are never popular with those who play the games purely for entertainment value, the rules here are not overly draconian, and so will not impede the flow of play. The smooth functioning of combat units was more dependent on sufficient fuel and munitions reaching the units than staying in radio contact with their headquarters, which is why supply is more critical than communication in play.
Artillery and Anti-tank: The extensive use of artillery and anti-tank guns is identified with the battle of Kursk. The Soviet anti-tank guns blunted many a German armored offensive throughout the two weeks of battle, and artillery on both sides played extremely important roles at various times. The Soviet numerical superiority in guns wiped out any German qualitative edge.
Scenarios: A game on Kursk must include the historical scenario. An attack in May has been hypothesized by many armchair generals conversant with the battle, and should be of interest to almost any Eastern Front fan. At first, I was not in favor of including the August scenario, but when I devised the current system, only a few changes were required to include the Soviet counteroffensive. I find the August scenario to be most important, for it is the first time the Soviets employed the strategies (massed formations plus rolling artillery barrages) which took them to Berlin.
In retrospect, the most important decision made during the length of the project was to junk the original PGG-derivative system and the faulty research. The Kursk situation deserved the fresh approach herein presented. Some aspects of the game will be maddeningly familiar to the Eastern Front gamer, such as the German individual unit superiority (one can always tell the Soviet units — they have the lowest strength values), but even here subtle changes have been instituted. A fair number of good things in the game are due to an unusually skilled and dedicated group of playtesters; they can blame me for the bad things.
The simulation of the battle of Kursk required an effort almost as massive as the battle itself. I have put a large amount of sweat and blood into this most ambitious undertaking of my professional career. I trust the reader will be able to appreciate it.
PLAYER'S NOTES
The player of Kursk will find two important mechanisms which distinguish it from other games of this period: the extensive use of combat modes and an unusual system for combat resolution. While the use of modes is certainly not unique to this game, it is as important in Kursk as the formation rules commonly found in pre-twentieth century simulations. The modes in which both attacker and defender place their forces will strongly influence not only movement but also combat results and exploitation by armored formations. The combat results table, on the other hand, is unique. It forces the attacker to use relatively large forces in order to obtain a favorable result; the apparent ratio of the opposing forces is less important. However, the outcome will be greatly modified by the size of the defending stack (more steps provide both more staying power and more favorable combat results), the defensive position and terrain, and by the modes of both forces. In general, the combat results obtained are what one would normally expect, in spite of the fact that the means of calculating the results are different from those used in other games.
The strategy and tactics for each side are, of course, different for each scenario. However, a study of the historical scenario provides a useful insight into the game system. These lessons can be employed in the other scenarios and are summarized below.
German Player
The only realistic strategic options for the German player are determinations of the exact points of attack. The set-up positions favor attacks into the shoulders of the salient, as was done historically. While this entails confronting the heart of the Soviet defense, any breakthroughs threaten Kursk and all of the forces in the salient. Attacks further west along the salient will meet with less initial resistance, but usually allow the Soviet player more time to mobilize his reserves. Attacks aimed in an easterly direction from the shoulders look promising, since they threaten to cut off most of the Soviet army; again, these attacks move directly into the path of easily mobilized reserves. While the historical approach often holds the most promise, players should feel free to experiment.
German tactics are succinctly stated: attack until the armored and mechanized divisions are depleted. On the first turn, place all units in Assault Mode and attack Soviet strong points during both combat phases. Step losses will be high; ideally, as many losses as possible should be taken from infantry units. If possible, each attack should be made with two armored corps, although a single full corps will suffice in a pinch. Try and keep a corps (or some units in independent command) in Mobile Mode, so that optimal exploitation can be made during the Mechanized Movement Phase. If necessary, use overrun attacks to remove weak blocking units, since it is crucial at this time to exploit fearlessly. By the end of the first turn, breakthroughs should have been forced on both sides of the salient and preparations made to confront the second line of resistance. Depleted armored units should be built up with replacement steps. Finally, any available armored units in the far southern and northern corps should be placed in independent command and rushed to the front.
Once the first line of trenches is breached, more tactical possibilities will present themselves. The German player should carefully examine the terrain in search of any weaknesses. He should note that during the first Movement Phase, he can use infiltration tactics along, but not across, trench lines; this is the ideal method for surrounding and destroying carelessly placed defenders. Aside from this, the German player should attack strongly, using Assault Mode with some back-up mobile units to displace the second line of defense. It may also be wise at this time to break down infantry units into Kampfgruppen, which will later serve to hold the flanks of the penetration; armored units will be needed elsewhere.
When free of the trench lines, infiltration tactics combined with Mobile Mode attacks should be most effective. The Soviet line should be badly stretched at this point, providing many opportunities for judicious infiltration. Most German armored forces should be in Mobile Mode, in order to exploit the breakthroughs likely to occur once the Soviet player is deprived of good defensive terrain. Assault Mode should only be used for reducing large unavoidable concentrations. With luck, these tactics will allow the German forces to reach the outskirts of Kursk (and perhaps into Kursk itself) before the arrival of Soviet reinforcements and depletion of the panzers grind the offensive to a halt.
Headquarters units serve a dual purpose for the Germans. They are crucial to play in that they provide supply and communication to all units; in a sense, headquarters direct front-line traffic. The headquarters also possess artillery and anti-tank capability. The German player should use at least the artillery strength of his headquarters when conducting his offensive; at the same time, he cannot leave a headquarters unit in an exposed position. The loss of a single headquarters unit will seriously undermine the German attack; losses of more than one such unit will cripple that attack. The German player cannot always place headquarters units in front-line positions under armored units because this may prevent other units from absorbing losses. How the German player balances his front-line units will be one of the keys to victory or defeat.
Soviet Player
The onus is upon the Soviet player to prevent the German from finding any fruitful axis of attack; the Soviet position is very fragile and a single misplacement can result in a lost game. The strategic choice for the Soviets is whether to defend strongly or to counterattack. Such counterattacks should be launched on the flanks, using local reserves, against the relatively weak German line. However, the enemy occupies good defensive terrain in these areas and it is recommended that such attacks be abandoned if not initially successful. If the Soviet player is fortunate enough to breach those enemy trenches, the counterattacks should be pressed ruthlessly in order to relieve German pressure on the salient. A simpler and sounder line of play is to move all reserves into defensive positions ahead of the German line of advance. With proper play, these units should arrive just in time to save the day. It's your game; choose your strategy.
The initial set-up should have artillery and anti-tank units sprinkled liberally among the units likely to be destroyed by the initial German attack; remember that the first nine artillery and anti-tank units to be removed from play will be "resurrected" and placed with the reserve units. The front line should consist of strong stacks (five or more steps, if possible) stationed no more than two hexes apart. Place a screen of weaker units two hexes back; they cannot be attacked during the second combat segment and will serve to limit the extent of any German penetration. Keep a close watch on the terrain, looking for additional defensive column shifts provided by woods, hills, depressions and rivers. Static Mode is de rigueur in the trenches; Mobile Mode should only be used for rapid redeployment or retreat.
Once the German player has penetrated the first row of entrenchments, defense becomes more difficult. Weak and depleted units currently holding the line must be reinforced and a new secondary defensive line (two hexes back) must be emplaced. However, the German player now has the ability to infiltrate along trench lines and surround poorly positioned units; such free avenues of advance must be blocked.
As the (hopefully) orderly retreat continues, use terrain to your advantage and stay in Static Mode in the trenches. Once pushed out of the trenches, Mobile Mode may be preferable. At the same time, a continuous line (with a suitable secondary line) is virtually indispensable, since the Germans can now infiltrate freely.
In general, the Soviet player must force the German to deplete his armored formations. To do so, the Soviet player must be prepared to take very high losses and should not be discouraged by the size of his "dead pile." In good defensive terrain, it is usually best to stand and fight, even with very weak stacks, forcing the German player to attack repeatedly and sustain additional losses.
In Summary
Kursk is a game which requires planning ability and patience on the part of both players. The German player will often be faced with a solid Soviet line, which, almost as often, he can break. The Soviet player will usually be faced with staggering casualties and German breakthroughs, but his reserves and the limitations on advance after combat can usually hold off disaster. Players will find Kursk a very tense game, but, should worse come to worst, should not be afraid to resign if the situation is hopeless. Unless the players are exploring historical alternatives, there is no need to play out an already decided game.
The German player should attack until he has nothing left and the Soviet player should defend to the last man. Proper execution of these tactics requires a grim frame of mind; Kursk was decidedly such a battle.
WARNING TO EXPERIENCED GAMERS
The Players should carefully read all the Secondary Cases before beginning play. The rules to Kursk do have many similarities to those of other Eastern Front games; however, the differences are crucial to the play of the game. As an example, supply is judged at the instant of movement (in most other Eastern Front games, it is judged before any units are moved).
A NOTE ON TACTICS
The game system herein presents many options to each Player as he moves his units, and will probably require some play experience before a Player develops a good tactical strategy for his style of play. It was discovered during testing that when Players new to the system played each other, the defender was the victor a disproportionate number of times. The attacker should not worry; a few plays of the game will swing the balance to a more equitable arrangement.