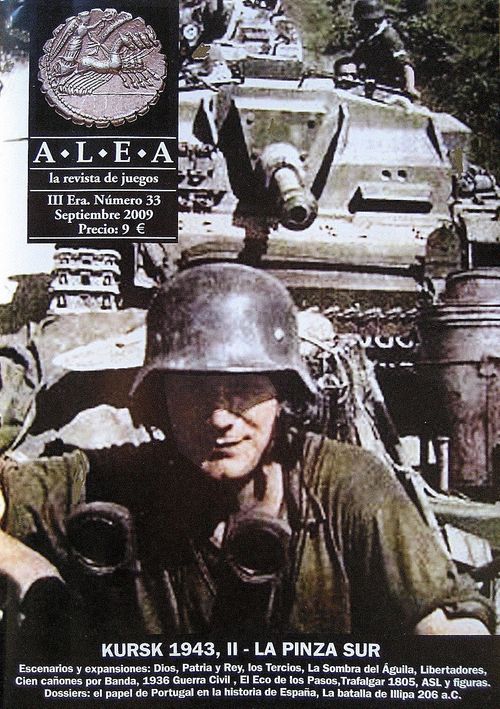
Kursk 1943: The Southern Pincer
Official rulebook: Ludopress (Alea)
Kursk 1943: The Southern Pincer Rulebook
Table of Contents
Table of Contents
Specific Rules for Kursk II
Abbreviations Used
Germans
- DR: 2 Div. Pz. Gren. SS "Das Reich"
- GD: Panzer Grenadier Div. Grossdeuts-chland, ("Great Germany").
- GrR: Grenadier Regiment, (Grenadier Regi-ment).
- Kp: Kompanie, (Company).
- LAH: 1 Div. Pz. Gren. SS "Leibtandarte Adolf Hitler".
- Lh: Lehr, (Training).
- PzA: Panzer Abteilung (Tank Detachment).
- PzR: Panzer Regiment (Panzer Regiment).
- PzGrR: Panzer Grenadier Regiment, (Panzer Grenadier Regiment)
- StGA: SturmGeschutz Abt. (Assault Gun Detachment).
- s.Kp: Schewere Kompanie, (Heavy Tank Company).
- TOT: 2 Div. Pz. Gren. SS "Totenkopf".
Soviets
- IAP: Figther Regiment (All Soviet air units are two-step divisions excepting some one-step, regiment-sized units).
- MK: Mechanised Corps.
- TK: Tank Corps.
Abbreviations used in the Set Up map
- TK Gd: Guards Tank Corps.
- D: Division (Infantry).
- D Gd.: Guards Division.
- ID: Infantry Division.
1. Initial Set Up
Both players must agree before starting play if they will use the free set up or historical set up options. If the "free set up" option is chosen, both players must deploy their units as per the following rules. If they choose the "historical set up" option, they must deploy following instructions listed in Scenario 3 "Panzerkeil.".
Free Set Up Turn 1. Before starting play, both players must place their units on the map following the rules below:
Soviet player deploys first.
Soviet Set Up: They must deploy in hexes of Soviet fortified line, always respecting stacking limits. The Soviet player can place on map all available units excepting the Front Reserve and STAVKA reserve units. These units should be placed outside of the map but in an easy to reach place. (See 15. Front and STAVKA Reserves). Artillery units can deploy in any hex under initial Soviet control.
German Set Up: German units must deploy in German trench hexes respecting stacking limits. However, units belonging to the following formations: 51 and 52 Pz. Abt., 503 Pz. Abt., 19 Pz. Div., and 198 Inf. Div. can also deploy in any German-controlled hex but never within less than four hexes of a Soviet fortified hex. Artillery, AA artillery and rocket artillery units can deploy in any hex under initial German control.
Deployment of other Counters and Markers: Air units of both sides will be placed in the respective "available air units" boxes. Game turn marker must be placed in box "1" of the General Data Track. The following markers: "destroyed tanks" "destroyed fighters" and "destroyed bombers" of both sides must be placed in box "0" of the General Data Track.
German Units: Independent (i.e., units not belonging to any major formation) Assault Gun and AA artillery units can set up stacked with any other German units (always respecting stacking limits.)
Soviet Units: Artillery units not belonging to Front Reserve can deploy in any Soviet-controlled hex within 3 or more hexes of the closest enemy unit.
Soviet Independent Tank Units: All independent Soviet tank, assault gun and heavy tank brigades and regiments as well as AT fronts not belonging to any superior formation nor beloning to STAVKA or Front reserves can set up adjacent or stacked with any other Soviet unit.
Armored Trains: Armored Train units available on turn one will set up in any railway hex under initial Soviet control.
AT( Anti Tank) Fronts: The Soviet players has initially at his disposal 12 AT Fronts. Of these, at least 6 must deploy adjacent or stacked to units belonging to the 51 and 52 Guards Divisions.
Mines and AT Fronts: The Soviet players has initially at his disposal 12 AT Fronts. He receives 2 per turn starting with turn 3. The Soviet player receives four mine markers per turn starting with turn 3.
2. STAVKA Reserves. The 5th Guards and 5th Guards Tank Armies
Units belonging to the Soviet High Command (STAVKA) reserve are identified by a red square. These units are not under control of the Front commander. They enter play as reinforcements happen when the following conditions are met:
At least one supplied German unit enter an hex of the 2nd Soviet defensive line (see the map.) If this condition is not met the Soviet player can not activate units of the STAVKA reserve.
The cost of activating each Corps-sized formation from the STAVKA reserve is listed below:
- -5 VP: Each Corps sized formation.
- -1/2 VP: For every brigade- or regiment-sized independent unit.
3. The Soviet 4th Defensive Line
The line marked as fourth defensive line was not so well prepared as the other three. Their effects on combat is that Soviet units multiply their combat factor per x1.5 instead of x2 as the lines 1 to 3.
4. How to Win
In General: Winning in Kursk: II Souther pincer is measured in Victory Points (VPs). During the game both sides add up VPs. At the end of turn 11 (the campaign scenario lasts 11 turns, from 4 to 14 July 1943) the Victory Points are added as per the following list:
Soviet Victory Points:
- +2 VP for every German tank, assault gun, mech infantry or motorized infantry eliminated at the end of the match.
- +1 VP for every unit of any other type eliminated at the end of the match.
German Victory Points:
- +20 VP for exiting across the southern side of the map 6 or more tank or assault gun units before the end of turn 8.
- +10 VP for exiting across the southern side of the map 6 or more tank or assault gun units.
- +1 VP for every Soviet tank or assault gun unit in the deadpile at the end of the match.
- +1/2 VP for every soviet infantry unit in the deadpile at the end of the match.
At the end of turn 11, both players add up the total of VP gained and substract both amounts between each other. Example: the Soviet gains 20 VP and the German gains 30 VP. 40-20= 20 VP, German tactical victory.
Victory Level:
- If the difference is 20 VP or more for the Germans, they have achieved an operational victory.
- If the difference is 10 PV or more for the Germans, they have achieved a tactical victory.
- If the difference is 5 PV or more for the Germans, the Soviets have achieved a tactical victory.
Scenario 3. Panzerkeil (4 to 8 July 1943)
This scenario simulates the opening of the battle of Kursk, when the 4th Panzer Army assaulted the Soviet defenses with some of the finest divisions of the Wehrmacht and the SS: the divisions Grossdeutschland, Leibstandate, Totenkopf and Das Reich. As spearhead or "armored wedge" (Panzerkeil) of the offensive they deployed the new Mark VI Tiger and Mark V Panther tanks.
1. Initial Set Up
Scenario lenght: 5 turns, from turn 1 (4 July) to 5 (8 July). Place the "game turn" marker in box 1 of the General Data Track.
If optional rule "Luftwaffe fuel shortage" place the aircraft fuel marker in box "0" of the General Data Track.
Soviet player deploys first, German second. Scenario begins with the air phase of turn 1.
Set Up Procedure: Units of both sides which belong to major formations (divisions or Corps), must deploy in the hexes assigned to that division or corps in the scenario set up map. That is, units of the 51 Guards Division must deploy in the hexes marked "51 Gd" in the set up map; the German units of the Grossdeutschland division must deploy in hexes marked "GD", and so on.
German independent units (tank and assault gun battalions, AA artillery regiments and battalions): The 503 pz. Abt. Must set up adjacent or stacking with units of the 19 Pz. D. (See scenario set up map.) The 51 and 52 Pz. Abt. Must deploy as reserves, Assault gun battalions 393, 911, 905 and 228 must deploy (stacking or adjacent to) respectively with units of the following infantry divisions: 320, 167, 168, or 106. Finally, the 102 Sch. Pz. Abt. SS must deploy adjacent or stacking with units of any one of the following SS divisions: TOT, LAH or DR.
German Artillery Units: Supporting the 4th Panzer Army (sector: divisiones 255 to 167 inclusive, see scenario set up map): 132, 144, 137 and 122 ArKo, 52nd Rocket Regt, 1st Lh Rocket Artillery Regiment. They must deploy in German controlled territory within three or more hexes of trench line hexes between 255 and 167 divisions (inclusive).
Supporting Armee Abteilung Kempf (sector: divisions 168 to 320 inclusive, see scenario set up map): 130, 153, 3 ArKo, 54 Rocket Regt. They must deploy in German controlled territory within three or more hexes of trench line hexes between 168 and 320 divisions (inclusive).
Battalions and regiments of AA must deploy stacked or adjacent to any of the following formations:
- 47 and 48 AA Artillery Regts: stacked or adjacent to units of the 106 and 320 divisions.
- 99 and 153 AA Artillery Regts: stacked or adjacent to units of the 19, 6, or 7 Pz. Divisions.
- 616 AA artillery battalion: stacked or adjacent to units of the 255 or 332 divisions.
Independent Soviet Armored Units. The soviet player must deploy stacked or adjacent to other Soviet units the following independent armored units:
- 3 tank brigades (201st, 27th and 96th), and or 8 tank or assault gun independent regiments.
Armored train battalions 34 and 38 must deploy in railway hexes in the sectors of divisions 89 or 81 Guards.
60th Armored train battalion deploys in railway hexes in the town of Prokhorovka.
AT Fronts: The Soviet players has initially at his disposal 12 AT Fronts. Of these, at least 6 must deploy adjacent or stacked to units belonging to the 51 and 52 Guards Divisions.
AA Artillery: The 26th AA Division deploys stacked with units of any one of the following divisions: 184, 90 Gd., 51 Gd. It can deploys in AT or AA mode, Soviet player' choice. The 5th AA Div. Deploys stacked or adjacent to units of any one of the following formations 81, 78, 72 Gd. Divs.
Front Reserve: The Soviet Front reserve is composed by the following formations: 2 TK Gd., 5 TK Gd, 204 Div, 92 Gd. Div., 94 Gd. Div., 93 Gd. Div., 203, 59 and 60P Tank regiments plus 7 artillery and rocket brigades and 2 AA artillery divisions.
STAVKA Reserve: The STAVKA Reserve is composed by the following (units marked with a red): 1 artilelry brigade (27th), 1 AA Arty. Div.(6th), 2 TK, 18 TK, 29 TK, 5 MK, 10 TK, 9 VDG, 97 Gd Div., 95 Gd Div., 6 VDG, 66 Gd Div., 13 Gd Div., 3 independent armored (86, 180, 192).
STAVKA and Front Reserves Set Up. The following formations deploy initially on map but they belong to the Front reserve and therefore they can only be activated as per the Front Reserve rules: 6 TK, 2 TK Gd. y 5 TK Gd.
They must be set up on map but rotated 90º to indicate that they belong to the Front Reserve and that they have not been activated yet.
Activating Front Reserve units costs:
- -5 VP for every Corps sized unit (tank or mech) or infantry division.
- -1/2 VP for every independent brigade or regiment.
Units of the front reserve can enter the map through any road or railway hex in the north or east side of the map during the movement phase following their activation by the Soviet player.
Alternatively (instead of rotating units of certain formations 90º) all front reserve units can be placed aside of the map and be activated as per the standard procedure of 15. Front Reserve.
Units of the STAVKA reserve enter the game as per the procedure explained for STAVKA reserve units. (Their activation has a cost in VPs plus they can not be activated until one or more supplied German units enter one hex of the 2nd fortified line.)
2. Victory Conditions
German Tactical Victory: The German player achieves a tactical victory if at the end of the scenario he occupies 4 out of the following 6 positions: Sabynino, Shakovo, hill 220, hill 243, hill 266.8, hill 247.
German Operational Victory: If the German takes all six positions listed before plus hills 226 and 252, he achieves an operational victory.
Soviet tactical Victory: Prevent the German from achieving a tactical victory.
Scenario 4. The fight for Prokhorovka, (10 to 14 July 1943)
This scenario simulates the last effort of the German army to overcome the last Soviet defensive belt and the intervention en masse of the Soviet strategic reserve (the 5th Guards and 5th Tank Guards Armies) to prevent it. The decisive clash was fought in the vicinity of the town of Prokhorovka. The final result was a German tactical victory (greater number of enemy tanks destroyed) but a Soviet operational victory (the German offensive was stopped definitively.)
1. Initial Set Up
Scenario lenght: 5 turns, from turn 7 (10 July) to 11 (14 July). Place the "game turn" marker in box 7 of the General Data Track.
If optional rule "Luftwaffe fuel shortage" place the aircraft fuel marker in box "3" of the General Data Track.
Soviet player deploys first, German second. Scenario begins with the air phase of turn 7.
German Independent Units. (Tank/assault gun Battallions 51, 52, 503, 102 Pz. Abt. and 393, 911, 905, 228 StG Abt.). They must deploy stacked or adjacent to units of the following formations: GD, 19 Pz. Div., 7 Pz. Div., LAH division, DR division, 320 Division.
Soviet Independent Armored Units. The soviet player must deploy adjacent or stacked to other Soviet units the following: 3 independent tank brigades (201, 27 and 96), 3 Tank Brigades (192, 86, 180 from the STAVKA reserve) plus 10 independent assault gun/tank regiments (including the 59, 60P and 203 Tank Regiments from the Front Reserve).
The 34th and 38th armored train battalions deploy in railway hexes in the sector of the 89 or 81 Guards Divisions.
The 60th armored train battalion deploys in any railway hex adjacent to the town of Prokhorovka.
Soviet AA Divisions Set Up:
- The 36th AA Div. Must deploy adjacent or stacked to units belonging to any one of the following divisions: 305, 183.
- The 26th AA Division deploys stacked with units belonging to any of the following divisions: 184, 90 Gd., 51 Gd.
- The 5th AA Div. Deploys stacked or adjacent to units of any one of the following formations: 81, 78, 72 Divs. Gd.
Soviet Artillery Units: The Soviet player can use during the game up to 9 artillery and rocket brigades and divisions (7 in the Front Reserve and 2 initially available).
2. Step Loss Markers
Units of the following divisions and corps must deploy with step losses markers. That is, for instance 167 ID (-2) means that the units of the 167 ID must deploy with 2 step losses distributed among them.
Distribution of Step Losses: Players can distribute step loss markers as they see fit. They can even eliminate units.
Example: the units from the 167 German division must deploy initially with 2 step losses. The german player can assign one step loss to any two of its three regiments, or eliminate one and deploy the other units without step losses losses, or eliminate the HQ unit and deploy one regiment with 1 step loss, etc. etc.
German Divisions Losses: 255 ID (-1) 332 ID (-2), 3 Pz. D (-2), GD Div. (-3), 11 Pz. Div. (-3), Tot (-2), LAH (-2) DR (-2) 167 ID (-2), 168 ID (-2), 6 Pz. Div. (-2), 19 Pz. Div.(-3), 7 Pz. Div. (-2), 198 ID (-1), 106 ID (-2), 320 ID (-1).
German Independent Units: Up to 4 step losses must be distributed among the 8 independent tank and assault gun units: (51, 52, 503, 102 Pz. Abt., 393, 911, 905, 228 StG Abt.).
2 step losses must be distributed among the 5 regimients and 1 battalion of German AA artillery.
German Air Units: 2 step losses must be distributed among fighter units, 3 among bomber/assault units.
Soviet Divisions Losses: 213 Div. (-3), 72 Gd (-4) 78 Gd. (-4) 78 Gd (-3), 94 Gd (-2), 305 (-2), 92 Gd. (-2), 375 (-4), 81 Gd. (-4) 89 Gd. (-3) 93 Gd. (-2) 183 (-2), 52 Gd. (-4), 95 Gd. (-2), 51 Gd (-4), 31 TK (-3), 67 Gd (-4), 204 (-3), 6 TK (-4), 90 Gd (-4) 71 Gd (-4).
Soviet Independients Units: 12 step losses must be distributed among the Soviet tank and assault gun Independient units deployed on map.
Artillery Units: 12 step losses must be distributed among the 9 artillery/rocket divisions and brigades.
2 step losses must be distributed among the 3 AA artillery Divisions available on map.
Soviet Air Units: 6 step losses must be distributed among fighter units and 4 among bomber/assault units.
Front and STAVKA Reserves: The STAVKA reserve formations listed below have not been activated yet. They can be activated during the game.There is no cost in VP as in the campaign scenario but their activation has a different cost (see 3. Victory Conditions.)
6 VDG , 5 MK , 29 TK , 18 TK, 6th AA Div, 27th Artillery Brigade.
3. How to Win
German Tactical Victory: The German player achieves a tactical victory if at the end of the scenario occupies 3 of the following 5 hexes: Prokhorovka, hill 252, hill 226, hill 244.8, Zhuravka. (But see below)
If the Soviet player is forced to activate all remaining Front and STAVKA formations, the German player wins by conquering any 2 of the 5 objective hexes.
The 6th AA Div and 27th Artillery Brigade can be activated along with the units of any reserve formation. That is, if the Soviet player decides to activate for instance the 18 TK, he can "attach" to that corps' units the 6th AA Div and 27th Artillery Brigade. If both units remain unactivated but all other STAVKA Reserve formations (6 VDG , 5 MK , 29 TK , 18 TK) have been activated, it will be considered that all the STAVKA Reserve has been activated, and therefore the German player will win by taking any 2 of the 5 objective hexes.
Soviet Tactical Victory: Prevent the German player from achieving a tactical victory. That is, control at the end of the game 3 or more of the objective hexes without having to activate all his reserve formations. If he activates them all, he must control 4 out of 5 objective hexes at the end of the scenario.
Optional Rules for Kursk I and II
The following rules are valid both for Kursk I and II. In the "2.0" version of the standard rules (available for download at www.simtacludopress.net) these rules have been incorporated to the standard rules.
AA Artillery Units
Both sides, AA artillery units can be used both to support ground combat (as AT capable units) and to fire against enemy air units.
At the end of every game turn (during the mutual reorganization phase) both sides decide if the AA units will operate in mode AT (Antitank) or AA (Antiaircraft.)
Anti Tank Mode (AT): When operating in AT mode, AA artillery units can participate in tank combat as normal tank units. They can also participate in regular combat during the regular combat phase adding up their combat factors in attack or defence.
AA Mode (Antiaircraft): When operating in AA mode, AA artillery units can be fired during the air phase. If adjacent or stacked with ground units subjected to air bombardment, the AA artillery units may fire against the enemy bomber and assault planes using their AT/AA factor.
They can only fire once per turn. Firing procedure is the same as in air-to-air fire. The AA unit must fire after solving of air-to-air combats but before solving air bombarment.
Roll 1d10 for every step available for the AA unit. For every result equal or less to its AT/AA factor, the air unit being fired at suffers one step loss.
Example: on turn 3 the Soviet 26th AA division is deployed in mode AA in hex 2109. the germans launch an air raid against hex 2309, which is adjacent to the 26th AA Div. hex. After solving air combats, the Soviet AA division may fire against any one of the German air units (Soviet player' choice) Rolls 2d10 (the division has 2 steps) with results of 4 and 1. the AA/AT factor of the 26th division is "2" so one step loss is scored on one of the German air units (the step loss must be applied inmmediately before going to the following step, bombing resolution.)
AA Fire against Close Air Support
Soviet AA units that did not fired during the air phase (i.e. against enemy air units performing bombardment) may also fire against enemy air units performing CAS missions.
If the enemy air unit flies CAS in support of enemy ground units attacking the hex the AA div is placed, or an adjacent hex, the enemy air unit may be fired at by the AA division.
The AA fire must be resolved after announcing the attack to that hex, but before calculating the final combat odds
If the AA fire scores any step losses they must be applied immediately, before resolving ground combat. That is, if the air unit suffers step losses or is eliminated, this will be taken into account when calculating combat odds.)
Historical Note
The AA guns that appear in the Soviet counters are the M1939 (85 mm, the same gun mounted by the SU-85 assault gun) and the M1938 (76 mm.) The German counters show the very famous Flak 88.
Additional Counters
The following AA units included in Alea 33 can be used in Kursk I: northern pincer (Alea 31):
1st and 25th AA Divs. (13th Army), 16th AA (48th Army) and 12th AA Div. (70th Army), Front Reserve: 10 AA Div.
Panzerjäger Staffeln (Tank Hunter Squadrons)
During the air combat phase, German air units with AT factor (namely the Ju 87 and Hs129 units), can fire against Soviet tank units adjacent to the hex to which they must give air support (close air support.)
If the "AA Artillery" and "CG AA fire" (12.4) rules are used, and there is a Soviet CG or AA unit adjacent or stacked with the Soviet tank unit being fired at, they can fire against the German air unit performing AT fire against them.