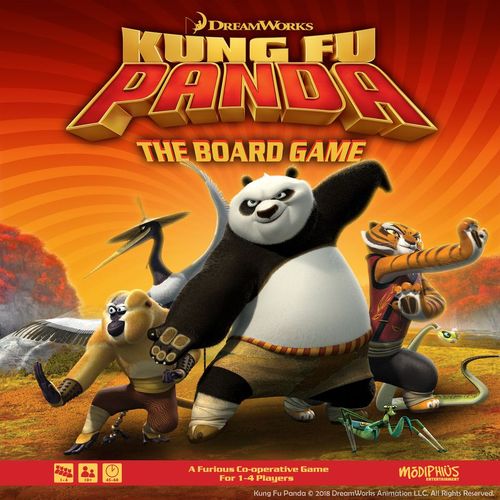
Kung Fu Panda: The Board Game
Kung Fu Panda: The Board Game Rulebook
Table of Contents
Table of Contents
- What's Inside
- How to Set Up the Game
- Aim of the Game
- How to Play
- Action Dice
- Combining Dice with Other Players
- Moving Between Scene Tiles
- Dials of Destiny
- Health
- Combat
- Hero Abilities
- Special Moves... and Dumplings!
- Pauses
- Winning or Losing a Mission
- Ways to Play
- Training Missions
- Missions and Adventures
- Guide to Tokens
- Guide to Scene Tiles
What's Inside
- 6 Hero Boards (Po, Tigress, Viper, Monkey, Mantis & Crane)
- 6 Hero Miniatures (Po, Tigress, Viper, Monkey, Mantis & Crane)
- 26 Enemy Miniatures (4 Ox Grunts, 12 Wolf Spearmen, 8 Wolf Slashers, Wolf Boss & Tai Lung)
- 20 Scene Tiles (8 Long & 12 Square, reversible)
- 4 Dials of Destiny (with Awesome Mode on reverse)
- 30 Colored Base Clips
- 3 Enemy Reference Boards
- 6 Wall Tiles (reversible)
- 16 Action Dice (4 per player)
- 4 Red Health Counters & 4 Green Dial Counters
- 6 Objective Tokens (reversible)
- 6 Spawn Tokens
- 4 Cart Tokens (reversible)
- 12 Special Move Cards
- Sand Timer
- Extra Damage and Extra Move Tokens
- Dumpling Token
How to Set Up the Game
Each game of KUNG FU PANDA THE BOARD GAME is played on a board built specifically for your heroes' mission. Before shouting "1, 2, Kung Fu!" and rolling dice, set the scene using tiles and tokens. Here's how:
1. Punchboards. Push the tiles and other components out of their cardboard frames and sort them into sets: scene tiles (both long and square), enemy reference boards, tokens, hero boards, and Dials of Destiny.
2. Pick an Adventure. Choose a single mission, a three-mission adventure, or the nine-mission story. Each mission's instructions tell you about your heroes' objectives (how to win the game), the enemies you need to overcome, and any special rules for that mission.
3. Choose Your Hero. Each player chooses one of the six heroes, adding a green base clip to its miniature, and using that hero's miniature and hero board during the game. Each hero has a different ability shown on its board. Any remaining hero boards and hero miniatures are returned to the box.
4. Dials of Destiny. Each player takes a health counter, dial counter, and Dial of Destiny. Which Dials of Destiny you should use depends on the game mode you are playing and the number of players:
- 2 Players: Dials 1 and 2
- 3 Players: Dials 1, 2 and 3
- 4 Players: Dials 1, 2, 3 and 4
Players then decide among themselves who will use which Dial of Destiny. Attach your Dial of Destiny to your hero board. Then place a dial counter on the Play symbol at the top of the dial, with your health counter on 4.
5. Action Dice. Each player takes 4 Action Dice. Return any remaining dice to the box.
6. Set Up Scene Tiles. Each mission's instructions will show you which scene tiles to use and how to set them up.
Try to leave a dice-rolling space for each player, which everyone can see but that isn't too close to the board. You'll need to roll dice very quickly without sending the board and pieces flying!
7. Prepare the Enemy Miniatures. Attach colored base clips to the enemy miniatures:
- Black bases for Wolf Slashers
- Red for Wolf Spearmen
- Blue bases for Ox Grunts
- Purple for Wolf Boss and Tai Lung
Each type of enemy has its own reference board. Place those where they can be seen by all of the players.
8. Place the Enemies. Each mission's instructions will show you which enemies need to be placed on which tiles to start with. The instructions also show where you must place the numbered spawn tokens (where additional enemies may appear during the game). Any Wolf Slashers, Wolf Spearmen or Ox Grunts not set up at the start of the game should be placed within easy reach of the players as a reserve supply.
9. Place Obstacles & Other Tokens. The mission instructions will tell you where to place tokens which show items, objectives and obstacles such as walls, carts, gongs or levers. It will also tell you how your heroes can use them or get past them. Place any spare tokens back in the box.
10. Sand Timer. The sand timer goes next to the board so that everybody can see when time is running out.
Aim of the Game
KUNG FU PANDA THE BOARD GAME is a fast-flowing, real-time dice game where players gain Kung Fu moves and special powers to knock out Wolf Spearmen and Slashers, tough Ox Grunts, and finally Tai Lung and his Wolf Boss lieutenant. However, the dice are not always friendly and, if you roll Claws, your counter moves forward on the Dial of Destiny, spawning more enemies and advancing Tai Lung's fearsome plans.
You can choose different lengths for a game, from a one-off mission, to a three-mission adventure or the nine-mission story; a tale of true epicness! There are also different ways of enjoying the fun:
- Young Master mode: for younger players
- Standard mode: for learning players
- Awesome mode: for true masters ready to take on a harder challenge.
How to Play
The game is played in three-minute rounds of fierce dice-rolling action, with pauses in between. All players play simultaneously and cooperatively to complete the scenario successfully. They do this by rolling their dice and spending the dice results to fight enemies and complete special tasks over a series of rounds.
To start a round all players say together "1, 2, KUNG FU!" and one player turns the sand timer over to start the mission. Players now have three minutes to do as much as they can! Each player rolls all four of their Action Dice to begin, creating an individual dice pool of four dice results.
To perform actions, players spend the results of their dice rolls. Players cannot spend each other's dice results, but they can sometimes combine results (see "Combining Dice with Other Players" below).
Note: dice results are spent immediately and automatically.
When a player spends a dice result, the player picks it up and it cannot be spent again until rerolled. A player chooses how many dice results they want to spend and how many they want to keep or "save". Spends must be all at once – players cannot incrementally spend dice to achieve a single goal.
Players then reroll the spent dice in their hand, adding them to the "saved" dice, if any are present. This becomes their new dice pool, and they repeat the process until the timer runs out. The player is not required to spend any dice results and may reroll any "saved" dice without spending the result.
Repeat the above until the end of the round.
Note to Kung Fu Masters: Because it is a race against time to defeat evil and achieve awesomeness, it is strongly advised that players roll, spend or save dice as quickly as possible. The fast dice might seem a little scary, but it's all about having expert timing!
Note to Those Playing with Younger Kung Fu Masters: The race against time, while a big part of the fun and thrill of the game, can be daunting for younger players. If this is the case, still use the timer and pauses, but take as many rounds as you need to defeat your foes.
Action Dice
Punch
Spending one Punch result allows your hero to make one Punch attack against an enemy on the same scene tile. It can also be used against an obstacle or to use or collect another type of token. Multiple Punch results allow for multiple Punch attacks. See "Combat" below.
Kick
Spending one Kick result allows your hero to make one Kick attack against an enemy on the same scene tile. It can also be used against an obstacle or to use or collect another type of token. Multiple Kick results allow for multiple Kick attacks. See "Combat" below.
Claws
Claws results advance the counter on a player's Dial of Destiny, and can result in a number of effects. If a player rolls any Claws results, the player must IMMEDIATELY stop and spend these dice results before choosing whether to spend any other dice results.
For each Claws result rolled, the player must advance their dial counter one space clockwise around their Dial of Destiny and resolve the destiny effect shown in the new space. If more than one Claws result is rolled at the same time, resolve each and every effect from those spaces in order. After all destiny effects are resolved you may choose to spend any other results.
Chi
You may spend a Chi result in two ways:
- To activate your hero's special ability. See "Hero Abilities" below.
- To revive fellow heroes who have been knocked out. See "Health" below.
Move
Once spent, the Move result on an Action Die allows heroes to move between scene tiles. One Move is usually required for heroes to move onto an adjacent tile. Heroes cannot usually move through walls.
Note: Some heroes have special movement abilities.
Enemies on the Same Tile: If there are enemies on a hero's tile, a hero moving to an adjacent tile requires one additional Move result for each enemy present (the number of enemies on the adjacent tile doesn't matter). So a hero on a tile with two enemies would need 3x Move to move, instead of 1x Move. Of course, the hero could spend other dice to remove enemies from their tile first, reducing the number of Move needed.
To enter some tiles, you will need to spend more than one Move. These are in addition to any extra Move required due to enemies on the same tile as the moving hero. See "Hard Going Tiles" below.
Mission Instructions: Some mission instructions may include special rules that further increase the amount of Move results that must be spent in order to move.
Combining Dice with Other Players
Heroes on the same tile can spend dice simultaneously as a group to achieve some actions and effects. For example, two players are on the same tile, next to a wall. They want to break the wall, and spend dice simultaneously – One player spends 2x Chi, the other spends 1x Kick and 1x Punch. The total combined spend is enough to break the wall, so it is broken. Special moves are the only exception to this. See "Special Moves... and Dumplings!" below.
Moving Between Scene Tiles
Scene tiles come in both large and small sizes, the only difference between them being the number of other tiles they can border. Note that movement from one tile to another can ONLY occur horizontally or vertically; you cannot move from one tile to another diagonally 'across the corner' of the tile.
Hard Going Tiles
While you'll need only one Move to move onto many scene tiles, others are tougher to enter. For example, it's harder to climb onto a rooftop than to move from street to street. Hard Going tiles show symbols next to a mountain symbol; you'll need to roll and spend those dice results to move onto such tiles. Hard Going tiles include:
- Rooftop: requires 1x Move and 1x Kick. To move onto the Hard Going Rooftop tiles, you must spend one Move AND one Kick result. This applies even if the hero is moving from one Rooftop tile on to another adjacent Rooftop tile.
- Bamboo Forest Clearing: requires 1x Punch and 1x Move. The bamboo forest can be tough to fight through... at least there is a clearing in here... somewhere!
- Bridge: requires 2x Chi and 1x Move. Cross the high, swaying bridge... once you've steadied your nerves!
- Great Wall: requires 1x Move and a cart token on the tile they are moving from or to.
- Training Room: requires 2x Move and 1x Chi. Rushing through the training room is a painful challenge without great moves and concentration.
- Wall: requires 2x Chi, 1x Punch and 1x Kick. Walls are not scene tiles that heroes move onto, but are obstacle tokens that can stop heroes from moving between two tiles. A wall is impassable until broken (spending the results shown above). The wall token should then be flipped to the broken side to show that it is passable from now on. You may be able to break through walls in other ways, depending on the mission's instructions.
No Entry
The Guard Tower tile allows no entry at all unless a mission's instructions say otherwise.
Dials of Destiny
Dial Number and Side
Each Dial of Destiny has a different number beneath its top Play symbol. Which Dials of Destiny you should use depends on the number of players:
- 2 Players: Dials 1 and 2.
- 3 Players: Dials 1, 2 and 3.
- 4 Players: Dials 1, 2, 3 and 4.
Each Dial also has two sides. If you are playing in Awesome mode, use the side that has a * next to the number.
Moving the Counter
At the start of each mission, the dial counter begins on the Play symbol on the top space of the Dial of Destiny. For each Claws result on the Action Dice, the counter moves one space clockwise. When the counter enters each space, the effect there must be resolved.
Spaces
Each time the dial counter moves on to a Play space the 'Play Effect' listed in the mission's 'Special Rules' is resolved. If no 'Play Effect' is listed, the space is treated as a blank space.
Blank Spaces: Blank spaces are a close call, a breather from the fight or a missed enemy attack. When the dial counter moves onto a blank space, there is no effect.
Spawn Enemy Space: When the dial counter moves onto a space that shows a Spearman, Slasher, or Ox Grunt icon next to a numbered spawn token, take one miniature of that enemy type from the reserve supply, and place it on the scene tile containing the same numbered spawn point.
If there are none of this type of enemy left in the reserve supply, they do not spawn – continue as if this had been a blank space.
Only a limited number of enemies can be on any one scene tile at a time. This maximum is stated in the mission's instructions. If an additional enemy is spawned on a tile where this limit has already been reached, it may be 'spread' to an adjacent tile of the player's choice IF that wouldn't exceed that tile's limit. If all adjacent spaces are full (or if spreading is not allowed because of mission instructions), the enemies do not spawn; continue as if this had been a blank space. Tai Lung, Wolf Boss and Ox Grunts do not count towards a tile's enemy limit.
Note: During a frenetic game, the number of miniatures on a tile may change rapidly. Each player must honestly use their judgement as to the amount of miniatures present and the outcome.
Enemies Fight Back Space: Enemies will try to KO the heroes to stop them winning. Whenever a player moves their dial counter onto an Enemies Fight Back space, each enemy on the same tile as that hero attacks, causing the hero to lose health. See "Health" below.
Health
Each hero's health is tracked using the health counter on their hero board. Heroes start on the highest health number on their board (usually 4).
If an enemy causes the hero to lose health, move the health counter down one heart for each health lost.
- Spearman causes the loss of 1 health.
- Slasher causes the loss of 1 health.
- Grunt causes the loss of 2 health.
- The Wolf Boss causes the loss of 2 health.
- Tai Lung causes the loss of 2 health.
In the 'Special Rules' of some mission instructions, enemies may cause more health loss or have different effects.
- Mountain Path: This is a treacherous place, and losing your footing here can hurt even when you're not under attack! The Mountain Path tile works differently to other Hard Going tiles. To enter the tile requires a spend of only 1x Move (adjusting as usual for any enemies on the tile you are leaving). However, once a hero is on this tile, if the counter on their Dial of Destiny moves onto an Enemies Fight Back space, they lose one extra health. For example, if a player loses health on this tile from a Slasher, they would lose 2 health (one from the tile and one from the Slasher). Even if a hero faces no enemies on this tile when their dial counter moves onto an Enemies Fight Back space, they would still lose 1 health from taking a tumble!
Knocked Out
If your hero's health counter is moved onto the KO heart, you are KO'd (knocked out)! You are now unconscious, tied up or otherwise unable to fight on until revived. Place your hero's miniature on its side on the scene tile where they were KO'd. You may not roll dice, spend dice or take part in the round or pauses until your hero is revived.
Reviving Your Friends
Heroes that are KO'd are not out of action for the whole game – with a little help from a friend they can get back on their feet and rejoin the fight. To revive a fellow hero from a KO, you must be on the same scene tile and spend 2x Chi results. Unless mission instructions say otherwise, you may revive fellow heroes in this way even if enemies are on the same tile or it is a 'Hard Going' tile.
Revived heroes move their health counter back up to full health, place their miniature upright on the tile in which they were KO'd, and may start rolling and spending dice again as usual.
Some other abilities or Special Moves may allow players to revive others while not on the same tile or for a different dice spend. Other abilities allow heroes to regain health at different times; for example, Po may regain health at any time that he is not KO'd by spending one Chi.
Combat
Defeating Enemies
To KO the enemies on your scene tile, you must roll and spend combinations of dice results. If an enemy is KO'd, remove them from the tile and put them back into the reserve supply. To KO enemies you need:
- Spearman: 1x Punch
- Slasher: 2x Kick
- Grunt: 2x Kick and 2x Punch
Wolf Boss and Tai Lung require different attacks to defeat and KO depending on the mission instructions.
Enemy Reference Boards: Three enemy reference boards should be placed alongside the board to remind you how much damage enemies do, or which results you need to KO them. The Wolf Spearman, Wolf Slasher and Ox Grunt share one reference board. The health damage Wolf Boss and Tai Lung do, and the results needed to defeat Wolf Boss, appear on a second board.
The reference board with the image of Tai Lung shows which results are needed to have any effect on Tai Lung. This varies, based on how many heroes are taking part in the mission:
- 2-player game: 5x Chi and 1x Punch
- 3-player game: 8x Chi and 1x Punch
- 4-player game: 11x Chi and 1x Punch
Note that mission instructions will tell you whether these results KO Tai Lung or merely cause him a wound resulting in some other effect, such as pushing him back to another tile.
Hero Abilities
Each hero has their own unique ability, as shown on their hero boards. Using these abilities requires spending specific dice results:
Mantis
If you are playing Mantis, you may ignore the need for extra Move results because of enemies on your tile when moving to an adjacent tile. Tiny Mantis is tricky to catch! See "Enemies on the Same Tile" above.
Crane
If you are playing Crane, you may spend any 1x Chi result to replace any and all other dice results (but only dice results) when attempting to move onto a tile marked with a Hard Going symbol. With a beat of his wings, Crane is there!
Note: Walls still prevent Crane from moving, Great Walls still require a cart token, and the Guard Tower is still inaccessible.
Monkey
If you are playing Monkey, you may count Chi results you roll as Kick results. In combat, no feet are faster than Monkey's!
Tigress
If you are playing Tigress, you may count Chi results you roll as Punch results. Beware Tigress' ferocious fists!
Viper
If you are playing Viper, you may count Chi results you roll as Move results. The coiled Viper springs suddenly!
Po
If you are playing Po, spend one of the Chi results you have rolled to regain one health (this may not take his health above 4). Po bounces back easily!
Special Moves... and Dumplings!
Masters do not live on Kung Fu alone – they also need dumplings! Dumplings power Special Moves and allow Masters to achieve their full potential.
The Special Move cards give players more ways to spend Chi. Special Moves cost 2x Chi or 3x Chi depending on the card. These moves are in addition to your usual options, giving you the edge against enemies, helping others from further away, or allowing you to dash through the enemies with ease.
You may not combine dice results with other players to use special moves – only your dice results may be used.
You use Special Move cards in two different ways, depending on the game length you are playing.
Single Mission
If playing a single mission, shuffle all Special Move cards and draw the number of cards equal to the number of players. Players then decide amongst themselves which player should have each of the drawn cards.
Multi-Mission Adventures
- If playing multiple missions together as an adventure or story, players must earn Special Moves. To do this, collect the dumplings from the Kitchen scene tile during a mission. If one of the players collects the dumplings AND the players complete the mission, the players draw Special Move cards exactly as in the single mission above, but do so during the pause before the next mission (see below).
- To collect the dumplings, a player must be on the Kitchen scene tile and spend 2x Chi to pick them up. They then count as collected for that mission.
Pauses
When the sand timer runs out, the round ends. The time between rounds in each mission is called a pause. It is a moment to breathe and plan tactics for the next exciting action round.
Pauses often have their own pause actions, described in the mission instructions; perhaps to help your heroes in some way, or to move the enemies. These pause actions may be optional or compulsory.
Unless otherwise stated in the mission instructions, players may not keep results in their dice pool once a round has ended. All dice must be rerolled at the start of a new round.
Once pause actions have been resolved, and the players are ready, the players say "1, 2, KUNG FU!", the timer is turned again, and the next round begins.
Winning or Losing a Mission
There is one true path to victory, but even the best can sometimes stumble on the way – in KUNG FU PANDA THE BOARD GAME there's one way to win but several ways to lose. Only true Kung Fu Masters will be victorious (though they may need a few tries to get there)!
Each mission's description details the win condition. This may be to evacuate villagers or protect homes, or may require collecting information, while others simply need you to beat up the bad guys!
The following are the three defeat types you and your fellow heroes must try to avoid:
Failing the Mission: Sometimes a mission can be failed automatically if certain events occur, or if players don't achieve goals before the bad guys. These mission failures are also described in the mission's instructions.
Time's Up! The mission's description will state how many rounds the mission lasts. If players have not won the mission by the time the sand timer runs out on the final round, Tai Lung has out-foxed them and the game is lost.
Full KO: Full KO's happen when all players are KO'd and cannot be revived. This happens most often when players go it alone or don't plan their game together in the pauses – There's no 'I' in Kung Fu! If all players are KO'd and cannot be revived, the game is lost.
However, if your heroes do fail a mission for any reason, don't worry... you can always try the mission again.
Ways to Play
You can play KUNG FU PANDA THE BOARD GAME in three different 'modes' of difficulty. These let players enjoy the game at their own challenge level. The modes are: Young Masters, Standard, and Awesome.
Standard Mode
This is the standard game described on the previous pages. We suggest starting with this mode after working through the tutorial missions.
Young Masters Mode
There is no limit to the number of rounds in Young Masters mode. With less urgency, you can take your time to talk about dice rolls and decide what to do. This means that while the sand timer is still used, it is less threatening and adults can help Young Masters through the rounds. This mode is suggested for players that like to take things a little slower, or for those with younger children to help them along.
- When playing this mode you may use 'Pause Actions' at any point during a mission.
- Players cannot lose by running out of rounds.
- You can also choose to ignore Claws effects and use the Play space on the Dial of Destiny if you want to.
- In this mode, if players earn Special Move cards they do not draw cards. Instead, look through all the Special Move cards and choose one card each player would like to use.
Awesome Mode
For veteran Kung Fu masters, spawning harder enemies, causing faster loss of health, and with your Special Moves entirely random.
- When playing in Awesome mode, players should flip their Dials of Destiny over to the side with an * next to the dial number. This side includes spawning Grunts and more Enemies Fight Back spaces.
- In this mode, if you earn Special Move cards, do not draw and share them amongst you as usual. Instead, deal each player a Special Move card which cannot be swapped with other players – Awesome heroes can deal with any Special Move!
Training Missions
Dice Handling
When rolling in KUNG FU PANDA THE BOARD GAME your dice will be in one of three stages: in hand (being rolled), saved and spent. Separating your dice into these piles each time you roll may help.
In order to progress you must constantly be rolling and rerolling your dice. Saving dice means you can keep them for later, i.e. you want to go onto a Rooftops scene tile, so you choose to save a Kick die and reroll your other dice in the hope of rolling a Move.
You can only spend a dice result once per roll; if spent, they can only be used again if you reroll.
Lesson 1: Movement
Scene tiles needed: A, H, L, m, g, r, t
Set up the scene tiles as a connected path from the Start Tile (Training Grounds) through the Training Room and further tiles to the End Tile (Hot Springs), with a wall placed before the Hot Springs tile.
In this mission, your heroes must start on the Training Grounds scene tile and if you do not end on the Hot Springs scene tile within 1 round, you lose. Ignore any Claws you roll; you will not need your dials for this.
Generally, you need 1x Move to enter the next tile, however there are exceptions. The exceptions in this mission are:
- Rooftops: 1x Move and 1x Kick to enter.
- Training Room: 2x Chi and 1x Move to enter.
As you may notice, there is a wall before the Hot Springs scene tile, you must break down the wall before you can move onto the final tile. The required dice results to remove the wall are as follows:
- Wall: 2x Chi, 1x Kick and 1x Punch to remove.
Lesson 2: Combat
Scene tiles needed: A, H, N, O, p, r, t
In this mission, your heroes must start on the Training Grounds scene tile and if you do not end on the Hot Springs scene tile within 1 round, you lose.
Like the tutorial before, the exceptions to normal movement are:
- Rooftops: 1x Move and 1x Kick to enter.
- Training Room: 2x Chi and 1x Move to enter.
- Wall: 2x Chi, 1x Kick and 1x Punch to remove.
Set Up: Place 1x Slasher and 1x Spearman on each spawn point (green number tokens).
Spawning: Every time you pass a spawn space on the Dial of Destiny with the spawn number 1, 3 or 5, you must spawn either a Slasher or Spearman as indicated on your dial. There is a maximum of three enemies per tile, so if it is full, spawn them on an adjacent tile (also to a maximum of three enemies).
Eliminating Enemies: To eliminate enemies you need:
- Spearman: 1x Punch
- Slasher: 1x Kick and 1x Kick
Movement: The tile must be clear of enemies in order to move onto the next with just one Move. Otherwise you will need another Move equal to the number of enemies still on that tile, excluding the one originally needed to move. For example, if there are two enemies on the tile, you need 3x Move to get onto the next tile.
If you pass an Enemies Fight Back space on your Dial of Destiny, move your health down by the number of enemies on that tile. If there are no enemies, you receive no damage.
Heroes' special moves do not apply in this mission.
The scene tiles for this mission form a connected path from the Start Tile through tiles with spawn points 1, 3 and 5 to the End Tile (Hot Springs).
Missions and Adventures
Mission 1.1: Across the Rooftops
Scene tiles needed: a, d, G, H, I, L, J, M, n, O, q, R, s, t
Snarling Wolf raiders and aggressive Ox Grunts are running amok in the village. Can you bring the villagers to safety?
Objectives
Win condition: Save all the villagers and reach the end tile (the gatehouse) before the end of 3 rounds.
Mission failure: If a villager is sharing a tile with 3 enemies of any type, you lose the game immediately.
Items and Obstacles
Rescuing villagers: spend 1x Punch and 1x Chi while you are on their tile to rescue villagers.
Dumplings: You must spend 2x Chi and be on the same tile as the dumplings to pick them up. If collected, players may draw a Special Move card at the start of their next mission.
Breaking through walls: Walls can be broken through by spending 2x Chi, 1x Punch and 1x Kick. When broken, flip wall tokens to the broken side to show that it is passable from now on. You may not move past walls until they are broken, unless you have a special rule which lets you do so.
Tiles
Rooftops: 1x Move and 1x Kick to enter.
Enemies
Start: 1x Slasher and 2x Spearman on each spawn tile, and 1x Ox Grunt on the Rooftop tile closest to the exit.
Spawn: According to players' Dials of Destiny.
Maximum enemies: A tile cannot contain more than 3 enemies of any type. Any further enemies spawn on adjacent tiles or, if impossible, do not spawn.
Pause
During each pause, you may choose to roll any number of your dice (up to 4 per player). Any Chi rolled may be changed to a dice result of that player's choice, ready to spend when the next round starts. However, if players collectively roll a total of 4x Claws or more, one rescued villager has wandered off while you were catching breath, and must be placed back on the board on spawn point 4. If no villagers have been rescued so far, nothing happens.
The scene tiles for this mission form a winding path with six numbered spawn points from the Start Tile to the End Tile (the gatehouse).
Mission 1.2: The Break In
Scene tiles needed: A, C, E, f, i, J, k, l, m, N, O, P, Q, S
The disturbance in the village was just a distraction, and the monastery is now under attack! You must defend the Sacred Archives and prevent them being stolen at all costs.
Objectives
Win condition: You must reach the tile with the scroll (spawn point 5), defeat the enemies on the tile, and read the scroll before the end of 3 rounds.
Mission failure: You lose if you run out of time.
Items and Obstacles
Read the scroll: To read the scroll, 6x Chi are required. This requires multiple players cooperating.
Activate the levers: Locked from the inside! The heroes cannot gain entry to the first stairs tile until they have activated both levers – located on the Flagstone tiles which contain spawn points 2 and 4. To activate each lever, you must spend 1x Chi and 2x Punch while on each lever's tile, removing that lever token from the board when successful.
Dumplings: You must spend 2x Chi and be on the same tile as the dumplings to pick them up. If collected, players may draw a Special Move card at the start of their next game.
Breaking through walls: Walls can be broken through by spending 2x Chi, 1x Punch and 1x Kick. When broken, remove walls from play. You may not move past walls until they are broken, unless you have a special rule which lets you do so.
Tiles
Training Ground: 1x Chi and 2x Move to enter.
Bridge: 2x Chi and 1x Move to enter.
Enemies
Start for 2 players: 1x Slasher and 2x Spearman on each spawn tile, and 1x Ox Grunt on the Jade Gallery.
Start for 3-4 players: 1x Slasher and 2x Spearman on each spawn tile, and 2x Ox Grunt on the Jade Gallery.
Spawn: According to players' Dials of Destiny.
Maximum enemies: A tile cannot contain more than 3 enemies of any type. Any further enemies spawn on adjacent tiles or, if impossible, do not spawn.
Pause
Players have to roll at least one die each. If the result is equal or more Chi than Claws the players may keep the rolled Chi and transform them into any result for the beginning of the next round. If the result is more Claws than Chi, spawn an additional Ox Grunt on the Jade Gallery.
The scene tiles for this mission connect the Start Tile through the Sacred Archives to the End Tile; each hero begins on a Monastery Bed tile of their player's choosing.
Mission 1.3: Rickshaw Chase
Scene tiles needed: d, I, J, L, M, n, q, R
Wolf Boss is trying to run after storming the Temple. Leaping onto a rickshaw, he is clattering through the village's marketplace, down busy streets, trying to lose the chasing heroes. Dash through the busy market stalls and over the rooftops to try to reach Wolf Boss. Can you catch him up before he escapes completely?
Objective
Win condition: Knocking out the Wolf Boss before the end of 3 rounds.
Mission failure: You lose if you run out of time.
Special Rules
- Each time the Dials of Destiny reach a Play space, Wolf Boss moves one tile forward (direction of movement runs from the Start Tile toward the Wolf Boss Start Tile and beyond).
- If Wolf Boss is on the last tile and needs to move, remove the leftmost tile and put it in front of Wolf Boss at the right of the board (all enemies on that tile will be discarded). If one of the heroes is on the leftmost tile when this happens, they will be automatically moved forward one tile.
- If the Kitchen tile reaches the beginning of the line, it will be lost (and the dumpling with it, if the heroes haven't collected it yet). If a hero is in the Kitchen when it would be removed, move them to the closest tile.
Items and Obstacles
Collecting dumplings: You must spend 2x Chi to pick up dumplings. If collected, players may draw a Special Move card at the start of their next mission.
Enemies
Start: Place 1x Slasher and 2x Spearman on each tile with a spawn point.
Wolf Boss starts on tile 2-3.
Spawn: According to players' Dials of Destiny.
Maximum enemies: A tile cannot contain more than 3 enemies of any type. Any further enemies spawn on adjacent tiles or, if impossible, do not spawn.
Tiles
Because of the market crowds, moving onto normal tiles (Move) requires an extra move (2x Move).
Rooftops: 1x Move and 1x Kick to enter.
Pause
Players have to roll at least one die each. If the result is equal or more Chi than Claws, Wolf Boss moves one tile backwards toward the beginning. If the result is more Claws than Chi, Wolf Boss moves one tile forward towards the end.
The scene tiles for this mission are arranged in a single line running from the Start Tile, through the Wolf Boss Start Tile, to the final tile at the right of the board, in the stated Direction of Movement.
Mission 2.1: Across the Great Wall
Scene tiles needed: b, c, D, e, F, h, J, l, m, N, O, p, q, R, s, t
You have to infiltrate the stronghold of the enemy, but the walls are too high to be climbed and the guard house heavily protected. Which way will you choose?
Objective
Win condition: You must reach the end tile before the end of 2 rounds.
Mission failure: You lose if you cannot reach the end tile before the time runs out.
Special Rules
Players cannot move to or from the Great Wall tiles unless there's a cart on the tile to or from which they want to move. You just need a little more height to climb those walls!
Items and Obstacles
Dumplings: You must spend 2x Chi to pick up dumplings. If collected, players may draw a Special Move card at the start of their next mission.
Moving carts: Moving a cart requires 4x Move and 2x Chi in order to push them to an adjacent tile. This requires multiple players cooperating.
Enemies
1x Slasher and 2x Spearman for each spawn point. 3x Ox Grunt are on the Gate House tile, and one is on the end tile.
Spawn: According to players' Dials of Destiny.
Maximum enemies: A tile cannot contain more than 3 enemies of any type. Any further enemies spawn on adjacent tiles or, if impossible, do not spawn.
Tiles
Mountain pass: Remember, the Mountain Pass mission tile deals one extra health damage when heroes are on it.
Pause
Players have to roll at least one die each. If the result is equal or more Chi than Claws the players may keep the rolled Chi and transform them into any result for the beginning of the next round. If the result is more Claws than Chi, spawn 2 additional Slashers on the end tile.
The scene tiles for this mission connect the Start Tile through the Great Wall (crossed by carts) to the End Tile.
Mission 2.2: Change of Guard
Scene tiles needed: c, D, e, F, I, J, K, l, M, N, O, p, R, s, t
Successfully over the walls of the enemy stronghold, the heroes must make their way to the inner sanctum and collect intelligence on who they are up against. The guard is changing soon; you can fight your way through, or cause a commotion and slip past in the confusion…
Objectives
Win condition: All heroes must reach the end tile within 3 rounds AND the scroll must be read.
Mission failure: You lose if you do not reach and read the scroll, or if not all heroes are on the end tile by the end of 3 rounds.
Items and Obstacles
Reading the scroll: requires 6x Chi to read (multiple players will need to cooperate). When read, remove it from play.
Breaking through walls: Walls can be broken through by spending 2x Chi, 1x Punch and 1x Kick. When broken, remove walls from play. You may not move past walls until they are broken, unless you have a special rule which lets you do so.
Sounding the gongs: Striking one of the gongs requires 1x Chi and 1x Punch. Doing so moves 1x Ox Grunt on the guard wall (the leftmost Great Wall tile) to the tile containing spawn point 6 OR moves 1x Ox Grunt from spawn point 6 to the guard wall (the player striking the gong may choose which).
Collecting dumplings: You must spend 2x Chi to pick up dumplings. If collected, players may draw a Special Move card at the start of their next mission.
Tiles
Guard tower: Heroes may not move through the Guard Tower scene tile.
Special Rules
Climbing great walls: Remember, heroes cannot move to or from the Great Wall tiles unless there's a cart on the tile to or from which they want to move.
Rooftops and gongs: Both gongs are on Rooftop tiles. Rooftop tiles require 1x Chi and 1x Kick to climb onto.
Enemies
Start the game with 1x Slasher and 1x Spearman on each spawn point. The game also starts with 3x Ox Grunt and Wolf Boss on the leftmost Great Wall tile.
Spawn: According to players' Dials of Destiny. Enemies cannot spawn on the Guard Wall tiles.
Maximum enemies: A tile cannot contain more than 3 enemies of any type. Any further enemies spawn on adjacent tiles or, if impossible, do not spawn.
Pause
During each pause, each player rolls one die. For each Claws rolled, 1x Ox Grunt is moved from spawn point 6 to the guard wall. Ignore this roll if there are no Ox Grunts on spawn point 6.
The scene tiles for this mission connect the Start Tile through the guard wall and gongs to the End Tile.
Mission 2.3: Escape Tai Lung
Scene tiles needed: E, F, g, J, K, l, m, N, o, r, s, t
Tai Lung is behind everything… and now he's behind you! Make a run for it and regroup at the Temple to plan a strategy to defeat him.
Objectives
Win condition: All players must reach the end tile before Tai Lung to win the mission. There is no round limit.
Mission failure: The players lose if Tai Lung reaches the end tile before them.
Special Rules
- Each time the Dial of Destiny reaches a Play space, Tai Lung moves one tile forward towards the end tile, following the path as shown.
- Tai Lung cannot be defeated or hurt in this level. Any player moving to an Enemies Fight Back space on their Dial of Destiny while they are sharing a tile with Tai Lung suffers 2 health loss.
Items and Obstacles
Collecting dumplings: You must spend 2x Chi to pick up dumplings. If collected, players may draw a Special Move card at the start of their next mission.
Enemies
Start the game with 1x Slasher and 1x Spearman on each spawn point. Tai Lung is placed as shown on the map.
Spawn: According to players' Dials of Destiny.
Maximum enemies: A tile cannot contain more than 3 enemies of any type. Any further enemies spawn on adjacent tiles or, if impossible, do not spawn.
Tiles
Mountain pass: The Mountain Pass scene tile deals one extra health damage when heroes are on it.
Bridge: 2x Chi and 1x Move to enter.
Guard tower: Heroes may not move through the Guard Tower scene tile.
Pause
Players have to roll at least one die each. If the result is equal or more Chi than Claws, move Tai Lung one tile backwards toward the beginning. If the result is more Claws than Chi, move Tai Lung one tile forward towards the end tile.
The scene tiles for this mission trace Tai Lung's Path from the Start Tile down to the End Tile (the gate to the Temple).
Mission 3.1: Village Attacked
Scene tiles needed: B, d, e, F, i, J, K, L, n, m, O, p, q, R, s, t
The village is under attack from Wolf raiders and several Ox Grunts. Fortunately, some of the monastery's heroes are already here training. That's bad news for bad guys!
Objective
Win condition: Move the cart to all the spawn points within 3 rounds.
Mission failure: You lose if there is at least one enemy on the same tile as a villager or if you don't win the mission before the end of round 3.
Items and Obstacles
Pushing carts: Pushing a cart to an adjacent mission tile requires 4x Move and 2x Chi. This requires multiple players cooperating. Carts cannot be pushed onto Rooftop scene tiles. When the cart is moved to a spawn point, no more enemies may subsequently spawn on that tile. Flip the numbered tokens over to show that enemies no longer spawn from these tiles.
Dumplings: You must spend 2x Chi to pick up dumplings. If collected, players may draw a Special Move card at the start of their next mission.
Villagers: The villagers cannot be removed from the board.
Enemies
Start for 3-4 players: 1x Slasher and 2x Spearman on each of the tiles with spawn tokens and Ox Grunt as shown on the map.
Start for 2 players: 1x Slasher and 1x Spearman on each of the tiles with spawn tokens, with no Ox Grunt on the Stairs and the Flagstones tile.
Spawn: According to players' Dials of Destiny.
Each time you reach a Play space on the Dials of Destiny, move ALL Ox Grunts one space closer to the villagers.
Maximum enemies: A tile is full if there are 3 enemies on it (excluding Ox Grunts). Any further enemies spawn on the next square closest to the villager. Keep selecting new tiles each time one gets filled up, moving towards the villagers' square.
Pause
Choose how many dice to roll – must be at least one. If there are equal or more Chi than Claws, move a cart of your choice to an adjacent square. If there are more Claws than Chi, spawn 1x Ox Grunt on either the Rooftops or the Flagstones tile.
The scene tiles for this mission form an L-shaped village layout, with the Start Tile and numbered spawn points 1 through 6 spread across it, leading toward the villagers' square.
Mission 3.2: Wolf Boss Attack
Scene tiles needed: a, b, E, F, g, I, J, l, m, n, o, p, q, R, s, T, TT1
Wolf Spearmen and Slashers have kidnapped some villagers while Wolf Boss awaits them out of town. Get to him and foil their plans before it's too late.
Objective
Win condition: Reach Wolf Boss and KO him before all the villagers reach the Prison Cell scene tile and before the end of 2 rounds.
Mission failure: You lose if all the villagers reach the Prison Cell tile or if you fail to beat Wolf Boss before the end of round 2.
Special Rules
Each time the players reach a Play space on the Dial of Destiny, move ALL villagers one tile forward towards the Prison Cell tile.
Items and Obstacles
Dumplings: You must spend 2x Chi to pick up dumplings. If collected, players may draw a Special Move card at the start of their next mission.
Enemies
Spawn: According to players' Dials of Destiny.
Start for 3-4 players: 1x Slasher and 2x Spearman on each of the scene tiles with spawn tokens, and 1x Ox Grunt as shown on the map.
Start for 2 players: 1x Slasher and 1x Spearman on each of the tiles with spawn tokens, but no Ox Grunt on the Bridge tiles.
Maximum enemies: A tile cannot contain more than 3 enemies of any type. Any further enemies spawn on adjacent tiles or, if impossible, do not spawn.
Tiles
Mountain pass: The Mountain Pass scene tile deals one extra health damage when heroes are on it.
Bridge: 2x Chi and 1x Move to enter.
Bamboo Patch: 1x Move and 1x Punch to enter.
Pause
Choose how many dice to roll – must be at least one. If there are equal or more Chi than Claws, move Wolf Boss one tile backwards toward the beginning. If there are more Claws than Chi, move ALL villagers one tile forward towards the Prison Cell scene tile.
The scene tiles for this mission form an L-shaped path from the Start Tile, through the numbered spawn points, to the Prison Cell Tile.
Mission 3.3: Tai Lung Showdown
Scene tiles needed: A, B, C, E, f, H, I, j, m, N, O, p, S, T
Tai Lung has launched the final attack on the Temple. Read the secret of the Dragon Scroll and defeat him once and for all.
Objective
Win condition: The heroes must reach and read the Dragon Scroll before Tai Lung gets his paws on it; then, push Tai Lung into the Prison Cell scene tile before the end of 3 rounds.
Mission failure: You lose if Tai Lung reaches the Dragon Scroll before you, or if you fail to push him into the Prison Cell within 3 rounds.
Special Rules
- Each time a player reaches a Play space on their Dial of Destiny, move Tai Lung one tile closer to the Dragon Scroll tile. After the heroes read the scroll, Tai Lung will still move towards the Dragon Scroll tile but he will stop on any tile with at least one hero on it.
- Tai Lung cannot be defeated before a hero reads the scroll. Any player moving to an Enemies Fight Back space on their Dial of Destiny while sharing a tile with Tai Lung suffers 2 health loss.
- Wounding Tai Lung: After reading the scroll, each wound inflicted on Tai Lung will push him one tile towards the Prison Cell tile. To wound Tai Lung, players on his tile must spend:
- 2-player game: 5x Chi and 1x Punch
- 3-player game: 8x Chi and 1x Punch
- 4-player game: 11x Chi and 1x Punch
Items and Obstacles
To read the Dragon Scroll, you must spend 6x Chi. This requires multiple players cooperating.
Enemies
Start for 3-4 player: 1x Slasher and 2x Spearman on each of the scene tiles with spawn tokens.
Start for 2 players: 1x Slasher and 1x Spearman on each of the scene tiles with spawn tokens.
Spawn: According to players' Dials of Destiny.
Maximum enemies: A tile cannot contain more than 3 enemies of any type. Any further enemies spawn on adjacent tiles or, if impossible, do not spawn.
Tiles
Bridge: 2x Chi and 1x Move to enter.
Rooftops: 1x Move and 1x Kick to enter.
Training Room: 2x Chi and 2x Move to enter.
Pause
Choose how many dice to roll – must be at least one. If there are equal or more Chi than Claws, move Tai Lung one tile backwards toward the Prison Cell scene tile. If there are more Claws than Chi, move Tai Lung one tile forward towards the tile with the Dragon Scroll.
The scene tiles for this mission connect the Start Tile through Tai Lung's starting position to the Dragon Scroll tile, and on to the Prison Cell Tile.
Guide to Tokens
Spawn Tokens
Use spawn tokens to show which scene tiles enemies will spawn on when that space is reached on a Dial of Destiny.
Round Tokens
Place a round token next to the board before each round to keep track of which round you are playing.
Villager Tokens
You may need to collect, protect or move villagers, depending on a mission's instructions. Doing so requires spending results of Chi and Punch.
Walls
Walls are an obstacle placed between scene tiles. A wall is impassable to heroes until broken (spending 2x Chi, 1x Punch and 1x Kick); the wall is then flipped to the broken wall side to show that it is passable from now on.
Scroll and Dragon Scroll Tokens
You may need to collect or read the scroll or dragon scroll tokens, depending on a mission's instructions. Doing so requires spending results of 6x Chi.
Dumplings Tokens
In a game of multiple players earn Special Moves by collecting dumplings from the Kitchen scene tile. To collect dumplings, a player must be on the Kitchen scene tile and spend 2x Chi to pick them up.
Gong and Lever Tokens
Gong and lever tokens will hold roles in missions that depend on individual mission instructions. By default, while on a mission with these tokens:
- spend Chi and Punch results to use a gong
- spend Chi and 2x Punch results to use a lever.
+1 Move and +1 Damage Tokens
Place these tokens next to the board if the mission instructions specify extra moves or extra damage applies during that mission.
Carts
Carts help heroes climb onto Great Walls. Carts can be pushed from one tile to another. To do so, you need to spend 4x Move and 2x Chi. This moves the cart one tile (the heroes do not move with the cart).
Guide to Scene Tiles
Scene tiles are double-sided, and in most cases have a scene tile on both the front and reverse.
Each scene tile has a letter code to help identify it. The front of the tile has a capital letter, while the reverse has a lower case letter (which is underlined for clarity). Each set of mission instructions includes a list of the letter codes for the scene tiles used in that mission.
Each scene tile also includes symbols which show the requirement to enter the tile. In some cases, entering the tile requires only spending a Move result, while Hard Going tiles include other results that must be spent or conditions that must be met.
The Guard Tower is an example of a tile that cannot be entered except by a special rule within mission instructions.
| Front | Name | Reverse | Name |
|---|---|---|---|
| A | Training Room | a | Long Rooftops 2 |
| B | Mountain Steps | b | Bamboo Forest Clearing |
| C | Jade Gallery | c | Great Wall 1 |
| D | Great Wall 2 | d | Long Market |
| E | Long Bridge 1 | e | Mountain Path 1 |
| F | Mountain Path 2 | f | Monastery Hall |
| G | Long Rooftops 1 | g | Long Bridge 2 |
| H | Long Rooftops 2 | h | Long Shop Interior |
| I | Rooftops 1 | i | Monastery Bed 1 |
| J | Kitchen | j | Dragon Scroll |
| K | Guard Tower | k | Monastery Bed 2 |
| L | Shop | l | Flagstones 1 |
| M | Rooftops 2 | m | Temple Steps |
| N | Dragon Statues | n | Market 1 |
| O | Flagstones 2 | o | Bridge |
| P | Monastery Bed 3 | p | Equipment Stash |
| Q | Monastery Bed 4 | q | Market 2 |
| R | Market 3 | r | Hot Springs |
| S | Parade Ground | s | Gatehouse |
| T | Prison Cell | t | Training Ground |
| tt1 | Pool of Tranquility | — | Enemy Quick Ref Guide |
| TT1 | Pool of Tranquility | — | (Make your own tile) |