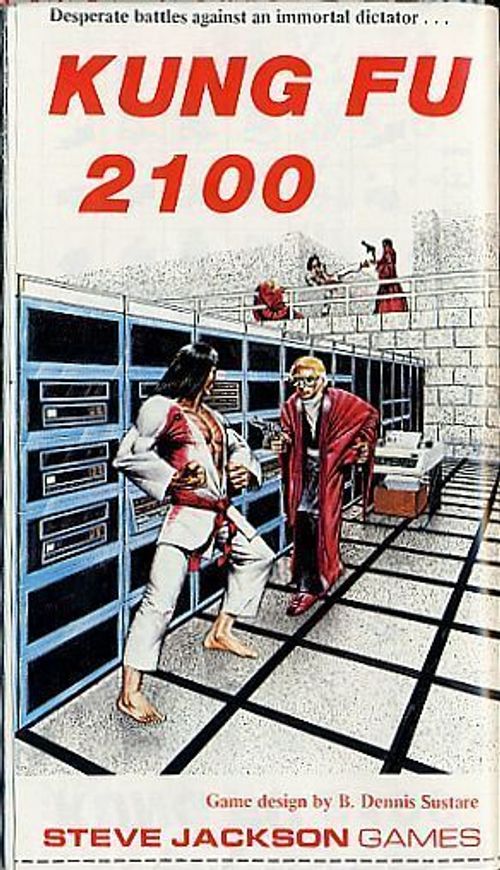
Kung Fu 2100
Kung Fu 2100 Rulebook
Table of Contents
Table of Contents
1.0 Historical Background
The perfection of cloning techniques in the year 2006 caused worldwide social disruption. The expensive and complex cloning procedure required large computers (for programming of clones with the personality and experience of the original), a well-equipped biological laboratory (for initial clone culture) and an elaborate growth chamber (for accelerated development of the clone). Only the wealthiest and most powerful had access to such equipment . . . but those few gained effective immortality for themselves and their loyal followers.
These powerful few (soon to be called CloneMasters) joined to defend their status against the angry masses who felt doomed to mortality. In the early riots, many laboratories and government buildings were put to the torch. Whole cities followed; much of civilization collapsed. Gradually, the surviving CloneMasters restored order - but of a very repressive kind. Technology was reserved for themselves; the populace was forbidden to use engines or machinery. Even metal was eventually outlawed.
By the year 2100, the world was fragmented into individual fiefdoms, each controlled by a CloneMaster from his personal fortress. Within this citadel was all he needed to grow and program his clones - letting him live forever in luxury. Attended by guards, servants, and his computer technicians, snug in his haven, a CloneMaster needed to give little thought to the Dark Ages beyond his walls. Any organized revolt would be quickly dealt with by the CloneMaster's own secret police, or by the armed forces maintained co-operatively by groups of CloneMasters.
But in the mean hovels beyond the walls, a secret cult came into life. Members called it the Society of Thanatos; the common folk called them Terminators. They had but one goal: to end the lives of the CloneMasters. Terminators were trained from childhood to fight with the only weapons left to them: their hands and feet. They reached the human limit in strength, stamina, unarmed combat, and immunity to pain.
A few failed in their training or rebelled against the strict Terminator discipline. Of these, many sought out the CloneMasters to inform on the cult. Such treachery often led to the destruction of a cult cell - but some always survived. The turncoats themselves took service guarding the CloneMasters. The CloneMasters called their kung-fu guards Janizaries. The common folk called them spineless Jellies - but not to their faces.
Kung Fu 2100 is a game of battle between the Terminators and the CloneMaster. One player - the Terminator - seeks to enter the fortress of his foe, to destroy him and all his works. The other player - the CloneMaster - must defend himself until help can arrive. The Terminators are few but powerful. The "Jellies" are weak by comparison - but any one would be a match for many normal men. And they will give their lives for the CloneMaster . . . .
WARNING: This is a game, not a simulation. Serious minded folk read further at their own risk!
2.0 Components
All the components are included in this issue of TSG. In order to use them, you will need to have photocopies made. We do NOT encourage you to tear up your magazine. Using white glue or rubber cement, mount the map and counters on thin cardboard and cut them out. You may want to color some of the counters for recognition.
2.1 Mapsheet. The map shows the residence of the CloneMaster. The heavy lines show outer walls; arrows show entry points. Light black lines are interior walls, which cannot be crossed. The walls divide the map into rooms and halls, each of which is named. Certain of the rooms contain vital installations - computers and clone tanks. These are marked with asterisks.
The rooms are separated by soundproof doors. Units may move through these doors freely, and even attack through them, at no penalty. There are also two "armored doors" shown by double lines. One is the front door of the building; the other separates the Overlook and the Upper Main Corridor.
Each room is divided into squares. These squares govern movement. The center of each square is shown by a dot, to control missile fire.
(Errata, TSG #31: seven doors were omitted from the printed game map. Two were really important - their omission made it impossible to leave the kitchen and dining area. The omitted doors were shown in the errata by circles and arrows on the map; they are soundproof doors that units may pass through as described above.)
2.2 Symbol Chart. The symbol chart is printed on the mapsheet. It shows the various symbols used on the counters and map.
2.3 Turn Record Track. This is also printed on the mapsheet. Place the "TURN" and "PHASE" counters on the track and move them at the completion of each phase.
2.4 Record Sheets. There are two record sheets - one for each player. The Jelly Record Sheet shows the abilities of Jellies 1 through 12. After the CloneMaster marks off the Jellies he is not using, the sheet is ready for play. The Terminator Record Sheet shows three levels of ability in each of 5 skills - a total of 15 levels. The Terminator player must choose which level of skill each of his men has in each ability, and mark off the sheet accordingly. Once play begins, the players use the record sheets by marking off skills lost due to injury. When combat occurs, place the Tactics counters on the record sheets to keep them from being mixed up.
2.5 Counters. There are several different kinds of counters:
2.51 Turn and Phase Counters. Place these on the Record Track.
2.52 Tactics Counters. There are 5 different kinds of these counters - 30 in all. They are used during combat (see Section 5).
2.53 Destruction Counters. Place one of these on a piece of vital equipment after the Terminators destroy it.
2.54 Door and Equipment Counters. These counters represent extra armored doors and pieces of equipment. Use them to make the game harder for the Terminator player - see Section 7, Optional Rules.
2.55 Counters Representing Humans. There are seven different kinds of "human" counters in this game.
2.551 Terminators. There are five counters representing Terminators. (Most games will use only three.) Each shows only the Terminator's picture and the initials of his name. A Terminator moves 5 squares per movement phase and has two movement phases each turn.
2.552 CloneMaster. There is one counter for the CloneMaster. It carries a picture of a gun, showing that he can fire once per turn. He moves 4 squares per turn.
2.553 Jellies. These are the CloneMaster's guards, trained in kung-fu. However, they are much less skillful than the Terminators. Each Jelly has a J plus a number (J-3 is Jelly number 3). It also has his silhouette and 3 or 4 small symbols indicating which abilities he has. Some Jellies have the same symbol twice; for instance, J-1 has two Lightning Foot symbols, indicating he has two levels of skill in that ability and could therefore kick twice in one turn. Jellies move 5 squares per turn.
2.554 Technicians. A technician is shown by an atom symbol. Technicians have no combat skills and move only 4 squares per turn.
2.555 Armed Technicians. A few of the technicians (the most trusted) are permitted to carry guns. Their counters are just like regular Technician counters except that they also show a gun, indicating they can fire once per turn. They also move 4 squares per turn. Note that when any armed figure is killed, his gun is lost. The Terminators and Jellies are better off without it, and the other figures don't know how to use it!
2.556 Servants. A servant is shown by the serving tray symbol. Servants have no combat skills and move 3 squares per turn.
2.557 Local Constabulary. These are the "policemen" guarding the outer wall of the CloneMaster's estates. In the advanced game, they will come charging through the front door in answer to the alarm. They are shown by the letters LC, a badge, and a gun. They move 4 squares per turn.
2.6 Combat Results Table. This table (CRT for short) shows the result of each type of attack when met by each possible defense. To use it, cross-reference the attack (horizontal rows) with the defense it meets (vertical columns). This will show the die-roll the attacker must make in order to hit. Some attacks are automatically successful; some defenses will automatically stop certain attacks without a die roll.
3.0 Setup and Sequence of Play
3.1 Setup. Before play begins, the players must choose a scenario from Section 6. Follow the setup instructions for the scenario. The Terminator will have to choose what levels of ability his men have and mark that on the record sheet. The CloneMaster will have to pick out his counters and arrange them, face down, on the map. Play then begins with the first movement phase.
3.2 Sequence of Play (Phases). Each turn is composed of seven phases, as shown on the Turn Record Track. They are:
TERMINATOR MOVE I. Each Terminator moves up to 5 squares.
COMBAT I. All combats created by this movement are resolved.
TERMINATOR MOVE II. Each Terminator moves up to 5 squares.
CLONEMASTER MOVE. CloneMaster may release new counters (see below). Then each CloneMaster counter that is now face-up may move up to its full movement allowance.
COMBAT II. All combats created by this movement are resolved.
RECOVERY. Any injured figure with Mountain Heart ability rolls one die to see whether it "recovers." If a 1 or a 2 is rolled, one level of Mountain Heart is recovered. See Section 5.6.
ADVANCE GAME TURN. Move the TURN marker ahead one turn. It is now time for the first Terminator move of the next turn.
It is important to keep track of what phase it is by moving the phase marker. Otherwise, great confusion may result.
4.0 Movement
4.1 Terminator Entry. At the beginning of the game, the Terminators may enter the building in any of several ways. It is possible for them all to come in the same way (though this may delay entry for some) or for each to use a different path. Any Terminator may delay his entry for any amount of time, but it is usually best to enter quickly.
4.11 Front Door. If Terminator(s) want to break down the front door, those Terminators may not move during Movement Phase I. During the Combat Phase, all Terminators at the front door may attack it (see Section 5.7). If and when the door is destroyed, any or all of the Terminators present may enter on the next Movement Phase. The Entry Corridor square shown by the arrow is the first square of movement for each.
4.12 Out of the Loo! Though the CloneMaster lives in luxury, his plumbing is primitive. Wastes drop directly into large sewer-pipes which lead into a stream. The Terminators may enter the castle by crawling along these pipes (remember, they're fanatics) to come bursting out of the facilities. One Terminator per Movement Phase may come out of each lower-level loo. The "Loo" square on the board counts as his first square of movement. It is not possible to enter or leave through Loo 4 or Loo 5.
4.13 Kitchen. Kitchen wastes also drop into the sewers. One or two Terminators may enter each phase through the kitchens. The square shown by the arrow is the first square of movement for each one.
4.2 Release. None of the CloneMaster's counters may move until they are "released." At the beginning of the game, all CloneMaster counters are upside-down. When a counter is released, it is turned right-side-up. Before a counter is released, it cannot move or attack . . . but the Terminator does not know what it is!
A counter may be released in one of two ways:
(a) Terminator movement. When a Terminator enters a room, all counters in that room are instantly released. Turn them right-side-up. The Terminator player may look at them before finishing the movement (if any) of the man that entered the room. He may even choose to move right back out of the room.
(b) CloneMaster choice. At the beginning of the CloneMaster Move each turn, the CloneMaster may activate one Jelly, one Servant, and one Technician (armed or unarmed). He may pick the ones to be activated from wherever he likes. If all the counters of a given type have already been activated, the CloneMaster does NOT get to activate an extra one of another type. If for some reason the CloneMaster wishes to leave some counters unactivated, he may. He never has to activate a counter.
4.21 CloneMaster Release. The CloneMaster himself may be activated at any time by the CloneMaster player . . . during any phase he wishes. At the moment he is activated he gets a free move of 4 squares (though this may be blocked; see Movement Restrictions, Section 4.4). If the CloneMaster is activated by a Terminator entering his room, he has his choice: he may take his extra move at the instant the Terminator enters, or he may wait until the end of that Terminator Move.
4.22 Units remain released. Once a CloneMaster unit has been released, it stays face-up for the rest of the game. It may never "hide."
4.3 Movement Allowance. Each counter carries a number (the bottom symbol on that counter) showing its movement. This is the number of squares that unit can move each phase. Terminators get two movement phases per turn. CloneMaster units get only one. A unit never has to move its full movement allowance. It can move fewer squares, or even stand still. A unit may re-trace its path if there is need.
It costs one movement point to move from one square to an adjacent one. Figures may move north, south, east, or west, but never diagonally.
4.4 Movement Restrictions. Some factors may hinder movement, as follows.
4.41 Armored Doors. If an armored door has not been destroyed, it costs one extra movement point to pass through it. A Terminator cannot pass through it at all until it has been destroyed. It is not possible to attack through an intact armored door.
4.42 Crossing the Drop-Off. The Overlook Corridor and the Central Room are separated by a line of dots. This represents a "drop-off" or split-level room. It costs two extra movement points to cross this drop-off in either direction - unless you are a Jelly or Terminator with an undisabled Monkey Soul ability. In that case, it costs nothing extra. You do not have to pick a Monkey Soul combat chit - you just need the ability. (Note: The map doesn't show it, but the Lower Main Corridor is a ramp - that's how the upper and lower levels connect normally. There is also a flight of steps from Overlook to Central.)
4.43 Hostile Martial Artists. It costs two extra movement points to enter a square occupied by an enemy Jelly or Terminator. It costs nothing to enter a square occupied by any other figure. It costs nothing to enter a square with an enemy if he is unconscious (see COMBAT).
4.5 Obstacles to Movement. It is impossible for any unit to cross a wall or to enter a square with a clone growth tank (circle with an asterisk). However, it is possible to enter a square with a computer (rectangle with an asterisk) along one wall.
4.6 Stacking. Only one human may occupy each square at the end of any movement phase. It is possible to go through other units, either friendly or enemy, if you have enough movement - but you cannot stop your movement on another figure. Exception: Any number of unconscious figures may occupy a square; one conscious figure can also be in that square.
4.7 Leaving the Map. CloneMaster units may never leave the map for any reason. Terminators may attempt to leave the map at the end of a game. They may exit by the lower-level loos or the kitchen, but not by the front door (they'd be cut down immediately). One per movement phase may exit by any loo; two per phase may exit through the kitchen. To leave, a Terminator must be in the appropriate entry/exit square and have at least one movement point remaining. Terminators who have exited the map may not re-enter.
4.8 Zones of Control. Those players accustomed to conventional wargames should note that there are NO "zones of control."
5.0 Combat
5.1 When combat occurs. Combat may take place during either of the two Combat Phases. Combat is always voluntary. It would be possible (but unlikely) to have enemy units side-by-side, but have no combat - because neither player felt it would be to his advantage.
All units involved in a combat must have been released. (Terminators, of course, begin the game "released.")
Units may make two kinds of attacks: hand-to-hand, and missile attacks. To make a hand-to-hand attack, you must be immediately adjacent to your foe. To make a missile attack, you must be immediately adjacent, diagonally adjacent, or one square away in a straight line. See the diagram below.
Diagram: a figure at the X could make a hand-to-hand attack against a figure in any of the squares containing a black dot (the four orthogonally adjacent squares and the four diagonally adjacent squares). He could make a missile attack (gun or throwing spikes) against a figure in any of the squares marked with an open circle (the squares exactly two squares away in a straight line - north, south, east and west - and the squares one square away in each direction, as above). He could not attack a figure farther away. Exception: An LC can fire his gun at ANY range.
5.2 Line of Sight. A figure can never attack an enemy if the "line of sight" between their squares is blocked. If a line drawn between the centers of their squares is blocked by a wall, piece of equipment, etc., then no attack can take place. However, an intervening figure does NOT block line of sight for missile attacks.
5.3 Multiple Combats. A combat is a single "fight." It is possible for there to be three combats during a single combat phase, if there are three Terminators in play. Then again, if they are all fighting the same foe(s), they might all be involved in the same combat. Each combat is played out separately. Any time two or more Terminators can strike the same foe, or be struck by the same foe, they are in one combat together. If they cannot strike the same foe (or be struck by the same foe) they are in different combats. Gunshots and thrown spikes count as "striking."
At the beginning of each combat phase, determine how many combats are taking place. Resolve one completely before going on to the next.
5.4 Procedure for Combat. Each combat goes through the following stages:
- Select tactics counters. Only Terminators and Jellies can select tactics counters. A Terminator may select three tactics counters for each combat. He must choose from those abilities he still has. For instance, if he has three levels of ability in Lightning Foot, he could take three Lightning Foot counters. If he has only one level of Lightning Foot, he could only take one counter for it. And if (through injury) he has lost his Lightning Foot entirely, he CANNOT pick that counter.
A Jelly picks counters in the same way, except that he may pick only two counters per combat, and picks only from those abilities he has.
A figure cannot pick counters for abilities he has lost. A Terminator who has only two abilities left may pick only those two counters. A Terminator or Jelly who has only one ability left will have only that one counter for each combat.
There are five different types of tactic counters: three attacking and two defending. Attacking counters are:
IRON FIST. This represents a punch. All Terminators start with this ability; some Jellies know it.
LIGHTNING FOOT. This represents a kick. All Terminators start with this ability; some Jellies know it.
WEAPONS. This counter is used to represent any of the four weapon attacks: throwing spikes, nunchaku, bo stave, or kon-go. The Terminators do not carry or use weapons, but some Jellies have them. Note that a weapon is never dropped until the Jelly has lost that ability, and that a Jelly with throwing spikes will not run out of them during the game.
The defending counters are:
MONKEY SOUL. This technique involves great agility and is useful both for dodging bullets and for scaling walls. It is a total protection against a kick, and useful against other attacks. All Terminators, and some Jellies, begin with it.
BODY OF MIST. This technique involves concentration as well as physical skill. It provides total protection against punches and against all hand-to-hand attacks by untrained foes. It is useful against kicks, but will not protect against gunshots. All Terminators, and some Jellies, begin with this ability.
There are no counters for MOUNTAIN HEART; it is not a combat ability.
A player may not look at the counters his opponent has chosen until they have been played. He may not study the unchosen counters to determine what has been picked.
- Play tactics counters. The Terminator player chooses who is to play first. (Exception: If throwing spikes are to be involved in the combat, they must be the first counter played - so the CloneMaster automatically goes first if he has spikes and is using them.)
If the first counter played is a defensive counter, it has no effect. If it is an offensive counter, it represents an attack. The player who put down that counter states who is being attacked.
Play of counters alternates. The first player plays one counter. Then the second player plays one counter. Play alternates until one player has used all his counters for that combat. At this time the other player may immediately play all his remaining attack counters. An attacking counter represents an attack and is modified by the next counter played.
When the first attack counter is played, the attacker states which figure is attacking and which figure is being attacked. The other player then replies with a counter. The effect of the first counter played is then figured by reference to the CRT. If the figure being attacked was NOT the one playing the reply counter, roll in the "Inactive" column (for most figures) or the "Helpless" column (for Servants and unconscious figures). If the figure that was attacked WAS the one playing the reply counter, roll on the CRT column for that type of reply.
Note: If figure A punches figure B, and figure B replies with (for instance) a kick, it does not matter where the kick is directed (back at A, at another figure, or at a piece of equipment). The player does not have to state whom B is kicking until it is his opponent's turn to counter that attack. Figure A's attack is resolved as "punch vs. kick" no matter where the kick is going.
If the CRT indicates a hit, the target figure loses one ability (if it is a Terminator or Jelly) or is removed from play (if it is any other figure).
Now: if the second (reply) counter was itself an attack, the person who played it must state whom that attack was directed against. The first player must then reply to that counter . . . and so on. If the second counter was only a defense, it has no further effect, and the first player may play another counter if he has one. If this seems complex, read the Example of Play, below. Once understood, the system is simple.
As long as a player has counters left, he MUST play one when his turn comes to reply to his opponent's play - even if the counter he plays is totally useless.
Should it happen that a figure has attack counters left but no one left to attack (or defense counters left but nothing left to defend against), those counters may be discarded. That figure's combat is ended for the time being.
-
Untrained attacks. After the Terminators and Jellies have played all their attack tactics counters, "untrained attacks" may be made by unarmed Technicians and Servants standing next to Terminators. Roll one die. If the result is equal to or less than the number of figures making the attack, the Terminator is hit and loses one ability. Example: If a Terminator is attacked by three Servants, he loses an ability on a die roll of 1, 2, or 3. However, if a Terminator has a "Body of Mist" counter that he has not yet played, he may play it now and be immune to all those attacks.
-
Gunfire. This is the last part of a combat. Each figure with a gun (CloneMaster, armed Technicians, or Local Constabulary) may fire one shot if a Terminator is within range. Each shot hits on a roll of 1, 2, or 3. If a Terminator has one or more Monkey Soul tactics counters left, he should play them now. Each one played will allow him to dodge one bullet. These counters must be played before results of the gunfire are rolled.
A Terminator loses one ability for each gunshot that strikes him.
When all gunfire has been ended, that combat is over. Go on to the next combat. When all combats have been resolved, go on to the next phase of that turn.
Example of Combat - I
First, a very simple example. One Terminator is standing next to Jelly 1. Both are uninjured. The Terminator's abilities are Fist-1, Kick-2, Mist-1, Soul-1, and Heart-2. The Jelly's abilities are Kick-2, Heart-1.
The Jelly has little choice; he picks two Kick counters. The Terminator is entitled to pick three counters. He chose two Kicks and a Monkey Soul.
The Terminator elects to go second, so the Jelly starts by playing one Kick. The Terminator responds with a kick of his own. Resolve this as follows: Attack - kick. Defense - kick. Cross-referencing these on the CRT, we see that the Jelly needs a 1, 2, or 3 to hit. He rolls a 4, which misses.
Now the Terminator's kick can take effect. The Jelly must reply. He plays his other Kick counter. Again we have an attack of "kick" and a defense of "kick." The Terminator must roll a 1, 2, or 3. He rolls a 2, which hits. The Jelly loses one ability. This does NOT affect this combat, but will affect his later play. (He should take the injury to his Mountain Heart - see 5.6 for explanation.)
Now the Jelly's second kick can take effect. The Terminator must reply. He plays his Monkey Soul counter. This, as we see from the CRT, is a total defense against a kick; no roll is needed.
The Monkey Soul is not an attack. However, the Jelly is out of counters and cannot reply. The Terminator has one Kick counter left, and he gets to play it. Since the Jelly has no possible reply, the "kick" attack is rolled on the "Inactive" defense column. The Terminator needs a 1, 2, 3, or 4. He rolls a 4, which hits. The Jelly loses another ability.
At this point, both figures have used up all their counters. Since no other figures are involved in this combat, it is over. The Jelly has taken two injuries, which must be marked on the record sheet. The Terminator is unhurt.
Example of Combat - II
Now for a complex example. This is much more complicated than most combats will be in the game. It covers almost every possibility. It takes place in the situation shown below:
Diagram: a section of the map showing a Servant, a Technician (armed) and a Technician beside Jelly 1 and Jelly 9 (see the errata note below), with Terminators Golden Song, Shadow Lotus and Rising Dream, Jelly 2 and Jelly 7, a second Technician and a second Servant.
Terminator figures:
Golden Song is unwounded. His abilities are Fist-2, Kick-1, Mist-1, Soul-2, Heart-1. He chooses two Fist and one Kick counters.
Shadow Lotus is slightly wounded. Her abilities are now Fist-1, Kick-1, Mist-0, Soul-1, and Heart-1. She chooses one Fist, one Kick, and one Monkey Soul counter.
Rising Dream is badly injured. His abilities are now Fist-2, Kick-0, Mist-0, Soul-0, and Heart-0. He has no choice but to take two Fist counters.
CloneMaster figures:
Jelly 1 is slightly wounded. His abilities are now Kick-1 and Heart-1. Since Mountain Heart is of no use in battle, he can take only one counter: Kick.
Jelly 2 is uninjured. He can take two counters. His abilities are Kick-1, Weapon-1, and Soul-1. He chooses the Kick and Weapon tactics counters.
Jelly 7 is injured. Of the three talents he started with, he has only one: Weapon-1. However (as shown by the counter) his weapon is throwing spikes. That means he can attack Rising Dream without being in dan- ger himself - in fact, even if he had other abilities left, he could not use them from where he is at the moment. He takes the Weapon counter as his only tactic.
The CloneMaster also has three Technicians (two armed) and two servants involved in the battle. Because of the position of the units, the entire battle must be handled as a single combat.
(Errata, TSG #31: in the printed diagram the counter shown was that for Jelly 9. It should, of course, have been for Jelly 7, as described in the example.)
FIRST COUNTER PLAYED. Jelly 7 throws spikes at Rising Dream.
SECOND COUNTER PLAYED. Rising Dream kicks - not at a human target, but at the clone tank. (See Section 5.8, Destroying Equipment.) The Jelly's attack, then, is resolved as "spikes vs. kick." He needs a 1, 2, or 3. He rolls a 5, which misses. Rising Dream's kick against the clone tank is automatically successful. The clone tank is replaced with a "destroyed" marker.
THIRD COUNTER PLAYED. It is the CloneMaster's turn again. Jelly 2 attacks Shadow Lotus with his kon-go. (Errata, TSG #31: the original text called Jelly 2's weapon "nunchaku"; it was of course the kon-go.)
FOURTH COUNTER PLAYED. Shadow Lotus kicks at Jelly 1. This means that Jelly 2's attack is resolved as "weapon vs. kick." He needs to roll a 1 or 2. He rolls a 2, which hits. Shadow Lotus loses one ability. She scratches the remaining Mountain Heart from her record sheet.
FIFTH COUNTER PLAYED. The CloneMaster's turn again. Jelly 2 kicks at Shadow Lotus. This means that Jelly 1 (whom Shadow Lotus just attacked) is inactive. Resolve Shadow Lotus' attack as "kick vs. inactive." Shadow Lotus must roll a 1, 2, 3, or 4. She rolls a 3, which hits. Jelly 1 is wounded and loses another ability. He will choose to lose the Mountain Heart, and is now down to one ability.
SIXTH COUNTER PLAYED. The Terminators' turn. Golden Song punches at Jelly 1. This means that Shadow Lotus is inactive - so the Jelly 2 attack against her (above) is resolved as "kick vs. inactive." The Jelly rolls a 5, which misses.
SEVENTH COUNTER PLAYED. CloneMaster's turn. All his counters have been played except one - the "kick" counter for Jelly 1. He plays it, kicking at Golden Song. This means that Golden Song's attack against him (above) is resolved as "fist vs. kick." Golden Song needs a 1, 2, or 3. He rolls a 1, a hit. Jelly 1 must lose another ability. Since he had only one left, that means he has lost ALL his abilities. He falls unconscious. The kick that he just made is not completed. No roll is needed.
The CloneMaster is now out of attack counters. The Terminator may now play all his remaining attack counters, one at a time.
EIGHTH COUNTER PLAYED. Rising Dream fists the technician "above" him. Technicians have no counters to play. The attack is resolved on the "fist vs. technician" column. Rising Dream needs a 1, 2, 3, or 4. He gets a 4. The technician is removed from play.
NINTH COUNTER PLAYED. Shadow Lotus fists Jelly 2. The Jelly has no counters left to play, so the attack is rolled at "fist vs. inactive." A 1, 2, 3, or 4 will hit. She rolls a 2. The Jelly is hit and must lose an ability. He chooses to lose Monkey Soul; it is scratched off his sheet. (The opponent knows that he has lost an ability, but not which one!)
TENTH COUNTER PLAYED. Golden Song has two kicks left. He kicks at the servant beside him. Rolling on "kick vs. helpless," he needs a 1 through 5. He rolls a 6, which misses.
ELEVENTH COUNTER PLAYED. Golden Song kicks again at the same servant. This time he rolls a 5, which hits. The servant is removed from play.
Now all attack counters have been played. The Terminator has one defensive counter left (Shadow Lotus' Monkey Soul).
UNTRAINED ATTACK. One servant is left, standing next to two Terminators. She can make an "untrained attack" on one of them. She chooses to attack Golden Song. Since she is alone, she needs to roll a 1 to hit. She does! Golden Song loses one ability. The player chooses to take the injury off of Mountain Heart (always the smart thing to do, when possible).
GUNFIRE. There are two armed technicians. Neither one can shoot at Rising Dream (see diagram). Either one, however, can shoot at either of the other two Terminators. Suspecting (correctly) that Shadow Lotus was holding out a Monkey Soul counter, the CloneMaster player has them both fire at Golden Song. The table shows that to hit with "gun vs. inactive" you need a 1, 2, or 3. One tech rolls a 5 (missing). The other rolls a 3 (hitting). Golden Song loses another ability. The Terminator player chooses to scratch Body of Mist from his record sheet. NOTE: If one tech had fired at Shadow Lotus, she would have played the Monkey Soul counter and the shot would have had no effect. If both had fired at her, she would have played the counter to negate one shot - but the other one would have been fired normally.
That concludes this combat.
5.5 Results of injury. Each time a character is injured by an enemy attack, he is affected as follows:
Terminators and Jellies lose one ability. When all abilities are lost, the counter falls unconscious. One further injury to an unconscious Terminator or Jelly will kill him. An unconscious warrior may possibly recover consciousness with Mountain Heart (see below).
Other Figures are killed by a single injury. Remove them from play. (Against servants, a Terminator might strike to incapacitate rather than kill - but the result is the same for play purposes.)
5.6 Mountain Heart. This is the fifth skill taught by the Society of Thanatos. It is not a combat tactic; it is the ability to recover quickly from severe injury. A figure who takes injury should always assign it to Mountain Heart if possible. Once each turn (during the Recovery Phase) each figure with damage to Mountain Heart rolls one die. On a roll of 1 or 2, that figure recovers one level of Mountain Heart. A figure gets only one roll per turn (no matter how many levels of Mountain Heart he had) and can never recover more than one level per turn. Mountain Heart may never recover past its original level. Once you have recovered your original level, you stop rolling for recovery. Other skills may never be recovered. Mountain Heart is a reservoir of inner strength; it does not heal broken arms and legs, or recover lost weapons. Note: The recovery roll is NOT secret.
5.61 Recovery from unconsciousness. An unconscious figure who has Mountain Heart may, if he rolls a 1 or 2, recover from unconsciousness. However, all his other abilities are still gone and may not be recovered. This means that the figure is good for nothing except blocking the enemy; he cannot fight or destroy things. If a figure recovers consciousness while another figure is in its square, the owner displaces the newly recovered figure to the closest empty square.
5.62 Effects of unconsciousness/death. When a Terminator or Jelly becomes unconscious, note it on his record. If he had any attack counters that had not taken effect, they are lost. His earlier attacks are unaffected - but if he had just made an attack which had not yet been rolled, that attack does not occur. NOTE: When a Jelly goes unconscious and does not have Mountain Heart, you may remove him from play immediately UNLESS you are playing a scenario where the Terminator gets points for killing Jellies. In that case, leave him there; the Terminator will have to hit him again to score any points for him.
5.7 Destroying armored doors. There are two armored doors in the CloneMaster's citadel. A Terminator cannot move through one of these doors until it is destroyed. To destroy an armored door, a Terminator must throw a kick or punch at it, and then roll a 1 or 2. A 1 or 2 destroys the door; other rolls have no effect.
5.8 Destroying vital equipment. There are several pieces of vital equipment (marked with * symbols) in the citadel. A chief Terminator objective is to destroy these. To destroy a piece of equipment, a Terminator need only throw a single kick or punch at it during combat. Destruction is automatic. NOTE: To destroy a clone tank (circular symbol) a Terminator must be adjacent to it. To destroy a computer (rectangular symbol) a Terminator must be in the same square with it.
5.9 The Overlook. A figure on the overlook cannot make hand-to-hand attacks against a figure in Central, and vice versa. A figure on the overlook CAN make a missile-type attack against a figure in Central, and vice versa. A figure in Control does not have line-of-sight for a gunfire attack on a figure in the Upper Main Corridor, and vice versa.
6.0 Scenarios
Below are three different scenarios for Kung Fu 2100. Players are encouraged to invent their own scenarios; extra pieces and optional rules are included for this. Players also may wish to draw new building maps. If you come up with an especially good and balanced scenario, The Space Gamer will consider it for publication.
6.1 Basic scenario. This is the first scenario you should play. It's a good introduction to the game.
CloneMaster Setup: The CloneMaster takes the following counters: 1 CloneMaster, 2 armed technicians, 10 unarmed technicians, 12 servants, and 8 Jellies. He may pick these from numbers 1 through 10 only; Jellies 11 and 12 may not be used. He places all units on the game board, upside-down, subject to the following restrictions:
(a) Servants may only go into a room or hall with an "S" in the lower corner. Jellies may only be set up in a room or hall with a "J." Techs may only be set up in a room or hall with a "T." The CloneMaster may go anywhere.
(b) No figure may be set up in a square adjacent to any door.
Terminator Setup: The Terminator has three figures. Each of these has a total of seven levels of ability: one level in each of the five talents, and two additional levels added anywhere. (Two possible choices would be: Fist-1, Kick-3, Soul-1, Mist-1, Heart-1, OR Fist-2, Kick-1, Soul-1, Mist-1, Heart-2.) Show the beginning abilities for each figure on the Terminator Record Sheet by scratching out the abilities he does not have. (Note: You may photocopy as many Record Sheets as you like.)
Terminator Entry: As specified in Section 4.1.
Length of Game: 10 turns.
Victory Conditions: CloneMaster total victory: CloneMaster survives, all Terminators killed. CloneMaster victory: CloneMaster dies but some of his equipment survives; all Terminators killed. Terminator victory: The CloneMaster, and all seven pieces of vital equipment are destroyed. Ter- minator total victory: As above . . . but at least one Terminator escapes (see Section 4.7) before the end of Turn 10.
Comments: The Terminators will not try to escape unless the CloneMaster AND all his equipment is destroyed; that is their whole mission, and they will die for it. If even one clone body or computer memory survives intact, the CloneMaster will live again. On Turn 10, the building will be surrounded and helicopters will land on the roof with sleeping gas; if the Terminators aren't gone by then, they're as good as dead.
6.2 Advanced Scenario. Play this scenario when the Terminator player starts winning the basic scenario most of the time. It's for more experienced players.
CloneMaster Setup: As before - but the CloneMaster gets 4 armed technicians and 8 unarmed technicians.
Terminator Setup: As before.
CloneMaster Reinforcements: Beginning on Turn 6, and each turn thereafter, 3 Local Constabulary come in the front door. LC are always "released." They are just like armed technicians except that they can fire at ANY range if they have a clear line of sight. Thus, by Turn 10, the Terminators will have a dozen policemen to contend with!
Length of Game: 12 turns.
Victory Conditions: As before.
Comments: Now it's a little harder for the Terminators to win!
6.3 Solitaire Scenario. One player can play both sides, or two players can play it as a regular game. When you play solitaire, the CloneMaster counters are controlled by certain rules.
Background: In a routine raid, the CloneMaster's secret police picked up a prisoner and brought him in for questioning by their master. They didn't know that their captive was a fully trained Terminator, captured only by sleep gas. As the CloneMaster walks into the room, the prisoner suddenly shatters his handcuffs and explodes into action . . . .
Setup: For solitaire play, the player picks all the figures that would be used in the Advanced Scenario, (except LC's) but only one Terminator. The Terminator has seven abilities. He starts in the far north square of the Servants' Work Area. The CloneMaster stands directly south of him. One Jelly stands beside the CloneMaster, to the east.
The other CM counters being used are mixed up, face down. One is placed in each room or hall (except the loos). An extra one is placed in each room containing vital equipment. Then the other counters are placed randomly on the board. Don't put more than two in any room; don't set up any figure in a doorway. All CloneMaster counters remain upside down; neither player knows which counters are where.
Terminator Objectives. The Terminator must take advantage of his opportunity to do as much damage as possible. He may try to escape, but only if (a) he is down to only 1 or 2 abilities, (2) it is turn 11 or 12, or (3) the CloneMaster is dead and all vital equipment has been smashed.
Length of Game: 12 turns.
CloneMaster Reinforcements: As in the Advanced Scenario.
CloneMaster Release and Movement: In solitaire play, the CloneMaster's minions are governed by the following rules:
(a) All units in a room are released when the Terminator enters it.
(b) At the beginning of each CloneMaster movement phase, the two upside-down figures closest to the Terminator (in squares of movement) are released.
(c) All released figures will move to attack the Terminator except servants and unarmed techs, who will run to the nearest equipment and protect it by crowding around it. Jellies will choose attack tactics rather than defensive ones whenever possible, and will always lose defensive abilities first. Figures with guns will fire from "safe" rather than adjacent squares.
Victory Conditions: are on a point system. The Terminator gets 5 points for killing the CloneMaster, 5 for each piece of equipment destroyed, and a bonus of 50 points if he kills the CloneMaster and destroys all the equipment. He gets 2 points for each Jelly killed. No points for constabulary, servants, techs, armored doors, etc., or for Jellies that are merely injured. The CloneMaster gets 30 points for killing the Terminator; 60 points if the Terminator is captured (by being in the building at the end of Turn 12).
The side with the most points wins. A win by more than 30 points is a "total" victory.
Comments: If this is a two-player game, the CloneMaster player sets up as per the Advanced Scenario (but no more than 2 figures per room) and moves his units as he pleases, but must use the solitaire release rules. Start the Terminator with a 10-point bonus; this is harder than solitaire.
7.0 Optional Rules
These are rules which may be added or changed to change the balance of the game or to design your own scenarios.
7.1 More or fewer Terminators. Example: to make the basic scenario really hard for the Terminator player, try it with only two attackers.
7.2 Changing Terminator Abilities. Try giving each Terminator eight abilities rather than seven. The change makes a big difference.
7.3 More and Better Jellies. A total of 12 Jelly counters are included - including two Jellies that start off with four levels of ability each. They can beef up the CloneMaster's force in a hurry.
7.4 Extra Equipment. Counters for extra armored doors and vital equipment are included. To make the Terminator's task harder, the CloneMaster may be given one or more extra armored doors and/or computer banks, to place wherever he likes.
Other optional rules and scenarios will suggest themselves as you play. What about four Terminators against a fortress guarded by all 12 Jellies?
8.0 Hints for Play
For the CloneMaster: Servants and technicians aren't as useless as they seem. Properly played, they can interfere with a Terminator's movement, slowing him fatally. If a room is full of servants, an enemy can't enter at all (until, of course, he disposes of them). Plan your initial setup so that entering Terminators will release most of your guards quickly. On your move, try to focus as many attacks as you can on one Terminator, to overload his defenses and kill him. It takes two fresh Janizaries to equal one Terminator, and three to hurt him much. If the Terminators catch your guards singly, they will kill them all.
For the Terminator: Decide on your strategy in advance. Let the abilities you choose, your point of entry, your path, and your tactics all serve that strategy. If you had all day you could win easily . . . but your time is very limited. You move twice per turn; sometimes it is better to leave a Jelly behind than to stay and kill him. Beware of throwing spikes and guns; they make it possible for the CloneMaster to focus more attacks on your men.
For both players: You are not entitled to look at your opponent's record sheet. However, if you keep track (mentally or on paper) of the amount of damage you have done to each foe, you will know which of your enemies are easy targets and which ones are still dangerous. Remember that the CloneMaster can win simply by putting his own counter in an unexpected place; the Terminator is taking a chance if he ignores ANY face-down counter. Also remember that there are two combats per turn. One is "arranged" by one player; one is arranged by the other. The Terminator should be careful that his second move does not expose one of his units to a CloneMaster counterattack. The CloneMaster, of course, must be careful all the time.
Combat Results Table
Reply (next counter played by the target of the attack) is shown across the top; the attack is shown down the side. The numbers are the die rolls on which the attack hits (for example, "1234" means a roll of 1, 2, 3 or 4 hits). "" means the attack has no effect; "-" means the attack cannot be made against that reply.*
| Attack | Helpless | Inactive | vs. Iron Fist (punch) | vs. Lightning Foot (kick) | vs. Body of Mist | vs. Monkey Soul |
|---|---|---|---|---|---|---|
| Iron Fist (punch) | 12345 | 1234 | 123 | 123 | * | 1 |
| Lightning Foot (kick) | 12345 | 1234 | 123 | 123 | 1 | * |
| Weapon (nunchaku, bo stave or kon-go) | 1234 | 123 | 12 | 12 | 1 | 1 |
| Throwing Spikes | 123 |
*Attack has no effect.
Helpless: Servant, or unconscious Jelly or Terminator.
Inactive: Jelly or Terminator who did not play a reply counter himself; Jelly who replied with a weapon attack; CloneMaster, Technician, or LC.
Other Attacks
To destroy an armored door: Roll a 1 or 2, attacking with a kick or punch.
To destroy vital equipment: Kick or punch. Destruction is automatic.
Untrained attacks: To hit a Terminator, the die roll must be less than or equal to the number of servants and/or techs making the attack.
Map, Track and Symbol Chart
Description of the printed mapsheet (the map itself is not reproduced). The map is printed in two halves labelled LOWER LEVEL (west) and UPPER LEVEL (east), north at the top. Room and hall names as printed: Servant's Quarters; Dining Area; Kitchen; Loo 1; Jelly Jar (Guards' Quarters); Jelly Ready Room; Lower Main Corridor; Entry Corridor; Guard Station; Loo 2; Electronic Repair; Technicians' Quarters; Central; Loo 3; Overlook Corridor; Main Biological Lab (clone cultures; three clone tanks, marked *); Lab Access Corridor; Biochemistry Work Area (computer, marked *); Nucleic Surgery; a computer room (two computers, marked *); Loo 4; Loo 5; Servants' Work Area; Clonemaster Bedroom; Clonemaster Library/Study; Dining Nook; Upper Main Corridor; Tele-Recording and Processing Center; Growth Chamber (clone tank, marked *); Clonemaster Exercise and Recreation Area. Small letters S, T and J printed in the rooms and halls show where Servants, Technicians and Jellies may be set up (Section 6.1); they are not transcribed room by room here.
Entry points printed on the map: Front Door [3/turn once open]; Garbage Disposal (kitchen) [2/turn]; Sewage Outlet [1/turn in each] (the loos).
Game-turn track: turns 1 through 12. Phase track: Term Move 1; Combat 1; Term Move 2; Clone Move; Combat 2; Recovery; Advance Game Turn.
Symbol chart: Terminator; CloneMaster; Jelly; Technician (atom symbol); Servant (serving tray); Local Constabulary (star badge); Armed figure (gun); Iron Fist; Lightning Foot; Body of Mist; Monkey Soul; Mountain Heart (heart); Bo Stave (weapon; a slash); Nunchaku (weapon); Kon-go (weapon; two dots joined by a bar); Throwing Spikes; Clone tank (circle); Destroyed clone tank; Computer (rectangle); Destroyed computer; Armored door (double line); Common door; Entry point (arrow); Change in elevation (dotted line).
Record Sheets
Terminator Record Sheet: for each of five named Terminators (Rising Dream, Shadow Lotus, Golden Song, Leaping Dragon, Arnie Goldman) the sheet shows three levels in each of Iron Fist, Lightning Foot, Monkey Soul, Body of Mist and Mountain Heart, for the player to scratch out.
Jelly Record Sheet: the abilities of each Jelly (as shown by the icons on the printed sheet and counters; each symbol is one level):
- J-1: Kick, Kick, Mountain Heart
- J-2: Kick, Monkey Soul, Kon-go
- J-3: Kick, Body of Mist, Nunchaku
- J-4: Fist, Monkey Soul, Bo Stave
- J-5: Fist, Fist, Mountain Heart
- J-6: Kick, Monkey Soul, Body of Mist
- J-7: Fist, Kick, Throwing Spikes
- J-8: Fist, Body of Mist, Body of Mist
- J-9: Fist, Monkey Soul, Nunchaku
- J-10: Fist, Kick, Body of Mist
- J-11: Kick, Kick, Monkey Soul, Body of Mist
- J-12: Fist, Kick, Mountain Heart, Throwing Spikes
(The J-1 to J-6 and J-8 to J-12 lists were read from the Jelly counters and record sheet icons; the printed rules text confirms J-1 as Kick-1/Heart-1 after injury, J-2 as Kick-1, Weapon-1, Soul-1, and J-7 as having Weapon-1 = throwing spikes.)
Counter set: five Terminators (Rising Dream, Shadow Lotus, Golden Song, Leaping Dragon, Arnie Goldman); the CloneMaster; 12 Jellies; Technicians (some armed); Servants; Local Constabulary (LC); Tactics counters (Iron Fist, Lightning Foot, Weapon, Body of Mist, Monkey Soul); Turn and Phase counters; Destruction counters; extra armored door and equipment counters.
Errata Applied (Space Gamer #31)
- Seven doors omitted from the printed game map; two of them (needed to leave the kitchen and dining area) were critical. See note in 2.1.
- In the more complex example of play (Example of Combat - II), the counter shown was for Jelly 9; it should have been for Jelly 7. Also Jelly 2's weapon is the kon-go, not the nunchaku. Both corrected in the example above.