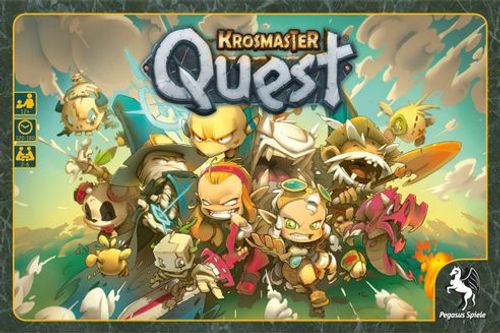
Krosmaster: Quest
Krosmaster: Quest Rulebook
Table of Contents
Table of Contents
- Game Pieces
- x7 Krosmaster Figures
- x7 Character Cards
- x5 Dashboards
- x1 Adventure Path
- x1 Marketplace Board
- x77 Mob Tokens
- x80 Item Tokens
- x16 Board Tiles
- x1 Scenario Book
- x5 Status Markers
- x50 Colour Markers
- x32 Kama Tokens
- x3 Tokens: Demon, Royal Tofu, and Royal Gobball
- x104 Resource Tokens
- x8 Resource Value Tokens
- x5 AP Markers
- x5 MP Markers
- x5 Range Markers
- x50 Injury Markers
- x2 Storage Containers
- x42 Scenery Elements
- x6 Dice
- x100 Event Cards
- x10 Scenario Cards
- x62 Personal Quest Cards
- x12 Boss Mood Cards
- x36 Mob Reference Cards
- Game Objectives
- Game Modes
- The Basics
- Understanding the Symbols
- Setting Up the Game
- Earning GG
- The Player's Turn
- The Demon's Turn
- Casting Spells
- Mobs
- Powers
- Marketplaces and Crafting
- The Dungeon
- Scenery Elements
- The Cards
- Game Variants
- F.A.Q.
- Game Help
Game Pieces
x7 Krosmaster Figures
Krosmaster figures are the main characters in the adventures you are going to play out in Krosmaster Quest. This box contains two exclusive figures, (the Royal Gobball and the Royal Tofu), as well as five characters from the Krosmaster Season 2 collection.
x7 Character Cards
These cards have key information regarding the Krosmasters.
x5 Dashboards
You can follow a Krosmaster's progress through the game on their Dashboard.
- x65 GG Tokens — By filling in their Dashboard's Geegee Path with these tokens, the players move ever closer to victory!
- x85 Spell Covers — These covers go on a character's spells to hide them. You'll be able to remove them later on by spending Kamas.
- x15 Bag Covers — These covers go on the bag spaces on the Dashboard. Players can pay to remove them during the game.
x1 Adventure Path
This game board allows you to follow each player's progress as they complete the various quests.
x1 Marketplace Board
This adjoining game board displays the values of resources, and contains recipes that are available to buy.
x77 Mob Tokens
Mob tokens represent the creatures your Krosmasters will have to fight. There are three different types of mobs: normal, special, and dungeon. Each token has a summary of the mob's stats on the back.
- x3 Summons Tokens — Some Krosmasters can bring their own summons into play.
- x6 Mob Covers — These tokens are placed in the storage locker in front of the corresponding Mobs tokens, to hide them from the players.
x80 Item Tokens
Item tokens can give the Krosmasters a boost during the game. There are different types of items, and they can be permanent (light background), or single use (dark background).
The majority of the items in the game can be crafted; you will find the list of necessary ingredients on the back of the token. Others, however, can be won by beating Bosses.
- x4 Set Tokens — Sometimes, with a little perseverance, a Krosmaster has the honour of wearing a complete set of related items. Getting four items in a set will provide special bonus effects.
- x8 Equipment Hider Tokens — These token go on top of the equipment tokens to hide them from the players' view.
x16 Board Tiles
Krosmasters and Mobs move around on these modular tiles, which are also where you place the scenery. This box contains 2 city tiles, 5 Gobball tiles, 5 Tofu tiles, and 4 dungeon tiles.
x1 Scenario Book
You'll have it in your hands soon!
x5 Status Markers
Each player has a status marker in their own colour, which they can place either face up or face down to show if their Krosmaster is in Combat mode or Adventure mode.
x50 Colour Markers
Each player has 10 tokens in their own colour, which are used to show if they've injured a mob, completed certain objectives, or formed a group with other players.
x32 Kama Tokens
Kamas are the currency used in Krosmaster Quest. They come in denominations of 1, 2, 5, and 10 Kamas.
x3 Tokens: Demon, Royal Tofu, and Royal Gobball
These markers show which player controls the mobs inside and outside the dungeons.
x104 Resource Tokens
There are 8 different types of resources in the Outer World: Iron, Wood, Gobball Dung, Gobball Wool, Gobball Horns, Tofu Eggs, Tofu Feathers, and Tofu Beaks.
x8 Resource Value Tokens
These tokens are placed on the Marketplace board to show the value of each resource.
x5 AP Markers
These markers temporarily modify a character's Action Points stat.
x5 MP Markers
These markers temporarily modify a character's Movement Points stat.
x5 Range Markers
These markers temporarily modify the ranges of characters' spells.
x50 Injury Markers
These markers allow you to track damage done to Krosmasters and mobs.
x2 Storage Containers
These handy containers allows you to safely store all of your game tokens.
x42 Scenery Elements
4 Zaaps - 2 Marketplaces - 2 Crafting Workshops - 2 Phoenixes - 2 Dungeon Entrances - 8 Trees - 8 Ore Veins - 2 Low Walls - 2 Hay Bales - 4 Fountains - 2 Gobball Totems - 2 Tofu Cages - 2 Tofu Nests
x6 Dice
These special Krosmaster dice are used primarily in combat. They are all identical and have six different faces.
x100 Event Cards
Events are played by the Demon, and they set the pace of the game. There are 4 different types of event: quests, marketplace events, monsters, and resource population.
x10 Scenario Cards
During each game, a Scenario card is placed face up on the Adventure Path.
x62 Personal Quest Cards
(32 Journeys and 30 Hunting Trophies). These cards represent the challenges the Krosmasters must complete.
x12 Boss Mood Cards
These cards represent bosses' moods, and enhance their stats.
x36 Mob Reference Cards
These reference cards have the full info for each type of mob.
Game Objectives
Krosmaster Quest is an adventure game for 2 to 6 players. Each player takes control of one character (known as a Krosmaster) and travels through a world represented by square game boards. To win the game, you must successfully complete various quests that will pop up throughout the game. Turn-based tactical combat, resource management, and your Krosmaster's power progression will let you succeed in your endeavor.
The Krosmasters
In Krosmaster Quest, each player plays a Krosmaster, a warrior from the Krosmoz. The warrior is represented by one of the figures included in the box. This figurine moves around the game board and tries to complete the quests they're given.
These Krosmasters' stats are on their accompanying character cards. Each one has different attacks and powers; choose the Krosmaster that suits you best at the start of the game! However, your Krosmaster won't have access to all of their powers when you begin the game. You will have to buy them as you go along using money (Kamas) won over the course of your adventures.
If you are already familiar with the Krosmaster universe, don't forget that you can use any of your Krosmaster figures in Krosmaster Quest! Take a look at page 30 of this book to find out more.
GG (Gallons of Glory)
When a Krosmaster completes a quest, they receive one or more Gallons of Glory (or GG, as they are also known) as a reward. GG are essential for making progress in the game. The first player to complete the Geegee Path on their Dashboard wins the game!
You can win GG by completing various quests, which will appear randomly throughout the game. Depending on the situation, the Krosmasters may have to confront mobs, cut down trees, travel the world, make a fortune selling their items, betray their allies, kill a Boss... all to win the GG they'll need to be victorious!
Mobs
Mobs are the Krosmasters' main opponents in game. Unlike Krosmasters, mobs are only represented on the board by tokens. They follow the same basic rules as Krosmasters, but each one is less powerful. Their true strength is in numbers!
Mobs are a source of wealth for the adventurers; by killing mobs, they can pick up precious resources and fill their pockets with Kamas. Don't get careless though; mobs are more than capable of looking after themselves, and an incautious adventurer might be undone by their attacks!
Of course, the stronger a mob is, the more tempting the reward. The more adventurous Krosmasters can even go down into the dungeon, where powerful mobs await them, including the terrifying Bosses, which are so threatening they get their own figures!
The Demon
The Krosmaster Quest world is alive and kicking, and the game elements need to constantly move and renew themselves. That's the role of the Demon, who is in charge of making sure the game runs like clockwork. They are the one who controls the mobs, unveils the Event Cards, keeps the game moving, and keeps an eye on the Adventure Path. One player can be the Demon throughout the game, or you can share the role, switching off each turn.
One version of Krosmaster Quest lets you place the Demon at the very centre of the game: the players join together to confront a Demon whose only goal is to make them fall! And an opponent that has the whole world in their hands is a fearsome foe indeed...
Game Modes
Krosmaster Quest can be played in a number of different ways. Before beginning a game, you will need to decide which type of game you want to try.
Free-For-All or Cooperative
These are the two main variants of Krosmaster Quest. The majority of the rules are the same for both modes, but which mode you choose will greatly affect your strategy during the game.
In Free-For-All mode, the goal is to win the game alone. The other players are your opponents, standing in the way of victory. Players may form temporary alliances, but in the end, there can only be one winner: the first player to complete their Geegee Path. In this mode, the Demon is an impartial participant who cannot win the game.
In Cooperative mode, the players are all allied against the Demon. They win or lose as a group. When one Krosmaster reaches the end of their Geegee Path, the whole group is victorious. The Demon gets to wield more potent powers in this game mode, and their personal objective is to defeat all of the other players.
Demon Player or Demon Sharing
There are two ways to handle the role of the Demon.
A single player can control the Demon from start to finish, and therefore does not play as a Krosmaster. They will thus manage the Event Cards, mobs, and all other aspects of the game that the Demon controls. This option is recommended if one of the players is already very familiar with Krosmaster Quest and wants to take charge of this aspect of the game. The Demon must be played by a single player in Cooperative mode.
Alternatively, the Demon's role can be a task shared between the players. Each player takes a turn at assuming the role's responsibilities, and a Demon token is passed from one player to the next. This method is particularly well-suited for a Free-For-All game; each player will have a chance to influence events, which ensures the Demon's impartiality... or at least, it makes sure that all players get to cover their own backs!
Scenarios
In the game box, you will find a Scenario Book in which you can read about... scenarios (surprise, surprise!). Each one provides instructions that allow you to play Krosmaster Quest in a new way.
Scenarios can influence all aspects of a game: the monsters and scenery used, the way the board is set up, how long the game lasts, etc. A scenario can make game set-up vastly different from a "basic" game.
They also influence the conditions for winning the game. Each scenario contains a repeatable quest, which the Krosmasters can complete several times in order to win GG. Build your strategy around completing this quest to get ahead! These repeatable quests can also cause some special events on the game board, altering the situation in unexpected ways.
Scenarios can also introduce special rules, like new actions made available to your Krosmasters. They can even completely change the game's victory conditions, setting an objective other than getting GG!
As you'll see, the scenarios are what make Krosmaster Quest. Read the Scenario Book carefully, and find out which game mode you enjoy the most!
Important! If you're playing Krosmaster Quest for the first time, we recommend you start with the tutorials in the Scenario Book. They will guide you through how to play step by step, and you'll get the hang of it in no time.
If you're a board game veteran, turn the page and jump straight in!
The Basics
The Dice
Krosmaster Quest uses special dice for resolving actions. These dice have 6 sides, as follows: Critical, Armour, Lock, Dodge, Critical or Dodge, and Dofus.
When a die lands on the Critical-or-Dodge face, the player turns the die to either Critical or Dodge. When a die lands on the Dofus face, the player turns the die to the Critical, Armour, Lock, Dodge, or Dofus face. You need to make this choice before the die will be taken into account.
The Reserve
Any pieces that are not in play, in the Marketplace, or in a Krosmaster's bag are stored in the communal reserve.
If a player receives a token which is not already present in game, they take it from the reserve. Similarly, when they discard a token, they return it to the reserve.
If a token or scenery element needs to be picked from the reserve, but there are none left, that pick is lost. The Demon's reserves are not limitless!
My Bag is Full!
When a Krosmaster collects a resource, it goes in their bag, in the right side of their dashboard. This bag can be expanded over the course of the game by paying a certain amount of Kamas.
Each resource takes up one slot in your bag, and each recipe or item takes up four slots. If a player receives a resource when their bag is full, there are 3 possible outcomes:
- They can immediately increase the size of the bag by paying to remove a cover, which means they then get the resource.
- They can discard one or more resources already in the bag to free up space.
- They can decline the resource offered to them, and put it back in the reserve.
It should be noted that Kamas (the game's currency) do not go into a character's inventory, but into their purse, located below the map on the Dashboard. Kamas don't take up any space, and a character can carry as many as they want.
The City
Two of the board tiles are called "the city." This is where Krosmasters start the game. The city is a safe, danger-free zone; nobody can take any damage there or cast any spells, even in Combat mode.
Characters in the city are not affected by any actions triggered by characters outside the city (such as attacks, locks, etc.). This protection works both ways; a character in the city can have no influence on a character who is outside the city, not even through summons.
Stats
Characters in Krosmaster Quest have three main stats: Action Points (AP), Movement Points (MP) and Health Points (HP).
MP allow the characters to move on the game board. Each MP allows them to move one cell, but they cannot move diagonally or to a cell that's already occupied (by a scenery element, another Krosmaster, etc.). Characters regain all of their MP at the start of each turn.
AP show how many actions a character can perform in a single turn. Each action has a specific AP cost. As with MP, characters regain all of their AP at the start of each turn.
HP represent a Krosmaster's endurance. As the game progresses, characters will suffer injuries. You will track these with Injury markers, which are collected on the character card.
A character can never have more Injury markers on their card than their HP. When a character has as many as they have HP, they enter the KO state. Krosmasters in this state are moved to a cell adjacent to a phoenix of their choosing, after which a token is removed from their character card. Mobs and summons in the KO state are simply removed from the game.
Some markers can temporarily influence the amount of AP or MP a character has during a turn: these are the +AP/-AP markers and the +MP/-MP markers.
Understanding the Symbols
Character Cards
Each Krosmaster has their own character card, which has the information required to play with that character. This is what you'll find:
- Name
- Initiative
- Class, Title
- Level
- MP: Movement Points
- HP: Health Points
- AP: Action Points
- Spell Range (Water, Air, Earth, Fire, Neutral)
- Spell name
- AP Cost
- Damage
- Area of Effect
- Additional Effect
- MP Cost
- Cost in Injuries
- Healing Spell
- Damage-free Spell
- History
- Powers
Types of Cards
Krosmaster Quest contains a large number of cards, which are used for many different aspects of the game. You can easily tell them apart by their backs.
- Event Cards — These cards are drawn on each of the Demon's turns, and they help to pace the game with random events.
- Scenario Cards — These cards show the scenario currently being played.
- Personal Quest Cards — These quests give individual players objectives to be completed during the game. Completing a quest will earn you 1, 2, or 3 GG, as indicated on the card.
- Boss Mood Cards — These cards show the boss' current mood, and enhance their stats when you fight them.
- Mob Cards — These reference cards provide the full stats of all of the different types of mobs.
Cells
The board tiles, which represent the locations where Krosmaster Quest takes place, have several different types of special cells.
Starting Cells — Mobs can spawn on these cells during the game. At the start of the game, the Krosmasters will spawn on cells like these in the city.
Dung and Egg Cells — Gobball dung and tofu eggs can appear on these cells. One of these cells can contain as many eggs or pieces of dung as appear on the cell. You can still walk on such a cell, even if it contains dung or eggs. (1 Dung Cell, 2 Dung Cell, 1 Egg Cell, 2 Eggs Cell)
The Scenery Cells — Scenery can be placed on these cells, depending on the Demon's or the players' choices. If no scenery has been placed on the cell, it has no effect and is considered to be a normal cell. There is a complete list of scenery elements on page 27. (Tree Cell, Vein Cell, Low Wall Cell, Hay Bale Cell, Demon Cell)
Resources
"Resources" will come up quite a bit in Krosmaster Quest. These are little tokens that represent what mobs leave behind. Learn to recognise them: Dung, Wool, Horn, Egg, Feather, Beak, Wood, Iron.
Setting Up the Game
Now that you know a little about the game's objectives, it's time to start playing! Everyone should help set up the game. Just follow the steps below!
A Question of Choice
Before starting the game, all players should decide on the following: will the game be Free-For-All or Cooperative? Will the role of the Demon be shared or played by a single player? Which scenario do you want to use in this game? Which mob families will be present (tofu, gobball, or both)? The scenario can influence the way the game is set up, so make sure you've chosen one before continuing.
Preparing the Krosmasters
Each player chooses a Krosmaster from the 5 available in the box. (You can't choose the Royal Gobball or the Royal Tofu; they're bosses that you may end up fighting!) Each player takes a Krosmaster figure and the corresponding character card. Arrange the players around the table in clockwise order, starting from the Krosmaster with the highest initiative to the lowest; this will make the game easier. If a player is acting as the Demon, they go last, after the Krosmaster with the lowest initiative.
The dashboard layout is numbered as follows:
- Player Marker
- Geegee Path
- Character Card
- Spell Covers
- Purse
- Space for Trinkets
- Space for Helmet
- Space for Cloak
- Space for Breastplate
- Space for Boots
-
- Space for Weapons
- Space for a resource in the bag
- Space for a recipe or piece of equipment in the bag
- Bag Cover
Each player puts their character card on their dashboard. Using covers, they then hide each attack, power, and line of text on the card, except for the AP, MP, and HP stats, and the Krosmaster's first spell. They also cover the last three parts of their bag with the 3, 5 and 8 Kama covers (in that order).
The Krosmaster also receives a certain number of GG, based on their level (3 for the characters in this game box), which go in their Geegee Path. They also receive 5 Kamas, which go in their purse. Also, don't forget to take the markers and Combat/Adventure tokens in the player's chosen colour.
The City
The Demon (or the Krosmaster with the lowest initiative, if the Demon is being shared) takes the two city tiles and places them side by side, adjusting the cell to create a grid. They then place each of the following four elements on a Demon cell of their choice: one phoenix, one Zaap, one Marketplace, and one Workshop.
The World
Each player, starting with the one with the highest initiative, chooses a land tile linked to the mob families chosen for this game; do not use the dungeon tiles. The cells in the tiles must be aligned to form a grid, and there cannot be any empty space between two tiles.
On the tile they just laid down, the player places the following elements:
- 1 tree on a tree cell
- 1 vein on a vein cell
- 2 eggs/pieces of dung, spread out randomly on cells that contain them
- 1 low wall/hay bale, if the tile contains a cell that should contain them
- 1 normal mob from the same family as the tile, picked at random, and placed on a paw cell
- 1 special scenery element from the following: Zaap, Phoenix, Marketplace, Workshop or Dungeon Entrance; placed on a demon cell
If one of these scenery elements is out of stock, too bad! The Demon's stocks are not unlimited, so you can't place this element.
Note: If there is only one Krosmaster in the game, place two board tiles to expand the map, but only populate one of them with the above elements.
Adventure Path
Take the event cards associated with the mob families in play, shuffle them, and place them on the allotted space.
Place a scenario card on the first cell of the Adventure Path.
- 1 Pile of Event Cards to draw from
- 2 Pile of Discarded Event Cards
- 3 Path for Quest Cards
The Marketplace
Take the pieces representing the resources used during this game (wood, iron, and resources linked to the mob families you're using) and place them in the Marketplace. The starting price for each of these resources is 3 Kamas.
The Demon randomly picks 2 weapons, 4 pieces of armour, and 2 trinkets (all linked to the mob families in use during this game), and places them face down on the appropriate spaces in the Marketplace. The visible face must be the one with the recipe, not the one describing what the item does.
The Marketplace board is laid out as follows:
- Prices of the Resources
- Resource Value Token spaces
- Weapon recipes for sale
- Armour recipes for sale
- Trinket recipes for sale
Distribution of Personal Quests
Take the personal quests associated with the mob families being played in this game and shuffle them. Each player receives two quests with a value of 1 GG and two quests with a value of 2 GG. Each player looks at their quest cards, picks one to put back into the deck (regardless of its GG value), and keeps the others.
Setting Off and Start of the Game
Going from the highest initiative to the lowest, each player places their Krosmaster in the city, on a starting cell.
If the Demon is shared, give the Demon token to the player with the lowest initiative, on its inactive face.
Let the games begin! Each Krosmaster takes turns playing, starting with the highest initiative and continuing down to the lowest.
Earning GG
To win a game of Krosmaster Quest you need to earn GG. This section explains how you do that.
The Geegee Path
Each player has a space to store accumulated GG on their dashboard; this is the Geegee Path.
This line is filled from left to right, with no spaces left empty. When the last space on the Geegee Path is filled with a GG, the game is over and that player wins.
Krosmasters start the game with a certain number of GG, depending on their level. The number is equal to (6 - its level); all of the characters in the Krosmaster Quest box are level 3, so they start the game with 3 GG.
Buying a GG
It is possible to buy a GG with Kamas. The price varies depending on your progress along the Geegee Path: the price is the one shown on the first free space along the path (which is not occupied by a GG).
Killing a Boss
If a Krosmaster kills a boss outside the dungeon, they immediately win 1 GG. Simple, fast, productive!
Personal Quests
At the start of each game, each player receives a certain number of personal quests. If the Krosmaster completes all of the actions required for a personal quest, they discard it and receive 1, 2, or 3 GG according to what is written on the card.
There are two types of personal quests:
Hunting Trophies task the player with killing specific mobs. Each time they kill a mob listed on the card, they can mark it with a token of their colour. If you defeat all of the listed monsters, you then earn the GG. It doesn't matter what order you kill the monsters in.
If a monster is listed multiple times on a quest card, then that many must be killed to complete the quest. However, if a Krosmaster has multiple quests that require killing the same monster, killing one will count for each of them.
Journeys task the Krosmaster with completing a series of actions. Unlike Hunting Trophies, these actions must be completed in the correct order, as shown by the arrow. Once the last step in the Journey has been completed, the player earns the GG. To read about the actions that can be required during a Journey, see page 29.
In each case, when the player completes a personal quest, they immediately pick one of a higher level (i.e., one that earns them more GG). If they complete a quest worth 1 GG, they then pick either a 2 or 3 GG quest. If the quest was already worth 3 GG, they pick another quest worth 3 GG.
When a character with the Wisdom power completes a personal quest, they roll a die. If the die lands on Dofus, they earn 1 additional GG!
Adventure Path
The Adventure Path is an additional board which gives Krosmasters quests to complete over the course of the game. It is made of 8 cells, with arrows and a dotted path showing their order.
When the Demon draws a quest card from the event deck (see page 28), they place it on the first free cell on the Adventure Path. This quest can then be completed by any Krosmaster.
Unlike personal quests, these must be completed in order. A Krosmaster can only complete a quest if they have already completed the previous ones on the path; the first quest on the path can be completed by anyone. Each quest can only be completed once by each Krosmaster, but multiple Krosmasters can complete the same quest.
If the Demon picks a quest card and all of the cells on the Adventure Path are already full, the game is immediately over. In that case the winner is the player with the most GG.
Please note that, depending on the chosen scenario, the Adventure Path can be shortened to only 7, 6, or even 5 cells. That will make the game shorter than normal. See the Scenario Book for more details.
Scenario and Repeatable Quests
The first card on the Adventure Path is always the scenario card. It is a quest that can be completed just like any other quest, but which will be different depending on the scenario in play.
This scenario card goes hand in hand with the repeatable quest card. This card is considered to be a copy of the scenario card. The repeatable quest can appear multiple times on the Adventure Path, and can therefore be completed multiple times (with a limit of once per card). All you need to do is complete the actions the scenario card requires again.
The Cost of Defeat: Losing a GG
A KO'd Krosmaster is not removed from the game. They reappear on a cell adjacent to the phoenix of their choice, with one Injury healed. However, they lose 1 GG; that's the price of failure.
The Player's Turn
Now it's your turn to play! But... What exactly can your Krosmaster do?
Adventure Mode and Combat Mode
When the player's turn starts, they must choose which mode their Krosmaster will be in for that turn: Combat mode or Adventure mode. They set their preference using a piece of their colour.
In Combat mode, the Krosmaster can use any of the revealed spells and powers on their character card. Additionally, some powers only work in Combat mode.
In Adventure mode, the Krosmaster cannot use any spells. However, they get a bonus of +3 MP for the turn, and remove an Injury from their card if they had any.
AP, MP, and Range Markers
If a character starts their turn with AP, MP, or range markers on their card, discard them. Their AP and MP stats are then increased or decreased for that turn by the amount shown on the discarded markers. The range of their spells is similarly affected by range markers; see page 19 for information on spell ranges.
Available Actions
Once this choice is made, the Krosmaster can take the following actions, in any order. Each action has an AP and/or MP cost; the Krosmaster can continue to carry out actions as long as they can pay the cost. An action must be fully completed before another can be started however.
Move (1 MP)
The Krosmaster moves to a free adjacent cell. They cannot move diagonally, or onto a cell which is already occupied by a scenery element, a monster, or another Krosmaster.
If the character is adjacent to a monster or a Krosmaster who isn't part of their group when trying to move, they must first win a dodge roll, while their opponent must make a lock roll:
- Dodge Roll: The Krosmaster rolls one die (or 2 dice if they have the Dodge power) and counts the number of Dodge results obtained.
- Lock Roll: The opposing character rolls 1 die (or 2 dice if they have the Lock power) and counts the number of Lock results obtained.
- Result: If the Krosmaster obtained at least an equal amount of Dodge than the opponent got Lock, they are free to move. If the opposite is true, they are locked: they can't move from their cell, and their turn ends immediately!
If there is more than one opponent adjacent to the Krosmaster when they try to move, each one gets a lock roll, which are compared to the Krosmaster's dodge roll one by one.
Cast a Spell (variable AP)
Combat mode only. The Krosmaster can cast a spell written on their card if it is not blocked by a cover, or one from a weapon they have equipped. The AP cost varies depending on the spell cast. See p. 18 for details on how to cast spells.
Farm (3 AP)
A Krosmaster can "farm" a tree or ore vein on an adjacent tile. Remove the scenery element from the board. The Krosmaster takes a resource from the reserve and places it in their bag: 1 Wood if they farmed a tree, or 1 Iron if they farmed a vein.
A Krosmaster with the Farmer power also rolls a die; if they roll a Dofus, they gain an additional resource of the same type.
Pick Up (1 AP)
A Krosmaster can pick up a piece of gobball dung or an egg located on their cell. Remove the resource from the board and place it in the Krosmaster's bag.
A Krosmaster with the Farmer power rolls a die; if they roll a Dofus, they gain an additional resource of the same type.
Craft an Item (3 AP)
A Krosmaster adjacent to a Workshop can create an item for which they have the recipe. They must spend 3 AP and discard the required resources. The complete crafting rules can be found on page 24.
A character with the Crafter power discards one resource less (of their choice) when crafting an item, but crafting an item always costs at least one resource.
Dabble (3 AP + Kama)
A Krosmaster adjacent to a Marketplace can dabble. For 3 AP, the Krosmaster can, in the following order: sell any number of resources or items for their Kama value, then buy any number of resources or items for their Kama value. The action then ends. If the Krosmaster wants to sell and buy again, they must pay the cost and complete the action once more.
Use a Zaap (1 MP + 1 Kama)
A Krosmaster adjacent to a Zaap can choose to use it to teleport. It will cost them 1 MP and 1 Kama for the trip. The Krosmaster then moves to a cell adjacent to any Zaap in play.
Remove a Cover (Kama)
At any point, a Krosmaster can remove a cover from their dashboard by paying the price shown on it. The Krosmaster can immediately benefit from what they just revealed by removing the cover.
When the Krosmaster removes the cover that hides the flavor text zone, they take an extra turn after this one. The player then plays twice in a row, following the same rules as usual.
Join/Leave a Group (0 AP)
A Krosmaster can (freely) choose to invite another Krosmaster who is located on the same land tile to join their group; the latter can accept or decline. Krosmasters who are part of the same group don't lock each other, can trade items, and can enter the dungeon together.
A Krosmaster can leave a group they belong to during their turn (at no cost), even if the other members are not on the same land tile.
Trade (0 AP)
Adventure mode only. The Krosmaster can give or trade resources, recipes or items to another Krosmaster who is part of the same group, and located on the same land tile.
Change Equipment (0 AP)
Adventure mode only. A Krosmaster can switch the equipment they are wearing with equipment they have in their bag.
Flee Combat (Miss a Turn)
Combat mode only. A Krosmaster in a dangerous situation can choose to flee combat. They can only perform this action if they have not performed any other actions during that turn. They then skip the rest of their turn, and are moved to a cell adjacent to the Phoenix of their choice, as if they had been KO'd. Krosmasters who use this action still lose 1 GG, just as if they had been KO'd.
Heal Injuries (Miss a Turn)
Adventure mode only. A Krosmaster can choose to miss their turn to immediately heal 5 Injury tokens. If you use this action you cannot perform any other actions during the same turn.
Enter the Dungeon (Ends Turn)
A Krosmaster adjacent to a dungeon entrance can choose to enter it; this will immediately end their turn. All other Krosmasters who are part of their group can choose to join them. See p. 26 for the full dungeon rules.
The Demon's Turn
The Demon's turn is very different from the Krosmasters' turns. Here is how its turn is played:
Event Cards
When the Demon's turn comes along, their first action is to pick the event cards for that turn. They must draw a number of cards equal to the number of Krosmasters minus one. For example, if there are 4 Krosmasters in play, they draw 3 cards. They always draw a minimum of one card however, even if there is only one Krosmaster in play.
The Demon then resolves the effects of the drawn cards, in the order they drew those cards. Event Cards can produce the following effects:
- Make one or more mobs appear on a land tile
- Make one or more resources appear on the board
- Change the location of the Marketplace
- Add a new quest to the Adventure Path
Please see page 28 for a detailed description of the various kinds of event cards and their effects.
Mob Activation
The Demon is responsible for deciding on the mobs' actions in game. They control each mob as if it were a Krosmaster.
Unlike Krosmasters, mobs always play in Combat mode, and the only actions available to them are moving and casting spells. Also, mobs cannot attack each other. The Demon does not have to play a mob if they don't want to.
Once they have played all the mobs they want to play, the Demon's turn comes to an end.
Shared Demon: the Demon Token
If you are playing with a shared Demon, the players will pass around a Demon token to show who is currently playing it this turn. This token has two faces: active (in colour) and inactive (black and white).
When the player's turn comes, if they have the Demon token, they must play the Demon's turn first. Once the Demon's turn is over, they can play their Krosmaster's turn normally.
When their turn comes, if the Demon token's active face is up, the Demon plays a complete turn: they pick event cards and control the mobs. They then turn the token over to the inactive side and finish their turn.
However, if the Demon token's inactive side is face up, the Demon only plays a partial turn: they pick and play the event cards, but don't control the mobs. At the end of their turn, they turn the token over so the active side is face up and passes it to the player to their right (in a counter clockwise direction).
This will mean that the Demon will activate mobs every other turn, and the token will pass from player to player in reverse order of normal game play.
Demon Player: With or Without Token?
If the Demon is being played by just one player, the method is slightly different.
If the Free-For-All mode is in play, use the Demon token method described above, but without passing the token to the other players. They continue to switch the token between active and inactive faces, and, as a result, play mobs every other turn.
If the Cooperative rule is in play, the Demon has their full power and plays a complete turn (event cards and mobs) for every one of their game turns! In this case, you don't need to use the Demon token.
Casting Spells
Krosmasters, mobs, and summons are all able to cast spells. That's how they fight one another. Each character has their own spells, but all of them work as explained in the following pages.
The words "target" or "targeted" often come up in rules relating to spells. The target is the cell that a spell affects, and, by extension, anything that may be on it (Krosmaster, mob, scenery element, etc.). You can also target an empty cell.
The Ally Concept
Some additional effects and powers make reference to "allies." For the players, this is a quick way of referring to friendly players' Krosmasters. Summons (mobs that a Krosmaster brings into play) are also considered to be allies.
For the Demon, the term "ally" refers to all of the mobs under their control, whether or not those mobs have acted during this turn.
Casting an Attack Spell
Before casting a spell, you should check to see if the three following conditions have been met:
- The character can pay the spell's cost
- The target is within range of the spell
- There is a line of sight between the caster and the target
If these three conditions are met, carry out the following steps in the order in which they appear:
- Pay the Cost: Spend AP and/or MP and add any Injury markers to your card as the spell requires.
- Additional Effects: If the spell has any side effects, apply them now.
- Critical Roll: Roll 1 die. If you roll more Criticals than your opponent rolls Dodges, increase the damage by one. Some powers (such as Critical) let you roll more than one die during this step.
- Armour Roll: The spell's target rolls 1 die. If you roll more Armour than your opponent rolls Criticals, reduce the damage by 1. Some powers (such as Armour) let you roll more than one die during this step.
- Injuries: Place as many Injury markers on the target as the total damage inflicted. If there are as many as their HP stat, they're KO'd.
Example: Pandalida uses her FLAMING BURP spell on Diver Birel. She pays 4 AP and suffers 1 Injury to pay for the spell. For her critical roll, she rolls 2 dice (1 basic + 1 for her Intelligence power), and gets two Criticals; Diver Birel makes his armour roll with 1 die and gets a Dodge result. The spell inflicts 3 damage: 2 basic + 1 because Pandalida rolled more Criticals than Diver rolled Armour. Diver gets 3 markers on his card.
Healing Spells
Healing spells work in the same way as attack spells, with two exceptions:
- The target does not make an armour roll (but the caster does make a critical roll).
- Instead of placing Injury markers on the target, you remove as many Injury markers from the target as the total obtained.
Non-Damaging Spells
Some spells, such as summons spells, do not inflict or remove damage at all. This is represented by a white circle where the damage is normally shown. For these spells, there is no point in doing a critical roll or an armour roll. However, the spell's additional effects are applied as normal.
How to Read a Spell
Spells appear in boxes that contain all of the necessary information.
- Name of the spell
- Usage limit
- Cost
- Range
- Damage (or Healing)
- Additional effects
Usage Limit
Spells whose names are written against a black background can be used as many times as you wish.
Spells written against a purple background can be used multiple times per turn, but not twice on the same target in a single turn.
Spells against a blue background can only be used once per turn.
Spells against a red background can only be used once per combat. If the Krosmaster enters Adventure mode, then returns to Combat mode later on, they will be able to cast this spell again.
Casting Cost
The majority of spells require you to spend AP. Some also require spending MP or taking Injuries. Some call for more than one type of cost, in which case they'll be separated by + symbols.
A character can only cast a spell if they can pay the cost. Also, if a spell's cost would result in them having more Injury markers than their HP stat, they cannot cast that spell.
Range
Each spell has an icon indicating its range. This includes the following two figures:
- The first number is the minimum range (min Range), the minimum distance (measured in cells) at which the target must be located for the spell to work. A 0 indicates that the character can cast the spell on themselves.
- The second number is the maximum range (max Range), the maximum distance (measured in cells) from the character to the target for the spell to work.
Certain things can modify a spell's range, such as being on a cell that contains a low wall, a hay bale, or a tofu cage, or when the character receives +/- Range markers. Regardless, only the max Range gets modified; the min Range is never affected.
- Classic Range: This spell can target a cell between the minimum range and maximum range indicated. If the icon is red, the spell's max Range cannot be increased or reduced.
- Spell Without Line of Sight: The same as the classic range, except that this spell does not require a clear line of sight to be cast on the target. If the icon is red, this spell's max Range cannot be increased or reduced.
- Line Spell: This spell can only target a cell located in the same line of cells (row or column) as the character who casts it. If the icon is red, the spell's max Range cannot be increased or reduced.
- Close Combat Spell: This spell can only be cast on a cell adjacent to that of the character. It doesn't have a max or a min Range.
- Personal Spell: This spell can only be cast on the character themselves. It doesn't have a max or a min Range.
Line of Sight
Unless it's a special spell that ignores line of sight, to cast a spell, there must be a line of sight between the caster and the target.
We consider this to be the case if we can trace an imaginary line going from the centre of the caster's cell to the target's cell. If this line does not pass through any cells occupied by an obstruction (such as a Krosmaster, mob, tree, etc.), then there is a clear line of sight between them.
For the purposes of line of sight, we treat cells as being perfectly square and obstacles as occupying the entire cell. The cell corners never obstruct the line of sight.
Spell Damage
Most attack spells have an elemental affinity. There are four different types of elements: Water, Air, Earth, and Fire. We call these elemental spells (Fire spells, Earth spells, etc.), and they inflict elemental damage.
Some spells are not associated with any elements; these spells are neutral, and they inflict neutral damage. You never roll more than one die for a critical roll with these spells, even if you have the Critical power.
Other spells include heal spells. These spells do not inflict damage, but rather remove Injury markers from the target.
If a spell inflicts 0 damage or heals 0 Injuries, that doesn't mean it has no effect, but rather it means that you have to get at least one Critical on the critical roll, or have a power that boosts its damage, to increase this figure enough to cause damage.
Finally, some spells do not inflict any damage at all, such as movement spells and summons. These have a white disc with no number instead of the elemental symbol. The spell's additional effects nevertheless apply.
Area of Effect
Some spells affect more than one cell at a time; they have an area of effect. Choose the main target of the spell as usual; it will also affect a certain number of other cells, depending on the type of area of effect. The spell affects the main target and any additional targets the same way. You only roll once for Critical when making an area attack, but each target makes a separate Armour roll.
The area-of-effect shapes are: Cross Zone, Square Zone, Hammer Zone, Staff Zone, Shovel Zone, Axe Zone, and Hand Zone.
Additional Spell Effects
Any additional spell effects will be written in the spell's box. Some effects are simply described in the box; apply the effect described there. Additional effects are always applied, even if the spell does not cause any damage or if damage is reduced to 0 by the armour roll.
Pierces Armour: This spell's target rolls one less die when rolling for Armour.
Steals Health: Once damage has been inflicted, the Krosmaster removes as many Injuries from their card as the number of Steal Health icons they have placed on their target.
Multiple Targets: After the player selects the spell's main target, all cells that could be targeted by that spell become secondary targets. The spell therefore hits all possible cells that are in range and in the caster's line of sight.
- - X AP: Place X -1 AP markers on the target.
- + X AP: Place X +1 AP markers on the target.
- Steal X AP: Place X -1 AP markers on the target, then place the same number of +1 AP markers on the character who cast the spell.
- - X MP: Place X -1 MP markers on the target.
- + X MP: Place X +1 MP markers on the target.
- Steal X MP: Place X -1 MP markers on the target, then place the same number of +1 MP markers on the character who cast the spell.
- - X Range: Place X -1 range markers on the target.
- + X Range: Place X +1 range markers on the target.
- + X Water: Water damage is increased by X points.
- + X Air: Air damage is increased by X points.
- + X Earth: Earth damage is increased by X points.
- + X Fire: Fire damage is increased by X points.
- Retreat X: The caster is pushed back X cells, moving away from the target.*
*This additional effect moves a character. When a spell moves a character, they stop if they reach an obstacle or the edge of the board. You do not need to perform dodge or lock rolls for this movement.
Punch
All Krosmasters have a spell that is not written on their card: Punch. You can use this spell without removing any covers from your dashboard.
Summons
Some spells allow a Krosmaster to bring a summon into play. The figure shown in brackets after the spell name is the summoning limit. A character cannot control more summons than the limit imposed by this spell; they cannot cast the spell when they have already reached the summons limit.
Summons can only be used in Combat mode. They can remain in play for several turns, but as soon as a Krosmaster switches to Adventure mode, all of their summons immediately disappear. They also disappear if the character who summoned them is KO'd.
Summons play their turn immediately after the character who brought them into the game. If a character controls several summons, they can play their summons in any order they like (this order can change each turn). However, if the summoner ends their turn in the city, all of their summons will automatically skip their turn without carrying out any actions.
Unless they have the Obstruction power, summons do not block line of sight.
When a summon dies, if they have the Loot power, the character who kills them receives the Loot. However, summons do not drop Kamas or consolation Loot unless they take more Injuries than their HP. Summons who disappear because their summoner is KO'd or leaves Combat mode do not leave anything behind. A Krosmaster who kills their own summons does not earn any Loot. That would be too easy!
Types of Summons
There are different types of creatures that Krosmasters can call to help.
Summoned Mobs — These summons work just like mobs, with the exception of the special summon rules above. They have AP, MP, and HP, generally an attack, and sometimes even powers.
Turrets — Turrets are mechanisms; they don't count as characters in terms of spells or powers. Turrets do not have MP and cannot lock, but they can be moved by Repel or Attract spells, for example. They use their attacks in the same way as mobs.
Bombs (*) — Bombs are mechanisms; they do not count as characters in terms of spells or powers. Bombs have the Itty-Bitty power, so they cannot lock. Each bomb has 1 HP and its Explosion spell is automatically triggered when it dies. What's more, at the start of the summoner's turn, each bomb automatically suffers 1 Injury, setting off its explosion.
Traps (*) — Traps are mechanisms; they do not count as characters in terms of spells or powers. Traps have the Unfazed power, and do not lock. They do not block the line of sight, and the cell on which they are located remains free (a character can step on it). They do not have HP, and it is impossible to kill them with a spell.
When a character moves onto a cell that contains a trap, it automatically triggers its spell on the character who stepped on it, and then the trap is removed from the game.
(*) These summons are used by characters in the Krosmaster Collection. You will not find them on the characters provided in this box. These rules are provided for informative purposes in case you want to play with other Krosmasters (see page 30).
Mobs
Mobs are your main opponents in the game. There are several types, of varying degrees of rarity and danger. Time to get to know them better!
The Mob Families
There are two mob families in Krosmaster Quest: the gobballs and the tofus. You can play a game with either family, or even with both at the same time. The choice of family is more often than not determined by the scenario being played.
Each family can be divided into three categories:
- Normal Mobs: These are the ones your Krosmasters will confront most frequently. Event cards make them appear in the game.
- Dungeon Mobs: These mobs are similar to normal mobs, but they are tougher and hit harder. You will only find them inside dungeons.
- Special Mobs: These mobs are dangerous, unique, and often have special rules. They come into play through event cards or the scenario's special rules.
When a mob appears in game, it must arrive on its family's tile. From there it can potentially move to any of the game tiles, with the exception of the city, which mobs cannot enter.
Mob Profile
Each mob's stats are listed on a mini-card and summarised on the back of their token. This is a condensed version of a character card.
- Name
- Movement Points (MP)
- Health Points (HP)
- Action Points (AP)
- Spell (attack)
- Powers and Loot
- Mob Type Icon
Loot
One of the main reasons for attacking mobs is to get the precious resources they carry.
When a Krosmaster kills a mob, they immediately receive the resources listed as Loot on the mob's card, in the stated quantities. They also receive 1 Kama per mob HP.
For example, killing a War Chief will get you one piece of Gobball Wool, two Gobball Horns, and 4 Kamas.
A Krosmaster with the Prospecting power will receive an additional resource of their choice from the types offered as Loot, or 1 additional Kama, when they kill a mob.
Consolation Loot
When a Krosmaster inflicts an Injury on a mob but doesn't kill it, they place a marker of their colour on the mob. If another player kills this mob, the first Krosmaster will receive "Consolation Loot" for having contributed to the extermination of this beast.
They will receive 1 Kama (regardless of the mob's HP) and one resource of their choice from amongst those included in the mob's Loot.
These resources and Kamas are in addition to those won by the player who kills the mob. If several Krosmasters have placed a marker on the mob without killing it, each one will receive Consolation Loot (in the order of Initiative). The Prospecting power has no effect on Consolation Loot.
If a Krosmaster kills a mob that they have previously injured (and marked), they do not receive Consolation Loot, but rather they simply receive the full Loot.
Mob Reserve
When a mob is KO'd, do not put their token back in the reserve; put it to one side. When there are no more mobs of that type left in the reserve, shuffle the mob tokens kept to one side and put them back into the reserve.
Powers
Just like the monsters, Krosmasters sometimes have special abilities called "powers." They are listed in the "Power(s)" box on the character card.
A Krosmaster cannot use these powers if this area is covered. Some equipment (see page 24) grants a Krosmaster additional powers; they can use them so long as the item is equipped, even if the Krosmaster's own powers still have a cover over them.
Krosmaster Quest Powers
Armour: This character rolls an additional die for armour rolls.
Crafter: When this character crafts an item (see page 24), they can spend one less of a material of their choice. Crafting from a recipe always costs at least 1 resource.
Critical: This character rolls an additional die for critical rolls.
Dodge: This character rolls an additional die for dodge rolls.
Farmer: When this character collects or farms a resource, roll a die: if it lands on Dofus, they receive an additional resource of the same type.
Lock: This character rolls an additional die for lock rolls.
Prospecting: When this character kills a mob that has the Loot power, roll a die. If it lands on Dofus, they receive one additional resource of their choice from those on offer from this mob, or 1 additional Kama.
Resistance (Water, Air, Earth, or Fire): Damage of the corresponding element inflicted on this character is reduced by 1 point. A character can have several different Resistances, but only one Resistance can apply to a given element at a time.
Unfazed: If an Unfazed character is the main or secondary target of a spell cast by another character, they ignore the spell's additional effects, with the exception of those that increase damage. As a result, they cannot receive AP, MP, or Range markers, be moved by spells, suffer "Steals Life" effects, etc.
Wisdom: When this character earns one or more GG by completing a personal quest, roll a die: if it lands on Dofus, they receive 1 additional GG.
Chance, Agility, Strength, Intelligence: When this character casts or is targeted by a spell of the corresponding element, they roll an additional die. These powers are cumulative with the Critical and Armour powers, for a total of 2 additional dice.
Other Krosmaster Figures' Powers
Some figures from the Krosmaster Collection have even more powers:
Counter: When an opposing game piece inflicts 1 or more Injuries to this character, the character who inflicted the injury immediately suffers 1 Injury.
Heal: When this character heals 1 or more thanks to a "Cross" area heal spell, they heal 1 additional point.
Immune (Water, Air, Earth, or Fire): The damage that would normally be inflicted on the character by the spells of the corresponding element is reduced to 0. A character can be immune to multiple elements.
Some Krosmasters have unique powers. Please refer to the description on their character card to learn about the effects of these powers. For example, a character's Power(s) box might read "Critical Hit. Lock. Compulsion." with a note explaining the unique power, such as: (Compulsion: The first attack spell cast by this character each turn deals +1 damage of the appropriate elemental type.)
Mob and Summon Powers
Mobs and Summons Tokens sometimes have powers of their own.
Got'em: When the Batofu KOs a Krosmaster, he immediately receives +3 MP, and +3 AP, and heals himself by 3 Injuries.
Itty-Bitty: This character is not affected by locking rules. They do not lock and cannot be locked.
Laying: When the Tofoone appears in game, place a Tofu egg on her starting cell.
Licking: At the end of her turn, the Gobbette removes 1 Injury from all Gobballs adjacent to her.
Obstruction: This summon blocks line of sight just like a Krosmaster would.
Provocation: When an opposing character casts a spell, if they are able to target a game piece with Provocation (if it is within range, and with the necessary line of sight), they must do so.
Royal Gobmob: All gobballs present on the same tile (or even in the same dungeon room) as the Royal Gobball gain Armour and Lock.
Royal Tofunator: All tofus present on the same tile (or even in the same dungeon room) as the Royal Tofu gain Critical and Dodge.
Tookool: At the start of each of his turns, the Gobkool heals 2 Injuries.
Marketplaces and Crafting
If you're going to collect all these resources, you might as well do something with them! Here are some rules to show you how to make money or items from them.
The Marketplace
On the extra board, you will find all the information necessary to set up shop.
- Resource Prices
- Resource Value Token spaces
- Weapons for Sale
- Equipment for Sale
- Trinkets for Sale
A token representing each resource is placed on this board to show their current prices. The price for this resource is the same, whether for sale or for purchase, and event cards can change these prices over the course of the game.
The number of resource tokens placed on this dashboard depends on the mob families in play in this game:
- Always Present: Wood, Iron
- Gobball Family: Dung, Wool, Horns
- Tofu Family: Eggs, Feathers, Beaks
Using the Marketplace
If a Krosmaster wants to use the Marketplace, they need to be adjacent to the scenery representing it and spend 3 AP. They can then carry out the following actions, in this order:
- Sell any number of resources and equipment, and receive Kamas in exchange.
- Buy any number of resources, recipes, or equipment, by paying the price in Kamas.
Of course, the Krosmaster needs to have enough space in their bag for their purchases. Once these steps have been completed, the action comes to an end. The Krosmaster may visit the Marketplace again if they like, but they will have to pay another 3 AP.
Buy Recipes
You can buy recipes for certain items at the Marketplace. Each recipe takes up 4 slots in a Krosmaster's bag. You are not allowed to look at the other side of a recipe before you buy it!
- Item Type
- Purchase Price
- Resources required to craft
Recipes are not useful immediately, but you can use one to craft the item on the other side of the recipe. A recipe can be resold at the Marketplace for its purchase value, in which case it goes back in the reserve.
In some scenarios, it is possible to buy equipment directly, without having to buy the recipe first.
Crafting Equipment
To craft an item, the Krosmaster must be adjacent to a Crafting Table and spend 3 AP. They must also expend the specific resources the recipe calls for. In return, the Krosmaster turns over their token and receives the equipment named underneath. From there they can place it in their bag or equip it immediately.
Each use of the Crafting Table can create one item. You will have to spend another 3 AP for each additional item you wish to create.
Krosmasters with the Crafter power can reduce the cost of crafting an item. They spend one less resource of their choice. However, a recipe always costs at least 1 resource.
Equipment
- Equipment Name
- Equipment Type
- Selling Price
- Bonus Granted
Equipment gives the character wearing it a bonus. This bonus is active as soon as the Krosmaster equips the item in the corresponding slot on their dashboard. It will remain active until they decide to store it in their bag.
If the equipment grants an AP or MP bonus, the corresponding stat's value increases. This is effective immediately, and the Krosmaster can use the additional AP or MP granted to them from their current turn onwards. If the equipment provides a power, the Krosmaster can use it, even if they haven't removed the cover from the Power(s) section of their character card.
Equipment can be sold at the Marketplace for the price indicated on its token. It then goes back into the reserve.
There are four basic types of equipment:
Weapons
Weapons are pieces of equipment that provide Krosmasters with new spells. Spells from weapons can only be used in Combat mode, but are available immediately without needing to remove a cover. A Krosmaster can wield up to two one-handed weapons or a single two-handed weapon.
Some weapons are actually shields. This means they don't give you any new spells, but you do get a bonus of some kind.
Armour
Armour gives a Krosmaster wearing it a bonus. There are four types of armour:
- Headgear
- Cloaks and Epaulettes
- Breastplates and Belts
- Boots
A Krosmaster can only equip one of each of these types of armour at a time. If they have more than one piece of equipment for a given category, they will have to keep the extras in their bag. During their turn, if they are in Adventure mode, they can freely switch two pieces of equipment from the same category between their bag and their equipment slots.
Trinkets
There are two types of trinkets. Permanent trinkets have a light background. They work like any other equipment, and use the trinket slot.
Consumable trinkets can be distinguished by their black background. They go in the Krosmaster's trinket slot, but they do not have a permanent effect. A Krosmaster may activate a consumable trinket's effect once, after which it is used up, or "consumed."
Sets
Some armour is part of the same family; we call these sets. When a Krosmaster has four pieces of armour from a set, they can exchange them for a set token at no cost, which takes the place of the four pieces of equipment on their dashboard. Trinkets and weapons are never part of a set. Remember that the effects of a set are more powerful than those of its separate parts!
At any time, a player can exchange a set token for the original 4 pieces that made up the set. This is handy if you want to sell or trade them.
Here is a breakdown of the various sets:
- Gobball Set: Gobball Headgear, Gobball Epaulettes, Gobball Cape, Gobball Breastplate, Gobball Belt, Gobboots
- Tofu Set: Helmetofu, Tofu Epaulettes, Tofu Cloak, Tofu Breastplate, Tofu Belt, Tofu Boots
- Gobbowler Set: Gobbowler Helmet, Gobbowler Epaulettes, Gobbowler Breastplate, Gobbowler Boots
- Royal Gobball Set: Royal Gobball Helmet, Royal Gobball Cloak, Royal Gobball Belt, Royal Gobball Boots
- Royal Tofu Set: Royal Tofu Helmet, Royal Tofu Epaulettes, Royal Tofu Cloak, Royal Tofu Belt, Royal Tofu Boots
The Dungeon
The dungeon is a special area of the game. Inside, you will find dangerous monsters and a boss who's ready for a fight. But if you can defeat him, you'll win some tantalising rewards!
Accessing the Dungeon
To enter the dungeon, a Krosmaster must be adjacent to the dungeon entrance and declare that they want to enter. Their turn then ends immediately, even if they still have AP and MP remaining. The Krosmaster is removed from the board, and gets placed in the first room of the dungeon.
All Krosmasters who are part of the same group as the one who entered the dungeon can decide whether or not to go along. If they do, they will also be removed from the board (from wherever they are on the map) and will be placed in the first dungeon room along with them.
Only one group can enter a dungeon at a time, but if two different dungeons are accessible, one group may enter each dungeon. If the Boss is present on a game tile when the players enter his family's dungeon, he is removed from the game without dropping any Loot.
If all of the game's Krosmasters are in a dungeon at the same time, the Demon does not play any event cards or control any mobs outside of the dungeon until at least one Krosmaster returns from the dungeon.
The Dungeon's Layout
The dungeon is not linked to the rest of the game board. It is a special separate room. You can only enter through the dungeon entrance, and you can only exit by killing the monsters in there or by getting KO'd. It is made up of special tiles called dungeon tiles.
When a Krosmaster enters the dungeon, the Demon chooses a dungeon tile and places it on the table. They also place each of the associated scenery elements (tofu cages, gobball totems, fountains, or tofu nests). The Krosmasters who entered the dungeon place themselves on the starting cells located on the last two rows to one side of the tile. The Demon then picks 4 dungeon mobs and places them on the starting cells in the last two lines of the opposite side of the tile.
You can only play in Combat mode inside the dungeon. Furthermore, dungeon mobs (and the Boss) act on each of the Demon's turns, even if they only play a partial turn outside the dungeon.
If, at the end of the Krosmaster's turn, there are no more mobs in the dungeon, it expands: the Demon chooses an additional dungeon tile and connects it to the first. They then add the associated scenery elements, and then pick 3 dungeon mobs and place them on the starting cells in the two rows furthest from the Krosmasters. They also set up the Boss in the same way as these mobs, and draw a Boss Mood Card.
Now the real fight can begin! When the boss and all of the mobs are finally beaten, the dungeon closes. Each Krosmaster in the dungeon receives their reward (see below) and respawns in the city on a starting cell of their choice.
Boss Moods
The Boss is an even more fearful opponent when you meet him on his turf! To demonstrate this, the Demon draws a Boss Mood Card when the Boss appears. This card will modify the Boss's stats, increasing (or decreasing) his AP, MP, and HP, and giving him a new attack and new powers. These bonuses are added to the stats that already appear on the Boss character card.
- Boss Mood
- MP Bonus
- HP Bonus
- AP Bonus
- New Spell
- New Powers and Loot
Rewards
Dungeon mobs' Loot works the same as for other mobs.
The Special Loot power is found on every boss mood card. When the boss is dead, all Krosmasters who are still in the dungeon immediately receive 1 GG and a royal item chosen at random from the reserve. This rare equipment cannot be crafted, so this is the only way of getting your hands on it!
Royal Gobball and Tofu Tokens
If you are playing with a shared Demon, you should use the Royal Gobball and Tofu tokens to show who is controlling the dungeon mobs. These tokens are passed from player to player just like the Demon token, with one notable exception: a player whose Krosmaster is present in the dungeon cannot receive this token. They simply pass it on to the next player.
You don't have to worry about the active and inactive faces of these tokens, since the dungeon mobs act on each one of the Demon's turns.
Scenery Elements
Key Words
Scenery Elements have special properties that we break down into a handful of keywords:
- Obstructing: This scenery element blocks a spell's line of sight (see page 19).
- Non-Obstructing: This scenery element does not block a spell's line of sight.
- Blocking: It is not possible to move into a cell that contains this scenery element.
- Non-Blocking: It is possible to move into a cell that contains this scenery element, as if it wasn't there.
Scenery Elements do not have HP, and cannot be destroyed through combat. They cannot receive markers from any spell, and cannot be moved by the effect of spells or powers. However, you may still target them with a spell if you wish.
Scenery Description
Tree — Obstructing, blocking. A tree can be farmed at a cost of 3 AP. It is then removed from the game and gives you 1 Wood.
Ore Vein — Non-obstructing, blocking. An ore vein can be farmed at a cost of 3 AP. It is then removed from the game and gives you 1 Iron.
Low Wall or Hay Bale — Non-obstructing, non-blocking. Spells cast by a character located on a low wall or hay bale cell gain +1 Range.
Gobball or Tofu Dungeon Entrance — Obstructing, blocking. This scenery element allows access to the dungeon by standing next to it and missing a turn.
Gobball Totem or Tofu Nest — Obstructing, blocking. These scenery elements can only be found in Dungeons.
Fountain — Non-obstructing, blocking. This scenery element can only be found in Dungeons.
Tofu Cage — Non-obstructing, non-blocking. Spells cast by a character located on a Tofu Cage cell gain +1 Range. This scenery element can only be found in Dungeons.
Marketplaces — Obstructing, blocking. A Krosmaster adjacent to a Marketplace cell can dabble to make sales and purchases for 3 AP.
Crafting Table — Non-obstructing, blocking. A Krosmaster adjacent to a crafting table can create an item for 3 AP.
Phoenix — Non-obstructing, blocking. A Krosmaster who has been KO'd reappears next to the Phoenix of their choice, and removes one Injury from his card, but they also lose a GG.
Zaap — Obstructing, blocking. A Krosmaster adjacent to a Zaap can spend 1 MP and 1 Kama to use it. This makes them reappear on a cell adjacent to a Zaap of their choice.
The Cards
Identify the Cards Easily
Depending on the scenario and the players' choices, you may be asked to use Gobball or Tofu cards. You can tell them apart by looking at the corners of the cards: Gobball Cards, Tofu Cards, and Cards used with both families.
Event Cards
These cards form the event deck, and get placed on the adventure path. The Demon will pick a certain number of event cards per turn to make the game progress.
- Gobball Spawn: Pick 1, 2 or 3 normal gobballs and place them on the starting cells of your choice on a gobball tile.
- Special Gobball Spawn: Pick 1 special gobball and place it on a starting cell of your choice on a gobball tile.
- Royal Gobball Appearance: Place the Royal Gobball on a starting cell of your choice on a gobball tile. It then acts like any other monster. If it is summoned by this card, the Royal Gobball does not have a Boss Mood. This card has no effect if the Boss is already in the Dungeon.
- Tofu Spawn: Pick 1, 2 or 3 normal tofus and place them on the starting cells of your choice on a tofu tile.
- Special Tofu Spawn: Pick 1 special tofu and place it on a starting cell of your choice on a tofu tile.
- Royal Tofu Appearance: Place the Royal Tofu on a starting cell of your choice on a tofu tile. It then acts like any other monster. If it is summoned by this card, the Royal Tofu does not have a Boss Mood. This card has no effect if the Boss is already in the Dungeon.
- Enemy Krosmaster Appearance: Take one of the remaining Krosmasters from the Krosmaster Quest box and place them on a starting cell of your choice (outside the city). This Krosmaster can use all their spells and powers, but works just like a mob. If there are no more Krosmasters available, use a special mob instead.
- Tree Respawn: For each non-city board tile, take 1 tree from the reserve and place it on a free tree cell. If there are no cells of this type free on this tile, the tree goes back in the reserve.
- Vein Respawn: For each non-city board tile, take 1 ore vein from the reserve and place it on a free vein cell. If there are no cells of this type free on any available non-city tiles, the vein goes back in the reserve.
Quest Cards
These cards are drawn from the event deck and placed on the adventure path. Completing one earns the Krosmaster a certain number of GG.
- Put Your Foot In It: To fulfill this quest, the Krosmaster must have at least 4 pieces of gobball dung in their bag. They then win 1 GG.
- So Soft: To fulfill this quest, the Krosmaster must have at least 3 pieces of gobball wool in their bag. They then win 1 GG.
- Horn In: To fulfill this quest, the Krosmaster must have at least 2 gobball horns in their bag. They then win 1 GG.
- Baker's Dozen: To fulfill this quest, the Krosmaster must have at least 4 tofu eggs in their bag. They then win 1 GG.
- Light as a Feather: To fulfill this quest, the Krosmaster must have at least 3 tofu feathers in their bag. They then win 1 GG.
- Dos Beak: To fulfill this quest, the Krosmaster must have at least 2 tofu beaks in their bag. They then win 1 GG.
- Bling Bling: To fulfill this quest, the Krosmaster must have at least 12 Kamas. They then win 1 GG.
- Gobbicide: To fulfill this quest, the Krosmaster must kill a monster from the gobball family (it doesn't matter which one). They then win 1 GG.
- Toficide: To fulfill this quest, the Krosmaster must kill a monster from the tofu family (it doesn't matter which one). They then win 1 GG.
- Krosmasticide: To fulfill this quest, the Krosmaster must kill a Krosmaster opponent (controlled by a player or the Demon). They then win 2 GG.
- Repeatable Quest: This quest is considered to be an exact copy of the scenario card.
Journeys
To complete a journey, you'll need to carry out a number of steps in the right order. Here are the actions that could be requested of you:
- The Krosmaster must cut down the listed number of trees.
- The Krosmaster must farm the listed number of ore veins.
- The Krosmaster must have a certain number of this resource to complete this stage.
- The Krosmaster must discard a certain number of this resource to complete this stage.
- The Krosmaster must have the listed number of Kamas to complete this stage.
- The Krosmaster must discard the listed number of Kamas to complete this stage.
- The Krosmaster must move onto a cell containing a low wall.
- The Krosmaster must move onto a cell containing a hay bale.
- The Krosmaster must use a Zaap.
- In a single turn, the Krosmaster must buy the given number of resources and/or pieces of equipment from the Marketplace.
- In a single turn, the Krosmaster must sell the given number of resources and/or pieces of equipment at the Marketplace.
- The Krosmaster must craft the given number of pieces of equipment using a crafting table.
- The Krosmaster must kill a monster from the gobball family. It doesn't matter which one.
- The Krosmaster must kill a monster from the tofu family. It doesn't matter which one.
- The Krosmaster must kill a Krosmaster opponent (controlled by a player or the Demon).
If a quest requires resources to be discarded, the player may do so at any time during their turn. They simply remove the resources or Kamas from their Dashboard and put them back in the reserve.
Game Variants
Once you've played a few games and you're used to the rules, you can move on to the next stage and really make Krosmaster Quest your own. It has huge potential if you're willing to get your hands dirty!
Play with Other Krosmasters
Krosmaster Quest is entirely compatible with the other figures in the Krosmaster Collection range. You're not limited to just the 5 characters in the box: you have dozens of options open to you!
To keep things equal between players, we recommend you choose Krosmasters of a similar level, but if balance isn't a priority, you can ignore this rule! Similarly, if the Demon summons an enemy Krosmaster, he is free to pick from his collection to find a suitable opponent.
The only restriction is that players cannot select Boss type Krosmasters. These are dangerous opponents that are better put to use as a Boss to be defeated in a dungeon. And while we're on the subject...
Confronting Other Bosses
Krosmasters with the Boss trait can replace the Royal Gobball or Tofu. For a balanced game, we recommend you choose a boss with a level equal to that of the player average... but you can ignore this rule if you want to make the game more difficult!
This type of Boss can be associated with any type of monster family. Similarly, they can be in any type of Boss mood if you confront them in their Dungeon. Don't think twice about combining different monster families, or inventing your own mobs to help out the Boss!
Create Your Own Scenarios
The Scenario Book provides you with dozens of ways to enjoy the game, but if you want to take it further, you can use these scenarios as a template from which to create your own Krosmaster Quest.
All the aspects of the game can be modified freely thanks to the scenarios. You can emphasise a particular rule to push the players to look at the game from a different angle, or get rid of that rule entirely. You can mix the monster families and create brand new interactions between them. You can even completely change the conditions for victory and replace the GG system used in the rest of the game!
Unless you decide to completely remove the Adventure Path, you need to invent a repeatable quest associated with your new scenario. It needs to be simple enough to be repeated several times, and it should reflect the tone you want to set with the scenario. Generally speaking, the reward for this quest is 1 GG, but you may decide to offer more if the quest is more difficult than those on offer in the box. In any case, use a repeatable quest card to represent your scenario card on the Adventure Path.
Draw inspiration from the scenarios in the book to create your own. Or experiment with some madder ideas; your imagination is the limit!
F.A.Q.
Q: Raul Bak has both the Chance and Critical powers. Does he roll three dice when he uses his CLOCK spell?
A: YES; the Critical and Chance powers are cumulative. The Agility, Strength and Intelligence powers are also cumulative with Critical.
Q: When the Royal Tofu uses his ROYAL TOFU SUMMONS spell, can he choose a Pudgy Tofu from the reserve and bring it into play?
A: NO, this summons only introduces a normal Tofu to the game. It is not possible to choose another member of the family instead.
Q: Chrissy Entrinch is back in the city. Can her Harpooners that are still outside the city continue to block the line of sight using their Blocking power?
A: YES. When a Krosmaster enters the city, their summons miss a turn but are still present on the game board, and their powers remain active. However, remember that as summons the Harpooners will disappear if Chrissy enters Adventure Mode.
Q: If I have the Gobball Headgear, a Gobball Belt and two pairs of Gobboots, can I combine all four to make a Gobball set?
A: NO, because your Krosmaster must have all 4 items equipped, and you cannot equip two items in the same slot. To create a set, you will need one of each type of armour: a helmet, a cape or epaulettes, a breastplate or belt, and a pair of boots.
Q: Can I consume a Starred Potion from my inventory?
A: NO, consumable trinkets must be equipped on your dashboard in the appropriate space for you to be able to use them, after which they go to the reserve.
Q: If I decide to skip my turn to heal my Krosmaster of 5 Injuries, does he heal himself of 1 Injury because he is in Adventure mode?
A: YES, these two heals combine for a total of 6 Injuries healed in one turn.
Q: I want to use a Zaap, but all the cells around the Zaap I want to travel to are taken. What should I do?
A: In this situation, you cannot go to this Zaap. Choose another available Zaap or, if there isn't one, choose another action.
Q: Can I destroy the scenery?
A: NO, scenery elements cannot be destroyed. Trees and ore veins can be removed from the game by farming them however.
Q: My game tile is asking me to place a decoration that isn't in the box, like a roll of rope, a camp fire, etc. What should I do?
A: If the item is not described on page 27, it is nothing more than a decoration, and it will not influence the game. Treat it as a free cell.
Q: Is a cell containing Gobball Dung or Tofu Eggs considered to be a free cell?
A: YES, dung and eggs do not occupy a cell on which they are placed. A Krosmaster can move onto a cell even if it contains them.
Q: My personal quest card is asking me to kill a Skeletal Tofu, but I can't find one among the monsters in the game...
A: Do not confuse the mobs (shown by their token on your quest card) and the types of mobs (shown by a symbol without a token). In this case, your quest is asking you to kill any monster from the Tofu family, not a specific type of tofu.
Q: Is it possible to play a "basic" game, without scenario cards?
A: YES, this is what we call a "free game." A standard quest drawn at random will then act as a scenario card. The rules for this type of game are found in the Scenario Book.
Q: We are playing with Brotherhood of the Tofu Krosmasters. Their powers are only active if "another ally from the Brotherhood of the Tofu is in play." How can we determine if their powers are active or not?
A: To be considered an ally, a Krosmaster must be a member of your group. The power will therefore only be active if your group includes an ally from the Brotherhood of the Tofu. Please note that during a Cooperative game, all Krosmasters are considered to be your allies, so you don't need to form a group.
Q: My Krosmaster's power says "at the start of the combat." When does it activate?
A: The power activates at the moment your Krosmaster switches from Adventure mode to Combat mode. If you return to Adventure mode, then switch back to Combat mode, the power will activate again!
Q: Are you sure that we can't play with characters of different levels? Or Bosses? Come on, pleeeeease...
A: You are free to do what you like, and change the game rules if you think it will make the game more fun. But don't come crying to us if the game balance gets out of whack!
Game Help
A Player's Turn
- Adventure Mode or Combat Mode
- Adventure: +3 MP, heal 1 injury
- Combat: Can use spells
- Remove AP, MP and Range markers
- Apply bonuses/penalties for the turn
- Krosmaster's Actions
- Cost AP and MP (and sometimes require taking Injuries)
- Krosmaster's turn ends
- Krosmaster's summons' turns (if present)
The Demon's Turn
- Select and activate Event Cards
- Number of cards = Number of Krosmasters -1 (min 1)
- If Demon token is active side up:
- Plays the mobs present
- Turns the Demon token over to the inactive side
- If the Demon token is inactive side up:
- Turn the Demon token active side up
- Pass the token to the next player (shared Demon only)
- Demon's turn ends
Actions
| Action | Cost | Adventure Mode | Combat Mode |
|---|---|---|---|
| Move | 1 MP | yes | yes |
| Farm | 3 AP | yes | yes |
| Pick Up | 1 AP | yes | yes |
| Cast a Spell | x AP | no | yes |
| Craft an Item | 3 AP | yes | yes |
| Dabble | 3 AP | yes | yes |
| Use a Zaap | 1 MP + 1 Kama |
Damage
Injuries Inflicted = Basic Damage (printed on the spell) + Critical Hit Damage (from rolling dice) - Canceled Damage (from opponent's die roll)
Casting a Spell
Prerequisites
- Check the cost
- Check the range
- Check line of sight
Steps
- Pay the Cost
- Additional Effects
- Roll for Critical (attack and healing spells only)
- Roll for Armour (attack spells only)
- Add or Remove Injuries (attack and healing spells only)
Line of Sight
- Imagine that all cells are perfectly square.
- A line of sight is drawn from the center of one cell to the center of another.
- It must not pass through any cell that blocks the line of sight (trees, characters, etc.)
Areas of Effect
Cross Zone, Square Zone, Hammer Zone, Staff Zone, Shovel Zone, Axe Zone, Hand Zone.
Using your unique code, activate your figures and fight against other players online! Will you become the Master of the Krosmoz? www.KROSMASTER.com