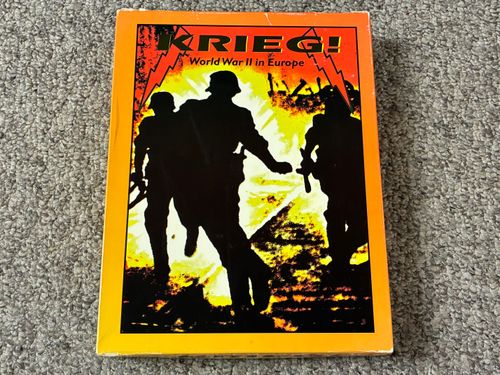
Krieg! World War II in Europe
Krieg! World War II in Europe Rulebook
Table of Contents
Table of Contents
- Quick Start Scenario
- Game Components
- Units & Markers
- Option Cards
- The Turn Sequence
- Victory Conditions
- 1. Seasonal Phase
- 2. Initial Administrative Phase
- 3. Operational Movement Phase
- 4. Combat Phase
- 5. Reserve Movement Phase
- 6. Final Administrative Phase
- 7. Game Turn Interphase
- 8. Zones of Control
- 9. Stacking Limits
- 10. Supply & Friendly Ports
- 11. Weather
- 12. Countries & Factions
- 13. Limited War
- 14. Truce Restrictions
- 15. Special Markers
- 16. Political Event Results
- 17. Conditional Event Results
- 18. Game Setup
- 19. Minor Country Setup
- 20. Optional Rules
Quick Start Scenario
Experienced gamers who want to learn Krieg! by playing can use this “jump start” procedure. Begin by examining the game component descriptions below and reading rules sections 8 through 14 (Zones of Control, Stacking, and other “housekeeping” rules). Then set up the game (section 18).
Now, rules in hand, begin reading and playing. Follow the Sequence of Play (sections 1 through 7) closely. These rules are presented in the order you will use them in the game. Read a section, then play that Phase or Segment.
Select cards in historical (numerical) order. You do not need to learn the Special Markers or Special Event rules (sections 15, 16, and 17)--read only the ones that apply as you play. You won't play quickly this way, but you'll end up with a firm grasp of game mechanics and you'll have a much better idea of how to plan an effective game strategy.
Continue playing until the end of the July-August 1940 turn, and then perform one last Victory Point Check.
- If the Victory Point Marker reads "Allied Crusade" after this Victory Point Check, the Allied player has won.
- If the Victory Point Marker reads "Axis Tide," the Axis player has won.
Game Components
Krieg! includes this rule hook, two 22 x 34 mapsheets, 420 die-cut playing pieces, three sets of Option cards (101 total), three Force Pool Displays, three copies of the charts and tables, and one six-sided die.
Game Scale: Each hex on the map measures about 60 miles from hexside to hexside. Each complete game turn represents the passage of thirty to sixty days in the history of the war in Europe.
Units & Markers
Combat units portray corps, armies, army group headquarters (HQ units), and fortresses.
- Attack Factor is a unit's strength when attacking enemy units during a Combat Segment.
- Defense Factor is a unit's strength when defending against an enemy attack during a Combat Segment.
- Movement Allowance is the number of Movement Points a unit can use to move from hex to adjacent hex during Operational and Reserve Movement Phases.
- Reinforcement Number is keyed to the card number printed on the Option cards, and helps you find the pieces to add to the game when the like-numbered card is revealed.
- Step Value indicates the number of steps in a unit. Multi-step units (those with a Step Value greater than one) are formed by combining a number of units equal to the multi-step unit's Step Value.
- Organization Size xxxx-army, xxx-corps. All armies are multi-step units; all corps are one-step units. Armies and corps constitute the bulk of each country's combat forces.
- Designation is a unit's historical identity number (Patton's 3rd army, for example).
- On Partisan units, "C" indicates a Communist Partisan, while "N" stands for Nationalist.
- On French units, a "C" indicates Colonial units.
- A minor country corps unit with an "EX" (Expeditionary) designation indicates a corps capable of stacking and attacking with units of another minor country.
- Every minor country has one "Res" (Reserve) corps.
- All minor country units have a Nationality identification, used to help sort units and to find the correct units to add when a minor country is activated.
- A-Axis Nationalist,
- B-Bulgaria,
- BH-Belgium-Holland,
- BL-Baltic States,
- DN-Denmark-Norway,
- FN-Finland,
Infantry -Units with infantry, cavalry, airborne, and mountain symbols are considered infantry-type units.
Airdrop mode is a special feature found on the reverse of all airborne infantry-type units.
Armor - Units with armor, cav-mech, and mechanized symbols all are considered armor-type units for all game purposes. Soviet armor is sometimes referred to as "tank," and German armor is sometimes referred to as "panzer."
HQ - All units with the artillery symbol are HQ units.
Fortress - All units with an open symbol box fortress units.
Air Support/Beachhead units have an aircraft on one side, and a port symbol (anchor) on the other.
Markers include Convoy Markers (Supply Convoy/Troop Convoy), Strategic Warfare Markers, and the No Retreat/Military Takeover Marker. Many of these Markers have a Reinforcement Number keyed to the number of the Option card that adds the Marker to the game. Other Markers used to keep track of various game functions include four Ceded Border Markers, four Truce Markers (Nazi-Soviet Pact, Appeasement, and two Negotiations/ Armistice Markers), the Victory Point Marker (Axis Tide/Allied Crusade), and the Turn Record Marker.
Option Cards
There are three sets of Option cards included with the game-one set each for the Axis, Soviet, and Western Allied factions. Each deck contains a variety of Limited War cards and Total War cards. Cards provide information used to play the game (not all cards contain all elements).
Card Title - Those cards whose title is black print are Limited War cards. Cards whose title is in red print are Total War cards. Players begin the game holding only Limited War cards.
Blitz Cards - Cards indicated by lightening bolts on either side of the card Title. A player usually gets to attack twice during his turn when his Current Option card is a Blitz card.
A card whose title is in red print and surrounded by lightening bolts is called a Total War Blitz card.
US Commitment Level Number - Most Western Allied Total War cards have a US Commitment Level number (US 1, 2, 3, or 4) that tracks the growing strategic clout wielded by the United States in the European Theater. This number is used as a Political and a Delay die roll modifier, and adds to the number of minor country replacement steps the Western Allied player receives during his Seasonal Reinforcement Segments.
Effects and/or Restrictions - Listed below a card's title, these may prohibit a player from selecting a card unless a specific other card has been played, or may require him to discard another card, among other things (see 1.1.2 for other card play restrictions).
Force Pool - Additional units first added to a faction's Force Pool during the Reinforcement Segment of the Seasonal Phase in which the card is revealed (see 1.3.8).
Delay Box - Additional units and Markers placed in the Delay Box during the Reinforcement Segment of the Seasonal Phase in which the card is revealed. These pieces will enter the game during some future turn, determined by random die roll during the game turn interphase (see 1.3.8 and 7.2).
Replacements - The Major Power armor and infantry steps that are placed on the map as one-step replacement corps units during the Reinforcement Segment of the Seasonal Phase in which the card is revealed (see 1.3). These are boxed on the cards to remind players that they are received during Seasonal turns only.
Political Event - Conditions and consequences checked during the Political Event Segment, or events and actions determined by random die roll during the Political Event Segment of the player's Initial Administrative Phase (see 2.1).
Conditional Event - Conditions and consequences checked during the Conditional Event Segment of a player's Final Administrative Phase (see 6.2).
Card Number - Keyed to the reinforcement numbers printed on units and Markers, the like-numbered pieces are placed in the Force Pool or Delay Box during the Reinforcement Segment of the Seasonal Phase in which the card is revealed.
Historical Date - Indicates the Seasonal turn during which the card was "revealed" historically. Players are not bound to play cards in historical order (you are very much encouraged to play your cards as you see fit-see 1.1.2 for the restrictions that do pertain to card selection). Please note, though, that playing the cards in historical sequence makes for an interesting and challenging game, and will save a lot of wear and tear on the ol' gray cells your first time out.
The Turn Sequence
A game of Krieg! is played in a series of consecutive game turns, each of which consists of three player turns-Axis, Western Allied, and Soviet Allied, in that order. The player whose player turn is currently in progress is referred to as the phasing player. In a two-player game, the Allied player plays the Western Allied and the Soviet Allied player turns.
Each player turn is divided into steps called "phases," often further sub-divided into "segments." Players perform actions in accord with the sequence of phases and segments given below, known as the "Sequence of Play." Once the phasing player finishes one phase or segment and moves on to the next, he cannot go back.
Important: The sequence and mechanics of play require that you treat all non-phasing units as "enemy." This means that Western Allied units treat both Axis and Soviet Allied units as enemy units, and that Soviet Allied units treat both Axis and Western Allied units as enemy units. Rule of Thumb-when it's your turn, everything that doesn't belong to your faction is in your way.
A. Seasonal Victory Point Check
A Victory Point Check is performed at the beginning of every game turn highlighted as a Seasonal turn on the Turn Record Track (every March-April, May-June, Aug-Sept, and Nov-Dec game turn).
B. Axis Player Turn
- 1 Seasonal Phase
- 1.1 Option Card Segment
- 1.2 Reinforcement Segment
Important Note: Seasonal Phases are not performed every game turn. Each player begins his player turn with his Seasonal Phase only on those game turns highlighted as Seasonal turns on the Turn Record Track (every March-April, May-June, Aug-Sept, and Nov-Dec game turn). On all other game turns, each player begins his turn with his Initial Administrative Phase.
- 2 Initial Administrative Phase
- 2.1 Political Event Segment
- 2.2 Convoy Segment
- 2.3 Air Superiority Segment
- 2.4 Organization Segment
- 3 Operational Movement Phase
- 4 Combat Phase
- 4.1 Blitz Combat Segment
- 4.2 Regular Combat Segment
- 5 Reserve Movement Phase
- 6 Final Administrative Phase
- 6.1 War & Peace Segment
- 6.2 Conditional Event Segment
C. Western Allied Player Turn
The Western Allied player turn follows the same sequence as the Axis player turn.
D. Soviet Allied Player Turn
The Soviet Allied player turn follows the same sequence as the Axis player turn.
E. Mutual Interphase
- 7 Game Turn Interphase
- 7.1 Delay Segment
- 7.2 Turn Record Marker Segment
Victory Conditions
Victory is obtained by occupying the enemy's Strategic Hexes and preventing enemy units from occupying your own Strategic Hexes. Trying to keep countries that contain your own Strategic Hexes out of the war entirely can be an effective part of your game strategy.
A Victory Point (VP) Check is performed at the beginning of every game turn highlighted as a Seasonal turn on the Turn Record Track. A Final Victory Point Check is also performed at the end of the November-December 1945 game turn. The 1946 game turns are used only it a Separate Peace Extension occurs (see 17.6-Separate Peace).
When computing Strategic Values in a VP Check procedure, count only the Strategic Hexes occupied by ground units and ignore the presence of Air Support units.
Seasonal Victory Point Check Procedure
First count the number of Axis Strategic Hexes occupied by Allied ground units (both Soviet and Western), and subtract the number of Allied Strategic Hexes (both Soviet and Western) occupied by Axis ground units. This total is the Allied Strategic Value. Find the Allied Strategic Value on the VP Track-the box above it is the corresponding Victory Point Box.
- If the VP Marker reads "Allied Crusade," the Allied players must immediately move the Marker to the Box on the VP Track corresponding to the current Allied Strategic Value.
- Allied players cannot move the VP Marker if it reads "Axis Tide" unless they can advance it into a higher Box-if (and only if) they can do this, they flip the Marker to read "Allied Crusade" and move it to that higher VP Box. Then count the number of Allied Strategic Hexes occupied by Axis ground units, and subtract the number of Axis Strategic Hexes occupied by Allied ground units. This total is the Axis Strategic Value. Find the Axis Strategic Value on the VP Track-the box below it is the corresponding VP Box.
Then account the number of Allied Strategic hexes occupied by Axis ground units, and subtract the number of Axis Strategic hexes occupied by Allied ground units. This total is the Axis Strategic value. Find the Axis Strategic value on the VP track - the box below it is the corresponding VP box.
- If the VP Marker reads "Axis Tide," the Axis player must immediately move the Marker to the Box on the VP Track corresponding to the current Axis Strategic Value.
- The Axis player cannot move the VP Marker if it reads "Allied Crusade" unless he can advance it into a higher Box-if (and only if) he can do this, he flips the Marker to read "Axis Tide" and moves it into that higher VP Box.
- When the "No Retreat" Marker is on the Victory Point Track, the Axis player can never move the VP Marker into a VP Box to the right of the "No Retreat" Marker, regardless of his Strategic Value. The Axis player can move the VP Marker to the right of the Marker when it reads "Military Takeover" (see 15-Special Markers).
Example: It is the Victory Point Check at the beginning of the August-September 1940 Seasonal Turn-the VP Marker is in the I VP Box and reads "Allied Crusade." The Allied players find that there are no Axis Strategic Hexes occupied by Allied units, and count no Soviet and three Western Allied Strategic Hexes occupied by Axis units. The Allied Strategic Value is less than 0 (0 to minus 3), the "Allied Crusade" VP Marker must be moved from the 1 VP to the 0 VP Box.
The Axis player's three Western Allied Strategic Hexes (minus no Axis Hexes occupied by Allied units) yield an Axis Strategic Value of 3; the Axis player finds this Axis Strategic Value over the 1 VP Box, so he advances the VP Marker from the 0 VP Box to the 1 VP Box. Because he was able to advance the Marker, he flips it from "Allied Crusade" to read "Axis Tide." Had the Axis Strategic Value been 2 or less, he would not have been able to advance the VP Marker, and would therefore have left it in the 0 VP Box reading "Allied Crusade."
Automatic Total Victory
A player may end the game at any time by achieving an Automatic Total Victory.
If the "Axis Tide" Marker ever enters the Total Victory VP Box during a VP Check, the Axis player wins an Automatic Total Victory. Remember that the Axis player cannot move the VP Marker into a space to the right of the No Retreat Marker when it is on the VP Track.
If the "Allied Crusade" Marker ever enters the Total Victory VP Box during a VP Check, the Allied players win an Automatic Total Victory.
Determining Historical Victory
If neither side has won an Automatic Total Victory by the end of the Nov-Dec 1945 game turn, the historical victory level is determined by the position and mode of the VP Marker after a Final Victory Point Check performed at the end of the Nov-Dec 1945 turn.
"Axis Tide" VP Marker
4 VP Box-Axis Decisive Victory
3 VP Box-Axis Substantive Victory
2 VP Box-Axis Marginal Victory
0 or 1 VP Box-Draw
"Allied Crusade" VP Marker
4 VP Box-Allied Decisive Victory
3 VP Box-Allied Substantive Victory
2 VP Box-Allied Marginal Victory
0 or 1 VP Box-Draw
Determining Game Victory
The historical victory level determines which side won the war. Determining who won the game is a different matter. To determine which side won the game, adjust the historical result one level in favor of the Axis for each VP in the box occupied by the "No Retreat" or "Military Takeover" Marker. This adjustment never alters an Allied Automatic Total Victory. If for example, the "No Retreat" Marker is in the 2 VP box, an Allied Marginal Historical Victory would be adjusted two levels to an Axis Marginal Game Victory. If the "No Retreat" Marker is in the 3 VP Box, the Allied players must win an Automatic Total Victory or none at all, since even a Historical Allied Decisive Victory would be adjusted to a Game Draw.
No provision has been made for determining individual Allied player victory levels (unless a Separate Peace Extension occurs). The two Allied players in a three-player game must equally share the credit for an Allied victory and the blame for an Allied defeat. The time spent after the game arguing about who did what is known as the Cold War.
1. Seasonal Phase
Seasonal Phases are not performed every Game Turn. Add a Seasonal Phase to the beginning of each player turn only on those turns highlighted as Seasonal turns on the Turn Record Track.
During his Seasonal Phase, the phasing player reveals the Option card he selected during his last Seasonal Phase, selects the Option card he will reveal during his next Seasonal Phase, and may receive and place his faction's reinforcements.
1.1 Option Card Segment
1.1.1 Procedure
First, the phasing player must discard his Current Option card (the card he revealed during his last Seasonal Phase). This card is set aside and cannot be played again.
Next, the phasing player must reveal his Pending Option card (the card he selected during his last Seasonal Phase). He must turn this card face up on the table in full view of all players-this card is now his new Current Option card.
- As this card is revealed, any units on the back of it are placed in or adjacent to any city (free of enemy ground or Air Support units) in their home country. You won't have to deal with this very often, if ever, units may be placed on the back of Pending Option cards only when Vichy is created (see 12.2.4).
Any Immediate Effects or Restrictions listed on the new Current Option card are checked-if the card calls for some other card to be discarded, that card must be discarded now, even if it is not yet in the player's active card hand. If there are other restrictions or preconditions listed below the title of the new Current Option card, the phasing player must verify that he is in compliance. The phasing player must also verify that he was in compliance with the selection restrictions of 1.1.2 below. If found with an illegal Current Option card, he must immediately return that card to his hand, and will not have a Current Option card this Season.
Finally, the phasing player must select from his hand the card he intends to reveal during his next Seasonal Phase. He places this card face down (concealed from the other players) on the table-this card is now his Pending Option card.
The phasing player should now have a face up card (his Current Option card), and a face down card (his Pending Option card) on the table, and can proceed to the Reinforcement Segment of his Seasonal Phase.
Players are not allowed to examine another player's cards before they have been revealed. Players may share or withhold information about their own cards with other players at their own discretion (except for their Current Option card, which is in full view of everyone).
Exception: The Western Allied player has two Ultra cards that allow him to examine the Axis Pending Option card while it is still face down on the table. He is not obligated to share the information with the Soviet Allied player.
Each player should designate a small space on the gaming table for his Current and Pending Option cards-it must be absolutely clear to all players at all times which cards are Current Option cards and which cards are Pending Option cards. All discarded cards should be set aside together where they cannot accidentally re-enter the game-all players are free to examine all discarded cards at any time.
1.1.2 Selection Restrictions
The phasing player can select only one card each Option Card Segment and it must be selected from among those he currently holds in his hand. A player cannot select a card that has not yet been added to his hand, or a card that has already been revealed and/or discarded each Option card can be played only once.
Card selection is final. Once a player has selected a card, placed it face down as his Pending Option card, and moved on to his Reinforcement Segment, he is bound to reveal that card and make it his Current Option card during his next Option Card Segment no matter how badly he wants to take it back.
Important: Before selecting a particular card, carefully check the restrictions listed on that card. Many cards cannot be selected unless certain pre-conditions have been met. Look, for example, at Axis cards 11 and 14 -these cards cannot be selected unless another specified Axis card has already been revealed at some point in the game (it does not have to be the card revealed most recently). In addition to any restrictions so listed on the cards themselves, the restrictions listed below always apply to card selection. A player who finds that he cannot select any card in his hand without violating a restriction must say so. He will not select a Pending Option card, and thus will not reveal a new Current Option card during his next Seasonal Phase. Pay close attention to these restrictions, and be careful! If you save up Axis or Soviet Total War Blitz cards for the endgame, for example, you may find yourself unable to select a card, and will then have to muddle through a Season without a Current Option card.
- Allied players cannot select Western Allied or Soviet Total War cards until the Axis player has revealed an Axis Total War card.
The Axis player may select a Total War card at any time after he has revealed his Mobilization card (this card adds the Axis Total War cards to the Axis card hand). Once the Axis player has revealed his first Total War card, "Total War" is in effect for the duration of the game-Allied players are free to select Allied Total War cards and all Limited War Restrictions are permanently lifted (see 13.1). Limited War cards can still be played while Total War is in effect, but this never alters the fact that Total War is in effect.
- The Axis player cannot reveal Axis Total War Blitz cards in consecutive Seasonal Phases.
In other words, if he reveals an Axis Total War Blitz card at the beginning of an Axis Option Card Segment, he cannot then select another Axis Total War Blitz card during that same Option Card Segment-he can never play two Axis Total War Blitz cards in a row. There is no such restriction on Axis Limited War Blitz cards.
- The Soviet Allied player cannot reveal more than one Soviet Total War Blitz card in a single calendar year.
If, for example, the Allied player reveals a Soviet Total War Blitz card in November-December 1942, he could select another Soviet Total War Blitz card in the same Soviet Option Card Segment, because that card would not be revealed until the following March-April 1943 turn, which is in a different calendar year. If he reveals a Soviet Total War Blitz card during his March-April 1943 turn, he will not be able to select another such card until his November-December 1943 turn at the earliest-the card would be revealed in calendar year 1944. There is no such restriction on Soviet Limited War Blitz cards.
When selecting a Western Allied card with a US Commitment Level number, the Western Allied player must make his selection from the cards with the lowest US Level number.
The Western Allied player cannot select a US Level 3 card, for example, if he still holds any US Level 1 or 2 cards in his hand. He can always select a card without a US Level number unless prevented by other selection restrictions.
1.2 Seasonal Reinforcement Segment
During his Seasonal Reinforcement Segment, the phasing player may add units to his Force Pool and Available Air Support Track (sometimes by way of the Delay Box), and may introduce a variety of special markers into the game. He will also receive replacement steps to place on the map as one-step corps units. Most reinforcements received in a Seasonal Reinforcement Segment will be listed on the phasing player's Current Option card.
1.2.1 Force Pool Additions & Delayed Entry
The phasing player's Current Option card may list certain units and markers under the headings Force Pool or Delay Box. Unlike replacements, such units are not placed directly on the map.
The phasing player places any corps, army, fortress, and HQ units listed on his Current Option card under the heading Force Pool in his Force Pool. Any Air Support units so listed are placed on his Available Air Support Track. The phasing player places any units or markers listed under the heading Delay Box in the Delay Box. These pieces will enter the game on some future turn, determined by modified die roll during the Game Turn Interphase (see 7.1 and 7.2).
1.2.2 Major Power Seasonal
Replacements
German, Soviet, British and US replacements are listed under the heading Seasonal Replacements on the Option cards. The cards list the appropriate number and type (infantry or armor) of steps received. During his Seasonal Reinforcement Segment (only!), the phasing player receives the replacement steps listed on his Current Option card.
Important: Conditional Replacements listed under the heading Conditional Event on an Option card are not received during the Seasonal Reinforcement Segment-you have to wait for your Conditional Event Segment to get these special replacements. Conditional Event Segments occur every turn, so Conditional Replacements can be received on turns other than Seasonal turns, and can therefore be received more than once.
1.2.3 Additional Seasonal Replacements
In addition to the Major Power Seasonal Replacements listed on their Current Option card, players may receive a variety of additional Seasonal replacement steps for minor countries, Lend-Lease, etc. These are fully described in rules 1.2.4-1.2.6 below. Neutral minor countries are never eligible to receive replacements.
1.2.4 Axis Additional Seasonal Replacement Steps
Axis Minor Countries
During each Axis Seasonal Reinforcement Segment, the Axis player receives one Axis minor country replacement step of any type for each VP in the Box currently occupied by the "Axis Tide" VP Marker. The Axis player may allocate the step(s) thus received to any Axis minor country or countries.
- No Axis minor country replacement steps are received at all if the VP Marker is in the 0 VP Box or reads "Allied Crusade," or if there are no Axis minor countries.
If the "Axis Tide" VP Marker is in the 2 VP Box, for example, the Axis player gets two Axis minor country replacement steps-total If there are four Axis minor countries, the Axis player will have to decide who gets the limited resources this quarter.
Axis Italians
During each Axis Seasonal Reinforcement Segment, the Axis player receives one Italian replacement step of any type if Italy is an Axis minor country. This Axis Italian replacement step is in addition to any Axis minor country replacement step(s) allocated to Italy. The Axis Italian replacement step is not received if any of the following conditions apply:
- Appeasement Restrictions arc in effect;
- Italy has collapsed at any time during the game;
- no Italian units occupy any city outside of Italy (Mussolini must have some sort of an "empire");
- Allied units occupy any city in Italy.
Note: Tripoli and Tobruk are not cities "in Italy "-they are "outside of Italy" in Libya, which is an Italian Dependent country (see 13.3).
Axis Nationalists
Important: Axis Nationalist steps are received only if the Anti-Comintern Pact Marker is on the Strategic Warfare Track. This Marker comes into play (with the Axis Nationalist units) when the Axis player reveals his Anti-Comintern Pact Option card-if he never selects this card, he will never receive Axis Nationalist replacement steps. This option represents a serious German effort to organize and equip foreign Nationalists.
During each Axis Seasonal Reinforcement Segment, the Axis player receives one Axis Nationalist step of any type for each VP in the Box currently occupied by the "Axis Tide" VP Marker. These steps are received in addition to Axis minor country replacement steps.
- No Axis Nationalist replacement steps are received if the VP Marker is in the 0 VP Box or on its "Allied Crusade" side, or if the "AntiComintern Pact" Marker is not on the Strategic Warfare Track.
German Festung Europa Replacements
Important: German Festung Europa Replacements are received during Axis Seasonal Reinforcement Segments only if the "No Retreat" Marker is on the Victory Point Track. This Marker enters the game when the Axis player reveals his Festung Europa Option card. They are not received if the Marker is not on the VP Track, or if it reads "Military Takeover."
During each Axis Seasonal Reinforcement Segment the Axis player receives one additional German infantry replacement step for each VP in the Box occupied by the VP Marker if it reads "Axis Tide." If he is entitled to more than one such infantry step in a single Reinforcement Segment, he can exchange two such infantry steps and receive one German armor step instead. Only Festung Europa replacement steps can be exchanged in this way. If for example, the "Axis Tide" VP Marker is in the 4 VP Box, the Axis player could take two German armor steps, OP One German armor step and two German infantry steps.
1.2.5 Western Allied Additional Seasonal Replacement Steps
Western Allied Minor Countries
During each Western Allied Seasonal Reinforcement Segment, the Western Allied player receives one Western Allied minor country replacement step of any type for each VP in the Box currently occupied by the "Allied Crusade" VP Marker, plus a number of steps equal to the US Level number (if any) on the Western Allied Current Option card. The Western Allied player may allocate the step(s) thus received to any Western Allied minor country or countries.
- Partisan units are considered Western Allied minor country units-these are added to the Western Allied Force Pool when Total War breaks out, and cannot be taken as replacements before then.
- Seasonal minor country replacement steps cannot be allocated to a Western Allied minor country while it is conquered.
Western Allied French
During each Western Allied Seasonal Reinforcement Segment, the Allied player receives one additional French replacement step of any type. This step is in addition to any Western Allied minor country step(s) allocated to France. The additional French replacement step is not received if any of the following conditions apply:
- Axis units occupy any city in France or French North Africa;
- Appeasement Restrictions are in effect;
- Vichy has been created at any time during the game.
1.2.6 Soviet Allied Additional Seasonal Replacement Steps
Soviet Allied Minor Countries
During each Soviet Seasonal Reinforcement Segment, the Soviet player receives one Soviet Allied minor country replacement step of any type for each VP in the Box currently occupied by the "Allied Crusade" VP Marker. The Soviet player may allocate the step(s) thus received to any Soviet Allied minor country or countries.
- No Soviet Allied minor country replacement steps are received at all if the VP Marker is in the 0 VP Box or reads "Axis Tide," or if there are no Soviet Allied minor countries.
Soviet Lend Lease Replacements
If (and only if) the "Lend-Lease" Marker is in the Soviet Force Pool, the Soviet player rolls one die for additional Soviet replacement steps during each Soviet Seasonal Reinforcement Segment. The Lend-Lease Table itself, and the modifiers that apply to the die roll, are printed on the Soviet Force Pool Display. Modified die rolls less than 1 are treated as 1.
- Soviet Lend-Lease replacements are not received if there is a Truce Marker of any type (Nazi-Soviet Pact, Armistice, or Negotiations) in Moscow.
1.3 Placing Replacement Units
Replacement steps are placed directly on the map as one-step corps units-a player cannot place multi-step units as replacements. Only those one-step corps units currently in a player’s Force Pool are available to be placed as replacements. The Axis player cannot, for example, take an SS panzer corps as a German panzer replacement step if no SS panzer corps unit is currently available in the Axis Force Pool.
Many one-step corps units are the reduced-strength sides of two-step army units. When in the Force Pool, these corps are available to be taken as replacement corps. You '11 get the chance to build them up to full-strength two-step armies during your Organization Segment
(2.4).
Only infantry-type corps units (infantry, cavalry, mountain, and airborne*) can be taken as infantry replacement steps. Any type of corps unit can be taken as an armor, tank, or panzer replacement step. You can always take an infantry-type corps as an armor replacement, in other words, but you can never take an armor-type corps as an infantry replacement.
- A player must spend two infantry-type replacement steps to take a one-step airborne corps as a replacement unit. The Western Allied player must use a US and a British infantry replacement step if he wishes to take the Allied airborne corps-this unit may then be placed as either a US or a British replacement unit.
Players cannot accumulate or save replacement steps. If a player cannot place all scheduled replacement steps because there are not enough legal placement hexes, or because there are not sufficient one-step corps units of the type called for in his Force Pool, the unplaced replacement steps are lost forever. A player may voluntarily destroy friendly units on the map to obtain sufficient one-step corps, or to make room in the available placement hexes for the corps he wishes to place. Stacking limits are enforced after Seasonal Reinforcement Segments; so don't pile six replacement corps units into the same hex-you'll have to eliminate three of them.
Political Events and Conditional Events will sometimes allow players to add replacements during phases or segments other than the Seasonal Reinforcement Segment. These special replacements are placed exactly like replacements received during the Reinforcement Segment of a Seasonal Phase.
Each replacement corps unit is placed on the map in a city hex in the unit's home country. A replacement corps cannot he placed in a city hex that contains an enemy unit (including enemy Air Support units, even if there are other friendly units in the hex).
- The US Box is a home country city for both British units and US.
- The Trans-Africa Box is a home country city for British units.
- Any capital city occupied by the SHAEF HQ Marker is a home country city for both British units and US.
- Any port occupied by the British Naval Base Marker is a home country city for British units.
- Soviet replacement corps can also be placed in any hexes in the Soviet Union occupied by Soviet HQ units that can trace a supply line to Moscow. This helps the Soviet player concentrate his replacements while underscoring the importance of Moscow as a transportation and communication hub.
- Though French North Africa and Syria are considered part of France (12.2), French corps lacking a Colonial designation can never be placed as replacements in cities in French North Africa or Syria, and French Colonial corps can only be placed as replacements in cities in French North Africa or Syria.
Axis Nationalist units have no "home country" in game terms. Axis Nationalist replacement corps can be placed in any city that is also a capital and/or a Strategic Hex (Axis, Soviet, or Western Allied). The city must be free of enemy units (including Air Support units), and must be occupied by an Axis ground unit that can trace supply.
Partisans also have no "home country" in game terms. Partisan replacement corps can be placed only in unoccupied rough or city hexes in any Soviet Allied, Western Allied, or Conquered Western Allied minor country or countries. The hex must be completely vacant. Partisans can also be placed in such hexes in the Soviet Union, Great Britain, Greater Germany, Italy, and France (but not in neutral Vichy territory), but only if the country has collapsed at any time in the game.
- Partisan replacement corps can never be placed in Axis Zones of Control.
- No more than one Partisan replacement corps can be placed in a given hex during a single Western Allied Seasonal Reinforcement Segment.
- There can never be more Partisan units in a country at one time than there are units belonging to that country in the counter mix. Thus, there can never be more than one Partisan unit in Denmark-Norway at any given time, since there is only one Danish-Norwegian unit in the counter mix; up to three Partisan units can be in Portugal at the same time, since there are three Portuguese units in the counter mix.
In a "live" enemy country, be sure to garrison the enemy cities you take to prevent enemy replacements from popping up in them. In a Russian campaign, for example, the Axis player will want to be sure to occupy all the Soviet cities he can before each Soviet Seasonal game turn.
Players will notice that partisans cannot be placed in the Soviet Union unless it has collapsed. This is not an oversight. It was found during playtesting that partisan units in the Soviet Union had an impact on the Russian campaign out of proportion to their historical effect. You'll find that the axis player will garrison captured Soviet cities to prevent Soviet replacement corps from being placed in them, creating a realistic and appropriate drain on axis front-line strength.
2. Initial Administrative Phase
During his Initial Administrative Phase, the phasing player will resolve any Political Events on his Current Option Card, place Convoy Markers, attempt to establish Air Superiority, and organize his ground forces.
2.1 Political Event Segment
If the phasing player's Current Option card is face down, or does not have a Political Event on it, skip this Segment.
If the phasing player's Current Option card is face up and has a Political Event on it, he must resolve the Political Event, even if he has already "resolved" the event on an earlier turn-he must resolve the event anew each turn until the card is turned face down (Axis Treaty and Ultimatum cards only-see 16.1), or is discarded during a Seasonal Option Card Segment (1.1.1).
Most Political Events are resolved by rolling one die, applying the Political die roll modifiers, and comparing the roll to the Political Event Table on the card. Modified die rolls less than 1 or greater than 6 are treated as "1" and "6" respectively.
Some results on Political Event Tables will direct players to one of the other Political Event Tables printed on the Player Aid Card. Roll the die again, apply the Political die roll modifiers, compare the roll to the appropriate table, and implement the result immediately. It is possible that an additional roll on yet another Political Event Table will be called for. Continue rolling (with Political die roll modifiers) until some final result is obtained-a final result is any result that does not call for another die roll. For details of Political Event results, see 16-Political Event Results.
Important: Political die roll modifiers are applied only during Political Event Segments, and only when a Political Event Table is in use (some Political Event Tables are printed directly on Option cards under the heading "Political Event Segment," and there are six other Political Event Tables located on the Player Aid Card). Do not apply Political die roll modifiers to Conditional Events or to any other die rolls.
2.2 Convoy Segment
During his Convoy Segment, the phasing player can change the location and mode of his Convoy Markers. Because the Western Allies have no Convoy Markers (and no need for them), the Convoy Segment is always skipped during Western Allied player turns.
Important: Axis and Soviet Allied units can use Naval Transport (3.7) to cross a Naval Zone only if it contains a friendly Convoy Marker in Troop Convoy Mode, and can trace supply (10.2) across a Naval Zone only if it contains a friendly Convoy Marker in Supply Convoy Mode. Western Allied units are not dependent on Convoy Markers to use Naval Transport or to trace supply across Naval Zones.
2.2.1 Convoy Marker Placement Procedure
The phasing player must first remove all his Convoy Markers from the map and place them in his Force Pool.
The phasing player can then place any Convoy Markers in his Force Pool on the map, one at a time-simply place the Marker on the map somewhere clearly within the desired Naval Zone.
Convoy Markers cannot be placed in a Naval Zone that does not contain a friendly port (10.4) in the Convoy Marker's home country. German Convoy Markers can only be placed in the Baltic or North Sea; the Italian Convoy Marker can only be placed in the Eastern or Western Mediterranean-the Axis player will need the Vichy Convoy Marker if the wants one in the North Atlantic.
- Any Axis friendly port (10.4) in continental France can be considered a friendly home-country port for the Axis Vichy Convoy Marker.
- The Axis Black Sea Convoy Marker has no "home country." If (and only if) Sevastopol or Istanbul is an Axis friendly port (10.4), the Axis player can place his Black Sea Convoy Marker in the Black Sea Naval Zone only-it can never be placed in any other Naval Zone.
- The Soviet Convoy Marker cannot be placed in the Arctic Sea Naval Zone during Snow turns.
- Convoy Markers cannot be placed in a Naval Zone containing any enemy (i.e. non-phasing) Air Support unit or units-a Convoy Marker can be placed in a Naval Zone that contains enemy Convoy Markers or Beachhead units.
Clarification: Not only can you place two German Convoy Markers in the Baltic Sea, you can place German Convoy Markers in the Baltic Sea even if there is already a Soviet Convoy Marker in the Baltic Sea-enemy Convoy Markers have absolutely no effect on each other.
2.2.2 Convoy Mode
As he places his Convoy Markers, the phasing player also sets the mode of those Convoy Markers. Each Convoy Marker can be placed on the map in either Troop Convoy mode or Supply Convoy mode, at the phasing player's discretion.
- A Convoy Marker in Troop Convoy mode will allow Naval Transport to be conducted from port to friendly port across the Naval Zone in which it is placed (3.7).
- A Convoy Marker in Supply Convoy mode will allow supply to be traced from friendly port to friendly port across the Naval Zone in which it is placed (l0.2).
You might be surprised to see the Soviet Convoy Marker transporting supplies across the Baltic Sea on one turn, and transporting troops across the Black Sea on the next turn. Folks, it ain 't the same fleet. Convoy Markers represent naval activity, not the actual ships. Convoy mode is very important for those dependent on Convoy Markers (everybody but the Western Allies). For example, if Italy is Axis and the Italian Convoy Marker is in Troop Convoy mode, the Axis player can ship corps across the Mediterranean, but his units in North Africa will be left out of supply-which will seriously impair their ability to place Air Support units, combine during the Organization Segment, move during the Operational Movement Segment, use armor and HQ shifts, and advance after combat. Don 't forget to switch to Supply Convoy mode when ready to take the offensive, and don't neglect the ability to stretch your convoy capacity by placing Air Support units in Naval Zones (2.3.3) to perform Convoy Support (3.72).
2.3 Air Superiority Segment
During his Air Superiority Segment, the phasing player places his Air Support units in land hexes and/or Naval Zones, non-phasing players may use Air Support units to contest such placement, and the phasing player may convert his Air Support units into Beachhead units.
2.3.1 Air Superiority Procedure
The phasing player must first remove all his Air Support and Beachhead units from the map and place them in the Delay Box. If you have phasing ground units in an All-Sea hex from which you just removed the Beachhead unit, don't panic-yet. You'll have the opportunity to place afresh Beachhead in the hex before you're called on to "sink" those ground units (see 2.3.5-Beachhead Creation).
If the phasing player has any Air Support units on his Available Air Support Track, he can then place these units on the map, one at a time. Each available phasing Air Support unit can be placed in a land hex or in a Naval Zone. As each unit is placed, non-phasing players have the option to "contest" placement if they have any Air Support units on their own Available Air Support Tracks.
After the non-phasing player contests, declines to contest, or is unable to contest a placement, the phasing player may then place another Air Support unit. The non-phasing player must again decide whether or not to contest Air Superiority. Continue in this fashion until the phasing player runs out of available Air Support units or simply announces that he is done placing his Air Support units. The phasing player is not required to place all, or even any, of his available Air Support units-he may wish to save some for his next turn, or to contest placement during the Air Superiority Segment of his opponent's upcoming Player Turn.
When in play, the German Me-262 Jet Fighter Air Support unit can only be used to contest Air Superiority-it can never be placed in a land hex or Naval Zone, and can never be converted into a Beachhead.
- When in play, the German Type XXI U-boat unit functions like a German Air Support unit except that it can only be placed in Naval Zones. It cannot be placed in a land hex, cannot contest placement, and cannot be converted into a Beachhead. It’s placement can be contested by enemy Air Support units.
2.3.2 Placing Air Support Units in Land Hexes
Phasing Air Support units can be placed in a land hex that is within three hexes of a supplied HQ unit, or within three hexes of any city or port occupied by a supplied ground unit-the HQ unit or ground unit must be the same nationality as the phasing Air Support unit. A HQ unit, city, or port in a hex containing an enemy Air Support unit cannot be used for this purpose.
- The three-hex range cannot be traced across neutral territory (including Switzerland), but can be traced across all other terrain types, including All-Sea hexes and hexsides.
- Air Support units cannot be placed in an impassable land hex or a land hex in a neutral country.
- Air Support units cannot be placed in a land hex during Mud turns.
- Air Support units cannot be placed in or adjacent to a land hex already containing any Air Support unit, friendly or enemy.
- Air Support units can be placed in a land hex containing friendly or enemy ground units.
2.3.3 Placing Air Support Units in Naval Zones
Phasing Air Support units can be placed in a Naval Zone containing a friendly port (10.4) occupied by a supplied ground unit of the same nationality as the phasing Air Support unit-simply place the phasing Air Support unit on the map somewhere clearly within the desired Naval Zone. A port in a hex containing an enemy Air Support unit cannot be used for this purpose.
- Air Support units cannot be placed in a Naval Zone containing an enemy (i.e. non-phasing) Air Support unit-the presence of other friendly Air Support units or enemy Beachhead units does not prevent placement in a Naval Zone, nor does the presence of the German Type XXI U-Boat unit.
2.3.4 Contesting Air Superiority
As each phasing Air Support unit is placed, the non-phasing player has the option to contest Air Superiority if he has any Air Support units on his Available Air Support Track. The non-phasing player must decide whether or not to contest Air Superiority as each phasing Air Support unit is placed. Such decisions are final-he may not go back later in the same Air Superiority Segment and contest the placement of an Air Support unit he has already declined to contest.
- When a phasing Air Support unit is placed in a land hex, the non-phasing player can contest Air Superiority if the placement hex is in or adjacent to a hex occupied by a supplied friendly ground unit of the same nationality as the contesting Air Support unit.
- When a phasing Air Support unit is placed in a Naval Zone, the non-phasing player can contest Air Superiority if the Naval Zone contains a friendly port occupied by a supplied ground unit of the same nationality as the contesting Air Support unit. A port in a hex already containing an enemy Air Support unit cannot be used for this purpose.
When Air Superiority is contested, both the phasing Air Support units (the unit being placed) and the non-phasing (contesting) Air Support unit are immediately placed in the Delay Box. This is the only effect of contesting Air Superiority.
2.3.5 Beachhead Creation
After Air Superiority placement is complete, the phasing player may convert any of the phasing Air Support units he placed in Naval Zones into Beachhead units. To convert, flip the Air Support unit over to its Beachhead side and place it in any All-Sea hex in that Naval Zone. Beachheads can be placed in All-Sea hexes only (never in hexes containing a mixture of sea and land), and only in All-Sea hexes adjacent to a hex containing land.
- The non-phasing player cannot contest Beachhead creation-his option to contest came when the phasing Air Support unit was initially placed in the Naval Zone.
- Beachheads cannot be placed in hexes containing other Beachheads (friendly or enemy) or in hexes adjacent to land hexes containing enemy Air Support units.
- Air Support units can never be converted into Beachhead units in the Arctic Sea Naval Zone, nor in the North Sea, or Baltic Sea Naval Zones during Snow turns (these Naval Zone names are printed in white as a reminder).
Important: After the phasing player has finished converting Air Support units to Beachhead units, all phasing ground units left in All-Sea hexes without friendly Beachhead units are eliminated. Don 't let this happen to you. Try to make it happen to the other guy.
- Multi-step army units with a Step Value of three or four on their full-strength side and HQ units (regardless of Step Value) are placed in the Delay Box. All other units are returned to their Force Pool.
Phasing Air Support units in Naval Zones need not be converted into Beachheads. The phasing player may wish to save them to provide Convoy Support Options during his upcoming Movement Phases, or to block enemy Air Support unit placement in the Naval Zone during the Air Support Segments of the upcoming player turns. Any Air Support unit you leave in a Naval Zone will also prevent the enemy from placing Convoy Markers in that Naval Zone, using Naval Transport to cross that Naval Zone, or tracing supply across that Naval Zone.
You'll really need to try some Amphibious Movement and Naval Transport to figure out the implications of Beachhead placement. Suffice it to say here that Beachhead units function both as friendly ports and as amphibious bridges - start thinking of Beachhead units as mobile terrain features rather than combat units. There are two different ways to get ground units to or from a Beachhead:
- A friendly Beachhead is a friendly port (10.4). One-step corps units can use Naval Transport (3.7) to move between friendly ports and Beachheads in the same Naval Zone.
- A friendly Beachhead unit functions as an amphibious bridge (3.6). Any unit (including multi-step units) can cross an All-Sea hexside to get to or from a friendly Beachhead during an Operational or Reserve Movement Phase. Phasing units can also attack an adjacent coastal hex across an All-Sea hexside from a friendly Beachhead.
That's it in a nutshell. Sea Lion, anyone?
- Efficient use of Air Superiority is one of the keys to victory in Krieg! Air Support units provide combat shifts, block enemy movement and retreat, negate enemy Zones of Control and make invasions possible. Learn how to place them and when to contest Air Superiority. One thing that won 'tie clear right away is that Air Superiority is not merely a function of the number of Air Support units you have-Delay die roll modifiers play a huge role (pun intended). The mighty Luftwaffe is far less frightening when the Axis player is adding 3 to his Delay die rolls.
2.4 Organization Segment
During his Organization Segment, the phasing player can combine steps on the map to form powerful and stacking-efficient multi-step army, fortress, and HQ units. He can also break down multi-step units into an equivalent number of one-step corps-sized units during his Organization Segment. One-step corps units can use Naval Transport and the special Road/ Rail movement rate-they are transportable and fast.
Important: The phasing player must make all the combinations he wishes to make during his Organization Segment before he begins breaking down units. You will not be able to breakdown a multi-step army unit, for example, and re-combine the same steps to form a multi-step HQ unit in a single Organization Segment.
The units available in a player's Force Pool are an absolute limit on unit combination and breakdown. At any time during his Organization Segment, the phasing player can, if he wishes, voluntarily destroy any friendly ground unit or units already on the map and place them directly in his Force Pool. This can be a useful (but costly) way to circumvent the Delay Box when you 've just got to have that HQ unit right now.
2.4.1 Multi-step Units
All ground combat units in the game are composed of a certain number and type of steps. The basic building block for all multi-step army, fortress, and HQ units is the one-step corps unit. All corps units are one-step units, and are either infantry-type (infantry, cavalry, airborne, and mountain) or armor-type (armor, cav-mech, and mechanized).
The number of steps in a unit is indicated by the unit's Step Value printed in the upper right of the counter. Most multi-step units are composed exclusively of infantry-type steps. The Organization Displays detail the step-type composition of those multi-step units in the game that are not composed exclusively of infantry-type steps. Refer to these Displays when combining one-step corps units to form multi-step units, when breaking down multi-step units, and when taking step losses.
Display Example
- A three-step full-strength German Panzer army is composed of one German infantry step and two German armor (panzer) steps.
- A three-step full-strength German Panzer army can be formed from, or broken down into, its own two-step (reduced-strength) German Panzer army side and one German armor corps.
- A two-step (reduced-strength) German Panzer army can be formed from, or broken down into, one German infantry corps and one German armor corps.
Combination and breakdown is done one step at a time, but can continue as long as further combinations or break downs are possible (as long as all combinations are completed before any break downs are begun).
If for example, the Axis player has one German infantry corps and two German armor corps stacked in the same hex and in supply, he can
- first combine the infantry corps with one of the armor corps to form a reduced-strength two-step German Panzer army (if he has one available in the Axis Force Pool). He can then combine the second armor corps with the two-step Panzer army and flip the Panzer army to its full-strength, three-step side, alt in the same Axis Organization Segment.
When combining or breaking down units, all involved units must be of the same nationality, with three exceptions.
The Allied player can mix British and/or US corps together in the 15th Allied HQ unit. The corps units making up this HQ unit must be placed in the 15th Allied army group Holding Box in the Western Allied Force Pool-these are the corps taken when breaking down this unit (these same corps need not, however, be used to re-form this HQ). This is solely to prevent crafty Allied players from forming this unit with US corps and then breaking it down into British corps or vice-versa-you can t use this HQ as an Allied "Nationality Converter."
- The Axis player uses German and Italian corps as specified on the Axis Organization Display when forming or breaking down the two German-Italian multi-step units.
- The Axis player uses a Finnish corps and the German Mountain corps when forming or breaking down the German-Finnish 20th army multi-step unit.
2.4.2 Combining Units
Important: Only supplied units stacked in the same hex can be combined. Units in a hex containing an enemy Air Support unit cannot combine.
A multi-step unit from the Force Pool can be formed on its reduced-strength side by combining one-step corps units of the appropriate type. Remove the appropriate number of one-step corps units of the appropriate type from the hex, place them in the Force Pool, and replace them with the desired reduced-strength multi-step unit from the Force Pool.
Clarification: the display is or intended to show the mix of unit types need to form certain kinds of multi-step units, particularly the mix of infantry-type and armor-type steps needed. Some confusion may result from the fact that specific corps units are pictured on the organizational display. Look, for example, at the British 8th army unit pictured on the Western Allied display. The British infantry-type corps used for a two-step British army need not be 1-1-3 units specifically. The Western Allied player could also use a 1-1-3 and a 1-2-2 or two 1-2-2 British infantry-type corps. Similarly, the Soviet Allied player could use any three Soviet infantry-type corps to form three-step Soviet front unit (including Cavalry corps). The German-Italian units pictured on the axis display show both type and nationality of the units needed to form these two multi-national units.
The British Gibraltar Fortress unit and the Finnish Mannerheim Fortress unit are one-step units (but are not corps) on their reduced-strength side. If available in the Force Pool, these units are formed by converting a one-step corps unit of the appropriate nationality.
A reduced-strength unit with a full-strength side can be increased to full-strength by combining with a one-step corps unit of the appropriate type. Remove a one-step corps of the appropriate type from the hex, place it in the Force Pool and flip the reduced-strength unit to its full-strength side.
The armor-type steps used to form the sixth SS panzer army, or to increase it to full strength, must be SS panzer corps. You can take any panzer corps when breaking down the sixth SS panzer army but you got to use the good stuff to build.
A player cannot "switch" multi-step units in the process of combining.
Allied multi-step units can never be at three- or four-step strength on the map while Limited War is in effect. They can be built up to two-step strength during Limited War. Once Total War breaks out, Allied players are free to form three- or four-step Allied multi-step units for the duration of the game.
Exception: The French Maginot fortress units begin the game at full three-step strength. If reduced below three-step strength, they are subject to this rule.
Units with a movement allowance of 0 can be formed only in certain hexes.
- A Soviet Fortress unit can be formed only in its designated city-Mos(cow), Len(ingrad), or Sev(astopol).
- The British Gib(raltar) Fortress unit can be formed only in Gibraltar.
- The British Lon(don) HQ unit can be formed only in London.
- The Finnish Man(nerheim Line) Fortress unit can be formed only in Finland or the Finnish Frontier Border Region.
The French Mag(inot Line) Fortress units can be formed only in hexes in continental France (not in French North Africa). They can only be placed in hexes w3319, 3420 and Metz.
- German Fortress units can be placed only by means of the Festung Europa Fortress conversion process (2.4.4)-they can never be formed by combining steps.
- The German FB (Fuhrer Bunker) HQ unit can be placed only according to the provisions of Axis card #25. If eliminated, it never returns to play.
Examples: If the Soviet player has one plain infantry corps and one Guards infantry corps in the same hex, he can combine them to increase either one to its two-step, full-strength side - he cannot remove two plain infantry corps from the map and replace them with a two-step Guards army from the Force Pool. The Soviet player can remove any two infantry-type corps units from a hex and replace them with a two-step reduced-strength HQ unit if one is available in the Soviet Force Pool.
The Axis player cannot combine a two-step German infantry army with a one-step infantry corps to form a three-step German HQ unit, even though the number and type of steps involved would be the same in both cases (this would be a case of "switching" multi-step units).
The Soviet player can combine three one-step infantry-type corps to form a three-step Soviet infantry Front unit - he cannot combine a two-step HQ unit or a two-step infantry' army with a one-step infantry-type corps to form a three step infantry Front unit (another case of' "switching" multi-step units).
The Western Allied player can remove a one-step British infantry corps from Gibraltar and replace it with one-step reduced – strength Gibraltar Fortress unit.
2.4.3 Breaking Down Units
After all combinations have been done, one-step corps units can be created by breaking down multi-step units, essentially reversing the processes described in 2.4.2 above. Once the phasing player has begun to break down units, he cannot go back and combine any more units. Stacking limits are enforced after Organization Segments, so don 't break two three-step units down to six one-step units in the same hex-you '11 have to eliminate three of them.
Important: Whenever any multi-step unit with a Step Value of 3 or 4 on its full-strength side, or any Fortress or HQ unit (regardless of its Step Value), is removed from the map as a result of unit break down, the owning player must place that unit in the Delay Box.
In other words, units with a Step Value of] on either side are returned directly to the Force Pool unless they are HQ or fortress units. All other units go into the Delay Box. Remember that you can always voluntarily destroy a unit on the map and place it directly in your Force Pool. This allows you to circumvent the Delay Box, but you lose the steps that were in the unit on the map.
Units need not be in supply to break down, and can be broken down in hexes occupied by enemy Air Support units.
- A Fortress unit adjacent to an enemy unit cannot be broken down.
- A German Fortress unit can never be broken down (it can be reduced or eliminated by taking step losses).
- A one-step British or Finnish Fortress unit can be "broken down" (i.e., converted) into a one-step infantry corps unit of the same nationality.
A player cannot switch multi-step units in the process of breaking down.
The Axis player cannot, for example, break down a three-step German infantry army into a one-step German infantry corps and a two-step German HQ unit. He must reduce the three-step army to its own two-step side and place a one-step German infantry corps in the hex.
When placing one-step corps units on me map while breaking down multi-step units, you will have to observe a few special "elite" distinctions with regard to unit-type. These special restrictions only apply when breaking down multi-step units-you can always take an airborne corps as an infantry-type step replacement, for example, or use an airborne corps as an infantry-type step when combining to form a multi-step unit. But remember that it costs two infantry replacement steps to take a one-step airborne corps as a replacement unit.
- Airborne corps can never be placed as infantry-type steps when a multi-step unit is being broken down.
- German SS panzer corps can only be placed when the German 6SS Panzer army is being broken down.
- Cavalry corps, the German mountain corps, and Soviet Shock ("S") and Guards ("G") corps can only be placed when the two-step unit on their reverse is the unit being broken down.
Examples: You break down a Soviet two-step Guards army by flipping it to its own one-step (reduced Strength) Guards corps side, and placing a plain Soviet infantry corps (not another Guards corps, or Shock corps, or cavalry corps) in the hex with it. You break down a Soviet two-step infantry army by flipping it to its own one-step infantry corps side, and placing another plain Soviet infantry corps (not a Guards corps, or Shock corps, or cavalry corps) in the hex with it. When you break down a two-step Soviet HQ or Fortress unit, you place two plain Soviet infantry corps in the hex (and you place the HQ or Fortress unit in the Delay Box).
It is the Axis Organization Segment of July-August 1944. The Axis player has the army group G HQ unit in his Force Pool, but does not have any infantry corps where he wants to form the HQ. He does, however, have the three-step 19th army right there. After doing his other combinations, the Axis player breaks down the 19th army. He first flips it to its reduced-strength two-step side and places a one-step German infantry corps in the hex. He then removes the two-step army from the hex, places it in the Delay Box, and replaces it in the hex with two more German one-step infantry corps units from his Force Pool. During the next Axis Organization Segment (August-September 1944), the Axis player combines two of the three corps (they stayed in the same hex, and they're in supply), replacing them with the German army Group G HQ unit from the Force Pool on its reduced-strength two-step side. He could continue by combining the third infantry corps with the two-step HQ, returning the corps to the Force Pool and flipping the HQ unit to its full-strength three-step side.
Note that it took two Axis Organization Segments to turn a three-step infantry army into a three-step HQ. Step combination and break down is not quite as simple as "making change" (as in some wargames), though it's not really much more difficult.
2.4.4 Festung Europa German Fortress Conversion
During each Axis Organization Segment, the Axis player may convert one (and only one) one-step German corps unit into a two-step German fortress unit if (and only if) the "No Retreat" Marker is on the VP Track.
- Fortress Conversion is done after all combination and break down has been done.
- To convert a German corps unit, simply return it to the Axis Force Pool and replace it on the map with a German fortress unit (0-3-0) from the Force Pool. The fortress unit is placed as a full-strength, two-step unit, and must be placed in the hex from which the one-step corps was removed. Any type of German corps unit can be converted into a German fortress unit, and need not be in supply to be converted.
- Festung Europa Fortress Conversion is the only way for the Axis player to place German fortress units on the map. German fortress units can never be converted back into German corps units, and cannot be broken down.
Conversion will increase both the defense strength and the Step Value of German forces, but at a considerable cost in mobility.
3. Operational Movement Phase
Every unit in the game with a Movement Allowance printed on it is a ground unit, and every ground unit in the game has a Movement Allowance printed on it. A unit's Movement Allowance is the number of Movement Points (MPs) the unit may spend during each Movement Phase. Units expend Movement Points to move across the map from hex to adjacent hex. The exact MP cost to enter a hex depends on the terrain in that hex and along the hexside crossed to enter the hex. These costs are listed on the Terrain Effects Chart printed on the map.
3.1 Moving units
The phasing player can move all, some, or none of his supplied ground units once each during his Operational Movement Phase.
Important: A unit that cannot trace supply cannot move at all during the Operational Movement Phase.
Units move one at a time. A unit moves from hex to adjacent hex, in any direction or combination of directions the moving player wishes, spending MPs from its Movement Allowance as it enters each hex, up to the limit of its Movement Allowance. Moving units are not required to expend all of their available MPs before stopping, but a player must complete the movement of one unit before beginning to move another unit. No unit can move more than once in a given Movement Phase. MPs cannot be accumulated from turn to turn, nor can they be loaned or transferred from one unit to another. Stacking limits are enforced at the end of every Movement Phase, so don 't pile three multi-step units into the same hex-you '11 have to eliminate one of them.
A supplied phasing ground unit with a Movement Allowance greater than 0 can always move one hex even if it does not possess sufficient MPs to pay all the costs involved in moving one hex. A unit cannot use this guaranteed one-hex movement to enter hexes or cross hexsides prohibited to it during movement (see the Terrain Effects Chart), or to violate Zone of Control effects that prohibit movement (see 8-Zones of Control). In other words, a unit can 't do anything it couldn 't do if it had all the Movement Points in the world.
3.2 Enemy Units &Zones of Control
Units can never enter hexes containing enemy units (including enemy Air Support units, even if there are other friendly units in the hex). Units can freely leave hexes containing enemy Air Support units. All non-phasing units are considered enemy units.
A unit must stop moving when it first enters a hex containing an Enemy Zone of Control (see 8-Zones of Control) during the Operational Movement Phase unless another friendly unit is present in the hex to negate the Enemy Zone of Control. A unit beginning the Operational Movement Phase in an Enemy Zone of Control (EZOC) can freely leave, and may move directly into another EZOC (where it must, of course, immediately stop, unless another friendly unit is present to negate the EZOC).
- The presence of a friendly unit in an EZOC negates the effects of the EZOC on Operational Movement.
3.3 Terrain
Each hex a unit enters costs it a number of its MPs. Crossing certain types of hexsides requires paying an additional MP cost. All these costs are listed on the Terrain Effects Chart. The cost for crossing hexside terrain is paid in addition to the cost of entering the adjacent hex.
3.4 Road/Rail Lines
Road/Rail hex costs differ according to the size of the moving unit.
- Multi-step units pay 1 MP per hex.
- One-step corps units pay only 1/2 MP per hex.
These movement cost benefits are only available to units moving from a Road/Rail hex directly to an adjacent, connected Road Rail hex. When using these benefits, ignore any terrain costs for the hex being entered or for any terrain along a hexside crossed by the Road/Rail Line. Units can use the benefit when crossing a Strait that "connects" Road/ Rail Lines, even though the Road/Rail Line graphic itself does not appear to cross the water on the map.
3.5 Weather and Movement
- No unit can ever exit a hex in the Zone of Control of enemy units during the Operational Movement Phase of a Mud turn (11.1), regardless of the presence of other friendly units in the hex.
- A unit must always stop immediately upon entering or exiting a hex in an enemy Zone of Control in a hex affected by snow (11.2) during the Operational Movement Phase of a Snow turn, regardless of the presence of other friendly units in the hex.
3.6 Amphibious Movement
A Strait is considered to exist across each All-Sea hexside separating a Beachhead unit from any adjacent hexes containing land. Friendly Beachhead units (see 2.3.5) thus function as "bridges" when occupying All-Sea hexes adjacent to coastal hexes. Phasing units can cross All-Sea hexsides when moving from a coastal hex to an adjacent friendly Beachhead, or from a friendly Beachhead to an adjacent coastal hex. All normal movement rules apply to this type of movement. Amphibious movement is not Naval Transport (see 3.7.1), and can be performed by multi-step units.
3.7 Naval Transport
3.7.1 Procedure
Only one-step corps units can ever use Naval Transport. Multi-step units and one-step fortress or HQ units can never use Naval Transport. A unit cannot both move and use Naval Transport in the same Movement Phase. The phasing player can use Naval Transport at any time during his Movement Phase.
To use Naval Transport, a unit must begin the Movement Phase in a port (port hex, the US or Trans-Africa Box, or an All-Sea hex containing a Beachhead unit). Units using Naval Transport must end up in a friendly port in the same Naval Zone as the port in which they began (see 10.4, and note that a friendly Beachhead unit is by definition a friendly port).
- A unit cannot use Naval Transport to enter a port unless it meets the definition of a friendly port (10.4). A unit may freely leave a port whether or not it is friendly. A unit can, for example, use Naval Transport to leave a port containing an enemy Air Support unit, but cannot use Naval Transport to enter a port containing an enemy Air Support unit.
- Phasing Axis and Soviet Allied units cannot use Naval Transport to cross a Naval Zone unless it contains a phasing Convoy Marker in Troop Convoy Mode. The units and Troop Convoy need not be the same nationality-German units can cross a Naval Zone containing an Axis Italian Troop Convoy Marker, for example.
- Western Allied units are not dependent on Convoy Markers to use Naval Transport across Naval Zones. They can use Naval Transport to cross any Naval Zone in which they have a friendly port destination.
- A unit cannot use Naval Transport to cross a Naval Zone containing an enemy Air Support unit.
- Only one unit can cross each Naval Zone in a single Movement Phase (but see 3.7.2 below). However, a single unit can use Naval Transport more than once in a single Movement Phase.
Exception: A British or US unit that enters or leaves the Trans-Africa Box or leaves the US Box cannot continue to use Naval Transport in the same Movement Phase-it must cease Naval Transport upon entering the Trans-Africa Box, or in the first friendly port it enters upon leaving one of these boxes. A unit can never move directly from the US Box to the Trans-Africa Box.
US and British one-step corps units that begin a Movement Phase in Suez or Basra can use Naval Transport to enter the Trans-Africa Box, and US and British one-step corps units that begin a Movement Phase in this Box can move to Suez or Basra if they are friendly ports.
Note: The Trans-Africa Box is not a sea zone. Consequently, any number of Western Allied one-step corps units can move between it and Basra and/or Suez in a single Western Allied movement phase.
Note that several ports-Narvik, Copenhagen, Brest, Gibraltar Malta, Tripoli, and Istanbul-are in more than one Naval Zone. This gives these ports great strategic significance.
Examples: Gibraltar Malta, and Athens are Western Allied friendly ports. A British infantry corps in Bristol can transport across the North Atlantic to Gibraltar then transport from Gibraltar across the Western Mediterranean to Malta, and then transport from Malta across the Eastern Mediterranean to Athens, all in the same Western Allied Movement Phase. Note, however that no more Western Allied units can cross the North Atlantic, Western Med, or Eastern Med in this Movement Phase, as each of these Naval Zones has now been crossed by one unit. But see 3.7.2.
A British infantry corps in Bristol that transports across the North Atlantic to the Trans-Africa Box would have to stop upon entering that Box, and could not move on to land in Suez or Basra until the next Western Allied Movement Phase. A US infantry corps in the US Box that transports across the North Atlantic to Gibraltar would also have to stop upon entering Gibraltar because it used Naval Transport to leave the US Box.
Brest, Gibraltar and Tripoli are Axis friendly ports. A German infantry corps in Narvik can transport to Brest, then to Gibraltar and from there to Tripoli, but only if there are Axis Convoy Markers in Troop Convoy mode in the North Sea (German Convoy), the North Atlantic (Vichy Convoy), and the Western Mediterranean (Italian Convoy) Naval Zones.
3.7.2 Convoy Support Options
At any time during his Movement Phase, the phasing player may use Convoy Support Options in any Naval Zones containing friendly Air Support units. This represents the allocation of air assets to air transport, interdiction, suppression, and convoy protection missions.
Each Convoy Support Option the phasing player uses in a given Naval Zone allows the phasing player to either:
- Naval Transport an additional unit across that Naval Zone (containing a Troop Convoy Marker if you're Axis or Soviet);
-or-
- change the mode of a phasing Convoy Marker in that Naval Zone.
The phasing player may use either or both Options any number of times in a given Naval Zone, limited only by the number of Air Support units he placed there.
For each Convoy Support Option used, a phasing Air Support unit must be removed from the Naval Zone and placed in the Delay Box. The Air Support unit need not be of the same nationality as the Convoy Marker. You can, for example, remove a German Air Support unit from a Naval Zone containing the Axis Italian Convoy Marker to allow an additional Axis unit to cross that Naval Zone, or to change the mode of the Italian Convoy Marker.
More than one Convoy Support Option may he used in a given Naval Zone in a single Movement Phase-the phasing player could ship an additional unit or units and change the mode of a Convoy Marker in a single phase if he placed enough Air Support units in the Naval Zone during the Air Superiority Segment.
Example: It is theAxis Operational Movement Phase. A German infantry corps in Naples transports across the Western Mediterranean to Tripoli (the Italian Convoy Marker is in Troop Convoy Mode in the Western Med). The Axis player has a German and an Italian Air Support unit in the Western Mediterranean. He spends the Italian Air unit to allow a second German corps to transport across the Western Med to Tripoli, and then spends the German Air unit to flip the Italian Convoy Marker to Supply Convoy Mode. This allows an Italian infantry army that began the Movement Phase in Tripoli to trace supply back to Naples, enabling it to move in this Operational Movement Phase.
3.8 Command Paralysis
(Axis only)
If the Command Paralysis Marker is in Berlin at the beginning of an Axis Operational Movement Phase, Axis units cannot enter or exit enemy Zones of Control during this Operational Movement Phase, regardless of the presence of other Axis units.
- The Axis player always removes the Command Paralysis Marker from Berlin at the end of an Axis Operational Movement Phase unless the German FB (Fuhrer Bunker) HQ unit is on the map.
3.9 Partisan Movement Restrictions
Partisans cannot move across border hexsides except to cross a Border Region (see 12.4) hexside within their own country, as defined by its pre-war boundaries. Note that partisan units may attack cross, and their zones of control do extend across, border hexsides.
Partisan units can never use naval transport.
4. Combat Phase
During the Combat Phase, combat can occur between adjacent opposing units at the phasing player's discretion. The player whose Player Turn is in progress is considered the attacker, and the other player is the defender, regardless of the overall strategic situation.
4.1 Blitz Segment
If the current turn is a Mud turn, or if the phasing player's Current Option card is not a Blitz card, or is a Blitz card that has been turned face down (Axis Ultimatum cards-see 16.1), he must skip the Blitz Segment.
If it is not a Mud turn and the phasing player's Current Option card is a face-up Blitz card, the phasing player may perform a Blitz Segment.
4.1.1 Airdrops
Supplied phasing airborne corps can perform Airdrops during a Blitz Segment. To make an Airdrop, the phasing airborne corps must be in supply. Flip the airborne corps unit over to its Airdrop side, and place it in a land hex that is within three hexes (two hexes intervening) of its current location.
- This range cannot be traced across neutral territory (including Switzerland), but can be traced across all other terrain types, including All-Sea hexes and hexsides.
- Airdrop units cannot be placed in or adjacent to a land hex containing an enemy Air Support unit.
- Airdrop units cannot be placed in an impassable land hex, or a land hex in a neutral country.
- Airdrop units can be placed in a land hex containing enemy ground units.
Like Air Support units, Airdrop units count as friendly units, and can be used to negate enemy Zones of Control, or to render an unoccupied port friendly. You'll use Airdrop units for their combat shift, to temporarily block a retreat path, open an advance path, or to grab unoccupied ports or cities.
4.1.2 Blitz Combat
After phasing Airdrop units have been placed, a Blitz Segment proceeds exactly like a Combat Segment with three exceptions:
- The attacker receives a one-column shift to the right during step 4 of Blitz Segment Attack Sequences (4.2.2) whenever a supplied armor-type unit is part of the attacking force;
- The attacker may receive a one-column shift to the right during step 4 of Blitz Segment Attack Sequences (4.2.2) if the defender's hex contains a phasing Airdrop unit (4.1.1);
- Most units cannot attack hexes affected by snow (11.2) during the Blitz Segment of a Snow turn. Phasing German SS units, any other German units adjacent to or stacked with phasing German SS units, and all phasing Soviet, Swedish, and Finnish units can attack during the Blitz Segment of a Snow turn, whether or not the defender's hex is affected by snow.
4.1.3 Landings
Phasing ground units stacked with a friendly Beachhead unit can make an unopposed landing into any adjacent coastal hex that contains no enemy units at the end of a Blitz Segment-simply move the unit or units from the Beachhead into the coastal hex.
- Landing units cannot have participated in combat in the Blitz Segment in which they make an unopposed landing.
- Units need not be in supply to make an unopposed landing.
After all attacks have been resolved and any unopposed landings have been performed, the phasing player must remove any and all phasing Airdrop units from the map and place them in the Delay Box.
If an Airdrop unit is in supply and is not stacked with any enemy units when it is removed, the phasing player may replace it on the map with a one-step infantry corps from his Force Pool. The corps must be of the same nationality as the Airdrop unit (the Western Allied Airdrop unit may be replaced with either a US or a British one-step infantry corps). Only basic one-step infantry corps units can be used - you cannot replace an Airdrop unit with a cavalry corps, mountain corps, or Soviet Guards or Shock corps.
4.2 Combat Segment
An attack is an attempt by phasing ground units to inflict losses and/or retreats on enemy ground units in adjacent hexes.
4.2.1 Combat Parameters
Only units with combat factors can attack or be attacked, though Air Support and Airdrop units can participate in the Attack Sequence.
The phasing player may resolve his attacks in any order he chooses, but must complete an Attack Sequence (4.2.2) for one attack before moving on to another.
An attack must always have a single defending hex as its target. Defending units stacked in the same hex always combine their defense strengths. the defender may not withhold units from combat, nor may the attacker single units out of a defending stack and attack them separately.
Attacking units in the same hex may attack different hexes. The attacker may attack with some of the units in a hex and withhold others from combat. Units with an attack factor of "0" cannot participate in attacks (and so cannot be used to absorb attacker step losses). Units in hexes with Air Support units (enemy or friendly) can attack and can be attacked.
No phasing unit can attack more than once in a single Combat Segment, and no hex can be attacked more than once in a single Combat Segment. A non-phasing unit can be attacked more than once in a single Combat Segment if it ends a retreat in a hex that has not yet been attacked and that is adjacent to phasing units that have not yet participated in an attack.
Nationality
- Minor country units and Partisan units cannot participate in an attack with units of another minor country- "EX" corps units and Axis Nationalist units are exempt from this restriction.
- Soviet Allied and Western Allied units may freely attack each other.
Headquarters Units
A supplied HQ unit has the ability to participate in combat even when not adjacent to (if attacking), or stacked in (if defending), the defender's hex. HQ units have a combat range of two hexes, and can apply their combat ratings to combats within range (this is called "providing ranged support"). The range is traced from the HQ unit to the defender's hex-do not count the hex occupied by the HQ, but do count the defending hex when tracing range (in other words, up to one hex intervening). This range cannot be traced across neutral or impassable hexes or hexsides, but cannot otherwise be blocked (it can be traced across All-Sea or Lake hexes or hexsides, and across hexes containing enemy or friendly units).
- No more than one HQ unit per side can participate in a single combat. An attacking HQ unit thus cannot provide ranged support to an attack that already includes an adjacent HQ; a defending HQ unit cannot provide ranged support to a defending hex that already contains an HQ unit.
- A HQ unit cannot participate in more than one combat per segment. A defending HQ unit that has itself been attacked cannot support another combat later in the same segment-however, a defending HQ unit that has already provided ranged support to one combat does still contribute its defense factor (and HQ
Shift) if an attack is later declared on its own hex.
- A HQ unit cannot provide ranged support to a combat unless at least one other unit of the same nationality as the HQ unit is involved in that combat.
- A HQ unit cannot use ranged support to attack a non-adjacent hex by itself.
Beachheads
Strait hexsides are assumed to exist between Beachhead units and adjacent coastal hexes. Thus, a phasing ground unit stacked with a friendly Beachhead unit in an All-Sea hex can attack an adjacent coastal hex across an All-Sea hexside. A non-phasing ground unit stacked with a friendly Beachhead unit in an All-Sea hex can be attacked from an adjacent coastal hex across an All-Sea hexside.
4.2.2 Attack Sequence
The phasing player must complete the following sequence each time he declares an attack.
Step 1 - The attacking player chooses a hex occupied by enemy units and declares which adjacent phasing ground units will attack it. The attacking player can, at his option, commit a supplied HQ unit to provide ranged support if the attacking force does not already include an adjacent HQ unit. If the attacker cannot muster at least a 1-3 raw odds ratio at this point, he cannot make the attack.
Step 2 - The defending player can, at his option, commit a supplied HQ unit to provide ranged support if there is not already an HQ unit in the defending hex.
Step 3 - Add up the attack factors of all attacking units (including any HQ unit providing ranged support) committed instep 1 above, this is the attacking force. Then add up the defense factors of all defending units in the target hex plus any HQ unit committed in step 2 above, this is the defending force. Divide the defender total into the attacker total, and express the result as one of the ratios found along the top of the Combat Results Table (CRT). Round any fractional results in favor of the defender. At this point in the attack sequence, odds greater than 9:1 or less than 1:3 are treated as 9:1 or 1:3 respectively.
Step 4 - Determine the CRT column shifts available to the attacker and defender. All shifts are cumulative. Note that these are column shifts - a 6:1, 7:1, or 8:1 attack that receives one column shift to the right would be resolved on the 9:1 column.
Terrain & Weather Shifts
- The defender may receive one or more column shifts to the left based on the terrain in the hex occupied by the defending units, or along the hexside(s) separating the adjacent attacking units from the defender's hex (refer to the Combat Shift column of the Terrain Effects Chart on the map).
- The defender receives a one-column shift to the left if the defending hex contains a fortress unit.
- The defender receives a one-column shift to the left during Mud turns.
HQ Support Shifts
- The attacker receives a one-column shift to the right if the attacking force includes a HQ unit (either adjacent to the defending hex or providing ranged support).
- The defender receives a one-column shift to the left if the defending force includes a HQ unit (either in the defending hex or providing ranged support).
Air Superiority Shifts
- The attacker receives a one-column shift to the right for each phasing Air Support unit in or adjacent to the defender's hex.
- The defender receives a one-column shift to the left for each non-phasing Air Support unit in or adjacent to the defender's hex.
- An Air Support unit cannot provide an Air Superiority shift to a combat unless at least one ground unit of the same nationality as the Air Support unit is involved in that combat.
2
- Air Superiority Shifts cannot be received when the defender's hex is affected by snow (11.2).
- A single Air Support unit can provide a shift to any number of combats.
Armor Shift
(only during Blitz Segment attacks!)
- The attacker receives a one-column shift to the right if the attacking force includes at least one supplied armor-type unit. Note that a three-step Western Allied HQ unit is not an armor-type unit, even though an armor corps had to be used to increase it to full-strength.
Airborne Assault Shift
(only during Blitz Segment attacks!)
- If the defender's hex contains a phasing Airdrop unit, and the attacker has received an Armor, HQ, and/or Air Superiority Shift, the attacker receives an additional one-column shift to the right.
After determining the final net column shift, apply it to the column determined in step 3. The result is the CRT column on which the combat will be resolved. Final odds greater than 9:1 or less than 1:3 are resolved on the 9:1 or 1:3 columns respectively.
Step 5 - The attacking player rolls one six-sided die and cross-indexes the die roll with the final odds column on the CRT determined in step 4.
Step 6 - Apply the italicized combat result.
Step 7 - Apply any attrition results, first to the attacking force, then to the defending force. Attrition results are listed below the italicized combat result, and are expressed in terms of step losses-the number to the left of the slash is the attacker's step loss, and the number to the right of the slash is the defender's step loss.
Step 8 - If the defender's hex has been vacated, surviving attacking units may now advance or exploit after combat.
4.2.3 Combat Results
There are two kinds of Combat Results-Italicized results and Attrition results.
Italicized Combat Results
Ar1 - The entire attacking force must retreat one hex. When retreat is not possible, the attacking force must instead take one step loss.
- Ex - The entire attacking force must retreat one hex or take one step loss (attacking player's choice when retreat is possible). If the attacking force takes the step loss, the entire defending force must then retreat one hex or take one step loss (defending player's choice when retreat is possible).
Dr1, Dr2, Dr3 - The entire defending force must retreat the indicated number of hexes. When retreat is not possible, retreat results are converted into step losses on a one-for-one basis.
- When the defender's hex is a city hex, or when all adjacent attacking units are attacking across strait or mountain hexsides, the defender may, if he wishes, freely convert any or all Dr retreat results into step losses on a one-for-one basis.
- Dr results against hexes affected by mud (11.1) or snow (11.2) are reduced:
Dr3 becomes Dr2;
- Dr2 becomes Dr1;
Dr1 becomes Ex;
Ex, Ar1, and Attrition combat results are not affected by weather.
Attrition Combat Results
#/# -The number to the left of the slash is the number of step losses taken by the attacking force. The number to the right of the slash is the number of step losses taken by the defending force.
Retreats
A player may be called on to satisfy combat results by retreating all of his ground units involved in the combat. Retreats are measured in hexes-units do not expend movement points to retreat.
All retreats are conducted by the owning player. To retreat, move the affected units out of the hex they occupy into an adjacent hex. Units must move one hex further from the hex that was the target of the attack with each hex they retreat.
- Stacked units must retreat together-they cannot be retreated to different hexes.
- All ground units in a hex into which units retreat automatically become part of the retreating force, even if they were not originally involved in the combat.
When a force cannot retreat without all or some of its units violating one or more of the restrictions listed below, that force cannot retreat to satisfy its combat result, and must convert retreat results into step losses.
- A unit cannot retreat into a hex, or across a hexside, that it could not enter or cross in a Movement Phase.
- A unit can never retreat into a hex containing an enemy unit (including Airdrop and Air Support units, even if other friendly units are already in the hex). Units can freely retreat out of a hex containing an enemy Air Support or Airdrop unit.
- A unit cannot retreat into a hex in an enemy Zone of Control unless the hex is occupied by a friendly unit (including friendly Airdrop and Air Support units)-if a choice is available, a retreating unit must enter a hex that is not in an enemy Zone of Control at all, as opposed to one in an enemy Zone of Control occupied by a friendly unit.
- A defending force containing a fortress unit cannot retreat.
- A force that includes a HQ unit (including a HQ unit providing ranged support) cannot retreat.
- Units stacked with a friendly Beachhead unit cannot retreat.
Clarification: HQ Units and Combat Results.
An attacking or defending force that includes a HQ unit (including one providing ranged support) cannot retreat-it must lose steps until it has satisfied the retreat portion of its combat result, or until it no longer includes an HQ unit, at which point the force may retreat to satisfy any remaining portion of its retreat result.
A HQ unit providing ranged support is a part of an attacking or defending force only so long as it remains a HQ unit. When a two-step HQ unit takes a step loss and is replaced on the map by a one-step infantry corps, this remnant is obviously no longer an HQ unit.
Defending forces that retreat may be required to "pick up" additional units while retreating. If defending units retreat into a hex containing a unit unable to retreat (a fortress or HO unit. for example), the defending force cannot continue to retreat - it must convert retreat results into step losses until it has satisfied the combat result, or until it no longer contains a unit unable to retreat. Units thus added to a retreating force are themselves available for taking step losses in the process of satisfying the combat results. Note that you can do a lot of damage by forcing enemy units to retreat back onto their HQ units, or by herding enemy units back into an overstocked situation.
It is entirety possible for defending units that retreat from one combat situation to end up in a hex that is the target of another attack in the same Combat Segment. Such units are included in the defense strength of their new hex (unlike many other wargames).
Step Loses
Players satisfy attrition results by taking step losses-that is, by eliminating one-step units and/or removing steps from multi-step units in the attacking or defending force (including any units added to the force as a result of retreat).
- Though retreat results may sometimes be converted into step losses, step losses can never be converted into retreats.
- HQ units providing ranged support are part of an attacking or defending force, and thus are subject to (and available for) taking step losses.
- When an attacking force that includes any armor-type units takes step losses, the first step lost must be an armor step.
- If a unit has a reduced strength on its back, its first step loss must be taken by flipping the unit to its reduced strength side.
- A player cannot switch multi-step units in the process of taking step losses.
- In general, all rules that apply to unit break down (2.4.3) also apply when taking step losses.
Examples: A full-strength, three-step German Panzer army loses a step. The unit must be flipped over to its two-step (reduced-strength) side.
A two-step reduced-strength German Panzer army loses a step. A glance at the Organization Display shows that a reduced-strength German Panzer army is composed of one infantry step and one armor step. The Axis player may thus replace the unit with either a one-step armor corps or with a one-step infantry corps. if the Axis player was the attacker in this combat, losing the infantry step would not be an option-the Axis player would be required to lose the armor step and replace the Panzer army with a one-step infantry corps. In either case, since the Panzer army unit has three steps on its full strength side, it must be placed in the Delay Box.
A full-strength, three-step German Infantry army loses a step. The Axis player must flip the unit over to its two-step side. He may not replace the unit with a two-step HQ unit (or a different two-step army unit), even though a two-step German HQ unit is also composed of two infantry steps-this would be a case of "switching" multi-step units.
Delays Due to Combat Losses
Whenever any multi-step unit with a Step Value of 3 or 4 on its full-strength side, or any Fortress or HQ unit (regardless of Step Value) is removed from the map in the process of satisfying combat results, the owning player must place the unit in the Delay Box. Any other units removed from the map as a result of combat are placed directly in their faction's Force Pool. In other words, units with a Step Value of] on either side are returned directly to the Force Pool unless they are HQ or fortress units.
4.2.4 Advance After Combat
After all italicized results and attrition losses have been satisfied by both sides in a given combat, supplied ground units in the attacking force still adjacent to the defender's hex may advance into the defender's hex if that hex has been vacated.
- Defending units can never advance after combat.
- Units must be in supply to advance.
- HQ units themselves can never advance after combat. However, the presence of a HQ unit in an attacking force does not prevent the non-HQ units in that force from advancing.
- Units can never advance into a hex containing an enemy ground unit, Air Support unit, or Beachhead. A unit can freely advance out of a hex containing an enemy Air Support unit.
Exploitation
Any or all units that can advance after a combat may, instead, "exploit" if the attacking force
included at least one armor-type unit (even if no attacking armor-type units survived the combat).
- Units can never exploit during Mud turns.
- Exploiting units can move a number of hexes equal to the number of hexes the defending force retreated plus the number of retreat results and/or attrition losses the defender was unable to satisfy at all.
- Exploiting units do not pay Movement Points to enter hexes or cross hexsides.
- The first hex entered by exploiting units must be the vacated defender's hex.
- An exploiting unit cannot enter a hex containing an enemy ground, Air Support, or Beachhead unit. A unit can advance out of a hex containing an enemy Air Support unit.
- Exploiting units move one at a time. The phasing player must complete one unit's exploitation before he can begin to move another. An exploiting unit may stop at any time.
- An exploiting unit cannot move a number of hexes greater than its printed Movement Allowance.
- An exploiting unit must stop immediately upon crossing a mountain, strait, or All-Sea hexside (from a Beachhead), or upon entering an enemy ZOC. Friendly units (including Airdrop and Air Support units) negate enemy ZOC for this purpose, and units exploit one at a time-the first exploiting unit to enter an enemy Zone of Control must stop, but then negates that Zone of Control for the next unit, which could then advance into and beyond that hex.
Example: The defending force is a one-step infantry corps unit and it must satisfy a combat result of Dr3 0/2. The defending player satisfies one retreat by retreating the corps one hex. The hex it enters is occupied by a friendly two-step HQ unit which did not participate in this particular combat - even so, this HQ unit is now part of the defending force because it is in a hex into which the defending force retreated. Since the defending force now includes a unit unable to retreat, the defender must convert the second retreat into a step loss. The defender elects to take this step loss from the HQ, so he places the HQ unit in the Delay Box and replaces it on the map with a one-step infantry corps unit from his Force Pool. The defending force now no longer includes a unit unable to retreat, so the defender retreats both infantry corps together (he can 't break up a retreating stack) one more hex to satisfy the third retreat. The 0/2 attrition result then eliminates both of the defender's one-step infantry corps units. If the attacking player used armor in this attack, his surviving units could exploit, advancing up to two hexes, one for each of the two hexes the defending force actually retreated. Had the defender's HQ unit not been in the way, the original defender would have retreated three hexes to satisfy the italicized result before being eliminated by the first attrition step loss. If able to exploit, attacking units could then have advanced up to four hexes – one for each of the three hexes retreated by the defending force, plus one for the second attrition loss left unsatisfied by the defender.
5. Reserve Movement Phase
Movement during the Reserve Movement Phase is identical to movement during the Operational Movement Phase, with three exceptions.
- Units cannot enter or exit enemy Zones of Control during the Reserve Movement Phase, regardless of the presence of friendly units.
- Units need not be in supply to move during the Reserve Movement Phase.
- Non-Soviet one-step corps units cannot use the 1/2 MP Road/Rail benefit in the Soviet Union during Reserve Movement Phases. Soviet one-step corps units cannot use the 1/2 MP Road/Rail benefit outside the Soviet Union during Reserve Movement Phases. These units can use the 1 MP multi-step unit Road/Rail benefit.
6. Final Administrative Phase
During his Final Administrative Phase, the phasing player may declare war on neutral minor countries, and may adjust the status of one Truce Marker. He must also check and resolve his Permanent Conditional Events and any Conditional Event on his Current Option card.
6.1 War & Peace Segment
The phasing player may declare war on any neutral minor countries. A player may declare war against as many neutral minor countries as he wishes during his War & Peace Segment.
- The Axis player can declare war during any Axis War & Peace Segment.
- Allied players cannot declare war during Soviet or Western Allied War & Peace Segments until Total War has broken out.
The phasing player may then, if he wishes, adjust one (and only one) "Negotiations" or "Armistice" Truce Marker in London or Moscow (see 14.3 for Truce Restrictions). The Axis player can adjust the status of a Truce Marker in either capital. The Western Allied player can only adjust the status of a Truce Marker in London, and the Soviet player can only adjust the status of a Truce Marker in Moscow. Truce Marker adjustment allows the phasing player to do either one of the following:
- remove a "Negotiations" Marker;
- flip an "Armistice" Marker to read "Negotiations."
6.2 Conditional Event Segment
The phasing player first checks his faction's Permanent Conditional Events to see if any countries have been conquered, liberated, occupied, etc. (see 17.1, 17.2, 17.3, Permanent Conditional Events; these have also been listed on the Player Aids for ease of reference). All of the phasing faction's Permanent Conditional Events must be checked in order, and the results must be implemented. To qualify as “occupied” the occupying unit must be a ground unit. The Axis player cannot, for example, decline to occupy an Axis minor country if the conditions for Occupation exist.
Axis Permanent Conditional Events
-
Conquest of Western Allied Minor Countries.
-
Liberation of Soviet Allied Minor Countries.
-
Occupation of Axis Minor Countries.
-
Axis Coup.
Western Allied Permanent Conditional Events
-
Re-activation of Conquered Western Allied Minor Countries.
-
Free France..
-
Liberation of Axis and Soviet Allied Minor Countries
-
"Their Finest Hour."
-
Free French Coup.
Soviet Allied Permanent Conditional Events
-
Liberation of Axis and Western Allied Minor Countries.
-
Emergency Mobilization.
The phasing player then checks his Current Option card. If the card contains a Conditional Event, he checks to see if he has fulfilled the conditions. If he has fulfilled the conditions, the results must be implemented. Details of Conditional Events and their consequences will be found in section 17.4 &17.5, Option Card Conditional Events.
Conditional Replacements can be received during each Conditional Event Segment in which the conditions are fulfilled, for as long as the card is the Current Option card. Summer (May-June) is a good Season to reveal a card with Conditional Replacements-it will be the Current Option card for three Conditional Event Segments, and so could provide its Conditional Replacements three times!
7. Game Turn Interphase
During the Game Turn Interphase, players will:
-
determine how long it will take for all units and Markers in the Delay Box to enter or return to the game;
-
move the Turn Record Marker to signal the end of one turn and the beginning of the next;
-
place returning units and Markers in their Force Pools, on their Available Air Support Tracks, or on the Strategic Warfare Track.
7.1 Delay Segment
During the Delay Segment, every player with units and/or Markers in the Delay Box rolls one die for each of his units and Markers in the Box, applying the appropriate Delay die roll modifiers to each die roll. The modified die roll determines how long it will take the unit or Marker to enter or re-enter the game. Note that all players participate in the Delay Segments together.
As each unit or marker is rolled for, the controlling player places that piece on the Turn Record Track a number of turns ahead of the current game turn equal to the modified die roll. Delay die roll modifiers are cumulative within each faction - apply all Soviet Delay die roll modifiers to all rolls for Soviet units, for example, but never apply Soviet Delay die roll modifiers to rolls for Western Allied units. Modified die rolls less than “1” or greater than “6” respectively.
Example: The Axis player removes a German Air Support unit from the map at the beginning of the Axis Air Superiority Segment of the April-May 1943 Axis Player Turn and places it in the Delay Box. During the Game Turn Interphase at the end of the April-May 1943 Game Turn, the Axis player takes the unit from the Delay Box and rolls one die - the roll is a 3. Consulting the Axis Delay die roll modifiers, the Axis player finds that the Current Western Allied Option card has a US Level of 2, which gives a +2 modifier. The VP Marker reads "Axis Tide" and is in the I VP Box, which yields a -1 modifier. The Axis player also notes that he has a War Production Marker on the Strategic Warfare Track, which yields another -1 modifier. The modifiers thus cancel out, and the Axis player places the Air Support unit on the Turn Record Track three turns ahead of the current game turn - on the July-August 1943 space. This Air Support unit will return to the Axis Available Air Support Track when the Game Turn Marker is moved into the July-August 1943 space on the Turn Record Track Had the Axis player rolled a 1 for the above unit, it would have been placed on the May-June 1943 space on the Turn Record Track, returning to the Axis Available Air Support Track as soon as the Turn Record Marker advanced into that space-that is, right after the Axis player's roll (see 7.2).
7.2 Turn Record Marker Segment
After all units and markers in the Delay Box have been rolled for and placed on the Turn Record Track, the Turn Record Marker is advanced into the next space on the Turn Record Track.
Any units and markers in the turn space entered by the Turn Record Marker are returned to the game at this time. Units returning to the game from the Turn Record Track are placed as follows:
- Ground units (including Airdrop units-flipped back to their airborne corps side) are placed in the appropriate Force Pool;
Air Support units are placed on the appropriate Available Air Support Track.
Most Special Markers (those with Reinforcement Numbers on them) enter the game by first being placed in the Delay Box. These Markers have no effect on play until returned to the game from the Turn Record Track. For placement of these Markers upon return to the game, see 15 - Special Markers.
8. Zones of Control
All ground units are able to project a degree of influence into the six hexes adjacent to their location hex. These projections are called "Zones of Control" or "ZOC." Only ground units exert a Zone of Control. A unit's ZOC never extends across a mountain hexside, impassable hexside, lake hexside, or All-Sea hexside (even where a strait crossing is present). Enemy Zones of Control ("EZOC") can inhibit friendly Operational Movement, Reserve Movement, Supply, Retreat, and Advance after Combat. Remember-all non-phasing units are considered enemy units. Western Allied and Soviet Allied units must always observe each other's Zones of Control.
In many cases (detailed below), the presence of a friendly unit in a hex negates the effects of EZOC on that hex. Friendly units need not have combat factors to negate EZOC-Airdrop and Air Support units can also negate EZOC. When friendly units negate the effects of EZOC, they do so immediately. A player can, for example, move a unit into a hex in an EZOC, thereby negating the effects of that EZOC on the next unit entering that hex (it wouldn't have to stop), or perhaps opening a supply line to a unit that has yet to move.
8.1 Effects on Movement
A unit must stop moving when it first enters an EZOC during the Operational Movement Phase. A unit beginning the Operational Movement Phase in an EZOC can freely leave. Such units may move directly into another EZOC (where they must, of course, immediately stop, unless another friendly unit is present to negate the EZOC).
- The presence of a friendly unit in an EZOC negates the effects of the EZOC on Operational Movement.
A unit cannot exit an enemy Zone of Control during the Operational Movement Phase of a Mud turn (11.1). A unit must stop immediately upon entering or exiting an EZOC in a hex affected by snow (11.2) during the Operational Movement Phase of a Snow turn.
The presence of a friendly unit in an EZOC does not negate these weather effects of the EZOC on Operational Movement.
Units cannot enter or exit EZOC during Reserve Movement Phases.
The presence of a friendly unit in an EZOC does not negate the effects of the EZOC on Reserve Movement.
8.2 Effects on Supply Lines
A supply line cannot be traced into or out of an EZOC.
- The presence of a friendly unit in an EZOC negates the effects of the EZOC on Supply Lines.
8.3 Effects on Retreats and Advances
A unit cannot retreat into an EZOC. An advancing or exploiting unit must stop in the first EZOC it enters.
- The presence of a friendly unit in an EZOC negates the effects of the EZOC on Retreats and Advances.
9. Stacking Limits
Placing more than one friendly unit in the same hex is called "stacking." Up to three friendly units can be stacked in the same hex, including All-Sea hexes containing friendly Beachhead units.
Exception: Gibraltar (West Map hex 2208) is a special case, as it actually represents part of the hex containing Cadiz. The stacking limit in Gibraltar is, therefore, only two units.
- Only ground combat units count against stacking limits-Airdrop units, Air Support units, Beachhead units, the British Naval Base Marker, the SHAEF HQ Marker, and Truce Markers never count against stacking limits.
- No more than two of the units stacked in a hex can be multi-step units.
- A HQ unit cannot stack with another HQ unit.
- A Fortress unit cannot stack with another Fortress unit.
- A Soviet Front unit cannot stack with another Soviet Front unit (Soviet Front units are the big Soviet infantry army units with a Step Value of 3 or 4).
- British units cannot stack with French units while Limited War is in effect.
- A minor country or Partisan unit cannot stack with a unit of another minor country- "EX" corps units and Axis Nationalist units are exempt from this restriction.
Stacking limits are enforced for all units, both phasing and non-phasing, at the end of every Phase and Segment. The owning player must eliminate sufficient steps or units to bring any stacks found in violation back into compliance with the stacking limits.
You are always free to violate stacking limits during a Phase or Segment, but you are required to pay the penalty at the end. You may, for example, retreat or advance any number of units into a hex during a Blitz or Combat Segment, but you '11 have to lose something at the end of the Segment if you 've over stacked.
10. Supply & Friendly Ports
Partisan units are always in supply. All other ground units must trace supply lines to supply sources in order to conduct various game functions. Supply lines are traced from units to supply sources.
10.1 Supply Sources
A unit's supply source is any city in the unit's home country.
- The US Box is a home country port city for both British units and US.
- The Trans-Africa Box is a home country port city for British units.
- Any capital city occupied by the SHAEF HQ Marker is a home country city for both British units and US.
- Any port occupied by the British Naval Base Marker is a home country city for British units.
- Axis Nationalist units trace supply to Berlin.
10.2 Supply Lines
A unit is in supply if it can trace a supply line to a supply source.
- The first two hexes (only) of a supply line can be traced across any terrain type traversable by the unit. A supply line can be traced across an All-Sea hexside adjacent to a friendly Beachhead unit (All-Sea hexsides adjacent to friendly Beachheads are treated as if crossed by Straits).
- Once it reaches a Road/Rail Line hex, a supply line can then be traced any distance along a series of connected Road/Rail Line hexes to a supply source. Road/Rail Lines connected by a Strait are considered connected.
- A supply line can also be traced across a Naval Zone from friendly port (this includes friendly Beachheads by definition-see 10.4) to friendly port. An Axis or Soviet Allied supply line can be traced across a Naval Zone only if the Naval Zone contains a friendly Convoy Marker in Supply Convoy Mode. A supply line cannot be traced across a Naval Zone containing an enemy Air Support unit or U-Boat unit.
- A supply line traced across a Naval Zone can be considered part of a connected Road/Rail Line supply line (see the example below). In other words, a supply line can be traced any distance along a combination of connected Road/Rail Lines and friendly port-to-friendly port traces.
- A supply line cannot be traced into or out of a hex containing an enemy Zone of Control unless a friendly unit occupies the hex.
- A supply line cannot be traced into a hex containing enemy units (including Airdrop and Air Support units even when a friendly unit also occupies the hex). A city or port, thus, cannot serve as a supply source while occupied by enemy units (including Air Support and Airdrop units).
- A supply line can be traced out of a friendly-occupied hex containing an enemy Zone of Control or enemy Air Support or Airdrop unit. Remember that a supply line is traced out of a unit's hex to a supply source hex.
- A supply line cannot be traced across impassable or lake hexsides, or into impassable hexes or hexes in a neutral country.
Exception: The Soviet player can treat the Soviet Border Region portion of a neutral minor country as part of the Soviet Union while the appropriate Border Dispute card is the current Soviet option card (see 12.4).
Examples: The Axis player has the Italian Convoy Marker in Supply Convoy mode in the Western Mediterranean, and Tripoli and Naples are Axis-friendly ports. A German unit in Libya traces a supply line two hexes to the North African coastal road, and by road to Tripoli. The supply line can then be traced across the Western Mediterranean from Tripoli to Naples (because the Italian Convoy Marker in the West Med is in Supply Convoy mode). If a connected series of Road/Rail Lines uninterrupted by enemy units and/or Zones of Control can then be traced from Naples to any friendly city in Greater Germany, the German unit in Libya is in supply.
Athens, Malta, Gibraltar, and Bristol are Allied-friendly ports. A British unit in Yugoslavia traces a two-hex path to a road connected to Athens, across the Eastern Mediterranean to Malta, across the Western Mediterranean to Gibraltar, and across the North Atlantic to Bristol, which is a friendly port and a supply source (it's a British home country city).
10.3 Supply Effects
Supply is traced for each unit at the moment it begins one of the actions covered below. Thus, a unit judged to be in supply for Operational Movement is free to make a complete move, even if it moves out of supply in the course of its move. It is also possible for the movement of some units to affect other units' supply lines (by negating the effects of EZOC on supply lines, for example) before those other units attempt to trace supply.
- Units must be in supply to combine during the Organization Segment.
- Range for Air Support unit placement or contesting during the Air Superiority Segment is traced from a supplied unit.
- Units must be in supply to move during the Operational Movement Phase (units need not be in supply to move during Reserve Movement Phases).
- Airborne corps must be in supply to make an Airdrop.
- Attacking armor units that cannot trace supply cannot provide an Armor Shift during Blitz Segments.
- HQ units that cannot trace supply cannot provide ranged support or a HQ Support Shift.
- Units must be in supply to advance or exploit after combat.
- Airdrop units must be in supply to be replaced by infantry corps during Landing Segments.
10.4 Friendly Port Definition
-
A port currently occupied by friendly units (including Airdrop or Air Support units) is a friendly port.
-
A port hex in an active friendly home country is a friendly port - it need not be occupied by any friendly units.
Exception to both of the above: A port hex cannot be a friendly port while it contains an enemy unit (including enemy Air Support units, even if a friendly ground unit is present).
- A friendly Beachhead unit is always a friendly port - it need not be occupied by friendly units, and it cannot be occupied by enemy units.
- Any port hex occupied by the British Naval Base Marker or the SHAEF HQ Marker is a Western Allied friendly port - it need not be occupied by Western Allied units to be considered friendly.
- The US Box and the Trans-Africa Box are ports in the North Atlantic Naval Zone. They are always friendly to the Western Allies. The Trans-Africa Box can only be entered by US and British one-step corps units using Naval Transport. Only US and British one-step corps units can enter the US Box, and only by being placed there as replacements-they cannot use Naval Transport to enter this Box.
The friendly port parameters not only simulate the logistical “tail" required when conducting operations overseas, they also make it easy to determine at a glance which ports you can use for Naval Transport and for tracing supply. Many unoccupied ports will not be friendly to any faction. Except for those ports in your own active home countries, you must actually occupy a port for it to be friendly. Note, for example, that Malta is not automatically friendly to the British (Malta is a British Dependent). It must be considered friendly. This is also true of any unoccupied port in a Conquered Western Allied minor country. This is very important when tracing supply across Naval Zones and when conducting Naval Transport (3.7.1).
11. Weather
Weather turns are marked on the Turn Record Track. Every November-December and January-February turn is a Snow turn; every April-May and September-October turn is a Mud turn.
Dr Combat Results against hexes affected by mud or snow are reduced:
Dr3 becomes Dr2;
Dr2 becomes Dr1;
Dr1 becomes Ex;
Ex, Ar1, and attrition combat results are not affected by weather.
11.1 Mud
During Mud turns, all land hexes on the map are affected by mud.
- A unit cannot exit an enemy Zone of Control during the Operational Movement Phase of a Mud turn, regardless of the presence of other friendly units. A unit thus cannot move from one enemy Zone of Control to another during mud turns, or even disengage.
- Air Support units cannot be placed in land hexes during Mud turns.
- Blitz Segments are always skipped in Mud turns.
- The defender receives a one-column shift to the left during Mud turns.
- Units cannot exploit during mud turns.
11.2 Snow
During Snow turns, most land hexes on the map are affected by snow.
Snow weather never affects land hexes in Libya, Egypt, Palestine, Syria, or Iraq-these names are printed in brown on the map as a reminder.
- Air Support units cannot be converted into Beachhead units in the Arctic Sea, North Sea, or Baltic Sea Naval Zones during Snow turns-these names are printed in white on the map as a reminder.
- Convoy Markers cannot be placed in the Arctic Sea Naval Zone during Snow turns.
- A unit must stop immediately upon entering or exiting an enemy Zone of Control in a hex affected by snow during Operational Movement Phases, regardless of the presence of other friendly units in the hex.
- Most units cannot attack hexes affected by snow during the Blitz Segment of a Snow turn. Phasing German SS units, any other German units adjacent to or stacked with phasing German SS units, and all phasing Soviet, Swedish, and Finnish units can attack during the Blitz Segment of a Snow turn whether or not the defender's hex is affected by snow.
Air Superiority shifts cannot be used in a combat in which the defender's hex is affected by snow.
12. Countries & Factions
12.1 Major Powers and Factions
The Axis, the Western Allies, and the Soviet Allies are factions. Each faction has its own player turn, and its units are always considered enemy units by both other factions for all game purposes. The Western Allied and Soviet Allied factions may sometimes be referred to collectively as "Allied," with no qualifier.
Greater Germany includes East Prussia and possibly the Polish Corridor and/or Alsace-Lorraine. The term Axis includes GreaterGermany and all Axis minor countries (including Axis Nationalists).
Great Britain includes Belfast. The United States is represented on the map by the US Box. The term Western Allied includes Great Britain, the United States, and all Western Allied minor countries (including Partisans).
The Soviet Union includes any Soviet Border Regions containing Ceded Border Markers. The term Soviet Allied includes the Soviet Union itself and all Soviet Allied minor countries.
12.2 Minor Countries
Minor countries have capital cities and units, and will always be either neutral, Axis, Western Allied, or Soviet Allied in orientation.
Minor countries are:
- France (includes Alsace-Lorraine, Corsica, and French North Africa);
- Spain (includes Majorca and Spanish
Morocco);
- Italy (includes Sardinia and Sicily);
- Greece (includes Crete);
- Portugal;
- Yugoslavia;
- Poland (includes Eastern Poland and Polish Corridor);
- Hungary;
- Rumania (includes Bessarabia);
- Bulgaria;
- Turkey (includes Turkish Frontier);
- Finland (includes Finnish Frontier);
- Sweden;
- Ireland;
- The Baltic states*;
- Denmark - Norway*;
- Belgium - Holland*
*These artificially "combined" countries are each considered a single minor country for all game purposes.
In addition, the neutral minor country Vichy will be created if France collapses (see 12.2.4).
12.2.1 Neutral Minor Countries
At the beginning of the game, all minor countries are neutral (except France, which begins the game as a Western Allied minor country). No units may enter hexes in a neutral country. Supply lines may not be traced into or through a hex in a neutral country, nor may range of any type be traced into or through a hex in a neutral country. Exception: The Soviet player may treat the Soviet Border Region of specified neutrals as part of the Soviet Union while a Soviet Border Dispute is the Current Soviet Option card (see 12.4).
12.2.2 Activation of Neutral Minor Countries
Activation of a neutral minor country changes that country's orientation from neutral to Axis, Western Allied, or Soviet Allied, and causes that country's units to be set up on the map (see 19-Minor Country Setup). Certain Event results can change the orientation of a country that is already active (see, for example, Liberation of a Soviet Minor Country under Axis Permanent Conditional Events, 17.1).
A neutral minor country can be activated in two ways:
- The phasing player declares war on a neutral minor country during his War & Peace Segment (6.1). When an Allied player declares war on a neutral minor country, it is activated as an Axis minor country. When the Axis player declares war on a neutral minor country, it is activated as an Allied minor country (see 12.2.3);
- A Political or Conditional Event calls for a neutral minor country to be activated as an Axis or Allied minor country.
A minor country's units are set up by the controlling player the instant it becomes an active minor country (see 19-Minor Country Setup). In most cases, the Normal Setup procedure will be used (19.2). In some cases, the Event that calls for a neutral country to be activated will specifically call for Limited Setup (19.1).
12.2.3 Allied Minor Countries
Allied players must keep track of which Allied minor countries are Soviet Allied and which are Western Allied (it won't be hard to keep track, since each active minor country will often have at least one unit in the Force Pool of its controlling faction).
There may be a limited choice in deciding whether a neutral minor country will be activated as a Western Allied or a Soviet Allied minor country.
- Any minor country can be activated as a Western Allied minor country.
- A minor country must share a land border with the Soviet Union or with another Soviet Allied minor country to be activated as a Soviet Allied minor country.
When a choice is available, the Western Allied player decides whether the minor country will be Western Allied or Soviet Allied.
Important Exception: The Axis player makes this decision (if a choice is available) for any neutral minor countries activated on the first turn of the game (Sept-Oct. and Oct-Nov. 1939) only.
Examples: The Axis player declares war on Belgium-Holland in Mar-Apr 1940. The Western Allied player must declare Belgium-Holland a Western Allied minor country since It does not share a land border with the Soviet Union or any Soviet Allied minor country.
During resolution of an Axis Aggression Political Event result, players are called on to activate a neutral country adjacent to Yugoslavia as an Allied minor country. Both Bulgaria and Rumania are currently neutral. The Axis player must pick one; if he picks Rumania, the Western Allied player must then decide whether Rumania will be Western Allied or Soviet Allied, since it shares a land border with the Soviet Union.
The Axis player declares war on Poland in Sept-Oct 1939, the first turn of the game. Since Poland shares a land border with the Soviet Union, the Axis player gets to decide whether Poland is a Western Allied or a Soviet Allied minor country.
12.2.4 Creation of Vichy
Vichy is a minor neutral country created if France collapses. Vichy can be created only once per game. If Vichy has already been created, ignore any further instructions to create Vichy.
The term Vichy is used for consistency and convenience only-if Vichy is ever activated as an Allied minor country, by all means refer to it as Free France.
Vichy Territory
- Vichy territory consists of French North Africa, Corsica, and that part of continental France bounded by the Vichy Border and containing the cities of Lyon, Marseilles, and Toulouse.
- When Vichy is created, Syria becomes an Independent country (see 12.3), and Alsace-Lorraine becomes a permanent part of Greater Germany.
- Even though it is not in Vichy territory, Paris is considered the capital of Vichy for all game purposes.
- If neutral Vichy is ever activated, all original French territory except for Syria is considered part of Vichy (the Vichy Border printed on the map can be ignored for the rest of the game). Syria cannot become part of France again once it has become an Independent.
Disposition of French Forces
- Remove all French units from the map, Force Pools, Delay Box, and Turn Record Track when France collapses and Vichy is created.
- The French Air Support unit, HQ unit, and the three Maginot fortress units are permanently removed from the game.
- Place the Axis Coup corps in the Axis Force Pool. This is an Axis unit, not a neutral Vichy unit.
- Set all remaining French units aside with the other neutral minor country units when Vichy is created.
- Any non-French units in Vichy territory when Vichy is created are immediately placed on the back of their controlling factions' Pending Option cards ("interned")-these will return to the map ("repatriated") when the Pending Option card becomes the Current Option card. This also applies to any non-French units in Syria if Vichy is created during Limited War (only), since Independent countries are neutral territories until Total War breaks out (12.3).
- The Vichy Convoy Marker can only be used by the Axis player. It is possible for the Vichy Convoy Marker to be in use by the Axis player even while Vichy is a neutral or an Allied minor country. This represents Axis seizure of French shipping, not renegade French fleet units.
12.3 Dependent & Independent Countries
- Iraq, Egypt, Cyprus, Palestine, Malta, and Gibraltar are British Dependents.
- Albania, Libya, and Rhodes are Italian Dependents.
- Syria is a French Dependent. If Vichy is ever created (12.2.4), Syria becomes an Independent country.
- Persia is an Independent country.
Dependent and Independent countries have no capital cities, no units, and no "orientation"-they are never part of any faction. Cities and ports in Dependent and Independent countries are never considered "home country" cities or ports.
- Units cannot enter the Italian Dependents until Italy has become an active minor country.
- Units cannot enter Independent countries while Limited War is in effect - hexes in these countries are treated as neutral territory.
- Units are free to enter Independent countries once Total War has broken out. Players need not declare war on these countries in order to enter.
12.4 Border Regions
12.4.1 Soviet Border Regions
The Finnish Frontier, Eastern Ceded Poland, Bessarabia, and the Border Turkish Frontier are known as "Soviet Border Regions" - the names of these regions are printed in red on the map. Each Soviet Border Region is a part of a neutral minor country at the beginning of the game, and is a part of that country until and unless that country's Ceded Border Marker is in the Border Region.
- Finnish Frontier - Finland.
- Eastern Poland - Poland.
- Bessarabia - Rumania.
- Turkish Frontier - Turkey.
A Border Region with a Ceded Border Marker is considered a part of the Soviet Union for all purposes. This happens as a result of Soviet Border Dispute Option card Conditional Event resolution-a Ceded Border Marker is placed on the map to mark Soviet Border Regions that have become part of the Soviet Union. This is an "all-or-nothing" deal-if Finland cedes its Soviet Border Region, for example, all hexes in both parts of the Finnish Border Region are a part of the Soviet Union.
Soviet Border Dispute cards also allow the Soviet player (only) to temporarily treat specific Soviet Border Regions as part of the Soviet Union, but only while the Border Dispute card is the Soviet Current Option card. This gives the Soviet player a chance to fulfill the card's Conditional Event allowing him to place the appropriate Ceded Border Marker in the Border Region (see the Soviet Border War Table on the map). If the Soviet player does move units into a neutral minor country's Border Region and does not succeed in placing the Ceded Border Marker before the card is discarded, he must eliminate any Soviet units left stranded in the neutral Border Region.
Soviet Border Disputes have nothing to do with the orientation of the country against which they are directed. The Soviet player can resolve Border Wars against neutral, Axis, Western Allied, Conquered Western Allied, and even Soviet Allied minor countries.
Note: the note in the shaded box implies that Soviet units left in a Border Region when the Border Dispute card is discarded, are always eliminated. The rule itself correctly states that the Soviet units are eliminated when the card is discarded, only if the Soviet player or has failed to place the ceded border marker and the minor country is still a neutral minor country.
A Soviet Border Dispute will generally unfold as follows. The Soviet player sends a number of units into the Border Region. During his Conditional Event Segment, he adds up the attacker units in the Border Region, rolls the die, and consults the Soviet Border War table. If he fails to place the Ceded Border Marker, he must then decide during his turn whether to pull out or leave units in the Border Region to try again. If he has not succeeded by the time he discards any units left in the Border Region will be eliminated.
12.4.2 German Border Regions
The Polish Corridor is a part of neutral Poland at the beginning of the game. It becomes a permanent part of Greater Germany the instant Allied Poland is conquered or liberated by the Axis player.
- Alsace-Lorraine is part of France at the beginning of the game. It becomes a permanent part of Greater Germany the instant France is conquered or collapses.
12.5 Multi-National Units
There are four multi-national units in the game.
- 15th Allied Army Group HQ unit - British and US.
- Afrika Panzer Army unit - German and Italian.
- Mediterranean Army Group HQ unit - German and Italian.
- 20th Army - German and Finnish.
These units are formed as described in 2.4. When in play, these units are considered to belong to both nationalities. Thus, for example, both German and Italian Air Support units can be placed within range of, and contribute Air Superiority Shifts to a combat involving, the Panzer Army Afrika or Mediterranean HQ units. These same units must trace supply to both German and Italian home country cities. The Med HQ unit could support and contribute a shift to a combat involving German and/or Italian units, but not Axis Rumanian units. Nor could it stack with a Rumanian unit, because Axis Italian units cannot stack with, or participate in an attack with, units of another Axis minor country.
13. Limited War
Limited War is in effect at the beginning of the game and remains in effect until Total War breaks out. Total War breaks out the instant the Axis player reveals a Total War card.
13.1 Limited War Effects
- Soviet and Western Allied multi-step units cannot be formed at, or increased to, a Step Value of 3 or 4 while Limited War is in effect. They can be built up to two-step strength during Limited War. Once Total War breaks out, Allied players are free to form three- or four-step Soviet and Western Allied multi-step units for the duration of the game.
Exception: The French Maginot fortress units begin the game at full three-step strength. If reduced below three-steps they become subject to this rule.
- British units cannot stack with French units while Limited War is in effect.
- Allied players cannot declare war during Soviet or Western Allied War & Peace Segments (6.1) while Limited War is in effect. Once Total War has broken out, Allied players are free to declare war during their War & Peace Segments.
- Units cannot enter Independent countries (12.3) while Limited War is in effect-hexes in these countries are treated as neutral hexes. Units are free to enter Independent countries at any time once Total War has broken out.
13.2 Allied Total War Cards
All Soviet Total War cards and all Western Allied non-US Total War cards are added to the Allied players' card hands the instant Total War breaks out.
All US cards are added to the Western Allied card hand according to the year in which Total War breaks out. If Britain collapses, schedule the addition of the US cards to the Western Allied card hand as if Total War had just broken out.
The US cards are the Western Allied Total War cards with "US" next to their card numbers (Western Allied cards #12-#26) plus the Intensive Bombing card (#31) and the Separate Peace card (#32). These US cards are added to the Western Allied hand at the beginning of the game turn indicated below, and can be selected during the Western Allied Option Card Segment of that same game turn.
- Total War in 1939 - Add the US cards at the beginning of the August-September '40 turn.
- Total War in 1940 - Add the US cards at the beginning of the May-June '41 turn.
- Total War in 1941 - Add the US cards at the beginning of the March-April '42 turn.
- Total War in 1944 - Add the US cards at the beginning of the November-December '42 turn.
When Total War Breaks out, place the Allied SHAEF HQ Marker face down in the appropriate space on the Turn Record Track as a reminder to add the US cards to the Western Allied card hand that turn.
14. Truce Restrictions
Nazi-Soviet Pact and Appeasement Restrictions are always in effect at the beginning of the game, and remain in effect until lifted. Certain Political and Conditional Events call for Armistice Truce Markers to be placed in London or Moscow. Players may flip Armistice Markers to their Negotiations side during War & Peace Segments (6.1)
14.1 Nazi-Soviet Pact Restrictions
While the Nazi-Soviet Pact Marker is in Moscow, the following restrictions are in effect.
- Western Allied units cannot enter Soviet Allied countries (including the Soviet Union).
- Soviet Allied units cannot attack German units or enter Greater Germany.
- Soviet Air Support units cannot be placed in, or contest Air Superiority in, a land hex in Greater Germany, a land hex occupied by or adjacent to a German ground unit, or a Naval Zone containing an Axis friendly port.
- Soviet Allied units cannot enter the Zones of Control of German units during Soviet Operational Movement Phases, regardless of the presence of other Soviet Allied units.
- The Zones of Control of German units do not extend into hexes in the Soviet Union, Soviet Allied minor countries, or Soviet Border Regions (whether or not they contain Ceded Border Markers).
Nazi-Soviet Pact Restrictions are permanently lifted the instant any one of the following events occurs (remove the Nazi-Soviet Pact Marker from Moscow).
- A Soviet Allied unit is attacked from a hex containing a German unit (whether or not the German unit actually participates in the attack-you can 't use German units to shield other attacking Axis units from counterattack).
- A German unit enters the Soviet Union, a Soviet Allied minor country, or a Soviet Border Region (whether or not it contains a Ceded Border Marker).
- A German Air Support unit is placed in, or contests Air Superiority in, a hex in the Soviet Union, a Soviet Allied minor country, a Soviet Border Region (whether or not it contains a Ceded Border Marker), or a Naval Zone containing a Soviet Allied friendly port.
- A card or Event result lifts Nazi-Soviet Pact Restrictions.
- An Axis Total War card is revealed.
14.2 Appeasement Restrictions
While the Appeasement Marker is in London, the following restrictions are in effect.
- Soviet Allied units cannot enter Western Allied countries (including Great Britain and British Dependents), but may enter Conquered Western Allied minor countries.
- Western Allied units cannot attack German units or enter Greater Germany.
- Western Allied Air Support units cannot be placed in, or contest Air Superiority in, a land hex in Greater Germany, a land hex occupied by or adjacent to a German ground unit, or a Naval Zone containing an Axis friendly port.
- Western Allied units cannot enter the Zones of Control of German units during Western Allied Operational Movement Phases, regardless of the presence of other Western Allied units.
- The Zones of Control of German units do not extend into hexes in Great Britain, Western Allied minor countries, or British Dependents.
Appeasement Restrictions are permanently lifted the instant any one of the following events occurs (remove the Appeasement Marker from London).
- A Western Allied unit is attacked from a hex containing a German unit (whether or not the German unit actually participates in the attack-you can 't use German units to shield other attacking Axis units from counterattack).
- A German unit enters Great Britain, a British Dependent, or a Western Allied minor country.
- A German Air Support unit is placed in, or contests Air Superiority in, a hex in Great Britain, a British Dependent, a Western Allied minor country, or a Naval Zone containing a Western Allied friendly port.
- A card or Event result lifts Appeasement Restrictions.
- An Axis Total War card is revealed.
Clarification: Note that it is possible for a minor country containing a German unit to become Soviet or Western Allied through an Allied Liberation Conditional Event. If this happens, the presence of the German Unit does not constitute a breach of the appropriate restrictions. Let's say the Nazi-Soviet Pact is in effect, Rumania is an Axis minor country, and the Soviets manage to take Bucharest. If there is a German unit in Rumania during the Soviet Conditional Event Segment, the Nazi-Soviet Pact restrictions will not be lifted when the Soviet Liberation Event makes Rumania a Soviet Allied minor country. However, no additional German units may enter Soviet Allied Rumania without causing the Pact to be lifted. The operative word in the restrictions is “enter”- this also applies to the restrictions regarding Western Allied and Soviet Allied units entering each others' territories.
14.3 Armistice and Negotiations Restrictions
Armistice and Negotiations Restrictions are the same, the only difference between the two sides of the Marker is one of potential duration (see 6.1 War & Peace Segment). The capital in which an Armistice/Negotiations Truce Marker is located determines which Allied faction's units will be affected by Armistice and Negotiations Truce Restrictions. It is thus possible for Armistice/Negotiations Restrictions to apply between the Axis and one Allied faction while no Restrictions apply between the Axis and the other Allied faction.
- When an Armistice/Negotiations Truce Marker is in London, Western Allied units are affected.
- When an Armistice/Negotiations Truce Marker is in Moscow, Soviet Allied units are affected.
- Affected Allied units cannot enter the Zones of Control of Axis units during the affected Allied faction's Operational Movement Phase, regardless of the presence of other affected Allied units.
- Axis units cannot enter the Zones of Control of affected Allied units during Axis Operational Movement Phase, regardless of the presence of other Axis units.
The Axis player need not "declare war " against Great Britain, France, or the Soviet Union - he is free to enter these countries and attack their units whenever he wishes. The implications of such actions are covered by the Appeasement and Nazi-Soviet Pact Restrictions. Note that declarations of war and minor country activations do not lift these Restrictions in and of themselves. Let 's say the Axis player declares war on Poland on turn one, and declares Poland a Western Allied minor country. At this point, Appeasement Restrictions are still in effect - they will not be lifted unless and until German units actually enter Western Allied Poland or attack Polish units (or any other Western Allied units). An attack by Axis Hungarian units (for instance) on Western Allied Polish units would not cause Appeasement Restrictions to be lifted, and Western Allied Polish units are free to attack Axis Hungarian units (for instance) even while Appeasement Restrictions are in effect.
- Armistice and Negotiations Restrictions cover more than just their face value definitions. They can represent internal dissent or confusion, indecision, logistical SNAFUs - even actual cease-fires. They also allow players to participate in Hitler's believe that he could, like Frederick the Great, negotiate a way out of the whole mess. These truces don't prohibit combat because they aren't always in effect from the first day of the game turn to the last. Forces in close contact can continue to jockey for position until a clear partition line is established or the truce breaks down completely. A player who wants a cease-fire with his truce will have to withdraw from the front-line.
15. Special Markers
Allied SHAEF HQ This Marker goes in the Delay Box. When it returns to play, the Allied SHAEF HQ Marker is placed in any capital city occupied by a supplied US ground unit, and functions as a US and British home country city. If there is no such capital city available, or if the SHAEFHQ Marker is ever alone in a hex entered by Axis or Soviet ground units, place it back in the Delay Box. The Western Allied player may also voluntarily remove the Marker from the map and place it in the Delay Box at the beginning of any Game Turn Interphase, just before units in the Delay Box are rolled for (this is the only way to move the Marker from one capital to another).
- Anti-Comintern Pact This Marker is placed in the Delay Box, and goes on the Strategic Warfare Track when it returns to play. The Axis player may receive Axis Nationalist steps during Axis Reinforcement Segments while this Marker is on the Strategic Warfare Track.
- British Naval Base This Marker goes in the Delay Box. When it returns to play, the British Naval Base Marker is placed in any port occupied by a supplied British ground unit, and functions as a British home country city. If there is no such port available, or if the Marker is ever alone in a hex entered by Axis or Soviet ground units, place it back in the Delay Box. The Western Allied player may also voluntarily remove the Marker from the map and place it in the Delay Box at the beginning of any Game Turn Interphase, just before units in the Delay Box are rolled for (this is the only way to move the Marker from one port to another).
- German/Japanese Pact If this Marker is already on the Strategic Warfare Track or Turn Record Track reading "Soviet/Japanese Treaty" when due to be placed in the Delay Box, it is permanently removed from the game. Otherwise, it is placed on the Strategic Warfare Track when it returns to the game from the Turn Record Track.
- Intensive Bombing This Marker is placed in the Delay Box, and is placed on the Strategic Warfare Track when it returns to the game. Alternately, the Allied player can permanently remove this Marker from the game when it returns and permanently remove the Axis Jet Fighter Marker and unit, or the Axis U-Boat Marker and unit, or one Axis War Production Marker. This "exchange" can be inflicted only against Axis units and markers that have actually entered the game (even if they are on the Turn Record Track or in the Delay Box).
- Jet Fighter /War Production The Axis Player must decide whether to place this Marker in the Delay Box as a Jet Fighter Marker (with the Jet Fighter unit), or as a War Production Marker (the Jet Fighter unit is removed from the game). Once made, this decision is irreversible. When the Marker returns to play from the Turn Record Track, it is placed on the Strategic Warfare Track.
- Lend-Lease This Marker is placed in the Delay Box (it is a Western Allied Marker, and subject to Western Allied delay die roll modifiers). When it returns to play, place it in the Soviet Force Pool. Once it is in the Soviet Force Pool, the Soviet player rolls for additional Lend-Lease Soviet replacement steps during every Soviet Seasonal Reinforcement Segment (see 1.2.6-use the Table and modifiers printed in the Soviet Force Pool). In a three-player game, the Western Allied player can permanently remove the Lend-Lease Marker from the game at any time.
16. Political Event Results
In general, a player must perform actions as directed by Political Events (they portray events beyond the player's power to control). Do not change the orientation of minor countries that are already active unless specifically directed to do so.
Important: Treat any Event Result that is impossible to fulfill given current conditions as a No Result.
16.1 Axis Treaty and Ultimatum Target Country Selection
Whenever the Political Event to be resolved is on an Axis Treaty or Ultimatum Option card, the Axis player must select a target country before making the die roll.
- The Axis player is not obligated to select the same target country he selected during a previous turn, even if his Current Option card is the same Treaty or Ultimatum card he used in that previous turn.
- Only neutral minor countries can be selected as target countries. The Axis player can never select Germany, the Soviet Union, Great Britain, the United States, a Dependent or Independent Country, or an Axis, Soviet Allied, Western Allied, or conquered Western Allied minor country as a target country.
- A neutral minor country can be selected as the target of a Treaty attempt only if it shares a land border with Greater Germany or an Axis
minor country.
- A neutral minor country can be selected as the target of an Ultimatum attempt if it shares a land border with any country containing an Axis ground unit.
- If the Axis player does not wish to select a target country, or cannot select any target country because of the restrictions above, the Axis player must turn the Ultimatum or Treaty card face down and skip this Political Event Segment. Once turned face down, a card cannot be turned face up again-it has essentially been discarded early.
Examples: The Axis player reveals a Treaty card in the Axis Option Card Segment of his May-June turn. He will be able to make Treaty attempts during the Axis Political Event Segments of his May-June, June-July, and July-August turns (the card will be discarded at the beginning of the Axis Option Card Segment of the August-September turn). With good die rolls, he could activate three neutral minor countries as Axis minor countries with one Treaty card. Of course, that's a lot of prime Blitzing weather to spend on diplomacy. The Axis player chooses neutral Vichy as the target country of a Treaty attempt during the Axis Political Event Segment of the August-September 1940 turn, and rolls a Diplomatic Setback-No Result. During the Axis Political Event Segment of the September-October 1940 turn, his Current Option card is the same face up Treaty card, but he decides to choose neutral Yugoslavia instead as the target country. He had planned to try Spain, but the result he obtained against Vichy leaves him unable to meet the conditions for choosing Spain as a Treaty Target Country, and he is not willing to spend another of his limited Treaty attempts to try Vichy again.
16.2 Political Event Results
Allies Support Nationalists
The Allied player can either place one Partisan infantry step as a replacement (if any are available in the Western Allied Force Pool), or inflict one Axis minor country or Axis Nationalist step loss anywhere on the map.
Appeasement
This result is No Effect if there is an Armistice or Negotiations Truce Marker in London, or if Total War is in effect.
- If the Appeasement Truce Marker is in London when this result is obtained, remove that Marker and lift Appeasement Restrictions.
- If, on the other hand, there is no Truce Marker of any type in London when this result is obtained, place an Armistice Truce Marker in London.
Axis Aggression Results
A die roll on the Axis Aggression Table will yield one of the following "trouble" countries: GreaterGermany; Poland; Yugoslavia; Greece; Spain; Italy.
If the "trouble" country is an Axis country (during limited war) or an Axis, Soviet Allied, Western Allied, or Conquered Western Allied country (during total war), immediately activate any one neutral minor country (Axis player's choice) that shares a land border with the "trouble" country (or with one of its Dependents) as an Allied minor country. No activation occurs if there is no such neutral minor country. When checking land borders, note that Spanish Morocco is part of Spain, and that Libya and Albania are Italian Dependents.
If the "trouble" country is neutral, the Axis player may, if he wishes, declare the country a Target Country and roll once on the Diplomatic Incident Table (applying the Political die roll modifiers, as usual). He may choose this option even if he cannot meet the usual conditions for choosing the "trouble" country as a Target Country (16.1). Be careful-this is an option that can burst into flames.
Border War
Activate the target country as an Axis minor country. Also, if any neutral minor country shares a land border with the target country, activate one such neutral minor country (Axis player's choice) as an Allied minor country.
Churchill Pressures Neutrals
The Allied player rolls on the Axis Aggression Table, applying the Political die roll modifiers.
-OR-
If Vichy is currently neutral, the Allied player can permanently remove the Vichy Convoy Marker from the game. This represents Free French sabotage and/or an Allied strike at French shipping. The Allied player can remove the Convoy Marker whether or not it has entered the game yet.
Command Paralysis
Place the Command Paralysis Marker in Berlin (see 3.8).
Coup
Activate the target country as an Allied minor country. No Mobilization steps are received
(19.2.2).
Declare War on Target Country
Activate the target country as an Allied minor country.
The only other way for the Axis player to declare war on a minor country is to do so during the Axis War & Peace Segment (6.1), which gives the Allied player an entire turn to respond. The Axis Ultimatum cards give the Axis player a chance to declare war on, and quickly overrun, neutral countries.
Free Passage
Activate the target country as an Axis minor country-use Limited Setup (19.1).
Hitler Orders Attack
The Axis player must, if possible, immediately make one attack somewhere on the map involving at least one German unit. Though this attack occurs during a Political Event Segment, it must follow the Attack Sequence (4.2.2) and adhere to all Combat rules.
Hitler Pressures Neutrals
The Axis player rolls on the Axis Aggression Table, applying the Political die roll modifiers.
-OR-
If Vichy is currently neutral, the Axis player can place the Vichy Convoy Marker in the Delay Box (unless it has already entered the game, or been removed from the game by a "Liberation of France" or "Churchill Pressures Neutrals" event).
Hitler Supports Nationalists
The Axis player can inflict one Allied Partisan step loss anywhere on the map, or place one Axis minor country or Axis Nationalist infantry step as a replacement (if the Axis player has any such units in his Force Pool).
Military Aid
The Allied player receives one replacement step of any type that can be assigned to any Western or Soviet Allied minor country as a replacement. If there are no Allied minor countries, the step may be assigned to Britain or the Soviet Union.
Military Takeover-Truce
The Axis player places the "Military Takeover" Marker on the Victory Point Track in the VP Box occupied by the "Axis Tide" VP Marker.
- If the VP Marker reads "Allied Crusade," the "Military Takeover" Marker is placed in the 0 VP Box.
- If the "No Retreat" Marker is already on the Victory Point Track when a Military Takeover Event occurs, the Axis player removes it, flips it to read "Military Takeover," and places it in the VP Box currently occupied by the "Axis Tide" VP Marker (or in the 0 VP Box as above).
The Axis player must also place an Armistice Truce Marker in either London or Moscow (his choice, but he cannot place the Armistice Truce Marker in a capital already containing a Truce Marker).
Nazi-Soviet Pact
This result is No Effect if there is an Armistice or Negotiations Truce Marker in Moscow, or if Total War is in effect.
- If the Nazi-Soviet Pact Truce Marker is in Moscow when this result is obtained, remove that Marker and lift Nazi-Soviet Pact Restrictions.
If, on the other hand, there is no Truce Marker of any type in Moscow when this result is obtained, place an Armistice Truce Marker in Moscow.
Neutrality
Place the target country's Res(erve) corps unit face down in the country's capital city. The country remains neutral. The Axis player cannot select a neutral minor country so marked as the target country of a Treaty Attempt. The Axis player may, if he wishes, change this to a "Coup" result instead.
Pacific Commitment
The Allied player must immediately place one (if Limited War is still in effect) or two (if Total War has broken out) currently available US and/or British Air Support units in the Delay Box. If there are not enough Air Support units on the Available Air Support Track, the Allied player must use units on the Turn Record Track-take the unit or units closest to returning to the game.
Special Weapons Failure
The Axis player must place an available German Air Support unit, U-boat unit, or War Production Marker (from the Strategic Warfare Track) in the Delay Box, or take one German armor step loss anywhere on the map.
Special Weapons Success
The Axis player may immediately place one Soviet or Western Allied Air Support unit, Beachhead unit, or the Allied Intensive Bombing Marker in the Delay Box. The Axis player may choose the unit from among those on the Available Air Support Tracks or may choose one actually in play on the map. Any Allied ground units stacked with a Beachhead unit so removed are eliminated (see 2.3.5).
Target Country joins Axis
Activate the target country as an Axis minor country.
Volksturm
The Axis player must place an available German Air Support unit, U-boat unit, or War Production Marker (from the Strategic Warfare Track) in the Delay Box, or take one German armor step loss anywhere on the map. He immediately receives in exchange one German infantry replacement step.
17. Conditional Event Results
In general, a player must perform actions as directed by Conditional Events (they portray events beyond the player's power to control). Do not change the orientation of minor countries that are already active unless specifically directed to do so.
Important: Treat any Event Result that is impossible to fulfill given current conditions as a No Result.
17.1 Axis Permanent Conditional Events
During every Axis Conditional Event Segment, the Axis player checks to see if he has fulfilled the conditions for any of his Permanent Conditional Events. Check Events in the order listed below.
Conquest of Western Allied Minor Countries
A Western Allied minor country is conquered if, during any Axis Conditional Event Segment, all of its cities are occupied by Axis ground units.
Exception: If Nazi-Soviet Pact restrictions are in effect, Western Allied Poland is conquered if Axis units occupy Posen, Krakow, and Warsaw-they need not occupy Lvov in Eastern Poland (this is also true if the Polish Ceded Border Marker is on the map, since Eastern Poland and Lvov would then be part of the Soviet Union, not part of Poland).
All of the minor country's units are removed from the map and from the Active section of the Western Allied Force Pool the instant it is conquered, and placed in the Conquered Country section of the Western Allied Force Pool.
Liberation of Soviet Allied Minor Countries
A Soviet Allied minor country is liberated if, during any Axis Conditional Event Segment, all of its cities are occupied by Axis ground units.
All of the minor country's units are removed from the map and the Soviet Allied Force Pool the instant it is liberated and placed in the Axis Force Pool. The country's Reserve corps unit is placed in the capital, and the country becomes an active Axis minor country.
Occupation of Axis Minor Countries
An Axis minor country is occupied if, during any Axis Conditional Event Segment, aground unit of any other Axis minor country occupies any hex or hexes in that country or its Dependents.
An Axis minor country is also occupied if more than one German multi-step unit occupies any hex or hexes in that country during an Axis Conditional Event Segment. Vichy, Finland, and Axis Italy are occupied if even one German multi-step unit occupies any hex or hexes in that country or its Dependents.
- German one-step units, Axis Air Support units, Axis "EX" units, and Axis Nationalist units can never trigger occupation-the Axis player can have any number of these units in any Axis minor country without penalty.
- Neither the German-Italian Afrika army nor the Mediterranean HQ units trigger occupation of Axis Italy. The Axis player may have one or both German-Italian multi-step units in Italy or its Dependents without penalty.
- The German-Finnish 20th army multi-step unit never triggers occupation of Axis Finland.
When found to be occupied during an Axis Conditional Event Segment, all of the Axis minor country's units are removed from the map and placed in the Axis Force Pool. Its Convoy Marker and/or Air Support unit (if any) are placed in the delay box. This can happen any number of times to any Axis minor country. The country remains an Axis minor country, and its units are still eligible to return as Axis minor country replacements.
The occupation conditions simulate the political costs of imposing foreign forces on Germany's allies. Italy and Finland were able to pursue more independent policies. Vichy would also have been a very sensitive Axis partner. To reflect this, the Axis player is even more limited in his ability to impose substantial German forces on these countries. Allied players will gladly help the Axis player check Axis minor countries for occupation during Axis Conditional Event Segments.
Axis Coup
This Event can occur only once per game.
If the Axis Coup corps unit is in the Axis Force Pool, the Axis player can place this unit in any unoccupied or Axis occupied city in Egypt, Iraq, Syria, Persia, or Vichy territory. This unit traces supply to Berlin.
Note: The Axis coup unit can be placed in Syria or Persia only during total war.
- If eliminated, or if Vichy is activated while the Axis Coup unit is still in the Axis Force Pool, the unit is flipped to its Free French side and placed in the Western Allied Force Pool.
- Placing the Axis Coup unit in a city in Vichy constitutes an immediate declaration of war on Vichy if Vichy is neutral. This is intended and allowed.
17.2 Western Allied Permanent Conditional Events
During every Western Allied Conditional Event Segment, the Western Allied player checks to see if he has fulfilled the conditions for any of the permanent Western Allied Conditional Events.
Re-activation of Conquered Western Allied Minor Countries
A Conquered Western Allied minor country is re-activated if, during any Western Allied Conditional Event Segment, its capital city is not occupied by an Axis or Soviet Allied ground unit.
All of the minor country's units are moved back into the Active section of the Western Allied Force Pool the instant it is re-activated. The country's Reserve corps unit is placed in the country's capital, and the country becomes an active Western Allied minor country. Any N(ationalist) Partisan units in the country can be immediately removed and replaced with that country's own units on a step-for-step basis.
Liberation of Axis and Soviet Allied Minor Countries
An Axis or Soviet Allied minor country is liberated if, during any Western Allied Conditional Event Segment, all of its cities are occupied by Western Allied ground units.
All of the minor country's units are removed from the map and the Axis or Soviet Allied Force Pool the instant it is liberated and placed in the Western Allied Force Pool. The country's Reserve corps unit is placed in its capital, and the country becomes an active Western Allied minor country. Any N(ationalist) Partisan units in the country can be immediately removed and replaced with that country's own units on a step-for-step basis.
"Their Finest Hour"
This Event can occur only once per game.
- During the first Western Allied Conditional Event Segment that an Axis ground unit occupies Paris, the Western Allied player moves the British Air Support unit from the "Finest Hour" Box to his Available Air Support Track.
If Appeasement Restrictions are still in effect when this Event occurs, place the unit in the Delay Box instead.
Free France
This Event can occur only once per game.
While Vichy is neutral, it can be activated as a Western Allied minor country during any Western Allied Conditional Event Segment in which Paris is not occupied by an Axis ground unit.
Free French Coup
This Event can occur only once per game.
If the Axis Coup unit is eliminated, or if Vichy is activated while the unit is still in the Axis Force Pool, the Axis Coup unit is flipped to its Free French side and placed in the Western Allied Force Pool. If in the Western Allied Force Pool, the Allied player can place the Free French corps unit in any unoccupied or Western Allied occupied city in Egypt, Syria, Iraq, Persia, or Vichy territory. This unit traces supply to London.
Note: The Free French coup unit can be placed in Syria or Persia only during total war.
- Placing the Free French unit in a city in Vichy constitutes an immediate declaration of war on Vichy if it is neutral. This is intended and allowed.
- If the Free French unit is eliminated, it is placed in the Force Pool to which the other Vichy units belong and is treated like any other French Colonial corps for the rest of the game.
17.3 Soviet Permanent Conditional Events
During every Soviet Conditional Event Segment, the Soviet Allied player checks to see if he has fulfilled the conditions for any of the permanent Soviet Allied Conditional Events.
Liberation of Axis and Western Allied Minor Countries
An Axis or Western Allied minor country is liberated if, during any Soviet Conditional Event Segment, all of its cities are occupied by Soviet Allied ground units.
All of the minor country's units are removed from the map and the appropriate Force Pool the instant it is liberated and placed in the Soviet Force Pool. The country's Reserve corps unit is placed in the capital, and the country becomes an active Soviet Allied minor country. Any C(ommunist) Partisan units in the country can be immediately removed and replaced with that country's own units on a step-for-step basis.
Emergency Mobilization
This Event can occur only once per game.
During the first Soviet Conditional Event Segment in which the Nazi-Soviet Pact Marker is no longer in Moscow, the Soviet player places one Soviet one-step infantry-type corps units in each Soviet Strategic Hex (except Tehran) not containing any Axis units (including Air Support units).
17.4 Axis Option Card Conditional Events
National Redoubt
The Fuhrer Bunker HQ unit must be placed, and is placed for free-the Axis player need not convert a corps unit to form it. The German Command Paralysis (3.7) Marker cannot be removed from Berlin while this unit is on the map. It can never be broken down, and must be the last step lost in any combat. If eliminated, this unit is permanently removed from the game.
French Collapse
This Event can occur only once per game.
- Vichy is created (see 12.2.4)
- The Axis player may immediately activate as an Axis minor country any one neutral country sharing a land border with continental France.
- Partisan units can be placed in France (but not in neutral Vichy territory) once it has collapsed.
Soviet or British Crisis
- The effects of a Crisis differ depending on whether or not Axis units occupy the country's capital when the result occurs.
- If an Axis ground unit occupies Moscow when a Soviet Crisis occurs, the Crisis results in a Soviet Collapse. Otherwise, it results in an Armistice.
- If an Axis ground unit occupies London when a British Crisis occurs, the Crisis results in a British Collapse. Otherwise, it results in an Armistice.
Armistice
- If there is not a Truce Marker in the indicated capital, place an "Armistice" Marker in London (British Crisis) or Moscow (Soviet Crisis).
Soviet Collapse
This Event can occur only once per game.
- All Soviet ground units are immediately removed from the map and placed in the Soviet Force Pool. The Soviet Convoy Marker and any Soviet HQ units and Air Support units in play are placed in the Delay Box.
- The Soviet Pending Option card is returned to the Soviet card hand (it will not be revealed during the next Soviet Seasonal Phase-the Soviet player will have to make do without a card for a Season).
- Remove all Ceded Border Markers. All Border Regions that have become part of the Soviet Union revert back to their original minor countries.
- The Soviet player then places up to twelve Soviet infantry-type corps, one each in any unoccupied cities in the Soviet Union. These Soviet corps cannot be set up in any Soviet cities occupied by Axis or Western Allied units, and no more than twelve may be placed, even if there are, say, fifteen open cities in the Soviet Union. (If there are only ten open cities, only ten corps may be placed, etc). The Soviet player still controls Soviet (now Russian) forces.
- The Axis player may immediately activate as an Axis minor country any one neutral minor country sharing a land border with the Soviet Union.
- If there is not a Truce Marker in Moscow, place an "Armistice" Marker in Moscow.
- Partisan units can be placed in the Soviet Union once it has collapsed.
Even after a Soviet collapse, taking and holding a place as big and complex as Russia will present a sizable problem to the axis player.
British Collapse
This Event can occur only once per game.
- All British ground units are immediately removed from the map and placed in the Western Allied Force Pool. Any British HQ units and Air Support units in play are placed in the Delay Box.
- The Western Allied Pending Option card is returned to the Western Allied card hand (it will not be revealed during the next Western Allied Seasonal Phase-the Western Allied player will have to make do without a card for a Season).
- The Allied player then sets up three British infantry corps: one in the US Box, one in the Trans-Africa Box, and one in any unoccupied or Western-Allied occupied port in Great Britain, a Western Allied minor country, or a British Dependent. The Western Allied player still controls British (now Commonwealth) forces. Remember that British replacement corps can be placed in the US Box.
- If Limited War is still in effect, schedule the addition of the US cards to the Western Allied card hand as if Total War had just broken out.
- The Axis player may immediately activate as an Axis minor country any one neutral minor country anywhere on the map.
- If there is not a Truce Marker in London, place an "Armistice" Marker in London.
- Partisan units can be placed in Great Britain once it has collapsed.
17.5 Allied Option Card Conditional Events
Liberation of France
This Event can occur only once per game.
- If Vichy is an Axis minor country when this event occurs, remove all Vichy units from the map, Axis Force Pool, and Turn Record Track. Place all 0-1-2 units in the Western Allied Force Pool, and place all other units in the Delay Box.
- Remove the Vichy Convoy Marker from the game.
Italian Collapse
This Event can occur only once per game.
- The Italian Air Support unit and Convoy Marker are permanently removed from the game.
- All other Italian units are immediately removed from the map and placed in the Axis Force Pool (the Axis player must perform an emergency breakdown of any German-Italian units and remove the Italian steps).
- Italy remains an Axis minor country.
- Partisan units can be placed in Italy once it has collapsed.
The Italian Armistice has nothing to do with Truce Markers or restrictions, it is more like the Allies making the Italians an offer they can't refuse.
German Collapse
This Event can occur only once per game.
- All German ground units are immediately removed from the map and placed in the Axis Force Pool. All German Air Support units and Convoy Markers are placed in the Delay Box.
- The Axis Pending Option card is returned to the Axis card hand (it will not be revealed during the next Axis Seasonal Phase-the Axis player will have to make do without a card for a Season).
- The Axis player then sets up one German infantry corps in each unoccupied city in Greater Germany (German corps cannot be set up in any cities occupied by Soviet or Western Allied units). The Axis player still controls German forces.
- Place the "Command Paralysis" Marker in Berlin.
- Partisan units can be placed in Greater Germany once it has collapsed.
17.6 Separate Peace Extension
A Separate Peace Extension means that the game will continue through the November-December 1946 game turn instead of ending after the November-December 1945 game turn. A Separate Peace Extension can occur only once. If you've started one, ignore all further results calling for one to begin.
- Whenever a Separate Peace Extension begins in a Western Allied Conditional Event Segment, place an "Armistice" Marker in London.
- Whenever a Separate Peace Extension begins in a Soviet Conditional Event Segment, place an "Armistice" Marker in Moscow.
- Whenever a Separate Peace Extension begins in an Axis Conditional Event Segment, place an "Armistice" Marker in London if Western Allied units occupy fewer Axis Strategic Hexes than Soviet Allied units do. Place it in Moscow if Soviet Allied units occupy fewer Axis Strategic Hexes than Western Allied units do.
- If there is already a Truce Marker in the indicated capital when a Separate Peace Extension begins, set it to read "Armistice."
The usual Victory Point Checks are performed during a Separate Peace Scenario, but the Victory Points on the VP Track will not be used to determine final Victory (they are still used as die roll modifiers, to determine replacements, etc). There is no "historical" versus "game" victory in a Separate Peace Extension, and there are no Automatic Total Victories. Consider the Automatic Total Victory Box to contain 4 VPs when calculating die roll modifiers, replacements, etc.
Victory is determined at the end of the November-December 1946 game turn solely by the result of a final Victory Point Count.
- The Western Allied faction scores one VP for each Western Allied and Axis Strategic Hex occupied by Western Allied ground units.
- The Soviet Allied faction scores one VP for each Soviet Allied and Axis Strategic Hex occupied by Soviet Allied ground units.
- The Axis faction scores one VP for each Axis Strategic Hex occupied by Axis ground units.
- A faction wins a Decisive Victory if it has fifteen Victory Points.
- If two factions have fifteen Victory Points, or if no faction has fifteen Victory Points, everybody loses and a new phrase is coined by the press, "Atomic Winter."
18. Game Setup
Game Length: 57 turns-the first turn is August-September 1939; the last turn is November-December 1945 (the 1946 turns are used only if a Separate Peace Extension occurs).
Preparation
- Trim the east edge of the West Map to remove all xx28 hexes. Cut in a straight north/south line along the hexsides so that the hexes containing the cities of Budapest and Stockholm are removed in their entirety from the West Map.
- Lay the maps out on the table with the trimmed east edge of the West Map overlaying the west edge of the East Map.
- Place the three Force Pool Displays in some convenient and accessible spot on the table.
- Separate the units by nationality, and set all US and minor country units (including Partisans and Axis Nationalists) off to the side (this is the "Neutral Force Pool"-no actual box is provided for this).
Game Setup
- Place the "Nazi-Soviet Pact" Truce Marker in Moscow, and place the "Appeasement" Truce Marker in London.
- Set up the Victory Point Marker reading "Allied Crusade" in the 1 VP Box on the Victory Point Track.
- Place the Game Turn Marker in the August-September "Autumn" 1939 space on the Turn Record Track. The game will begin with a Victory Point Check followed by an Axis player turn with Seasonal Phase.
- Players then set up their units in the order listed below.
Soviet Union (Soviet Allied)
Fifteen 3-3-2 infantry armies; two 1-1-3 cavalry corps; two 1-1-3 tank corps-in or adjacent to any city or port in the Soviet Union, no more than one per hex.
One Convoy Marker-Baltic Sea or Black Sea, either mode.
One Air Support unit-Soviet Available Air Support Track.
Soviet Force Pool
Twenty-five 3-3-2 infantry armies.
One 4-2-2 Shock army.
Two 3-3-3 cav-mech armies.
Two 1-1-3 tank corps.
Two 0-4-0 fortress units (Sevastopol and Leningrad).
Set aside all Soviet units with Reinforcement numbers.
Soviet Card Hand
The Soviet player holds all Soviet Limited War cards at the beginning of the game.
- Add all Soviet Total War cards to the Soviet hand the instant the Axis player reveals a Total War card.
Great Britain (Western Allied)
One 1-2-2 infantry corps and three 1-1-3 infantry corps one each in Malta, Alexandria, Suez, and Basra.
One 1-2-2 infantry corps, one 1-1-3 infantry corps, and one 2-1-3 armor corps-in or adjacent to any city in Great Britain, no more than one per hex.
One 0-2-0 Fortress unit (Gibraltar, reduced)-Gibraltar.
One Air Support unit-Western Allied Available Air Support Track.
Western Allied Force Pool
Six British 1-2-2 infantry corps.
Two 2-3-3 infantry armies.
Five 2-1-3 armored corps.
Place one British Air Support unit in the "Finest Hour" Conditional Reinforcement Box.
Set aside all British units with Reinforcement numbers.
France (Western Allied)
Three 0-6-0 Mag(inot Line) fortress units (full strength)-one per hex in continental France adjacent to the border with Greater Germany, hexes w3319, 3420 and Metz.
Three 1-2-2 infantry armies (3rd, 5th, and 8th, full-strength) -one each stacked with each of the Maginot Line fortress units.
Five 1-1-2 infantry corps, one 1-2-3 infantry corps, and one 2-2-2 HQ unit (2nd, 4th, 6th, 7th, 9th, and 10th armies, and the French HQ, all reduced)-in or adjacent to any city or port in continental France, no more than one per hex.
Three 0-1-2 Colonial corps-one each in any cities in French North Africa or Syria.
Western Allied Force Pool
One French 0-1-2 Res(erve) corps.
One 2-2-2 army (Alps).
Delay Box
One 6-6-3 1st army
One 2-2-2 C(olonial) army.
One 1-2-3 mechanized EX corps.
One Air Support unit.
Set aside the "Axis Coup/Free French" corps unit and the Vichy Convoy Marker-these will be added to the game only if Vichy is created.
Western Allied Card Hand
The Western Allied player holds all Western Allied Limited War cards at the beginning of the game.
- Add all Western Allied non-US Total War cards to the Western Allied hand the instant the Axis player reveals a Total War card.
- The Western Allied US Total War cards are added to the Western Allied hand according to the schedule in 13.1.2-Allied Total War Cards.
Germany (Axis)
One 2-2-3 HQ (North, reduced); one 4-4-3 army (4th, reduced); six 3-4-2 armies (1st, 3rd, 7th, 8th, 10th, 14th, all reduced); two 2-2-4 panzer corps; one 1-2-4 mountain corps-in or adjacent to any city or port in Greater Germany, no more than one per hex.
One Convoy Marker-Baltic Sea or North Sea, either mode.
Two Air Support units-Axis Air Support Track.
Axis Force Pool
Three German 5-6-2 armies (12th, 19th, and E).
Ten 2-2-4 panzer corps.
Thirty-six 1-2-3 infantry corps.
The Black Sea Convoy Marker.
Set aside all German units with Reinforcement numbers.
Axis Card Hand
The Axis player holds all Axis Limited War cards at the beginning of the game.
- Add all Axis Total War cards to the Axis hand the instant the German Mobilization card is revealed.
Initial Card Selection
After setup, but before beginning play, each player selects one Option card from his beginning hand as his initial Pending Option card. In a two-player game, the Allied player selects one Western Allied and one Soviet Allied card. All selection restrictions apply to this initial card selection. The first turn of the game, August-September 1939, is a Seasonal Turn-all players will add Seasonal Phases to their player turns, and will thus have Pending Option cards to reveal during the Option Card Segments of their Player Turns.
19. Minor Country Setup
All minor countries begin the game neutral. Minor country units are not set up on the map until their country is activated.
19.1 Limited Setup
In some cases, the Event Result that calls for activation of a minor country will specify Limited Setup.
- The country's Reserve corps is placed in the country's capital and the remainder of its units are placed in the controlling faction's Force Pool. This is the full extent of setup allowed-ignore all Normal Setup procedures. Note that Vichy will not be able to set up its Reserve corps if Paris is occupied by enemy units.
- When Italy is activated with a Limited Setup, its Air Support unit and Convoy Marker are placed in the Delay Box.
19.2 Normal Setup
Unless specifically mandated to use Limited Setup, a neutral minor country always uses Normal Setup when activated.
19.2.1 Procedure
When activated, place the minor country's Reserve corps unit in the controlling Force Pool, and set up all remaining units within the country's borders, in or adjacent to any city or port in the home country. Note that Ireland, Denmark-Norway, and the Baltic States have only Reserve corps units-they have no units to set up on the map when activated with Normal Setup.
- Any units with reduced-strength sides must be placed at reduced strength.
- No stacking is allowed during minor country setup.
Italy has limits on the setup of certain of its units, as detailed below. These units are placed before the remainder of Italy's units are set up.
- Four 0-1-2 corps-one each in Tripoli, Tirana, Tobruk, and Rhodes (5th, 9th, 10th, and A(egean) armies, all reduced).
Convoy Marker-Eastern or Western Mediterranean, either mode.
Delay Box
The Italian 1st and 8th armies.
One mechanized EX corps.
One airborne EX corps.
One Air Support unit.
The German-Italian PanzerArmee Afrika.
The German-Italian Med HQ.
Vichy has specific limits on the setup of its units, detailed below (make sure you removed the French Air Support unit, HQ unit, and the three Maginot fortress units from the game like you were supposed to when Vichy was first created-see 12.2.4).
- No Mobilization roll (19.2.2) is made for Vichy-the only units that set up on the map are the three 0-1-2 Colonial corps, none of which has a two-step side. Theses units are set up in any city hexes in Vichy territory, no more than one per hex.
- The French Reserve corps is placed in the controlling faction's Force Pool.
- If the Axis Coup corps unit is still in the Axis Force Pool, it is flipped to its Free French side and moved to the Western Allied Force Pool when Vichy is activated.
- All remaining French units are placed in the Delay Box immediately upon Vichy activation. If it has not already entered the game or been eliminated, the Vichy Convoy Marker will go to the Axis Force Pool, even if Vichy is activated as an Allied minor country.
19.2.2 Mobilization Steps
After setting up a minor country's units, the controlling player then rolls one die for that country's Mobilization. The die roll result is the number of reduced-strength units that can be flipped to their full-strength sides.
- If more Mobilization steps are called for than can be absorbed by flipping starting units to full strength, the excess steps are lost-no additional units (including the country's Reserve corps) can be placed on the map as a result of a Mobilization die roll.
- No Mobilization roll is made for Allied minor countries activated by a Coup result on the Diplomatic Incident Table.
- No Mobilization roll is made for Vichy.
20. Optional Rules
The following rules are strictly optional. They will add to the time and effort it takes to play the game (but not too much), and will also add to the play value. Their use is recommended.
20.1 Soviet Command Control
There are four Command groups in the Soviet forces. Each Command group includes an Air Support unit, a Front unit (the three-and-four step Soviet infantry armies), and one or more HQ units. The four Command groups are Baltic, Byelorussian, Ukraine, and the Stavka Reserves. In general, the Soviet player must observe command restrictions within the first three Command groups, but is free to use Stavka Reserves in conjunction with any other Command group.
- A Soviet HQ unit cannot apply its rating to a combat involving a Soviet Front unit from a different Command group. The Stavka HQ unit and the Reserve Front unit are exempt from this restriction.
- A Soviet HQ unit cannot stack with a Soviet Front unit from a different Command group. The Stavka HQ unit and the Reserve Front unit are exempt from this restriction.
- Two Soviet Front units cannot participate in the same attack unless one of them is the Reserve Front unit.
- A Soviet Air Support unit cannot provide a shift in a battle involving a Soviet HQ and/or Front unit from a different Command group-the Stavka HQ unit and the Reserve Front and Air Support units are exempt from this restriction.
- Soviet Air Support units from different Command groups cannot both contribute Air Superiority Shifts to the same combat-the Soviets can receive two Air Superiority Shifts only if one is being contributed by the Reserve Air Support unit, which is exempt from this restriction.
- The Stavka HQ unit can participate in a combat together with any one other Soviet HQ unit. And yes, the Soviets get two HQ Support Shifts when they have two HQs participating in a combat.
20.2 Replacement Options
During his Seasonal Reinforcement Segments, the phasing player may freely convert any number of his faction's Major Power replacement steps into minor country replacement steps (including partisans and Axis Nationalists if in play) of the same type. A player may not convert minor country replacements into Major Power replacements.