Kribbeln
Kribbeln Rulebook
Table of Contents
Table of Contents
Components
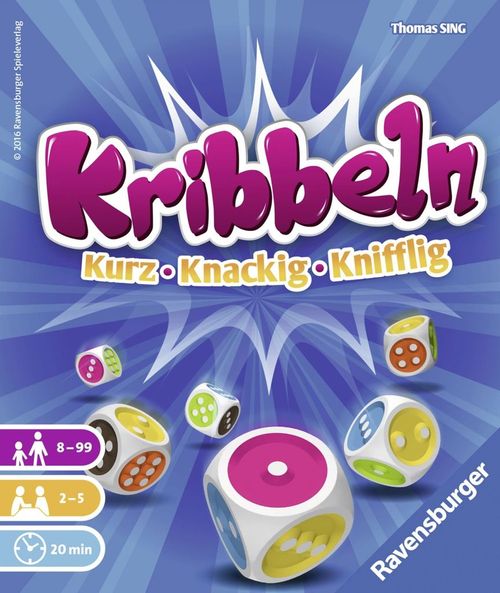
6 Kribbeln dice, 1 pad, 1 pencil
Setup
Set out a scoring sheet and the dice.
Choose a player to take charge of filling in the scoring sheet. To keep the game exciting for a long time, there are 6 different scoring sheets with different tasks. Pick one.
Write the names of all players in the spaces provided for them on the sheet.
Let's Go!
The oldest player among you begins and takes the dice. After their turn, play continues clockwise. You first play through the first row of the scoring sheet together, in turn order, then the second row, and so on. After everyone has made an entry in a row, you immediately hand out scoring points for that row.
During a Turn
You have three roll attempts to fulfill the current task. At the same time, try to achieve as high a dice total as possible.
So you may roll up to 3 times, and each time decide anew whether you set dice aside, bring dice you have already set aside back into the roll, or stop rolling altogether.
The Tasks
To fulfill the tasks, you must roll certain colors. The tasks are easy to understand from their symbols: for example, you might need to roll exactly one green die (1x green), or more blue dice than red dice. If you are ever unsure about a symbol, you can find the tasks explained in the Task Icons section.
Important: A required number must always be met exactly. For "2x blue," that means neither 1 blue die nor 3 or more blue dice will do.
Task Fulfilled or Not
Task Fulfilled
Add up the pip values of all six dice and write the total in the corresponding space on the scoring sheet.
Note: Sometimes you fulfill a task already on the first roll. You are allowed to keep rolling, but you risk spoiling the task again. A tricky decision.
Task Not Fulfilled
This means the dice total is unfortunately not valid for the task space. Now you can decide: enter either
- an X in your task space, or
- the dice total in the Kribbel space of the same background color.
Then immediately try the current task again. You again have 3 roll attempts.
Watch out: The Kribbel space is what makes "Kribbeln" tricky. Making an entry in a Kribbel space is tied to certain conditions, explained in the Kribbel Spaces section.
Placement and Scoring
As soon as a row is completely filled in (that is, every player has either their dice total or an X in their space), the points for each player are determined. Points depend on the number of players: the player with the highest dice total receives as many points as there are players taking part.
The player in second place gets one point less, and so on. Anyone who has entered an X receives no points.
Depending on the number of players, the following points are awarded:
- 2 players: 2, 1
- 3 players: 3, 2, 1
- 4 players: 4, 3, 2, 1
- 5 players: 5, 4, 3, 2, 1
Example: In the first task, Tom rolled a dice total of 26, Nina 31, Frank 24, and Carola 17. Tanja did not fulfill the task, so she has an X in her space. Nina therefore did best and receives 5 points, Tom 4, Frank 3, Carola 2, and Tanja 0.
Tie
If several players achieve the same dice total in a row, they all receive the points for the correspondingly lower place.
So, for example, if 2 players share 1st place, both are credited only with the points for 2nd place. If 3 players achieve the second-highest dice total, they receive the points for 4th place — 2nd and 3rd place are skipped.
The Next Row Begins...
...with the player who has the highest value in the row above (regardless of whether it was a task, a Kribbel space, or a subtotal).
In the event of a tie, whichever of the players involved rolls the higher number with one die begins.
Kribbel Spaces
On the scoring sheet there are three areas (with the background colors red, yellow, and blue). Spread across them you'll see four rows of Kribbel spaces. These 4 rows are not tied to any task.
Once both task rows of a color area are filled in, the Kribbel spaces directly below them come up next. All players who don't yet have an entry there may now roll as usual and enter their dice total.
These Kribbel Spaces Are Quite Tricky!
The color of the dice doesn't matter here. The trick: the dice totals you enter in the Kribbel spaces must always get bigger from top to bottom.
If it is bigger, you may enter your dice total. If you can't manage that, an X is entered in the space instead. So for a Kribbel space, the entry must always be higher than in all of your own previous Kribbel spaces. In the first Kribbel space, therefore, any total is possible.
Now score the row of Kribbel spaces as usual and hand out scoring points as described above.
Tip: It is allowed to deliberately spoil a task, in order to possibly optimize a Kribbel space in the same area!
Switching to a Kribbel Space
If you do not fulfill your current task (and only then), you may, if you wish, switch to the Kribbel space instead. Then enter the total you rolled in the Kribbel space. The condition for this, however, is:
- that the Kribbel space has the same background color (red, yellow, or blue) as the unfulfilled task.
- that the total you enter is higher than in all of your own previous Kribbel spaces.
Second chance: afterward, try the task itself again right away.
For Those Who Want to Know Exactly
In the blue area you can even switch to a Kribbel space twice. However, Kribbel space 3 must be filled in before Kribbel space 4. It is not allowed to switch and enter an X in the Kribbel space just so you can attempt the color task again — when switching, a total must always be entered.
End of Game
As soon as all rows of the scoring sheet have been filled in and scored, the game ends. Now add up the points and write the total in the Final Score space. The player with the highest overall result has won! In the event of a tie, whichever of these players has the higher result in Kribbel space 4 has won. If there is a tie there too, there are multiple winners.
Variant for Beginners: The Kribbel spaces do not have to always get bigger from top to bottom.
The Task Icons
The tasks are always about colors. The pip value of the 6 dice has no bearing on successfully fulfilling a task: it only counts toward calculating the dice total.
Specified Colors
- No die shows the specified color. Example: no yellow dice.
- No die shows either of the specified colors. Example: no yellow dice and no blue dice.
- Exactly 1 die of the specified color (1x). Example: exactly 1 green die.
- Exactly 2 dice of the specified color (2x). Example: exactly 2 green dice.
- Exactly 1 die of the first color AND no die of the second color (1x & no [color]). Example: exactly 1 yellow die and no green ones.
Free Colors
- Any one color exactly 3 times (3x, any color). Example: 3 blue dice, 1 yellow, 1 green, and 1 red. Watch out: two colors 3 times each is not allowed.
- No color exactly 3 times (3x, any color, crossed out). Example: 4 blue dice, 1 green, 1 red.
- Exactly two different colors, each exactly 2 times (2x any color + 2x any color). Example: 2 blue dice, 2 yellow, 1 green, 1 red. Watch out: three colors 2 times each is not allowed, and neither is one color 4 times!
- Any one color exactly 4 times (4x, any color). Example: 4 green dice and 2 yellow.
- Exactly 3 colors, in any combination. Example: 2 red dice, 1 green, and 3 blue.
- No color exactly 2 times (2x, any color, crossed out). Example: 3 blue dice, 1 red, 1 yellow, 1 green.
Note: It is allowed for a color not to appear at all.
Comparison
- More dice of the left-hand color than the right-hand color (scale tipped toward the left color). Example: 2 blue dice, 1 red, 3 green.
- Both shown colors occur equally often (balanced scale). Example: 0 green dice, 0 orange, 3 yellow, 2 red, 1 blue.
- Both shown colors occur a different number of times (≠). Example: 3 yellow dice, 1 orange, 1 red, 1 blue.
- All three shown colors occur a different number of times from one another (≠, ≠). Example: 1 orange die, 0 red, 2 yellow, 1 blue, 2 green.
- The left-hand color occurs more often than every other color (scale tipped toward the left color, against every other color). Example: 3 yellow dice, 1 blue, 2 red.
To illustrate the scoring, you'll find a filled-in scoring sheet behind the pad's cover sheet.