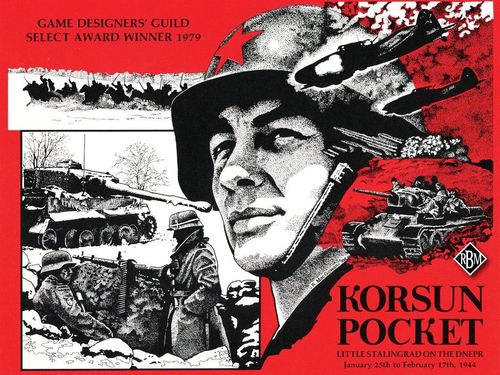
Korsun Pocket: Little Stalingrad on the Dnepr
Korsun Pocket: Little Stalingrad on the Dnepr Rulebook
Table of Contents
Table of Contents
- Introduction
- Game Components
- Sequence of Play
- Weather
- Movement
- Zones of Control
- Stacking
- Observation, Visibility, and Reconnaissance
- Combat
- Artillery
- Supply
- Air
- Extra Night Turn and Fatigue
- Engineers, Building and Demolishing
- Battalion Breakdown and Companies
- Dismount
- Desperation Breakout Attempt
- Partisans
- Scenario Instructions
- Reinforcement Record
- Scenario No. 1: 6th Tank Army's Debut
- Scenario No. 2: On to Zvenigorodka
- Scenario No. 3: The Pocket Is Formed
- Scenario No. 4: "I will rescue you." Gen. Hube, 1st Panzer Army to the cut-off forces in the Korsun Pocket
- Scenario No. 5: von Vormann Tries Again
- Scenario No. 6: Testing the Ring
- Scenario No. 7: Massacre on the Gniloi Tikich
- Scenario No. 8: The Korsun Pocket Campaign
- Roll Your Own Scenario
- Counter Errata
- Order of Battle
- Designer's Notes
- Bibliography
- Official Errata
- Charts and Tables
- Turn Record Track (historical weather, with reinforcement arrivals)
- Air Base Cards
- Play Aids
- Zero Visibility Movement Chart
- ZOC - Visibility Chart
- Front/Army Delivery Means Chart
- Frozen/Snow Terrain Effects Chart
- Mud/Deep Mud Terrain Effects Chart
- Terrain Effects on Combat, Line of Sight, and Artillery Chart
- Fatigue Effects Chart
- Supply Rate Schedule
Introduction
While Korsun Pocket is by no means a simple game, many of the concepts should be familiar to experienced gamers. I strongly recommend reading the rules thoroughly a few times and playing one or more of the smaller scenarios before tackling the campaign game.
Game Scale. Korsun Pocket is played on a 1:100,000 scale map, with one mile per hex. The day is divided into two five hour day turns and a night turn that is 14 hours long, including the optional Extra Night Turn. Most units are battalions, representing at full strength 600-900 men, 60-70 tanks, or 8-12 artillery pieces.
Game Components
- One Rules Book
- Six Counter Sheets
- Map Sections A, B, C, and D
- Three Situation Maps (Jan. 25, Feb. 1, Feb. 10)
- One plastic die
- Three Air Base Cards
- Two Turn Record Tracks
- One set of Play Aids
- One resealable plastic bag
If any parts are missing or damaged, please write to People's War Games, 3972 Gardenia Place, Oakland, California 94605. Please send damaged part with letter.
Counters
Counter Symbols: Infantry, Security, Rifle, Guards Rifle; Airborne; Machine Gun; Cavalry; Mechanized Rifle, Panzer Grenadier; Reconnaissance; Tank, Panzer; Motorcycle; Ski; Engineer; Construction; Bridge; Anti-Tank; Anti-Aircraft; Artillery; Artillery (cavalry); Self Propelled Artillery; German Rocket Launcher (Nebelwerfer); Soviet Rocket Launcher (Katyusha); Maultier (German self propelled rocket launcher); Supply; Headquarters; destroyed HQ.
How to Read the Counters (illustrated in the book):
- Typical Infantry Battalion: front is full strength, back is depleted. Elements shown: unit size symbol (company; if no symbol, battalion; regiment; brigade; division; corps/Korps; army; front), regiment # / division #, combat strength, defense strength, movement allowance, motorized marking, tank/antitank support strength. A fatigue marker, a "Tired" marker and unsupplied marker (U-1) also exist.
- Typical "pure" tank unit: tank strength 2, antitank strength 3 (see "Typical Antitank Unit").
- Typical Tank Supported Unit: carries tank/antitank support strength.
- Counter states: In Column; Artillery Column; Fortified; Dug In; Emplaced; building Improve (improved road); supply dump; supply unit status (Ammo: number of ammo points that can be carried; None on Hand).
- Typical Artillery Unit: shown In Battery or Out of Battery; gun type (howitzer); range; attack strength; barrage strength; FPF strength; defense strength; movement allowance; "uses 3 ammo points to fire" marking; size (regiment); corps #.
- Typical Air Unit: type (fighter); air to air combat strength; damaged side; air to ground attack (barrage) strength.
- Typical Corps or Artillery Brigade HQ; Typical Army or Division HQ.
Counter Abbreviations
Soviet
| Abbrev. | Meaning |
|---|---|
| A | Army |
| AA | AntiAircraft Division |
| B, Bd | Brigade / B on air unit means bomber (Pe-2) |
| C | Corps |
| Cv | Cavalry Division |
| DAM | Damaged |
| Div | Divisional Artillery Regiment |
| F | Fighter (Yak-9) |
| FA | Fortified Area |
| g | gun |
| G | Guards |
| GA | Guards Army / on air unit means Ground Attack (Il-2 Sturmovik) |
German
| Abbrev. | Meaning |
|---|---|
| A | Army |
| B | Korps Gruppe B / on air unit means Bomber (Ju-88) |
| Baeke | Heavy Panzer Regiment Baeke |
| Bd | Brigade |
| F | Ferdinand (Porsche "Elephant" heavy tank destroyer) |
| F | in air unit means Fighter (Me-109) |
| FE | Feld Ersatz replacement battalion |
| Fus | Fusilier reconnaissance unit |
| GA | on air unit means ground attack (Ju-87 "Stuka") |
| Ger | SS motorized regiment "Germania" of 5th SS Panzer Division |
| K | Korps |
For units that are part of a division, the number to the left of the slash indicates the regiment, the bold number to the right indicates the division. All units not otherwise marked are battalions with the following exceptions: Soviet Rocket Launcher, Antitank, Heavy Howitzer, and Cavalry units represent half regiments. While not strictly historical, they work better on the game scale than either full regiments or the next lower breakdown. In some cases, certain tank, antitank, engineer, construction, motorcycle, etc., units have their individual battalion number to the left of the slash and the number of their superior formation in bold to the right. In all cases where a regiment or brigade symbol appears on the counter, the left hand number is that particular unit's individual number, while the right hand number is that of its superior formation (corps, army, front, etc.). Units of Korps Gruppe B are marked Regiment Gruppe number/Division number/B.
Any unit with a movement allowance of 10 or more, and all heavy artillery, are motorized units. The two dots on the bottom of the unit type box appear when there are both motorized and non-motorized units of that type present, i.e., all German antitank units are motorized so no dots appear, but some Soviet antitank units are horse drawn and some are motorized so the latter are marked.
The Map
The Korsun area is a fertile and well settled agricultural area, well suited for growing sugar beets. There are sugar refineries in many of the larger towns, as well as an occasional distillery, tractor station, etc. Windmills dot the landscape.
Just north of the edge of Map A, the Dnepr makes a small loop, almost touching the map again at Chodorov. This loop contained the Bukrin bridgehead, scene of many bloody battles in October 1943 including the first (and last) large scale Soviet paratroop operation.
The Dnepr then turns north again and curves upstream about sixty miles to the Ukrainian capital of Kiev. Uman lies twenty miles directly below the lower left hand corner of Map C. Twenty miles to the southeast of the lower right hand corner of Map D is the large town of Kirovgorod, while Nikipol is a further 125 miles southeast. This was the easternmost German position in the Ukraine in the beginning of 1944.
For all further purposes in the discussion of the game, north will be considered to be the top edge of the map, although the compass rose on the map indicates true north. It was necessary to tilt the map slightly to get the whole battle in a reasonably sized area.
The scale is 1:100,000 or one mile per hex. The original maps used were German Army maps either copied from captured Soviet maps or actual Soviet staff maps with German names printed under the Cyrillic. While these maps included an enormous amount of detail, they sadly did not include any information on the location of fords over the numerous streams and rivers. No doubt many existed but I have been unable to discover where.
Considerable effort was made to produce a map that has somewhat natural lines to it. As a result there are several places where the terrain does not rigidly follow the hex grid. The following rule should guide your terrain interpretation. If at least a quarter of a hex contains either Broken, Woods or Rough terrain symbology, or at least two "buildings" of Village, then treat the hex like the appropriate terrain type. As for the rules lawyer who insists he doesn't have to pay the movement cost to cross a stream because the hex he is in contains a tiny slice of the far bank, beat him about the face with a blunt instrument until he becomes calmer. Example: on Map D in the upper left hand corner is the large village of GORODISHCHE. The name of the village crosses a Broken terrain hex that slops over into the surrounding hexes. Only the one hex there is considered Broken.
Clear Terrain: This is very gently rolling, good farm land, apt to be boggy when wet.
Woods: The smaller patches are mostly orchards, some of the larger are well laid out forest preserves with fire trails. They tend to be a mixture of conifers and deciduous types. The largest forest on Map B is one piece of high ground but the slope is quite gradual so it is not shown.
Broken: This tends to be cut by numerous ravines and small ridges, plenty of defilade.
Rough: Like Broken but steeper yet, with fairly untamed forest covering it. A good place to look for partisans.
Swamp: Very wet, low lying ground, with numerous small streams. In warm weather virtually bottomless.
Village: Almost all of the buildings are of wood and perhaps plaster, the largest villages might contain some brick structures. Cherkassy undoubtedly has more of the latter. Most villages are well spread out, with large vegetable gardens. Some of those on the map had doubtless been burned down by the Nazis or in the course of fighting. A few of the smaller villages were omitted from the map, as were the railroad stations, foresters' cabins, etc. At their option, players may wish to consider villages destroyed after being attacked by heavy artillery or bombers; you will need to make your own markers.
Causeway: A raised roadbed through a swamp.
Primary Road: Gravel topped, it is doubtful there was asphalt anywhere on the map.
Secondary Road: "Improved" dirt road. There were also many tertiary roads on the original map but since they were little more than wagon ruts they had little game significance except where difficult terrain is crossed and the roads appear as Paths.
Railroad: With a raised, drained and graded roadbed, in wet weather they represented the best bet for many vehicles. As far as I can tell, there was no functioning railroad on the map.
Hills: For the most part, the hills on the map do not represent the individual peaks they look like. Rather, they are the highest points on gently rising ground where most hilltops were between 180 and 280 meters in elevation. Much of the Broken and Rough terrain is elevated and if you wish to play it all like that, it will not offend me.
Airfield: Really an airstrip, since no aircraft were based here and the facilities were just for unloading supplies and loading the wounded. The location is approximate; there may also have been as many as two others although only one source alludes to this.
River: The Gniloi Tikich River where much of the German breakout came to grief was described as "thirty yards wide, six to nine feet deep..." with water temperature near freezing and with a swift current. Most other rivers were of similar size. Note that the south bank of the Dnepr River is the edge of the playing area.
Streams: Mostly narrow and shallow, but often with steep banks.
Marsh Hexside: Any vehicle attempting to cross will either have to be towed out with a tank or heavy tractor or else abandoned.
Lakes: Treat them like a small piece of river for ZOC purposes but they cannot be crossed or bridged. Note that some lakes are mistakenly shown with marshy sides; this is an error.
Bridges: Almost all of the bridges on the board are shown on the source maps. No doubt a goodly number, certainly including the railroad bridge at KANEV, had been destroyed long since. Optionally, if players see any further need for movement restrictions, it is probably reasonable to assume that units with a tank support strength (underlined or not) of 3 or more can only use bridges that either are crossed by some type of road or that are pontoon bridges.
Margin: In the border of the map are lines connecting on-board roads with numbers indicated on them. The number represents the number of secondary road hexes between the two on-board points. Units may move off the map, over these connectors, and back on to the map if In Column. Remember that units on these roads are not on the board and have no effect on on-board activity until they reenter the map. Likewise, they may not be attacked while off of the map.
To Set Up the Maps: Lay them down in the following order: C, D, A, B. Note that this will cover the #6 at the bottom of Map C. The maps may not precisely align due to some distortion of the hex grid during production.
Map Errata: Map B, lower left hand corner - a secondary road should connect Nabakov Khutor with Valyava (as indicated on Map D). Map D, center left - Shpalka River should be considered to be a stream east of the railroad bridge in southern SHPOLA.
Turn Record Track
On the two parts of the Turn Record Track (the long pieces of paper with the dates, weather, and crosses and stars on them) will be found the historical weather for each turn (if players wish to use it). The Soviet stars and German crosses indicate the arrival of reinforcements; check the Reinforcement Arrival Chart under the appropriate number to determine what arrives where and in what condition.
Air Bases
The three pieces of paper labeled 5th Air Army, 2nd Air Army and VIII Air Korps are the offboard Air Bases. Each Air Base contains the name of the base and its antiaircraft strength (AA 3). The sortie allowance for the Air Army/Korps is indicated under the boxes, depending on the Ground Conditions. (The three numbers indicate Frozen or Snow / Mud / Deep Mud.) Remember that this number will be halved, dropping fractions, on Raining or Snowing turns and that no sorties are allowed during Fog or Blizzard.
Play Aids
These are found on the third long piece of paper in the game. Before cutting these out, it may be desirable to tape or glue them to cardboard (the thickness of a file card or file folder works well). After cutting them out as indicated and folding them, it is probably best to hold them together with either paper clips or masking tape so that you can flatten them out for storage again. When they are all assembled, place them on a board edge easily visible to both players and unambiguously facing the map edge. Now at a glance you can tell the time of day, weather, ground conditions and Visibility.
Sequence of Play
- Weather Determination Section
- Mutual Air Allocation and Superiority Section
- Mutual Army Supply Section (MASS) (AM game turns only)
- Mutual Supply Determination Section (MSDS)
- First Player Turn
- A. Movement Phase
- B. Building and Demolition Phase
- C. Counter Battery and Surprise Attack Phase
- D. Defensive Barrage Phase (second player)
- E. Combat Phase
- Second Player Turn (A. through E.)
- Fatigue Reduction Section
- Game Turn Indication
At the end of the Night Game Turn there is an Extra Night Turn available at the player's option. See Night Rules.
Weather
There are three variables that determine the weather in Korsun Pocket: Temperature, Atmospheric Condition and Ground Condition. There are two types of Temperature: Cold or Warm; six types of Atmospheric Condition: Clear, Cloudy, Raining, Snowing, Blizzard and Fog; and four types of Ground Condition: Frozen, Snow, Mud and Deep Mud.
To determine weather conditions, players may either use the historical weather as printed on the Turn Record Track or use the Variable Weather Table. The First Player is responsible for keeping the Play Aids (Weather, Visibility, and Game Turn display) correctly oriented and for determining and recording the weather when using the Variable Weather option. Both players must pay close attention to the weather and visibility as it will strongly affect movement, construction, ZOCs, supply and air functions.
If players agree to use the Variable Weather Table, the First Player should roll one die twice each turn. The first roll determines the temperature, the second the atmospheric condition. If the second result is Precipitation possible, the player rolls again consulting the Precipitation column on the table. (See Variable Weather Table.)
Movement
The Movement Allowance of a unit is expressed in Movement Points. A unit uses Movement Points (MP) to enter hexes, cross certain hexsides, leave or enter certain Zones of Control (ZOC), change formations, perform overrun, break down into companies or build up from same. The rate at which a unit expends MPs depends on the unit type, the formation of the unit, and the ground conditions. The amount of MPs available to a unit will vary according to the unit type and the supply state of the unit. No unit may expend more MP than its Movement Allowance in one turn.
In his movement phase, a player may move some, all or none of his units. Each unit or stack of units is moved individually from hex to hex, paying appropriate MP cost for each hex entered. A unit may not save MPs from turn to turn nor may any unit use another unit's MPs.
Movement Types. All units are divided into three types for movement purposes:
- Foot units have a movement allowance of 6 and carry the infantry-type symbols (the book also lists a German-only symbol).
- Horse units have a movement allowance of 8 or 9 and carry the cavalry/horse symbols. Please note that while cavalry units may cross rivers paying the horse costs, all horsedrawn artillery, antitank, and supply units may only cross at bridges or with engineer assistance.
- Motorized units have a movement allowance of 10 or higher, except for Heavy Artillery units which are motorized but slow. Motorized units carry the motorized symbols (Soviet-only symbol and Heavy symbol exist).
In order to find the MP cost of entering a particular hex, cross index the unit's movement type, according to the formation the unit is in, with the terrain effects chart appropriate for the ground condition. Except to perform overrun, a unit may never enter a hex containing an enemy combat unit. Regardless of their movement allowance, all nonmotorized units may always move one hex per turn. This does not allow movement from one Strong Enemy Zone of Control (EZOC) to another (see Zone of Control Rules).
Movement and ZOC. A unit must stop its movement as soon as it enters a hex that is in a Strong Enemy ZOC. A unit pays 2 MP to leave a hex in a Weak Enemy ZOC. A unit may move directly from one Weak EZOC to another. Any ZOC of an enemy unit that is Dug In costs one additional MP to enter; if an enemy unit is Fortified its ZOC costs two additional MP (see Engineer Rules).
Formations. All units in the game are in one of two Formations: Deployed or In Column. A Deployed unit is in combat formation, spread out and ready to fight or take cover. All units are normally deployed. Deployed units may freely move through other units. A unit In Column is lined up to travel efficiently. All units that are In Column have an In Column marker placed on them. It costs 4 MP for a battalion-sized unit to change formation. Units may change to In Column at any point during their movement phase, paying the 4 MP cost. However, a battalion-sized unit may only deploy out of Column at the beginning of that unit's movement. Company-sized units pay only 2 MP to change formation and may change formation at any point in their move providing they still retain 2 MP.
Units may not change formation while in EZOC, with one exception. If the unit is in Woods, Village, Broken or Rough Terrain, it may deploy from Column in EZOC.
Units In Column use the Column section of the Terrain Effects Chart to calculate movement costs. If they move directly from one connected road hex to another, units In Column may use roads and bridges, paying appropriate costs. Units that are Deployed never benefit from roads or bridges. It is important to note that units In Column may not move through each other at any point nor may they be stacked together (see Stacking Rules).
Movement caused by combat, i.e., advances and retreats, is not considered to be movement and does not cost MPs.
Artillery Formations. Artillery may be in one of three formations: In Battery (the front of the counter), Out of Battery (the back of the counter) or Artillery Column (marked with an Artillery Column marker).
At the beginning of the friendly movement phase, each artillery unit that is not in Artillery Column may freely change from In Battery to Out of Battery or vice versa. No artillery unit may flip into Battery during the same turn in which it comes out of Column.
An Artillery Column on a road is considered to occupy two adjacent road hexes in addition to the hex the unit is in. Orient the arrow on the marker to help indicate the appropriate hexes. Friendly units In Column may not enter these hexes nor may an Artillery Column move adjacent to a friendly unit In Column on the same road.
Artillery Movement. For purposes of movement, all artillery is classified in one of four categories: Light, Medium, Heavy and Self-Propelled. Note that while Light and Medium artillery may be either horse drawn or motorized, Heavy and Self-Propelled artillery is always motorized.
Light Artillery includes Nebelwerfer 150, 76 gun, 120 mortar, and Cavalry Artillery. Light Artillery can move 1 MP per turn while In Battery, or up to 2 MP per turn Out of Battery. To move further they must go into Artillery Column.
Medium Artillery includes 105 how, 100 gun, 150 how, Div Arty Rgt How, and Med Gun Rgt Med. Medium artillery may move 1 MP per turn while Out of Battery. To move further they must be in Artillery Column.
Heavy Artillery includes 170 gun, 210 how, 203 how, 152 gun and 210 rocket. Heavy Artillery may only move in Artillery Column.
Self-Propelled Artillery includes Katyusha units, Mlt Maultier, and German self-propelled FG-D-1 units. Self-Propelled Artillery may move up to half of its movement allowance In Battery and its entire movement allowance Out of Battery. Of course, it is still necessary to go into Artillery Column in order to use roads and bridges. Self-Propelled Artillery can also perform the "shoot and scoot" maneuver (see Artillery Rules).
Note that Light and Medium artillery units may not use their Out of Battery movement ability the same turn in which they come out of Column.
Overrun. Overrun is a special form of combat that takes place during the movement phase, and is performed by moving friendly units directly into the hex containing the enemy unit. During the friendly movement phase, any unit bearing one of the following four symbols (tank, mechanized, reconnaissance and cavalry types) may overrun any enemy non-tank type unit (one which does not bear one of the first three symbols) that is In Column. To be overrun the enemy unit must be in Clear, Village, or Broken terrain, or in any terrain type and on a road. The units performing the overrun must be Deployed.
The overrunning unit moves into the enemy's hex, ignoring the EZOC and paying 2 MP in addition to the normal terrain cost to enter the hex. The defender's strength is halved for being In Column and the overrunning unit attacks using the normal combat procedure (see Combat Rules). The combat results are applied immediately.
If the combat results are adverse to the attacker, the attacker must retreat out of the hex and may move no further. The defender now automatically becomes Deployed. If the result is adverse to the defender, the defender must retreat out of the hex, taking a one step loss for retreating through an enemy ZOC. The attacker does not advance after combat. The attacker could then continue to move if it had sufficient MP remaining, ignoring the ZOC of the overrun unit. A stack of units may overrun an enemy unit, totaling their attack strengths into one attack.
Enemy supply units and Artillery Columns may be overrun in any terrain by any non-artillery combat unit in any formation for a cost of 2 MP plus the cost of entering the hex. The defending unit is automatically destroyed.
(For further explanation, see Combat Rules.)
Reinforcements. During the course of the game, both sides will receive reinforcements according to the Turn Record Track and the Reinforcement Record. Reinforcements enter the map at their designated entry area as described in the scenario instructions during the friendly movement phase.
To bring reinforcements on to the map, set up all units to be brought in at each entry road in a column on an assumed road that is considered to extend off of the map from the entry hex. The assumed road is considered to be of the same type as the on-map road it connects with. All reinforcements are In Column on the turn they enter the map. As each successive unit enters the map, it pays a movement cost to enter the entry hex using road movement rates, and any movement point cost that would be necessary to reach the entry hex, moving on the assumed road. Thus, if the first unit in a column paid 1/2 MP to enter the map, the second will pay 1 MP, the third 1 1/2 MP and so on.
Stacking restrictions apply on the assumed road, as do prevailing ground and visibility conditions. Units that have not yet entered the map may in no way affect any activity on it, and similarly enemy units not on the map may not in any way affect units lined up on the assumed road.
Units may never enter the map through an entry hex that is in EZOC or is occupied by an enemy combat unit.
Optional: A player may decide to bring his reinforcements in a different entry zone than the one indicated in the Reinforcement Record. To do this, the player announces his intention two turns prior to the scheduled arrival of the reinforcements. The reinforcements will now arrive two turns later than originally scheduled. The German player may shift his reinforcements east or west by one entry zone for every two turns delay incurred. The Soviet Fronts may shift their reinforcements by one zone north or south for every two turns delay incurred. Thus, German reinforcements can potentially be moved up to three zones to the east or west, the Soviet reinforcements may only be shifted one zone north or south.
Zones of Control
A unit's Zone of Control (ZOC) consists of the six hexes adjacent to the hex the unit occupies. ZOCs do not extend across River and Lake hexsides. Friendly ZOCs never affect friendly units in any way; friendly units are affected only by enemy ZOCs (EZOCs). A unit's ZOC may be modified by the density of units in a hex, visibility conditions, engineering works or the supply state of the unit. An EZOC can halt or slow movement, require a unit to attack the enemy unit exerting the EZOC, block supply lines, inflict casualties during retreats and prevent units from changing formation.
Strong ZOCs. All deployed, non-artillery combat units or stacks of units that consist of at least two steps exert a Strong ZOC. (Note that all non-artillery battalion-sized combat units that are face up [full strength] have two steps; all companies, depleted combat units, artillery units, HQ units, bridge, construction and some engineer units have only one step.) Also, any Deployed combat unit that is Dug In or Fortified exerts a Strong ZOC. Units entering a Strong EZOC must stop and move no further this turn. Units beginning a friendly movement phase in a Strong EZOC may leave that EZOC at a cost of half of their movement allowance in addition to the terrain cost of the first hex they enter. A unit may never move from one Strong EZOC directly into another.
Weak ZOCs. Non-artillery combat units that have no more than one step in a hex, artillery units In or Out of Battery, and all non-artillery combat units In Column exert a Weak ZOC. Weak ZOCs function in all ways like Strong ZOCs except that a unit may continue to move after entering a Weak EZOC, paying two additional MP for each hex it leaves that is in a Weak EZOC.
The following units exert no ZOC: HQ, supply, Artillery Column, construction and bridge units. These units may never enter an EZOC unless there is a friendly unit that is not one of the above listed types in the hex.
ZOC and Supply. Supply lines may not be traced through a hex that is in any kind of EZOC unless the hex is occupied by a friendly unit. Units may retreat through EZOCs, but for each EZOC hex a friendly unit or stack enters, it must suffer a one step loss.
ZOC and Combat. If a player's unit begins the friendly Combat Phase in EZOC, the player is required in some way to attack every hex containing enemy units that are exerting the EZOC. Units that are Dug In, Fortified, or in Rough or Village hexes are not required to attack enemy units exerting a ZOC on their hex. The enemy unit will still be required to attack them in some way if they remain adjacent during the enemy's combat phase unless the enemy unit is also in one of the above listed terrain types.
Units that cross a river directly into hexes in the ZOC of an enemy unit adjacent to the river must stop and in the combat phase attack the enemy unit, no matter what kind of ZOC it is exerting. Unless there is a friendly non-artillery combat unit involved in the attack who has neither just crossed the river (as described above) nor is attacking directly across the river, the defender receives defensive shifts (see Combat Rules) as if the attacker(s) was attacking directly across the river.
ZOC and Visibility. A unit's ability to control the terrain around it is dependent on its ability to observe area in question. In Poor or Zero Visibility, consult the ZOC Visibility Chart to determine a particular unit's ZOC (see ZOC Visibility Chart). Reduced means that a Strong ZOC becomes a Weak one, a Weak one is no longer a ZOC.
Zero Visibility Infiltration. When moving directly between two enemy units, roll one die, a 1 result forces the moving unit to attack one of the enemy units; roll again, an odd number indicates the enemy unit to the left, an even result the one to the right. The Zero Visibility Surprise Attack table is used and the attack is then carried out like an Overrun.
Stacking
Two or more units occupying the same hex at the end of the friendly movement phase is called a stack. There are two sizes of units, Battalion-sized (Bn-sized) which includes everything except companies, and Companies (German only). Battalion-sized units include all units bearing the battalion-size, regiment-size and brigade-size symbols on their unit type box (as well as all HQ units). Company units are identified by the company symbol.
Stacking and Movement. There may never be more than four German units or three Soviet units per hex at the end of any friendly movement phase. There may never be more than three Bn-sized units in a hex at the end of the friendly movement phase. There may never be more than one Bn-sized unit and one Company In Column in one hex at any time during the game. Thus, Deployed units may freely move through friendly units regardless of the friendly units' Formation and may stack with them at the end of the friendly movement phase within the above listed restrictions. Note, however, that units In Column cannot move through each other at any point, although they may move freely through Deployed friendly units. (See Movement Rules - Artillery Movement for special features of Artillery Columns.)
Stacking and Combat. During any combat phase, no more than two Bn-sized units and one company unit, or one Bn-sized unit and two companies, or three companies can use their combat strength in one hex. This applies to attackers and defenders. (See Combat and Artillery rules for more detail.)
Observation, Visibility, and Reconnaissance
Observation. All units have the ability to observe enemy units depending on the visibility, the distance between units, intervening terrain and the terrain that the enemy unit is in. Units that are not on hill tops have a maximum observation range of two hexes in Good visibility conditions. Units on hill hexes have an observation range of three hexes in Good visibility, provided the hex being observed is not on the same hill as the observing unit. During Poor visibility, observation range of all units is reduced to one hex (adjacent hexes). During Zero visibility, observation is not possible.
Visibility. During all AM or PM game turns in which Clear, Cloudy, Raining or Snowing weather prevails, visibility is GOOD. (Snowing and Raining do not affect visibility as these conditions are considered intermittent.) During all AM or PM turns in which there is Fog or Blizzard, and during all Night turns in which the weather is not Fog or Blizzard, visibility is considered POOR. During all Night turns in which there is Fog or Blizzard, visibility is ZERO.
Line of Sight. The line of sight of units that are not on hills is blocked by intervening Hills, Village, Woods, Broken and Rough hexes. The line of sight of units on hills is blocked only by intervening hills. If a line of sight passes through any part of, or along the hexside of any hex containing any of the above listed terrain types, it is blocked. Line of sight is considered to be from hex center to hex center; if you can't agree, get a piece of thread. A unit must be able to trace a line of sight to a unit in order to observe it.
Cover. Units that are in cover cannot be observed by non-adjacent enemy units. Cover consists of all Village, Woods, Broken, Rough, Dug In and Fortified hexes.
Rocket launcher units In Battery are observable at a distance one hex greater than a unit's usual observation range in Good and Poor visibility conditions, regardless of what cover the rocket unit is in.
Air units may spot, and attack, enemy units In Column in Village and Broken hexes.
If an enemy unit in cover is observed by any friendly unit (adjacent) all other friendly units may treat that covered hex as clear for purposes of observation.
Reconnaissance. A player must be able to legitimately observe an enemy stack in order to examine which units are in it. During the friendly movement phase it is permissible to move a unit adjacent to an enemy unit in cover and then, before moving any more units, to examine the contents of the enemy stack to determine what other units should be brought up to join the attack. The first unit to do this is committed now to attack the enemy stack, and if the reconnaissance discovers that the hex is a hard nut to crack, it may be tough luck for the recon force.
In keeping with the spirit of this rule, watching as an enemy player examines his own stacked units, or sets up, or drops something, or, in addition, too careful study of the enemy's Order of Battle or Reinforcement Record is considered unsportsmanlike play and out of keeping with the simulation.
Combat
During the friendly combat phase, the player whose phase it is becomes the attacker and the other player the defender, despite the overall situation in the scenario.
Stacking and Combat. No more than two bn-sized, non-artillery combat units may use their combat strengths in attack or defense in one hex. No more than three units of any size may use their combat strengths in one hex. Thus, the legal maximum combinations are two Soviet bn-sized units, or two German bns and a company, two German companies and a bn, or three German companies.
If there are more units in the hex than are permitted to fight, the owning player decides which will participate in combat. All units in the hex are affected by retreat or advance after combat results on the Combat Results Table (CRT). Mandatory losses must be taken from units committed to combat. If there are more losses required than the committed units can fulfill, then the losses are taken from uncommitted units. Within the stacking limits, any number of artillery units may fire missions from one hex against non-adjacent hexes.
Sequence of Combat. The sequence of resolving combat is as follows. First, the attacker may fire Counter Battery Fire against enemy artillery units that are In Battery and observed by friendly units. The attacker then announces all of his attacks, and if conditions are appropriate announces all attempted Surprise Attacks and rolls for them on the Surprise Attack Table.
After the attacker rolls, the defender may fire Defensive Barrage fire at any of the attacker's units that are making attacks this turn. The attacker then calculates his attacks, indicating which units are participating in which attacks. The defender then announces which of his defending units will be used and what Final Protective Fire (FPF) will be committed to each battle. The attacker resolves the attacks in any order he wishes, computing the odds, rolling one die and applying all combat results immediately for each attack. Retreats and advances are executed and the same procedure is followed again for each attack until all attacks have been resolved.
Optional: The attacker can announce which enemy units will be attacked by his non-artillery ground combat units and then both sides may secretly commit their artillery for Offensive Barrages and FPF, revealing them battle by battle. While more realistic, this procedure is also more time consuming.
Requirements and Restrictions. Units in EZOC at the beginning of the friendly combat phase must attack those enemy units in some way. Every hex containing enemy units that exert a ZOC on friendly units must be attacked either by friendly units adjacent to them or by artillery fire or air strikes. Every friendly unit or stack of units in EZOC must be involved in some attack within the restrictions of the stacking rules. No unit may divide its combat strength. No unit may attack or be attacked more than once per combat phase.
Units in a supply state of U-4 or in Village, Rough, Dug In or Fortified hexes are not required to attack adjacent enemy units. However, the enemy units are still required to attack such units during the enemy's combat phase, unless the adjacent enemy units are in one of the situations listed above themselves.
Units In Column formation have their combat strengths halved. Units attacking from Swamp hexes, and units in certain supply and fatigue states have their attack strength halved. When halving combat strengths, round fractions down, but no unit may ever have its attack strength reduced below 1.
Units with parenthesized () attack strengths cannot move into hexes where they would be forced to attack unless there is another friendly unit with an un-parenthesized attack strength in the same hex. Units with parenthesized attack strengths who find themselves forced to attack alone in a hex retreat one hex instead. Units with parenthesized attack strengths may attack normally if stacked with friendly units with un-parenthesized attack strengths.
Multiunit, Multihex Combat. If there are several units in one hex, they may separately attack different enemy units in different hexes. Units in different hexes must combine their attack strengths to attack a single hex. For an attack to be resolved as one attack, all attacking and defending non-artillery combat units must be adjacent. When there is more than one enemy unit in a hex, the stack must be attacked in one attack.
Combat Resolution. To resolve an attack, total the attack strengths of all units attacking one hex and the barrage strengths of all supporting artillery and air units. Compare this total with the total defense strength of all defending units plus any added FPF strength to achieve a probability ratio expressed as attacker's strength to defender's strength. Round this off in favor of the defender (29-10 = 2-1). If appropriate, total relevant Tank Support Strength points and subtract Antitank Support Strength points. Total any combat shifts that the attacker and defender have due them including those produced by Tank or Antitank superiority, and shift the odds appropriately.
Having thus determined the final odds, the attacker rolls one die and reads the result from the CRT. This result is applied immediately, all losses, retreats and advances are executed and the same procedure is followed again for each attack until all attacks have been resolved.
Shifts on the Combat Results Table. There are 15 different factors that can affect the final odds. For the attacker they are Tank Support, Regimental Support, Engineer Support, Ambush, Surprise Attack; for the defender, AntiTank Support, Regimental Support, Hills, Marshy Hexsides, Rivers, Broken, Village, Woods, Rough, and Dug In hexes and Night. These conditions will shift the odds to the left or right on the CRT. In any one attack there may be a net shift of no more than four permitted in the combat odds. Naturally, one shift to the left will cancel out one shift to the right and vice versa. Shifts to the right are indicated with a + and shifts to the left with a -.
Regimental Support: Every stack of units that contains two battalions of the same Infantry, Rifle, Gds Rifle, Gds Abn, Motz Inf, Pz Grenadier, or SS Pz Grenadier Regiment, or of the same Motz Rifle, Mechanized, or SS Brigade or two bn-sized units of the same Cavalry Regiment is eligible for a regimental support shift.
Both defending and attacking units may receive regimental support. Attacking stacks that have regimental support receive a +1 shift, defending stacks receive a -1. Unlike other kinds of support, it is not necessary for both of the units of the regiment to be committed to the combat in order to receive the shift. Hence a stack consisting of two Rifle Bns of the same regiment and an AT Bn could commit the AT bn and one of the rifle bns to defend the hex and still receive the regimental support shift. The regimental number of a unit is found to the left of the slash above the unit symbol. While some regiments contain two bns and others three, only two are ever needed to be eligible for regimental support.
Two defending German bns who are eligible for regimental support both receive it if both bns are adjacent or are stacked together. Note that while some other types of bns carry a regimental number, only those types listed above are eligible; the other regimental numbers are for identification only.
Tank/AntiTank Support: Tank support shifts apply to attacking units only, antitank shifts to defenders only. All units capable of providing tank or antitank support have a tank/antitank support strength. This is the number printed directly to the left of the unit symbol (tank support strength) and to the right (antitank support strength), e.g. "4 [unit symbol] 3".
There are two kinds of units that can give Tank Support: pure tank units (tank or assault gun) and tank supported units (two further symbols in the book). Tank supported units are mixtures of tanks or assault guns and motorized infantry.
Tank supported units may use their tank support strength under any circumstances, regardless of the presence or absence of other friendly units in the same hex. Pure tank units are tank support capable and must be stacked with a unit of equal size bearing one of the following eight symbols (shown as icons in the book) in order to use its tank support strength.
There are two kinds of units that can give antitank support. All units that are pure tank or tank supported, and all Soviet MG bns are considered antitank supported and can use their antitank support strength under any circumstances, regardless of the presence or absence of other friendly units in the hex. All antitank, German self-propelled artillery, and engineer units, as well as some artillery and antiaircraft units are antitank support capable (six unit-type symbols shown as icons in the book). For these units to use their antitank support strength, they must be stacked with a unit of at least equal size of one of the types listed above in the tank rules.
Antitank support may only be used to defend against an attack involving pure tank or tank supported units. Antitank support can be used against a tank attack that is unable, due to lack of accompanying infantry, to use its own tank support strength.
All non-artillery combat units without a printed antitank strength but with an attack strength of 1 or greater can receive minimal antitank support under certain circumstances. Minimal antitank support provides 1 point of antitank support strength. Minimal antitank support can only be used by units in a hex which has no unit with a printed antitank support strength committed to its defense. The maximum antitank strength of a hex receiving minimal antitank support is 1. Company units without a printed antitank support strength do not receive minimal antitank support.
To use Tank/AntiTank support, total the tank support points of units committed to the attack and compare that with the total antitank support points committed to the defense in each combat. If there are more tank support points than antitank support points, the odds are shifted +1; if there are twice as many tank points as antitank points it's +2; if three times as many it's +3; and if there are four times as many or more it's +4. Similarly, if there are more antitank support points than tank support points, the odds are shifted -1, if double -2, if triple -3 and if quadruple -4 and notify the tankers' next of kin. Note that no more than one company may use its Tank/AntiTank support strength in any one battle.
If tank or antitank units use their support strength to influence a battle, and their side is either forced to or chooses to take a loss, the first step lost must be from a participating tank or antitank unit as appropriate. Any additional losses may be taken from any units the owning player chooses.
Note that certain units have their tank support strength underlined. This indicates that their tank support is provided by assault guns. As a result, their tank support strength is one less than the printed number, although their antitank support strength remains the same. Soviet mech rifle units do not have their tank support strength underlined, since their tank support came from T-34s, KVs and at least 15 Shermans.
There is one Nashorn (self-propelled 88mm tank destroyer) company in the game. It is marked with an asterisk (*) to indicate that although it bears an armor symbol, it has no tank support strength at all, only an antitank support strength.
Tank units may attack across rivers. However, they may only use their tank support strengths and advance after combat if the tank unit is attacking across a bridge and it is In Column. AntiTank units do not use their antitank support strength against cross river tank attacks that cannot use their tank support strength.
Engineer Support: Engineers committed to attacks against Dug In or Fortified hexes give the attacker a +1 shift. Engineers committed to a combat in which they provide engineer support and in which their side is forced to or chooses to take a step loss, are required to suffer the first loss. This, however, is superseded by the requirement for tank support units to take the first such loss. If tanks and engineers support an attack that suffers more than one step loss, the tanks must take the first step and the engineers the second.
Ambush: Any time an attack is made entirely by non-artillery combat units that are in cover against an enemy unit that is In Column, it is considered an Ambush and the attacker receives a +1 shift. The defender may not support the ambushed unit with artillery in any way.
Surprise Attack: During Poor Visibility turns, the attacker may use the Surprise Attack Table in an attempt to produce a favorable shift in the combat odds. During Zero Visibility turns any attacks made must use the Surprise Attack Table. The attacker consults the appropriate column of the table, rolls one die and holds his breath.
If the attack succeeds, the defender may not choose to take losses rather than retreat. Committed attacking units may only advance into the defender's hex, no matter how far the defender retreats. Units stacked with attacking units, but not committed to combat, may advance normally. If all defending units are Exhausted, subtract one from the die roll. (See Surprise Attack Table.)
The Surprise Attack Table is consulted at the end of the Counter Battery phase. Any attacking units that receive a + result may not be fired on during the Defensive Barrage phase.
Terrain Effects and Night. The defender may receive various shifts for the terrain his units are defending. (See the Terrain Effects on Combat, Line of Sight, and Artillery Chart.) Note that terrain shifts are cumulative; a unit defending the part of the village of Lenina that is on a hill would receive a -2 shift. The only types of terrain shifts that are not cumulative are the shifts for a cross river attack and night. See ZOC rules for more detail on cross river attacks. If a defender is getting a shift for any type of terrain, ignore the shift for night altogether.
(See Terrain Effects on Combat, Line of Sight and Artillery Chart.)
Diversionary Attacks. Although an attacker may wish to concentrate most of his attack strength on a key position, he must still attack every enemy unit exerting ZOCs on his units. In order to deal with this obligation, he may use adjacent combat units, artillery fire, ground attack air units, or any combination thereof. However it is done, minimum odds must be achieved against each defending hex, dependent on the terrain type. (1-4 against units in clear terrain, 1-3 against units in wooded, village or broken hexes, etc.) The odds are calculated before any Final Protective Fire is added to the defender's strength. Any unit that is forced to attack at worse than minimum odds automatically takes a 2 step loss and is thrown back 2 hexes.
Combat Results. Once the odds are determined, the attacker then rolls one die and reads the results. All results preceded by an A refer to the attacker, those by a D to the defender. The number following the letter indicates the number of hexes that the unit or stack of units must retreat. If this number is also followed by another number in parentheses, the relevant unit(s) must suffer a loss of this many steps.
Step Reduction: All Bn-sized, non-artillery combat units have two steps. The front of the counter represents the full strength of the unit. When the unit takes a step loss, flip over the counter to the unit's reduced strength side. If the unit loses a second step, it is eliminated.
All artillery, HQ, supply, construction, bridge, Soviet divisional engineer bns and company-sized units consist of one step only and if they take a one step loss they are eliminated. The back of these units do not represent a reduced strength unit.
Retreats are never mandatory. If a player wishes to stand in place rather than retreat he may do so by suffering a loss of steps equal to the number of hexes of retreat required. The owning player may break the loss down as he chooses - if a stack of units suffered a D2(1) result they could lose three steps and stand in place with the survivors; take two steps loss and retreat one hex; or suffer one step loss and retreat two hexes. If the player wishes to retreat, all units committed to the combat and all units stacked with them not committed to a different combat, must retreat the appropriate amount. However, a one step loss means one step lost from one unit, not one step from each unit involved. A1/D1 results are applied first to the defender and then to the attacker. No advance after combat is possible with this result.
Morale (Optional). If players wish, the option to take losses rather than retreat is not automatically available. For each unit or stack of units a player wishes to stand and take losses rather than retreat, the player must roll one die. If the die roll is equal to or less than the unit's morale rating, the unit may stand fast and take losses. If the die roll is greater than the unit's morale rating, the unit must retreat the full amount called for. If units with different morale ratings occupy the same hex, roll the die only once but apply the results individually. Thus, some units may run and leave other (braver) units to take it on the chin.
Morale Ratings. All Panzer Divs, SS Panzer Divs, Tank Corps, Mech Corps, Gds Abn Div, Gds Rifle Div, and Gds Cav Corps non-artillery combat units and all independent Pz and tank units have a morale rating of 4. All Inf Div, Rifle Div, Partisan, and all independent (Korps and Army level) assault gun, recon, mcycl, or cav recon units and all AT units have a morale rating of 3. All KG (kampfgruppe), Fortified Area, artillery and all other units have a morale rating of 2. Units that are Exhausted have their morale rating reduced by 1. If a friendly HQ unit is within one half move, add 1 to the morale rating of all units in combat.
Retreat. Retreats are indicated on the CRT in terms of hexes, not movement points. Retreats are conducted by the owning player according to the following priorities:
- a hex free of EZOC
- toward the nearest friendly supply source
- through the clearest terrain.
Units may not enter the same hex twice during a retreat. A unit or stack of units may retreat through EZOC if there is no other route open to them, but must lose one step for each enemy controlled hex entered.
A stack of retreating units must retreat as a stack. Defending units may retreat through or into friendly units in violation of stacking rules. However, units that end a retreat overstacked must correct the situation by the end of the next friendly movement phase, or else the excess units are eliminated (the owning player choosing the units to be eliminated). Attacking units forced to retreat to a hex where an overstacked condition would result must continue to retreat until they reach a hex where they may legally stack.
If retreating units end their retreat in a hex which is subsequently attacked during the same combat phase, the units already attacked add nothing to the defense of the hex and are eliminated if the other friendly units in the hex suffer any combat result. Units may never retreat through terrain where they would be prohibited in normal movement.
Artillery units that are forced to retreat and are not already Out of Battery immediately become so. If they are forced to retreat further than they would be allowed to move normally (dependent on the artillery movement type and the ground condition), they are eliminated instead.
Advance after Combat. If the defender's hex is vacated due either to retreat or elimination, attacking units may advance into the vacated hex and beyond, as many hexes as the defender retreats or as many hexes as the defending unit had left to retreat when it was eliminated. Mud reduces Motz advance after combat to two hexes, Deep Mud to one hex. Advance after combat is always optional and may be halted at any point. All attacking units, except pure tank and recon units, that advance after combat must follow the exact path the defender retreated through. Tank and recon units may advance in any way they choose as long as the first hex they enter is the defender's vacated hex. Advancing units may not violate stacking restrictions. Advancing units In Column may advance one hex further than they would otherwise be able to do. With the exception of the defender's vacated hex, advancing units must stop upon entering the first EZOC of any other type. Pure tank units advancing after combat may ignore the ZOCs of enemy units that have no more than minimal AT support.
No unit may advance more than one hex through terrain which would cost more than 3 MP to move through. Units attacking across a River hexside may advance only into the defender's vacated hex, and attacking Motz units can only advance over a River across a bridge (see Dismount Rules). Remember that committed units making successful surprise attacks in Zero Visibility may only advance into the defender's vacated hex. However, units stacked with the attacker, but uncommitted, may advance normally.
Units advancing after combat, whether Deployed or In Column, may advance through enemy supply units and artillery columns, destroying them in the process. This will expend one hex worth of the attacker's advance distance, i.e., a unit advancing 3 hexes after a successful attack could advance 2 hexes and overrun one enemy supply unit.
Combat Example
In the situation in the illustration it is the German Counter Battery Phase in an AM turn with Good Visibility. A powerful group from 5th SS Pz Div Viking is trying to take the hill west of Zavadovka. The hill is defended by two battalions of 18/7GAb with 7GAb's divisional artillery, and rocket and antitank units from 52nd Army in support.
There is no counter battery fire because the Germans cannot observe any Soviet artillery. (If there was a unit of Viking 1 hex northeast of Miropolye or in Glushki, they would be able to observe and call counter battery fire on the 17G/52A rocket unit. This is because the hill would not block their line of sight and rocket units In Battery are observable at one hex further than usual.)
The Soviet player decides to fire all of his artillery in a defensive barrage, choosing the 5SS Recon Bn as the best target. The division artillery regiment using the one Ammo Point available fires with a strength of 3, the 17G/52A rocket unit fires with a strength of 6 and uses up its ammo reserves. Remove the ammo point from the board and place a U-1 marker on the rocket unit. The total defensive barrage is 9, attacking the recon bn's defense strength of 8 gives us 9-8 or 1-1. The Soviet player rolls a 5, so the defensive barrage has no effect, a waste of ammo. Had a 1, 2 or 3 been rolled, the recon bn would have to either retreat one hex or take a one step loss.
The German player then totals up the attacker's strengths, tank support points, and appropriate shifts. Committing one motorized infantry battalion (motz inf bn) and the recon bn from stack A, he counts 13 (attack strength), and 2 (tank support points); from stack B he commits one motz inf bn and the Ferdinand bn counting 9, +1 (regimental support shift since 2 bns of the Germania Rgt are present) and 3. Together this adds up to 22 +1 and 5. He then fires his artillery: the 150 bn uses Intensive Fire, removing the Ammo 3 marker and replacing it with an Ammo 1 while the 105 bn uses Direct Fire using no ammo. Both artillery units double their barrage strength giving a total of 10 additional attack strength points. Thus the German total is 32 attack strength, +1 shift, and 5 tank support points (32 +1 and 5).
The Soviet strength on the hill, committing the full strength airborne bn and the antitank bn, totals 10 defense strength, -2 shifts (-1 for regimental support, -1 for the hill) and 3 antitank support points (10 -2 and 3).
To reduce 32 +1 and 5 to 10 -2 and 3 to a combat ratio, first compare the tank/antitank strengths: 5-3 gives the Germans a +1 shift for tank superiority. That leaves 32 +2 to 10 -2 or 32-10 or 3-1. (At this point the Soviet player wishes he had saved his divisional artillery regiment to fire FPF as one more defense strength point would make it 32-11 or 2-1. On the other hand if the defensive barrage had worked and the recon bn driven off the odds would be 29 +1 and 3 to 10 -2 and 3 or 1-1. That would have been bad news for the Germans with a 33% chance of losing a step of Ferdinands.)
The Germans now roll to resolve the combat and roll a 4. A 4 at 3-1 odds produces a D-1 result. If the Soviets wish to hang on to the hill they must remove the 438/52A antitank unit. In their next combat phase, they would be required to attack stacks A and B, a formidable task without any artillery ammo.
Artillery
Artillery units function differently than other combat units. Artillery units have only one step and when forced to take a step loss they are eliminated. An artillery unit may be in one of three formations. The front side of the unit represents its In Battery state, the back side represents its Out of Battery state, and in addition, Out of Battery units may have an Artillery Column marker placed on them. The numbers on the front of the counter are the Barrage Strength, the Final Protective Fire (FPF) Strength and its Range. On the back are its Attack Strength (always 0), its Defense Strength, and its Movement Allowance. An artillery unit uses its Defense Strength whether it is In or Out of Battery. If the unit is in Artillery Column, its Defense Strength is automatically one (1). To use its Barrage or FPF strength, an artillery unit must be In Battery; to use its Movement Allowance, most artillery units must be Out of Battery (see Movement Rules for artillery movement).
Unlike other combat units, artillery units may engage in combat in nonadjacent hexes within their range. When measuring the range, count the target hex, not the hex the artillery unit is in. An artillery unit may use its Barrage Strength to attack enemy units within range by itself or in combination with other friendly units. The FPF strength may be added to the defense strength of friendly units within range (the target hex in this case is the hex the friendly unit is in). Artillery units may fire no more than once each player turn. Thus units that fire during the Counter Battery Phase of the turn may not fire during the Combat Section and units that fire Defensive Barrage may not fire FPF during the same turn.
Formations. Artillery units that are not In Column may flip from In Battery to Out of Battery and vice versa at the beginning of their movement phase. Let us say an artillery unit wishes to change its firing position. At the beginning of its friendly movement phase the unit flips from In Battery to Out of Battery, pays four MP to go into Column and then moves the rest of its movement allowance In Column. Assuming this is enough to get it to its new firing position, the unit goes out of Column at the beginning of the next friendly movement phase, pays four MP, and remains Out of Battery. Note that an artillery unit may not flip to In Battery in the same turn in which it expends MP to go out of Column. During the next friendly movement phase the artillery unit may flip to In Battery and if other requirements (see below) are met it may fire during this turn's Counter Battery or Combat phase.
Spotting. In order to fire, artillery must have a target which can be observed by either the artillery unit itself (Direct Fire - see below), or a friendly unit in communication with the artillery unit. There are two ways for an artillery unit to be in communication with a friendly unit (called the spotting unit). The artillery unit must either be adjacent to the spotting unit, in which case it makes no difference what parent formation the spotting unit belongs to, or else the artillery unit must be of the same parent formation as the spotting unit, and in the case of Soviet artillery, emplaced (see below). Note that artillery may freely use its barrage strength to support attacks by units that are not of the same parent formation just as long as the unit that is spotting the target for them is. FPF may only be fired to support units of the same parent formation and must be spotted for by the unit receiving it.
Organic and Attached. For purposes of determining which artillery is part of what large unit, there are two types of artillery, organic and attached. Organic artillery consists of all artillery units which are part of Division sized units (including Soviet Tank and Mech Corps and German Kampfgruppe and Korps Gruppe) and have their Division (etc.) number in the upper right corner. Organic artillery may only be spotted for by units of their own Division (etc.). They may never be spotted for by nonadjacent units not of their Division.
Some artillery units have a Corps designation in their upper right corner (75C, VIIK). All Soviet Corps artillery is considered to be organic to that Corps. This means that any unit of the Corps or of any Division attached to the Corps may spot for the Corps artillery. It is very strongly discouraged, but not illegal, to attach organic artillery to formations other than the parent one.
All artillery units that are not organic are considered attached. Attached artillery units include all German Korps artillery and all Soviet Artillery with an Army or Front designation (40A, 2UF). In order to have their fire spotted for, attached artillery must be attached to a particular Corps (Korps). Attached artillery can only be called for by units of the Corps to which they are attached. Attachment and reattachment may only take place at the beginning of the friendly movement phase. Attachment is announced and should be kept clear and unambiguous. As a last resort, if the attachment is hard to clear, write it on scratch paper or make Corps designation markers and stack them with the artillery. Optional: Soviet artillery may only be attached or reattached during the AM Army Supply Section.
Emplacement. Soviet Artillery may only be spotted for by nonadjacent units if the artillery is Emplaced. To Emplace Soviet artillery, the artillery unit must start the friendly movement phase not In Column. The unit must flip In Battery if it is not already so and place an Emplacing marker on top of the artillery unit. At the beginning of the next friendly movement phase, flip the Emplacing marker over to its Emplaced side. The artillery unit is now considered to have its phone wires laid and its guns registered and may now be spotted for normally. Emplaced markers may only be placed or flipped in Good visibility.
While emplacing, the artillery may not fire; if it is attacked by an enemy unit the emplacing marker is removed. Emplaced markers do not affect the defensive strength of the unit. If an artillery unit is emplaced, friendly artillery units that move into the same hex and are of the same type (light, medium, heavy, self propelled) and of the same parent formation (Div or Corps) become emplaced automatically. Other artillery units must go through the same emplacing procedure. An Emplacement marker is removed when all artillery units under it are removed from the hex. Soviet rifle bns that are surrounded by enemy units and ZOCs may not spot for artillery to which they cannot trace a line free of enemy units and ZOCs. When emplaced attached artillery is reattached to a different corps, the Emplaced marker is removed and the unit must be re-emplaced.
Note that there are 16 Emplaced markers that are darker than the rest. This is done so that you can place these markers on your non-divisional artillery and easily distinguish it from the rest.
Artillery Fire. Artillery units can attack using their barrage strength or add to the defense strength of a friendly unit by using their Final Protective Fire (FPF) strength. When artillery engages in combat against nonadjacent hexes using its barrage or FPF strength, the artillery unit suffers no adverse results, regardless of the combat result. If the artillery is used to fire on adjacent enemy units, adverse combat results do apply to the artillery unit.
When artillery is attacked it uses its defense strength and is affected by all appropriate results. Artillery that is In Battery and suffers an adverse combat result is flipped Out of Battery and retreats as appropriate. If the required retreat exceeds the unit's movement ability when performed as movement, then the artillery unit is eliminated. Remember that an Artillery Column that is forced to retreat first goes out of Column before it retreats.
As is the case with other units, artillery units may only engage in combat once per player turn. Also an artillery unit's barrage and FPF strengths must be used as a whole and may not be divided among several combats.
Direct Fire: If artillery units are able to observe their target, their barrage strength is doubled. This does not apply to artillery units observing downhill targets from a hill hex at a distance of over two hexes. In this case, the barrage strength is normal. Direct Fire never consumes any artillery ammo (see Supply Rules). FPF may be fired at double strength using Direct Fire if the artillery unit can observe the defending unit's hex.
The following units do not double their barrage strength when firing Direct Fire: all 120 mortar and all rocket units. Furthermore, rocket units firing Direct Fire use ammo normally.
Terrain and Visibility: When artillery attacks are fired into Village, Rough, Dug In and Fortified hexes, the total barrage strength of the artillery is halved. A Dug In or Fortified marker has no further effect on Village or Rough hexes in this regard. See Terrain Effects on Combat, Line of Sight and Artillery Chart.
During Poor visibility, the total of all barrage and/or FPF strengths in each combat are halved. While heavy artillery is not halved by the above listed terrain types, all artillery is halved due to Poor visibility. This halving is cumulative with the halving for the terrain types so that a barrage fired against a Village during Poor visibility is quartered.
During Zero visibility, artillery units may use only their barrage strengths to attack adjacent enemy units, and the barrage strength is halved. FPF may not be fired during Zero visibility.
Counter Battery Fire: During the friendly Counter Battery phase, a player may fire on any observed enemy artillery units that are In Battery. Observed Counter Battery fire is resolved normally, using the barrage strength of the attacking artillery against the defense strength of the defending unit. Counter Battery fire may be conducted against all, some or just one enemy artillery unit in a hex, in any way the attacker chooses as long as no defending unit is attacked more than once and no attacking unit participated in more than one attack.
Friendly units adjacent to enemy artillery units In Battery may be committed to attack the artillery during the Counter Battery phase. The attacking player may then fire Counter Battery fire at the enemy artillery. If the enemy artillery is destroyed or forced out of the hex, the friendly attacking unit could immediately advance into the hex. If the enemy artillery is not forced out of the hex, the non-artillery attacking unit would then resolve its attack normally during the combat phase, after the enemy artillery had a chance to fire a Defensive Barrage.
Defensive Barrage: After the attacking player has fired all his Counter Battery fire, the defending player may use his artillery to fire a Defensive Barrage against enemy units that are attacking friendly units. This includes enemy artillery units that are In Battery and are adjacent to friendly units. Defensive Barrages may be fired against any one enemy unit in a target hex. If one wished to attack several enemy units in one hex, the attacks would be resolved separately and would involve different friendly artillery units. Defensive Barrage attacks are resolved as normal combat. If an enemy unit suffers a retreat result it may still choose to take an equivalent step loss and participate in the upcoming attack. However, the participation would be at the unit's new reduced strength. Defensive Barrages may not be fired at enemy units that have achieved a + result on the Surprise Attack Table.
Offensive Barrage: During the friendly combat phase, friendly artillery may add its barrage strength to the attack strengths of attacking units. All the artillery units attacking one hex total their barrage strengths, modify them for terrain and visibility and add them to the attack strengths of the friendly attacking units.
Final Protective Fire (FPF): Defending artillery units that did not fire Defensive Barrage fire may add their FPF strength to the defense strengths of friendly units being attacked. FPF may not be added to the defense strengths of units that are under attack solely by enemy artillery fire and/or air strikes. FPF is modified for visibility but not for terrain. (Optional - If all attacking units are attacking from hexes that are in covering terrain that would halve barrage fire and the covering terrain is part of the same terrain feature that the defender is in, then FPF is halved. Thus, attacks from an adjacent village hex would cause the FPF to be halved only if the defender were in a hex of the same village.) Artillery units that are in EZOC may not fire FPF.
Independent Fire: Artillery units may attack any enemy units that can be observed by appropriate friendly units, even if no friendly unit is adjacent to the target. Independent fire may be used to fulfill the obligation of friendly units to attack adjacent enemy units (if the friendly unit is involved in some other attack) as long as minimum odds are met. Independent fire is treated like any other attack and is resolved during the friendly combat phase.
Intensive Fire: Intensive Fire may be used in conjunction with any other kind of fire except Direct Fire. Intensive Fire doubles the Barrage or FPF strength of artillery units by doubling the ammo expenditure of the unit. (See Supply rules.) Heavy Artillery may not fire Intensive Fire; self-propelled units that fire Intensive Fire may not exercise the "shoot and scoot" option (see below). Company-sized artillery units use 1 ammo point when firing Intensive Fire.
Heavy Artillery: Heavy artillery includes all 152 gun, 203 how, 170 gun, 210 how and 210 rkt artillery units. All heavy artillery is treated as Motz for movement purposes despite its movement allowance. When heavy artillery fires against hexes that are Woods, Villages, Dug In or Fortified, its barrage strength is not halved. Any attack which results in a combat result unfavorable to the defender causes the removal of the Dug In or Fortified marker. Heavy artillery may not fire Defensive Barrage missions.
Artillery Fire and Building: Any time a unit in the process of building anything (Digging In, Fortifying, bridge) is fired on by artillery at at least minimum odds, the building marker is destroyed, with the exception of pontoon bridges, which are placed back under the unit that was carrying it. If the unit is forced to retreat, the bridge is destroyed.
Shoot and Scoot: Self Propelled artillery (German SP arty, Maultier, and Soviet Katyusha units) may freely flip Out of Battery any time they fire. The decision must be made as soon as the unit fires. The unit, of course, may not flip back to In Battery until the next friendly movement phase.
Artillery as Replacements: Artillery units may be disbanded to provide manpower for depleted infantry units. This may become a desirable course of action due to lack of supplies or bad ground conditions that immobilize the artillery. In order to be disbanded, an artillery unit must be within a six Foot MP of an Infantry, Fusilier, Inf Rgt Grp, FE, or Rifle, Gds Rifle, or MG unit that has lost one step. At the beginning of the movement phase, move the artillery unit as if it were a foot unit to the inf unit. Then remove the artillery unit, placing it in the dead pile and flip the infantry unit over to its full strength side. The infantry unit may then move using any remaining MP the artillery unit would have had. If the units start in the same hex the infantry unit can move its full movement allowance. Artillery units may never be remanned by reversing the process.
Artillery Supply: See Supply Rules. Stop at this point and take a deep breath.
Supply
Supply played a critical role in the Korsun Pocket battle, as in any encirclement operation. The game thus reflects both the ability of the two sides to provide supplies to their forward units, and the ability of units to carry limited amounts of supply with them.
Supplies, with the exception of artillery ammunition, are handled in terms of Supply Points. Artillery ammunition is handled in Ammo Points. Once each day, during the AM Mutual Army Supply Section (MASS), supply points and ammo points arrive at Soviet Front and German Army supply dumps. Supplies are allocated to the supply units of the various divisions and corps, and artillery ammunition is moved onto the board. Once each game turn (not player turn) during the Mutual Supply Determination Section (MSDS), both players determine which of their combat units are in supply and which are not, marking the latter with Unsupplied Markers (U-1 etc.). Air supply missions are flown during this section and limited amounts of artillery ammunition can be moved onto the board.
Thus while the supply portion of the game is more detailed than in many games of this size, almost all of it is handled in the MASS and MSDS and does not interfere with the action of the game. In practice, the supply portion of the game consumes relatively little time and effort, unless the weather gets warm. Should Mud or Deep Mud conditions prevail, supply is going to be a royal pain in the rear echelon as it was historically.
Supply Dumps. Supply Dumps represent accumulated supplies and ammunition as well as limited amounts of vehicles to deliver it. Each Soviet Front, Soviet Army and German Army has its own supply dump. In addition, the Germans begin the battle with three supply dumps on the board at Korsun, Shpola and Zvenigorodka. The Army dumps and the three additional German ones are represented by counters; those of the Soviet Fronts are not. Additional dumps may be created on the board during the course of the game but no counters are provided for this and players will have to make their own. Each dump may contain an unlimited number of Supply and Ammo points, the players must keep a written record of this on scratch paper. (See To Start for an example of supply dump record.)
Supply dumps do not count against stacking limits and have no combat strengths. They may be destroyed by demolitions, in which case all supply and ammo points in them go up in smoke and the dump is removed from the board. Supply dumps are captured when enemy combat units occupy the hex they are in. When a supply dump is captured, flip it over to its POL side. All supply and ammo points in it are considered destroyed, as the opposing sides were unable to use much of the enemy's ammo. Fuel, however, was a different matter. For three game turns after capture, no friendly motorized unit within one move of a captured enemy dump ever suffers any movement penalty for being out of supply.
Supply Units. Supply units represent trucks and horse-drawn carts and the men who drive them. Supply units carry Supply and Ammo points, and act as conduits for tracing supply lines from Army dumps to combat units.
There are two kinds of supply units, horse drawn and motorized. Each Soviet Tank or Mech Corps and each German Panzer Division has three motorized supply units, the Soviet Cavalry Corps and the Wallonien Brigade each has one. Each German Infantry division has three horse drawn supply units and each Soviet Rifle, Gds Rifle, Gds Abn and Cavalry division and Fortified Areas has two.
Motorized combat units may only be supplied by motorized supply units, nonmotorized units may be supplied by any supply unit. Supply units have a zero (0) combat strength and any supply unit alone in a hex that is attacked by any enemy combat unit is automatically destroyed.
A supply unit may carry one, two, or no Supply points. The front of the counter showing the number 2 represents two Supply points, the back of the unit shows one Supply point and a supply unit with a None on Hand marker on it has no supplies. If so marked, the supply unit can still serve as a conduit for supplies, may carry Ammo points and move normally.
Front/Army Delivery Means. Every Soviet Front and German Army and the supply dumps at Korsun, Shpola and Zvenigorodka have an ability to move Supply and/or Ammo points during the MASS. In addition, each German Army and Soviet Front has an additional ability to move Supply and Ammo points during the MSDS. These abilities are indicated on the Front/Army Delivery Means Chart.
The Front/Army Delivery Means represent concentrations of trucks, wagons, sleds and other means of transport. They may be used during the appropriate game section to move ammo points onto the board, move ammo or supply points that are already on the board, move infantry units on the board at motorized movement rates.
Ammo or supply points may be moved using delivery means for any distance, as long as the route is over continuous road hexes. The route must lead from the supply dump or friendly board edge where the delivery means are considered to be to the destination. During Frozen, Snow and Mud ground conditions, paths do not count for this purpose. (In the scan the words "for this purpose" appear partly struck through.) The line of continuous road hexes may not go through enemy units or ZOCs or across unbridged Rivers, Swamps or Marshy Hexsides.
Front/Army Delivery Means may be used to transport units that are classified as Foot for movement purposes. To move an infantry unit requires two points of delivery means. The player performing the move announces it during the MASS or MSDS as appropriate and executes it during the immediately following friendly movement phase. To be transported in this way, the infantry unit must be In Column on a road that can be reached by the delivery means over continuous road hexes. During the movement phase, the infantry column is moved at motorized movement rates as if it had a movement allowance of 10 MP. It may only be moved over continuous road hexes. On the following MSDS or MASS as appropriate, the delivery means committed to moving the infantry may not be used for any purpose.
Mutual Army Supply Section (MASS). During MASS both sides receive Supply and Ammo points according to the Supply Rate Schedule. The amount on the rate is modified according to the previous day's weather. Reduce the amount received by 10% for each game turn of Mud, and 20% for each turn of Deep Mud during the previous day. Count the Night turn as two turns for these purposes. Thus if the previous day had three straight turns of Deep Mud, reduce the amount of supply and ammo points received by 80%.
After the Soviet player receives his supply and ammo at the Front level, he may then shift supply and ammo points freely from his Front totals to the supply dumps of the Front's subordinate armies. The German player may likewise freely transfer supply and ammo points from off board supply dumps to airbases, keeping track of these proceedings on scratch paper.
During the MASS, each army may allocate supply to the supply units of its subordinate divisions. For a supply unit to receive supplies during the MASS, it must be able to trace a line, no longer in Movement Points than the supply unit's movement allowance (i.e., one move) to a road hex which in turn leads over continuous road hexes to the dump from which supplies are being allocated. Each supply unit that can trace such a line may be allocated supplies for the day at a cost of one supply point from the dump's total. Depleted supply units may be refilled during any MASS when a valid supply line can be traced to a dump. Simply deduct the points from the dump's total and change the supply unit's status appropriately. Supply units may not draw supply from other supply units.
Every supply unit that either cannot be supplied, or that a player chooses to withhold supply from, has a None Allocated marker placed on it.
As long as it does not have a None on Hand marker on it, a supply unit may be carrying one or two supply points even though it is not supplied during the MASS. Combat units can draw on these points normally despite the None Allocated marker (see below). A supply unit that is in a None on Hand state during the MASS and is not allocated any supply from a friendly dump has a U-3 marker placed on it and is of no use for supply purposes until it is resupplied.
The supply point allocated in order to supply a supply unit for a day represents the supplies flowing through it to its combat units; the supply points the supply unit carries itself, shown by the numbers printed on it, represent its supply reserves.
A player is never required to allocate supply to a supply unit. A player may never allocate more supplies from a dump than it contains, obviously. (See Designer's Notes for discussion.)
After having received ammo and supply and allocating supply to supply units, German and Soviet Armies and the on-board German supply dumps can use their MASS Delivery Means.
Mutual Supply Determination Section (MSDS). A Mutual Supply Determination Section takes place every game turn immediately prior to the first player turn. The MSDS is structured as follows. First all Air Supply missions are executed and Soviet Fronts and German Armies may use their MSDS Front/Army Delivery Means. Then both players announce which of their combat units are and are not in supply and place or remove Unsupplied markers (U-1, U-2, U-3, U-4) as appropriate.
For a combat unit to be in supply, a supply line, free of enemy units and EZOCs, must be traced from a functioning friendly supply unit to the combat unit. The radius of this supply line is 8 hexes from a horse drawn supply unit and 10 hexes for a motorized supply unit during Frozen and Snow ground conditions, 4 hexes for horse drawn and 3 for motorized during Mud and Deep Mud turns.
A supply unit can function in one of two ways. A supply unit that is not marked with a None Allocated marker or a U-3 or U-4 marker and is within one move of a road that leads over continuous road hexes to a friendly supply dump, may be used to trace supplies through. In this case, the combat units are considered to be receiving the supplies allocated during MASS and the supply level of the supply unit is unaffected.
If the supply unit cannot trace a supply line to an appropriate road or it is marked with a None Allocated marker, combat units can still draw supply from it, as long as the supply unit carried either one or two supply points. Each time units draw supply from a supply unit, the supply unit's supply level drops by one; a fully loaded supply unit (2) is flipped over to its (1) side, and a supply unit that is carrying 1 supply point has a None on Hand marker placed on it.
No more than 12 combat units may trace a supply line through or draw supply from any one supply unit during one game turn. Units may be supplied by supply units that are from a different division but, except in emergencies, the practice is hereby strongly discouraged.
Supply States of Combat Units. If a combat unit is unable to either trace supplies through or draw supplies from a supply unit, place a U-1 unsupplied marker on the combat unit. Each time a unit with a U-1 marker (or a U-2 or U-3) engages in combat either in attack or defense, its supply state is degraded by one (from a U-1 to a U-2, etc.). An attack on a unit solely by enemy artillery and/or air units never changes the friendly unit's supply state. If a combat unit is able to indicate a supply line of any length to a functioning supply unit, the combat unit's supply status can never get worse than U-2, even if the line is too long for a valid supply line.
During any MSDS in which a combat unit starts with a U-1 marker on it and the unit is now judged to be in supply, the marker is removed. If the combat unit has a U-2, U-3 or U-4 marker, one supply point must be deducted from some functioning friendly supply unit that is within supply range of the combat unit. One supply point is expended for every U-2 (U-3 or U-4) marker removed. This supply point must be drawn from the supply unit in question, not traced through it.
Supply lines are blocked by enemy units and EZOCs. Units with no combat strengths do not block supply lines. Friendly units negate EZOC for purposes of figuring supply lines. Supply lines may not go through or across terrain that the supply unit in question could not move through.
After all other combat units have had their supply states determined and appropriately marked, any artillery unit that is marked with a U-1 marker, and within one move of an Ammo point, may remove the U-1 marker by expending the Ammo point (see below).
Attached Units. Independent units, i.e., tank, assault gun, antitank, antiaircraft, engineer, etc. that are not part of a particular division (or Soviet Tank or Mech Corps or the Wallonien Bde) may draw or trace supply from the nearest friendly supply unit. This is an exception to the rule that states motorized units can only be supplied from motorized supply units.
Artillery Supply. Artillery supply is handled separately from other supply questions. In general, artillery units use one ammo point each time they fire. (Exceptions: see Direct Fire, Intensive Fire.) Artillery units that require two Ammo points have a large dot in the upper left hand corner of the front of the unit (Soviet Katyusha 1/2 regiments with a barrage strength of 6). Soviet Howitzer regiments have two dots on their counter and use three Ammo points every time they fire. Additionally, all Soviet 203 howitzer and German 210 rocket launcher units should be marked with a large dot. (See Counter Errata.)
Artillery units must be within one move of Ammo points in order to use them. As each artillery unit is committed to fire, the owning player announces it and removes appropriate Ammo points from the board.
Each artillery unit carries enough ammunition to fire one time, no matter how many ammo points this involves. Any time that an artillery unit fires when it is not close enough to sufficient ammo points on the board, or when it chooses not to use these ammo points, a U-1 marker is placed on the artillery unit. This indicates that the artillery unit has used up its own ammo reserve. An artillery unit marked U-1 may not fire until its ammo reserve has been replenished by using up the correct number of ammo points from within one move of the artillery unit. This may be done at the end of the next MSDS. The defense strength and Movement allowance of an artillery unit marked U-1 remain normal.
Ammo Points: Ammo points may be placed on the board at the beginning of a game according to scenario instructions, brought on to the board by air supply, Front/Army Delivery Means, or carried on to the board by supply units or certain headquarters. German Korps and Panzer Korps HQs and Soviet Rifle Corps HQs can carry 6 ammo points each. The ability to carry ammo is indicated on headquarters by the number to the left of the HQ symbol. Likewise, all Soviet artillery brigade HQs can carry Ammo points in amounts varying between 2 and 12. All supply units can carry a maximum of 2 ammo points. When one of the above listed types carries ammo points, place the ammo point marker underneath the unit.
Supply units and the above listed HQs may pick up ammo points that are on the board or in on-board dumps, carry them, and deposit them elsewhere on the board. It costs 1 MP for a unit to pick up its full load of ammo points or any fraction thereof. There is no MP cost to unload them. Artillery units within one move of a supply or HQ unit carrying ammo may use that ammo as though the ammo were sitting on the board itself.
Ammo points may be placed anywhere on the board - alone, stacked with friendly units, or in supply dumps. An unlimited number of ammo points may be placed in any one hex. Ammo points may not be attacked by enemy airstrikes or artillery fire. If a HQ or supply unit carrying ammo points is destroyed by enemy action, the ammo points are removed from the board. If a hex containing ammo points is occupied by enemy units, the ammo points are removed from the board.
Ammo points carried by HQs or supply units should be used only to supply the artillery of their own brigade or division, or in the case of Corps HQs, the artillery attached to that Corps. But once the ammo has been unloaded there is no way to differentiate it. Now you can mark your ammo point markers with particular calibres and types but I think that is too much of a good thing. So if you want to use the ammo being carried in divisional supply units (105mm and 150mm howitzer for the Germans, 76.2mm gun and 122mm howitzer for the Soviets) for your heavy artillery or rocket launchers, it is up to you to decide how much you are interested in simulating historical difficulties and how much you want to win.
"Within one move": When calculating whether an ammo point is within one move of the artillery using it, or a supply unit is within one move of a road, or a HQ unit is within one half move of a combat unit, count from the unit (artillery, supply, HQ) to the destination, using the best formation for movement purposes, regardless of the formation the unit is in. Needless to say, use the current ground conditions and any modifications for Zero visibility. The "one move" cannot be traced across or through terrain types that the unit involved could not move through, including enemy units or EZOCs.
Intensive Fire: Any time an artillery unit fires Intensive Fire, its ammo expenditure is doubled.
Direct Fire: Artillery units that use Direct Fire do not use any ammo. (Exception - rocket launchers.)
Air Supply: There are two ways to receive supply and ammo points by air. The best way is to possess the airfield at Korsun on the map (or else build one if using optional rules). For each air transport sortie successfully flown to the airfield, the owning player may bring in 10 supply or ammo points or some combination thereof. These points are then added to the totals in the Korsun dump. The airfield on the map has no other game purpose. During Deep Mud turns, the airfield is unusable. Further, it may not be used if any enemy unit is able to observe the airfield and is capable of calling artillery fire on it, if there is an EZOC in the airfield hex, or if the airfield is in the Air Defense Zone of any enemy antiaircraft unit.
If the airfield is unavailable for any of the above listed reasons, or if the enemy has occupied it, supplies may be air dropped. During the MSDS, any air transport sortie designated for air drop that has survived air combat may drop supplies to friendly units. The air transport unit loads up with 6 ammo or supply points. It then flies to the designated drop hex and rolls one die. The result is the number of supply or ammo points successfully received on the ground. Dropped ammo points are placed in the drop hex; dropped supply points may be left in the hex, creating a new dump or allocated to any friendly supply units within one move, or used to supply any 12 friendly units within 3 hexes of the drop hex. Supply and ammo points not successfully received are lost.
For drops made in Snowing, Raining or Night turns, or made into Swamp or Rough hexes, deduct two from the die result. Drops may not be made in EZOC or in the Air Defense Zone of enemy antiaircraft units. (See Air Rules for more information on procedure.)
(See Supply Rate Schedule, Front/Army Delivery Means Chart, Supply Effects Chart.)
Air
During the Mutual Air Allocation Section, both players may commit available air units, up to the number of sorties they have available for this turn. To commit them, the players each list their sorties on scratch paper by unit type and mission type. Air units are of four types: Fighter, Ground Attack, Bomber, and Transport. There are five different types of mission they can fly: Combat Air Patrol (CAP), Escort, Ground Attack, Deep Strike and Air Supply, each of which is plotted differently.
Air Units. All air units have unlimited range and may be assigned to missions anywhere on the board or to off board airbases without regard to distance. No air unit has a ZOC nor may it have any effect on ground units unless it either attacks or drops supplies to them. An unlimited number of air units, friendly or enemy, may occupy the same hex.
A player will often have more air units available on his bases than he can fly. The number of air units that can be flown in one turn is indicated by the Sortie Allowance of the Air Army or Korps for the game turn. Air units may be used in any combination in a turn as long as the total of units flown does not exceed the sortie allowance.
The Soviet air bases, air units and sortie allowance is divided between the 2nd Air Army (1st Ukrainian Front) and the 5th Air Army (2nd Ukrainian Front). The German VIII Air Korps is not divided and may be used freely to support any German unit. The Soviet Front's air units should operate only in the Front's area of responsibility. There is no formal definition of this operating area, players are expected to be reasonable.
Fighter Units: Fighter Units are the only air units that can attack other air units. Fighter units may be plotted for the following missions: CAP, Escort, Ground Attack, and Deep Strike. Fighter units are Me-109s and Yak-9s.
Ground Attack Units: Ground Attack units can attack enemy units on the ground and enemy air units on airbases. Ground attack units may be plotted for Ground Attack and Deep Strike missions. Ground Attack units are Ju-87 Stukas and Il-2 Stormoviks.
Bomber Units: Bomber units are treated exactly as Ground Attack units, they simply have different strengths. Bomber units are Ju-88s and Pe-2s.
Transport Units: Transport air units may carry supply points. A German transport unit may carry up to 10 supply or ammo points from an off board air base to the airfield at Korsun, or up to six supply points to air drop. Soviet transport units may land on any primary road hex in any ground condition except Deep Mud. This landing is treated like an airdrop except that the points land safely and there is no die roll. This is the only way Soviet transport units can deliver supplies. Transport units are Ju-52s and Po-2s.
Air Bases. An air base represents a major airfield and several surrounding fields, a supply dump and antiaircraft defenses. In the case of the Kiev air base, three bases are represented - Kiev I, II, III. An air base can hold an unlimited number of air units and supply points.
Each air base holding has its own Anti-Aircraft (AA) Factor printed on it. This AA Factor attacks every enemy unit performing a Deep Strike mission against the air base.
Sorties. The 2nd and 5th Air Armies and the VIII Air Korps each have certain air units and air bases allotted to them together with a certain sorties allowance, depending on weather and ground conditions. (See Air Order of Battle.)
In Snowing and Raining turns, sortie allowances are halved, rounding fractions down. Only Transport missions may be flown at night; no air activity of any kind is allowed during Fog and Blizzard turns. On Cloudy turns, CAP radius is reduced to 4 hexes; on Raining and Snowing turns it is reduced to 2 hexes. Transport units flying during Snowing or Raining Night turns must roll one die for each unit and read the result as a 1-1 attack on the Air CRT.
Missions
Combat Air Patrol (CAP): In order to plot a CAP mission, the player indicates the map location, village or other terrain feature and the number of fighters assigned to the hex. A fighter flying CAP has a Patrol Area that extends six hexes in all directions. In general the unit flying CAP may attack any enemy air unit or stack of air units entering its Patrol Area. If several friendly fighters have the same hex within their Patrol Areas they can combine to attack an enemy air unit entering this hex. CAP missions may be flown over off board air bases. Fighters flying CAP may engage in ground attack against any visible enemy unit within their Patrol Area if they have not intercepted anything up to that point.
Escort: To plot an escort mission, simply note the number of escorting fighter units at the end of the plot of air unit(s) being escorted. The fighter unit(s) involved are stacked with the air units they will escort and fly the mission with them. Escorting fighters may attack enemy air units only if the enemy units intercept the stack being escorted.
Ground Attack: To plot Ground Attack, simply note the number and types of air units and to which Army (Soviet) or Korps (German) they are assigned. No target hex is designated. Ground attacks are conducted like artillery fire and may be carried out during any part of the turn that artillery may be used in. Ground Attacks function exactly as artillery barrage strength points except that they may observe targets for themselves. Ground attacks may not be used for FPF. Any Ground Attack mission flown into an enemy Patrol Area and/or Air Defense Zone of AA units is attacked by the enemy fighters or AA before the ground attack is made. Ground attacks against Horse or Motz units In Column receive a +1 on the CRT. Air units may observe and attack enemy Columns that are in Village or Broken hexes.
Deep Strike: During the plot section, Ground Attack and Bomber units may be assigned to Deep Strike missions against enemy off board air bases. To plot a Deep Strike mission write DS, the name of the air base to be struck, and the number of attacking air units and escorts, if any (example - DS Vinnitsa 3GA escort 1F). Deep Strike is executed during the friendly combat phase, by placing the attacking air units in the enemy air base holding box. The strike is then attacked by any enemy fighters on CAP over the base, and then by the base's AA Factor. After this, the attacking air units may use their ground attack strength to attack any enemy air units in the holding box. The air units on the ground defend with a strength of one (1) no matter what their type. Otherwise the attack is carried out exactly as air to air combat (see below) except that no air unit on the ground can hit back.
Air Supply: During the Mutual Army Supply Section, off board air fields may receive supply points. These supply points may be loaded onto air transport units, up to 10 points on a flight to the Korsun air field, up to six points for an air drop, and up to two for a Soviet air supply mission. To plot an air supply sortie, list the amount of supplies carried and a flight path defined by a minimum of two and a maximum of four terrain features. The points designated must be, in order, the hex where the unit will enter the board, up to two points in between in which the unit will change direction, and the objective hex (either the airfield or the drop zone). Let's say the flight path was to involve two changes of direction, the maximum. The plotted mission would include 10 supply or ammo points, entry hex, first turn, second turn, and objective. (Turn in this case refers to a change in direction, only the terrain feature would be written down.) The flight path would be a straight line of hexes leading from one plotted hex to another, in sequence. These lines must be along the grain of the hexes. In other words, there are only six possible flight lines from each hex and the next coordinate must lie on one of these six lines. To fly to the airfield, the objective hex designated need only be within 4 hexes of the airfield; from there the transport units get a "free" change of direction and fly directly to the airfield. Having reached the airfield or airdrop hex, the transport units are considered to have done their work, the supplies are unloaded and the transport units returned to their base. Reasonable disputes should be settled in favor of intercepting fighter units.
Air Superiority. During the Mutual Air Allocation and Superiority Section, players secretly plot all the missions they are allowed to by sortie allowance limitations. When all plotting is completed, all fighter units flying CAP are placed on the board in the center of their Patrol Areas. Each player then rolls one die and the one with the higher result may use any fighter unit of his flying CAP, using the Air to Air combat procedure, to attack any enemy fighter unit that is within the friendly unit's Patrol Area. (See below.) Now the other player can do the same and both players alternate the procedure until neither wishes or is able to make any more attacks. This concludes the Section.
Air to Air Combat. Air to air combat occurs only as a result of enemy air units appearing in the Patrol Area of friendly fighters flying CAP. Whenever enemy units so appear, the fighter(s) on CAP may exercise the option to attack. Move the attacking fighter to the enemy air unit's hex. Before the attack is made, the enemy player may commit any one fighter of his that is on CAP within six hexes of the developing air battle. If the enemy player does so, both sides can now alternately add fighters to the battle, if it is within their respective Patrol Areas, until neither has any more fighters that he wishes or is able to add to the battle.
To resolve the battle, first count the number of opposing fighter units. If the number is the same for both players, the fighter units are paired off and attack each other individually at 1-1 odds. If one player has more fighter units than the other, he must attack each enemy fighter individually with at least 1-1 odds. He may then use his excess fighters to either raise the odds against selected enemy fighter units, or attack other enemy air units in the hex.
The player with the lower number of fighter units may respond to each 1-1 attack with a 1-1 attack of his own, with all attacks being resolved before any of the results are implemented. If a fighter unit is attacked at higher than 1-1 odds, it may still respond, but may attack only one of the enemy fighter units, as odds of less than 1-1 are not allowed in air to air combat. For example, four Soviet ground attack units escorted by four fighter units are intercepted by five German fighter units as they enter the fighter's Patrol Area. Four of the German fighters and all four Soviet fighters must take each other on in four 1-1 attacks. The remaining German fighter could choose to raise one of these attacks to 2-1, in which case the four Soviet fighters could still attack only one German fighter apiece. As an alternative, the German fighter could choose to attack any one of the ground attack units (the odds would be 3-2 = 1-1). Let's say that there had only been three Soviet fighters escorting. This would allow the Germans to deal with the escort with three fighter units if they wished, leaving two fighter units to attack the Stormoviks. Both fighters together (3+3) could attack three ground units (2+2+2) at 1-1; or one ground attack unit at 3-1; or make the bad choice to attack two ground units (2+2) at 6-4 or 1-1; or each fighter separately tackle one ground attack each at 1-1. Another possibility would be for one or both of the excess fighter units to join in the dog fight with the enemy fighters.
Damaged Air Units. Air units that receive a damaged result are flipped over to show their damaged side and returned to their air base. During the plot part of the next Air section, each Soviet Air Army and the German Air Korps may attempt to repair one damaged air unit. Roll one die, a one or two results in a damaged air unit being flipped back to its undamaged side - it may be used this turn; a die roll of 3, 4, 5, or 6 produces no result. Damaged air units that are attacked on the ground by an enemy Deep Strike and suffer another D result are destroyed. Destroyed air units are removed from play.
AntiAircraft (AA). There are four kinds of AA in the game: Heavy AA units (Soviet 85 and German 88), Soviet Light AA (37), German Light AA (all German Motz Inf, SS Motz Inf, Pz Gren, 88AA and SS Pz Gren) and Air Base AA. Heavy AA has an Air Defense Zone (ADZ) of two hexes in all directions, Soviet Light AA has an ADZ of all adjacent hexes, and German Light AA has an ADZ only in the hex it occupies. Air Base AA applies only to the Air Base. The antiair strength of Heavy and Soviet Light AA is equal to the unit's attack strength (parenthesized or not), German Light AA is always equal to one (1).
Every time an air unit appears in the ADZ of an AA unit, the AA unit may attack it. Ground attacking air units can be attacked by AA in the hex they make their strike against. Any time a fighter unit on CAP finds itself in an enemy ADZ (except that of German Light AA) at the end of the Air Superiority procedure, it may be attacked by the enemy AA. Escorting fighters are never subject to AA. Air units flying Deep Strike missions are attacked by air base AA before they make their strike.
AA units may fire an unlimited number of times during a game turn. Each AA unit may only attack each air unit once per turn. AA units that fire at enemy air units are in no way restricted in their other game activities. AA units in a U-3 or U-4 supply state may not fire on enemy air units. Only German Light AA units may fire if In Column, all other AA units must be deployed to fire. AA units may not fire during Night turns.
Ground Attack units may attempt to suppress enemy AA. This function is performed like any other ground attack mission except that the air unit is simply placed on the AA unit and the AA unit attacks it. If the Ground Attack unit survives the AA fire and is not driven off by enemy fighters, the AA unit is automatically suppressed for the rest of the game turn which prevents it from firing at any other air units.
AA attacks are resolved on the Antiaircraft Combat Results Table. Compare the AA strength to the Air-Air strength of the air unit. All "returned to base" results are ignored, i.e., the air unit is not returned to base; all other results are treated normally. If an air unit is in the ADZ of more than one AA unit at one time, the AA units may combine their strengths to increase the odds.
(See Air Combat Results Table, Antiaircraft Combat Results Table, Air Order of Battle.)
Extra Night Turn and Fatigue
At the end of the Night game turn, the first player and then the second player may exercise the option to use an Extra Night Turn. If a player chooses to use an Extra Night Turn, an abbreviated sequence of play, consisting only of a First Player Turn, phases A through E is used for the turn. The second player may then choose to use an Extra Night Turn using the same abbreviated turn sequence. Weather, Visibility and Ground Conditions remain the same as they were for the preceding Night turn, no air activity may take place and Supply states remain as they were for the preceding Night turn. Players are never required to use the Extra Night Turn.
During the Extra Night Turn all normal activity may be carried out as per a normal Night turn with the following exceptions: supply and HQ units may not move, units in a U-3 or U-4 state may not move and artillery units may not flip into Battery, nor may Soviet artillery emplace. Any unit performing any non-combat function during the Extra Night Turn, spending movement points to move or change formation, building anything (either placing building markers or flipping them over) or attempting to demolish anything, has a Tired marker placed on it.
Extra Night Turn Combat. Any unit that moves into an EZOC during the Extra Night Turn is required to attack as usual. Any unit that begins the Extra Night Turn in EZOC may attack if it wishes to but is in no way required to. Any unit that attacks in the Extra Night Turn has a Tired marker placed on it, as does any unit that defends during the Extra Night Turn and suffers an adverse combat result. Any time during the AM, PM or Night that a Tired unit attacks, flip the marker over to Exhausted. This is the only way a unit's Fatigue state can get worse except in the Extra Night Turn. Motorized units beginning the Extra Night Turn In Column and who move exclusively on continuous road hexes do not become Tired from movement during the Extra Night Turn.
Fatigue Effects. Units that are Tired have their Attack Strength halved; their Defense Strength remains normal and their Movement Allowance is halved for Foot and Horse units, normal for Motz. Units that are Exhausted have their Attack and Defense Strength and their Movement Allowance halved.
Fatigue Recovery. During the Mutual Fatigue Recovery Section, any unit that is not in EZOC may reduce its Fatigue level by one - if the unit is Exhausted it becomes Tired, if Tired the marker is removed. Note that there is no Fatigue Recovery Section during the Extra Night Turn. Units that do nothing and are not attacked during the Extra Night Turn are considered to be asleep and are not affected in any way.
(See Fatigue Effects Chart.)
Engineers, Building and Demolishing
Engineers. Engineer, Construction and Bridge units have special abilities to build various things and, in addition, Engineers have special combat abilities. Certain other units also have limited abilities to build things.
- All non-artillery combat units have the ability to Dig In.
- All Engineer (except Divisional engineers of Soviet Rifle, Gds Rifle and Gds Abn Divs) units and Construction units can Fortify a hex.
- All Engineer and Construction units can improve roads.
- All Engineer, Construction and Bridge units can rebuild a printed bridge that has been demolished.
- All Motz Engineer and Bridge units can carry and place a pontoon bridge.
- No company sized unit can build anything, repair anything or carry anything.
- All Engineer units are combat units and have all normal combat abilities. (Note that the Soviet Divisional Engineers of the above listed types have only one step.)
In addition, engineer units that attack Fortified or Dug In hexes receive a +1 shift on the CRT, and if they receive a favorable combat result the Fortified or Dug In marker is removed. (Note that all Engineer units have an antitank strength of one (1).)
Building. Any unit involved in building, either placing building markers or flipping them over to their built side, uses its entire Movement Allowance to do so. Nothing can be built under enemy observation; any time an enemy combat unit can observe a friendly building marker the marker is removed from the map. The only exception is pontoon bridges, which are placed back under the unit that was building them.
It takes two game turns to build anything other than Roads. In the first friendly building and demolition phase, the building marker displaying the building symbol is placed on the unit doing the work. During the next friendly building and demolition phase, the marker is flipped over to its built side. No unit may attack in the same turn in which it is involved in building.
Nothing may be built in Deep Mud Turns.
Digging In / Dug In: All non-artillery combat units may Dig In. Units under a Dug In marker receive a -1 shift on the CRT if they are attacked. Artillery fire, except Heavy Artillery, is halved when attacking Dug In units. Only one unit is required to build a Dug In position, but any amount of units up to the stacking limits may be placed under a Dug In marker. Any time there are no friendly units in a Dug In hex as a result of movement or combat, the marker is removed. Dug In units exert a special ZOC. (See ZOC rules.) Artillery units may not Dig In nor may they benefit from Dug In markers in their hex. Unless degraded by visibility conditions, Dug In combat units always exert a Strong ZOC. Dug In units are never required to attack adjacent enemy units, otherwise EZOCs extend normally into Dug In hexes.
Fortifying / Fortified: All Engineer units (except Divisional engineers of Soviet Rifle, Gds Rifle and Gds Abn Divs) and Construction units can Fortify a hex. Units including artillery units, under a Fortified marker have their defense strength doubled. Artillery fire, except Heavy Artillery, is halved when attacking Fortified hexes. Only Construction and certain Engineer units can build Fortifications in a hex but all other units may benefit from them. Fortified markers stay on the board whether occupied or not and may be used by either side. Fortified markers can be removed from the board only by Heavy Artillery fire, engineer assault, or demolition. Units in a Fortified hex do not have to attack adjacent enemy units; in fact, EZOCs have no effect in Fortified hexes except for purposes of retreats. Units in Fortified hexes always exert Strong ZOCs unless degraded by visibility conditions. Optional: Defending units in Fortified hexes do not need to be revealed to the attacking player until after the attacker has indicated which of his units will attack the hex, artillery included.
Building Pontoon Bridges and Rebuilding Demolished Bridges: All Bridge units and Motz Engineer units can carry and build Pontoon Bridges. All Engineer, Bridge and Construction units can rebuild demolished bridges. All Bridge units and Motz Engineer units start the game carrying a pontoon bridge. Place a pontoon bridge marker under the unit. While carrying the pontoon bridge, the unit may only move In Column. Its movement allowance is cut to 7 movement points. To build a pontoon bridge, the Bridge or Engineer unit must begin the friendly building and demolition phase Deployed adjacent to the Stream or River hexside to be bridged. The player then places the pontoon bridge on top of the unit, building side up. During the next friendly building phase, the bridge is flipped over and the arrow on it is pointed toward the bridged hexside. If the Engineer or Bridge unit is eliminated or forced to retreat while the bridge is being built, the bridge is destroyed and removed from the game. Once a bridge is built, the Engineer or Bridge unit may leave to move elsewhere. Any Engineer or Bridge unit able to carry a pontoon bridge may also pick one up, whether it is friendly or enemy. To pick up a pontoon bridge, the unit must start the friendly building phase Deployed adjacent to the bridge. During the building phase, simply place the pontoon bridge under the unit, which may carry it normally during the next friendly movement phase.
To rebuild a bridge printed on the map that has been demolished (i.e., has a demolished marker pointing to it), an Engineer, Bridge or Construction unit must begin the friendly building phase Deployed adjacent to the hexside the bridge previously spanned. During the building phase place a bridge building marker on the unit. At the end of the next friendly building phase, the printed bridge may be used normally by removing both the building marker and the demolished bridge marker. If the building unit is eliminated or forced to retreat while it is building, the demolished bridge marker remains but the bridge building marker is removed.
All Engineer and Bridge units have the special ability to ferry other units across Rivers. All non-Motz units can cross Rivers paying 2 MP less than they would otherwise if a friendly Engineer or Bridge unit is Deployed adjacent to the River hexside they wish to cross. A Motz Engineer or Bridge unit carrying a pontoon bridge may ferry Motz units across a River at a cost of 4 MP. In either case, the Engineer or Bridge unit need not be on the same side of the River as the unit being ferried. If Engineer or Bridge units are used for ferrying, they may not move, change formation, or build anything during that turn. Units must be In Column to use pontoon ferries.
Improving Roads (Optional but recommended): All Engineer and Construction units can improve existing roads and build new ones. Roads may be improved or built at a rate of two hexes per turn, per unit. During the friendly building phase, place an improved road marker under the unit, move the unit one hex and place a second improved road marker, with the uncompleted ends facing away from each other. In the following turns, the unit may lengthen the improved section by moving whichever marker it begins building on. The improved section of road is considered to extend between the markers.
An improved road is considered to be one level better than its printed value as follows: Primary/Secondary-Railroad/Path. There is no point in improving a Primary road, since there are no facilities for asphalt available and the gravel topped surface is as good as it can get for the game. Improved Secondary road or Railroad is treated like Primary road; improved Path is treated like a Secondary road.
New road may be built in clear terrain and Village hexes only. Newly built road is always treated like Secondary road. New roads can be built using the same procedures and at the same rate as existing roads are improved. The new road is considered to run in a straight line of hexes between the markers. (If you want to make new roads with lots of twists and turns and don't have a plastic sheet over the map, make your own markers to indicate where they go.) New Paths may be built through terrain other than Villages and Clear hexes. They may be built at a rate of only one hex per turn; otherwise, all the procedures for improving roads apply. During Deep Mud turns, all Improved Road markers are removed and the roads revert to their previous dismal state.
Demolitions. All Engineer and Partisan units have the ability to demolish bridges, pontoon bridges, Fortified markers and supply dumps. Engineers may attempt to demolish any or every bridge, pontoon bridge, Fortified marker or supply dump in the hex they are in, in any adjacent hex, or crossing the hexside of any of these seven hexes. Partisans may only attempt demolitions against targets in the hex they are in or that cross any of its hexsides.
Demolitions are attempted during the friendly building and demolition phase. Units that have moved during the directly preceding Movement phase may freely attempt demolitions; however, units must be Deployed to attempt demolitions. Demolitions may not be attempted against hexes that are in EZOC unless the hex is occupied by a friendly unit. If a bridge crosses a hexside of a hex in EZOC, the unit attempting the demolitions or a friendly unit must be adjacent to the hexside in question. Units may always attempt to demolish a bridge adjacent to them, even if there is an enemy unit in the hex at the other end of the bridge. A unit may attempt as many demolitions as it wishes in one turn, but may only attempt to demolish each target once per turn. More than one unit may attempt to demolish a target in one turn; each attempt is resolved separately.
To attempt a demolition, simply announce the unit making the attempt and the target and roll one die. With a result of 1, 2, 3 or 4 the attempt is successful; 5 or 6 produces no results. A successful result causes a pontoon bridge, Fortified marker or supply dump to be removed from the map. A successfully demolished bridge has a demolished bridge marker placed in an adjacent hex with its arrow pointing toward the bridge.
Optional: The German player may build airfields on the map. This requires a construction bn and a motz engineer bn and takes three consecutive turns. The units in the hex must not be moving, taking part in combat or doing anything else. Such an airfield may only be built during Snow or Frozen ground conditions, on a Hill hex in Clear terrain. Make up your own marker. The marker is removed from the board whenever Mud or Deep Mud conditions prevail. This airfield functions in all other ways as the one at Korsun does.
Battalion Breakdown and Companies
Battalion Breakdown. Only the following German battalions can break down into companies and be built up similarly from companies: Infantry, Fusilier, Rgt Gruppe, Motz Infantry, SS Wallonien Motz Inf, SS Motz Inf, Pz Gren, SS Pz Gren, Recon, Mk IV Panzer, Panther, Tiger, Ferdinand, Sig, AT, Mx AT, and AA. Any of the above battalions may break down into companies during the friendly movement phase at a cost of 2 MP.
To break down a battalion, consult the Battalion-Company Breakdown chart (see below), take the battalion unit off the map and place it in the Battalion Breakdown box (Note: There is no Battalion Breakdown Box provided on the map. Make one for yourself.), and place the appropriate company units in the hex the battalion was in. Units may not break down into companies in EZOC, or if the battalion is in a reduced state, or in violation of the stacking rules.
A unit may break down at any point during its movement phase if it has the movement points remaining. In this case, the companies may continue to move separately using what movement points the battalion retained after the cost for breaking down is paid. If there are not enough company units left in the countermix, a battalion may not break down. Of course, there is nothing to prevent players from making additional counters but be warned it will not make the game go any faster.
Rebuilding a Battalion. To rebuild a battalion that has been broken down, the appropriate combination of company units must be stacked in the same hex at some point during the friendly movement phase. After paying 2 MP, the company units are removed from the map and an appropriate battalion unit is taken from the Battalion Breakdown Box and placed in the hex. The battalion unit chosen must be of the proper type corresponding to the companies involved (see the Battalion-Company Breakdown chart) and must be, as closely as possible, of the Division and Regiment to which the companies originally belonged. If it is possible that the build up of a battalion involves companies of different Regiments or Divisions, use a battalion from the Breakdown Box corresponding to the nearest Regiment and Division. Try to be realistic. Battalions may not be rebuilt in EZOC. Bns may not break down and rebuild in the same movement phase. The newly rebuilt battalion unit may move during the same movement phase, using the remaining movement points of the company expending the most MP thus far, including the 2 MP cost for rebuilding.
Companies. Companies have one step only and if forced to take a step loss are destroyed. Companies are printed on both sides but the sides represent different types of companies. Remember that stacking limitations are no more than four units of any type per hex and no more than three Bn-sized units per hex. In combat no more than two Bn and one Co, or one Bn and two Co, or three Co may use their combat strengths from one hex, artillery excepted. Companies may change formation at any point during their movement at a cost of 2 MP.
Note that certain German artillery units (170 and Mlt) begin the game in company-sized units (properly called Batteries - to avoid confusion I am calling them companies). These units may never recombine in any way. Company-sized artillery units do not use Artillery Column markers, but rather normal Column markers and only take up one hex of road space when In Column.
Battalion-Company Breakdown Chart
(The chart is printed with unit-type symbols. Each battalion breaks down into the stated number of companies, each with the printed strengths attack-defense-movement; support strengths are shown where printed. Rows are given in printed order; the first four rows are identified here by the symbol described, the rest by the label printed beside the symbol.)
| Battalion | Breaks down into | Company strengths |
|---|---|---|
| Infantry-type battalion (first symbol) | 3 companies | 1-2-6 |
| Motorized infantry-type battalion (dotted symbol) | 3 companies | 1-2-10 |
| Pz Gren-type battalion (support strength 3 shown) | 3 companies (company shows support 3) | 2-3-12 |
| Recon-type battalion (support strength 3 shown) | 3 companies | 2-2-14 |
| Mx AT | 3 StG companies (support 3) + 3 AT 75 companies (support 3) | StG company 1-3-10; AT 75 company (1)-1-10 |
| AT 75 | 2 companies (support 3) | (1)-1-10 |
| AA 88 | 2 companies (support 4) | (1)-3-10 |
| Mk IV |
Dismount
At times players may wish to dismount some of their motorized or mechanized infantry, either temporarily or permanently. Units might be dismounted temporarily in order to cross a river and capture a bridge, or permanently due to lack of supplies or impossible ground conditions.
A dismounted unit's movement allowance is reduced to 6 and they are treated as Foot units for movement. Mechanized and Panzer Grenadier units lose their Tank/Antitank Strength and have their Attack and Defense strengths reduced by two points each. Pz Gren companies have their combat strengths reduced by one point each. A unit dismounts before it moves at the beginning of the friendly movement phase. It expends no MP to dismount and may then move normally using its new movement allowance.
Units permanently dismounted may not remount, their vehicles are considered destroyed.
Units that have temporarily dismounted may remount if the owning player can reasonably demonstrate that it was possible for the vehicles to have reached the unit without crossing any enemy units, EZOCs, or terrain impassable to the vehicles. Thus, if your motorized infantry has dismounted to assault across a river, they may remount during any subsequent movement phase in which their side possesses a bridge across the river and the unit can trace a line to the bridge.
Desperation Breakout Attempt
(Sauve qui peut) Optional: A player may wish to salvage soldiers from friendly units in an enemy encirclement that appear to have no chance of being relieved or fighting their way out. A Desperation Breakout Attempt is made during the friendly combat phase. At the end of the friendly movement phase, units intending a desperation breakout may be overstacked. Units announced as planning such an attempt may stack any number in one hex. During the friendly combat phase, each unit involved in the breakout attempt is individually moved again, using its normal movement allowance, even if they have moved in the immediately preceding friendly movement phase. The unit pays normal terrain costs. Exhausted and Tired units do not have their movement restricted by their fatigue (three benzedrine apiece).
A unit attempting a desperation breakout in good visibility may move through EZOCs, Strong or Weak. In Poor visibility, ignore all EZOCs except those of infantry or cavalry type units (six unit-type symbols are shown in the book: the infantry, mechanized and cavalry-type symbols) containing at least two steps in a hex. In Zero visibility, ignore all ZOCs. In addition units may attempt to break out directly through hexes of enemy units. Treat the above listed unit types as Strong EZOCs when moving through their hexes; treat all other enemy combat units as Weak EZOCs for this purpose. For each hex of Strong EZOC entered, roll one die. For breaking out units that are at full strength, a die result of one means a loss of 100 men, a roll of two means 200, a roll of three means the loss of a step, four means 400 lost, five means 500 and six eliminates the unit. If the breaking out unit is depleted, one or two means the loss of 100, three or four 200 and five or six eliminates the unit. The same procedure is followed for Weak EZOCs but two is subtracted from the die roll, with a roll of one or two producing no casualties. If there are enemy cavalry units of any strength in the hex exerting the EZOC, add one to the die roll.
At the end of a unit's desperation breakout movement, the unit must reach a friendly unit that can trace a supply line of any length to friendly board edge. The unit that broke out is then removed from the board and placed in the dead pile. For each full strength unit reaching safety, 600 men are considered to have escaped, for each depleted unit 300. If the unit has taken losses crossing EZOCs, adjust the number accordingly. Keep track on scratch paper of the number of escapees.
A unit or stack of units breaking out must reach friendly lines within two friendly combat phases or else all the units are considered destroyed. If at the end of the first combat phase the units have not reached friendly lines, players should make a marker (none is provided in the game - it should read PANIC). Normal stacking rules apply to this panicked stack for combat purposes only. The attack strength of the units in such a stack is normal, defense strength is halved. Should such units attack and suffer an adverse combat result, they may not voluntarily take losses rather than retreat. Should such a stack be attacked and suffer an adverse combat result, its mandatory losses are doubled and it is retreated by the opposing player. Should the opposing player so choose, he can break up the stack and retreat it in different directions. Needless to say, all fragments of the stack remain panicked.
Such a stack can be overrun, with one step loss being inflicted for every MP the overrunning unit spends in the hex. After expending as many MP as he wishes in this manner, the attacking player then performs a normal overrun attack against the topmost unit of the stack.
Partisans
There are seven Soviet partisan units in the game. These are deployed behind German lines in any unoccupied Rough Terrain hex except the two adjacent to the Korsun airfield. As the Germans had just completed an antipartisan sweep of the area, four of the units should be deployed Depleted.
Partisan units function as other infantry units with the following exceptions:
- Partisan units in Rough terrain, or in cover hexes adjacent to Rough terrain, may refuse combat by retreating voluntarily at the beginning of the German combat phase. Partisans may ignore EZOCs in Rough terrain for this purpose.
- Partisan units are always considered to be in supply.
- Partisan units that make contact with regular Soviet forces may be used to rebuild Soviet rifle bns, with one partisan unit disbanded to bring one depleted rifle bn up to full strength.
- Partisan units may perform demolition attempts against bridges and supply dumps. In the case of bridges, the partisan unit must be adjacent to the bridge to be blown; with dumps, the partisan unit must occupy the hex in which the dump is located. Use normal demolition procedures (see Engineer rules).
- Rough terrain hexes cost partisans 2 MP to enter in Frozen/Snow turns, 3 MP in Mud and Deep Mud.
- Partisan units in covered hexes or in Poor or Zero visibility may always leave enemy ZOCs at no extra movement penalty. However, they may not move directly from one Strong EZOC to another.
Scenario Instructions
The game of Korsun Pocket is played by using one of several alternative scenarios. There are eight scenarios allowing players to play part or all of the battle. Each scenario includes information on history, scenario length, deployment, reinforcements, withdrawals, special rules, weather, supply, movement restrictions, victory conditions and comments.
To Start. Before punching out the counters, read this. There is no sense in dropping 2400 counters loose in a plastic bag. My advice is to either buy three of the old-style plastic boxes from SPI (257 Park Ave. South, N.Y. N.Y. 10010), or better yet, look in your closet where you keep your games, select three SPI games you haven't played in years and remove the contents from the boxes. Voila, you have just saved yourself $9.00.
Now, punch out the counters, referring to the Order of Battle, and divide the units by Front, Army, Corps and Division. Pick the scenario you wish to play and place the units you will need alongside the map. Examine the situation map, the order of battle, the victory conditions and the terrain you will be fighting over carefully before setting up.
Supply Records. The next thing you will need will be some scratch paper for recording air allocations and artillery attachments. Then, take some paper and set up a supply record as follows.
For a Soviet Front, list each Army and the Front itself across the top with a heading underneath each for ammo and supply. For a German Army, list the army, any independent dumps on the board (as per scenario instructions) and the three air bases. It is also a good idea to record here the supply delivery schedule and the Army/Front Delivery Means available to each Army and Front, as well as the number of supply units on the board to which supply must be allocated during AM MASS.
Example record (Soviet): columns for 40th Army, 27th Army, 6th Tk Army, 2nd Tk Army and 1st Ukr Front, each with an Ammo and a Supply column.
The initial supply level is given in the scenario instructions for the Front only. Deduct from the Front's ammo allotment the amount allowed to be set up on the board and set aside enough ammo point markers for this (best bet is to place them on the board after setting up artillery). Divide the Front's ammo and supply points between the Front's column and the Armies' supply dumps as desired.
During the AM MASS, add the incoming supply and ammo points to the Front's totals, then subtract from Front and/or Army the number of supply points allocated to supply units on the board and the number of ammo points placed on the board by the Armies' delivery means. The procedure for the Germans is simpler, there being no Front to deal with.
If using variable weather, it is probably a good idea to set up yet another level of record keeping, listing all the turns of the scenario and filling in for each the turn's temperature, atmospheric and ground conditions.
Victory. Victory is treated a little differently in Korsun Pocket than in some other war games - it's not so clear cut. Some scenarios have territorial victory conditions. The campaign scenario and some of the others have victory conditions based on number of losses inflicted on the enemy. No formula is offered in this game for calculating victory, however. Those who wish to may count all the surviving units at the end of a scenario, compare it with original strength and with enemy losses, modify this for the greater value of tank, antitank, artillery, engineer and air units, and come up with some magic number. But as far as the rules are concerned, either one of you clearly beat the tar out of the other, or you didn't. If neither of you has conceded at game's end and neither feels he was altogether beaten, well, war is like that.
You should also evaluate the situation on the board at battle's end with an eye to the fact that the war is not over. If you have achieved your victory conditions and find yourself with little ammunition and no armor left while your foe retains the resources to continue the battle, odds are you've lost, no matter what you accomplished up to this point.
Uman. In the never-ending effort to portray the Soviet military leadership as bumbling fools (and by implication the Soviet system, communists in general, and even all Slavic peoples; J. F. C. Fuller for the latter), pro-German "historians" cannot even discuss a Soviet victory without deriding their opponent's judgment and ability. The Korsun Pocket battle is no exception.
Both "Paul Carell" and his echo at SPI, Steven B. Patrick, severely criticize the Soviet command for missing a golden opportunity. When the Soviet pincers closed at Zvenigorodka, the Soviet armor dug in to defend the outer ring. The critics contend that all the Soviets had to do was turn south through the 55-mile-wide hole between 1st Panzer Army at Ryshanovka and 8th Army at Slatopol, to destroy the whole German southern flank.
What was available on January 29 to go through that hole? The 6th Tank Army had been forced by the German counterattack (taking place off board to the west of Map C) to send 5th Mechanized Corps some 30 miles off board to Tetiev. That left 5th Guards Tank Corps, a badly understrength unit that was holding in the Popovka-Olkhovets area with part of its forces and attacking the pocket in the Steblev area with the rest. As for 5th Guards Tank Army, January 29 found it with 20th Tank Corps spread from Zvenigorodka to Shpola, and 29th Tank Corps at Vodyanoye-Lipyanka. Both had been out of contact with their Army supply dumps since the 26th, their rear and flanks were being harassed by roving groups of German tanks and submachine gunners of 11th and 14th Panzer Divisions. The 18th Tank Corps was engaged in a furious battle at Kapitanovka-Tishkovka to reopen supply lines to 20th and 29th Tank Corps. The inner wall of the pocket was not closed yet either.
As for the German armor, on January 29th, 17th Panzer Division had taken up defensive positions between Ivanki (bottom of Map C) and Talnoye (three miles south of Zokolovotscha on the primary road). The 16th Panzer was on its way to join 17th, and 1st SS Panzer (50 miles away) was getting ready to do the same. These formations were tired but fairly strong. The 8th Army was also building up 47th Panzer Korps as an armored striking force on its left flank, with 13th and 24th Panzer, both strong divisions, moving over to support 3rd, 11th, and 14th Panzer around Novo Mirgorod.
Suppose the Soviets turned south. What could have been accomplished? A raid on Uman, 20 miles south of Map C, would have been fun, with massive German supply dumps and air bases, provided the raiders didn't run into anything to slow them up. But to have committed any or all of the three tank corps in position to exploit the hole in German lines (5th Guards, 20th, 29th) would have been the very height of folly. The probable results of such adventurism would have been the destruction or crippling of two Soviet Tank Armies and the failure to pocket any German unit at Korsun. Instead of sticking their head in a noose, the Soviet armor was used to accomplish its mission - the destruction of enemy forces in the Korsun Pocket.
All of this is to explain why the Soviet player does not gain any "victory points" from sending armored units (or any units) off the south map edge. An important thing for the Soviet player to remember is that the southern map edge should be treated as if one or more panzer divisions were likely to appear anywhere along it at any moment. Neither side in the actual battle had a complete enemy order of battle, or an order of appearance chart, or an accurate long-range weather forecast, for that matter.
Now I could lay a bunch of rules like barbed wire along the southern map edge to keep the Soviet player honest, but I'm not going to. Both sides should try to play as if they were entrusted with a large part of their respective nations' armored striking power. If you get it destroyed for little purpose, your nation's chance at victory and your career prospects are going to suffer accordingly.
If you want to simulate the problems of operational warfare circa 1944 in the Ukraine, you should have no problems with this approach. If you find an historically unreasonable tactic by squeezing a tank column between two paragraphs of rules, don't do it!
For those of you who want to win and don't care whether or not it's realistic just as long as it seems to be in the rules, try this one. When your opponent leaves the room, remove his units from the map and place them in the dead pile. This is legal, I just said so. You have just won the game. Are you happy? Now go find another opponent and another game - please.
Depletion. Many units will begin the battle depleted, that is, having already taken serious casualties in previous battles. Some divisions will have a parenthesized number next to them, e.g., 180th Rifle Div (-10), on the Order of Battle and Order of Appearance Charts. This means that the 180th Rifle Division has lost 10 steps prior to being placed on the board.
To deplete a unit, use the following priority. First reduce the infantry battalions in the division. Only when each infantry battalion has been flipped over may the player deplete other units: antitank first, then engineer. Once all infantry, antitank, and engineer units have each taken a one-step loss, the player may take any additional losses from any unit in the division he chooses. So with ten steps depleted, the 180th Rifle Division would have all nine rifle battalions and its antitank battalion flipped over to their depleted side.
Some units, in particular German divisions and Soviet tank corps, may have specific instructions as to which units are depleted.
Movement Restrictions. In reality, a defending commander cannot look at the map and get the same clear picture of the enemy's dispositions that a war gamer can. In fact, communications with the sector under attack are very likely to break down. Likewise feints, and misleading artillery "preparations" in adjacent sectors can all tend to delay the commitment of reserves. It is impossible to exactly duplicate these conditions in KORSUN POCKET without making the game unplayable. Consequently, some units will be unmoveable at the start of a scenario. These troops will have conditions stated under which they may be released: either after a certain date, or if the enemy attains certain objectives.
Any division-sized unit that has any sub-unit attacked by any non-artillery ground combat unit is automatically released and may henceforth move normally. Corps support units may be moved one turn after any sub-unit of the corps is attacked. Any unit that is released for any reason is considered released for all subsequent turns. In addition, players should keep the following concept in mind. Imagine a division-sized unit is holding a section of front. Although the division itself has not been attacked, it will be released one turn after the friendly division on either flank (or both) is forced to break contact with it due to enemy attacks. There are a lot of variables here and if players' judgments differ, the first rule is be as reasonable to your opponent as you would wish him to be to you; the second rule is stop arguing and roll the dice.
German Air Allowance. All scenarios that involve all four maps likewise involve all the air units of the VIII Air Korps and 2nd and 5th Air Armies. When a scenario calls for using two or fewer maps and the forces of only one Soviet Front and German Army this poses no problem for the Soviets as their Air Armies are subordinate to their respective Fronts. But for the Germans the problem is more complex. The German air effort was divided several ways, between flying CAP and Ground Attack missions for 1st Panzer Army and the 8th Army, and flying support and supply for "Gruppe Stemmerman." But these functions were not constants and the Germans could concentrate on one mission in one particular turn and a different one the next. Of course, this procedure left other sectors bare of air cover.
Thus, for scenarios that involve one or two maps, the German player should roll one die at the beginning of each Mutual Air Allocation, etc., Section and consult the following table to find the percentage of VIII Air Korps sorties that will be available to him that turn.
| Die | Sorties |
|---|---|
| 1 | 9/5/3 |
| 2 | 6/3/2 |
| 3 | 4/2/1 |
| 4 | 3/1/1 |
| 5 | 3/1/1 |
| 6 | none |
Read the result for the current ground condition: Frozen or Snow / Mud / Deep Mud.
The German player keeps the die result to himself until both players have plotted their air missions, then reveals it to the Soviet player.
Reinforcements From Other Maps and Withdrawals. In certain scenarios, reinforcements will appear from other maps that are not in play. These are treated as any other reinforcements.
There are also requirements to withdraw certain units off the map. This should be done as rapidly as possible.
Variable History. Although this game is designed to simulate the battle at the Korsun Pocket, you can play it any way you like. For example, the game is much more unpredictable and exciting using the Variable Weather Chart. When using variable weather, a "hot hand" with the dice that produces a long string of warm weather will rapidly bog the game down to its eyes in Deep Mud. You do not have to stay there for days, cursing the weather (any reading on the battle will show how historical this is), the dice, and the designer. Go ahead and cheat, if you both agree to, and make it colder. After all, it is February, and the game is there for you to play with, not vice versa. Figure that after three days of solid warm weather, the odds on a cold snap are going to increase turn by turn. If both players agree, the setup maps may be ignored except to delineate the front line. The available units may then be set up to cover the front line in any way the players choose.
The most obvious "what if" about the battle concerns the 24th Panzer Division. This full strength division had been the remaining mobile reserve of German Army Detachment Schnorer at Nikopol, 200 miles southeast of Map D. It was marched over bad roads and through mud to the southeast corner of Map C, on the road to Yekaterinopol. It was to join 47th Panzer Korps' effort on February 4th. But at the last moment, it was ordered back to Nikopol where the Soviets were breaking through. As a result, it was not available for either battle.
There are several ways to include 24th Panzer in the game. Both players can simply agree that it will become available on the AM turn of February 3rd on the road to Yekaterinopol, Map C. Alternately, the German player can have the option to bring it in anytime after February 3rd AM, realizing that if he does so he has shifted the balance of the battle in his favor and thus cheapened any victory he might achieve as far as bragging rights are concerned. He might also consider the relative advantages of holding the 24th in offboard reserve until a favorable moment, thus forcing the Soviets to be prepared at many points.
While the second of these approaches will leave the Soviet player guessing, the German player will still know whether he has an ace up his sleeve or not. In the battle, the sudden withdrawal of 24th Panzer came as a surprise to von Vormann of XLVII Panzer Korps, who had been depending on it. If mutually so desired, the German player may roll two dice every AM turn between February 1st and February 5th to see if 24th Panzer will arrive. The division will appear on a roll of 2 or 12. If not summoned by February 5th, consider that it is on its way back to Nikopol.
How to Use the Situation Maps. First assemble the units of each division listed on the order of battle, deplete them as indicated, and find their setup location on the map. Where a division's location is indicated by a line, this means that the sub-units of this division may be in or behind any of the hexes through which the line passes. The division must do its best to either have a unit or a ZOC covering each hex that the line passes through. Where a division's position is indicated by a circle rather than a line, all of the division's sub-units must be on or within that circle.
The units may be in any formation. The presence of Dug-In or Fortified markers will be indicated in the scenario instructions.
All Corps, Army, and Front support means may be freely set up behind the front line of their respective subordinate units. In some cases where units were detached from their parent formation and assigned to some other organization, a special note will be made in the scenario notes.
Reinforcement Record
German. All German reinforcements enter the south edge of the map in one of four Entry Zones: W, X, Y and Z. Reinforcements may enter the board through any road entering the map in their Entry Zone. Entry Zone W is the area south of the Gnoryi Tikich River; Entry Zone X is between the Gnoryi Tikich and the Gniloi Tikich Rivers; Entry Zone Y is between the Gniloi Tikich and Bolshaya Vyss Rivers; and Entry Zone Z is south of the Bolshaya Vyss River.
When a German cross followed by a number appears on the Turn Record Track, consult the list below to find out what units appear where and in what shape. (The printed list has no number 23.)
- Jan. 26 PM: 1PzA: 249th StG/3PzK (-1), 1 motz eng bn/3PzK - Enter W
- Jan. 26 Night: 8A: 59th Rkt Rgt/47PzK, 1 mlt/47PzK - Enter Z
- Jan. 27 AM: 1PzA: 506th Tiger/3PzK, 1 mlt/3PzK - Enter W
- Jan. 27 PM: 1PzA: 1 150 rkt bn/3PzK, 1 motz 105 bn/3PzK - Enter W
- Jan. 27 Night: 8A: 8th StG/47PzK (-1), 1 eng bn/47PzK - Enter Z
- Jan. 28 PM: 1PzA: 57th Rkt Rgt/3PzK, 1 bridge bn/3PzK, 3PzK HQ - Enter W
- Jan. 29 PM: 1PzA: 1 bridge bn/3PzK, 1 210 How bn/7K - Enter W
- Jan. 30 AM: 1PzA: 2 FE bn/7K, 1 FE bn/3PzK, 54th Rkt Rgt/3PzK - Enter W
- Jan. 30 PM: 1PzA: 1 motz 105 bn/3PzK, 1 motz eng bn/3PzK - Enter W
- Jan. 30 Night: 1PzA: 17th Pz Div (Recon-1, inf-1, MkIV gone) - Enter X
- Jan. 31 AM: 1PzA//8A: 16th Pz Div (recon-1) Enter W//203rd StG/47PzK (-1), 376th Inf Div (-7, 2 105 how bns gone) - Enter Z
- Jan. 31 PM: 1PzA//8A: 1 motz eng bn/3PzK, 2 150 rkt bn/3PzK - Enter W//any 3 bn of 13th Pz Div - Enter Y
- Jan. 31 Night: 1PzA: 2 bridge bn/3PzK, 1 FE bn/3PzK - Enter W
- Feb. 1 AM: 8A: rest of 13th Pz Div, Entry Y, 26th Panther Bn/47PzK, 1 motz 105 bn/47PzK, 315/167 (-2) - Enter Z
- Feb. 1 PM: 1PzA//8A: 1 210 rkt bn/3PzK Enter W//1 bridge bn/47PzK, 1 motz eng bn/47PzK, 1 210 how co/47PzK - Enter Y
- Feb. 1 Night: 8A: 1 AA bn/47PzK - Enter Z
- Feb. 2 PM: 1PzA: 2 210 rkt bn/3PzK - Enter W
- Feb. 3 AM: 1PzA//(8A): Pz Rgt Baeke - Enter W//(optional 24Pz Div enter Y)
- Feb. 3 PM: 8A: 266th Inf Rgt, 1 supply unit, 1 105 bn/all of 72nd Inf Div - Enter Z
- Feb. 3 Night: 1PzA: 1st SS Pz Div (not including artillery) - Enter W
(A handwritten addition in the scanned copy, "29. Feb 18 AM 167 Inf Div", is not part of the printed text; see the Counter Errata section and the errata sheet.)
Soviet. All Soviet 1st Ukrainian Front reinforcements arrive in one of two areas, S or T. S represents all roads entering the western map edge north of the Gniloi Tikich River, and T represents all those between the Gniloi Tikich and the Gnoryi Tikich. All Second Ukrainian reinforcements arrive in one of two areas, U or V. U represents all roads entering the east edge of the map north of Alexandrovka, V represents all those south of Alexandrovka. When a Soviet star followed by a number appears on the Turn Record Track, consult the list below to find out what units appear where and in what shape.
- Jan. 26 AM: 2UF: 5th Constr Bde, 27th Eng Bn - Enter U (the battalion number is blurred in the scan; the errata sheet names the 27th Eng Bn as omitted from the countermix)
- Jan. 27 PM: 1UF: 32nd Anti-tank (AT) Bde (-3) - Enter S
- Jan. 27 Night: 2UF: 10th AT Bde (-3), 30th AT Bde (-3) - Enter U
- Jan. 28 AM: 2UF: All units of 49th Corps, 6th Gd Abn Div (-6), 94th Gd Div (-7), 84th Rifle Div (-8), 34th AT Bde (-4) - Enter U
- Jan. 29 AM: 1UF: 74th Rifle Div (-10) Enter T
- Jan. 31 AM: 1UF//2UF: 5th Mech Corps (as it left) - Enter T//110th Gd Div (-7), 233rd Rifle Div (-10) - Enter V
- Feb. 3 AM: 1UF//2UF: 16th Tank Corps - Enter S//49th Lt Arty Bde, 11th AT Bde (-3) - Enter U
- Feb. 3 PM: 2UF: 27th Hvy Gun Bde - Enter U
- Feb. 3 Night: 1UF//2UF: 3rd Tank Corps - Enter S//116th Rifle Div (-7) - Enter V
- Feb. 4 PM: 1UF: 2nd Tank Army HQ and support units - Enter S
- Feb. 5 Night: 2UF: 27th Gd Tk Bde - Enter U
- Feb. 7 AM: 1UF: 3rd Gd Abn Div (-6) Enter S
- Feb. 7 PM: 1UF: 2nd Gd Abn Div (-5) - Enter S
- Feb. 9 AM: 1UF//2UF: 340th Rifle Div (-10) - Enter S//31st AT Bde (-3) Enter U
- Feb. 9 PM: OOOPS mistake on Turn Record Track - no reinforcement
- Feb. 11 AM: 1UF//2UF: 202nd Rifle Div (-7) - Enter S//252nd Rifle Div (-10) - Enter U
- Feb. 12 PM: 1UF: 163rd Rifle Div (-11) - Enter T
- Feb. 14 Night: 2UF: 41st Gd Div (-9), 81st Gd Div (-6) - Enter U
Optional Variable Arrival. Note that the historical arrival of reinforcements depended, among other things, on the road conditions. When using the Variable Weather Table, players may wish to vary the entry day of reinforcements. To do so, count the number of turns between the beginning of the game and the arrival date of the reinforcements in which there was Mud and Deep Mud. Compare this with the historical weather recorded on the Turn Record Track. For every turn of Mud more than historically indicated, the reinforcements will arrive one turn later. For every turn more of Deep Mud, it will be delayed three turns. Similarly, for every turn less of Deep Mud, the reinforcements will arrive two turns earlier, for every turn less of Mud they will arrive one turn earlier.
Scenario No. 1: 6th Tank Army's Debut
(The printed scenario heading reads "Scenario #1"; the errata sheet states it is supposed to be titled "6th Tank Army's Debut.")
History: Marshal Vatutin's 1st Ukrainian Front had begun a drive south against 4th and 1st Panzer Armies on Christmas eve, 1943, with the objective of taking Vinnitsa and Uman. They had been stopped short of their goal and thrown back some distance by a powerful German counterattack. On January 26th, the right wing of the Front was preparing to attack west toward Rovno-Lutsk and south-west toward Shepetovka. The center of the Front, 1st Tank Army, and the right wing of 40th Army were being pounded by 1st Panzer Army and taking serious losses.
The Front's left wing, consisting of part of General Zmachenko's 40th Army, General Trofimenko's weak 27th Army, and the newly formed 6th Tank Army of General Kravchenko, were set to jump off against the German salient around Korsun.
German intelligence had discovered the build up on January 24th, correctly identifying the 5th Mechanized Corps and the 359th Rifle Division, with artillery and rocket launchers in support, and over 70 tanks (including 15 Shermans) camouflaged in and around Tinovka. The German 34th Infantry Division defending the Vinograd area was consequently reinforced and 5th Mechanized was unable to make much progress on the 26th when it attacked.
However, the other corps of 6th Tank Army, General Kravchenko's own veteran, but understrength 5th Guards Tank Corps, reinforced with a tank brigade and some assault guns from 5th Mechanized, managed to hit the seam between the jittery 198th Infantry of Seventh Korps and the badly understrength 88th Infantry of Forty-Second Korps. Down the main road they sped, seizing the Lisyanka bridge, releasing the units of 136th Rifle Division and their own comrades of 6th Guards Motorized Rifle Brigade at Tichonovka which had been surrounded for more than two weeks, and finally racing into Zvenigorodka to join up with the lead elements of General Rotmistrov's 5th Guards Tank Army.
The hole they tore in the German line enabled 27th Army to advance to Boguslav, Shanderovka, and finally, Olshana to meet the cavalrymen of 5th Guards Don Cossack Corps. The Korsun Pocket was formed.
Scenario Length: Scenario #1 is 15 turns long, from AM January 26th to Night January 30, 1944. It is played on Maps A and C and involves the forces of 1st Ukrainian Front and 1st Panzer Army.
Deployment: Deployment is according to the January 25th situation maps, all German front line units may start Dug In, except between Burty and Kanev, Map A, where they may start Fortified. German units may start the game broken into companies. Korps reserves, except for artillery, may start on the front line. The Zvenigorodka supply dump must be deployed in Zvenigorodka.
The Soviets may have all their front line units Dug In except those from Kagarlyk to the Dnepr, Map A, which may be Fortified.
The Soviet force at Tichonovka (2 depleted battalions of 358/136 and one depleted battalion of 6GB/5GTC) starts Dug In and U-2. There is probably no need to deploy Dug In markers on the Soviet assault forces although cautious players may do so if they wish. The German player sets up first, the Soviet player moves first and is the First Player for this scenario.
Reinforcements and Withdrawals: Both players receive the reinforcements for 1st Ukrainian Front and 1st Panzer Army (1 UF and 1 PzA) respectively from the reinforcement record between January 26th AM and January 30 Night turns. In addition, the German player receives the following reinforcements on the primary road entering just above the southeast corner of Map A:
- January 26th PM - Nrv/5
- January 26th Night - 1 bn of Germania Motz Inf Rgt, 1 Antitank bn, 1 Motz Eng bn, 1 150 RL bn, one Panther Co., and 1 full supply unit carrying two ammo points, all from 5th SS Viking Panzer Division
- January 30 AM - 1 SP arty bn, 1 88 AA bn; both of 5th SS.
The Soviet player must, on the January 28th Night turn, withdraw the 5th Mechanized Corps off the east edge of Map C at Besedka as rapidly as possible. It will reenter the map in the same spot on January 31 AM, in the same state of depletion in which it left.
The Soviets receive the following reinforcements from the Primary Road Kazatskoye-Zvenigorodka from the east edge of Map C:
- January 28th AM - 8 Gd, 155 Tk Bdes, of 20 TC (both depl.)
- January 29th AM - rest of 20 TC (all depl.)
- January 30th AM - at Tolstoye - 11th Gd Cav Div, 1st Gd McRg
These units' supply units are all marked "None Allocated" and each carries only one supply point and one ammo point. These units are elements of 2nd Ukrainian Front and may not move out of an area bounded by the Shpalka River, Gniloi Tikich River, Zvenigorodka, Gudsovka, Tarassovka, Shevchenkovo, Dymkov, Olshana and the swamp east of Olshana. Within these confines these units function normally.
Special Rules: None
Weather: The January 26 AM weather is: Temperature - Cold; Atmosphere - Fog; Ground - Frozen; Visibility - Poor.
Supply: The scenario starts after the January 26th AM MASS and MSDS. The on and off board dumps begin the scenario as follows:
| German Korsun | German Zvenigorodka | German 1st PzA | Soviet 1UF | |
|---|---|---|---|---|
| Supply | 25 | 50 | 15 | 100 |
| Ammo | 200 | 100 | 75 | 150 |
1st Panzer Army may place up to 50 of its 75 Ammo Points on the board at the start of the scenario; no more than 10% of the ammo at Zvenigorodka and Korsun may be placed other than at the dumps. 1st Ukrainian Front may place 75 ammo points on the board other than at the dumps. 1st Ukrainian Front may distribute its ammo and supply points among its subordinate army's dumps as it wishes.
Movement Restrictions: Except for reinforcements, no German unit may move until one of the following conditions is met: 1) its parent division is attacked by enemy non-artillery ground combat units; 2) a neighboring division-sized unit is forced to break contact with its flank, due to enemy action; 3) a Korps support unit is released the turn after any division of its Korps is attacked, as in 1; 4) the German player releases it by rolling one die every friendly movement phase up to Jan. 29 AM, the result being the number of German Battalion-sized units that are released that turn; 5) the Jan. 29 AM turn begins. From Jan. 29 AM on, all German units may move freely. The German player is required to make every reasonable attempt to hold its fortified line on Map A until the Jan. 29 AM turn or until the Soviets hold Lisyanka and Zvenigorodka, whichever comes first.
Both players are required to make every attempt to maintain a continuous line of friendly units or ZOCs connected to the point where their westernmost flank reaches the western map edge.
Victory Conditions: The Soviet objectives, in order of importance are Zvenigorodka, Boguslav, Olshana, Steblev, Vinograd, Ryshanovka, and destroying German units. The aim of 1st Ukrainian Front was to form a corridor, as wide as possible, between the German Seventh and Forty-second Korps, with the walls of the corridor covered by Soviet units or ZOCs cutting off the Korsun supply dump from the south edge of the map. The Soviets historically took most of these objectives except for Steblev and inflicted moderate losses on the Germans.
The Soviet objectives fell according to the following schedule. The players can use this to judge their performance against the historic achievement.
- Zvenigorodka - Jan. 28 PM
- Boguslav - Jan. 28 Night
- Olshana - Jan. 31 Night
- Steblev - Feb. 16 PM
- Vinograd - Jan. 29 AM
- Ryshanovka - Jan. 28 PM
The German objectives are to keep the Soviet player from fulfilling his victory conditions, or to delay their fulfillment; to keep a valid supply line to the Korsun supply dump; to preserve as much as possible of their original strength; and to inflict losses on the Soviets.
Comments: Although this is scenario #1, it is not the best scenario to start with (try #4). The German player is in a hell of a fix and it will take a great deal of skill to both slow the Soviet drive and to keep from being swept under by it. Historically, the only German division that took serious losses in this part of the battle was the 88th. To hold up Kravchenko's tanks for a day or two at the cost of losing the 34th or 198th divisions as effective fighting forces is no German victory.
The Soviets must likewise fight with an eye to keeping their losses down. An attempt to blast through all the thickest parts of the German line will probably give the Germans a sure victory, and even if the objectives are taken, the cost will probably be too high. If 1st Ukrainian Front has no strong infantry or armored forces left when 3rd Panzer Korps comes charging to the rescue in a week or so, there is going to be serious trouble.
This scenario is an exercise in breakthrough and exploitation. Remember to move your supply echelons up in order to keep your spearheads in supply.
Scenario No. 2: On to Zvenigorodka
History: On the eastern face of the salient, an altogether different situation prevailed. General Konev's 2nd Ukrainian Front had concluded the bitter battle for Korovgorod. Both sides had suffered heavily, several German infantry and panzer-grenadier divisions and Soviet mechanized corps had been reduced to shadows of their former selves. German intelligence had placed the Soviet armored forces massed around Korovgorod (southeast of map D) and were tensely awaiting a renewed Soviet offensive there. But they had been fooled.
With the rest of his front quiet, General Konev had secretly massed the 5th Guards Tank Army of General Rotmistrov on the sector Verbovka-Balandino. This move was camouflaged by the use of wooden dummies and artillery tractors with the mufflers removed. There is evidence that some people are misled by it even up to this day.
Likewise 4th Guards Army and 53rd Army, along with the 5th Guards (Don Cossack) Cavalry Corps were massed to smash their way through the weak German 389th and 3rd Panzer divisions.
On the 25th of January the blow fell, cutting through Ositnyashka before evening with the 20th and 29th Tank Corps leading. These units raced ahead, fighting off German counterattacks on their flanks and rear and seizing Zhuravka, Lebedin, Shpola and on the 28th, Zvenigorodka.
The Germans promptly counterattacked, with parts of 57th and Viking divisions striking from Pastorskoye briefly linked up in Tishkovka with the 11th and 14th Panzer Divisions attacking from Novo Mirgorod. Tishkovka and Kapitanovka changed hands repeatedly, but by January 29, Konev's reserves, the 18th Tank Corps and the Cavalry Corps, reopened communications with spearheads and General Stemmerman's Eleventh Korps was cut off.
Scenario Length: The scenario length is 15 turns, from Jan. 25 AM to Jan. 30 Night, only Maps B and D are used.
Deployment: Deployment is according to the Jan. 25 situation maps. All German assault gun battalions must set up 12 hexes from the front line. All German front line units may be Dug In. Fortified markers may be placed as follows:
- 10 between Mlyev-Vyasavok-Topilno (markers must be within one hex of the Olshana River between the first two villages)
- 5 between Starosellye-Derenkovez
The Shpola dump should be deployed in Shpola. The Soviet player may place Dug In markers on any front line units but it is probably a wasted effort in the sectors where the Soviets plan to attack. All Soviet artillery may start Emplaced. The German player sets up first, the Soviet player moves first.
Reinforcements and Withdrawals: Both players receive the reinforcements for the 2UF and 8A respectively from the reinforcement record. The German player must exit certain elements of Viking SS Panzer Division off the west edge of Map B on the primary road that starts between Nabakov Khutor and Valyava. Oh, you want to know which hex that road is supposed to be in? Let's call it the hex directly adjacent to both towns. Use the Viking units listed in Scenario #1 and the exiting times.
Special Rules: Part of the 294th Rifle Division is shown set up on the left bank of the Dnepr i.e., out of play. To cross the river, one bn per turn may be ferried to the right bank to any hex free of German units or ZOCs. These units must trace a normal supply line to be in supply and may not retreat back across the Dnepr. Alternately, beginning on any turn in which there are no German units adjacent to the Dnepr, the units of 294th Rifle that are on the left bank of the Dnepr may be brought into play as reinforcements. They enter the map across the railroad bridge at Cherkassy.
Weather: The Jan. 25 AM weather is: Temperature - Cold; Atmosphere - Fog; Ground - Frozen; Visibility - Poor.
Supply: The scenario starts after the Jan. 25 AM MASS and MSDS. The on and off board supply dumps contain the following:
| Shpola | 8A | 2UF | |
|---|---|---|---|
| Supply | 40 | 40 | 250 |
| Ammo | 75 | 60 | 200 |
8th Army may place 40 of its 60 ammo points on the board, 7 points of ammo from the Shpola dump may be placed outside of the dump.
2nd Ukrainian Front may place up to 125 ammo points on the board. 2nd Ukr. Front may distribute its ammo and supply points among its subordinate army's dumps as it wishes.
Note that if the Germans have troops cut off from supply from the south edge of the map, they may receive an unlimited amount of supply and 8 ammo points per MASS from any road that enters the west edge of Map B.
Movement Restrictions: Except for reinforcements, no German unit may move until one of the following conditions is met: 1) its parent division is attacked by enemy non-artillery ground combat units; 2) a neighboring division is forced to break contact with the flank of the unit's parent division due to enemy action; 3) a Korps support unit is released when any unit of the Korps is attacked; 4) the 5th SS Viking, 11th and 14th Panzer Divisions are released on the Jan. 26 AM turn; 5) the unit is released by rolling the die (see scenario #1 for the method); 6) the Jan. 28 Night turn is reached; at this point all German units may move freely. Note that the regiment of 57th division that sets up at Zerdyukovka is free to move on the first game turn.
The Germans must attempt to maintain a line of units and ZOCs with no gaps of more than one uncovered hex facing (within 5 hexes of) the Dnepr River between just NW of Kreshchatik and Losovok.
Both players are required to make every effort to maintain a continuous front of units and ZOCs connected to the point where their southern-most flank reaches the southern edge of Map D.
Victory Conditions: The Soviet objective is to set up a corridor to cut off the German salient around Korsun. To meet the historical schedule, the Soviet player should exit two tank brigades and two other motorized non-artillery combat units on the primary road off the west edge of Map D just south of Topilno by the Jan. 28 PM turn. By the Jan. 30 PM turn, the balance of a tank corps (less the 4 units) should have exited the same point, plus a cavalry division and the guards motorcycle regiment at Tolstoye. On Jan. 30 PM the Soviets should have a continuous road link from any supply dump or from the eastern board edge to their exit hexes on the western edge of Map D. Historically, the Soviets set up an external line, Novo Ositnyashka-Tishkovka-Turiya-Lipyanka-Tolmach-Kapustino-Iskrenoye and an internal line, not yet solid, Dnepr River-Bolto Irdyn Swamp-Bereznik-Konstantinovka-Rotmistrovka-Zignayevka-Tereschki-Topilno-Tolstoye by Jan. 30 Night.
Comments: If the Germans can hold the shoulders of any penetration on Jan. 25, they may have a chance for a mobile battle between four of their panzer divisions and two tank corps of the 5th Guards Tank Army. That should not be an altogether displeasing prospect. Its holding the shoulders against that mountain of artillery that will be uncomfortable.
Two types of terrain features are of paramount importance, roads and marshy streams. The 2nd Ukrainian Front appears to have an overwhelming mass, but a Soviet player may quickly find that the first thing to be overwhelmed is his traffic control. And although his divisions seem to be packed in like sardines in their jump off positions, after three or four days of trying to set up two back-to-back forty mile long fronts, the Soviet player may be echoing the German's constant wail of "Don't I have some more infantry somewhere?!?" (The answer for the Germans will usually be "no," for the Soviets, "caught in traffic.")
The Soviets must remember that to make a short hook against a German open flank west of Novo Mirgorod while presenting an open (Soviet) flank to the southern board edge is badly out of keeping with the simulation. Act as if 13th and 24th Panzer Divisions were expected from that direction presently.
One question a lot of German players are likely to ask is "Who is the fool who stuck Viking in the swamps like that?" It wasn't me. The reason it was up there was to keep it out of harm's way. The division was being freshly reequipped and rebuilt, training, terrorizing the local population and conducting antipartisan sweeps. (The whole area between Kanev, Cherkassy and Gorodische had been full of partisans since the fall of 1941 and recently reinforced by the survivors of the unsuccessful Soviet paratroop attack in late 1943.)
The grenadiers of the Westland and Germania regiments were largely green and unmotivated Volksdeutsch conscripts - Eastern European ethnic Germans. They should probably have a morale rating of 2 rather than 4. This scenario is more work than #1 but also much more rewarding. Both sides have some hitting power and although the balance is towards the Soviets, it is not as bad as it looks when first set up.
Scenario No. 3: The Pocket Is Formed
History: On January 5, 1944, 1st Panzer Army warned that unless it pulled its Forty-Second Korps below the Ross River, a disaster threatened. Two days later, Hitler refused to allow the pull out, gambling that the counterattacks being organized by Army Group South's Manstein would halt the advancing armies of 1st Ukrainian Front and still leave a jumping off place on the Dnepr for a drive on Kiev from the south. Fat chance. Although Vatutin's 1st Tank and 40th Armies were beaten back between Vinnitsa and Uman, and Konev's 2nd Ukrainian Front was fought to a draw after taking Kirovgorod, the next move was Zhukov's, not Manstein's.
Scenario Length: This scenario combines scenarios #1 and #2 into a four map game. All deployments and forces available are the same with the following exceptions. On the Jan. 25 AM, PM and Night turns, no units may move on Maps A or C. The units of 5 SS Viking division that are withdrawn from one map and appear on the other are no longer required to do this. When otherwise freed from movement restrictions, they may move wherever they like.
Victory conditions require the Soviets to cut all German supply lines to the Korsun supply dump. At the end of the scenario the Soviets should hold Vinograd, Ryshanovka, Zvenigorodka, Shpola, Lebedin, Zhuravka, Kapitanovka on the outer line and Kanev, Boguslav, Shanderovka, Dymkov, Tolstoye, Zignayevka, Tashlyk and Smela on the inner line. If they can drive all German forces in the south below the Gnoryi Tikich and Bolshaya Vyss Rivers, and take Steblev, Olshana and Gorodishche, they have done very well indeed and much surpassed history.
If the Germans can prevent a pocket from being cut off at all they win hands down.
If the Germans can deny the Soviets some or all of their objectives, this can be considered some measure of a German victory. Remember, this is just the first round of a three round fight; if one side has its objectives in hand but few troops left to hold them, the taste of victory is going to get pretty sour quickly.
Comments: This is a good scenario for four or more players. On the other hand, if the Soviet team is competent this is not going to be a lot of fun for the Germans, unless they enjoy a cliffhanger of a defensive battle. Things for the German players to think about include how to fight a rear guard action without sacrificing the rear guards; when the artillery should fire and when it should run; whether it is better to break the engineers up into companies to attend to the work of bridge demolition or to keep them in battalions to build strong points to fall back on.
If the Soviet player fails to heed the lessons of the first few years of war and attacks head on across a broad front, or fails to support his armored spearheads with motorized infantry and supply units, or insists on trying to smash through German strongpoints rather than going around them, then he should be prepared to pay a high butcher's bill.
Scenario No. 4: "I will rescue you." Gen. Hube, 1st Panzer Army to the cut-off forces in the Korsun Pocket
History: With the Forty-Second and Eleventh Korps cut off around Korsun, the German command wasted no time assembling forces for a counterattack. Breith's Third Panzer Korps was ordered to finish its attack against First Tank Army and shift east to relieve the pocket. In fact, something even more ambitious was planned. Third Panzer Korps led by the 16th Panzer Division was to cut through the shoulder of the Soviet position at Tinovka, seize a bridge over the Gniloi Tikich and then drive on Medvin. From there, the Germans could smash 6th Tank Army from the rear and strike east to relieve the pocket. This was to be coordinated with the attack of Forty-Seventh Panzer Korps through Shpola to Vyasavok, thus relieving the pocket and trapping two Soviet tank armies around Zvenigorodka.
After resting and refitting, 16th and 17th Panzer Divisions jumped off on February 4, making good initial progress. A bridgehead over the Gniloi Tikich was taken at Kosyakovka-Kuchkovka, but that was as far as they got.
Freshly transferred from STAVKA reserve, General Bogdanov's 2nd Tank Army with its brand new JS-II and JSU-122 tanks and tank destroyers hit the German bridgehead and crushed it. At the same time, a warm air mass settled into the Ukraine and trucks and tanks began to settle into the Ukrainian mud. Supply lines turned into deep bogs. Freezes followed thaws, sleet, snow and rain fell, alternating with fog for variety. Breith's first attempt to free the pocket slithered to a halt in front of Bogdanov's heavy tanks.
Scenario Length: This scenario is 21 turns long, from Feb. 3 AM to Feb. 9 Night. Only Map C is used in this Scenario.
Deployment: Although the scenario begins on the Feb. 3 AM turn, the situation was basically unchanged from Feb. 1 AM, at least in terms of the location of units; with the exception of 5th Mech Corps. It may be deployed anywhere within 4 hexes of Vinograd, north of the rail line. Use the Feb. 1 scenario map. All front line units may be Dug In, no Fortified markers are deployed on the map. All Soviet artillery may be emplaced. The Soviet players set up first and the German player moves first.
Reinforcements: Players receive all reinforcements for the 1st Ukrainian Front and 1st Panzer Army (1UF and 1PzA). There are no required withdrawals from the map. Before starting the scenario, the German player should divide 1st Panzer Division into five groups, two of 4 units each and three of 3 each. Then place the groups in order so that it is clear which will enter the board first, which second, etc.
Weather: The Feb. 3 AM weather is: Temperature - Warm; Atmosphere - Clear; Ground - Mud; Visibility - Good.
Supplies: The scenario begins with the Mutual Air Allocation, etc., section; MASS and MSDS for Feb. 3 AM are skipped. The on and off board dumps contain the following:
| 1PzA | 1UF | |
|---|---|---|
| Supply | 30 | 50 |
| Ammo | 75 | 100 |
The 1st Ukrainian Front receives supplies at the rate of 60 ammo points and 38 supply points per MASS since 27th Army is not in play in this scenario.
1PzA may place 55 of its ammo points on the map; 1UF may place 70 ammo points on the board outside of dumps. 1UF may distribute its supply and remaining ammo points among its subordinate army's dumps as desired.
Movement Restrictions: No Soviet units may move until the following conditions are met: 1) the Germans attack any sub-unit of the same division; 2) a neighboring division-sized unit is forced to break contact with the flank of the division in question; 3) corps support units are released when any unit of any division belonging to the corps is attacked; 4) 5th Guards Tank Corps and 5th Mech Corps are automatically released on Feb. 4 PM; 5) Feb. 6 AM is reached. After Feb. 6 AM all Soviet units may move freely. Reinforcements are always free to move except that all units of 2nd Tank Army may not cross to the south bank of the Gniloi Tikich River until Feb. 6 AM or unless a German unit comes within two hexes of the same river.
Both players must make every attempt to maintain a continuous line of friendly units or ZOCs connected to the point where their westernmost flank reaches the western map edge.
Victory Conditions: If the German player can establish a supply line from the south edge of the board to either Medvin, Shcherbashintsy, Petrovskoye, or Morenzy, he gains a decisive victory (his opponent should be taken out and shot). If the German player can establish and hold a bridgehead north of the Gniloi Tikich River that is in supply at the end of the scenario, he gains a major victory. The Soviets gain a victory by preventing either from happening. At scenario's end, proper attention should be paid to the relative losses in armor.
Comments: This is the smallest scenario in Korsun Pocket and probably the bloodiest. A no-holds-barred punchout between one Panzer Korps and two Tank Armies. Players may easily find themselves holding on by their fingernails in one sector and only a few miles away conducting a smashing offensive. While logistics and supply lines figure in this scenario, the slugfest is the thing.
An important terrain feature to watch out for is the marshy stream from Bushanka to Yablonovka. Lying across lateral lines of communication, it tends to force players to commit themselves on one side or the other of it. Concentration, quick reaction to opportunities, and sound planning will all pay off here.
Scenario No. 5: von Vormann Tries Again
History: Although the initial counterattacks of Forty-Seventh Panzer Korps had cut off Konev's spearheads, the subsequent heavy fighting in the Tishkovka-Kapitanovka area had gone against the Germans and by January 30th, the Soviets had established communications with their lead elements in Zvenigorodka. The 2nd Ukrainian Front then began shifting infantry west to line the corridor, 20th Guards Corps marched on Olshana to relieve the cavalry and link up with 27th Army of 1st Ukrainian Front, and 49th Corps was assigned to stiffen the 5th Guards Tank Army on the outer front around Shpola.
The Germans wasted no time either. The 13th Panzer Division was pulled out of the line south of Kirovgorod and hurried north to reinforce General von Vormann's 47th Panzer Korps. Likewise, the 24th Panzer Division was brought up from Schnorer's group at Nikopol. The objective was to cut through the thin Soviet line west of Shpola and link up with Stemmerman's 11th Korps in the Vyasavok-Burty area. On February 1st, they attacked.
At the last minute, Soviet attacks on the Nikopol bridgehead forced the 24th Panzer to retrace its steps and left von Vormann with only one full blooded Panzer Division. The 24th ended up spending its time crawling back and forth through the mud and failed to be in either place at the right time.
The 47th Panzer Korps first struck at Iskrenoye-Vasilovka and Tolmach, only to be stopped by direct artillery fire and air strikes. The Chief of Staff of 53rd Army radioed to 5th Air Army, "Smash the tanks in the vicinity of Zobolevka and Tolmach, they are the enemy's. Don't touch the artillery - it's ours." Counterattacks by 29th Tank Corps forced the Germans to change direction.
On the 4th of February, the attack shifted toward the east of Shpola, striking at Vodyanoye and toward Lebedin. Stopped at Lebedin, the attackers then cut toward Shpola but Soviet reinforcements stopped them again and by the 7th, the attacks had all petered out.
Meanwhile, the 4th Guards Army jumped off against the pocket on February 3rd and successfully cleared Gorodishche by the 9th. In the process, some enemy units were encircled and destroyed around Vyasavok.
Scenario Length: Scenario #5 is 21 game turns long, from Feb. 1 AM to Feb. 7 Night. It is played on Maps B and D and involves the forces of the 2nd Ukrainian Front and 8th Army.
Deployment: Deployment is according to the Feb. 1 situation map. All units east of the Smela-Novo Mirgorod railroad may set up Dug In, as may all units of the Wallonien SS Brigade. All attached Soviet artillery of 53rd Army and 2nd Ukrainian Front must be set up east of this railroad. No Soviet artillery west of the railroad may set up Emplaced. The Germans may deploy 13 Fortified markers between Derenkovez-Starosellye-Mlyev-Vyasavok as described in Scenario #2. The Soviet player sets up first, the German player moves first.
Reinforcements: Players receive all scheduled reinforcements for 2UF and 8A from the reinforcement record.
Special Rules: None.
Weather: The Feb. 1 AM weather is: Temperature - Cold; Atmosphere - Blizzard; Ground - Snow; Visibility - Poor.
Supplies: The scenario starts after the Feb 1 AM MASS and MSDS. The on and off board dumps contain the following:
| Korsun | 8A | 2UF | |
|---|---|---|---|
| Supply | * | 30 | 175 |
| Ammo | * | 40 | 140 |
*The Korsun dump lies off the west edge of Map B, connected to the board by the railroad running into Gorodishche from the northwest. Every MASS the German player may allocate an unlimited number of supply points and eight artillery ammo points from this source. There is no need to fly air transport missions to keep this dump in supply. The 8th Army may place all of its ammo points on the board south of the Soviet front line; 2UF may place 50 ammo points on the board outside of dumps, 35 of which must be east of the Smela Novo Mirgorod railroad line.
Movement Restrictions: Unless attacked by enemy units or unless a German unit enters Shpola, 18th and 29th Tank Corps may not move until the Feb. 2 Night turn. Both players must do everything possible to maintain contact with the southern map edge at their starting point. The pocket forces and the Soviets facing them must attempt to maintain a line connected with the western map edge.
Victory Conditions: The German player wins by having a line of supply into Shpola and no Soviet units in Shpola at game's end. This will produce a major German victory. If the Germans can establish a supply line into the pocket and preserve it at game's end this is a decisive victory. The Soviets win by avoiding the German victory conditions. Additionally, the Soviets have the objective of taking Gorodishche. Take into account losses inflicted as compared to losses taken, particularly in armor.
Comments: This is not one of the more balanced scenarios; von Vormann is too heavily outnumbered. If the scenario is played only on Maps B and D, a certain amount of history will be distorted also. The 20th Guards Rifle Corps of 4th Guards Army attacked Gorodishche by way of Olshana-Petropavlovka, thus outflanking the Olshanka River line. If you want to include this action, use scenario #6. If not, realize that the result is to restrict the 4th Guards Army to a frontal assault on the Vyasavok-Nozatschev position. As an option, players may wish to require the Soviet player to exit two divisions off the west edge of Map D through Topilno as soon as possible.
Scenario No. 6: Testing the Ring
History: The first large German pocket since Stalingrad had been formed on the Dnepr's right bank. The Soviets braced themselves to hold the outer ring against the inevitable German relief effort and began to squeeze the pocket. The Germans massed 8 panzer divisions and launched a vigorous counterattack to free the two imprisoned korps. All in vain, however, since all of the attacks bogged down from heavy losses, Soviet counterattacks and mud up to a meter deep. The ring was badly dented in places but still holding.
Scenario Length: Scenario #6 is 27 turns long from Feb. 1 AM to Feb. 9 Night. All four maps are used for this scenario and both Soviet Fronts and both German Armies participate.
Deployment: Deployment is according to the Feb. 1 situation map. Follow all setup instructions for scenarios #4 and #5 with the following exceptions: on Map C only the following units may be Dug In - the Soviet 232nd, 74th and 38th Rifle Divisions, German - the 75th Infantry Division; no Soviet artillery may be emplaced on Map C east of Tinovka. The Soviet player sets up first; the German player moves first.
Reinforcements: As per scenarios #4 and #5.
Special Rules: There are two ways in which players may simulate the situation that caused 1st Panzer Army to jump off two days later than 8th Army. The first is to have all units of the 1PzA and 1UF set up as per scenario #4 and not move until Feb. 3 AM. The 27th Army of 1UF should be allowed to move freely, as should those German units set up on Maps A and C that are in the pocket. The 1st Ukrainian Front should assign a certain amount of ammo and supply to the 27th Army's dump and let them use that until the Feb. 3 AM MASS.
The alternate approach involves setting all forces up according to the Feb. 1 situation map, and rolling two dice for each division-sized unit of 1PzA and 1UF (except 27th Army) and reading the result as the number of Exhausted markers to deploy on the division's units. No supply unit could start the scenario carrying ammo points. The supply units of 16th and 17th Panzer Divisions would be marked None on Hand.
Weather: Feb. 1 AM weather is: Temperature - Cold; Atmosphere - Blizzard; Ground - Snow; Visibility - Poor.
Supplies: Scenario #6 starts after the Feb. 1 AM MASS and MSDS. The on and off board dumps contain the following:
| Korsun | 1PzA | 8A | 1UF | 2UF | |
|---|---|---|---|---|---|
| Supply | 30 | 20 | 30 | 30 | 175 |
| Ammo | 120 | 40 | 40 | 30 | 140 |
The Korsun dump may place 40 of its ammo points on the board outside of the dump and inside of the pocket. The 1st Panzer Army may place 20 ammo points on the board, 8th Army may place all 40 of its ammo points on the board in its respective sector. The 1st Ukrainian Front may place all 30 ammo points on the board outside of dumps, 2nd Ukrainian Front may place 50 ammo points outside of dumps as per scenario #5.
Movement Restrictions: As per scenarios #4 and #5.
Victory Conditions: The German objective is to cut two corridors into the encircled forces, establishing a supply line from the southern map edge to the Korsun dump and possibly surrounding some Soviet forces in the bargain. This is a decisive German victory. If the Germans can break through to the pocket, tracing a path to the Korsun dump free of Soviet units and ZOCs, with or without a valid supply line in, it should still be considered a decisive victory. The Germans achieve a major victory by capturing any or all of the following: Shpola, any part of the Verbovka-Shpola secondary road, Olshana, or any bridgehead in supply north of the Gniloi Tikich River. The Soviet's objectives include Gorodishche, the Korsun airfield, and denying the Germans their victory conditions. Both sides should receive credit for inflicting losses on the enemy.
Comments: A fine scenario for five or six players. Before starting, players should decide what they are going to do about the 24th Panzer Division, as explained in the variable history section. Watch out for sudden changes in the weather, plan your operations carefully but also be prepared to drop a plan in order to seize an opportunity. This scenario is less fluid than #3, as both the German pocket and the Soviet outer line have begun to harden. If you waste time in attacking, you will probably find yourself facing a deeply fortified line, studded with antitank weapons and backed up by well-sited artillery with plenty of ammo. On the other hand, too hasty an attack without adequate support may break the back of your hitting power before you can get started. The answer is to find your enemy's weakest point and get there "fustest with the mostest."
Scenario No. 7: Massacre on the Gniloi Tikich
History: The first German efforts to relieve the pocket had failed. The size of the pocket was contracting, its casualties mounting, more and more of its 15,000 vehicles being abandoned in the mud or turned into columns of black smoke by the incessant Stormovik attacks.
Von Vormann's 47th Panzer Korps was played out, low on tanks and without sufficient infantry strength to do much more. Breith's 3rd Panzer Korps was still in fairly good shape, though. Despite powerful counterattacks by 2nd Tank Army, Breith disengaged three panzer divisions and concentrated them between Rizino and Vinograd. They struck on February 10, cutting clean through to Lisyanka by the next day. At the same time, the forces in the pocket, now dubbed "Gruppe Stemmerman," attacked south toward Shanderovka.
This caused a crisis in the Soviet command. Marshal Zhukov, coordinating both Fronts, reported to STAVKA that Kravchenko of 6th Tank Army had failed to use his forces effectively and ordered that Trofimenko, commander of 27th Army, move on Dzhurzhentsy to take control of the battle on the Gniloi Tikich. Soviet air reconnaissance was reporting up to 160 panzers in Breith's leading units. All communication with 47th Rifle Corps HQ was lost and the situation in the Rizino-Lisyanka sector was unclear.
Hurriedly, reserves were dispatched to defend the river line. Likewise, 5th Guards Tank Army began to shift westwards toward the planned breakout zone. The Germans were stopped in Lisyanka.
At this point, General Ivan Konev, commander of 2nd Ukrainian Front, saw his opportunity. Learning that a German attack from within the pocket had taken Khilki, Komarovka and Novo Buda, he called Stalin and apparently suggested that his neighbor, Vatutin, was losing the battle and that he, Konev, should take over the operation of containing and destroying the pocket. Stalin agreed and ordered Vatutin to deal with the 1st Ukrainian Front's offensive in the Lutsk-Rovno direction at the far end of the Front's line. Zhukov was given personal responsibility for halting Breith's attack and Konev was given 27th Army which by now was down to two divisions and two fortified areas and the job of mopping up the pocket. As a result, only the 2nd Ukrainian Front received official credit for the victory at Korsun, and soon afterwards, General Konev became Marshal Konev.
No one made any significant progress between the 12th and the 16th except for the forces of 52nd and 4th Guards Armies who took Korsun and closed in on Steblev from the northeast. Along the Gniloi Tikich, German attack was followed by Soviet counterattack and 3rd Panzer Korps was bled white without being able to take hill 239, overlooking Oktyabr. Some divisions lost 50% of their strength in a few days. Finally, the pocket was ordered to break out on the night of February 16.
Many German accounts of the breakout claim anywhere from 30,000 to 40,000 escapees out of a breakout force variously estimated at from 45,000 to 56,000. However, Wagener's Heers Gruppe Sud claims only 20,000. The earlier Soviet accounts claimed that all "but a handful" were either killed or captured, but more recent accounts indicate around 7,000 escapees. Just from the descriptions of the last desperate breakout itself, which found most of the German troops trying to cross a deep and fast icy river without a bridge while under attack by tanks and cavalry, I find 14,000 probably as accurate a guess as is possible.
Scenario Length: This scenario is 24 turns long, from Feb. 10 AM to Feb. 17 Night. All four maps are used and the forces of both Soviet Fronts and both German Armies.
Deployment: Deployment is according to the Feb. 10 situation maps. All front line units may be Dug In with the following exceptions: 3rd Tank Corps, 16 Tank Corps, 5th Mech Corps, 340th Rifle Division, 1st SS Panzer and all forces in and directly facing the pocket. All Soviet artillery may start Emplaced. The Soviet player sets up first and the German player moves first.
Reinforcements: Use all scheduled reinforcements.
Special Rules: None.
Weather: The Feb. 10 AM weather is: Temperature - Warm; Atmosphere - Rain; Ground - Mud; Visibility - Good.
Supply: The scenario begins after the Feb. 10 AM MASS and MSDS. Air allocation is performed normally for this turn, however. The on and off board dumps begin the scenario containing the following:
| Korsun | 1PzA | 8A | 1UF | 2UF | |
|---|---|---|---|---|---|
| Supply | 40 | 45 | 40 | 120 | 180 |
| Ammo | 70 | 150 | 100 | 200 | 210 |
The pocket forces, Gruppe Stemmerman, may deploy 30 ammo points outside of the Korsun dump, 1st Panzer Army 70 ammo points and 8th Army 50. The 1st Ukrainian Front may place 100 ammo points on the board outside of dumps and the 2nd Ukrainian Front may also place 100. The Soviet Fronts may disburse ammo and supply points among their subordinate armies' dumps as they wish.
Movement Restrictions: The following units are restricted in their movement: all units of 5th Guards Tank Army, 5th Guards Cavalry Corps, 1st Guards Airborne, 6th and 69th Guards and 66th, 80th, 89th and 138th Rifle Divisions. Unless attacked, these units are released on the following schedule:
- Feb. 12 AM - 5th Guards Tank Army
- Feb. 13 Night - 5th Guards Cavalry Corps
- Feb. 14 Night - Everything else.
Victory Conditions: Blood. The Soviet's objective is to annihilate the pocket and inflict as heavy casualties as possible on the relief columns, especially the armor. The German objective is to free the pocket and kill as many Red Armymen as possible in the process.
Comments: This scenario is much more playable than it looks due to the fact that large sections of the front line will be quiet for extended periods. The Germans will have to move fast, any delays will be costly. The relief forces must both cross rivers, which is a thankless job against prepared defenses. It can be done with plenty of air and artillery support, but it is much better to get there before the defenders are prepared.
The Soviets have three threats to worry about and essentially two groups of armor. Historically, Rotmistrov left 18th Tank Corps to deal with 47th Panzer Korps and shifted 20th and 29th Tank Corps to the Potschapintsy-Dzhurzhentsy sector, while Bogdanov's and Kravchenko's tankers continuously attacked Breith's flanks. Casualties were high on both sides.
Scenario No. 8: The Korsun Pocket Campaign
History: At the end of January 1944, the armies of Nazi Germany and the Soviet Union stood facing each other like two punch-drunk fighters who had been on their feet too long. Since early July there had been a continuous series of offensives and counteroffensives of unparalleled ferocity. The Soviets had broken the back of the German offensive at Kursk, fought their way into the Ukraine and across the Dnepr by November. Furious German counterattacks, successful in places, were all eventually halted and at Christmas the Soviets attacked again. Fresh German panzer divisions were railed in from quiet sectors in Western Europe and thrown at the advancing armies of the First and Second Ukrainian Fronts. Stretched to the limit, both Fronts were halted again and Marshal Vatutin's forces pushed back above Uman. The costs had been astronomical on both sides. Both were operating units that were shadows of their former selves.
The Soviet troops were going into battle having recently passed through the Left Bank of the Dnepr, the devastation of which was to earn Manstein his conviction as a war criminal at Nuremberg. They had some scores to settle and a lot of dead to avenge. Over the German's heads hung the fate of the 6th Army the previous winter. Many units at Korsun bore the number of divisions destroyed at Stalingrad.
And still, a German salient stubbornly clung to the Dnepr below Kanev, dividing Vatutin's front from Konev's and offering the Germans an opportunity to strike straight north along the Dnepr to Kiev, cutting into the flank and rear of 1st Ukrainian Front. Hitler chose to gamble for these high stakes and refused to pull back the exposed salient. But the gamble failed and Zhukov struck. Konev and Vatutin drove into the flanks of the salient and in three days, two German Korps were trapped in the KORSUN POCKET.
Scenario Length: The Korsun Pocket Campaign Game may go from Jan. 25 AM to Feb. 17 Night (72 game turns) or longer if so desired but it is quite possible to bring it to a conclusion in less time than that. All maps and all units are used.
Deployment: Deployment is according to the Jan. 25 situation map. Use deployment instructions from scenario #3. The Soviet 1st Ukrainian Front sets up first, then all the German units, then the 2nd Ukrainian Front. The Soviet player moves first.
Reinforcements and Withdrawals: All scheduled reinforcements are received. The only required withdrawals are the Soviet 5th Mech Corps (which also returns as per scenario #1) and the 136th Rifle Division which must withdraw from the west edge of the map starting Feb. 9 AM.
Special Rules: If any division-sized unit loses two or more motorized supply units due to enemy action, they may replace one supply unit per such division-sized unit once per game. The replacement supply unit is taken out of the dead pile and becomes available 21 turns from the turn that a player uses this option. At that time, deduct two points capacity from the appropriate army's MASS delivery means. The unit enters the board at the dump or board edge leading to the dump that contributes the trucks.
Weather: As per scenario #2.
Movement Restrictions: As per scenarios #1 and #2.
Supplies: As per scenarios #1 and #2. Remember that the supply rate changes during the game.
Victory Conditions: There is only one objective in the Korsun Pocket Campaign Game. Kill enemy soldiers and destroy enemy equipment. There is no numerical scale provided for gauging victory. If you wish to count your combat and tank factors, etc., both before and after the game, please be my guest. However, if it is not clear who won when you get to the end, a slight numerical edge is just that - neither of you won or lost. But usually you won't need a calculator to tell you who won or lost, you'll know.
Comments: What can I say? If you have the time and interest to play this scenario, please drop me a line and let me know how it comes out. My best advice is to plan ahead.
Confine your attacks to the sectors that are critical and conserve your strength when you can. It should be SOP for troops not otherwise employed to dig. Likewise, no engineer should ever stand idle. Plan your supply so that it will be in position to be effective but not exposed. Concentrate your efforts - armor, artillery, ammunition, air power and strong infantry units - on the key point and smash yourself a hole. The defender must not try to be strong everywhere, the result will be to be inferior at the point of attack. A strong reserve must be kept to meet any enemy drive.
In general, you will have far more tasks to perform than specialized units available to perform them. It won't hurt to write up an operations order each AM turn with objectives set for each Army and Corps.
Roll Your Own Scenario
While the battle of the Korsun Pocket is an interesting bit of history, you can do a lot more with the components of this game than just simulate one battle. You can set up other battles, historical or hypothetical, and fight them out; attack a deeply echeloned defensive position; conduct a meeting engagement between a Tank Army and a Panzer Korps, or any other situation you care to set up. You can set the weather for high summer or a winter in which the streams and swamps freeze solid. You can start your units full strength or as tattered remnants. Armies and Fronts operating under decent conditions should receive one supply point per supply unit per day and have a reserve of two or three points per supply unit. The Soviets should receive enough ammo points for each artillery unit to fire once per day and the Germans enough for two "shots" per day per artillery unit. A set piece offensive might start with as many as 10 "shots" per artillery unit in the supply dumps, along with three or four days worth of supply points.
Air strengths will vary with the particular situation. Remember that prior to December 1943 most German divisions were organized very differently, and almost no Soviet tank brigades were equipped with T-34/85s.
Do your own research and use your imagination.
Counter Errata
- All 203mm Howitzer and 210mm Rocket Launcher units should be marked with a large dot in the upper left-hand corner to signify that they use two ammo points every time they fire. (See also the errata sheet, which revises the 210mm rocket units to three ammo points.)
- One battalion of the 45th Mech Brigade/5th Mech Corps (45MB/5MC) has a cavalry symbol on the back instead of a mech symbol.
- The 25HHB/40A should actually be the 25th Guards Heavy Howitzer Brigade (25GHHB/40A) but there wasn't room on the counters. The brigade HQ has it correctly on the front of the counter, everywhere else the G is omitted.
- For the same reason (room to typeset), German Korps designations are in Arabic rather than Roman numerals. 52 Hw Bd should be 52 Hw Bd/53A (no room again).
- The tank strength on the back of 5 SS Division's Recon battalion should be underlined. It is correct on the front.
- Somehow the engineer and antitank battalions of the German 72nd Division got omitted altogether; please make your own.
Order of Battle
How to read the Order of Battle. Parenthesized notations refer to missing sub-units indicated by the word "minus"; number of units or particular units depleted indicated with a - sign or the word "depl." When it says "all depl" this means that all units containing two steps are depleted one step; one step units are not affected. A set of numbers divided by a slash, i.e., 172/75, refers to a regiment (rgt), in this case the 172nd Rgt of 75th Inf Div. When a Soviet Corps is listed, all units organic to that Corps are included.
Note: a few entries are struck through in the scanned copy (9th AA Div under 40th Army support means; "Gen. Bogdanov" under the first 2nd Tank Army heading on Feb 1 and Feb 10; "1 motz eng bn, 1 constr bn, 1 105 bn" in the Feb 10 Gruppe Stemmerman list). They are omitted below, and the errata sheet at the end also deletes the 9th AA Div and the Bagdanov reference. Obvious OCR confusions (l/t for 1, "Mir" for Mtr, "bus/Bits" for bns, etc.) have been normalized.
Order of Battle Jan. 25 AM - German
1st Panzer Army: Gen. Hube
7th Korps: 34th Inf Div (plus 1 105 bn, 1 RG, of Korps Gruppe B, 172/75), 75th Inf Div (AT bn -1) (172/75 detached to 34th Inf Div), 198th Inf Div, 158/82 Inf, 202, 239, 281 StG bns (all depl), 905 Ferdinand Bn, 215 Motz Eng Bn, 135 Constr Bn, 1 100 gun bn, 1 motz 105 bn, 1 105 bn, 1 170 gun bn, 1 170 gun bty (co), 7th Korps HQ
42nd Korps: Gen. Lieb. 88th Inf Div (minus 248/88, plus 1 bn 417/168, 2 bns 213th Sec), Korps Gruppe B (1 RG, 1 105 bn detached to 34th Inf Div), 1 cavalry rgt, 1 bn 417/168, 213 Eng Bn, 2 105 bns, 1 motz 100 gun bn, 42nd Korps HQ
Reinforcements: Jan. 25 AM - Jan. 31 Night
7th Korps: 2 FE bns
3rd Panzer Korps: Gen. Breith. 16th Pz Div (recon -1), 17th Pz Div (minus Mk IV bn; recon and 1 inf bn depl), 57th Rkt Rgt, 506 Tiger Bn, 249 StG Bn (-1), 3 motz eng bns, 3 bridge bns, 3 150 rkt bns, 2 motz 105 bns, 2 FE bns, 1 Mlt bty (co), 3rd Pz Korps HQ
8th Army: Gen. Wohler
11th Korps: Gen. Stemmerman. 57th Inf Div (-3), 72nd Inf Div (266/72 detached off board, also 1 105 bn, 1 supply unit), 389th Inf Div (-7), 5th SS Pz Div Viking, SS Motz Bde Wallonien (inf, pz, at, -1 each), 226 StG Bn (-1), Ski bn, 323rd Div, 1 AA bn, 1 constr bn, 1 100 gun bn, 1 motz 100 gun bn, 1 motz 105 bn, 1 105 bn, 1 170 gun bty (co), 11th Korps HQ
47th Panzer Korps: Gen. von Vormann. 3rd Pz Div (minus 150 bn; all depl), 11th Pz Div (2 inf, eng, Mk IV, AA, -1 each), 14th Pz Div (2 inf, both pz, recon, AA, eng, -1 each), 320th Inf Div (-2), KG 106th Inf Div, KG 282nd Inf Div, 911 Ferdinand Bn, 2 constr bns, 3 motz 105 bns, 1 210 how bn, 47th Pz Korps HQ
Reinforcements: Jan. 25 AM - Jan. 31 Night: 376th Inf Div (minus 2 105 bns; -7), 59th Rkt Rgt, 3 bns of 13th Pz Div, 8, 203 StG bns, 1 eng bn, 1 Mlt bty (co)
Order of Battle Jan. 25 AM - Soviet
1st Ukrainian Front: Marshal Vatutin
27th Army: (no subordinate corps) Gen. Trofimenko. 180th Rifle Div (-6), 206th Rifle Div (-9), 337th Rifle Div (-9), 54th Fortified Area (-12), 159th Fortified Area (-11), 33rd Gds Rkt Bde, 83rd Gds Rkt Rgt, 680th, 1612th AT Rgts (-1 each), 480th, 492nd Mtr Rgts, 249th AA Rgt, 38 Motz Eng Bn
40th Army (part of army off board): Gen. Zmachenko
47th Corps: 167th Rifle Div (-7), 359th Rifle Div (-3)
104th Corps: 38th Rifle Div (-2), 58th Rifle Div (-3), 136th Rifle Div (269/136, 342/136, -3 each, and 136 Div arty rgt at Popruzhna, 358/136 -4 at Tichonovka)
50th Corps: 133rd Rifle Div (-5), 232nd Rifle Div (-10)
40th Army support means: 25th Gds Hvy How Bde, 33rd How Bde, 328th Gds Rkt Rgt, 10th, 493rd Mtr Rgts, 8th AT Bde (-3), 4th Gds AT Rgt (-1)
6th Tank Army: Gen. Kravchenko. 5th Gds Tk Corps (all depl, plus 233rd Tk Bde, 1228th SU-85 Rgt), 5th Mech Corps (-2, 233rd Tk Bde, 1228th SU-85 Rgt detached to 5GTC)
6th Tank Army support means: 11th Gds How Rgt, 1 rkt rgt, 1 mcycl bn, 22nd Gds AA Rgt, 1 bridge bn, 6th Tank Army HQ
1st Ukr Front support means: 32nd Gds Rkt Bde, 1950th Med Arty Rgt, 494th Mtr Rgt, 330th AT Rgt, 1594th AA Rgt, 6th Bridge Bde
Reinforcements: Jan. 25 - Jan. 31 Night: 74th Rifle Div (-10), 32nd AT Bde (-3)
2nd Ukrainian Front: Gen. Konev
52nd Army: Gen. Korotayev
73rd Corps: 7th Gds Abn Div (-11), 254th Rifle Div (-12)
78th Corps: 62nd Gds Div (-9), 373rd Rifle Div (-13)
52nd Army support means: 294th Rifle Div (-12), 38th AA Div, 568th Med Arty Rgt, 490th Mtr Rgt, 17th Gds Rkt Rgt, 438th, 1322nd AT Rgts (-1 each), 366 Eng Bn, 32, 40 Bridge Bn
4th Gds Army: Gen. Ryzhov
20th Gds Corps: 5th Gds Abn Div (-7), 69th Gds Div (-10)
21st Gds Corps: 66th Gds Div (-8), 375th Rifle Div (-7)
4th Gds Army support means: 27th AA Div, 33rd AT Bde (-3), 173rd Tk Bde (-1), 452nd AT Rgt (-1), 466 Mtr Rgt, 48 Eng Bn
53rd Army: Gen. Galanin
25th Corps: 1st Gds Abn Div (-12), 25th (-6), 66th (-5), 78th (-9) Rifle Divs
48th Corps: 6th (-7), 14th (-9) Gd Divs, 80th (-6), 89th (-9), 214th (-11) Rifle Divs
75th Corps: 138th (-9), 213th (-10) Rifle Divs
53rd Army support means: 30th AA Div, 31st Lt Arty Bde, 14th Mtr Bde, 52nd How Bde, 61st Med Arty Bde, 90th Hvy How Bde, 6th AT Bde (-4), 232nd, 1316th AT Rgts (-1 each), 60th Tk Rgt (-1), 461st Mtr Rgt, 1328th Med Arty Rgt, 89th Gd, 96th Gd Rkt Rgts, 11, 17 Eng Bns
5th Gds Tank Army: Gen. Rotmistrov. 18th Tk Corps (all depl), 20th Tk Corps (all depl), 29th Tk Corps (all depl)
5th Gds Tk Army support means: 6th AA Div, 1st Gds Mcycl Rgt, 678th How Rgt, 76th Gds Rkt Rgt, 689th AT Rgt (-1), 337 Eng Bn (with bridge)
2nd Ukr Front support means: 5th Gds (Don Cossack) Cavalry Corps: 11th Gd, 12th Gd, 63rd Cav Divs, 213th Tk Rgt, 1 T-70 tk rgt, 1896th SU-76 Rgt, 1 at rgt, 1 mtr rgt, 1 aa rgt, 1 rkt bn, 1 45 at bn, 1 eng bn, 1 recon bn, 1 motz supply unit
Reinforcements: Jan. 25 AM - Jan. 31 Night:
49th Corps: 6th Gd Abn Div (-6), 94th Gd Div (-7), 84th Rifle Div (-8), 5th Constr Bde, 26th AA Div, 303rd Gds Rkt Rgt, 1073rd AT Rgt (-1), 8th Bridge Rgt, 69, 246 Eng Bns, 6, 7 Bridge Bns
110th Gd Div (-7), 233rd Rifle Div (-10), 10th, 30th AT Bdes (each -3), 34th AT Bde (-4), 27 Eng Bn
Order of Battle Feb. 1 AM - German
1st Panzer Army: Gen. Hube
7th Korps: 34th Inf Div (plus 1 bn of 158/82, 1 RG and 1 105 bn of Korps Gruppe B), 75th Inf Div (AT -1), 198th Inf Div, 1 100 gun bn, 1 105 how bn, 1 motz 105 bn, 1 170 gun bn, 1 170 gun bty (co), 202, 239 StG Bns (-1 each), 905 Ferdinand Bn (-1), 2 FE bns, 1 motz eng bn, 1 constr bn, 1 bn 158/82, 7th Korps HQ
3rd Pz Korps: 16th Pz Div (recon -1), 17th Pz Div (minus Mk IV bn; recon and 1 inf bn -1 each), 1st SS Pz Div Adolph Hitler (artillery off board), Pz Rgt Baeke, 54th, 57th Rkt Rgts, 506 Tiger Bn, 249 StG Bn (-1), 2 FE bns, 2 motz eng bns, 3 bridge bns, 2 motz 105 bns, 3 150 rkt bns, 3 210 rkt bns, 1 mlt bty (co), 3rd Pz Korps HQ
Reinforcements: Feb. 1 AM - Feb. 9 Night: 1st Pz Div, artillery of 1st SS Pz Div, 1 at bn, 1 motz eng bn, 1 self propelled arty bn, 1 bridge bn, 1 constr bn
8th Army: Gen. Wohler
47th Pz Korps: 3rd Pz Div (minus 150 how bn; 2 inf, AT, AA, Mk IV -1 each), 11th Pz Div (2 inf, recon, eng, AT, Mk IV -1 each), 13th Pz Div, 14th Pz Div (all depl; 103/14Pz -2 and in pocket; no bridge), 320th Inf Div (-2), 376th Inf Div (minus 2 105 bns; 5 inf and AT depl), KG 106th Inf Div, KG 282nd Inf Div, 8, 203 StG Bns (-1 each), 911 Ferdinand Bn, 1 eng bn, 3 motz 105 bns, 1 210 how bn, 1 210 how bty (co), 1 mlt bty (co), 47th Korps HQ
42nd Korps: Korps Gruppe B (minus 1 RG, 1 105 bn), 88th Inf Div (minus 248/88, plus 1 bn 417/168, 2 bn 213th Sec; division is -3), 1 cav rgt, 213 Eng Bn, 1 bn 417/168, 1 motz 100 gun bn, 2 motz 105 bn, 42nd Korps HQ
11th Korps: 57th Inf Div (-3), 72nd Inf Div (266/72, 1 105 bn and 1 supply unit off board), 389th Inf Div (-10), 5th SS Pz Div Viking, SS Motz Bde Wallonien (1 inf, AT, Mk III -1 each), ski bn of 323rd Inf Div (-1), 1 AA bn, 226 StG Bn (-1), 1 constr bn, 1 100 gun bn, 1 motz 100 gun bn, 1 105 bn, 1 motz 105 bn, 1 170 gun bty (co), 11th Korps HQ
Reinforcements: Feb. 1 AM - Feb. 9 Night: (24th Pz Div optional), 1st Bn/26th Pz Rgt Panther, 266/72 and 1 supply unit and 1 105 bn from 72nd Div, 315/167 (-2), 1 aa bn, 1 motz eng bn, 1 bridge bn, 1 motz 105 bn
Order of Battle Feb. 1 AM - Soviet
40th Army (part): Gen. Zmachenko
50th Corps: 38th Rifle Div (-12), 74th Rifle Div (-10), 232nd Rifle Div (-10)
104th Corps: 58th Rifle Div (-4), 133rd Rifle Div (-5)
40th Army support means: 25th Gds Hvy How Bde, 33rd How Bde, 8th AT Bde (-3), 4th Gds AT Rgt, 328th Gds Rkt Rgt, 10th, 493rd Mtr Rgts, 14 Eng Bn
27th Army: Gen. Trofimenko. 180th Rifle Div (-8), 206th Rifle Div (-10), 337th Rifle Div (-10), 54th Fortified Area (-12), 159th Fortified Area (-11), 136th Rifle Div (-13), 33rd Gds Rkt Bde, 249th AA Rgt, 83rd Gds Rkt Rgt, 680th, 1672nd AT Rgts, 480th, 492nd Mtr Rgts, 25, 38 Eng Bns, 27th Army HQ
6th Tank Army: Gen. Kravchenko
5th Gds Tank Corps (all depl), 5th Mech Corps (-3)
47th Corps: 167th Rifle Div (-8), 359th Rifle Div (-4)
6th Tank Army support means: 111th Gds How Rgt, 22nd Gds AA Rgt, 1 rkt rgt, 1 mcycl bn, 1 motz eng bn (with pontoon bridge), 6th Tank Army HQ
Reinforcements: Feb. 1 AM - Feb. 9 Night
2nd Tank Army: (3rd, 16th Tank Corps, 1 how bde, 1 rkt rgt, 1 aa rgt, 3 motz eng bns, 1 bridge bn)
2nd Gds Abn Div (-5), 3rd Gds Abn Div (-6), 340th Rifle Div (-10)
2nd Tank Army: Gen. Bagdanov. (3rd, 16th Tank Corps, 1 how bde, 1 rkt rgt, 1 aa rgt, 3 motz eng bns, 1 bridge bn), 2nd Gds Abn Div (-5), 3rd Gds Abn Div (-6), 340th Rifle Div (-10)
2nd Ukrainian Front: Gen. Konev
52nd Army: Gen. Korotayev
73rd Corps: 254th Rifle Div (-12)
78th Corps: 294th Rifle Div (-12), 373rd Rifle Div (-13)
52nd Army support means: 38th AA Div, 438th, 1322nd AT Rgts (-1 each), 17th Gds Rkt Rgt, 490th Mtr Rgt, 366 Eng Bn, 32, 40 Bridge Bns, 52nd Army HQ
53rd Army: Gen. Galanin
25th Corps: 1st Gds Abn Div (-12), 6th Gds Div (-9), 25th Rifle Div (-8), 80th Rifle Div (-7)
48th Corps: 14th Gds Div (-10), 78th Rifle Div (-9), 213th Rifle Div (-10), 214th Rifle Div (-11), 233rd Rifle Div (-10)
75th Corps: 110th Gds Div (-7), 66th Rifle Div (-6), 89th Rifle Div (-9), 138th Rifle Div (-9)
53rd Army support means: 52nd How Bde, 61st Med Arty Bde, 31st Lt Arty Bde, 14th Mtr Bde, 90th Hvy How Bde, 30th AA Div, 6th AT Bde (-3), 232nd, 1316th AT Rgts, 1328th Med Arty Rgt, 461st Mtr Rgt, 89th Gds, 96th Gds Rkt Rgts, 11, 17 Motz Eng Bns, 53rd Army HQ
4th Guards Army: Gen. Ryzhov
20th Gds Corps: 5th Gds Abn Div (-9), 7th Gds Abn Div (-12), 62nd Gds Div (-8)
21st Gds Corps: 66th Gds Div (-9), 69th Gds Div (-10)
4th Gds Army support means: 27th AA Div, 173rd Tk Bde (-1), 33rd AT Bde (-3), 452nd AT Rgt (-1), 466th Mtr Rgt, 48 Eng Bn, 4th Gds Army HQ
5th Guards Tank Army: Gen. Rotmistrov
18th Tank Corps (minus 1 tank unit, all others depl), 20th Tank Corps (minus 1 tank unit, all others depl), 29th Tank Corps (minus 1 tank unit, all others depl)
49th Corps: 6th Gds Abn Div (-6), 94th Gds Div (-7), 84th Rifle Div (-8), 375th Rifle Div (-8), 10th, 30th AT Bdes (-3 each), 34th AT Bde (-4)
5th Gds Tank Army support means: 6th AA Div, 1st Gds Mcycl Rgt, 689th AT Rgt, 76th Gds Rkt Rgt, 678th How Rgt, 337 Motz Eng Bn (with bridge), 5th Gds Tk Army HQ
2nd Ukrainian Front support means: 5th Gds Cav Corps: 11th Gds Cav Div (-1), 12th Gds Cav Div (-3), 63rd Cav Div, (following Corps units depl: 213th Tk Rgt, T-70 rgt, 1896 SU-76 Rgt, AT rgt, 45 AT bn, recon bn), 26th AA Div, 303rd Gds Rkt Rgt, 1073rd AT Rgt, 8th Bridge Rgt, 6, 7 Bridge Bns, 69, 246 Motz Eng Bns
Reinforcements: Feb. 1 AM - Feb. 9 Night: 116th Rifle Div (-9), 27th Gds Tk Bde, 11th AT Bde (-3), 49th Lt Arty Bde, 27th Hvy Gun Bde
Order of Battle Feb. 10 AM - German
1st Panzer Army: Gen. Hube
3rd Pz Korps: 1st Pz Div (minus 150 how bn, AA bn depl), 16th Pz Div (minus SP arty, eng, at bns; 2 pz, 2 inf bns, recon bn -1 each), 17th Pz Div (minus Mk IV, recon bns; panther bn, 2 inf bns -1 each), 1st SS Pz Div AH (eng bn -1), 198th Inf Div (eng, at bns -1 each), Hvy Pz Rgt Baeke (-2), 54th, 57th Rkt Rgt, 506 Tiger Bn (-1), 249 StG Bn (-1), 2 FE bns, 3 motz eng bns, 4 bridge bns, 135 Constr Bn, 3 150 rkt bns, 3 210 rkt bns, 1 mlt bty (co), 2 motz 105 bns, 1 170 bty (co), 1 210 how bn, 3rd Pz Korps HQ
7th Korps: 75th Inf Div, 34th Inf Div (minus FE bn, plus 1 RG of Korps Gruppe B, 1 bn of 158/82), 1 bn of 158/82, 2 FE bns, 202 StG Bn (-1), 1 motz eng bn, 1 motz 105 bn, 1 170 gun bn, 7th Korps HQ
8th Army: Gen. Wohler
47th Pz Korps: 3rd Pz Div (minus recon, Mk IV, 150 how bns and 1 supply unit; all others depl), 11th Pz Div (all depl), 13th Pz Div (all depl), 14th Pz Div (minus recon, Mk IV, aa, sp arty, 150 how bns and 1 supply unit; all others depl, 108/14 Pz -1 and in pocket), 320th Inf Div (-3), 376th Inf Div (plus 266/72 with 105 bn and supply unit of 72nd, 315/167-2, minus 2 105 bns; -7), KG 106 (-1), KG 282, KG 10th Pz Gren Div (KG is composed of 4 companies of motz inf, and 1 motz eng co), 1st bn 26 Pz Rgt panther (-1), 8, 203 StG bns (-1 each), 905, 911 Ferdinand Bns (-1 each), 59th Rkt Rgt, 1 at bn, 1 aa bn, 1 eng bn, 1 motz eng bn, 1 bridge bn, 2 constr bns; 4 motz 105 bns, 1 mlt bty (co), 1 210 how bn, 1 210 how bty (co)
"Gruppe Stemmerman" (11th and 42nd Korps): Gen. Stemmerman. 5th SS Pz Div Viking (4 inf, 2 pz, recon bn each -1), Korps Gruppe B (minus 1 RG detached to 34th; -1), 57th Inf Div (-6), 72nd Inf Div (minus 266/72, 1 105 bn and 1 supply unit detached to 376th Div; -3), 88th Inf Div (minus 248/88, plus 417/168; -6) remnants, 389th Inf Div (2 depl inf bns only units left), SS Motz Bde Wallonien (pz, aa, at, 1 inf -1 each), 108/14Pz (-2), 1 cav rgt (-1), ski bn of 323rd Div (-1), 226 StG Bn (-1), 1 aa bn (-1), 4 motz 105 bns, 1 100 gun bn, 1 motz 100 gun bn, 1 170 gun bty (co), 11 Korps HQ, 42nd Korps HQ
Order of Battle Feb. 10 - Soviet
1st Ukrainian Front: Marshal Vatutin
40th Army: (part) Gen. Zmachenko
50th Corps: 74th Rifle Div (-10), 232nd Rifle Div (-10)
104th Corps: 38th Rifle Div (-13), 58th Rifle Div (-9), 133rd Rifle Div (-10)
40th Army support means: 25th Gds Hvy How Bde, 33rd How Bde, 8th AT Bde (-4), 4th Gds AT Rgt (-2), 328th Gds Rkt Rgt, 10th, 493rd Mtr Rgts, 14 Eng Bn
2nd Tank Army: 3rd Tank Corps, 16th Tank Corps (2 tk, 1 inf, 1 at -1 each), 1 how bde, 1 rkt rgt, 1 aa rgt, 3 motz eng bns, 1 bridge bn, 2nd Tank Army HQ
6th Tank Army: Gen. Kravchenko. 5th Gds Tank Corps (all depl), 5th Mech Corps (1 tk, 6 mech inf -1 each)
47th Corps: 2nd Gds Abn Div (-5), 3rd Gds Abn Div (-6), 167th Rifle Div (-12), 340th Rifle Div (-10), 359th Rifle Div (-8)
6th Tank Army support means: 111th Gd How Rgt, 1 rkt rgt, 22nd Gds AA Rgt, 1 mcycl bn, 1 motz eng bn with bridge, 6th Tank Army HQ
27th Army: Gen. Trofimenko. 180th Rifle Div (-10), 206th Rifle Div (-9), 337th Rifle Div (-9), 54th FA (-9), 159th FA (-9), 33rd Gds Rkt Bde, 83rd Gds Rkt Rgt, 249th AA Rgt, 680th, 1672nd AT Rgts (-1 each), 480th, 492nd Mtr Rgts, 25, 38 eng bns, 27th Army HQ
1st Ukrainian Front support means: 32nd Gds Rkt Bde, 32nd AT Bde (-4), 1950th Med Arty Rgt, 494th Mtr Rgt, 330th AT Rgt (-2)
Reinforcements: Feb. 10 AM - Feb. 17 Night: 202nd Rifle Div (-7)
2nd Ukrainian Front: Gen. Konev
52nd Army: Gen. Korotayev
73rd Corps: 254th Rifle Div (-12)
78th Corps: 373rd Rifle Div (-13), 294th Rifle Div (-12)
52nd Army support means: 38th AA Div, 438th, 1322nd AT Rgts, 17th Gds Rkt Rgt, 568th Med Arty Rgt, 490th Mtr Rgt, 366 Eng Bn, 32, 40 Bridge Bns, 52nd Army HQ
53rd Army: Gen. Galanin
25th Corps: 1st Gds Abn Div (-14), 110th Gds Div (-7), 66th Rifle Div (-8), 80th Rifle Div (-9), 89th Rifle Div (-9)
48th Corps: 25th Rifle Div (-10), 78th Rifle Div (-8), 214th Rifle Div (-13), 233rd Rifle Div (-8)
75th Corps: 6th Gds Div (-9), 14th Gds Div (-12), 116th Rifle Div (-7), 213th Rifle Div (-12)
53rd Army support means: 31st Lt Arty Bde, 14th Mtr Bde, 52nd How Bde, 61st Med Arty Bde, 90th Hvy Arty Bde, 30th AA Div, 6th AT Bde (-4), 232nd, 1316th AT Rgts (-2 each), 89th Gd, 96th Gds Rkt Rgts, 461st Mtr Rgt, 1328th Med Arty Rgt, 11, 17 Eng Bns, 53rd Army HQ
4th Guards Army: Gen. Smirnov
20th Gds Corps: 5th Gds Abn Div (-12), 62nd Gds Div (-8), 138th Rifle Div (-8), 7th Gds Abn Div (-13)
21st Gds Corps: 66th Gds Div (-11), 69th Gds Div (-10)
4th Gds Army support means: 27th AA Div, 173rd Tk Bde (-1), 33rd AT Bde (-4), 452nd AT Rgt (-1), 466th Mtr Rgt, 48 Eng Bn, 4th Gds Army HQ
5th Guards Tank Army: Gen. Rotmistrov
18th Tank Corps (2 tk -1 each), 20th Tank Corps (2 tk -1 each), 29th Tank Corps (2 tk -1 each)
49th Corps: 6th Gds Abn Div (-8), 94th Gds Div (-9), 84th Rifle Div (-11), 375th Rifle Div (-12), 10th AT Bde (-6), 11th AT Bde (-4), 30th AT Bde (-4), 31st AT Bde (-6), 34th AT Bde (-5), 5th Constr Bde, 49th Lt Arty Bde, 27th Hvy Gun Bde
5th Gds Tk Army support means: 6th AA Div, 27th Gds Tk Bde (-1), 689th AT Rgt (-2), 76th Gds Rkt Rgt, 678th How Rgt, 337 Eng Bn (with bridge), 5th Gds Tank Army HQ
2nd Ukrainian Front support means: 5th Gds Cav Corps (11 Gds Cav -2, 12 Gds Cav -3, 63 Cav -1, following units -1: 1st Gds Mcycl Rgt, 213th Tk Rgt, T-70 rgt, 1896th SU Rgt, at rgt, 45 at bn, recon bn; all others OK), 26th AA Div, 303rd Gds Rkt Rgt, 1073rd AT Rgt (-1), 8th Bridge Rgt, 6, 7 Bridge Bns, 69, 246 Eng Bns
Reinforcements: Feb. 10 AM - Feb. 17 Night: 41st Gds Div (-9), 81st Gds Div (-6), 163rd Rifle Div (-11), 252nd Rifle Div (-10), 2nd Ukr Front advance HQ
Air Order of Battle - All Scenarios
VIII Air Korps: 11 Fighter, 5 Ground Attack, 2 Bomber, 8 Transport
2nd Air Army, 1st Ukrainian Front: 4 Fighter, 3 Ground Attack, 1 Bomber, 1 Transport
5th Air Army, 2nd Ukrainian Front: 5 Fighter, 3 Ground Attack, 2 Bomber, 1 Transport
Designer's Notes
Why Korsun? After playing Joe Balkoski's Wacht Am Rhein (SPI), I decided I liked the system very much and was curious what it would look like on the other end of the same war. A few weeks of research were sufficient to show that to do it right would take some time, in fact so much time that it would really be an occupation. For various reasons it looked feasible and a damn sight more pleasing than making shoddy nuclear reactor parts for the Spanish government and Pacific Gas and Electric.
The first thing that I looked for was a battle of the right size, in a period in which the adversaries were fairly even in skill and equipment. Not only did Korsun fulfill this category but even a brief examination showed it to be an extremely dynamic battle of double envelopment, hanging flanks, encirclement and relief. And controversy.
Western military history, and much of the wargaming hobby as well, tends to discuss this battle (and much else) in strictly German terms. This goes against my grain intellectually and politically. Comparing different primary and secondary sources for the real story behind the conflicting accounts was the most rewarding part of this project for me.
A Few Problems. As far as the rules went, I am pleased with the way that the weather, visibility, armor/antitank relationship, artillery, ammo and engineering rules came out. The armor rule reflects the idea that the difference in effect between no tanks and a few tanks is infinitely greater than that between a few tanks and more tanks. Also the idea that assault guns, despite their name, are more effective as defensive weapons than as offensive ones. The air game, while heavily abstracted, seems to work pretty well.
I am not all that pleased with the supply system, although it works well enough after a turn or two of getting used to. I was unable to accumulate enough data to have a proper formula of tons-per-vehicle-per-mile-of-road-space. A tonnage figure here, a unit of fire there, but not enough to work with.
As a result, I ended up approaching the problem from the other end - how much ammunition seemed to have been available - and tested it until it seemed to work right. It might very well be realistic to cut the available supply points by as much as a third, leaving stretches of front in a U-1 state, but that would require more markers and more time. The present system is certainly full of anomalies: you use no more supply fighting than you use sitting in reserve; you use three times more supply holding an extended line than a compact one; a division's supply requirements go down as its supply units rather than its combat strength is destroyed, etc.
The system will work if you routinely allocate supply for all of your supply units in position to receive it, and only voluntarily withhold supply in emergencies. If you mess around with it and try to run your army on as few supply points as possible, it is quite possible to amass unrealistic amounts of supply and waste a lot of time.
Supply mostly models small arms and heavy infantry weapon ammo, since food was never a serious problem for anyone for most of the battle and when it wasn't available people went without for a few days without serious effects. As for fuel, it is true that supply in this game is only consumed by fighting and not by moving. On the other hand, most vehicles carried enough fuel to cross the whole map several times, in good weather. The times in the battle when fuel became a critical problem were when the mud came, and then there are quite adequate movement restrictions to show the result of lack of fuel.
I am also not really pleased with the fatigue rules. Troops could march and fight for days on adrenalin and benzedrine (Wallonien had been on bennies for about a week before the breakout attempt). Fatigue would build up gradually until by the end of the battle several German formations were reporting themselves as too tired to move. But without the aid of a computer to keep track, the current system will do.
Outside of the movement restrictions and an optional rule affecting morale, command control plays little role in the game. Unfortunately, I was unable to develop a rule that was both realistic and clean and this game hardly needs another time consuming routine. However, headquarters units are provided and if you can come up with a realistic solution to this problem, let me know.
Where is the Fudge? A historian can look through his/her sources and say that "these sources say this, those contradict the first ones, these others offer the following clues and so the likely alternate hypotheses are...." The historical game designer does not have this luxury. It is necessary to say that "this unit had this strength and was at this place at this time," not "it might have been here but some other source indicates it was over there." Some designers would have you think they are presenting you revealed truth with what they show you. Often it ain't so.
The research for KORSUN POCKET included translations of German archival records, Soviet histories (some heavily footnoted with references to their national archives), memoirs in German, French, English and Russian, magazine articles, pamphlets, unpublished studies and a lot more. And when it came down to resolving some contradictions, a lot of guess work.
Now doing all of this research is much harder than simply reading and accepting some third-hand pro-German account of the battle, photostatting a few of the German staff maps available in the archives in Washington, D.C. and claiming to have the true story. Indeed, if you disparage the Soviets there will be few who will criticize you. But finding out the true story is much more rewarding for the designer and I hope for the gamer as well.
On the depletion levels, some are from actual strength reports (mostly 1st Panzer Army), some are from diaries and memoirs, and some are guessed at based on available information such as the known average strength, which unit was recently involved in a major battle and which recently came out of reserve. I found that most sources were of dubious accuracy. Everyone seems to have understated their own resources and overstated the enemy's. But I must say that after reading the likes of Earl Ziemke and "Paul Carell" and company and comparing their statements to archival documents, I found some of the Soviet sources to be refreshingly sober in their statistics. Not always believable but much closer to reasonable figures than the German sources.
A good part of the Soviet order of battle came from A. N. Grylev's excellent and detailed book, Dnepr, Karpaty, Krym in Russian which contains an OB dated 25 days before the battle. Many changes took place in those 25 days and many more in the next 24 of battle. To the best of my ability and where I could verify them, these changes are reflected in the game. In some cases the fudge is apparent: the supporting units of 2nd Tank Army, some of those of 6th Tank Army and of 5th Guards Cavalry Corps are estimates, not documentable facts. The same is true of the organic support of each rifle corps and the type of tanks in each tank brigade. Similarly, the partisan units are guesses in terms of strength and numbers. I do know that they had been there since 1941 and had been reinforced in October 1943 by the survivors of the unsuccessful airdrops of three Soviet airborne brigades near the north edge of Map A.
I would be much more comfortable with archival documents on all of these questions; unfortunately, I don't have access to them and for the game decisions must be made. I just want you to know what is an estimate and what is a fact.
A word on philosophy. A game this size requires time. Spending time with jerks is neither relaxing nor rewarding so if your available opponents are of the Vince Lombardi-Woody Hayes school, play something else. Play this game in the spirit of discovering something about history, not figuring out some clever way to distort history in order to gain 15 victory points, and you will get more out of it.
Finally, please remember that while wargames can be instructive and entertaining, war is destructive and brutalizing - the ultimate human folly. Do not believe anyone who tells you that the Soviet Union threatens the world with war. Unlike our country, the USSR has seen war first-hand and the whole population - civilians, soldiers and decision makers - know it is something to avoid at all cost. The bogeyman of "Russian expansionism" and the "Communist menace" was used to dupe millions of young Germans and others to their deaths and mutilations. We saw it happen again to our generation in Vietnam. Let us not be fooled again.
Bibliography
Books: The Battle of Kursk, Ivan Parotkin, editor; Dnepr, Karpaty, Krym, A. N. Grylev (Russian); Front de l'Est, Leon Degrelle (French); German Order of Battle 1944; Great Patriotic War of the Soviet Union (1 volume, English); Handbook on USSR Military Forces, U.S. War Dept.; Heersgruppe Sud, Carl Wagener (German); Korsun Story, various authors (Russian); Lost Victories, Erich von Manstein; The Memoirs of Marshal Zhukov, Georgi Zhukov; Operations of Encircled Forces, U.S. Dept. of Army; Panzer Battles, F. W. von Mellenthin; Panzer Leader, Heinz Guderian; The Red Army, Liddell Hart, editor; Russia At War, Alexander Werth; Scorched Earth, "Paul Carell"; The Soviet Army, various authors; Stalin and His Generals, Seweryn Bialer, editor; Stalingrad to Berlin, Earl Ziemke; Vremya i Tanki, Pavel Rotmistrov (Russian); War in the East, various authors (SPI)
Periodicals: Soviet Military Review, issues 7/72, 2/74; Voyenno Istoricheskiy Zhurnal, issues 7/67, 2/69 (Russian); U.S. Archive Microfilm: T-78, rolls 548, 549, 655; T-31, roll 64; T-314, rolls 206, 207, 359, 1132; some unpublished material dealing with 5th Guards Tank Army; Defense Mapping Agency, series N510, NM-36-7 1:250,000; Captured German Staff Maps, 48(2) T-5, M-36 sections 74, 75, 76, 85, 86, 88, 89, 97, 98, 99, 100, 101; Lagekarten die Rote Armee, Jan 25-Feb 17 (a few missing)
Official Errata
(Official People's War Games "Korsun Pocket Errata" sheet, faxed 07/26/2000. Page numbers refer to the printed pages of the 1979 rules book. A few letters on the scanned sheet were marked over by hand; see the note at the Reinforcement Record entry.)
-
Page 3 Contents: Dismount, Desperation Breakout, Partisans and Scenario Instructions may all be found on page 17, not page 7.
-
Page 4 How to Read the Counters: The typical infantry unit should be the same shade as the next two examples: it is also a German unit.
-
Page 7 Artillery Movement: 210 mm German Rocket units are treated as Light Artillery for movement purposes and Heavy Artillery for combat purposes. They require three ammo points to fire, not two as indicated in the counter errata in the rules book. Mark them with two dots.
-
Page 7 Zones of Control: Friendly units do not negate EZOC during retreats.
-
Page 8 Visibility: OK, OK I hear you. Yes, the reason rocket units are spottable at one hex further than usual is the rocket trails and units In Battery that haven't fired yet don't reveal any of the above. If you can remember who has and who hasn't fired without markers, fine. If not, go ahead and make your own markers.
-
Page 8 Visibility: In the last paragraph, should read "...treat that covered hex as clear for purposes of observation into but not through that hex."
-
Page 8 Reconnaissance: Optional: Enemy stacks in cover during Poor or Zero visibility, or fortified in any visibility, may not be examined until the end of the friendly movement phase.
-
Page 8 Tank/AntiTank Support: During playtesting it was obvious that 5th Mech Corps and 1st SS Pz Div were both awfully strong but the penny didn't drop until after the game was published. The problem is that units having basically company-sized tank or assault gun units for organic support were able to their tank/antitank factors in one battle. This brought my attention also to the size of the Soviet SU regiments.
Charts and Tables
(The charts and tables below were printed as images in the scanned copy and are transcribed from the page images.)
Turn Record Track (historical weather, with reinforcement arrivals)
Format: Atmosphere/Ground. "G" = German cross with reinforcement number; "S" = Soviet star with reinforcement number (see the Reinforcement Record). The printed German list omits number 23, although a cross numbered 23 appears on the track at Feb. 6 AM.
| Date | AM | PM | Night |
|---|---|---|---|
| Jan. 25 | Fog/Frozen | Snowing/Frozen | Snowing/Frozen |
| Jan. 26 | Fog/Frozen, S1 | Snowing/Frozen, G1 | Clear/Frozen, G2 |
| Jan. 27 | Clear/Frozen, G3 | Clear/Frozen, G4, S2 | Clear/Frozen, G5, S3 |
| Jan. 28 | Clear/Frozen, S4 | Clear/Frozen, G6 | Clear/Frozen |
| Jan. 29 | Fog/Frozen, S5 | Fog/Frozen, G7 | Clear/Frozen |
| Jan. 30 | Snowing/Frozen, G8 | Clear/Frozen, G9 | Clear/Frozen, G10 |
Air Base Cards
Each air base card shows its anti-aircraft factor (A-A-n). Sortie allowance is shown as Cold / Mud / Deep Mud.
| Air force | Air bases (AA factor) | Sorties (Cold/Mud/Deep Mud) |
|---|---|---|
| VIII Air Korps, 1st Panzer Army | Vinnitsa (3), Uman (3), Novo Ukrainka (3) | 9 / 5 / 3 |
| 5th Air Army, 2nd Ukrainian Front | Kirovgorad (2), Kremenchug (3) | 10 / 6 / 3 |
| 2nd Air Army, 1st Ukrainian Front | Kiev I (3), Kiev II (3), Kiev III (3), Belaya Tserkoye (2) | 8 / 5 / 4 |
Play Aids
The Play Aids strips carry the labels AM, PM, Night, Cold, Warm; Frozen Ground, Mud Ground, Deep Mud Ground, Snow Ground; and Blizzard, Snowing, Raining, Fog, Cloudy, Clear. They also reproduce the Sequence of Play (see above) and the following charts.
Zero Visibility Movement Chart
| Unit Type | Deployed | Column |
|---|---|---|
| Foot & Horse | -2 MP | Full |
| Motz | MA = 4 | MA Halved |
ZOC - Visibility Chart
| Unit Type | Visibility | ZOC into Clear, Swamp | ZOC into Covered |
|---|---|---|---|
| Pure Tank | Good | Full | Full |
| Pure Tank | Poor | Reduced | None |
| Pure Tank | Zero | None | None |
| All Others | Good | Full | Full |
| All Others | Poor | Full | Reduced |
| All Others | Zero | Reduced | None |
Front/Army Delivery Means Chart
| MASS | MSDS | ||
|---|---|---|---|
| 27th Army | 12 | 1st Ukrainian Front | 6 |
| 6th Tank Army | 10 | 2nd Ukrainian Front | 12 |
| 40th Army | 10 | 1st Panzer Army | 10 |
| 2nd Tank Army | 10 | 8th Army | 12 |
| 4th Gds Army | 10 | ||
| 52nd Army | 10 | ||
| 53rd Army |
These numbers are modified for ground conditions: the MASS according to the previous night's ground condition; the MSDS values according to the current ground condition. Reduce the numbers by 50% for Mud and 75% for Deep Mud. Round all fractions down.
Frozen/Snow Terrain Effects Chart
(Movement point costs. Deployed columns: Foot / Horse / Motz. Column columns: Foot / Horse / Motz.)
| Terrain | Dep. Foot | Dep. Horse | Dep. Motz | Col. Foot | Col. Horse | Col. Motz |
|---|---|---|---|---|---|---|
| Clear | 1 | 1 | 1 | 1 | 1 | 1 |
| Broken | 1 | 1 | 2 | 1 | 1 | 2 |
| Woods | 1 | 2 | 3 | 1 | 1 | 2 |
| Rough | 3 | 4 |
This chart is used on all turns when the Ground Condition is Frozen or Snow. Numbers in parentheses apply to Snow Ground condition only. P = Prohibited. - = no effect.
* see Engineer rules for ferry costs.
** Soviet pure tank units can cross, the unit must begin the move adjacent to the Marshy Hexside, costs all MP. Other motz units can cross with Engineer assistance, costs same as for Soviet pure tank. Soviet pure tank units with engineer assistance takes 2 MP less than full MA.
Mud/Deep Mud Terrain Effects Chart
| Terrain | Dep. Foot | Dep. Horse | Dep. Motz | Col. Foot | Col. Horse | Col. Motz |
|---|---|---|---|---|---|---|
| Clear | 2 | 2 | 3 | 2 | 2 | 3 |
| Broken | 2 | 2 | 6 | 2 | 2 | 6 |
| Woods | 3 | 4 | 6 | 2 | 3 | 4 |
| Rough | 6 | 8 |
This Terrain Effects Chart is used for all turns with Mud or Deep Mud Ground Conditions. P = Prohibited. All = unit spends total MA to enter hex. * = see Engineer rules for ferry costs. - = no effect.
Deep Mud Special Effects: Motz units moving off Road pay double movement costs. Motz Columns pay Clear Terrain costs for Primary Road or Railroad, Path costs for Secondary Road, ignore Paths, and may not move off roads.
Terrain Effects on Combat, Line of Sight, and Artillery Chart
| Terrain | Combat Effects | Line of Sight | Cover | Artillery |
|---|---|---|---|---|
| Clear | - | - | - | - |
| Broken | -1 | blocks | (yes) | - |
| Woods | -1 | blocks | yes | - |
| Rough | -2 | blocks | yes | halved** |
| Swamp | all attackers in swamp halved | - | - | - |
Combat effects are in terms of shifts on the CRT unless otherwise stated. Units in cover may not be observed by non-adjacent enemy units. Air units may spot (and attack) units In Column in parenthesized cover hexes (yes).
* In Good visibility, a unit on a hill can observe targets three hexes away. The only terrain that blocks the line of sight of a unit on a hill is another hill hex.
** Heavy artillery is not halved firing into these hexes.
*** These shifts not cumulative with any other terrain-caused shift. Shifts for River and Marshy Hexside are received only if all attackers are attacking across the hexside in question.
Fatigue Effects Chart
| Fatigue State | Movement Type | Attack Strength | Defense Strength | Movement |
|---|---|---|---|---|
| Tired | Foot & Horse | halved | full | halved |
| Tired | Motorized | halved | full | full |
| Exhausted | Foot & Horse | halved | halved | halved |
| Exhausted | Motorized | halved | halved | halved |
Supply Rate Schedule
Ammo points / supply points received per MASS.
| Front/Army | Jan 25-Jan 31 | Feb 1-Feb 9 | Feb 10-Feb 17 |
|---|---|---|---|
| 1UF | 45/38 | 60/38 (70/44)* | 80/45 |
| 2UF | 80/60 | 80/60 | 80/60 |
| 1PzA | 24/16 | 40/20 | 50/25 |
| 8A | 30/20 | 40/25 | 40/25 |
* 1UF supply rate goes up again on Feb 3.
To read the schedule read ammo points/supply points received at Front/Army supply dumps per MASS. Modify these figures based on the previous day's ground conditions, counting the Night turn as two turns for these purposes. Reduce the printed amount 10% for each game turn of Mud, and 20% for each turn of Deep Mud. (Optional - reduce 10% for each turn of Blizzard.) Round all fractions down.
Supply Effects Chart
| Supply State | Combat Unit | Artillery Unit | Supply Unit |
|---|---|---|---|
| U-1 | no effect | no fire allowed except direct fire | NONE ON HAND*: supply may be traced through, not drawn from |
| U-2 | AS halved; Motz MA halved | as above; Motz MA halved | NONE ALLOCATED*: supply may be drawn from, not traced through |
| U-3 | AS = 1; DS halved; ZOC reduced; T/A halved; Motz MA halved | as above; no ZOC; no fire allowed; DS halved; AT halved | no supply function; Motz MA halved |
| U-4 | no AS; DS halved; no ZOC; no T/AT; no Motz MA; other MA halved; no attacks required | as above; no Motz MA; other MA halved; no AT | no supply function; no Motz MA |
AS = attack strength. DS = defense strength. Motz MA = motorized movement allowance. T/AT = tank/anti-tank support strength. ZOC reduced = Strong becomes Weak, Weak becomes none. * supply units are never marked U-1 or U-2; see Supply rules.
Weather Effects Chart
- Fog, Blizzard: produce Poor Visibility AM or PM, Zero Visibility at Night, prevents all air missions.
- Snowing, Raining: halve air sortie allowance, reduces CAP radius to two hexes, transport sorties flown at night roll on 1-1 Air CRT.
- Cloudy: reduces radius of CAP to four hexes.
- Frozen: use Frozen/Snow Terrain Effects Chart.
- Snow: use Frozen/Snow Terrain Effects Chart, use parenthesized values, ski bn has one extra movement point.
- Mud: use Mud/Deep Mud Terrain Effects Chart. Motorized units may advance no more than two hexes after combat. Medium artillery may not move except In Column. Light Artillery may only move one hex per turn Out of Battery, may not move In Battery. Horse drawn supply range = 4 hexes, Motz supply range = 3 hexes. MASS and MSDS Army/Front Delivery Means halved. Air sorties reduced, supply delivery reduced. Fortifications may not be built.
- Deep Mud: use Mud/Deep Mud TEC, motorized units may only advance one hex after combat, Light Artillery must be In Column to move, Heavy Artillery may not move or change formation, nothing may be built, all building markers and Improved Road markers are removed. MASS and MSDS Front/Army Delivery Means quartered. Air Sorties reduced, on-map airfield unusable, supply and ammo delivery to Front/Army level reduced.
Variable Weather Table
| Die | Temperature | Atmospheric | Precipitation (Cold) | Precipitation (Warm) |
|---|---|---|---|---|
| 1 | Warm | Clear | Blizzard | Raining |
| 2 | Warm | Clear | Snowing | Raining |
| 3 | Warm | Precipitation | Snowing | Raining |
| 4 | Cold | Precipitation | Snowing | Raining |
| 5 | Cold | Fog | Snowing | Cloudy |
| Temperature Die Adjustment | Atmosphere Die Adjustment | Precipitation Die Adjustment |
|---|---|---|
| -1 if Warm | -1 if PM | -1 if PM |
| -1 if PM | +1 if AM | +1 if AM |
| +1 if Cold | ||
| +1 if Night |
Die adjustments on Temperature for Warm or Cold refer to the previous turn's temperature.
Ground Condition. After the Variable Weather Table is consulted, the Ground Condition is determined, taking into account the temperature and atmospheric conditions of the current and previous game turns.
- Frozen is produced by Cold immediately from Mud, Deep Mud, or from Snow on the second consecutive Warm turn.
- Snow is produced by three consecutive turns of Snowing or immediately by Blizzard.
- Mud is produced from Frozen or Snow on the second consecutive Warm turn.
- Deep Mud is produced on the second consecutive turn of Rain or by the fourth consecutive turn of Mud.
- For purposes of determining Ground condition, treat the Night turn as two consecutive turns.
Combat Results Table
Odds across the top; die roll (1-6) down the left. All "A" results apply to the Attacker, all "D" results apply to the Defender. Numbers refer to the number of hexes to retreat, parenthesized numbers indicate mandatory losses.
| Die | 1-4 | 1-3 | 1-2 | 1-1 | 2-1 | 3-1 | 4-1 | 5-1 | 6-1 | 7-1 | 8-1 | 9-1 |
|---|---|---|---|---|---|---|---|---|---|---|---|---|
| 1 | A-1 | A-1/D-1 | D-1 | D-1 | D-2 | D-3 | D-2(1) | D-2(1) | D-3(2) | D-3(2) | D-3(2) | D-4(2) |
| 2 | A-1(1) | A-1 | A-1/D-1 | D-1 |
Air Combat Results Table
| Die | 1-1 | 2-1 | 3-1 | 4-1 |
|---|---|---|---|---|
| 1 | D | D | DK | DK |
| 2 | * | D | D | DK |
| 3 | * | * | D | D |
| 4 | * | * | * | D |
| 5 | * | * | * | * |
| 6 |
D = one defender Damaged. DK = one defender Damaged, one Destroyed. K = one defender Destroyed. A = defender Aborts. * = no result.
Antiaircraft Combat Results Table
| Die | 1-2 | 1-1 | 2-1 | 3-1 | 4-1 |
|---|---|---|---|---|---|
| 1 | A | A | D | D | K |
| 2 | * | A | A | A | D |
| 3 | * | * | * | A | A |
| 4 | * | * | * | * | A |
| 5 | * |
Surprise Attack Table
| Die | Poor Visibility | Zero Visibility |
|---|---|---|
| 1 | +2 | +3 |
| 2 | +1 | +2 |
| 3 | * | +1 |
| 4 | * | -1 |
| 5 | -1 | -2 |
| 6 | -2 | -3 |
Read result as shifts on Combat Results Table. * = no effect.