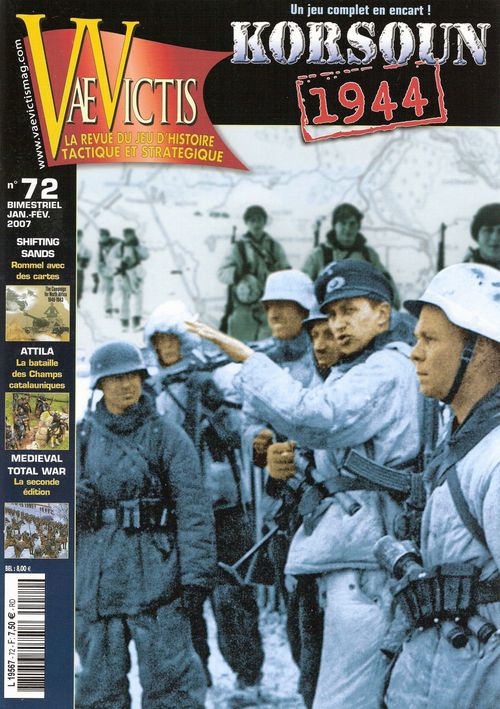
Korsoun 1944
Korsoun 1944 Rulebook
Table of Contents
Table of Contents
- 0 - Overview
- 1 - Units and Organization
- 2 - Sequence of Play
- 3 - Activation
- 4 - Zones of Control (ZoC)
- 5 - Stacking
- 6 - Movement
- 7 - Combat
- 8 - Command
- 9 - Doctrine
- 10 - Supply
- 11 - Fog of War (optional rule)
- 12 - Defensive Works
- 13 - The Pocket (Kessel)
- 14 - Russian Replacements
- 15 - Weather
- 16 - Alarm Abteilung [Alert Battalions]
- 17 - The 24th Panzer Division
- 18 - Scenarios
- Reference Tables
0 - Overview
0.1 Game Scales
A game turn represents two days of real time. A hexagon on the map covers approximately 4.5 km [2.7 mi.]. The unit counters represent corps, divisions, regiments and kampfgruppes or headquarters (HQ) with their organic elements.
0.2 Terrain
The map represents the area south of the Dnepr [River] around the small city of Korsun.
A hexagonal grid is superimposed on the map to regulate units' Movement (6.0) and Combat (7.0). The effects of different terrain types on movement and combat are summarized in the Terrain Effects Table. ['Effets du Terrain', on the mapsheet, also at the end of this translation.]
0.3 Rounding
When values are divided, fractions are always rounded to the nearest whole number. EX: 7 divided by 3 is 2.33 which becomes 2; 3 divided by 2 is 1.5, which becomes 2.
All values and modifiers are added before dividing.
1 - Units and Organization
1.1 Units
Each unit has the following notations on the counter: combat strength; quality rating; number of steps; unit type (infantry or mechanized/armored or cavalry); identification: unit name, formation color code, NATO symbol.
Any armor bonus is indicated by one to three stars. A parenthesized combat value indicates that the unit cannot attack (i.e. this value only applies on defense).
Combat units are grouped into formations. A color code allows the easy recognition of different formations.
Infantry units have 2 Action Points (AP), cavalry and mechanized units, including HQs, have 3 Action Points. These Action Points are used for movement and combat. The number of APs available may be reduced by the weather or the unit's status.
[Note that some 16 counters have errors, the corrected versions can be downloaded from: http://vaevictis.histoireetcollections.com/telechargements.html. These counters have been marked in red in the scenario setup/reinforcements.]
Some Russian units have a lower quality rating on their reverse side, this is intentional.
The mechanized infantry units of the Soviet 5th Mechanized Corps have a single star for armored superiority, because these counters include armored formations.
The KG/14 Pz (47th PzK) has no armor superiority star, because this formation was exceptionally weakened.
1.2 Unit Reduction
Units have one to four strength steps.
Units which only have one strength step (particularly HQ) are eliminated by the first loss.
When a unit with two combat steps loses a strength step the unit is flipped. If the unit is already flipped, then it is eliminated.
A unit with three steps receives a loss marker with the first step loss. A second step loss removes this marker and the unit counter is flipped to its reverse side. A third step loss eliminates the unit.
Units with four steps receive a loss marker on the first step loss. With the second step loss this marker is removed and the counter is flipped to its reverse side. On the third step loss, the unit receives a loss marker. A fourth step loss eliminates the unit.
Russian step loss markers reduce the unit's combat strength by 3 points, German markers by 2. Unit quality and any armored bonus remain unchanged.
1.3 Status
At all times, units have a specific status depending upon game circumstances: Normal, Isolated (10.3), Unsupplied (10.3), Out of Command (8.2), Fatigued (3.5), in Improved Position (12.1), and/or Disorganized (3.6).
The effects of such status on unit performance are explained in the relevant rules sections. The default status of each unit is Normal.
A unit may have several status simultaneously (for example, Isolated, in Improved Position, and Out of Command). In such a case, all effects are cumulative.
Example: a unit which is both Fatigued and Unsupplied will have no APs: a base of 1 for Unsupplied and -1 for Fatigued.
1.4 Organization and Command
Each formation includes a headquarters (HQ) and a certain number of units attached to it. A color code allows rapid identification to which formations units belong.
During a game turn, a player may activate his units in two ways: either by activating all of the units of a single formation which are within command range of their HQ, or by activating a given number of units from different formations or which are beyond command range of their HQ (see 3).
Note: the number of units activated is given in the doctrine rules as a function of nationality. Note that the Russian side has several independent units which are not attached to any formation; they follow the activation rules for their side (see 9).
1.5 Headquarters (HQ)
[Counters with a portrait of a general.]
Headquarters counters represent formation HQ. These are their sources of command and supply. They have 3 Action Points and show the following notations: their quality rating as well as how many supports they can allocate each turn to their subordinate units.
They have an intrinsic combat strength of 1 (which is only usable in defense) and a single strength step. The reverse side of the counter indicates the HQ's activation.
HQ can support friendly units in attack and defense if they are within its command range (if a Line of Communications reaches their hex, see 8.1) at the moment of support (attack or defense). In that case, Support markers possessed by the HQ can be stacked with the supported unit. German and Russian HQ can only support units of their formation which are within command range.
HQ can only be destroyed if they are attacked while alone in a hex, or if all of the units with which they are stacked are eliminated.
Note: a destroyed HQ returns in the following turn at the end of phase 1 of the sequence of play and may be placed by the owning player wherever he wishes on the map, so long as the placement hex is not in enemy Zone of Control (see 4) and is supplied (see 10).
At the moment of the HQ's destruction, Support markers present in its HQ box are returned to the pool (see 1.6). They will be available again on the following turn.
1.6 Support Markers
Each side has a certain number of Support markers. This pool may increase during the game through reinforcements and will decrease according to the rules for expending each type of support.
During the Support Phase, each side can allocate its support markers to the different friendly HQs on the map or arriving as reinforcements during the game turn. Each HQ may receive a number of markers equal to its support level [note that an Unsupplied HQ cannot be allotted Support markers, see 10.3].
These support markers are placed in the 'Available' ['Disponible'] section of the HQ display to which they are attached, on the player aid card [back of the countersheet, PHOTOCOPY THIS SHEET before cutting the counters ...]. They will then be expended during combat, in attack or defense, to assist units within the HQ's command range at the moment of combat.
After a support marker is used, roll a die. According to the result (see below), it may be placed on the 'Used' ['Utilisé'] portion of its HQ display, or it may be placed on the game turn track (to return later) or it may be eliminated from the game. When the weather is 'Mud', the die roll is increased by one.
During the support phase, markers in the 'Used' ['Utilisé'] portion of the display may be placed in the 'Available' ['Disponible'] portion of any HQ display (if the weather is Snow), or of the same HQ (if the weather is Mud). To transfer a support marker from one HQ to another, you must be able to trace a path of hexes free of enemy Zone of Control (see 4.1) from one HQ to the other.
1.6.1 German Markers
Nebelwerfer: Shifts the combat two columns in favor of the German player (to the right in attack, to the left in defense). When it is used, the German player rolls one die, on a roll of 1 to 3 the counter is placed in the 'Used' portion of its HQ display for the next turn's use. On a result of 4 to 6, it returns to the game two turns later (place it on the turn track).
Artillery: Shifts the combat one column in the German player's favor (right in attack, left in defense). When it is used, the German player rolls one die, on a 1-4 the marker is placed in the 'Used' portion of its HQ display for the next turn's use. On a 5-6 it returns to the game two turns later (place it on the turn track).
StuG: Shifts the combat one column in the German player's favor (right in attack, left in defense). When it is used, the German player rolls a die, on a roll of 1-5 the marker is placed in the 'Used' portion of its HQ display for the next turn's use. On a result of a 6 it returns to the game two turns later (place it on the turn track). The player may choose to eliminate the marker as a combat loss (the StuG marker has one strength step). The StuG marker may also be eliminated in order to give one strength step back to a German armored unit in the same formation as the HQ to which the StuG is attached.
Tiger: This marker shifts the combat one column in the German player's favor (right in attack, left in defense), and provides a bonus when determining armor superiority (see 7.5). When it is played, the German player rolls a die, on a result of 1-4 it is placed in the 'Used' portion of its HQ display for the next turn's use. On a result of 5-6 it returns to the game two turns later (place it on the turn track).
StuG and Tiger markers can only be used if the defender's terrain, and at least one hex of the attacker's terrain, are not impassable to armor (see the Terrain Effects Table).
1.6.2 Russian Markers
Katusha ['Katioucha']: like the German Nebelwerfer, this marker shifts the combat two columns in the Russian player's favor (right in attack, left in defense). When it is played, the Russian player rolls a die, on a result of 1-3, the marker is placed in the 'Used' portion of its HQ display for the next turn's use. On a result of 4-5 (or a 5 modified by Mud, see 16), it returns to the game two turns later (place it on the turn track). On a roll of a natural [unmodified] 6, it is eliminated from the game. A HQ which has one (or more) Katushas attached may not use more than 1 AP during its activation.
Armored Brigade ['Brigade Blindé']: Shifts the combat one column in the Russian player's favor (right in attack, left in defense). When it is played, the Russian player rolls a die, on a 1-4 the marker is placed in the 'Used' portion of its HQ display for the next turn's use. On a result of a 5-6, it returns to the game two turns later (place it on the turn track). Unlike the German StuG marker, the Armored Brigade marker cannot be used to absorb a step loss in combat.
The Armored Brigade marker can only be used if the defender's terrain and at least one hex of the attacker's terrain are not impassable to armor (see the Terrain Effects Table).
Antitank ['Antichars']: This marker provides a bonus when determining armor superiority (see 7.5). When it is played, the Russian player rolls a die, on a result of 1-4, the marker is placed in the 'Used' portion of its HQ display for the next turn's use. On a result of 5-6, it returns to the game two turns later (place it on the turn track).
2 - Sequence of Play
Korsun 1944 is played in a number of turns (depending on the scenario being played), each game turn being composed of several phases.
2.1 Game Sequence
1 - Supply and Command Phase. Both players check the Line of Supply (LoS, see 10) and Line of Command (LoC, see 8) for all of their units.
2 - Support Phase. Support markers received this turn are placed in the pool. Depending on the weather, markers attached to a HQ (available or used) may be returned to the pool or remain attached to the same HQ (see 1.6).
Both players allocate their available Support markers (see 1.6) to the corps and army HQs by placing them in the appropriate box on the player aid display (on the back of the countersheet), up to the limit of each HQ's support rating [note that unsupplied HQ cannot be given Support markers, see 10.3].
3 - Determine Initiative. Each player rolls 1d6 to determine who has the initiative for the turn, high roll wins. Reroll in case of ties.
4 - Operations Phase.
- First Player activation sequence: the player with the initiative may activate all of the units belonging to a single formation, or 3-4 (depending on nationality) units of his choice (including this turn's reinforcements, see 18). These units may then spend their Action Points (AP) according to the action rules (see 3.4.1). They may move, take up defensive positions and/or attack. The player may also decide to pass and not activate any units.
Stacking limits are checked and corrected as needed (see 5). Both players may play Stratagems.
- Second Player activation sequence: the second player does the same with the units of his choice. Stacking limits are checked and corrected as needed (see 5). Both player may play Stratagems.
The players thus alternate activation sequences until the end of the turn.
5 - Administrative Phase.
- "Activated", "Breakthrough" and "Disorganized" markers are removed;
- Victory Conditions are checked;
- the Turn marker is advanced one space.
2.2 Turn End
The game turn may end early in two ways:
- if both players in succession pass in their action phase. A player may decide to pass during his action phase, and not activate any units. If the opposing player does likewise, the turn automatically ends.
- if one of the players has activated all of his units twice (Fatiguing them), the opposing player may then do a series of activation sequences. At the end of each activation sequence (of either type) beginning with the second, this player must roll 2d6. On a result of 11 or 12 the turn ends prematurely.
When either player has unit remaining to activate, the turn automatically ends.
3 - Activation
3.1 Overview
In order to move and fight, a unit must be activated. A unit is activated by the owning player during his operations phase, as either a 'formation activation' (see 3.2) or a 'general activation' (see 3.3).
- Each unit or HQ can normally only be activated once per turn (exception, Fatigue see 3.5).
- A unit may only move and fight during its activation. A HQ cannot be activated during a general-type activation except to move (but in no case to activate the units of its formation).
To avoid confusion, an Activated marker may be placed on a unit at the end of its activation.
3.2 Activating by "Formation"
The player may activate all of the in-command units of a single formation during the operations phase.
A HQ must be activated to perform this type of activation and the following conditions must be met:
- The formation's HQ is not destroyed;
- those of the formation's units which the player wishes to activate must be in command (see 8.1).
Note: a player is not required to activate all the units of his formation, they may instead be activated during a general-type activation (see 3.3).
An already-activated HQ may normally not do a formation activation. A player may however decide to perform a new formation activation by reactivating this HQ, in which case the HQ is automatically Fatigued at the moment of activation, and suffers the same penalties as a Fatigued unit (see 3.5). An un-Fatigued HQ may also be reactivated during a general-type activation, in which case it is treated as any other unit, i.e. it becomes Fatigued.
3.3 General-Type Activation
Instead of activating units through a single formation HQ, the player may decide to activate or reactivate units which are independent or belong to different formations, whether in or out of command. To do this, he chooses a general-type activation and may activate 3 or 4 units, depending on nationality (see 9). These units do not need to be within a certain distance of each other.
A unit which is out of command or whose HQ has been destroyed must make a C3I check to activate (see 9.4). If it passes, it has all of its normal APs, if not it has only one AP.
Special case: Units arriving before their HQ is on the map can only be activated using general-type activations.
3.4 Activation Mechanics
The activation process is relatively flexible and allows the players to perform different combinations of movement and combat.
3.4.1 Actions
The actions undertaken by a unit (Movement, Combat etc.) during the course of its activation cost Action Points (APs) which are subtracted from its current allotment as a function of its Category (see 1.1) and Status (see 1.4).
A unit may choose as many actions as its APs permit.
A unit is not required to use all of its APs during its activation but unused APs do not accumulate for later activations and are lost immediately at the end of the current activation phase.
The possible actions are:
- Movement (costs 1 AP). The unit may move up to its movement allowance as a function of its mobility class and status, paying the terrain costs according to unit type.
- Normal Attack (costs 1 AP). The unit may attack any unit in its zone of control (ZoC, see 4) possibly in conjunction with adjacent friendly units.
- Fatigue Recovery (costs 2 AP). A fatigue recovery (see 3.5.2) must be done as a fatigued unit's first action of its first activation sequence.
- Prepared Attack (costs 2 AP). The unit may attack any unit in its ZoC with bonuses and possibly in conjunction with adjacent friendly units.
- Enter Improved Position (costs 1 AP). See 12.
- Leave Improved Position (no AP cost). See 12.1.
3.4.2 Free Combination
During the activation, the player may move some or all of his activated units, attack with one or more of these units, then move other activated units and have them attack in all possible combinations within the following limits:
- entering an enemy ZoC stops movement and requires combat before the end of the formation's activation sequence, in those cases where it is mandatory (see 4.3).
- a unit may attack more than once per turn.
- an enemy unit may be attacked more than once per turn.
3.4.3 Order of Actions
Each activated unit undertakes actions singly or as a stack (see 5), in the order desired, regardless of the activation method used. None of the units of a stack can however expend more APs than they have available. Units with APs remaining may continue their Activation even if other units in the stack must end theirs.
A unit or stack may spend part of their APs, then wait while another stack also spends APs, before resuming in turn: the only restrictions are the rules on zones of control (ZoC, see 4) and the number of APs per unit.
AP Remaining markers are provided to note the remaining APs within an activated formation during an activation phase.
3.5 Fatigue
A unit may be reactivated once more during the same turn in a subsequent activation phase by its HQ or a general-type activation. In this case the reactivated unit and/or HQ automatically receive a Fatigue marker at the start of their activation. It is possible to jointly activate some units which are fresh and others which will be fatigued.
3.5.1 Fatigue Effects
The unit loses 1 AP and has its combat strength halved.
3.5.2 Fatigue Recovery
To recover from fatigue, the HQ or unit must spend 2 AP at the moment of its first activation in a turn, even if it is in enemy ZoC. The marker is then removed.
Note: a fatigued unit cannot immediately refatigue, it must first recover from fatigue before possibly fatiguing itself again.
3.6 Disorganization
A unit which retreats after combat becomes disorganized. Its combat strength is halved in both attack and defense until the end of the turn. A Disorganized marker is placed on the unit.
4 - Zones of Control (ZoC)
4.1 Overview
A unit's ZoC affects movement and combat of other [enemy] units.
Most units exert a ZoC into their own hex and the six adjacent hexes, except across a river, even one spanned by a bridge. However, ZoC applies along a river hexside, it is thus forbidden to cross a river hexside if an enemy ZoC is in the hex on the other side of the river. [Units extend a sort of quasi-ZoC across rivers. Your unit does not have to stop or attack when it moves to a hex across the river from an enemy unit, however it may not move across the river without attacking the enemy unit. For example, suppose a German unit in 2818. A Soviet unit which moves into 2918, across the river, does not have to stop or attack, however it could not move into 2919 so long as the Germans exert a ZoC into that hex.]
HQ, and non-HQ units which are alone in their hex (or are stacked with a HQ) and which have only one strength step, exert a ZoC only into their own hex, which still however may not be entered.
4.2 ZoC Effects
- A unit which enters an enemy ZoC must stop its movement. It must then make a Normal Attack (7.3.1) or a Prepared Attack (7.3.2), before the end of the formation's activation phase, and pay the appropriate APs. If it does not have sufficient AP to declare an attack, it cannot enter the ZoC in question, except if it is a hex where attack is not mandatory: city, village or forest ... (see 4.3).
- A unit which begins its movement in an enemy ZoC may leave this ZoC by spending an additional +1 movement point (MP).
- A unit may move directly from one enemy ZoC to another enemy ZoC by paying +2 MP (do not count the +1 MP for leaving an enemy ZoC in this case), provided that this second ZoC is not exerted by the same unit.
- A unit cannot move directly from one ZoC to another ZoC exerted by the same enemy unit (exception, see Breakthrough, 7.8).
- The presence of a friendly unit in an enemy ZoC nullifies it for retreat (see 7.7), and supply lines (see 10.1), but not for movement. Important: the presence of a friendly ZoC does not negate an enemy ZoC.
4.3 ZoC and Combat
- Combat is mandatory for a unit which ends its move in an enemy ZoC during its activation (see 3.4.2 and 4.2).
Exception: a unit in city, village, forest, or difficult terrain is not required to attack enemy units exerting a ZoC upon it.
- A unit which enters an enemy ZoC during an advance after combat is not required to attack.
- A unit which begins its activation phase adjacent to an enemy unit which exerts a ZoC upon it is not required to attack. It may remain in place without being required to attack, may disengage or recover from fatigue.
- A unit or stack of units which retreats into an enemy ZoC as a result of combat loses 1 strength step (for the entire stack) per hex of enemy ZoC traversed (see 7.7) unless a friendly unit is present in the hex.
5 - Stacking
Maximum stacking in any given hex is 4 regiments (or brigades or kampfgruppes) for the Germans and two divisions for the Russians (A Russian division equals two brigades for stacking purposes, a corps equals three brigades). HQ do not count towards stacking.
Stacking limits apply after each of a unit's move actions. However, during each sequence friendly units may freely move through each other. Units in violation of stacking at the end of the sequence are eliminated, owning player's choice as to which units. The various markers do not count toward stacking limits. Exception: armored movement along a road (6.2).
6 - Movement
6.1 Overview
During a movement action, a unit may move using all or part of its movement allowance by spending the movement points (MPs) required for each type of terrain moved through.
Infantry units have a movement allowance of 4 MPs per move action, mechanized units have an allowance of 6 MPs.
A unit is not required to expend all of its MPs during its move action, but if it does not, the remaining MPs are lost for this action.
A unit which wishes to spend several consecutive movement actions may sum the MPs from these actions.
Example: a unit of tanks uses a move action to move through 5 hexes of clear terrain (5 MPs) then a hex of difficult terrain (2 MPs); it may use a second movement action in order to pay the missing MP and continue its movement with the remaining 5 MPs. This is equally true with certain events that cost 1 AP. The unit pays the AP and then continues with its remaining MPs.
6.2 Terrain Effects
Terrain effects on movement and combat are given on the Terrain Effects Table [at the end of these rules].
Roads: For mechanized units, the road movement cost only applies if the unit is alone in the hex. If another unit is stacked with it or it moves through a unit already on the road, it will then pay the cost of the non-road terrain. Mechanized units ignore infantry units when determining whether they are alone in the hex.
Note: if a mechanized unit occupies a road hex in difficult terrain, no other mechanized unit may enter the hex.
Infantry units always benefit from the road bonus. [The Alsace 44 errata clarifies that the Terrain Effects Chart is incorrect in this regard, but the Korsun 44 chart repeats the error.]
7 - Combat
In Korsun 1944, combat occurs during an attack action taken during the activation sequence. Units which attack are termed the Attackers, the units in the attacked hex(es) are termed the Defenders.
7.1 Overview
A unit may attack any adjacent hex containing an enemy unit (the 'target hex') by choosing between the two permitted types of attack (see 7.3).
- Combat is mandatory once a unit or stack (5.0) enters an enemy ZoC (4.2, 4.3), this requirement may be voided by the terrain in the attacker's hex;
- the number of stacked units which can attack from the same hex cannot exceed four;
- a unit may attack any adjacent enemy unit (unless it cannot normally enter the defender's terrain: tanks across an unbridged river or out of a difficult terrain hex that is not connected by road to the defender's hex ...);
- a unit must attack at least one hex containing an enemy unit or stack which exerts a ZoC upon it, but is not required to attack all the hexes which exert a ZoC upon it;
- an enemy unit may be attacked by all the friendly units adjacent to it.
7.2 Multiple Attacks
All the enemy units in the same hex must be attacked together, and must all take part in the defense; their defense strength is the sum of their combat strengths.
Different units attacking from a single hex (i.e. a stack) may attack different enemy hexes. Each attack is resolved separately. However, the combat strength of a unit may not be divided among several combats.
7.3 Attack Actions
There are two possible types of attack. Each type has its own characteristics as explained below and summarized in Table 7.3.
7.3.1 Normal Attack
The unit or stack spends 1 AP to attack a target hex. This attack may benefit from one and only one HQ support. Other adjacent stacks may join in the attack if they have at least 1 AP.
The unit or stack of units may again move and/or attack after its first attack if it has APs remaining.
7.3.2 Prepared Attack
The unit or stack spends 2 APs to attack a target hex. The active player notes the APs expended then may activate other units or stacks within the constraints of the chosen activation (3.1) and available APs (3.4.1), in order to attack the same hex. He then notes the APs expended by these new participants in the attack and declares a Prepared Attack. This attack may benefit from two HQ supports.
Following any required advance after combat (see 7.7.2), units may subsequently attack units adjacent to them or move if they have APs remaining.
7.4 Modifiers
Modifiers are as follows:
- Defender's Terrain: the terrain in the defender's hex provides column shifts. These modifiers are cumulative (example: a village in difficult terrain shifts two columns to the left).
- Quality Difference: the quality rating of one attacking unit minus the quality rating of one defending unit gives a positive or negative die roll modifier. The unit whose quality rating was chosen must suffer the first step loss, if any.
- HQ Support: these supports provide column shifts (see 1.6).
- Improved Positions: An IP provides a 1 column shift to the left [see 12.1].
- Combined Attack: when an infantry unit (mechanized or foot) and an armored unit are stacked, they benefit from a +1 drm when attacking, regardless of the number of 'tank-infantry' groups involved.
All of these modifiers are cumulative.
7.5 Armor Superiority
If at least one attacking or defending unit has an armor modifier, each player chooses one of his units to determine armor superiority. Check the Armor Superiority Table. The attacker rolls one die to determine the final column shifts. If a loss result is obtained, the afflicted side must immediately apply it.
Tiger and Antitank markers influence the determination of armor superiority.
7.6 Combat Resolution
Combat takes place as follows:
- The attacker declares the type of attack and the target hex(es).
- The attacker sums his modified combat strengths.
- The defender sums his modified combat strengths.
- A ratio is made between the attacker's and defender's sums to obtain a basic force ratio. This ratio is always rounded to the nearest whole number (Example: 1.49 to 1 gives a 1:1; 1.50 to 1 gives a 2:1).
- Beginning with the active player, the players add support from their HQ (see 1.6).
- Column shifts are applied to obtain the final strength ratio column.
- The attacker consults the appropriate column on the Combat Results Table (CRT) then rolls 1d6 which he modifies as needed to determine the final combat result.
7.7 Combat Results
Results are given in the form of numbers which can affect the attacker as well as the defender. These numbers indicate the number of strength steps which that force must lose and/or the number of hexes of retreat.
The owning player apportions his combat losses among the stack (but the unit whose quality rating was used must suffer the first loss) and the number of retreat hexes, always beginning with the losses (mandatory or not) and then the optional retreats. The defender apportions his losses and retreats if any, then the attacker does the same (note that for a prepared attack or if the defender accepts losses then the attacker must suffer at least one step loss on any adverse result).
Asterisked * results indicate that at least one strength step must be lost by the defender or attacker before any retreats, regardless of the type of attack.
If the defender chooses to remain in place and lose strength steps, the attacker must take any of his losses and may not retreat.
If armored or mechanized units are present on both sides, then the first or second loss (if the unit whose quality rating was used is not armored/mechanized) must be taken from an armored or mechanized unit.
7.7.1 Retreats
The owning player may decide to retreat instead of suffering step losses. A unit or stack of units which retreats cannot enter a hex occupied by enemy units. It also cannot retreat into a hex impassible to it such as an unbridged river for tanks for example.
Retreats must be done as much as possible within the following order of priorities:
- toward a hex out of enemy ZoC;
- in the general direction of the friendly board edge or towards the unit's HQ;
- toward the hex furthest from an enemy unit.
A unit or stack may retreat into an enemy ZoC, losing one strength step for the entire stack per hex of enemy ZoC moved through, unless this hex is occupied by a friendly unit.
A unit cannot retreat into a hex in violation of stacking limits. If such would be the case, the unit must absorb the entire combat result as losses.
Units from a retreating stack may retreat into different hexes so long as they all retreat the same number of hexes.
Any unit which retreats, whether attacker or defender, becomes disorganized.
A unit which must retreat off the map or into a hex with impassable terrain is eliminated.
7.7.2 Advance After Combat
When a unit or stack of units retreats or is eliminated, it leaves the hex that it was in vacant, as well as a retreat path of varying length depending upon the number of hexes retreated.
Victorious units which took part in the combat may then enter the vacated hex and advance along the retreat path of the defeated unit still respecting impassible terrain (an unbridged river to tanks, for example). If a retreating stack splits into several hexes, the active player is free to follow whichever of the retreat path(s) as he wishes.
Exception: Armored and mechanized units are not required to follow the retreat path of retreating units after the first hex.
This movement ends when they enter an enemy ZoC, except for the initial vacated hex. However, units are not required to attack, regardless of the terrain type.
This movement also ends after crossing a river, even if the enemy retreated further.
In the case of a shared result, the attacker must convert all of his adverse result into step losses if he wishes to remain in place or advance after combat.
Only the attacker may advance after combat and this advance is mandatory (by at least one unit) in the case of a prepared attack.
Example: a 1/2 result indicates that the defender must: lose 2 strength steps and remain in place or lose 1 strength step and retreat all of his units 1 hex or retreat all of his units 2 hexes. The attacker must either retreat 1 hex (only if the defender did not remain in place) or lose 1 step. If he chooses the second option, he may then advance into the defender's vacated hex if the defender retreats.
If the defender retreats 2 hexes, the attacker may follow the defender along his retreat path provided that an enemy ZoC does not prevent him from entering the second hex vacated by the retreat (exception breakthrough, see 7.8). If the result had been 1/2*, the defender would have been obliged to take a step loss before being able to choose whether to retreat a hex or take a second step loss.
Advance restrictions:
- if an enemy unit is eliminated before fulfilling all the requirements of its combat result, the attacker may convert remaining requirements into hexes of advance after combat.
Example: a result of -/3* eliminates a unit which had only one strength step, in this case the attacker may advance two hexes.
- Fatigued units may advance after combat normally.
7.8 Special Result: Breakthrough
If the attacker's result is printed in bold on the CRT, a "breakthrough" has occurred in the enemy front. A Breakthrough marker is then placed in the hex formerly occupied by the enemy unit before its elimination or retreat. This marker nullifies all enemy ZoC in the hex it occupies and the six adjacent hexes.
Units advancing after combat and friendly units activated during the same operations phase may then move through the breakthrough hex or the six adjacent hexes without being stopped by any ZoC exerted into these hexes.
This Breakthrough marker is removed at the end of the turn in which it was placed.
8 - Command
8.1 Command Range
Russian HQ have a command range of six hexes, German HQ have a command range of eight hexes (range exclusive of the HQ's own hex but inclusive of the hex of the unit concerned).
In order to be in command, a unit must be able to trace a Line of Command (LoC) to its HQ. This LoC may pass through any terrain or enemy ZoC but not through an enemy-occupied hex.
At the start of each turn, both players check the command status of all their units. Units which are in command at the start of the turn remain so for the entire turn, even if they move out of command range.
8.2 Effects
A unit which is unable to trace a LoC to its HQ at the start of the turn gets an Out of Command marker. It cannot be activated during a "formation" activation, only during a general-type activation. In addition, an Out of Command unit must pass a C3I check to be activated (see 9.4). A Russian unit which is out of command cannot receive replacements.
9 - Doctrine
9.1 Overview
The doctrines of the various belligerents require some modifications or restrictions to the base rules; they are indicated by nationality.
9.2 Russians
Activation by formation: In addition to the units of its formation, a Russian HQ may activate two independent units within command range. Use Activated markers.
General activation: 4 units.
9.3 Germans
Activation by formation: A German HQ may only activate units of its formation.
General activation: 6 units.
A German unit which is unable to trace a LoC to its HQ at the start of the turn but which is able to trace a LoC to another HQ, is considered to be in command. However, it may only be activated during a general-type activation.
9.4 C3I Check for Out of Command Units
Out of Command units must pass a C3I check to be activated. The player rolls 1d6 and must roll less than the unit's quality rating. Example: for a quality rating of 5, the player must roll 1, 2, 3, or 4.
10 - Supply
10.1 Overview
A LoS may pass through any type of terrain usable by a mechanized unit but cannot pass through an enemy-occupied hex or through an enemy ZoC, unless this hex is occupied by a friendly unit.
Unit supply is checked during the supply and command phase.
10.2 Supply
For a unit to be supplied on Mud weather turns, it must be able to trace a LoS to a supplied HQ within command range (depending on nationality) or to a road within 1 hex and leading to a friendly board edge, regardless of distance.
For a HQ to be supplied on Mud weather turns, it must be able to trace a LoS to a road within 2 hexes, which itself connects to a friendly board edge (south for the German, east or west for the Russian) or the Korsoun airfield (once the Kessel has been established, see 14) regardless of distance.
During Snow weather turns, a unit must be able to trace a LoS to a HQ within command range (no limit related to roads) or to a board edge. A HQ must be able to trace to a friendly board edge.
10.3 Effects
If a unit or HQ is unable to trace a LoS at the start of the turn, it gets an Isolated marker. The consequences are as follows:
- An armored or mechanized unit or HQ has only 2 AP (an isolated infantry unit still has 2 AP);
- All units attack normally but cannot make prepared attacks;
- All units defend normally.
- Isolated Russian units may not receive replacements.
An already Isolated unit or HQ which is unable to trace a LoS at the start of the turn gets an Unsupplied marker, the consequences are as follows:
- An armored, mechanized, HQ or infantry unit has only 1 AP;
- All units attack with only half their combat strength and cannot make prepared attacks (they do not have enough AP to do this);
- Units defend with half their combat strength.
- Unsupplied Russian units may not receive replacements.
An unsupplied HQ cannot receive support markers to distribute to its units in the support phase.
11 - Fog of War (optional rule)
In order to limit players' knowledge of enemy dispositions and strengths, the following rules are used.
11.1 Enemy Stack Inspection
Players may only examine the contents of an enemy stack under the following conditions:
- the stack is engaged in combat with friendly units (at the moment when the attack type is declared);
- if a friendly unit exerts a ZoC on the enemy stack.
11.2 Stacking Order
A player may arrange his stacks in whatever order he wishes, for example putting the weakest unit on top in order to hide stronger units.
Note: players may mutually agree to use the game markers (Unsupplied, Activated, Fatigued, etc.) to hide the top unit of a stack.
12 - Defensive Works
12.1 Improved Position
A unit can establish an Improved Defensive Position (IP) at any point in its activation. To do so it spends 1 AP and cannot be in a hex where it is required to attack (see 4.2).
Each unit which wishes to enter IP must spend 1 AP. An IP cannot be transferred from one unit to another. If a stack of units wishes to enter IP, each of the units in the stack must spend the required AP. If some units in a hex are in IP and others are not, the IP bonus does not apply in combat. Units may freely leave an IP in order to perform normally (i.e. to be able to move in a new activation).
The unit or stack in IP gets a beneficial modifier for combat (see the CRT).
13 - The Pocket (Kessel)
13.1 Overview
If at the start of a turn, the Russian player is able to trace a continuous path of hexes free of German units from the east map edge to the west map edge, and if the German units north of this line cannot trace a LoS to the south edge, the German units are trapped in the pocket (Kessel).
13.2 Gruppe Stemmermann
All of the units in the pocket are considered to belong to a single formation. HQ within the pocket are removed from the game. In their place, the German player places HQ Stemmermann on the map within the pocket. Support markers that were attached to the removed HQ are now attached to HQ Stemmermann. If there were no HQ within the pocket, HQ Stemmermann still enters the game, with no support markers.
Units outside of the pocket, which belonged to a formation whose HQ has just been removed, for the rest of the game are considered to belong to the formation of the HQ which was nearest to them at the moment the pocket closed.
13.3 German Reinforcements
When Gruppe Stemmermann is first activated, the player may have the four counters [Ger/5SS, Wallonie SS, 112/KAB, 255/KAB] enter via the north edge of the map.
13.4 Aerial Supply
The Luftwaffe will supply the pocket by air, as long as the Korsoun airfield is occupied by a German unit.
In each supply phase, the German player rolls a die on the Aerial Supply Table, to know how many AP the units in the pocket will have, and the modifier for HQ support checks for HQ Stemmermann. Supports which return two turns later can only be attached to HQ Stemmermann.
[Editor's note: the rules refer to the Aerial Supply Table, which is printed on the tables sheet as "AIR SUPPLY (14.0)"; the table is reproduced in the final section.]
13.5 Russian Movement Restrictions
Until the pocket has been formed, the Russian formations 52 A and 27 A cannot be activated. This restriction is lifted at the start of Turn 4, if the pocket has not been formed by then.
14 - Russian Replacements
Each turn beginning Turn 3, during the Supply and Command phase the Russian player receives as replacements one step of armor and two steps of infantry. These steps must be used immediately.
An armored replacement step allows an armored or mechanized infantry unit to recover one lost step.
An infantry replacement step allows an infantry unit [not a mechanized infantry unit] to recover one lost step.
A unit may only receive a single replacement step per turn. The unit cannot be Isolated, Unsupplied or Out of Command.
15 - Weather
The weather for each turn is indicated on the turn track.
The basic weather condition during the game is Snow. When the weather is Mud, armored units have their base AP allotment reduced to 2 AP. Terrain costs are also changed (see the Terrain Effects Table).
16 - Alarm Abteilung [Alert Battalions]
The German player has two Alarm Abteilung units.
These units have only a single strength step (so no ZoC) and receive only one AP (which cannot be modified by the weather). The player may place them on the map within command range of any HQ at any time, even during a Russian activation.
17 - The 24th Panzer Division
As discussed in the historical article, the 24th Panzer Division was returned to the Nikopol sector before it had even fought at Korsun. The use of this division, in good shape relative to most German units, could have been decisive and makes an interesting hypothesis to study.
The three units of the 24 Panzer Division are optional. They may be used if both players agree. In that case they enter the game on Turn 5.
18 - Scenarios
18.0 Scenario Special Rules
The Russian player has the initiative on Turn 1. He may activate two formations in succession if he wishes (due to surprise).
There is no supply and command phase on Turn 1.
On Turn 1, the HQ of the German 7th AK is not on the map. The units of this formation therefore on Turn 1 may only be activated using a general-type activation. On Turn 2, they become commanded once their HQ has entered the game.
18.1 German Placement
7 AK [Armee Korps, note that the HQ is a Turn 2 reinforcement]
- 0117 172/75
- 0216 80/34
- 0316 107/34
- 0415 253/34
- 0413 326/198
- 0511 305/198
- 0714 308/198
- 0915 KG 82
42 AK
- 0806 HQ 42 AK
- 0502 332/KAB
- 0304 245/88
- 0306 248/88
- 0409 246/88
- 0308 417/168
- 0401 213 Sec
- Free Cossacks ["Cosaques" cavalry]
11 AK
- 2115 HQ 11 AK
- 2203 West/5SS
- 2208 676/57
- 2308 217/57
- 2507 179/57
- 2708 124/72
- 2809 266/72
- 2811 105/72
- 2912 544/389
- 2913 545/389
- 2914 546/389
- Free KG Koller/5SS
47 PzK [Panzer Korps]
- 2719 HQ 47 PzK; 103/14 Pz; 108/14 Pz
- 2718 KG/14 Pz
- 2917 3/3 Pz
- 2918 15/11 Pz; 4/11 Pz; 110/11 Pz
- 3015 6/3 Pz; 394/3 Pz
- 3118 KG 106
- 3216 585/320
- 3317 586/320
- 3318 587/320
- 3319 KG 282
Initial support markers: 2 Artillery, 1 StuG.
18.1.1 Reinforcements
Reinforcements enter through hex 0321 (units marked with a *), or via hexes 2121/2321/2820 (units marked with a #).
-
First activation of HQ Stemmermann [all units are from 11 AK]:
- Ger/5SS mech
- Wallonie mech
- 112/KAB inf
- 255/KAB inf
These units enter along the north edge of the map between hexes 1101 and 2001 [see 13.2].
-
Turn 2
- * 7 AK HQ
- * 202/75 inf [7 AK]
- * 222/75 inf [7 AK]
- 1 each Tiger, StuG and Nebelwerfer support markers
-
Turn 3
- * 3 PzK HQ
- * 17 Pz Div./3 PzK (-1 AP) [39/17 Pz armor; 40/17 Pz mech; 63/17 Pz mech]
- 1 Artillery support marker
-
Turn 4
- # 13 Pz Division/47 PzK [4/13 Pz armor; 66/13 Pz mech; 93/13 Pz mech]
- * 376 Infanterie Division/47 PzK [672/376 inf; 673/376 inf; 767/376 inf]
- # 1/26 Pz/47 PzK
- # 16 Pz Division/3 PzK [2/16 Pz armor; 64/16 Pz mech; 79/16 Pz mech]
18.2 Russian Placement
27 Army [yellow]
- 0105 27 A HQ
- 0411 180
- 0205 159 RF
- 0310 337
40th Army [dark blue]
- 0114 40 A HQ, 163, 232
- 0115 42 Guards
- 0116 74
- 0215 133
- 0315 58
6th Tank Army [dark green] [Note that the HQ is a Turn 2 reinforcement]
- 0213 136
- 0313 167
- 0314 359
52nd Army [red]
- 2806 52 A HQ
- 2302 294
- 2304 254
- 2807 373
4th Guards Army [white]
- 3310 4 GA HQ
- 3010 7 Guards Para; 62 Guards
- 3011 5 Guards Para; 375
- 3012 252
- 3112 31; 69
53rd Army [light blue]
- 3414 53 A HQ
- 3012 110 G
- 3013 214; 25 G
- 3014 66 Guards
- 3014 1 G Para
- 3115 138
- 3115 14
- 3315 213
- 3316 233
- 3417 116
5th Tank Army [black]
- 3413 5 Guards TA HQ; 18 TC (3 identical counters, 2 reduced)
- 3313 20 TC (3 identical counters, 1 reduced) [Two of these are still missing from the corrected counters - the reverse side quality should be 4, not 2]
- 3314 29 TC (3 identical counters, 1 reduced)
Independent units [light green]
- 3311 11 G Cav; 12 G Cav
- 3312 63 Cav
Initial support markers: 2 Armored brigade ['Brigade blindée'], 3 Katusha, 2 Antitank ['Antichars'].
18.2.1 Reinforcements
- Turn 2
- 6 TA HQ; 5 Guards TC [6 TA] (3 identical counters, 2 reduced); 5 MC (3 counters, 1 reduced) enter west edge on/between 0118 and 0113)
- 38, 240, 340 [all from 40 A] (west edge)
- 2 Katusha markers
- Turn 3
- 6 and 78 [53 A] (east edge)
- 4 G Para [40 A] (west edge)
- Turn 4
- 94 G, 84 and 6 G Para [all from 5 TA] (west edge)
- Turn 6
- 3 and 16 TC [independent units] (west edge)
- Support markers: 1 Armored brigade ['Brigade blindée'], 1 Katusha, 1 Antitank ['Antichars']
- Turn following formation of the pocket
- 54 RF and 206 [both 27 A] (via north edge on/between 0501 and 1901)
18.3 Short Scenario: The Russian Encirclement
- Length: 3 turns, from Turn 1 through Turn 3.
- Victory conditions:
- Russians have formed a pocket which at the moment of its formation contained at least 12 units: 1 VP
- Russians destroyed at least 6 units of the 11 AK and 42 AK: 1 VP
- Russians have captured the Korsun airfield: 1 VP
- Victory level:
- 0 VP: German victory
- 1 VP: Russian tactical victory
- 2 VP: Russian operational victory
- 3 VP: Russian strategic victory
18.4 Long Scenario: The Battle of Korsun
- Length: 9 turns, from Turn 1 through Turn 9.
- Victory conditions: At the end of Turn 9, the Russians receive the following VPs:
- Pocket still exists (i.e. HQ Stemmermann cannot trace a LoS to the south edge): +1 VP
- All of the units in the pocket have been destroyed: +2 VP (cannot be combined with the first victory condition, above)
- Korsun has been captured: +1 VP
- High German armored losses (8 or more German armored and/or mechanized units have been eliminated, armor units count double): +1 VP
- Pocket was never formed (i.e. HQ Stemmermann never entered the game): -1 VP
- Russians destroyed fewer than 8 units of 11 AK and 42 AK: -1 VP
- Victory level:
- -2 VP: German strategic victory
- -1 VP: German operational victory
- 0 VP: German tactical victory
- 1 VP: Draw
- 2 VP: Russian tactical victory
- 3 VP: Russian operational victory
- 4 VP: Russian strategic victory
Reference Tables
Transcribed from the companion tables sheet (English translation, Grognard.com). The symbol printed as "•" in the Armor Superiority table has no key on the sheet and is kept as printed.
Terrain Effects Table (0.2)
| Terrain | Snow Infantry | Snow Mech | Mud Infantry | Mud Mech | Combat effects |
|---|---|---|---|---|---|
| Clear | 1 | 1 | 1.5 | 2 | None |
| Forest ("Foret") | 2 | 3 | 2 | 4 | -1 col, Attack optional |
| Marsh ("Marais") | 3 | impassable | 4 | impassable | -1 col, Attack optional |
| Hill ("Colline") | 2 | 2 | 3 | 3 | -1 column |
* "Attack optional": A unit in this terrain is NOT required to attack enemy units which exert ZoC into the hex.
Attack Types (7.4)
| Type | Modifier | Support | Attacker results | Advance |
|---|---|---|---|---|
| Normal | - | 1 marker | Retreat possible | Optional |
| Prepared | +2 col | 2 markers | Retreat possible, but at least 1 loss | Mandatory |
Doctrine (9.0)
| Nationality | Command Range | Formation Activation | General Activation |
|---|---|---|---|
| Germans | 8 | Entire | 6 |
| Russians | 6 | Entire +2 | 4 |
Actions (3.4.1)
| Action | APs required |
|---|---|
| Movement | 1 |
| Normal attack | 1 |
| Prepared attack | 2 |
| Enter IP | 1 (12.1) |
| Recover fatigue | 2 (3.5.2) |
Air Supply (14.0)
Roll 1d6 in the German Aerial Supply check (see 13.4).
| 1d6 | Armor/mech APs | Inf APs | Support check |
|---|---|---|---|
| 1,2 | 1 | 1 | +2 |
| 3 | 1 | 1 | +2 |
| 4 | 2 | 1 | +2 |
| 5 | 1 | 1 | +1 |
| 6 | 2 | 2 | +1 |
| 7 | 2 | 2 | 0 |
+1 to die roll on turn the Kessel is declared.
Armor Superiority (7.5)
Rows are the armor superiority difference (attacker minus defender); columns are the die roll (0 to 7).
| Difference | 0 | 1 | 2 | 3 | 4 | 5 | 6 | 7 |
|---|---|---|---|---|---|---|---|---|
| -3 | 0 col† | -1 col | -1 col | -1 col | -1 col | -1 col* | -1 col* | -2 col* |
| -2 | 0 col† | 0 col | -1 col | -1 col | -1 col | -1 col* | -1 col* | -1 col* |
| -1 | 0 col† | 0 col† | -1 col |
Die roll modifiers:
- +1 if defender using Tiger or antitank marker
- -1 if attacker using Tiger marker
- * 1 attacker armor loss
- † 1 defender armor loss
Combat Results Table (CRT) (7.6)
Results are attacker/defender. Column headings are the final force ratio.
| 1d6 | 1:4+ | 1:3 | 1:2 | 1:1 | 2:1 | 3:1 | 4:1 | 5:1 | 6:1 | 7:1 | 8+:1 |
|---|---|---|---|---|---|---|---|---|---|---|---|
| -0 | E/- | *4/- | *3/1 | *3/1 | *3/1 | *2/- | *2/1 | 1/1 | -/1 | -/1 | -/1 |
| 1 | *4/- | *3/- | *3/1 | *2/- | *2/- | *2/1 | 1/1 |
- # : combat steps lost and or optional retreat (7.5, 7.5.1)
- Bold: Breakthrough (7.5.3)
- *: 1 step must be lost by the afflicted side(s)
- E: entire stack is eliminated
Combat Modifiers (7.4)
| Modifier | Effect |
|---|---|
| Terrain | See Terrain Effects Table (0.2) |
| Prepared attack | +2 col |
| Combined arms attack | +1 drm |
| Armor superiority | See Armor Superiority table |
| Unit status | See table (1.4) |
| Artillery, Nebelwerfer, Katyusha support markers | +/- 1 or 2 cols |
| Quality difference | +/- drm |
| Improved Position | -1 col |