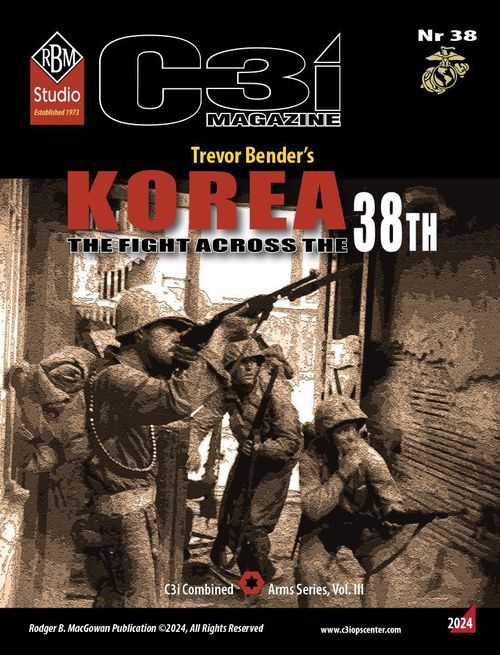
Korea: The Fight Across the 38th
Korea: The Fight Across the 38th Rulebook
Table of Contents
Table of Contents
- 0.0 Using These Rules
- 1.0 Introduction
- 2.0 General Course of Play
- 3.0 Game Equipment
- 4.0 Sequence of Play
- 5.0 Victory Conditions
- 6.0 Setting Up the Game
- 7.0 Zones of Control
- 8.0 Movement
- 9.0 Combat
- 10.0 Reinforcements & Replacements
- 11.0 Naval Transport & Amphibious Assault
- 12.0 Unit Isolation & Attrition
- 13.0 Harsh Winter Conditions
- Designer's Notes
- Further Reading
- Further Playing
0.0 Using These Rules
Bold text notes new gaming terms when they are initially defined, along with other important information.
The instructions for this game are organized into major "Rules" sections and represented by the number to the left of the decimal point (e.g., rule 4.0 is the fourth rule). These rules generally explain the game's components, procedures for play, the game's core systems and mechanics, how to set it up, and how to win.
With each Rule, there can be "Cases" that further explain a rule's general concept or basic procedure. Cases might also restrict the application of a rule by denoting exceptions to it. Cases (and Subcases) are an extension of a Rule shown in the way they are numbered. For example, Rule 4.1 is the first Case of the fourth Rule; and Rule 4.1.2 is the second Subcase of the first Case of the fourth Rule. Examples of play are provided throughout the rules.
Text in italics, like this, provides the voice of the game's designer, who is addressing you to explain an idea or concept that is not, itself, a Rule or a Case.
1.0 Introduction
Operation Pokpung was the North Korean attempt to forcibly reunify the Korean Peninsula through a rapid, largely infantry based, Blitzkrieg-style offensive in the summer of 1950. This attack, and the following United Nations (UN) and subsequent Communist Chinese interventions, are the subject of Korea: The Fight Across the 38th (or just Korea).
A full game is comprised of 13 monthly turns and portrays the elastic back-and-forth operations that ranged across the Korean Peninsula. These operations are in some ways comparable to the wild swings of fortune seen in the Western Desert of WWII, as covered in the game Desert Victory: North Africa 1940-42, found in C3i Nr36. In many ways, the Korean Conflict was the opening salvo in the nearly five-decade Cold War that followed, with both US and Soviet interests pitted against each other via proxy or volunteer forces. The outcome of this struggle would largely determine the next phase of the Communist efforts to dominate Southeast Asia.
Korea is played on a map of the Korean Peninsula where the battles were fought. It uses playing pieces that represent the actual military units that participated in this campaign. Each player represents the combined General Staff of their respective armies. The individual ground units represent divisional units of approximately 10,000 soldiers for the Korean and Chinese armies, and significantly more for the Allied divisions. The air units abstractly represent the air components dedicated to the campaign at that given point in time.
Korea uses similar mechanics to Battle for Kursk: The Tigers are Burning (as published in C3i Magazine Nr34 (C3i Nr34), which was based on Battle for Moscow (as published in C3i Nr25), and as such may be considered an expansion of that game in a series which includes Objective: Kiev found in C3i Nr26. Nevertheless, Korea introduces new terrain types, revised Logistics, and Air Power to allow players to explore the options available to the historical combatants in this conflict. It also introduces new Combat Capabilities such as Surprise and Offensive turns as well as combat odds shifts to showcase the effects of Combined Arms and large concentrations of troops.
2.0 General Course of Play
Korea is a two-player game: One player assumes the role of the Allies (South Korea, the United States and associated UN contingents including Commonwealth forces) and the other player assumes the role of the Communists (North Korea and the Chinese interventionist forces known as the People's Volunteer Army (PVA)).
Players should decide between themselves who will play each side or determine it randomly. Each player moves their units and executes attacks on enemy units in turn, attempting to fulfill the game's Victory Conditions. To move from one space to another, each unit expends a portion of its Movement Allowance.
Combat is resolved through Battles by comparing the total Strength Points of adjacent opposing units and expressing the comparison as a simplified probability ratio (odds), which could then be modified up or down columns based on other factors. A die is rolled, and the outcome indicated on the Combat Results Table (or CRT) is then applied to the units involved.
3.0 Game Equipment
Parts Inventory:
- One 22" x 34" mapsheet (with the game map and the tracks required for play)
- One set of 105 5/8" square game pieces
- Two double-sided Player Aid Cards (PAC) with all of the charts required for play
- One Rules booklet
Not included is one 6-sided die needed for resolving battles.
3.1 The Game Map: The map portrays the Korean Peninsula where the major battles were fought in the second half of 1950 and the first half of 1951. A hexagonal grid is superimposed on the terrain features on the map. These hexagonal spaces (referred to as "hexes" for short) define units' positions, just like the squares of a chessboard. The map also shows important terrain such as broken, rough, mountain, cities, rivers, and roads. Explanations of the terrain features are found on the Terrain Effects Chart (or TEC) printed on the back of the PAC, and a Terrain Key is provided along both edges of the map as a mnemonic.
3.2 Game Charts & Tables: Various game aids are provided for the players to simplify and illustrate certain game functions. These include the CRT, TEC, Turn Track, Sequence of Play, etc. All charts and tables are printed on the double-sided PAC and explained where presented in the appropriate rules section, with some tables also printed on the mapsheet.
3.3 The Playing Pieces: The playing pieces represent the actual military units that fought in this campaign. The numbers and symbols on the ground combat playing pieces represent the strength and type of unit simulated by that particular playing piece. The playing pieces shall henceforth be referred to as units.
The Allied player controls the light brown (South Korean), green (American), tan (Commonwealth) and blue (other United Nations) units. The Communist player controls the dark brown (North Korean) and red (Chinese) units.
Unit Type is either infantry, armor or air.
- Infantry: Composed primarily of leg formations.
- Armor: Composed primarily of armored and truckborne formations, represented by the silhouette of a typical armored unit of that nationality at that time.
- Air: Composed of the type of aircraft that were commonly entering the theater of battle at that time as represented by the aircraft silhouette.
Combat Strength measures a unit's value in battle as expressed in Strength Points (higher numbers are stronger).
Movement Allowance determines how far the unit can move in hexes, subject to Terrain restrictions. (See TEC.)
Unit Size and ID (identification) are included purely for historical interest and have no effect on game play.
All units have two sides: A full-strength (front) side and a reduced-strength (back) side; the reduced-strength side is indicated by a white horizontal band across the middle of the counter and contains values that are about half the Combat Strength of its full-strength side. Losses in combat can reduce a full-strength unit to a reduced-strength unit, by flipping the counter over to its back side. Replacements can turn a reduced-strength unit into a full-strength unit, by flipping the counter over to its front side. Air units show USED on their back side to signify that they have already been expended this game turn, but are never damaged or destroyed.
3.4 Markers: There is a Turn marker to track the current turn and designate the phasing player. There are also 10 Control markers used to designate which side controls a City as an aid in determining In Communication status and Isolation. These markers do not count as a unit for stacking purposes.
The six-sided die (which players must provide) is used only with the CRT to determine the result of attacks. The die has nothing to do with movement of units.
4.0 Sequence of Play
Game Length: There are thirteen regular Game Turns in a full game of Korea.
Time Scale: Each Game Turn represents one calendar month of real time.
How the Turns Work: Each Game Turn is divided into nine phases that are performed in the exact order listed below. All actions in one phase must be finished before the next phase can begin. Phases 1-4 are the Communist Player Turn; Phases 5-8 are the Allied Player Turn; Phase 9 is performed first by the Communist player and then by the Allied player.
Communist Player Turn
- Reinforcements & Replacement Phase. The Communist player receives reinforcements & replacements (see 10.0).
- Pre-Combat Movement Phase. All Communist units that are eligible to move in this phase (see 8.1 and the PAC) may move.
- Combat Phase. Communist units may attack (see 9.0).
- Movement Phase. All Communist units may move, including units that moved in the Pre-Combat Phase (see 8.0).
Allied Player Turn
Flip the Game Turn marker to the Allied side.
- Reinforcements & Replacement Phase. The Allied player receives reinforcements & replacements (see 10.0).
- Pre-Combat Movement Phase. All Allied units that are eligible to move in this phase (see 8.1 and the PAC) may move.
- Combat Phase. Allied units may attack (see 9.0).
- Movement Phase. All Allied units may move, including units that moved in the Pre-Combat Phase (see 8.0).
Administrative
- Housekeeping Phase. Beginning with the Communist player, check for Unit Isolation & Attrition (see 12.0). Flip all USED Air Power units to their fresh side. Advance and flip the Game Turn marker to the Communist side or, if the last turn was played (Turn 13), stop and determine the winner (see 5.0).
Commonly used Abbreviations & Definitions
- ROK: Republic of Korea
- UN: United Nations
- CMWLTH: Commonwealth
- KPA: Korean People's Army
- PVA: People's Volunteer Army
- Comm.: Communists
- RP: Replacement Points
- Off.: Offensive
- US: United States
- Allied
5.0 Victory Conditions
5.1 Decisive Victory: Either side can achieve an Immediate Decisive Victory by capturing their opponent's Star City (capturing Pusan for the Communists or Manp'o for the Allies).
5.2 Substantive Victory: Barring a Decisive Victory, then at the end of Turn 13 (July 1951), a Substantive Victory is awarded to the player who controls their opponent's capital (controlling Seoul for the Communists or Pyongyang for the Allies). If both players control the other's capital, it is considered a Communist Substantive Victory.
5.3 Marginal Victory: If neither capital is controlled by the opposing side, the player who controls the greater number of hexes on their opponent's side of the 38th Parallel start line is granted a Marginal Victory, with a tie considered a Communist Marginal Victory. Do not count the half hexes that are split by the 38th Parallel line. Controlled hexes are typically those that are in or behind friendly lines. If a more precise definition is needed, a controlled hex for this purpose is one that is occupied by a friendly unit that is In Communication (10.0) or is closer to a friendly unit that is In Communication than an enemy unit that is In Communication if tracing a direct path of hexes from that hex and without traveling through an enemy unit or ZOC. Units that are not In Communication are not counted for being the closest unit, though they and their ZOCs could still block the tracing of other enemy units' paths. A hex adjacent to an In Communication unit from both sides is not controlled by either side.
Marginal Victory Calculation Example: This shows a section of the map at the end of a turn late in the game. The + symbols show which hexes count for one side or the other. The X symbols are hexes that don't count, due to being divided by the 38th Parallel, being isolated, or unoccupied hexes in contested zones of control. On this section of the map, each side has five controlled hexes that count toward Marginal Victory, with the Communist player winning ties.
PLAY NOTE: The determination of friendly controlled hexes at the end of the game should be fairly obvious and intuitive in most situations, but if not clear, use common sense.
5.4 Armistice Discussions: At any point in the game a player may engage their opponent in armistice style discussions to postulate on the future course of the game, the likely winner and the level of victory. Players may agree to "roll the die" on key future battles to see what the outcome would be, for example, in an effort to retake a capital.
PLAY NOTE: It's possible that one side or the other may have secured a Substantive or a Marginal Victory by Turn 10 or 11, with very little chance that their opponent could reverse this. These armistice discussions are not unlike how the Korean conflict ended, where after two years of negotiations, a cease fire and new border were agreed to, that gave the Allies a small Marginal Victory in game terms of 9 hexes to 7 (see the red dashed DMZ end line for the front line at the actual end of the conflict).
6.0 Setting Up the Game
Procedure
6.1 The Allied player sits on the east side of the map and the Communist player on the west side. Place the Turn marker, Communist side up, on Turn 1 of the Turn Track.
6.2 Take all the starting military units (those with a 4-digit hex grid coordinate number in the top right corner) and place them in their respective hexes on the map. The South Korean units will all start on their reduced-strength back side, and the North Korean units will all start at full-strength. No more than one unit will start in each hex.
6.3 All of the remaining units will be reinforcements that enter the game later per a pre-determined schedule and should be placed on their respective side's boxes (or just off-map if that is easier) near the turn in which they enter the game per the number in the top right corner of the unit. Note: Units with a colored triangle in the top right corner start on their reduced-strength back side. EXCEPTION: Place the 24 Chinese PVA units that enter on Turn 6 in the map space marked China, so they do not clutter the Turn Track.
7.0 Zones of Control
General Rule
Each unit has a Zone of Control (ZOC) that consists of the six hexes surrounding it (see diagram below), including hexes occupied by enemy units. Enemy Zones of Control have important effects on movement, combat, In Communication and replacements. Friendly units do NOT negate enemy Zones of Control in the hex they occupy for any purpose. Zones of Control do NOT extend across all water-hex sides (such as 1919/1920). Units retain their ZOCs regardless of their In Communication status.
7.1 Movement Effect: A unit entering an enemy Zone of Control (EZOC) must immediately end its movement for that Movement Phase (see 8.3). On a subsequent Movement Phase, units may freely leave EZOCs as their first movement action. As such, a unit can move directly from one hex in an EZOC directly to another hex in an EZOC but must then stop (this can be EZOCs of the same, or different enemy units).
7.2 Combat Effect: Units are eliminated if they end their retreat in an EZOC. Retreating units lose one step when retreating through an EZOC (see 9.3). Also, if all units involved in a battle from one side are not In Communication (see 9.2.2), then the combat odds are shifted one direction in favor of the other side. (If all units for both sides in a battle are not In Communication, then the shifts cancel each other out.)
7.3 Effect on Replacements: Zones of Control also affect how a path can be traced to allow for Replacements (see 10.0).
7.4 Task Force Smith: This American reinforcement enters on Turn 1. It has no combat value and projects a ZOC in its own hex only (as symbolized by the white oval around its counter); thus, an enemy unit could enter its hex but would then have to stop. It is placed in Pusan and then during Pre-Combat movement it is moved along the road network as far as desired if its path is free of enemy units and EZOC to a location the Allied player chooses, where it remains. The last hex moved into could be in an EZOC. The TF Smith counter is removed at the end of any Communist Pre-Combat Movement or regular Movement Phase in which an enemy unit is in its location or adjacent to it. If this does not occur, it is removed at the beginning of Allied Reinforcements & Replacement Phase of Turn 2 when its parent unit, the US 24th Division arrives as a reinforcement. TF Smith is non-replaceable as signified by the black dot on its counter and may not be brought back into play again.
8.0 Movement
General Rule
Units are moved during the Movement Phases (i.e., Pre-Combat Movement and Movement Phase) of each Game Turn. Movement works essentially the same way in each phase. Each unit has a Movement Allowance that represents the distance in hexes it can move in each eligible Movement Phase, subject to Terrain Effects. See the Terrain Effects Chart on the back of the PAC for an explanation on the various costs in hexes of each terrain type. In a Movement Phase, the player moves any or all their units that qualify (i.e., only certain units qualify for Pre-Combat movement, while all units of a given side may move during the regular Movement Phase). Units move one at a time, from hex to hex, in any direction or combination of directions up to the limit of their Movement Allowance. A unit may always move 1 hex across an allowed hex side, even if that space requires more hexes of movement than that unit currently has (such as crossing a river to enter a mountain hex).
Design Note: Korea uses the same rules language and logic as the original introductory Battle for Moscow game, designed by Frank Chadwick in 1985. Thus, movement costs are paid in "hexes" rather than the more common Movement Points but are essentially equivalent in game terms.
8.1 Pre-Combat Movement: In the Pre-Combat Movement Phase, only certain units are allowed to move as follows:
- Surprise: On a Surprise turn, all units of a given side may move. Surprise is designated by a star or asteriks on a player's side of the Turn Track. (See mapboard Turn Track.)
- Armor: Armor units may move during every Pre-Combat Movement Phase.
- Naval Transport / Amphibious Assault: UN units (including reinforcements and replacements starting in a port hex, but not South Korean units) may use Naval Transport (Turn 2 or later) and American units (only) may conduct Amphibious Assault (Turn 4 or later).
- Reinforcements: All arriving reinforcements may use Pre-Combat Movement.
- Replacements: All newly arriving replacements (but not units that started on the map and were flipped to their full-strength front side) may move.
A unit that qualifies to move for multiple reasons during a Pre-Combat Movement Phase receives no extra benefit and may only use its Movement Allowance once during that phase.
8.2 Movement Restrictions: The following restrictions apply to both the Pre-Combat and regular Movement Phases.
8.2.1 Enemy Units: A unit can never enter a hex containing an enemy unit.
8.2.2 Stacking: A unit can enter a hex containing a friendly unit, but there can only be one unit in a hex at the end of each phase. Stacking can also be exceeded during other phases but must be enforced at the end of each phase, with the owning player removing units to their Eliminated Units Box until legal stacking is achieved.
8.3 EZOC: A unit entering an Enemy Zone of Control (EZOC) must immediately end its movement for that Movement Phase (see 7.1). There is no penalty or effect for leaving an EZOC.
PLAY SUGGESTION: Sometimes it helps to turn a unit slightly sideways after receiving replacements or moving as a mnemonic that that piece has already taken an action in that phase.
Movement Example (Refer to the back side of the Player Aid Card for terrain movement costs): Here are some ways that the North Korean player could move their units during the Pre-Combat Movement Phase of the first turn. The numbers in the illustration show how many hexes of movement (frequently called Movement Points (MP) in other games) each unit has spent from its Movement Allowance (the second number just beneath the counter's Unit Type symbol) to enter that hex. Since Turn 1 is a Surprise turn (as shown by the red star on the Turn Track) all North Korean units get to move in this phase.
- A) The 1st Infantry Division spends all of its movement points to move one hex in example A. Since units cannot move any further after entering a new Enemy Zone of Control (EZOC), it must stop there.
- B) In example B, the 105th Tank Division spends ½ MP for each of the two road hexes it traverses, since it started on a road and each hex was connected to the next road hex, and then one more MP to traverse clear ground, and finally a total of 2 more MPs (4 total) to cross the river into clear terrain. The 105th Tank Division must stop there because it has entered an EZOC; it could not use its last 2 MPs to move elsewhere or enter an enemy occupied hex. Also, a friendly unit may only enter another friendly unit's hex as long as that hex only has one unit remaining at the end of that phase.
- C) In example C, the 4th Division expends 2 MPs to enter hex 2115, 1 to cross the river and 1 to enter the clear terrain.
- D) The 3rd Division enters hex D by spending 3 MPs to enter a rough hex and must stop due to the presence of an EZOC.
- E) In example E, the 2nd Division spends 4 MPs (1 to cross the river and 3 to enter the rough hex), and even though it has not yet entered an EZOC, it must stop there as it has consumed its entire Movement Allowance for this phase.
9.0 Combat
General Rule
In each Combat Phase all friendly units (those owned by the phasing player) may attack adjacent enemy units. Attacking is completely voluntary – units are never compelled to attack. A Battle is an attack on one enemy defending unit by any or all of the attacking player's units, that are adjacent to that Battle hex. A 6-sided die is used to determine the outcome of Battles, utilizing the Combat Results Table printed on the map.
Procedure
First, the "attacker" (i.e., the Communist player during their Combat Phase, and the Allied during their Combat Phase), announces all of their intended Battles; that is, they declare in advance which enemy units they will attack and which of their own ("friendly") units will attack them.
PLAY SUGGESTION: Players may find it helpful to predesignate their attacks by pointing the tops of their units at the defending hex being attacked as a mnemonic that those units are committed to combat. Similarly, players may find it helpful to mark the declared defender Battle hexes with pieces marked 1-1 through 6-1 (provided as markers in this game) so they do not need to recalculate odds after designating all Battles but before resolving them individually. If the initial odds are above 6-1, as they likely will be in a PVA Human Wave (9.2.4.2) style attack, place odds markers that add up to the grand total.
PLAY NOTE: Through the retreat and advance of units, the EZOC situation could change and the odds on previously designated Battles could be different than originally calculated due to changes in In Communication status. Also, Air Power placed just before a Battle is resolved would cause column shift(s) and change the odds.
- Once Per Combat Phase: A unit may only be involved in one Battle per Combat Phase.
- Battle Commitment: Once all of a player's Battles have been announced for that Combat Phase, they may not be changed, and each Battle must be resolved (unless adjusted below 1:1 odds; see 9.1 Long Odds below).
The Battle Sequence
Battles are resolved, one at a time, in any order the attacking player desires. For each Battle, the following sequence is followed:
- Total the Combat Strengths of all the attacking units in the Battle.
- Divide this total by the Combat Strength of the defending unit, rounding down (dropping any remainder or "fractions"), to get one of the odds levels provided on the Combat Results Table (CRT).
- Determine if the combat effects of Terrain, In Communication, Combined Arms, Offensives, and Air Power have adjusted the odds column (see 9.2).
- Roll the die and consult the CRT; cross-index the row of the number rolled with the odds column to determine the combat results.
- Apply the combat result immediately (see 9.3).
- Advance After Combat: If the defending unit is no longer in its hex (i.e., it has been eliminated or forced to retreat), the attacking player may advance one attacking unit adjacent to the Battle hex into the defender's just-vacated hex, regardless of Movement Allowance or terrain effects.
- Conduct another unresolved Battle, if any.
The Combat Phase is over when all previously announced Battles are resolved.
Combat Example 1: The Communist player opens the offensive on Turn 1 north of Seoul. Against the unit in A, two NKPA divisions conduct an attack with 16 strength points against 4, calculated as 4-1 odds. The Allied division is not In Communication, which shifts the attack to 5-1. The attack against B, 12 NKPA points against 6 points, is 2-1. However, the attack is supported by the 4th Infantry Division (which is not adjacent to an enemy unit and not supporting any other attack on this offensive turn), shifting it to 3-1, and also gains Combined Arms for the 105th Armor Division participating, making it 4-1. Since the odds are 3-1 or greater, this will result in a guaranteed retreat (see combat odds chart). Success followed by an advance in this attack will improve the attack against C, which initially faces a 4-1 attack, but once surrounded by the NKPA advance into B, the Allied division will not be In Communication and will therefore face a 5-1 attack.
9.1 Long Odds: The odds may begin above 6:1 or below 1:1, but after modification during Step 3 above, if the odds are above 6:1, reduce them to 6:1. If the odds are below 1:1, that attack has no effect on either side (i.e., the attack does not take place); any Air Power units used to reduce the odds that low are still flipped to their USED side.
9.2 Odds Shifts in Combat: Each combat situation may produce one or more odds column shifts based on a variety of factors as listed below. These odd's shifts are all cumulative and are only adjusted for Long Odds (see 9.1) after all column shifts are accounted for.
9.2.1 Terrain: As shown on the Terrain Effects Chart (TEC), if the defending unit is in certain favorable types of terrain, reduce the odds by one or two levels (also known as a "shift left"). For example, a 4:1 attack becomes a 3:1, a 3:1 attack becomes a 2:1, and so on. If all of the attacking units in a Battle are across a river from the defending unit, reduce the odds by one level. Terrain effects are cumulative.
Design Feature: There are four playable types of hexes (Open, Broken, Rough and Mountain). The latter two have a dotted overlay on them which serves as a mnemonic that these types of terrain provide the defender with an odds column shift (one for Rough and two for Mountain).
9.2.2 In Communication: If none of a side's front-line units (not supporting unit(s)) in that Battle are In Communication (see 10.0), then the opponent will receive an odds shift in their favor. If both sides are completely not In Communication, then the shifts cancel each other out. Final In Communication status is checked at the moment the Battle is resolved and could be different than when it was declared, due to retreats and advances.
Reminder: Before each combat resolution, check all adjacent combatants for In Communication.
9.2.3 Combined Arms: If the attacking force consists of at least one armor and one infantry unit, including those supporting as part of an offensive, then the attacker receives one beneficial column shift ("shift right"). The defender never receives this benefit.
EXCEPTION: The US 1st Marine Division receives this bonus even if in combat without an infantry unit, due to the elite combined arms nature of this unit, and receives a beneficial odds shift even when on defense. The 1st Marine Division's combat value is encased in yellow to remind players of this.
9.2.4 Offensives: Certain turns are designated as Offensives by an armor symbol for that side on the Turn Track (see the Turn Track key on the top left of the map).
9.2.4.1 Offensive Support: During these turns the attacker may declare Offensive Support and involve units adjacent to the attacking unit(s) and not in an EZOC to participate. Each such unit so designated to participate will shift the odds in the attacker's favor ("shift right") by one column for each such supporting unit. Additionally, these supporting units may be used to satisfy losses as if they were on the front line. Rotate the supporting unit to face the attacking unit to designate it is providing support.
9.2.4.2 PVA Human Wave: During an Offensive turn only, the Communist player may designate Chinese (red) PVA units to participate even if they are two hexes away from the attacking unit(s), regardless of terrain. These units similarly may not be in an EZOC, and contribute a column shift as well. Note: Following the resolution of a Human Wave attack, the Communist player must also reduce one participating PVA unit in that Battle (including supporting units) by one step. Also, if the Allied player successfully deploys two or more air units in that Battle, another step loss must be taken by the Communist player. (It may be the same unit.) In some situations, the visual will look like a cone on the map emanating from the Allied defending unit to adjacent attacking units, to supporting units in the next hex away, to the Human Wave participating units in the second hex away (see Combat Example 2 below).
Combat Example 2: In mid-game, China intervenes in force. In this case, the Communist player catches a powerful US unit that was making for the Yalu River. This example focuses on the attack against unit A. Two PVA divisions make the attack, with 12 strength points against 16. The US unit is out of communication, which makes the starting odds 1:1. Three PVA units provide support, shifting the odds to 4:1. Finally, two PVA units join with a Human Wave, bringing the odds to 6:1. The Allied player wants unit A to survive at least reduced, so commits two air units, bringing the odds back to 4:1. However, the US unit is just barely in MiG Alley, so the Communist player commits his air unit to the battle, canceling one of the Allied air units, and taking the final odds to 5:1. Regardless of the outcome of the Battle, an additional PVA step must be lost due to the declaration of a Human Wave attack. Although the Allied player committed two Allied air units to the Battle initially, one of them was canceled by the MiG-15 units, thus reducing Allied Air Power down to 1 air unit, thus not requiring a second additional PVA loss during the Human Wave attack.
9.2.5 Air Power: Each side receives air units during their Reinforcements and Replacement Phase per the Turn Track. These are placed in the respective side's available Air Power box on their turn and phase of entry and each unit may be used to produce a favorable column shift in one Battle per turn either on offense or defense. After use, flip the air unit over to its USED side. Flip it back to fresh during the Housekeeping Phase. Air units may be used in multiple Battles during the game, as long as each unit is only used once per turn. The Allied player may place no more air units in the Battle than there are attacking Allied units when on the attack, and attacking Communist units when on the defense (including Offensive Support and Human Wave). The Communist MiG-15 unit may only be used if the defending unit (either side) is within the MiG Alley yellow boundary line. If both players can place units in a given Battle, the Allied player places all of his first, and then the Communist unit may be used to cancel one of those units if desired. The MiG-15 may not be used to provide ground support, only to cancel an Allied air unit (thus the -1 on its counter). A canceled Allied air unit does not count towards the two or more air units required to cause an extra Communist step loss during a Human Wave attack. Also, air units are designated as each Battle is resolved, so they are the last column shifts to be accounted for and are done so at the moment of Battle just before the die is cast.
PLAY NOTE: As a practical matter, the Allied player when designating attacks during their turn may simply place the air units and calculate the final odds then, as there is no reaction the Communist player can do unless a Battle is occurring in MiG Alley.
As a reminder, all of these odd's shifts are cumulatively resolved together as one net shift from the effects of Terrain, In Communication, Combined Arms, Offensives, and Air Power, but the final odds if above 6:1, are resolved as 6:1, and if shifted below 1:1, the attack is canceled.
9.3 Combat Results Explanation: These outcomes can occur during Step 4 of a Battle as shown on the CRT:
-
NE (No Effect): Nothing happens.
-
DR (Defender Retreat): The defending unit is retreated (i.e., moved) two hexes by the attacking player as follows:
- Two Hexes: The unit must end up two hexes away from the defending hex. (i.e., it cannot zigzag; each hex of retreat must take that unit a hex further from the defending hex.)
- Avoid EZOCs: If possible, the unit must avoid entering an EZOC at all times during a retreat.
- Unavoidable EZOCs: If the unit must retreat through a hex in an EZOC, it loses one step. If it is forced to end its retreat in an EZOC, it is eliminated.
Source note: the four retreat rules below are printed without a heading in the source, in the right-hand column of page 9 directly after the Combat Example 2 caption. They are placed here because they govern how a DR or DRL retreat is carried out.
- Retreat Restrictions: The unit may never retreat into or through an enemy-occupied hex, nor end its retreat in a friendly-occupied hex.
- Or Else: If there is no retreat path which satisfies all of these conditions, the unit is eliminated instead.
- Off the Map: If the defending unit must retreat off a friendly map edge (Communist player only), it is brought in as a reinforcement during the next friendly Reinforcements and Replacement Phase, according to the rule for the placement of replacements. Allied units retreating off the map would be eliminated instead and placed in the Eliminated Units Box.
- Starting in Turn 4, Allied units in, or retreating through, a friendly port hex may retreat by sea if there is no other option. The Allied player places the unit in a friendly controlled port (including the FEC Box for American units if desired) to conclude its retreat. This counts as one of the 5 Amphibious Actions allowed by the Allied player during the game. If there are no friendly ports available to retreat to, or if there are no Amphibious Actions remaining, the unit is eliminated instead.
10.0 Reinforcements & Replacements
General Rule
Both players receive replacements and reinforcements on their respective Player Turns. The number of replacement steps received each turn is listed on the Turn Track. See the Turn Track key for an explanation.
Each replacement step allows that player to:
- Place a reduced-strength unit (one that was previously eliminated) on the map; see 10.2 and 10.3 for placement options, and 10.5 for replacement type restrictions.
– OR –
- Flip a reduced-strength unit that is currently on the map and In Communication over to its full-strength side.
"Friendly-Controlled" Defined: Friendly-Controlled means that your units were the last ones to have entered that city. A city has a black dot and could also be a port, capital, or Star City. At the start of the game all cities south of the 38th Parallel Start Line are controlled by the Allied side; cities to the north of the Start Line are controlled by the Communist side. Players may use the included flag Control markers to track which cities are owned by which side when it is not clear. Friendly control also allows Naval Transport and the tracing of a path for In Communication.
"In Communication" Defined: In Communication means being able to trace a path of hexes (through any type of terrain except an all-sea hex side) from the hex in question four hexes or less to a road, then along that road for any length to a northern map border edge (Communists) or to a friendly-controlled port (Allies). Excluding the origin hex, this path cannot enter a hex containing an enemy unit, an EZOC, or an enemy-controlled City.
PLAYER REMINDER: Recall that friendly units do not negate the effects of EZOCs for any reason (see 7.0). Thus, a friendly port in an EZOC could not provide Communication outside its hex even if a friendly unit was in that location, though the unit in the port hex would be In Communication, as the beginning of the path starts within that hex.
10.1 One Step at a Time: Two replacements points may NOT be used during the same Player Turn to create a full-strength unit. Existing reduced-strength units must be In Communication to be restored to full-strength. Units with a dot on their counter may not be replaced.
EXCEPTION: The reduced-strength side of the North Korean T-34 counter (105th Division) may be replaced, but not the full-strength side, as signified by the white dot on the front side only.
PLAY NOTE: Creating a new full-strength unit from one off the map requires two turns of replacements (and two total replacement steps; one received on each of those two turns).
10.2 Where Communist Reinforcements & Replacements Appear: Newly placed North Korean units (i.e., those being brought in from off the map either as a reinforcement or replacement) may be placed either in their capital (Pyongyang) if friendly controlled or their Star City (Manp'o). Communist PVA (red units) are placed in their Star City (Manp'o). Units may over stack upon placement but must move away during the Pre-Combat Movement Phase to rectify the situation.
EXCEPTION: To represent the surprise and shock of the Chinese intervention in the Korean conflict, the Turn 6 Communist PVA reinforcements are placed anywhere inside the yellow bordered MiG Alley, one unit per hex, and not in an EZOC. They may then conduct Pre-Combat movement from that starting location.
10.3 Where Allied Reinforcements & Replacements Appear: Newly placed South Korean units (i.e., those being brought in from off the map either as a replacement or reinforcement) may be placed either in their capital (Seoul) if friendly-controlled or their Star City (Pusan). All other Allied units including American, Commonwealth and the UN contingent are placed in the Star City (Pusan), though they may Naval Transport for free to any other Friendly-Controlled port as their full Pre-Combat move for that turn. American units may alternatively be placed directly in the Far East Command (FEC) Box, thus allowing them to Amphibiously Assault on that same turn.
Reinforcements & Replacements Example: At the start of the Allied portion of Turn 2, the Allies are in a tough situation, but help is on the way. The Allies receive 2 South Korean replacement points, which can only be used for that nationality. They also receive the three US ground units and one US air unit shown. The player uses one replacement point to flip unit A to full-strength, since it is In Communication, and uses the second point to bring an eliminated unit back at reduced-strength. With Seoul enemy-occupied, the unit must arrive at Pusan. The US ground units can arrive at Pusan (B) or go to the FEC box. The air unit goes to the Available Air Power holding box. All units arriving at Pusan get to move during the Pre-Combat Movement Phase and must meet stacking limits by the end of that Movement Phase. The South Korean unit that flipped from reduced-strength to full-strength this phase does not get to move during Pre-Combat Movement but is otherwise fully functional.
10.4 Use 'Em or Lose 'Em: If a replacement step is not used, it cannot be saved for later turns. It is permanently lost.
10.5 Replacement Types: Replacements are further defined as either North or South Korean, PVA or UN, based on the number under the respective flags on the Turn Track. United Nations replacements may be spent on any Allied units except South Korean (collectively US, Commonwealth and the blue UN Contingent division), and must be used to replace those types of units respectively. If a unit of a type of replacement point is not available to be replaced, those RPs are lost.
11.0 Naval Transport & Amphibious Assault
General Rule
Starting on Turn 2, the Allied player may use Naval Transport for their UN units (excluding ROK units). Starting on Turn 4, the Allied player may make Amphibious Assaults with their American units. Note: The Allied player may not invade a port in North Korea unless Seoul was friendly-controlled at the beginning of that phase.
11.1 Naval Transport: Any Allied unit (except ROK) that begins its turn in a friendly port, including reinforcements and replacements that just arrived at Pusan or the Far East Command (FEC) Box this turn, may Naval Transport to any other port on the map that was friendly-controlled at the beginning of this phase. This consumes all of their Pre-Combat Movement for that turn; thus, only one unit may be transported into a given port per turn to comply with stacking limits. (EXCEPTION: Amphibious Assault (11.2)). Units may Naval Transport into a friendly port that is in enemy ZOC. Naval Transport is free and does not reduce the UN Amphibious Actions Track. Naval Transport may not occur during the regular Movement Phase, only Pre-Combat.
11.2 Amphibious Assault: In order to Amphibious Assault, units must begin the Pre-Combat Movement Phase in the Far East Command (FEC) Box. A maximum of two units may assault in any one turn, and these could land at either one or two different locations. Amphibious Assaults may only occur at enemy-controlled ports that were enemy controlled at the beginning of this phase, whether occupied or not. (Note: Mokp'o [hex 1730] does not have an anchor symbol and is not a port hex.) A maximum of five units may Amphibious Assault during a game; once those are used up a player may not Amphibious Assault or retreat by sea. Use the UN Amphibious Actions Track to record this usage. Note: Retreats by sea count against this five-action limit. Only American units can Amphibious Assault, but any Allied unit (including ROK units), may retreat by sea, and only from Turn 4 on. Amphibious Assaults may not occur north of the 38th parallel line if Seoul was not Allied controlled at the beginning of the phase.
11.3 Amphibious Assault Movement: During the Pre-Combat Movement Phase, move the assaulting unit(s) from the FEC box to the port(s) being attacked and place them on top of any defending units. If the enemy-controlled port is unoccupied, place the unit(s) in the port hex(es) and end their movement. However, if two units land together, move one of them to an adjacent hex that it could have otherwise legally moved to in order to avoid any overstacking, but they may not enter an enemy-controlled city hex as part of this adjustment. The units may participate in combat against now adjacent enemy units during the Combat Phase.
11.4 Amphibious Assault Combat: If an enemy unit is in the port hex, then during the Combat Phase, resolve the combat as normal per all column shifts as listed on the TEC (plus two Column Shifts left for an Amphibious Assault). If two units are attacking, designate the primary attacking unit; the other one is considered a supporting unit. So, two units could only attack the same enemy-controlled port if it was an Allied Offensive turn, thus allowing support. Units already on land near the Amphibious Assault Battle may provide combat power if adjacent and support if qualified. If the port space is vacated during combat, the attacking units advance in (and can spread out as per above Naval Transport rule to avoid overstacking). If the second unit in an Amphibious Assault is unable to enter an empty space following a successful combat, then return it to the FEC box without loss. If the port hex is not vacated, the unit(s) return to the FEC box and that invasion force suffers 1 (total) additional step loss beyond the original effects of the combat.
12.0 Unit Isolation & Attrition
General Rule
During the Housekeeping Phase, both sides (starting with the Communist player) check for Isolation of their units. Units that are isolated suffer Attrition.
12.1 Isolation: A unit is isolated if it is not In Communication, and not adjacent to a friendly unit (including TF Smith) that is In Communication; both conditions must apply.
12.2 Attrition: All isolated units of that side suffer one step loss. Isolated units that are adjacent to each other have formed a pocket, and only one unit in that pocket need take a step loss each Housekeeping Phase until that pocket is broken up. It is possible that by eliminating Communist units earlier in this phase due to Attrition earlier in this phase, some Allied units may no longer be isolated, and would thus not suffer Attrition themselves.
Design Feature: By having the Communist player check for Isolation first, this rule deliberately favors the Allies who were more successful at keeping isolated units combat capable over the long term.
Isolation and Attrition Example: Here, the Communist player starts the Turn 5 Housekeeping Phase with several NKPA units not In Communication due to being surrounded by Allied units and Zones of Control. The three units in A must take a total of one step loss, since they constitute a pocket. The lone unit in B takes a step loss.
13.0 Harsh Winter Conditions
General Rule
During Turns 7 & 8 (Dec 1950 & Jan 1951) both sides suffer from Harsh Winter Conditions in all full hexes north of the 38th Parallel line.
13.1 Road Movement: All units must pay 1 hex of movement (instead of ½) when moving along roads during all movement phases of this turn when north of the 38th Parallel line. There are no other adverse movement or combat effects beyond this.
13.2 Allied Air Power Partial Grounding: The Allied player must flip half (rounded down) of the available Air Units to USED at the very beginning of each Harsh Winter turns.
PLAY NOTE: Effectively the Allies will have two serviceable air units at the beginning of Turn 7 and three at the beginning of Turn 8. Reminder that the B-29 unit that arrives as a reinforcement on Turn 7 does not show up until the Allied Reinforcements & Replacements Phase and thus would arrive available for use in the Allied portion of the turn.
Designer's Notes
Posture, Tempo, Pauses, and the Turn Track
Fans of the C3i Combined Arms Series will recognize right away that the greatest difference between Korea and its sister games is the lack of a Posture mechanic; players no longer secretly choose what tempo their forces will adopt for the turn. In researching the Korean Conflict, it quickly became apparent that for the 13 months represented, both sides were at or near full operational tempo through the first year of the war. Yet there were certain periods where a side had a certain advantage or had stored up supplies for a greater push. These were best modeled by designating certain historical turns on the turn track as either Surprise or Offensives (or both) to give a side significant offensive capabilities or advantages on those turns. This mechanic modeled the conflict very well and sped-up play of the game and simplified traditional solitaire play.
Reverse Order Sequence of Play
The games in the series follow the Battle for Moscow sequence of play where the general movement of all pieces occurs after combat. This is unusual for a wargame, where typically units advance to contact, then fight during the combat phase. The reverse sequence of play works extremely well for Korea, where during Suprise turns all units get to move before combat, then exploit holes in the line with movement after combat as well. Momentum stalls when one can't move very many units before combat, as frequently enemy units have adjusted and there is no one adjacent to attack during the combat phase. The turn track models well the North Korean rapid push for Pusan, followed by their inability to exploit any penetrations of the perimeter, and then the subsequent counterattacks by both sides across the peninsula.
This game is infantry heavy! Yes, armor was used extensively in Korea, but the terrain and doctrine of the combatants was such that it was employed differently from what we saw in Europe during WWII. Except for the rapid advances following the first and second fall of Seoul and the breakout of the Pusan Perimeter, very little armor exploitation movement occurred. Mostly the tanks were used for direct fire support, or to bolster defenses in an area where the line had been weakened. Technically neither the American 1st Marines or 1st Cavalry divisions, nor the Commonwealth tank unit were pure armor formations, but their training and aggressive approach to combat coming out of WWII warrants their higher combat values and first movement capability. The North Koreans had 200 T-34/85 tanks to begin the campaign and received very little thereafter. These were organized into brigades, but I have placed them into a single division to show their effect on a game of this level. This unit cannot be replaced back to full-strength, only back to its reduced side, due to shortage of spares and replacement vehicles.
A similar design adjustment was made to the UN units. There were 16 members of the United Nations that sent combat troops or support elements to Korea, most at the regimental level or below, though Turkey sent a full brigade. To show the combined effects of these forces, I have placed them into a division strength UN unit at the time they would have achieved this level of effectiveness to show their combined effects on a game at this level; in reality there was never a UN division in the conflict. The units were scattered across the front, usually attached to other US units. Similarly, all of the British Commonwealth nation's contributions have been organized into a single division. These design liberties allowed me to preserve the one unit stacking limit, a hallmark of the C3i Combined Arms Series which simplifies play.
Offensive Support
A key mechanic in all three games of the C3i Combined Arms Series is the use of Support to increase odds in critical battles. This allows a player to effectively add units to an attack that are behind friendly units and are assumed to be stacked in or near the same hex. In Korea we allow Chinese units to be two hexes away and still provide support. This Human Wave feature can allow for extremely high odds before final adjustment, but at the expense of step losses, which will add up over time, especially when Allied air power is present. Note the Chinese version of a Human Wave was quite a bit different than the traditional Russian Front version. Whereas in WWII, large formations of infantry would swarm the defender in long lines, in Korea the Chinese would have a platoon size unit attack one portion of a line at night, followed by another platoon just minutes later, and so on until that portion of the front line was overwhelmed or the attack was defeated. This also meant that any penetrations that resulted were small in nature and could be pushed back by an immediate counterattack if Allied strength was present nearby and available to do so.
Air Power
A characteristic of the early US response to the conflict was the massive employment of at first carrier-based and then later land-based air power. This would become a hallmark of later US interventions in the early stage of a developing crisis, and its impact in Korea was telling. Each of these units provides a simple odds column shift when used and are limited by the number of attacking units that are being supported when the Allies are on the offensive, or by the number of attacking units when the Allies are on the defensive. Air Power also makes attrition higher for Chinese offensives when a Human Wave has been declared. The air unit silhouettes are symbolic of a type of aircraft that was seeing much activity at the time that unit enters the game.
Victory Conditions
Early in the design phase, I wanted to have the Victory Conditions (VC) motivate players to strive to achieve the objectives set out by the original combatants, namely unifying the entire Korean Peninsula under one form of government. The Communists could achieve this by capturing Pusan. The UN can do the same at Manp'o. These objectives are achievable versus a new opponent who does not plan for how far units can move after combat. But after several plays, it should become straightforward on how to prevent the enemy from achieving a Strategic Victory.
In the middle phase of the struggle, the capture and holding of the enemy's capital became paramount, thus the Operational VC are based on this condition. Players will find that it is very difficult to hold a capital from a determined attacker, especially once US Air Power is maxed out. It takes careful planning from the beginning of the game to try and manufacture a win from this condition.
The last phase of the game will usually find the combatants strung out in a single line across the Korean Peninsula, likely straddling the 38th parallel. To achieve a Marginal Victory, one simply needs to control more hexes than their opponent on their opponent's side of the line. This is the most likely form of victory between two experienced players, and it will frequently be fairly obvious who will win by turn 10 or 11, thus the addition of the Armistice rule.
Armistice Game Theory
This rule, while cleverly named, does not really invoke the negotiation process, but is simply a mechanism to allow players to discuss in a friendly manner the likely course of the rest of the game, and maybe even make a few key future die rolls to speed the outcome. But it also portrays the slog the Korean conflict became in the last couple of months of the first year, that helped get the parties to the negotiating table in the first place. The Communist armies had really bled themselves dry by this point, and the Allied forces were in a state where they based much of their decision making on minimizing Allied loss of life.
Solo Play
Astute observers of the C3i Combined Arms Series will note that the solitaire rating for each game in the series has gone up one level in each successive publication. This is partially in response to player feedback that making hidden decisions for each side real-time (such as Posture selection), is difficult to do when playing solitaire, and the request of eliminating these types of processes in future games. Both previous games in the series provided the historical choices made by each side which could then be used as a decision aid when playing solitaire. For Korea, which was mostly fought at the Engage posture the entire time, it was easier to show nuances in each side's resources and commitment level each turn via the historical turn track.
Nevertheless, a game designed for two players is still a challenge to play solitaire, and frequently it's best to have a BOT or at least additional guidance, to aid in the decision-making process, beyond the general solo guidance, "make the best decisions for each side." For this game, I have crafted the Victory Conditions (VC) to do just that. When each side has their initial offensive period, they should strive to achieve the Strategic VC. Once the middle game starts, strive to achieve the Operational VC, and so on for the Marginal VC for the end of the game, if the others are not achievable. Making decisions like this during solo play will parallel the historical record and allow the solo player to grasp the history involved and prepare strategies for future two player play.
The Game as History
The table below shows the 13 turns of the full game, the number of replacements each side receives, and the turns in which they have Offensives or benefit from Surprise. Also, a historical summary of what actually transpired that month is given, so players can compare their game to actual results.
| Turn | Date | ROK RP | UN RP | Allied Off. | KPA RP | PVA RP | Comm. Off. | Surprise | Historical Notes |
|---|---|---|---|---|---|---|---|---|---|
| 1 | Jun 1950 | 1 | 0 | - | 0 | 0 | Yes | Comm. | KPA launches Operation Pokpung, the invasion of South Korea, on 25 June. UN votes Intervention two days later. |
| 2 | Jul 1950 | 2 | 0 | - | 0 | 0 | Yes | Comm. | ROK army mostly defeated. KPA advances largely unopposed. Task Force Smith overrun. |
Source note: the turn table is transcribed from the printed page 15 chart; the table's column layout has been rebuilt as a Markdown table.
Map Design, Naming Convention and Famous Locations
I wanted the map to fit on one standard 22"×34" war game map. Charlie Kibler gave me the basic layout, and then we increased it by one hex row to the North to get Hyesanjin on the map. I then applied the four common terrain types while Charlie adjusted the coastline and roads to fit the hex grid. I am very happy how it turned out and think the basic brown color helps portray the type of mud slogging conflict this was.
Perhaps the most common question, and in some cases critique, I received from play testers is why we did not follow the Revised Romanization of Korean place names that was adopted in the year 2000. The answer is that I wanted the spelling, as much as possible, to be the same as those on maps used by the combatants in the original struggle. Changing the Pusan Perimeter to the Busan Perimeter did not seem right to me. Most historical books on the Korean War follow this same logic as well, as it allows for easier comparison with other works on this conflict published before the year 2000. By no means is this spelling choice intended to cause offense.
The second most common question I received is where is the MAS*H piece?! Of course, this game is well above the level to show a 60-bed mobile hospital, but to place this and other famous locations from the war, I have created the list below.
- MAS*H: Mostly operated out of hex 2016, just north of Seoul
- Chosin Reservoir: hex 2104
- Porkchop Hill: hex 2013
The Two Countries Today
To compare and contrast the difference between a free-market economy vs a command economy, one has to look no further than the Korean Peninsula. With a GDP that is 20 times greater than its neighbor, South Korea has prospered in the decades following the armistice while the North has languished under a brutal communist hereditary dictatorship. To be sure, the South has benefited from a host of friendly nations who have provided aid, investment and military support, but these nations are largely free-market democracies as well, further supporting the argument.
Since 1953, South Korea has also created a functioning democracy and become one of the top ten economies in the world. North Korea still adheres to Juche, or self-reliance, and a North Korean form of socialism that has turned the country into a poverty-stricken place where food, freedom and hope for a better future are all in short supply, with even a 1/3rd of those in the Army suffering from food insecurity. By the 2000s, the South Korean economy provided more benefits for its citizens than North Korea could provide for its subjects; South Koreans can travel freely around the world, and many have migrated to the United States and other Western countries, while North Korea is akin to prison, where leaving is unlawful and those who try and are caught are sent to labor camps for years as punishment. Many do not survive a few years in a North Korean labor camp.
To make matters worse for their people, what little investment the North Korean government makes is in its nuclear weapons and rocket programs, and in weapons sales to Russia for its struggling war in Ukraine. The recent sending of North Korean soldiers to the Kursk Oblast, effectively turning them into state mercenaries for hire, is another example of this type of behavior.
Korea: What's New?
For those of you familiar with Battle for Kursk, which Korea is heavily based upon, the following rules sections are the most important to read to transition from that game into this one:
- 5.0 Victory Conditions
- 6.0 Setting up the Game
- 9.2 Combat Odds and Offensives
- 10.0 Reinforcements & Replacements
- 11.0 Naval Transport & Amphibious Assault
- 12.0 Unit Isolation & Attrition
- 13.0 Harsh Winter Conditions
Familiarity with Battle for Moscow is not required to play Kursk or Korea, though it is a simpler presentation with far fewer counters, if one wanted an easier introduction to operational wargaming. This and related games can be found at https://www.c3iopscenter.com/pages/wargame-room-store/
- Battle for Moscow, C3i Nr.25 (available as a free download) and also in C3i issue Nr. 38
- Objective Kiev, C3i Nr.26
Further Reading
Some of the best books to aid the war game designer are the Campaign Series by Osprey Publishing. Two titles were instrumental in the design of Korea: The Fight Across the 38th:
- Campaign 162 – Inch'on 1950: The Last Great Amphibious Assault, by Gordon L. Rottman
- Campaign 346 – Yalu River 1950-51: The Chinese Spring the Trap on MacArthur, by Clayton S. Chun
As for books focused exclusively on the Korean war, and the lead-up to it, the following were helpful:
- This Kind of War: A Study in Unpreparedness, by T. R. Fehrenbach, The MacMillan Company, 1963, 689pp.
- East of Chosen: Entrapment and Breakout in Korea, 1950, by Roy E. Appleman, Texas A&M University Press, 1987, 399pp.
- The Forgotten War: America in Korea 1950-1953, by Clay Blair, Anchor Books, 1987, 1136pp.
- The Coldest Winter: America and the Korean War, by David Halberstam, Hyperion, 2007, 719pp.
- The War for Korea 1945-50: A House Burning, by Allan R. Millett, Kansas University Press, 2015.
- The War for Korea 1950-51: They Came from the North, by Allan R. Millett, Kansas University Press, 2010.
Lastly, Paper Wars #105 has an excellent article by Ty Bomba, entitled "Ebb & Flow: The Final Communist Offensive in Korea" detailing the last Chinese counteroffensive.
Further Playing
In many ways, the Korean War is the forgotten war from a game design perspective as well. Part of that is due to the last two years of the conflict being somewhat stagnant and not really worth gaming. But the first year was so dynamic that there is much to be learned by maneuvering pieces on a map and drawing conclusions of what might have been. In chronological order of date of publication, here are some additional games that may help further your understanding of this conflict:
- Korea: The Mobile War – 1950-51, Simulations Publications, Inc. 1971, by James F. Dunnigan.
- Korea: The Mobile War, Strategy & Tactics #111, 1987, by David Ritchie.
- Yalu - The Chinese Counteroffensive in Korea: November 1950 to May 1951, Compass Games, 2009, by John Hill.
- MacArthur's War: The Korean War and Beyond, self-published, 2009, by Kerry Anderson. Shows the conflict from a global perspective including the possible use of atomic weapons.
- Korea: The Forgotten War, Multi-man Publishing, Inc., 2014, by Rod Miller. The Operational Combat Series (OCS) series (as created by Dean Essig) treatment of the Korean War. Perhaps the most detailed analysis of the entire conflict.
- 1950: The Forgotten War, Conflict Simulations LLC, 2018, by Matthew Ward and Ray Weiss. Simple presentation in the Procedural Combat Series of games, comparable to Korea: The Fight Across the 38th.
- The Korean War: June 1950-May 1951, Compass Games, 2020, by Joe Balkoski. Remake of the Victory Games classic. This was the inspiration of my design for Korea, to make a game that could be played in a single sitting that had a similar feel to this one.
- Korea: The Mobile War, Strategy & Tactics #349, 2024. A solitaire game from the UN player's perspective.
- Ebb & Flow: The Final Communist Offensive in Korea, Compass Games, 2024, by Ty Bomba.