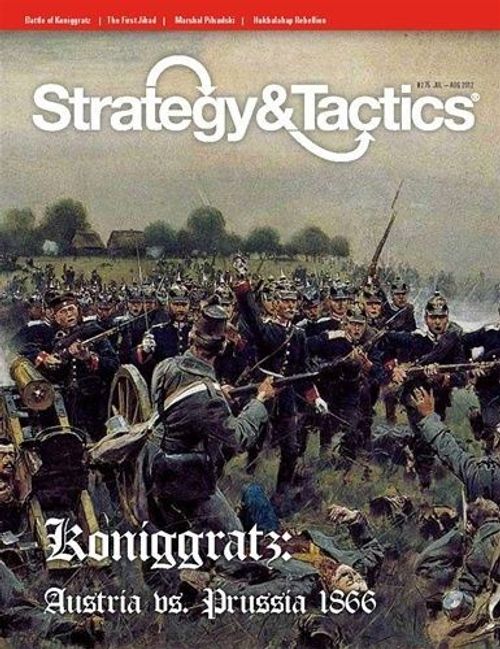
Koniggratz: Blood & Iron Triumphant
Koniggratz: Blood & Iron Triumphant Rulebook
Table of Contents
Table of Contents
- 1.0 Introduction
- 2.0 Components
- 3.0 Sequence of Play
- 4.0 Movement
- 5.0 Stacking
- 6.0 Zones of Control
- 7.0 Combat
- 8.0 Artillery
- 9.0 Cavalry
- 10.0 Leaders
- 11.0 Recovery
- 12.0 Army Morale
- 13.0 Entering the Map
- 14.0 Nature
- 15.0 Designer's Notes
- Koniggratz Exclusive Rules
- 16.0 Introduction
- 17.0 Set Up
- 18.0 Victory Conditions
- 19.0 Special Rules
- 20.0 Folio Notes
- 21.0 Orders of Battle
- Charts: Combat Results Table & Terrain Effects Chart
1.0 Introduction
1.1 The Musket & Saber System
Each game in this system depicts a battle from the musket era (c. 1756-1871). Players command opposing forces in the situation faced by their historical counterparts. The goal is to reach the victory conditions established by the exclusive rules for a game, usually the capture of key terrain, or the destruction of enemy units, or both.
Player Note. Experienced players are cautioned to read these rules carefully, particularly those involving combat resolution and retreat.
1.2 Game Scale
Each hex represents 352 yards. Game turns represent 90 minutes of daylight or several hours at night. Infantry and cavalry units represent 300 to 4,500 men, artillery units from four to 24 cannon.
2.0 Components
2.1 Inventory
This game consists of
- the Musket & Saber Standard Rules explaining the mechanics of play
- Exclusive Rules including the set up and victory conditions
- The charts & tables, including the Terrain Effects Chart (TEC) and Combat Results Table (CRT) on page 16.
- a map of the battlefield, including the Turn Record Track (TRT).
- a die-cut sheet of playing pieces (280 counters).
Players must provide one or more six-sided dice (two differentiated dice per player is ideal).
2.2 The Map & Terrain
Each map portrays the chosen battlefield. The hexagonal grid is superimposed on the terrain to regulate the placement and movement of units; a unit on the map is considered to be in a single hex at any given time. Terrain has been altered to fit the grid, but the spatial relationships have been retained to present the historical time-space problems. Each hex has a unique 4-digit number to aid set up and play.
Every hex has a primary terrain, which affects movement into, and sometimes out of, that hex, and may affect combat. The basic terrain is "clear." A hex with any amount of another primary terrain is considered to consist entirely of that feature (but note that a "clear" hexside has a combat effect when adjacent to woods).
Each hex also may have one or more secondary terrain types. The effects of secondary terrain may modify the primary, or may affect units separately.
Still other terrain features lie on the hexside between two hexes. They affect movement and combat across that hexside only, and have no effect on units in either adjacent hex.
Terrain types and effects are summarized on the Terrain Effects Chart (TEC).
2.3 The Counters
Most of the counters represent combat units (2.4). Others represent key leaders or fulfill a game function. The counter types and the rules section describing their uses are:
[Editor's note: the counter-type list that this sentence introduces is not present in the text of the source file as supplied (the RTF holds no picture or table for it). It is not reproduced here.]
2.4 Combat Units
Infantry, artillery, and cavalry are combat units. Infantry is the most common, and the rules are written with it in mind. Most rules also apply to artillery and cavalry, but see the special rules for each at 8.0 and 9.0, respectively.
Each combat unit has the following information:
- Army: the background color denotes which counters belonging to each army; they are listed in the Exclusive Rules.
- Unit ID: its historical identification. This unit is Cleburne's (Confederate Infantry) Brigade from the Shiloh game.
- Formation: the unit's place in its army's command hierarchy. It affects the ability of a unit to cooperate with others in combat. A formation of "0" indicates an independent unit, belonging to no formation; an "A" indicates a unit that may be treated as belong to "All" other formations.
- Combat Factor (CF): this is the measure of the unit's ability to inflict damage in combat (see 7.0). Zero is a factor. A parenthesized CF is halved when attacking.
- Morale Rating (MR): the unit's ability to withstand the vicissitudes of combat. To check a unit's morale, roll a die: if the roll is greater than the MR, the unit fails. Regardless of the MR, all units succeed on a die roll of "1," all units fail on a die roll of "6." The effect of failure is explained in the specific rules requiring the check. MR may be modified by leaders (see 10.0).
- Movement Allowance (MA): the unit's ability to move across the map (see 4.3). A "V" in place of a number means the unit's MA is variable (see 4.4). A bracketed MA means the unit cannot skirmish (see 7.13).
2.5 Steps
Most infantry units have two strength steps. The front side shows the unit at its full, two-step strength. The reverse side, with a red band, shows the unit after it has suffered casualties (see 7.8 and 11.2). The factors are generally weaker, but the degree of weakening varies from unit to unit. Infantry with a red band on the front are one-step units and are blank on the reverse side.
2.6 Artillery & Cavalry
Artillery and cavalry units have only one step. They have printing on the reverse side indicating a loss of unit effectiveness (see 2.9, 7.8, & 11.3). A player may flip a unit to its ineffective side at the beginning of any of his movement phases (this may be useful for units which move faster when ineffective).
2.7 Battalions & Squadrons
Infantry battalions and cavalry squadrons are one-step units with an ineffective side like artillery and cavalry. They have special stacking and combat capabilities (see 5.1, 7.4, & 7.5).
2.8 Disruption
A unit may become disrupted for one of several reasons. Mark a disrupted unit with a disrupted marker. It may recover during the movement phase (see 11.1). It may be disrupted and recover any number of times per game. It operates normally except for the following:
- it exerts no ZOC (6.0);
- it must roll for its MA (4.4);
- its CF is treated as parenthesized (2.4 & 7.7);
- it may not advance after combat (7.12);
- subtract two from its morale rating (2.4; it passes a morale check on a roll of "1");
- if forced to retreat (7.9), it must retreat two hexes.
2.9 Ineffectiveness
Ineffectiveness applies only to infantry battalions, to all artillery and cavalry units, and to leaders. Flip an ineffective unit to its reverse side; it operates normally but with considerably reduced values. It may recover during movement (see 11.3).
3.0 Sequence of Play
3.1 The Course of a Game
Set up the map and counters according to the instructions in section 17.0 of the Exclusive Rules. The players then alternate moving and attacking with their units during the game turns (3.2) to reach the victory conditions set in section 18.0 of the Exclusive Rules. Victory is determined after the last game turn is completed.
3.2 The Game Turn
The game is played in a series of game turns, tracked by moving the Game Turn Marker along the TRT on the map. Each turn consists of five phases. Only the actions specified for each phase may occur in that phase; a player may not change a move or execute a forgotten action without permission of his opponent. The Exclusive Rules for each folio specify which player is the First Player and the number of turns in the game.
First Player Movement Phase: the first player moves his units according to the rules for movement (4.0), stacking (5.0), zones of control (6.0), and entering the map (13.1). Eligible units may recover from combat damage (11.0) and/or re-enter the map (13.2).
First Player Combat Phase: the first player uses his units to attack enemy units within the constraints of the combat rules (7.0, as modified by 8.0, 9.0, & 10.0).
Second Player Movement Phase: same as above, with the players switching roles
Second Player Combat Phase: same as above, with the players switching roles
Game Turn Marker Phase: if the last game turn has been completed, determine the winner of the game (18.0). If more turns remain, advance the Game Turn Marker and return to the beginning of the sequence.
4.0 Movement
4.1 The Movement Phase
During his movement phase, the active player may move as many or as few of his own units as he desires. The inactive player's units may not be moved. No combat takes place during the movement phase. Units may move off the map at any time; treat it as having routed off the map with an unsafe line of retreat (see 7.10).
In lieu of movement, a unit may attempt to recover from the effects of combat (see 11.0).
4.2 Moving a Unit
Units are moved one at a time tracing a path of contiguous hexes (no skipping allowed), in any direction or combination of directions. Once a unit has been moved, its move may not be changed without consent of the other player. The distance a unit may move is limited by its movement allowance (4.3 & 4.4), terrain (4.5), friendly units (5.0), and/or enemy units (6.0).
If the owning player desires, a stack of units (5.0) may move together. The stack must start in the same hex and remain together for the entire move. Use the MA of the slowest unit and the highest terrain cost for any unit in the stack.
4.3 Movement Allowance (MA)
A unit's printed MA indicates the number of movement points (MP) available during each movement phase. As a unit enters a hex it must pay one or more MP depending on the terrain (see 4.5). A unit may not exceed its MA during a single movement phase. Unused MP may not be accumulated or transferred to another unit.
4.4 Variable Movement Allowance
The MA of some combat units (only; leaders, HQs, and Trains are unaffected) must be determined at the moment their movement begins. For each unit meeting one or more of the criteria listed below, roll one die (if the unit's printed MA is greater than 6, roll two dice). The die roll is its MA for that movement phase. If the roll exceeds the unit's printed MA, use the printed MA. Roll for a unit if it
- has a printed MA of "V" (see 2.4)
- is disrupted (see 11.1)
- is overstacked (see 5.2)
- is disengaging (see 6.3)
- is subject to a fortune of war (see 12.4)
4.5 Terrain Effects on Movement
Entering a clear hex across a clear hexside costs one MP. Other terrain requires more MP to enter; those costs are listed on the TEC. Units crossing certain hexside terrain must pay additional MP, denoted by a "+1" on the TEC. Those MP are added to the normal cost to enter a particular type of terrain. A unit lacking the necessary MP may not enter the hex.
4.6 Road & Trail Movement
To use a road or trail, a unit must move from a hex containing the path across a hexside containing the same path into another hex containing the same path. Any break, even within a single hex or across a single hexside, terminates the path. Units using a path ignore the movement effects of other terrain and pay just one MP cost for the path hex. Road, trail, and non-road/trail movement may be combined in a single movement phase.
Infantry and cavalry may not use road or trail movement to enter an Enemy Zone of Control (EZOC; see 6.0); they pay the full terrain cost starting with the last hexside crossed. Artillery may use road/trail movement to enter EZOC.
4.7 March Movement
March movement allows units that will not be near the enemy to move faster. A unit may employ march movement as long as 1) neither it nor its Zone of Control (ZOC; see 6.0) start the phase in or enter an EZOC during movement, and 2) it does not initiate combat during the combat phase (except by virtue of an FOW). It may not enter certain terrain (see the TEC).
In place of the unit's printed MA, all infantry and artillery units receive a march movement allowance of nine MP; all cavalry units receive an allowance of 15 MP. If the unit is rolling for its MA (4.4), roll one die and add three for infantry and artillery, roll two dice and add three for cavalry.
A marching unit pays only 1/2 MP when marching along a road (only; not a trail); any leftover 1/2 MP is lost as soon as the unit leaves the road, even if another segment of road is used later in the same move. If the marching unit on a road leaves or enters a hex containing another combat unit, it pays the full 1 MP, not the 1/2 MP.
A marching unit may recover (see 11.0).
5.0 Stacking
5.1 Stacking Generally
Generally, there is no limit to the number of friendly units entering, leaving, passing through, or stopping in a given hex at any time though a penalty may apply (5.2). There is a limit to the number of units that can participate in combat in a single hex (7.4 and 7.5).
5.2 Overstacking & Movement
If, at the beginning of a movement phase or at the instant of combat, there are more than three units in a single hex, the hex is considered overstacked. Battalions, squadrons, leaders, and headquarters do not count for stacking purposes.
If a unit begins its movement in an overstacked hex, roll to determine the unit's MA. All units in the overstacked hex must roll, even after enough units have departed the hex to bring it within stacking limits. An overstacked hex may remain overstacked indefinitely.
5.3 Combat Stacking
For combat, one artillery unit plus one battalion/squadron plus any one other combat unit may fight from a single hex. The owning player may readjust stacked units freely, choosing which fight and which stand by. Stacked units must participate in the same combat (but see 8.4).
Additional units stacked with the engaged units may not participate in combat in any way, but may be forced to retreat or rout (see 7.8).
Units defending or attacking from an overstacked hex have their CF halved (see 7.7).
6.0 Zones of Control
6.1 Zones of Control Generally
The six hexes adjacent to a unit constitute its zone of control (ZOC). All combat units exert a ZOC at all times (but see 6.4). There is no additional effect from having more than one unit, or opposing units, exert a ZOC on a single hex; all ZOCs exists independently of one another.
The ZOC of enemy units (EZOC) inhibit movement (6.2), impose combat requirements (7.2), and restrict retreat after combat (7.6 & 7.9). Friendly ZOC have no effect on friendly units.
6.2 ZOC Effects on Movement
A unit must cease moving when it moves into an EZOC. A unit already in an EZOC generally may not exit until released by the outcome of combat (but see 6.3).
Disrupted units and units with parenthesized combat factors may not enter EZOC during movement, unless accompanied by a leader or by an undisrupted unit with a non-parenthesized combat factor. Once in an EZOC, those units operate normally (but see 11.1).
6.3 Disengagement
A unit may disengage (move out of an EZOC) during movement if it has a higher printed MA than every unit exerting an EZOC on it.
A unit with the same or lower MA may disengage if it begins the movement phase stacked with another friendly unit in the EZOC and that other unit remains in the hex.
Disengaging units must roll for their MA. If the result is insufficient to reach another hex, the unit may not move. Disengaging units may not enter another EZOC during the movement phase of disengagement.
6.4 Limiting ZOC & ZOC Effects
Disrupted (see 11.1) and ineffective (11.3) units exert no ZOC. No unit may exert a ZOC into a hex or across a hexside into/across which it could not move.
Some kinds of terrain, in-hex or hexside, block ZOC going into a hex, coming out of a hex, or both, or across a given hexside: consult the TEC.
7.0 Combat
7.1 The Combat Phase
During his combat phase, the active player (the attacker) may use his units to attack those of the other player (the defender). Combat generally takes place between adjacent opposing units (but see 8.4). Within the constraints of this section, the attacking player may conduct as many or as few attacks as he wishes and in any order. This section is written primarily for combat involving infantry; see 8.0, 9.0, & 10.0, respectively, for special rules for artillery, cavalry and leaders.
7.2 Potential Combats
In general, a defending unit exerting a ZOC onto an attacking unit at the beginning of the combat phase triggers a potential combat. Defending units adjacent to an attacker but not exerting a ZOC do not trigger combat, but the attacker has the option of attacking if allowed within the constraints of this section.
Attacking triggered defenders is not mandatory. The triggering unit may attack another defender or remain inactive; however, any a triggered defending unit not attacked during the combat phase (bombardment may not count; see 8.4) receives a fortune of war (see 12.4). The FOW must be played on the triggered unit as soon as all triggering units have completed their combat. The FOW may be used to move all units in the triggered hex, or by one unit to charge or recover. Ignore EZOC for recovery and charge, and the need to move one hex to charge.
7.3 Combat Procedure
Resolve each combat using the following steps:
- Identify the involved units (7.4 & 7.5).
- Make a morale check for any defender lacking a safe line of retreat (7.6). If a unit fails, it is disrupted (11.1); if already disrupted, it routs (7.10; treat the rout as the result of combat).
- If desired, make a choice of tactics (7.13), attacker first.
- Determine whether the attack is coordinated (7.14).
- Calculate the combat differential (7.7) and locate the corresponding column on the CRT.
- Roll two differentiated dice with one identified as the combat die and the other as the morale die (or you may roll one die twice). Cross-index the combat die roll with the differential to get the combat result (7.8). If necessary, use the morale die roll to make a morale check for the primary unit of the affected side. Apply the results immediately.
7.4 The Defenders
Each attack may target one defending hex. Each hex may be the target of only one declared attack (but see 7.13, 8.4, and 12.4).
A hex may be defended by up to one artillery unit plus one battalion/squadron plus any one other unit. Additional defending units stacked in the hex do not take part in the combat, but may be affected by the result.
If a stack is involved, the defending player must select one unit as the primary defender; this unit's morale rating will be the MR for the combat. The primary defender cannot be an ineffective unit unless nothing else is available.
A single defending unit may be involved in more than one combat if forced to retreat into a hex which is attacked subsequently.
7.5 The Attackers
An attacking unit may attack into any adjacent hex into which it could move during normal movement (but see 8.4). Whether the attacker is in an EZOC does not affect its ability to attack, but if it is in an EZOC, a potential combat is triggered (7.2). A unit with a CF of zero cannot attack; parenthesized CF are halved.
One artillery unit plus one battalion/squadron plus any one other unit may attack from a hex. Other units stacked in that hex may not take part in the combat, but may be affected by the combat result. Stacked units must attack together (but see 8.4). If more than one attacking unit is involved, the attacking player must select one unit as the primary attacker. The primary attacker cannot be an ineffective unit or an artillery unit unless nothing else is available.
An enemy-occupied hex may be attacked by as many units as can be brought to bear in the six adjacent hexes, plus any artillery units able to bombard in support (see 8.8). The attacker may choose which units attack which defending hexes in any combination.
A unit may attack only once per combat phase.
7.6 Lines of Retreat
At any given time, a unit has one of the following.
Safe Line of Retreat (SLR): consists of a path of hexes from the unit to its active army HQ (12.1), or its active trains (12.2), or its army's line of communications (LOC hex (12.3 & Exclusive Rules). The path may not enter or cross prohibited terrain, enemy-occupied hexes, or enemy zones of control. For this purpose, an EZOC is negated by the presence of a friendly unit or the ZOC of a friendly unit.
Unsafe Line of Retreat: This is identical to the SLR but passes through or ends in an unnegated EZOC.
No Line of Retreat: This exists when no path exists without prohibited terrain or enemy-occupied hexes.
7.7 Calculating the Differential
Generally, the printed CF of each unit and leader involved in a combat is used to calculate the differential. Under certain circumstances, the CF may be modified. The most common modification is halving the CF, which may be done for a variety of reasons: certain terrain types (consult the TEC; effects are cumulative), disruption (11.1), parenthesized attack CF, and/or uncoordinated attacks (7.14).
If a unit is to be halved once, divide the combat factor by two, rounding up any remainder. If a unit is to be halved twice or more, treat it as having a combat factor of one, regardless of its original combat factor (zero CF remain zero).
Total the modified combat strength of all involved attacking units and leaders. Subtract the total combat strengths of all involved defending units and leaders to get the differential. Find the appropriate column on the CRT.
7.8 Combat Results
Each box on the CRT contains one or more combat results, which are explained below. All results must be applied before proceeding to the next combat. In those cases where one result is parenthesized, the parenthesized result is applied only if the first result does not take effect (for example, a unit passes its morale check after an "m" result).
NE = No Effect: all units on both sides remain in place.
Ar or Dr = Attacker retreat or Defender retreat. The owning player has a choice: either the primary unit on the affected side is disrupted (see 11.1) or all units of the affected side retreat (7.9). If the primary unit already is disrupted the retreat must be made. Retreating leaders, battalions, squadrons, and artillery become ineffective (2.8). Victorious attackers may advance (7.12).
Ac or Dc = Attacker check for retreat or Defender check for retreat. If the primary unit on the affected side passes a morale check, apply the (parenthesized) result. If it fails, the affected side retreats (as above).
Ax or Dx = Attacker loss or Defender loss. If the primary unit passes its morale check, it takes a loss (7.7); no advance may be made. If it fails the check, or if the owning player chooses, all units of the affected side are disrupted (no further effect if already disrupted) and must retreat (7.6); a victorious attacker may advance (7.9).
Dm = Defender rout check. If the primary defending unit passes the morale check, apply the parenthesized result. If it fails, all participating and stacked defending units rout (7.10), victorious attackers may advance (7.12), and the attacking player receives a FOW (12.4).
Ex = exchange. The primary unit on each side loses one step (7.11). No units retreat or advance, even if the defender's hex is emptied as a result of the step loss.
DF = Fortune of War. In addition to any other result, the defending player receives a fortune of war (12.4) to be played immediately.
Leader = Leader Casualty Check. Make a casualty check (10.3) for any stacked, participating, and/or coordinating leaders on both sides.
Ammo = Ammunition Depleted. Any one bombarding artillery unit is flipped to its ineffective side (see 8.5 & 11.1).
7.9 Retreat
A unit forced to retreat must move away from its combat hex. The length of the retreat may be one, two, or three hexes at the owning player's discretion. The retreat path may pass through and/or end in friendly-occupied hexes, even if overstacked. If the destination hex is attacked later in the same combat phase, the retreated units do participate in the defense.
A unit with a safe line of retreat (7.6) must move along it; if the unit has more than one, the owning player may choose which to follow.
A unit with an unsafe line of retreat--one that enters an unnegated EZOC or terminates in an EZOC, negated or not--must make a morale check for each EZOC hex it enters. If it fails the check, it routs. If the final hex of the retreat is in an EZOC, the unit must continue retreating until it reaches a hex free of EZOC. If the unit cannot reach such a hex within its printed MA, it routs from the last hex of its retreat (7.10).
A unit with a line of retreat only to a map edge (other than specified LOC hexes) is treated as routing with no SLR (7.10).
A unit with no valid line of retreat of any kind is captured; remove it from the map and hand it to the opposing player.
Any leader, cavalry unit, artillery unit, battalion, or squadron forced to retreat is flipped to its ineffective side; if already flipped, there is no further effect.
7.10 Rout
Determine a line of retreat (7.6) for each routing unit. If the unit has an SLR, it retreats three hexes and is disrupted. If an unsafe line exists, remove the unit from the map and place it on the TRT two turns after the current turn (that is, if it now is Turn 3, place it on the Turn 5 Box--if the rout occurs in the last two turns of the game, set the unit aside); it is eligible to re-enter the map per rule 13.2. If no line of retreat exists, the unit is captured; remove it from the map and hand it to the opposing player.
7.11 Step Losses
Step losses always come from the primary unit in that combat; however, if the unit is stacked with a non-participating battalion or squadron belonging to the same formation, or is stacked with another full-sized unit with the same ID, the stacked unit may be used to absorb losses.
If a unit is eliminated, determine its line of retreat (7.6). If a safe or unsafe line of retreat exists, remove the unit from the map and set it aside; it may be eligible to reenter the game later (see 11.2). If no line of retreat exists, the unit is captured; remove it from the map and hand it to the other player.
Certain choices of tactics (7.13) may inflict a second step loss. It may come from any participating unit at the owning player's discretion. If no second step is present to be lost, the opposing player receives an FOW.
7.12 Advance
Whenever a hex is vacated as a result of a retreat or rout--not when emptied by step losses alone--the victorious player may, but is not required to, advance his participating units one hex. The decision to advance must be made before the next combat begins.
If multiple attacking hexes were involved, any or all of the participating units may advance; the decision may be made separately for each eligible unit. Disrupted units, units with parenthesized CF, artillery, and defending units in some terrain (see the TEC) may not advance.
An advancing unit may move into the vacated opponent's hex, or into any vacant hex adjacent to the defender's hex (as long as the advancing unit could move into the hex during movement). The choice of hex(es) is entirely at the discretion of the advancing player, but hexes may not be overstacked after the advance. Advancing units ignore EZOC. An advancing unit may not fight again in that combat phase (but see 12.4).
If the combat has resulted in a rout of the defending units (only), for any reason, advancing attackers may advance two hexes instead of one; this option is not available if the defender is captured.
7.13 Choice of Tactics
The standard combat rules may be modified by one or both players through the following tactics. The attacking player always announces his choice first. Once selected, the choice of tactics may not be withdrawn.
- Skirmish. Any attacking infantry unit with a non-bracketed, non-V Movement Allowance may conduct a skirmish attack. The target of the attack must be either adjacent or two hexes away: if adjacent, the skirmishing unit may not be in an EZOC (due to enemy disruption and/or terrain); if two hexes away, the intervening hex must be unoccupied by either side. In all cases, the skirmishing unit must be able to move into the defender's hex during normal movement. Skirmishing may not be combined with any other type of combat except bombardment (see 8.4). Skirmishing does count as an attack for purposes of 7.2. More than one unit may skirmish attack the same hex; coordination applies. When calculating the combat differential, use the MA of involved infantry units on both sides as combat factors (ignore their printed combat factors); bracketed or "V" MA count as zero. Disrupted units with a non-bracketed MA skirmish with a strength of "0." Defending artillery uses its defense factor, defending cavalry uses its combat factor. No terrain effects apply. Treat all A or Ex results as NE; treat all Dx or Dm results as Dr. Ignore all secondary results. Skirmishers never advance after combat.
- Press Forward. Attacking infantry only; may not be disrupted or ineffective. Add two to the attacking combat factor (total, not per attacking unit). If the defender does not retreat, the attacker loses one step in addition to any other result from the CRT. If the defender retreats, the attacker must advance.
- Charge. Attacking infantry only (see 9.3 for cavalry charges). The charge must be declared during the preceding movement phase. Charge participants may not be disrupted or ineffective. A maximum of one leader plus one infantry battalion plus one other infantry unit of any size can charge a given defender's hex. They must start their move stacked and must be coordinated (7.14). The charge may move through friendly units (including into the hex adjacent to the enemy being charged), but may not be overstacked at any time. It may not be made into certain kinds of terrain (see the TEC). The unit/stack must move either one or two MP to reach the hex adjacent to the defender. No artillery support is allowed, and no other units may attack the same defender. Make a morale check for one charging unit before resolving combat. If the unit fails, the charge has not been pressed home; resolve the combat normally, with the CF halved. If the unit passes the morale check, conduct the combat normally. Treat all A or Ex results as Ax. Treat all D results as Dm (Ax). If the defender retreats, defending artillery is captured, and a victorious attacker must advance.
- Disengage. Either or both players may select this option. Calculate and resolve the combat normally. If the attacker selects disengagement, treat any D, Ex, or Ac result as an Ar; the unit must retreat, it cannot opt to be disrupted. If the defender selects it, treat any A, Ex, or Dc result as a Dr; the unit must retreat, it cannot opt to be disrupted. If both players select the tactic, it is possible both will retreat (defender first). Disengaging leaders, cavalry, artillery, battalions, or squadrons are not flipped to the ineffective sides (if already flipped, they remain so). If this tactic is chosen after the attacker chooses a charge, the attacker suffers no losses regardless of the outcome.
7.14 Coordination
Coordination refers to the ability of multiple units to synchronize their attacks against a single defender. An attack either is, or is not, coordinated; uncoordinated attacks suffer a penalty.
An attack is coordinated only if all the attacking infantry and/or cavalry units are in the same formation (see 2.4); artillery supporting fire requires no coordination (though bombarding artillery does).
A leader may coordinate the attack of units from different formations as long as all the attacking formations are within the leader's command span (see 10.0) and the leader either is stacked with or adjacent to one of the attacking units.
In an uncoordinated attack, units belonging to the formation of the primary attacking unit attack normally; units from all other formations are halved when calculating the differential.
8.0 Artillery
8.1 Artillery Units
Except for the changes noted in this section, artillery units operate in the same way as infantry units.
Artillery units have a different set of factors than infantry and cavalry. Instead of one combat factor, they have two: attack and defense. The attack factor is used when attacking an adjacent enemy unit (8.3), bombarding (8.4), or supporting a friendly unit (8.8). The defense factor is used when attacked by an adjacent enemy unit. The range factor is used during bombardments.
Artillery units in some folios have no morale rating. They have an MR of "6" when effective, (but fail a morale check on a roll of "6"), and an MR of "3" when ineffective.
8.2 Artillery & Terrain
Artillery is affected differently by some terrain for both movement and combat. Artillery may not move into, or bombard or support an attack into, any terrain prohibited to it. Consult the TEC.
8.3 Artillery Combat
An artillery unit adjacent to an enemy unit participates in combat just like infantry or cavalry, except that artillery may not advance after combat. Artillery may not attack any hex into which it could not move or bombard, but may defend any hex.
An artillery unit engaged in combat with an adjacent opponent suffers all combat results except "Ammo" ("Ammo" affect only bombarding artillery). Artillery is captured if forced to retreat by a charging enemy or if it chooses Last Stand (see 7.13).
8.4 Bombardment
Bombardment is an attack by artillery during its combat phase against a non-adjacent enemy-occupied hex or an adjacent one separated by a prohibited hexside. To bombard an enemy-occupied hex, an artillery unit must:
- have attack and range factors greater than zero;
- be undisrupted and effective (11.1 & 11.3);
- have a line of sight to the target (8.6);
- be within range of the target (8.7).
A bombarding artillery unit may target only a single enemy unit (it does not have to be the top unit in a stack). Stacked artillery units need not bombard together; they may target different units in one hex or may bombard different hexes. Artillery units in different hexes may bombard the same target hex and/or unit. All artillery bombarding a single hex must be declared before any bombardments are resolved; once targeted on a selected hex, the chosen units may not shift fire to another hex. The chosen target unit within a hex may be determined at the time the unit fires.
The bombardment by each artillery unit is resolved separately. To fire together in a single bombardment, two or more artillery units must be coordinated. To be coordinated, the units must be stacked with or adjacent to another coordinating unit and/or a coordinating leader.
Bombardment does not qualify as an attack for purposes of 7.2 unless some result (retreat, rout, step loss, disruption) is inflicted on the defending unit.
8.5 Bombardment Resolution
To resolve a bombardment, total the attack strength of the participating artillery. Double the artillery's CF if the targeted unit is cavalry. Express the total bombarding strength as a positive number and find the equivalent differential column along the top of the Combat Results Table. Roll the die, cross-index to get the result.
Ignore all A results and all parenthesized results. Bombarding artillery is affected only by an "Ammo" result, which indicates the artillery has run out of ammunition. Flip the firing artillery unit to its ineffective side; if multiple units are firing, the attacking player may choose one to render ineffective.
8.6 Line of Sight (LOS)
An LOS is a path from the center of the firing hex to the center of the target hex. If any intervening hex or hexside is blocked, the artillery may not bombard. If the LOS is congruent to a hexside, the LOS is blocked only if both hexes adjacent to that hexside are blocked (ignore the hexside terrain for this purpose). Units, friendly or enemy, do not block LOS.
Terrain in the firing and target hexes does not block the LOS, but bombardment is not permitted into certain terrain types.
The maximum LOS during daylight turns is 10 hexes; do not count the observer's hex, do count the observed hex.
8.7 Range
An artillery unit's range factor indicates the maximum number of hexes distant the unit may bombard; count the target hex but not the bombarding unit's hex. Add one hex to the range of any artillery unit firing from a hill.
8.8 Supporting Fire
Artillery may bombard to support other units in close combat. The artillery unit
- may not be adjacent to an enemy unit (unless separated by a prohibited hexside);
- must be able to bombard the defender; and
- must be adjacent to a unit attacking the same defender.
Add the bombarding artillery strength to the attacker's combat strength before calculating the odds; double the artillery's CF if any defending unit is cavalry. The bombarding artillery is unaffected by results except "Ammo" results.
No coordination is necessary for supporting fire; any artillery unit may support units from any friendly formation as long as it meets the requirements above.
9.0 Cavalry
9.1 Cavalry Units
Except as noted in this section, cavalry units operate like infantry and are affected by all game rules in the same way. Cavalry may stack with all other unit types.
9.2 Cavalry Combat
Cavalry engages in and suffers from combat just like infantry with the following exceptions:
- it is affected differently by certain terrain types (see the TEC)
- it is doubled when attacking a disrupted or ineffective defender
- any defender retreating from attacking cavalry (primary unit or not) is disrupted after applying any other combat result (if already disrupted there is no additional effect)
- The CF of bombarding artillery is doubled against defending cavalry.
9.3 Cavalry Charges
A cavalry charge may be made by up to squadron, one leader and any one other cavalry unit; they must be coordinated and are treated collectively as a single unit. All must be effective and undisrupted. The charging units may be stacked with other units prior to initiating the charge but may not be overstacked. Stacked cavalry units may initiate separate charges.
Resolve the charge as follows:
- The charge must be declared during the preceding movement phase. The unit must move one or two hexes and may enter, cross, and attack into clear terrain only. It may not enter a hex occupied by another friendly unit.
- No artillery support is allowed. The defender may be attacked by other charging cavalry only. Resolve each charge separately (this is an exception to 7.4).
- Before resolving the combat, make a morale check for the charging cavalry. If it fails, it is disrupted. If it passes, make a morale check for the target unit unless it is an infantry unit in square (9.5). If the target unit fails, it disrupts. Regardless of the roll, if it is an infantry unit, it may form square.
- Use the cavalry's charge factor in lieu of its CF; it is doubled against a disrupted or ineffective opponent.
- When resolving the charge, treat all Dr, Dc, and Dx results as Dm; if the defender routs, it also suffers a step loss (except artillery, which is captured). Treat any other result--the defender passing the rout check or an Ex, NE, or any A result--as Am (Ar). Resolve the Am in the same way as a Dm result.
- If the defender routs and the cavalry is still effective, it may advance zero, one, or two hexes and conduct another charge. The new target may be a unit already attacked or still to be attacked that phase. Victorious cavalry may continue advancing and charging indefinitely, as long as the defenders rout and the cavalry remains effective.
- The charging cavalry is ineffective at the end of a charge unless already ineffective.
9.4 Countercharges
If attacked by anything other than bombarding artillery, regardless of tactics, a defending cavalry unit may choose to countercharge. It need not move but must meet all other requirements. Against attacking infantry or non-charging cavalry, treat the countercharge as though the charging cavalry was the attacker and resolve per 9.3 above. Against charging cavalry, both sides use their charge factor when calculating the differential. Treat all A results as Am, all D results as Dm. If the affected unit does not rout, or on any other combat result, both sides retreat (Ar and Dr).
9.5 Squares
Any hex with an infantry unit in it may form square at the beginning of its movement phase or during a cavalry charge (see 9.3). A disrupted unit may form square, but cavalry is doubled when attacking it.
When the square is formed, place the square marker on it; treat all units in the hex as being in square. Units in square may move one hex per movement phase. Roll for disruption if the square enters or crosses any terrain other than clear. Subtract 2 from the combat factor if the unit attacks while in square. The square may be removed at the beginning of the unit's next movement phase.
Only the infantry unit forming square may participate in combat; the units stacked with it may not participate, but are affected by combat results. A unit in square does not make a morale check when charged by cavalry. Add 2 to the unit's combat and morale factors when being charged by cavalry.
Add two to the combat factor of any non-cavalry unit, including bombarding artillery; attacking the square. Non-charging cavalry does not receive this bonus.
10.0 Leaders
10.1 Leader Movement & Stacking
A leader does not count for stacking. He may move with a unit/stack or may move alone. He may stack with any friendly unit, even one not in his command span. When moving alone, he always has 12 MP (they never roll for their MA) and pay 1 MP for all hexes except roads, which cost 1/2 MP, and prohibited hexes/hexsides. He may not enter EZOC and may leave EZOC freely. If at any time other than the movement phase a leader ends up alone in an EZOC, and has an SLR, move him to the nearest friendly unit. If there is an unsafe line of retreat, check for a leader casualty (see below); if the leader survives, place him on the nearest friendly unit. If the leader has no line of retreat, he is captured.
A leader is flipped to his ineffective side as a result of combat (see 7.8). Ineffective leaders move normally, but have no other game effects. Effectiveness may be recovered during movement (see 11.3).
10.3 Leader Effects
The leader's command span indicates the formations over which the leader has authority; an "A" indicates all formations in that army. Each effective leader may assist one unit within his command span in each game turn. A leader may stack with a unit not in his command span, but cannot affect the unit's performance.
He may assist a unit for movement only if he begins the turn stacked with it. For other effects, he must be stacked with the unit at the instant the effect takes place (except for coordination, which may extend to units in other hexes). A leader may do any or all of the following:
Movement: the leader adds his movement value to the unit's MA. If the unit must roll for an MA, add the leader's movement value to the die result. The leader must remain with the unit throughout the movement phase. An accompanied unit with a parenthesized combat factor may enter an EZOC.
Morale Checks & Recovery: add the leader's morale rating to the MR of the unit when it checks morale. Regardless of the leader, the unit fails on a die roll of "6." A leader stacked with an active HQ, active trains, or the army's LOC hex (see 12.3) may add his morale rating to an eliminated unit attempting to recover a step.
Coordination: a leader may provide coordination for an attack involving the unit. Treat all involved units within the leader's command span as belonging to a single formation.
Participation in Combat: a leader need not participate in combat with a stacked unit (on attack or defense). If he does, add his combat and morale factors to the unit's factors for all combat purposes except bombardment and skirmishing. A parenthesized or disrupted unit is no longer halved when stacked with a participating leader. If the unit advances after combat, the leader must accompany it.
10.3 Leader Casualties
Any time a leader coordinates or participates in combat, or is stacked with a unit during combat (including bombardment), and a Leader result occurs, roll a die. A coordinating or stacked leader becomes a casualty on a roll of "6"; a participating leader on a roll of "5" or "6." Remove the casualties from the map; they are out of the game for good. Leaders retreating alone through an unsafe hex become casualties on a roll of "6."
[Editor's note: the source numbers two subsections 10.3 (Leader Effects and Leader Casualties) and has no 10.2. Both headings are transcribed as printed.]
11.0 Recovery
11.1 Disruption Recovery
A unit may recover from disruption during any of its movement phases. If the recovering unit is in an EZOC, it may not recover during that movement phase. If the unit is eligible for March Movement throughout the turn (it may but need not undertake actual march movement) it recovers automatically. In any other circumstance make a morale check for the unit at the end of its move (do not add two to the roll). If the unit passes, remove the marker. If it fails, the marker remains. At night (14.2), a unit not attacking (it may move, march, and/or defend) recovers automatically, without a morale check and regardless of EZOC.
11.2 Step Recovery
Step recovery is done during each player's movement phase and may be done simultaneously with disruption and/or effectiveness recovery. If the player receives replacement steps (consult the Exclusive Rules), each replacement step restores an eliminated one-step unit or one step of an eliminated two-step brigade. Place the replaced unit on the next box of the TRT; it is eligible to return to the map in its next movement phase (13.2). A replacement step may also be used to flip a reduced two-step brigade back to full strength on the map; if the unit meets the requirements for disruption recovery (see above), flip it back to its full strength side. Unexpended replacements are lost; they may not be accumulated.
Additional replacements may be created by making morale checks for eliminated units off the map (not for reduced units on the map). The owning player may make a check for each such unit each friendly movement phase. If the unit passes the morale check, the step is recovered and the unit eligible to return to the map as though created with a replacement step. If the unit fails the morale check, it is destroyed and no longer eligible to return to play; it also may count for victory determination (see 18.0).
A one-step unit with a red dot next to its formation number may not be replaced using replacement steps. Each step of a two-step unit may have a dot; it is possible for a unit to be able to recover both, one, or no steps. Those non-replaceable units may be replaced using leader-assisted (only) morale checks.
A unit may recover from disruption and/or ineffectiveness simultaneously.
11.3 Effectiveness Recovery
Artillery, cavalry, battalions, squadrons, and leaders flipped to their ineffective sides have the same constraints as disrupted units. They recover effectiveness during their movement phase if they meet the requirements for recovery from disruption (which may occur simultaneously).
12.0 Army Morale
12.1 Headquarters
The headquarters counter (HQ) represents the nexus of each army's command network. It does not count for stacking purposes; friendly units may move and stack normally in its hex.
The HQ may move during any friendly movement phase by being flipped to its inactive side (its MA is printed on that side). The HQ must be flipped to its inactive side at the beginning of the phase if it is to move. It moves like a cavalry unit, but may not enter an EZOC. It always receives its full MA; it never rolls for MA.
The HQ exerts no ZOC. It has a combat strength of zero; if attacked, it may not retreat or disengage. It is unaffected by combat results, but each time it is attacked (even if there are other units in the hex) the enemy player receives two fortunes of war. If unstacked and attacked in close combat, no die roll is needed; the attacker may advance into the hex, capturing the HQ; it is out of the game for good.
While the headquarters is active, the army functions normally. Whenever it is moved, placed in an EZOC, lacks an SLR to its active trains or to its LOC hex, or is subjected to an enemy attack (regardless of the result), flip the unit to its inactive side. It recovers to its active side at the end of any friendly movement phase in which none of those conditions apply.
While the HQ is inactive all units in its army must roll for their MA, reentering units may not enter at it (see 13.2), and safe lines of retreat may not be traced to it.
12.2 Trains
The trains represent the nexus of an army's logistical network. Its march movement allowance is limited to its printed MA (on its inactive side only). It always receives its full MA; it never rolls for MA. The MA is doubled during road movement. It may enter only clear, road, and trail hexes and cross bridge and ford hexsides. It must stop after entering a clear hex.
No friendly unit may move through the trains counter at any time for any reason. If a unit (friendly or enemy) is forced to retreat through the trains, it may pass through the trains but is disrupted (if already disrupted, there is no further effect).
It may not enter EZOC and has no combat factor or ZOC. If attacked, it ignores all combat results, but the attacker receives two FOW each time it is attacked. An enemy unit may enter its hex during movement or after combat, capturing the trains. Once captured, it is out of the game for good.
The trains remains active until it moves, is placed in an EZOC, lacks an SLR to the army's LOC hex, or is attacked (regardless of the result). If the trains is to be moved, it must be flipped to its inactive side at the beginning of the movement phase. It remains inactive until the end of a movement phase in which none of those conditions exists.
While the trains is inactive, units may not trace an SLR to it and reentering units may not enter at the trains.
12.3 LOC Hexes
LOC hexes represents a route to the army's logistical and administrative base. It functions as long as it is not occupied by an enemy unit or EZOC. Without a functioning LOC, HQ and trains may not be active and units may not return to the map (13.2).
12.4 Fortunes of War
Fortunes of war (FOW) represent interruptions to the normal flow of play brought about by the chaos of battle. Players receive FOW as a result of combat. Each FOW allows the player to take one of the actions listed below. Those actions must be carried out immediately; any FOW not used immediately is lost; they may not be accumulated.
Move an Enemy Unit. Pick an enemy combat unit (not stack, but it may be one unit in a stack). Roll the die. On a result of one or two, the unit may be moved. Roll for the unit's MA. Normal movement rules apply, but the unit may not use march movement and may not be moved off the map. It may be moved into an EZOC (that is, your ZOC). If moved during a combat phase, the unit must participate in any subsequent combat in its final hex, even if it has participated already.
Move a Friendly Unit/Stack. Any one friendly unit or stack may be moved; if a stack is moved, it must move together. Roll for a unit's MA; for a stack, roll for the slowest unit's MA. All movement rules apply. If moved during a combat phase, the unit must participate in any subsequent combat in its final hex, even if it has participated already. In lieu of moving a unit on the map, a unit on the next turn box of the TRT may be placed on the map (13.2). If the moving unit moves next to an enemy unit yet to be attacked in that combat phase by other friendly units, the moving unit reinforces that attack. If the moving unit moves next to an enemy unit that has not been attacked or already has been attacked the moving unit must attack it; if it moves adjacent to more than one unattacked enemy unit, it triggers combats against each.
Charge with a Friendly Unit/Stack. Any one friendly unit or stack may initiate a charge. The unit may not be in an EZOC and may not have participated in combat that same phase. If the primary unit passes its charge morale test, the CF (or cavalry charge factor) of all charging units (but not leaders) is doubled. The target unit may have been involved in combat during the same combat phase. If the target unit is yet to be involved in combat, the charge counts as its combat for that phase; treat the units slated to attack that defender as having received an NE result.
Enemy Morale Check. Make a morale check for any one undisrupted enemy combat unit (not a leader). If the unit fails, it is disrupted.
Friendly Recovery Check. Make a morale check for one combat unit to recover (any kind). The check may be made regardless of enemy proximity. A failed roll does not result in the destruction of the unit.
13.0 Entering the Map
13.1 Arrival of Reinforcements
Reinforcements enter the map after the game has begun. The turn and hex of entry is specified in the Exclusive Rules. Units enter one at a time, though battalions, squadrons, leaders, and HQs may enter stacked with another unit. Each unit pays the appropriate MP cost for the entry hex and moves normally thereafter.
Reinforcements may not enter an enemy-occupied hex, but may enter an enemy-controlled hex (an EZOC). If the entry hex is enemy occupied, the reinforcements may be delayed (indefinitely) until the hex is unoccupied. Alternatively, the hex of entry may be shifted along the map edge from the specified entry hex, at a cost of 1 MP per hex shifted, until reaching a hex not occupied by an enemy unit.
13.2 Reentry of Recovered Units
Units in the current Turn Box on the TRT at the beginning of the owning player's movement phase may return to the map. Each unit may be placed on or adjacent to an active HQ or adjacent to an active Trains unit, or on or adjacent to its side's LOC hex. The reentering unit may not be placed in an EZOC or enemy occupied hex, or into a hex that would become overstacked by its placement. Eligible units not placed for any reason are moved to the next Turn Box on the TRT.
14.0 Nature
14.1 Nature Generally
Low light and inclement weather affect operations in a variety of ways. Unless specified otherwise in this section, all standard rules apply.
14.2 Night
Night turns are indicated on the TRT and affect play as follows:
- Recovery: units recover more easily at night (11.1 & 11.3) but replacement rules do not change.
- Morale Checks: add two to all morale check die rolls; all units still pass on a roll of 1.
- Movement: only charging units may enter an EZOC. All units may disengage freely, without regard to comparative MA or leaving units behind, but do roll for the MA of disengaging units.
- Combat: no combat is allowed except for infantry charges. If the defender routs, the attacker may advance into the vacated hex only. If the defender does not rout, the attacker must retreat and is disrupted; the defender may not advance.
- LOS is zero at night: artillery may not bombard or support an attack, but may defend themselves normally.
14.3 Twilight
Twilight turns are indicated on the TRT and affect play as follows:
- Morale Checks: Add one to all morale check die rolls; all units still pass on a roll of 1.
- Coordination of attacks is not possible.
- LOS is one: artillery may support or bombard only adjacent hexes.
15.0 Designer's Notes
Musket & Saber is a remake and merger of the old Napoleon at War and Blue & Gray series. The originals had a lot going for them: the right scale for the era, quick set up, and a simple set of rules that made the battles accessible. On the other hand, the same simplicity gave us undifferentiated units and a combat system that forced players to adopt tactics both counter-intuitive and ahistorical. The result was more akin to a rugby scrum than a battle.
M&S is a reworking of the mechanics, while retaining the key elements of its progenitors--move-fight sequence, single-phase combat resolution, and a playing time of two hours or less without adding much complexity. The action is a better reflection of the realities of linear warfare. When units stand, the result is bloody collision, but units and whole lines can collapse quickly without fresh units to feed the fight. The changes enliven the game, turning the scrum into a more volatile, but less controllable, mix.
For expanded designer's notes, and to review Questions & Answers about the games in this series, go to the Decision Games Website in the E-Rules section.
Koniggratz Exclusive Rules
16.0 Introduction
16.1 Historical Background
The close of the Napoleonic wars in 1815 opened a half-century of Austro-Prussian rivalry--sometimes friendly, sometimes not, always calculated--for the domination of Germany. In the spring of 1866, Prussia finally was able to provoke a war, though it was not declared until the cusp of summer. Most observers expected a quick victory for the old order, Austria, but in the last week of June a nearly unbroken series of small Prussian victories pressed the Austrian field army back on the fortress of Königgrätz. There on the morning of 3 July, the main armies at last came to grips.
16.2 Course of the Game
The game starts at dawn of 3 July 1866 and runs through dusk of the same day. The Austrians begin the day in complete possession of the battlefield, facing three separate Prussian commands arriving from different points of the compass. To win the game, the Prussians must sweep the Austrian army off the field (as they did historically), while the Austrians must maintain a presence on the field to justify their claim to political primacy in central Europe.
17.0 Set Up
17.1 Getting Started
Determine which army each player will command. Lay out the map and sort the units by side and formation. Each player deploys his units on the map or as reinforcements according to the instructions in 17.2 and 17.3 below. Units placed on the map are identified by Formation, ID, and a 4-digit hex. The notations "w/1" and "w/2" indicates placement within 1 or 2 hexes, respectively, of the specified hex.
Reinforcements are identified by Formation, ID, and an entry location (Entry Hex or Box). The turn of arrival is indicated by a "T" (e.g. "T2" means the specified unit is available at the start of the owning player's movement phase on Turn 2).
The Prussian player is the First Player. The game starts with the Prussian Movement Phase of Game Turn 1. Place the Game Turn marker in the Turn 1 box of the Turn Record Track. Place the weather marker in the Turn 1 Box, with the Heavy Rain side up.
There are 10 Game Turns; at the end of Turn 10, determine the winner according to Section 18.0.
17.2 Austrian Set Up
All Austrian leaders except Benedek set up stacked with any unit in the leader's command span.
- Benedek (Active): 3416 (Chlum)
- HQ (see 19.5): 3416 (Chlum)
- Formation 1: w/3 2420 (Rosnitz); may be hidden (see 19.8)
- Formation 2: on or adjacent to the Austrian fieldworks (see 19.6) from and/or hexes 3624, 3724, 3725 (Nedelist)
- Formation 3: w/5 3709; any two infantry units in 4610 (Benatek)
- Formation 4: on or adjacent to the Austrian fieldworks (see 19.6) from 3514 through 3718
- Formation 6: w/3 2824 (Sweti); may be hidden (see 19.8)
- Formation 8: w/2 1614; may be hidden (see 19.10)
- Formation 10: any hex in columns 24xx through 32xx east of the Bistritz and west of xx13
- Formation S: any hex in columns 10xx through 23xx east of xx02 and west of xx14
- Formation C [1R, 2R, 3R]: w/3 2721 (Wschestar); may be hidden (see 19.8)
- Formation R: w/3 2721 (Wschestar); may be hidden (see 19.8)
- Formation E [1/L]: w/5 0608 (Hradek)
- Formation T [2/L]: w/3 3725 (Nedelist)
- Formation P: 3604, 3704, 3705 (Sadowa)
- Trains: 2722 (Wschestar)
- LOC: Entry Hex N
- Replacements: One per formation (not sub-formation; see 19.1) per turn. Replacements may not be accumulated or transferred between formations.
17.3 Austrian Free Set Up
All Austrian units may be set up anywhere on the board with the following exceptions:
- the only allowable hexes on or west of the Bistritz are town hexes
- no units may set up in columns 53xx, 54xx, or 55xx
- in columns 01xx through 10xx, no units may set up in hexes west of xx03
- the Trains must be set up in 2722
Any units may be hidden (see 19.8). LOC and Replacements remain as stated in 17.2.
17.4 Prussian Set Up
No Prussian units begin the game on the map, but arrive as reinforcements during the course of the game. The Prussian forces form the three separate organizations listed below. Headquarters and army commanders affect only those formations listed as part of the army; all Prussian units may stack together and use any LOC hex, but there is no means of coordinating attacks by units of different armies. All Prussian leaders arrive with any one unit in the leader's command span. Prussian units with a Formation span (two or more formation numbers) may arrive with any formation in the span.
Elbe Army
- HQ: Roll one die each turn starting T3; on a roll of "1" or "2" the HQ arrives at Entry Hex B or C
- Advance Guard (AG/14, 33 Fu/16, Lt Cav, Horse Art): Arrives T1 at Entry Hex B and/or C
- Formation 14: Arrives T2 at Entry Hex B and/or C
- Formation 15: Arrives T3 at Entry Hex A, B, C, and/or D
- Formation 16: Arrives T4 at Entry Hex A, B, C, and/or D
- Formation E: Arrives T5 at Entry Hex A, B, C, and/or D
First Army
- HQ: Arrives T1 at Entry Hex G
- Formation 3: Arrives T1 at Entry Hex E
- Formation 4: Arrives T1 at Entry Hex F
- Formations 5 & 6: Arrive T3 at Entry Hex F and/or G
- Formation 7: Arrives T1 at Entry Hex H
- Formation 8: Arrives T1 at Entry Hex G
- Formation F (Cavalry): Arrives T4 at Entry Hex E
- Formation F (Artillery): Arrives T4 at Entry Hex F and/or G
Second Army
- HQ: Arrives T5 at Entry Hex J
- Formation 1G: Arrives T4 at Entry Hex J
- Formation 2G: Arrives T5 at Entry Hex J
- Formations 1-2: Roll one die on T6; on a roll of 1-to-3 the formations arrive at Entry Hex I OR (not and/or) Entry Hex J. On a roll of 4-to-6, the formations arrive at the same locations on T7
- Formations 9-10: Arrives T7 at Entry Hex K and/or L
- Formation 11: Arrives T5 at Entry Hex L
- Formation 12: Roll one die on T5; on a roll of 1-to-3 the formations arrive at Entry Hex M. On a roll of 4-to-6 the formation arrives at the same locations on T6
- Formation S (Cavalry): On each turn starting with T5, roll one die. O a roll of 1-to-2, the cavalry arrives at Entry Hex J
- Formation S (Artillery): Arrives T6 at Entry Hex J
- LOC: Entry Hexes B, C, F, G, J, K, and/or L
- Replacements: One per formation (not sub-formation; see 19.1) per turn. Replacements may not be accumulated or transferred to another formation.
18.0 Victory Conditions
18.1 Prussian Victory
The Prussians win if at the end of the battle a Prussian unit was the last to enter hex 2030 (Entry Hex N), or if a Prussian artillery unit is in position to bombard the hex, meaning the hex is within range of the Prussian unit. For this purpose and this purpose only, the range is not limited by the reduction of LOS due to rain or darkness.
18.2 Austrian Victory
The Austrians win if (1) the Prussians have not achieved a victory and (2) the Austrian Trains have not moved or been attacked and (3) no Prussian unit occupies a fieldworks hex (see 19.6) at the end of the game.
18.3 Winning a Drawn Battle
If neither player achieves the conditions set forth above, the battle is drawn and the game is won on Victory Points (VP). Each player receives the following points:
- 1 VP for each enemy unit destroyed (see 11.2); do not count eliminated steps or routed units on the TRT
- 1 VP for each leader casualty
- 2 VP for each unit or leader captured
- 4 VP for a captured enemy HQ
The player with the greatest total wins, but if the total point count for the winner is fewer than 10, consider the game a draw.
19.0 Special Rules
19.1 Sub-Formations
Because of the large number of formations in the game, it was necessary to make a small modification to the normal presentation of formation numbers on the counters (2.4). The Prussian Guard Corps, the Saxon Corps, and each Austrian Corps are single formations consisting of two or more sub-formations. This is noted on the counters with two digits: the first (smaller type) is the sub-formation, the second (larger type) is the main formation. For purposes of coordination (7.14), each sub-formation is treated as a separate formation. For all other purposes, only the main formation is used.
19.2 Ridge Hexsides
This is a new terrain type. A ridge hexside blocks LOS for all purposes unless either the observing unit or the observed unit is adjacent to the ridge (on either side of it). This is the only effect of the ridge; for all other purposes, treat it as a clear hexside.
19.3 Modified Squares
Square markers (9.5) are not used in this game, but all infantry in the game has equivalent protection from cavalry. This reflects both the large size of the units represented by each counter, the dense formations used by the Austrians and Saxons, and the efficacy of the Prussian breechloaders.
Austrian and Saxon infantry that is not in line formation (see 19.7) is treated as being in square when charged by Prussian cavalry. It is not treated in square for any other purpose (i.e. movement or combat other than a cavalry charge).
All Prussian infantry is treated as being in square when attacked by cavalry (even if in open order).
19.4 Rain
Rain fell throughout the battle, varying from downpour to drizzle. The Rain Marker is used to reflect the current state of the weather: Heavy Rain is indicated by placing the marker with its Heavy Rain side showing in the current box of the TRT, Light Rain is indicated using the Light Rain side, and Clear weather is indicated by removing the marker from the TRT.
During the Game Turn marker phase of each turn, the weather for the following turn is determined. Either player rolls a die; consult the Rain Table on the map and place the marker for the following game turn.
Clear weather has no effect on play. In Light Rain, LOS is limited to 6 hexes, but that can be extended by one for hills (8.7) and by two for Austrian fieldworks (19.6). In Heavy Rain, the LOS is limited to an absolute maximum of 4 hexes regardless of any bonuses, and no unit may move more than four MP.
19.5 Austrian Lethargy
Benedek was one of the most accomplished Austrian soldiers, but was bedeviled by the sloppiness of Austrian staff work and the intransiegence of higher-titled subordinates (Benedek was not of the nobility). Orders weer transmitted haphazardly, not followed up, and sometimes obeyes slowly and reluctantly. At the beginning of each Austrian Movement Phase, the Austrian player rolls one die. On a result of 1-to-3, the Austrian HQ is flipped to its Active side (unless it does not meet the requirements of 12.1); on a result of 4-6, the HQ is Inactive for that turn.
19.6 Austrian Fieldworks
The Austrian fieldworks is the contiguous line of hexes with at least one protected hexside running from 2712 to 3723. They had been constructed not only to protect the infantry, but to enhance artillery fire with precise pre-battle ranging hand the clearing of trees and other obstructions.
Austrian (not Saxon) artillery bombarding from a hex marked with the Battery Position icon across a protected hexside adds two its range and two to its attack factor. All such units automatically are coordinated with one another.
There is no bonus when firing in support or on defense.
19.7 Austrian Line Formations
During the week prior to the battle, at least one Austrian corps commander avoided the massed infantry columns prescribe by Stosstaktik doctrine. He formed his men into four-man groups--the best shot firing, the other three loading--spread into a ragged line. The Austrian player (only) may adopt this formation for any of his infantry units. The diagram summarizes the key points of the following rules.
A. Creation & Removal. At the beginning of any Austrian movement phase, the Austrian player may place a line marker on any undisrupted, unstacked infantry unit (including a battalion) in a clear or light woods hex not in an EZOC. The line marker is removed automatically if the unit is stacked with another unit at any time (including during movement), retreats or routs, or is eliminated or disrupted. The Austrian player may remove the marker voluntarily at the end of any of his movement phase as long as the unit is not in an EZOC.
B. Facing & Flanks. While in line, the marker and unit must be placed such that the top of the marker faces an apex of the hex. The two hexes on either side of the apex are the unit's front hexes: the unit moves, exerts a ZOC, and fights normally only into its front hexes. Each time a Prussian unit enters a flank or rear hex at any time for any reason, make a morale check for the unit; if it fails, it routs.
C. Movement Effects. Use the MA on the line marker in lieu of the unit's MA when moving into front hexsides. If it enters or crosses any terrain other than clear, light woods or treeline, it is disrupted. The unit may not disengage or use march movement. If not in an EZOC, the unit may move backwards into either rear hex or may pivot to reorient the marker to any other apex. These latter two forms of movement constitute the unit's entire move.
D. Combat Effects. The unit may attack only into its front hexes. It may skirmish (using the marker's MA) but may not choose any other tactic in 7.13.
Add 2 to the unit's combat factor when fighting a unit in a front hex, but the unit is halved (after adding two) when attacking. If attacked from the flank, the attacker's CF is tripled; if attacked from the rear, the attacker's CF is doubled.
A unit in line formation and not in an EZOC may fire at an enemy unit up to two hexes away. Resolve long-range fire as though it was an artillery bombardment. Use the combat factor on the line marker only; do not use or add the unit's combat factor.
Design Note. Throughout the musket era of warfare, the line was recognized as the superior formation for infantry combat (and for the most part for cavalry combat) because it was the most efficient method of achieving maximum firepower. Infantry columns--relatively narrower and deeper--were useful for rapid movement, but only under unusual circumstances were they intended to be used within range of enemy infantry fire: the Austrian Stosstaktik was a notable exception. On the whole, combat rewarded the flexible use of a wide array of formations to deal with varying situations. In Musket & Saber, all infantry is presumed to be in the appropriate formation at any given time--line when in contact, column when moving--with the unit commanders giving the necessary orders at the right time. This rule is used to portray those situations where units adopted a specialized linear formation departing from that standard.
19.8 Austrian Hidden Movement
A. Markers & Boxes. The Austrian player has four HM boxes (A through D), each with a pair of counters. The boxes are used to store the units using hidden movement. During set up, place the markers in the associated boxes. They may be deployed to the map during set up (see B) and move like any other unit during play (C). One of the counters represents the units in the box; eventually it will be revealed (D) and the units deployed (E). The remaining counter is a dummy unit, but until revealed behaves in all ways as though it represents the units in the box. The opposing player may not examine the markers or the units in the box until the markers are revealed. The markers may be created only during the initial set up. Once removed, they may not be reused.
B. Creation & Placement. Using the historical set up, any or all of Formations 1, 6, 8, C, and/or R may be hidden. If the free set up option is chosen, all units are eligible for hidden deployment. Only units from a single formation may be placed in a single HM box, but C and R units may be in the same one. A single formation may be split among two or more boxes.
Deploy both markers for a box face up and unstacked on or adjacent to a hex assigned to any one of the units to be hidden. The hex must be hidden per paragraph D below. All units of the chosen formation may be placed in the box.
C. Movement. An HM marker may be moved moved during any Austrian movement phase. It uses the infantry movement and march movement rates; if the Austrian HQ is Inactive, roll for the marker's MA. It may not stack with any other combat units or HM markers at any time, even during movement; leaders and HQs do not count for this purpose. The marker may no-t be moved into any hex that would cause it to be revealed.
Disrupted and ineffective units may recover while in the marker; treat them as not moving even if they do. Units may receive replacements while hidden. For a recovery to be leader-assisted, the leader must be in the same HM marker.
An HM marker may be revealed voluntarily buy the Austrian player at the beginning of any Austrian movement phase if the Austrian HQ is active. Remove both markers associated with that box and deploy the contained units.
A marker is revealed involuntarily at any time it comes into the line of sight (LOS) of an enemy unit: leaders, HQs, and Trains do count for this purpose. This event is instantaneous and may occur during enemy movement, or during retreat or advance after combat. If it occurs while an enemy unit is in motion, temporarily halt the moving unit, reveal the marker, deploy any units, then complete the enemy activity.
D. Deployment. When an HM marker is revealed, place each unit in its box on or adjacent to the real marker's hex. The deploying units may be stacked (and/or overstacked) with one another or with units already on the map.
For each unit deployed into or adjacent to an EZOC, make a morale check; if it fails the unit is disrupted.
Design Note. Knowing what was on "the other side of the hill" was (and remains) of vital concern on any battlefield. One of the general downsides of board games is the nearly perfect information available to both players as to where and how strong an enemy is or isn't. This rule introduces that element of uncertainty into the games. It is not intended to be a complete lack of information or any kind of double-blind system. The intent is to create a situation where one or both players must divine some portion of the enemy's disposition or plans. If it causes a single turn's hesitation in the release of reserves, or the diversion of a single formation to deal with a possible threat, then it has achieved the desired outcome.
19.9 Prussian Needle Gun
The breechloading needle gun gave the Prussian infantry two important advantages over the Austrians: a higher rate of fire (accounted for in generally higher combat factors), and the ability to lie down while fighting and reloading. The latter effect kept casualties much lower during combat. To reflect this, Prussian infantry takes no losses when an exchange result is inflicted by an Austrian attack.
19.10 Prussian Open Order
The combination of high firepower and superior small unit leadership enabled the Prussian infantry to abandon close order formations during combat. This reduced their ability to attack, but limited the effectiveness of Austrian artillery fire. Prussian infantry units may adopt this formation subject to the following:
A. Creation & Removal. At the beginning of any Prussian Movement Phase, an open order marker may be placed on any undisrupted, unstacked Prussian infantry unit; terrain and EZOC do not affect this ability. The marker is removed automatically if the unit is stacked with another unit at any time, retreats or routs, or is eliminated or disrupted. The Prussian player may remove the marker voluntarily at the end of any movement phase as long as the unit is not in an EZOC.
B. Combat Effects. The unit's CF is parenthesized. It may choose only the Skirmish and Disengage tactics from 7.13.
C. Bombardment Effects. Austrian artillery is halved when bombarding the unit.
20.0 Folio Notes
20.1 Designer's Notes
The Austrians had no realistic chance to win the battle or the war in absolute terms. The best they could hope to do--victory in game terms--was to hold the selected position for an entire day of battle. That would reestablish both troop morale and Austrian political fortunes. Given the overall numerical and financial superiority of the Austrian empire, such an outcome likely would have led to more muted peace terms, more of a partnership in Germany rather than outright Prussian domination.
Like the Leipzig game of this series, the most difficult design constraint was the sheer number of combatants. Fortunately, the actual unit organization of both sides lent itself to easy modification. Each Austrian brigade had seven battalions; one of Jägers and two 3-battalion regiments. Each regiment has its own counter while the Jägers are combined into corps-level assets. Each Prussian division had four 3-battalion regiments, but they fought in 4-battalion groups (see the accompanying article for details).
In both cases, the counters represent historical organizations, but are treated as "fat," meaning they get more replacements than is usual in this series.
20.2 Player Notes
The Prussian player, badly outnumbered at first, must avoid playing too cautiously. The attack along the Bistritz must be pressed firmly: if the Austrian still has a substantial reserve at midday, Second Army will find slow going. On the other hand, some caution is warranted. If kept in groups, Prussian infantry has little to fear from the Austrian infantry, but the front must be stretched to pull in Austrian reserves, and that can lead to units being isolated. There's not much to be done about the Austrian artillery; just grit your teeth and take your lumps.
The Austrian player is in the opposite position. Caution is a must: occupy the towns and fortifications and use your artillery to smash Prussian attacks. Maneuver your reserves actively, using dummy units to keep the Prussian guessing as to your plans. Cautious does not mean passive though. If the Prussian gives you an opening in the early going, use your plentiful reserves to crush one of the armies along the Bistritz. Do not commit the reserves piecemeal; given the one-sided attrition due to the needle gun, you will need substantial numerical superiority to do any real damage.
21.0 Orders of Battle
Strengths given below are those present on 3 July after losses in the preceding weeks. The numbers in brackets are the formation numbers in the game.
Abbreviations:
- Bde = Brigade
- Bn(s) = Battalion(s)
- Bty(s) = Battery(ies)
- Cav = Cavalry, Cu = Cuirassier
- Div = Division
- Dr = Dragoon
- FS = on Federal Service
- Fus = Fusilier (usually a regiment)
- Gd(s) = Guard(s)
- Hu = Hussar
- Inf = Infantry (usually a regiment)
- Jg = Jaeger Battalion
- Lw = Landwehr
- pdr = pounder (gun)
- Res = Reserve
- Rgt = Regiment
- Sq(s) = Squadron(s)
- Uh = Uhlan
Prussian Armies
King Wilhelm & Gen. von Moltke: 203,500 men & 708 guns in 202 Bns, 118 Btys, 176 Sqs
The artillery was a mix of 6-pdr rifled (about two-thirds) and 12-pdr smoothbore guns (about one-third). The total number of batteries in each corps, the number assigned to army reserves, is putative; there may have been additional batteries in several corps. All Prussian cavalry regiments had four squadrons.
First Army
Prince Frederick Charles--the "Red Prince:" 76,000 men & 258 guns in 72 Bns, 43 Btys, 72 Sqs
[3-4] 2nd Corps (22,500 men & 48 guns in 25 Bns, 8 Btys, 8 Sqs)
- 3rd Division
- 5th Bde: 2 & 42 Inf
- 6th Bde: 14 & 54 Inf
- 4th Division
- 7th Bde: 9 & 49 Inf
- 8th Bde: 21 & 61 Inf
- Corps Troops
- 34 Fus (FS; fought with 16th Division)
- 2 Jg Bn
- Artillery: 4 btys with each div, remainder with First Army Res
- Cavalry (with First Army Res unless noted): 2 Cu, 3 Dr, 5 Hu (w/1st Div), 4 Uh (w/2nd Div), 9 Uh
[5-6] 3rd Corps (22,000 men & 48 guns in 25 Bns, 8 Btys, 8 Sqs)
- 5th Division
- 9th Bde: 8 & 48 Inf
- 10th Bde: 12th & 52 Inf (52 fought with 10th Div, replaced by 18 Inf from 9th Div)
- 6 Division
- 11th Bde: 20 & 60 Inf (20 FS fought in the west; replaced by 35 Fus)
- 12th Bde: 24 & 64 Inf
- Corps Troops
- 35 Fus (fought with 11th Bde)
- 3 Jg Bn
- Artillery: 4 btys with each division, remainder with First Army Res
- Cavalry (w/First Army Res unless noted): 6 Cu, 2 Dr (w/6th Div), 3 Hu, 3 Uh (w/5th Div), 11 Uh
[7-8] 4th Corps (21,000 men & 48 guns in 22 Bns, 8 Btys, 8 Sqs)
- 7th Division
- 13th Bde: 26 & 66 Inf
- 14th Bde: 27 & 67 Inf
- 8th Division
- 15th Bde: 31 & 71 Inf
- 16th Bde: 32 & 72 Inf (32 FS; fought in west)
- Corps Troops
- 36 Fus (FS; fought in west)
- 4 Jg Bn
- Artillery: 4 btys with each division, remainder with First Army Res
- Cavalry (w/First Army Res unless noted): 7 Cu, 6 Dr (FS, fought in west), 10 Hu (w/7th Div), 12 Hu, 6 Uh (w/8th Div)
[F] First Army Reserve
- Artillery: 2,500 men & 84 guns in 14 btys
- Cavalry: 8,000 men & 30 guns in 5 horse btys & 48 Sq, drawn from Gd, 2nd, 3rd, & 4th Corps
Second Army
(Crown Prince Frederick: 88,000 men & 324 guns in 92 Bns, 54 Btys, 76 Sqs)
[G] Guard Corps (24,500 men & 84 guns in 26 Bns, 14 Btys, 16 Sqs)
- 1st Guard Division
- 1st Gd Bde: 1 & 2 Gds
- 2nd Gd Bde: 3 & 4 Gds (4 Gds in Berlin; replaced by Gd Fus)
- 2nd Guard Division
- 3rd Gd Bde: 1 & 2 Grenadiers
- 4th Gd Bde: 3 & 4 Grenadiers
- Corps Troops
- Gd Fus (fought with 2 Gd Bde)
- Gd Jg Bn
- Gd Schuetzen Bn (equivalent to Jaegers)
- Artillery: 4 bty with each division, 1 horse bty, with First Army Res, rest in corps res
- Cavalry (w/First Army Res unless noted): Garde du Corps (King's Lifeguard, in corps res), Gd Cu (in corps res), 1 Gd Dr, 2 Gd Dr, Gd Hu (w/1st Gd Div, 1 Gd Uh, 2 Gd Uh, 3 Gd Uh (w/2nd Gd Div)
[1-2] 1st Corps (24,000 men & 96 guns in 25 Bns, 16 Btys, 20 Sqs)
- 1st Division
- 1st Bde: 1 & 41 Inf
- 2nd Bde: 3 & 43 Inf
- 2nd Division
- 3rd Bde: 4 & 44 Inf
- 4th Bde: 5 & 45 Inf
- Corps Troops
- 33 Fus (FS; fought with 16th Div)
- 1 Jg Bn
- Artillery: 4 bty with each division, rest with corps res
- Cavalry (in corps reserve unless noted): 3 Cu, 1 Dr (w/1st Div), 1 Hu (w/2nd Div), 8 Uh, 12 Uh
[9-10] 5th Corps (17,500 men & 78 guns in 22 Bns, 13 Btys, 8 Sqs)
- 9th Division
- 17th Bde: 18 & 58 Inf (18 fought w/5th Div, replaced by 37 Fus)
- 18th Bde: 19 & 59 Inf (both FS, fought in west, replaced by 7 In)
- 10th Division
- 19th Bde: 6 & 46 Inf
- 20th Bde: 7 & 47 Inf (7 fought with 17th Bde, replaced by 52 Inf)
- Corps Troops
- 37 Fus (fought w/9th Div)
- 5 Jg Bn
- Artillery: 3 bty FS, fought in west; 4 bty with each div, rest with corps res
- Cavalry (with Second Army Cav Res unless noted): 5 Cu, 4 Dr (w/9th Div), 2 Hu, 2 Lw Hu, 1 Uh (w/10th Div), 1 Lw Uh, 10 Uh
[11-12] 6th Corps (18,500 men & 54 guns in 19 Bns, 9 Btys, 12 Sqs)
- 11th Division
- 21st Bde: 10 & 50 Inf
- 22nd Bde: 11th & 51 Inf (11 FS, fought in west; replaced by 38 Fus)
- 12th Division
- 23rd Bde: 22 & 62 Inf (62 left in Silesia)
- 24th Bde: 23 & 63 Inf (63 left in Silesia)
- Corps Troops
- 38 Fus (fought with 22nd Bde)
- 6 Jg Bn
- Artillery: one bty left in Silesia; three FS, fought in west; rest in corps
- Cavalry: 1 Cu (Second Army Res), 8 Dr (w/11th Div), 4 Hu (w/12th Div), 6 Hu (corps res), 2 Uh (in Silesia)
[S] Second Army Reserve
- Artillery: assembled during battle from the corps
- Cavalry: 3,250 men & 12 guns in 2 horse btys & 20 Sq, drawn from 5th Corps plus 1 Cu from 6th
Elbe Army
Gen. Herwarth: 39,750 men & 126 guns in 38 Bns, 21 Btys, 28 Sqs
[14] 7th Corps (12,500 men & 24 guns in 13 Bns, 4 Btys, 4 Sqs)
- 13th Division (fought in west)
- 14th Division
- 27th Bde: 16 & 56 Inf
- 28th Bde: 17 & 57 Inf
- Corps Troops
- 39 Fus (FS, fought in west)
- 7 Jg Bn
- Artillery: 4 btys w/14th Div, rest in Elbe Army Res
- Cavalry: 4 Cu (w/13th Div), 7 Dr (w/14th Div), 8 Hu (w/13th Div), 11th Hu (Elbe Army Res), 5 Uh (Elbe Army Res)
[15-16] 8th Corps (23,000 men & 48 guns in 25 Bns, 8 Btys, 4 Sqs)
- 15th Division
- 29th Bde: 25 & 65 Inf (25 FS, fought in west; replaced by 40 Fus)
- 30th Bde: 28 & 68 Inf
- 16th Division
- 31st Bde: 29 & 69 Inf
- 32nd Bde: 30 & 70 Inf (fought in west, replaced by 33 & 34 Fus)
- Corps Troops
- 40 Fus (fought with 29th Bde)
- 8 Jg Bn
- Artillery: 4 btys w/ each division, rest in Elbe Army Res
- Cavalry: 8 Cu (Elbe Army Res), 7 Hu (w/15th Div), 5 Dr (FS, fought in west), 9 Hu (FS, fought in west), 7 Uh (Elbe Army Res)
[F] First Army Reserve
- Artillery: 1,000 men & 48 guns in 8 btys
- Cavalry: 3,250 men & 6 guns in 1 horse bty & 20 Sq, drawn from 7th & 8th Corps plus one Lw Cav Rgt from 2nd Corps
Austrian North Army
Gen. Benedek: 200,000 men & 762 guns in 221 Bns, 103 Btys, 170 Sqs
[1] 1st Corps (22,500 men & 80 guns in 28 Bns, 10 Btys, 4 Sqs)
- Bde Poschacher: 30 & 34 Inf, 18 Jg
- Bde Leiningen: 33 & Inf, 32 Jg
- Bde Piret: 18 & 45 Inf, 29 Jg
- Bde Ringelsheim: 42 &73 Inf, 26 Jg
- I Artillery: 8x4-pdr (2 horse), 2x8-pdr, 1x rocket btys
- Cavalry: 2 Hu (4 Sq)
[2] 2nd Corps (25,500 men & 80 guns in 28 Bns, 10 Btys, 4 Sqs)
- Bde Thom: 40 & 69 Inf, 2 Jg
- Bde Henriquez: 14 & 27 Inf, 9 Jg
- Bde Saffran: 64 & 80 Inf, 11th Jg
- Bde Wurttemberg: 47 & 57 Inf, 20 Jg
- II Artillery: 8x4-pdr (2 horse), 2x8-pdr, 1x rocket btys
- Cavalry: 6 Uh (4 Sq)
[3] 3rd Corps (28,000 men & 80 guns in 28 Bns, 10 Btys, 2 Sqs)
- Bde Kalik: 35 & 72 Inf, 22 Jg
- Bde Appiano: 46 & 62 Inf, 4 Jg
- Bde Benedek: 52 & 78 Inf, 1 Jg
- Bde Kirschberg: 44& 49 Inf, 3 Jg
- VIII Artillery: 8x4-pdr (2 horse), 2x8-pdr, 1x rocket btys
- Cavalry: 9 Uh (2 Sq)
[4] 4th Corps (24,000 men & 80 guns in 28 Bns, 10 Btys, 4 Sqs)
- Bde Brandenstein: 12 & 26 Inf, 27 Jg
- Bde Fleishhacker: 6 & 61 Inf, 13 Jg
- Bde Poeckh: 37 Inf, 51 Inf, 8 Jg
- Bde Joseph: 67 Inf, 68 Inf, 30 Jg
- IV Artillery: 8x4-pdr (2 horse), 2x8-pdr btys
- Cavalry: 7 Hu (4 Sq)
[6] 6th Corps (19,500 men & 72 guns in 28 Bns, 9 Btys, 4 Sqs)
- Bde Waldstaetten: 9 Inf, 79 Inf, 6 Jg
- Bde Hertwegh: 41 Inf, 56 Inf, 25 Jg
- Bde Rosenweig: 4 Inf, 55 Inf, 17 Jg
- Bde Jonak: 20 Inf, 60 Inf, 14 Jg
- X Artillery: 7x4-pdr (2 horse), 2x8-pdr btys
- Cavalry: 10 Uh (4 Sq)
[8] 8th Corps (19,000 men & 72 guns in 27 Bns, 9 Btys, 5 Sqs)
- Bde Fragnern: 15 Inf, 77 Inf, 5 Jg
- Bde Schulz: 8 Inf, 74 Inf, 31 Jg
- Bde Kreyssern: 21 Inf, 32 Inf, 24 Jg
- Bde Rothkirch: 25 Inf, 71 Inf
- IX Artillery: 7x4-pdr (2 horse), 2x8-pdr btys
- Cavalry: 3 Uh (5 Sq)
[10] 10th Corps (15,500 men & 64 guns in 27 Bns, 8 Btys, 3 Sqs)
- Bde Mondel: 10 Inf, 24 Inf, 12th Jg
- Bde Grivicics: 2 Inf, 23 Inf, 16 Jg
- Bde Knebel: 1 Inf, 3 Inf, 28 Jg
- Bde Wimpffen: 13th Inf, 58 Inf
- III Artillery: 6x4-pdr (1 horse), 2x8-pdr btys
- Cavalry: 9 Uh (3 Sq)
[P] Brigade Prochaska (5,7500 men & 8 guns in 7 Bns, 1 Bty)
13 Grenzer, IV/55 Inf, IV/56 Inf, 33+34 Jg (combined bn), 1x4-pdr bty (the infantry was fielded from Fortress Koeniggraetz, the artillery was borrowed from III Art/10th Corps)
Reserve Cavalry (31,000 men & 44 guns in 11 Btys, 128 Sqs)
(4 squadrons in the Cuirassier regiments, 5 in the light regiments; the batteries, all 4-pdr horse, appear to have had 4 guns each)
[E] 1st Light Cav Division (Gen. Edelsheim: 4,500 men & 12 guns in 3 Btys, 30 Sqs)
- Bde Appel: 2 Dr, 9 Hu, 4/XI Art
- Bde Wallis: 1 Dr, 10 Hu, 5/XI Art
- Bde Fratricevics: 5 Hu, 8 Hu, 6/XI Art
[T] 2 Light Cav Division (Prince of Thum und Taxis: 3,000 men & 8 guns in 2 Btys, 20 Sqs)
- Bde Bellegarde: 4 Hu, 12 Hu, 2/XI Art
- Bde Westphalen: 6 Hu, 14 Hu, 3/XI Art
[C] 1 Res (Heavy) Cav Division (Prince of Schleswig-Holstein: 4,000 men & 8 guns in 2 Btys, 26 Sqs)
- Bde Solms: 4 Cu, 6 Cu, 8 Uh, 5/VI Art
- Bde Schindloecker: 9 Cu, 11 Cu, 4 Uh, 6/VI Art
[C] 2 Res (Heavy) Cav Division (Gen. Egbell: 4,000 men & 8 guns in 2 Btys, 26 Sqs)
- Bde Boxberg: 3 Cu, 7 Cu, 2 Uh, 4/XII Art
- Bde Soltyk: 1 Cu, 5 Cu, 5 Uh, 5/XII Art
[C] 3 Res (Heavy) Cav Division (Gen. Coudenhove: 4,000 men & 8 guns in 2 Btys, 26 Sqs)
- Bde Windischgraetz: 2 Cu, 8 Cu, 7 Uh, 2/XII Art
- Bde Mengen: 10 Cu, 12 Cu, 11 Uh, 3/XII Art
[R] Artillery Reserve (4,000 men & 128 guns in 16 Btys from XI & XII Art)
Saxon Army
Prince Albert: 18,250 men & 54 guns in 20 Bns, 9 Btys, 16 Sqs
1st Division (8,000 men & 12 guns)
- 2nd Bde: 2 Jg, 5, 6, 7, 8 Inf Bns
- 3rd Bde: 3 Jg, 9, 10, 11th, 12 Inf Bns
- Batteries: One 12-pdr smoothbore, one 6-pdr rifled
- Cavalry: IV/2 Cav, IV/3 Cav
2nd Division (7,500 men & 12 guns)
- 1st Bde: 1 Jg, 1, 2, 3, 4 Inf Bns
- 4th (Leib) Bde: 4 Jg, 13, 14, 15, 16 Inf Bns
- Batteries: One 12-pdr smoothbore, one 6-pdr rifled
- Cavalry: IV/Gd Cav, IV/1 Cav
Cavalry Division (2,000 Cav)
- 1st Bde: Gd & 1 Cav (3 Sq each)
- 2nd Bde: 2 & 3 Cav (3 Sq each)
Artillery Reserve (750 men & 30 guns)
- Batteries: 2x6-pdr rifled, 3x12-pdr batteries (one horse)
Charts: Combat Results Table & Terrain Effects Chart
Transcribed from the Koeniggraetz charts sheet (S&T 275, page R16). Leader and Ammo results are printed beneath the die-roll result in the chart; they are shown here after a slash.
Combat Results Table
| Die Roll | -5 or less | -4 to -3 | -2 to -1 | 0 to +1 | +2 to +3 | +4 to +5 | +6 to +7 | +8 to +9 | +10 or more |
|---|---|---|---|---|---|---|---|---|---|
| 1 | Ax DF | Ax DF | Ax | Ar | Ac (NE) | Dc (Ex) | Dr | Dr | Dx |
| 2 | Ax DF | Ax | Ar | Ar | Dc (Ex) | Dc (Ex) | Dr | Dx | Dm (Dr) |
| 3 |
Chart key (as printed):
- NE = No Effect
- Ar / Dr = Primary affected unit is disrupted (if already disrupted, check for rout) or all units of affected side retreat
- Ac / Dc = If primary affected unit fails morale check, treat as Ar/Dr. If unit passes, apply parenthesized result
- Ax / Dx = Primary unit loses one step or all units retreat and disrupt
- Dm = If primary unit passes morale check, apply parenthesized result. If it fails, all affected units on the affected side rout. Victor advances and gets FOW
- Ae / De = If primary unit passes morale check, it loses one step and remaining units retreat. If it fails, the affected side routs
- Ex = The primary unit on each side loses one step; no retreat or advance
Terrain Effects Chart
Note: combat effects of terrain are cumulative.
Primary Terrain (the terrain of the hex)
- Clear: 1 MP. Trains must stop on entering.
- Light Woods/Orchards: Inf 1 MP; Art & Cav 2 MP. LOS blocked, but ignore at ground level if observer is on a hill. Attacker halved into if crossing clear hexside into the Light Woods hex.
- Deep Woods: Inf 2 MP, Art & Cav Prohibited. No March Movement into or out of. ZOC blocked into/out of. LOS blocked into and through. No bombardment into. Attacker halved if crossing clear hexside into Deep Woods. No charge into or out of. No defender advance out of.
- Swamp or Swamp & Stream: Inf 3 MP, Art & Cav Prohibited. No March Movement into or out of. Attacker halved into or out of. No charge into or out of. No defender advance out of.
- Swamp & Creek: Movement into is Prohibited except by Road or Trail. In that case, treat as Swamp for combat purposes. Artillery may bombard across.
- Town/Village: 1 MP. ZOC blocked into. Inf & Art halved attacking into. Cavalry attacks into with a CF of "1." Cavalry halved when defending. No defender advance out of.
Secondary Terrain (primary terrain applies unless altered below)
- River: All-River hexes only; ignore partial hexes. Movement into Prohibited except at Bridge or Ferry (see Exclusive Rules). Artillery may bombard across.
- Hill: No additional movement cost. Blocks LOS unless observer and observed on hill hexes. Negates light woods for LOS purposes. Adds 1 to range of artillery units on hill.
- Hollow: No additional movement cost. No LOS to hill or ground level.
- Shelf: No additional movement cost. LOS to both hollow and ground level.
- Rough: Inf 3 MP; Art & Cav Prohibited. No March Movement into or out of. ZOC blocked into or out of. Attacker halved into or out of. No defender advance out of.
- Road: 1 MP when traveling along the path (see 4.6). Inf & Cav may not use path to enter ZOC. 1/2 MP during March Movement (see 4.7).
- Trail: 1 MP when traveling along the path (see 4.6). Inf & Cav may not use path to enter ZOC.
- Stream: If no ford present, Inf & Cav +1 MP; Art must stop on entering. If ford present, use movement cost of other terrain in hex. All units halved attacking into or out of.
- Chateau/Bastion: Ignore for most purposes. Infantry battalions only may occupy. See the Exclusive Rules.
Hexside Terrain (affects action across hexside only)
- Slope: +1 MP moving upslope. LOS blocked downslope into slope hex only. Attacker halved upslope. Note hills do not necessarily have slopes.
- Ridge: Blocks LOS across hexside.
- Treeline: Art +1 MP. LOS blocked if observer on same level as target, but not for adjacent units.
- Creek: Prohibited except at Bridge or Ford. ZOC blocked across. Artillery may bombard across even in support of another attacker.
- Ravine: Inf only may cross. Must stop after crossing. If crossing made into EZOC, make a morale check for the moving unit: failure = disruption, rout if already disrupted. Artillery may bombard across even in support of another attacker.
- Bridge: Attacker halved attacking across. Treat destroyed bridge as Ford. ZOC blocked across.
- Ford: +1 MP. Attacker halved attacking across. ZOC blocked across.
- Protected: +1 MP in either direction. ZOC blocked into but not out of. Infantry halved attacking across hexside in either direction. Artillery halved firing into (bombardment, or support). Cavalry attack across with a CF of "1." Artillery attacks across in adjacent combat (not bombarding or supporting) with a CF of "1."