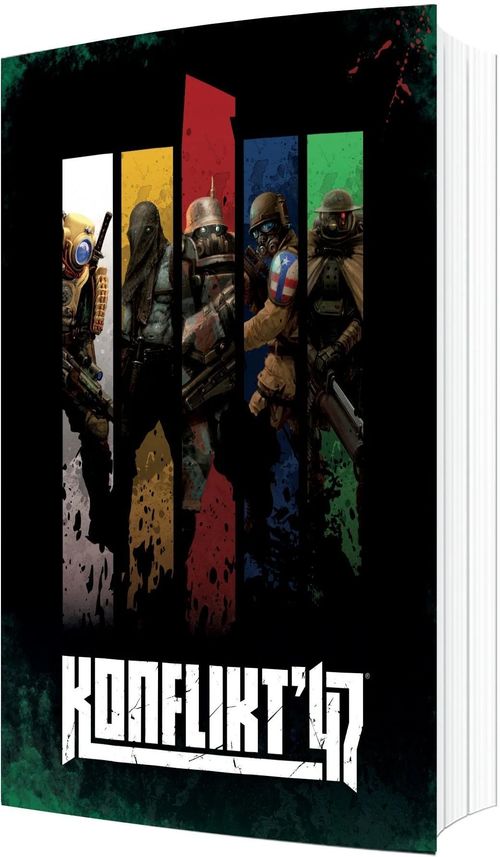
Konflikt '47
Konflikt '47 Rulebook
Table of Contents
Table of Contents
Battle
Printed p. 6.
A typical game of Konflikt '47 is played on a 6' x 4' playing area, but this is by no means a hard and fast rule. Games can be as large or as small as you like, and can be played just as easily on a kitchen table using a couple of books to pose as hills, as they can on a fully kitted out, terrain-filled gaming table.
Many solutions exist, including bespoke gaming mats, lovingly crafted, textured gaming tables made for the explicit purpose of wargaming, or the use of a local gaming club or friendly local gaming store.
What you will need to play are standard six-sided dice, a tape measure for measuring ranges, and enough Order Dice and Rift Dice for the force you'll be playing (more on those later).
Playing Games
Printed p. 16.
The most important thing to remember about Konflikt '47 (and wargaming in general) is that there is no wrong way to play, so long as you're having fun! As you enter the wider Konflikt '47 community, you'll find there are some common ways in which people like to play, which have a few differences – all are great, and you'll likely find yourself drawn to one or more types quite quickly, but it's always fun to try something new!
Pick-up Games. 'Pick-up' games are probably the most common, and certainly the simplest way to play Konflikt '47 – you just turn up at your local gaming club or store with your army and ask 'does anybody want a game?' Or you can pre-arrange a game using a store/club's social media. You'll find a wide range of new opponents this way, and no two games will ever be the same!
Narrative Play. 'Narrative' games are those in which players are less concerned about victory and defeat as they are telling a story, using miniatures as their protagonists. Such games are often linked together into entire campaigns, or played as 'mega-games' at large events and conventions, with many players on each side.
Competitive Play. Competitive play is aimed at players who want to test their mettle in head-to-head tournaments. Competitive armies often look very different from their casual or narrative counterparts, and are fine-tuned for performance on the tabletop. Tournaments are designed to provide fun and challenging gameplay, and there's a thriving competitive scene all over the world.
How to Play
Printed p. 17.
A game of Konflikt '47 is played across a number of turns. These follow a really simple sequence, which is shown below. After a set number of turns, the game ends – hopefully with your army victorious.
Turns
Konflikt '47 is played in turns. A game typically lasts six to seven turns. Unlike other games you may have played, Konflikt '47 uses a system of Order Dice to randomise the sequence of player actions within the turn. We'll discuss these fully in a moment, but be prepared to act at any time in the turn.
Orders
| Order | Summary of Action |
|---|---|
| Fire | Fire at full effect without moving |
| Advance | Move and then fire |
| Run | Move at double speed without firing; also used for assaulting |
| Ambush | May not move or fire, but prepare for opportunity fire or charge |
| Rally | May not move or fire, but lose all Pin Markers |
| Down | May not move or fire, but gain an extra +2 Cover Save modifier |
Turn Sequence
Orders Phase. In this phase, you draw a die from the dice bag, and the owning player will assign it to one of their units. A Rift Die influences the Rift abilities a unit can call upon, whereas an Order Die can be assigned to a unit to perform one of six actions, as summarised by the Orders Table above. Once a die has been drawn, assigned, and resolved, you draw again until all dice have been removed from the bag. This system ensures that so long as each player has at least one die in the bag, you never know who's going to go next.
Turn End Phase. Once all the dice have been removed from the bag and assigned, and all units on the table have executed an Order, the turn ends – at this stage, you can perform certain actions which carry over into the next turn.
Order Dice
Order Dice are at the very core of Konflikt '47 – they're what makes the game tick. Each face of these six-sided dice is printed with a different Order, corresponding to the actions your units can perform. You will have one Order Die for each unit you control – as will your opponent.
Each player needs a unique colour of Order Dice. For learning with the starter set, the player controlling the United States uses green coloured Order Dice, and the player controlling the Axis uses grey coloured Order Dice.
Rift Dice
Any units designated as Rift Units will also need one or more Rift Dice. We shall learn more about these later. As with Order Dice, each player should have a unique colour set. For the starter set, the US has green Rift Dice and the Axis has grey Rift Dice.
Losing Dice
At the start of each turn, each player puts one of their Order Dice in the bag per unit they have in the game. As they lose units, the number of dice that go back in the bag at the start of each turn will diminish. Any Exhausted Rift Dice will also be put back into the bag at the start of each turn, as shall be explained later.
Pin Markers
The other core mechanic of Konflikt '47 that it's important to be aware of is Pinning. We'll go into this in more detail once the shooting starts, but in brief, pinning represents the demoralising effect of being shot at. As a unit takes more fire, it can accumulate more and more Pin Markers. End up with too many, and you might find your unit refusing to obey orders, or even running away.
Printed p. 18 (continued). A set of cardboard Pin Markers is included with the starter set; other solutions (plastic dial markers, MDF dials, or dice) are equally valid, provided they show how many Pin Markers a unit has.
Basic Concepts
Printed p. 18.
Konflikt '47 utilises some key concepts across many aspects of the game – at certain times as you read and play, you'll need to make use of these. You can always refer back to this section if you're not sure what to do.
Rolling Dice
We use six-sided dice in Konflikt '47 to determine the outcome of many situations – they represent the fortunes of war. The usual way to see these dice represented is 'D6' – if three dice are needed, you'll see '3D6', and so on.
When you need to roll a die, you'll also have a 'target' score – normally you need to roll equal to or above that target number in order to succeed at whatever you're attempting. For example, a roll requiring a 4+ would succeed on a 4, 5, or 6.
Measurement
Printed p. 19.
All measurements in Konflikt '47 use inches, represented by the " symbol. It is easiest to use a measuring tape to work out the distances between units and to see how far your models can move and shoot.
Units
Printed p. 19.
A 'unit' in Konflikt '47 is usually a group of models, but sometimes may be a single model (in the case of Heroes or Vehicles, for example). When we talk about a unit, we mean all of the models in that group! All the models in a unit must remain within at least 1" of another model from the unit, and no two units, friend or foe, may ordinarily be closer than 1" to each other.
Stay in Formation. Models within a unit must remain 'within formation' – no single model can be further than 1" from at least one other model in the unit. Soldiers fight in units so it's important that they stay close together on the battlefield to support each other. Each model in an Assault-frame Squad must be within 1" of at least one other model in the unit.
Line of Sight
Printed p. 19.
For a unit to shoot or charge an enemy unit, it has to be able to see its target. In Konflikt '47, we call this 'Line of Sight', and it's a very simple but important part of the game.
In most cases, it's fairly obvious if one unit can see another, but sometimes it may not be so clear. In these instances, it's best to crouch down to get a 'model's eye view' to literally see what your unit can see.
When it comes to Line of Sight, we consider that you need to be able to see most of a model, not just a hand or a weapon barrel peeking out from behind a wall, for instance.
Caption: You can't shoot what you can't see – move your units into the right position before firing.
Missions
Printed pp. 23–25.
These missions are designed to be played in sequence. The lessons learned in each should be carried over to the subsequent missions, so after you've played all six, you'll have a robust understanding of the core principles of Konflikt '47.
Mission 1 – First Contact
This mission introduces you to the core of Konflikt '47 – movement and shooting.
Printed p. 23 (models): the United States player assembles five Fireflies, each armed with M1X Thompsons, and the Axis player assembles two Stahltruppen armed with StG 44Zs. The assembly diagrams are not reproduced here.
United States Units. The United States player commands a unit of five Fireflies armed with M1X Thompsons.
Axis Units. The Axis player commands a unit of two Stahltruppen armed with StG 44Zs.
- Fireflies (1 Unit). Unit Composition: 5 Fireflies. Movement: Advance 12", Run 18". Damage Value: 5+. Weapons: M1X Thompson – Range 12"; 2 Shots.
- Stahltruppen (1 Unit). Unit Composition: 2 Stahltruppen. Movement: Advance 6", Run 12". Damage Value: 6+. Weapons: StG 44Z – Range 18"; 3 Shots.
Set Up. Each player sets up their units as shown on the map (printed p. 24) and places one of their Order Dice into the dice bag.
Objectives. Be the first to destroy an enemy unit.
First Turn. One player draws a single Order Die from the dice bag, without looking. The player whose die is drawn may now issue an Order to their unit.
Orders. For this scenario, three Orders may be given as follows:
RUN. Sometimes you want your troops to move forward as quickly as possible, to secure a strategic position or to get the heck out of Dodge. To do so, you can issue a Run Order. When a Stahltruppen unit is ordered to Run, it may move up to 12" in any direction. Fireflies meanwhile are equipped with Repulsorlift jump packs, and can move up to 18"! Measure from the front of your model's base in the direction you want it to travel, then move it so that the base edge is not placed past the maximum distance for the model moving. You don't have to move the entire maximum if you don't want to! Repeat this process for each of the models in your unit. Ensure that, when they have completed their move, no model in your unit is further than 1" away from another model in the same unit, and that no models in the unit are within 1" of any enemy model.
FIRE. The most accurate soldier is one who isn't moving, taking the time to aim at their target. This is achieved by issuing a Fire Order. When a unit is ordered to Fire, it may not move, but may shoot with all the weapons it is equipped with.
Remember – always measure from the front of the base when moving.
First, choose a target. To check you are within range to shoot, first measure between the closest base edge of the model firing and the base edge of the nearest model in the target unit. If this distance is equal to or less than the weapon being fired, that model is in range to shoot. United States Fireflies need to be within 12" of their target, whereas Axis Stahltruppen have a slightly longer range at 18".
Repeat this process for each model in the firing unit. For each model found to be in range, roll a number of dice equal to the Shots value of their weapon. For instance, each Firefly rolls two dice when it fires its weapon, whereas a Stahltruppen will roll three! For each roll of 4+ the weapon has found its mark.
We'll then need to see if those hits become wounds. For each hit scored roll a further die. When a Stahltruppen model fires at a Firefly a roll of a 5+ kills a model in the target unit. Stahltruppen are in much heavier armour however. A Firefly firing at a Stahltruppen model requires a roll of a 6+ to remove one of them as a casualty. The target unit's controlling player chooses which of their models is removed.
ADVANCE. On occasion, you'll want the best of both worlds, moving your troops into position whilst laying down enough fire to keep your opponents' heads down. An Advance Order allows your troops to move and fire, but at slightly reduced accuracy. When a unit is Ordered to Advance, it may move in the same way as described for a Run Order, but at a reduced maximum distance. For Stahltruppen this is 6", whereas for Fireflies it is 12". The unit may then fire its weapons as described for a Fire Order. However, being preoccupied with the process of traversing the battlefield, the unit's aim is rattled. This is reflected with a -1 penalty to the 'to hit' roll, meaning each model in the unit will hit on a dice roll of 5+. For any hits scored, roll to wound as normal.
Rolling Dice. There's no need to roll dice one at a time. Instead, work out how many of your models are in range and roll that many dice at once. In addition to speeding up and streamlining play, there's a certain satisfaction in rolling a whole fistful of dice…
Once the first player has issued their unit an Order and completed an assigned action, draw the second Order Die from the dice bag, and repeat the above procedure for the opposing side – this is the end of your first turn of Konflikt '47.
Destroying a Unit. If all the models in a unit are killed, that unit is destroyed. Remove their Order Die from play and place it to one side – it no longer returns to the dice bag.
End of Turn. Place both Order Dice in the dice bag – you're ready to start a new turn.
Game Duration. The game ends as soon as one unit has been destroyed.
Victory. The player who destroys their opponent's unit first wins the game.
Mission 2 – Defensive Positions
A ruined building on the battlefield has a commanding view of the surrounding area – whoever controls it dominates the entire terrain. This mission demonstrates one of the most important parts of Konflikt '47 – Cover Saves.
Printed p. 26 (models and terrain): build one additional Firefly, and the Axis player needs another Stahltruppen armed with a StG 44Z. The ruins are assembled from two plastic sprues in any arrangement that gives four corners; the assembly diagrams are not reproduced here.
United States Units. The United States player commands two units, each of three Fireflies armed with M1X Thompsons.
Axis Units. The Axis player is outnumbered for this engagement and commands a single unit of three Stahltruppen armed with StG 44Zs.
- Fireflies (2 Units). Unit Composition: 3 Fireflies. Movement: Advance 12", Run 18". Damage Value: 5+. Weapons: M1X Thompson – Range 12"; 2 Shots.
- Stahltruppen (1 Unit). Unit Composition: 3 Stahltruppen. Movement: Advance 6", Run 12". Damage Value: 6+. Weapons: StG 44Z – Range 18"; 3 Shots.
Set Up. Each player sets up their units as shown on the map (printed p. 27). The United States player places two Order Dice into the dice bag, while the Axis player places one. The Axis unit is set up inside the ruin.
Ruins. In addition to the rules for Cover mentioned above, the ruins block Line of Sight – models can see inside it and out of them, but they cannot see all the way through them.
Game Duration. The game ends until one side has achieved their victory conditions, as described below.
Objectives. The United States player must drive the Axis out of the ruined building, whilst the Axis player must stop the United States' attack.
Victory. The United States player wins if they destroy both of the Axis player's units. The Axis player wins if they destroy both of the United States player's units.
First Turn. Play through this scenario using exactly the same turn sequence and Order options as the previous mission. However, there's one very important new feature that's being introduced here – Cover Saves.
Cover Saves. Whilst at least half of the models in the Axis unit are within the area of the ruins, all models in that unit gain a 4+ Cover Save. Roll a D6 for any such model hit and damaged by a shooting attack from the Fireflies. On a 4+, no damage is suffered from that shot. Note that if you receive two hits and 'kills', you would need to roll two Cover Saves, and so on. The Axis have fewer soldiers (and Order Dice) than the United States, so keeping them in cover is a good idea.
Remember – you can see into and out of the ruins, but not all the way through them.
Mission 3 – We're Pinned Down, Sir!
This mission teaches you about one of the most crucial and important mechanics of Konflikt '47: Pinning.
Printed p. 28 (models): build four additional Fireflies armed with M1X1 Thompsons (as printed), and one additional Axis Stahltruppen armed with a StG 44Z. Assembly diagrams are not reproduced here.
United States Units. The United States player commands two units, each of five Fireflies armed with M1X Thompsons.
Axis Units. The Axis player also controls two units, each containing two Stahltruppen.
- Fireflies (2 Units). Unit Composition: 5 Fireflies. Movement: Advance 12", Run 18". Damage Value: 5+. Morale Value: 10. Weapons: M1X Thompson – Range 12"; 2 Shots.
- Stahltruppen (2 Units). Unit Composition: 2 Stahltruppen. Movement: Advance 6", Run 12". Damage Value: 6+. Morale Value: 10. Weapons: StG 44Z – Range 18"; 3 Shots.
Set Up. Each player sets up their units as shown on the map (printed p. 29), and places two Order Dice in the dice bag. One unit on each side begins the game Pinned. After setting up, each player chooses one of their units and places two Pin Markers next to it.
Objectives. The objective of this mission is twofold – both players must Rally their Pinned unit and then destroy the enemy units.
First Turn. One player draws an Order Die at random from the dice bag and uses it to activate a unit. For the purpose of this mission, four Orders can be given: Fire, Advance, Run, and Rally.
Morale Value. Each unit has a Morale Value, which is a measure of how likely the unit is to follow orders under fire. For the purpose of this mission, all units have a Morale Value of 10.
Pinned. Every time a unit is fired at by an enemy unit and suffers one or more hits as a result, place a single Pin Marker next to it. Each Pin Marker on a unit decreases its Morale Value by 1. If a player wants to issue an Order to a unit that is Pinned, the unit must take an Order Test to see if it can summon up the courage to obey. In addition, if any unit is Pinned, it suffers a -1 to hit when shooting.
Order Tests. If a unit is required to make an Order Test, the controlling player rolls 2D6. In order to succeed, the player must roll equal to or below the unit's Morale Value, taking into account negative modifiers caused by Pin Markers. If the roll succeeds, the unit removes one Pin Marker and may carry out the Order issued to it. If the roll does not succeed, the unit does not carry out the order – instead, turn its assigned Order Dice to Down as the troops refuse to obey instructions and hit the dirt!
Down. If a unit has gone Down, it takes no further part in the turn – the troops are too busy taking cover to do anything else! Units which have a Down Order Die next to them receive a 5+ Cover Save in open ground. If a unit would already receive a Cover Save from being in terrain such as the ruins, it instead receives a +2 bonus to its Cover Save. So a unit in the ruins that goes Down receives a 2+ cover save, instead of the usual 4+.
Rally. Rally represents the soldiers in a unit gathering their courage, passing around water and ammunition, and generally readying themselves to get back into the fight. In games of Konflikt '47, the purpose of this Order is to remove Pin Markers that have accumulated on a unit, before they become overwhelming. In order to Rally, a unit must take an Order Test as described previously, but always makes this test using its unmodified Morale Value, ignoring all Pin Markers. If the test is successful, the unit takes no further action but immediately removes all of its Pin Markers.
Once the first unit has been activated, repeat the process until all Order Dice have been drawn and used, then put them all back in the bag (excluding any destroyed units) and repeat.
Game Duration. The game lasts until both units from one side are destroyed.
Victory. The victor is the player who destroys both enemy units.
Mission 4 – Heroes & Rift-Tech
The other key element of Konflikt '47 is Rift Dice. Whilst a unit has an Active Rift Die it can make use of powerful abilities, and strategic use of these is key to victory. In this section, we'll also introduce Heroes and Close Quarters combat.
Printed pp. 30–31 (models): build a Firefly Hero and a Stahltruppen Hero from the building guides; the assembly diagrams are not reproduced here.
United States Units. The United States player commands three units, two units each of three Fireflies armed with M1X Thompsons, and a Firefly Hero armed with an Assault Rifle.
- Fireflies (3 Units). Unit Composition: 3 Fireflies. Movement: Advance 12", Run 18". Damage Value: 5+. Morale Value: 10. Rift Dice: 1. Weapons: M1X Thompson – Range 12"; 2 Shots. (The printed stat block reads "Rift Dice: Two" beside the value 1; the value 1 is the one given.)
- Firefly Hero (1 Unit). Unit Composition: 1 Firefly Hero. Movement: Advance 12", Run 18". Damage Value: 5+. Morale Value: 10. Rift Dice: 1. Hero Points: 1 Guts. Weapons: M1X Thompson – Range 12"; 2 Shots. (The unit text says the Hero is armed with an Assault Rifle, while the stat block lists the M1X Thompson; both are printed as shown.)
Axis Units. The Axis player commands one squad of Stahltruppen, accompanied by a Stahltruppen Hero.
- Stahltruppen (1 Unit). Unit Composition: 3 Stahltruppen. Movement: Advance 6", Run 12". Damage Value: 6+. Morale Value: 10. Rift Dice: 1. Weapons: StG 44Z – Range 18"; 3 Shots.
- Stahltruppen Hero (1 Unit). Unit Composition: 1 Stahltruppen Hero. Movement: Advance 6", Run 12". Damage Value: 6+. Morale Value: 10. Rift Dice: 1. Hero Points: 1 Luck. Weapons: StG 44Z – Range 18"; 3 Shots.
Set Up. Place the models as shown on the map (printed p. 31). Each unit is assigned an Active Rift Die of their colour. The United States player places three Order Dice in the bag, and the Axis player places two.
Objectives. Both sides are looking to eliminate the enemy Hero in Close Quarters combat, whilst keeping their own alive and well.
First Turn. One player draws an Order Die at random from the dice bag and uses it to activate a unit. For this mission, four Orders can be given: Fire, Advance, Run, and Rally.
Close Quarters
Ordinarily, your models may not be within 1" of an enemy model (see Basic Concepts, page 18), but Close Quarters combat is an exception. You need to be close to fight hand-to-hand! To initiate an Assault, issue a unit a Run Order. It may then move its maximum Run distance and move into base-to-base contact with an enemy unit, as shown in the diagram on the right.
Printed p. 32 (diagram caption): "The Stahltruppen unit is within 18" of the Firefly unit, so it's within range of a charge."
When two units fight in Close Quarters in open ground, they strike each other simultaneously. There is no need to roll to hit! Roll a D6 for every model in your unit, while your opponent does the same. As with shooting, a roll of a 6 will defeat a Stahltruppen, whereas a roll of 5+ will destroy a Firefly – it's as brutal as that!
The winner of the combat is the unit which kills more enemy models. The losing unit is immediately destroyed entirely, and all its models are removed from play.
If the number of kills is the same for both units, remove the destroyed models, and immediately repeat the process.
Heroes
Heroes tend to be veterans of the battlefield, and have picked up some tricks along the way. To represent this, Heroes have access to some special statistics not normally accessible by any other units in Konflikt '47, that will help them survive. These are a finite resource that can only be used once a game. Use them wisely.
For the purposes of these Missions, we're presenting a simplified form of the Heroes special rules. You'll find the full ones in the Konflikt '47 rulebook. In this scenario, the Firefly Hero has a point of Guts, whilst the Stahltruppen Hero has a point of Luck.
Guts. A Hero may spend a Guts point to do one of the following:
- Modify a dice roll made by or against the Hero by +1 or -1. This could be the Hero attempting to hit something with shooting or in Close Quarters, or prevent an enemy's successful attack against them.
- Potentially survive an attack. If the Hero were to be removed as a casualty, spend a Guts point and roll a dice – on the roll of a 4+ the Hero survives.
Luck. A Hero may spend a Luck point to do one of the following:
- Re-roll any single D6 roll made by any unit in his army. For example, a 'to hit' roll, a 'to wound' roll, or a failed Cover Save.
- Survive a mortal attack. Spend a Luck point, and the Hero will automatically survive instead.
Rift Dice
Rift Units have powerful abilities derived from their Rift technology. In the case of Fireflies this comes from their Repulsorlift jump packs, and for Stahltruppen it is the Augmented Powered Armour that protects them so well in battle. For these learning missions we are presenting a simplified version of the full rules.
At the start of the game, each Rift Unit is assigned an Active Rift Die. Every unit in this scenario is a Rift Unit, so each is assigned an Active Rift Die.
Rift Dice have six faces – three depict Exhausted, two depict Active, and one face depicts Surging.
Whilst a unit has an Active Rift Die it has access to a powerful Enhancement. By exhausting an Active Rift Die it can perform a powerful ability. However, if it has an Exhausted Rift Die, or no Rift Die at all, it will not be able to make use of it.
To exhaust a Rift Die, turn it from its Active face to an Exhausted face. Alternatively, if a unit ever has a Surging Rift Die, it may exhaust the Rift Die by turning it to Active, this way the unit gets to use its effect whilst retaining the ability to use it again in the next Game Turn.
Rift Enhancements are many and varied across the world of Konflikt '47. Here we need only concern ourselves with the abilities of Fireflies and Stahltruppen:
Active Rift Enhancement: Regroup in Hell. After it has completed a Fire, Run, or Advance Order a Firefly Unit may exhaust a Rift Die to move again an additional 12".
Active Rift Enhancement: Vormarsch! If ordered to Advance, a Stahltruppen unit may exhaust its Rift Die to immediately discard all its Pin Markers, without the need to roll an Order Test.
Exhausted Rift Dice. At the end of the turn if there are any Exhausted Rift Dice on the table, the owning player rolls them. If the result is Active or Surging, the die should be immediately assigned to a friendly Rift Unit that doesn't already have a Rift Die. If the result is Exhausted, then place it in the Dice Bag along with the Order Dice.
Drawing a Rift Die from the Bag. When a Rift Die is drawn from the dice bag, its owning player rolls it, then whatever the result, assigns it to one of their Rift Units that does not already have a Rift Die.
Removing Rift Dice. If a Rift Unit is destroyed, remove their Rift Die from play along with their Order Die, placing them to one side.
Game Duration. The game lasts until one Hero from either side has been destroyed in Close Quarters Combat.
Victory. The player who destroys their opponent's Hero in Close Quarters combat first is the winner.
Mission 5 – Walker Incoming!
This mission introduces you to Vehicles in Konflikt '47. While it's primarily a game of infantry combat, vehicles of all kinds can be fielded in support, including powerful walkers. When used well, they can be powerful assets, but there are many ways to counter them.
Printed p. 34 (models): the Axis player needs an Anti-tank Rifle-equipped Stahltruppen, and the United States player puts together the cardboard Linebacker from the punchboard. The assembly diagrams are not reproduced here.
United States Units. The United States player commands two units, one of five Fireflies armed with M1X Thompsons, and the other a Linebacker Jump Walker, a powerful threat indeed.
- Fireflies (1 Unit). Unit Composition: 5 Fireflies. Movement: Advance 12", Run 18". Damage Value: 5+. Morale Value: 10. Rift Dice: 1. Weapons: M1X Thompson – Range 12"; 2 Shots.
Axis Units. The Axis player commands two squads of Stahltruppen, each of two soldiers. To counter the threat of the United States walker, one soldier will be armed with a Light Anti-Tank Gun.
- Stahltruppen (1 Unit). Unit Composition: 2 Stahltruppen. Movement: Advance 6", Run 12". Damage Value: 6+. Morale Value: 10. Rift Dice: 1. Weapons: StG 44Z – Range 18"; 3 Shots.
- Stahltruppen with Anti-Tank Gun (1 Unit). Unit Composition: 2 Stahltruppen. Movement: Advance 6", Run 12". Damage Value: 6+. Morale Value: 10. Rift Dice: 1. Weapons: StG 44Z – Range 18"; 3 Shots. Light Anti-Tank Gun – Range 48"; 1 Shot.
(No separate stat block for the Linebacker appears on printed pp. 34–36.)
Set Up. Each player sets up their units as shown on the map (printed p. 35), and places two Order Dice in the dice bag. Assign the Firefly unit and each Stahltruppen unit a Rift Die of the appropriate colour, with its face set to Active.
Objectives. The objective for the Axis player is to destroy the United States player's armoured walker, while the United States player must destroy both of the Axis player's units.
First Turn. The beginning of this mission is a bit different to previous ones. The United States Linebacker is a powerful asset in such a small-scale engagement, so we need to level the playing field a little by providing the Axis with an Anti-tank Rifle. (Printed as "Anti-tank Rifle"; the Axis unit's stat block and the rest of the mission refer to the Light Anti-Tank Gun.) This mission also provides an opportunity to demonstrate the last Order printed on the Order Dice – Ambush.
Before the start of the game, the Axis player takes one of their Order Dice from the bag, and places it next to the Stahltruppen unit with the Anti-tank Gun in the ruins, showing the Ambush Order. Then, begin drawing dice at random as normal.
Ambush. Ambush is a powerful Order in Konflikt '47 as it allows a unit to act outside of the normal turn sequence, interrupting another unit's action. The Order represents your troops quite literally setting up an ambush – biding their time and waiting until an enemy enters their sights before firing.
Units that are in Ambush can interrupt any move made by any enemy unit to shoot at it. The ambushers can interrupt at any point during the move, as long as they can see the target at that point – before, during, or as soon as movement is complete.
The player whose units are in Ambush declares when they want their troops to open fire, and the target unit is positioned accordingly. When the ambush is sprung, the ambushing player flips the unit's Ambush Order to Fire and resolves the shooting as normal.
Anti-Tank Gun
The Anti-tank Gun is a powerful weapon but fires only one shot. It requires a 4+ to hit as normal (or 5+ when the firing unit is issued an Advance Order). Such is its power that if it hits a Firefly, it will kill one on a 2+ rather than the usual 5+.
We'll describe its effects on the Linebacker in a moment.
Armoured Vehicles
Armoured vehicles use a slightly different set of rules to infantry, particularly concerning how they are damaged. We're presenting a streamlined version of the Vehicle rules here to give you an idea of how they work. You can find the full Vehicle rules within the Konflikt '47 rulebook.
For this game, the Linebacker can only be issued Advance Orders. When it does, it will move 6" per turn in a straight line, and may then fire its Heavy Machine Guns at an eligible target.
Heavy Machine Guns
The Linebacker mounts a pair of Heavy Machine Guns on one of its arms (abbreviated to HMGs), designed to suppress enemy infantry. For the purposes of this scenario, they count as a single weapon, with a 360 degree arc of fire and have the following statistics: Range: 36"; 6 Shots.
Damaging the Linebacker
For the purpose of this scenario, only the Axis Light Anti-tank Gun is strong enough to damage the United States Walker. The Light Anti-tank Gun is a powerful weapon and if it hits will likely cause significant damage.
When firing the Light Anti-tank Gun at the Linebacker, roll a single die to hit as normal. If a hit is scored, we'll assume that the powerful weapon automatically defeats the armour of the Linebacker – roll a D6 and consult the Full Damage Table (shown below).
Full Damage Results on Armoured Vehicles
| D6 Roll | Effect |
|---|---|
| 1 | Crew Stunned. Add one additional Pin Marker to the Vehicle. Assign the Vehicle a Down Order (take the Order Die from the Dice Bag if it does not have one) or change its current Order Die to Down. Further Crew Stunned results in the same turn simply add an additional Pin Marker to the Vehicle each time. |
| 2 | Immobilised. Add one additional Pin Marker to the Vehicle. The Vehicle cannot move for the rest of the game. If the Vehicle has already taken an action this turn flip its Order Die to Down. If the Vehicle suffers a further Immobilised result, the crew abandon the Vehicle and it is considered Knocked Out. |
| 3 | On Fire. Add one additional Pin Marker to the Vehicle and then make an immediate Morale Check. If the test is passed the fire has been put out or fizzles out of its own accord. Place a Down Order Die on the Vehicle or change its current Order Die to Down. If the test is failed, the crew abandons the Vehicle and it is considered Knocked Out. |
| 4, 5, or 6 | Knocked Out. The Vehicle is immediately destroyed and becomes a Wreck. The model is not removed, but instead marked in some way to indicate it is wrecked. Vehicle Wrecks count as Impassable Terrain. |
Game Duration. The game lasts until the Linebacker reaches the opposite side of the field, or is Immobilised or Knocked Out – as described on the Full Damage table.
Victory. To win the game, the Axis player must immobilise or knock out the Linebacker before it reaches the opposite side of the battlefield. The United States player must prevent them from doing so. A surefire way of doing this is to take out the Stahltruppen with the Light Anti-tank Gun!
Mission 6 – All Out War!
You've learned the basics of fighting a Konflikt '47 battle – now it's time to assemble the rest of your models and put them all into action.
Printed p. 38 (models): the United States player builds one more Firefly armed with an Infantry Flamethrower. The Axis player builds the cardboard Vogelspinne from the punchboard. Assembly diagrams are not reproduced here. Mission 6 continues on printed p. 39 (Field Manual PDF p. 41) below.
United States Units. The United States player commands two units of Fireflies, a Firefly Hero, and a Linebacker.
- Fireflies (Squad One). Unit Composition: 6 Fireflies. Movement: Advance 12", Run 18". Damage Value: 5+. Morale Value: 10. Rift Dice: 1. Weapons: M1X Thompson – Range 12"; 2 Shots. Flamethrower – Range 6"; 1 Shot.
- Fireflies (Squad Two). Unit Composition: 5 Fireflies. Movement: Advance 12", Run 18". Damage Value: 5+. Morale Value: 10. Rift Dice: 1 (printed "Rift Dice: Two" beside the value 1; the value 1 is the one given). Weapons: M1X Thompson – Range 12"; 2 Shots.
- Firefly Hero (1 Unit). Unit Composition: 1 Firefly Hero. Movement: Advance 12", Run 18". Damage Value: 5+. Morale Value: 10. Rift Dice: 1. Hero Points: 1 Guts. Weapons: M1X Thompson – Range 12"; 2 Shots.
Axis Units. The Axis player commands two units of Stahltruppen, a Stahltruppen Hero, and a Vogelspinne.
- Stahltruppen (Squad One). Unit Composition: 3 Stahltruppen. Movement: Advance 6", Run 12". Damage Value: 6+. Morale Value: 10. Rift Dice: 1. Weapons: StG 44Z – Range 18"; 3 Shots.
- Stahltruppen (Squad Two). Unit Composition: 2 Stahltruppen. Movement: Advance 6", Run 12". Damage Value: 6+. Morale Value: 10. Rift Dice: 1. Weapons: StG 44Z – Range 18"; 3 Shots. Light Anti-Tank Gun – Range 48"; 1 Shot.
- Stahltruppen Hero (1 Unit). Unit Composition: 1 Stahltruppen Hero. Movement: Advance 6", Run 12". Damage Value: 6+. Morale Value: 10. Rift Dice: 1. Hero Points: 1 Luck. Weapons: StG 44Z – Range 18"; 3 Shots.
Set Up. Each player sets up their units as shown on the map (printed p. 39), and places four Order Dice in the dice bag. Assign each Firefly unit and Hero and each Stahltruppen and Hero with a Rift Die of the appropriate colour, with its face set to Active.
Objectives. The objective for this mission is brutally simple – deploy all your resources and knowledge, and wipe your opponent's forces out!
First Turn. Draw an Order Die at random out the dice bag. The owning player issues it to one of their units to perform the first action of the game.
Infantry Flamethrower
One of the Firefly squads is armed with an Infantry Flamethrower. It has a maximum range of 6". If it hits, instead of rolling to wound as normal, instead roll a D6. The result is how many rolls 'to wound' you make with that weapon!
The Linebacker
The vehicle follows the same rules found on page 36, except that when issued an Advance Order, it can move 6" in any direction.
The Vogelspinne
The Vogelspinne follows the same rules for the Linebacker, except that it is armed with a Light Anti-Tank Gun instead of Heavy Machine Guns. This functions in exactly the same way as the Stahltruppen's Light Anti-Tank Gun.
(Map callout, printed p. 39: in order to damage the Vogelspinne, the Firefly armed with a Flamethrower must first hit it with a ranged attack, and then roll on the Full Damage Table to determine the result.)
Game Duration. The game lasts until one side achieves their victory conditions as described below.
Victory. The winner is the player who destroys all enemy units.
Quick Reference
Source: the free Konflikt '47 Quick Reference (Warlord Games, v2, file dated 07/10/25), 10 pages, transcribed as printed. Where it refers to page numbers (for example "page 114" and "page 138"), those point to the full 208-page Konflikt '47 Rulebook, which is not reproduced in this file. The printed copyright and download footer is omitted.
Rules Summary
The Turn
1. The orders Phase
- Draw a die from Dice Bag; hand it to owning player.
- If it is an Order Die:
- Player gives one of their units an Order.
- Place Order Die next to unit.
- If a Rift unit receives an Order when it has no Rift Die, player draws one of their Rift Dice from the bag, rolls it, and places it with the unit.
- If necessary, player takes an Order Test to determine if unit follows the Order.
- Unit executes the Order given.
- If it is a Rift Die:
- Player must roll it and choose one of their Rift units that has no Rift Dice to assign it to.
- If all their Rift units already have a Rift Die, player must choose one of their Rift units currently below its maximum number of Rift Dice to assign the rolled die to.
2. Turn end Phase
- Return all Order Dice to the bag, except for units wishing to retain an Ambush or Down Order.
- Each player picks up all Rift Dice assigned to units that are Exhausted and rolls them. Any dice that roll Active or Surging results are assigned to Rift units that have no Rift Dice (or if there are no such units, Rift units that have not yet been assigned Rift Dice up to their maximum threshold). Any dice that roll Exhausted results are placed into the Dice Bag.
Game End
- At the end of Turn 6, roll a D6.
- On a result of 1, 2, or 3 the game ends.
- On a roll of 4, 5, or 6 play one further turn. The game then ends automatically at the end of the seventh turn.
- The game also ends if one player has no more units left on the table.
Hero Abilities Summary
Guts
- Expend a point of Guts to modify a single die roll made by or against the hero by +1 or -1.
- Expend a point of Guts to return an Order Die assigned to the Hero or a friendly unit within 6" to the Dice Bag.
- When a Hero model is removed as a casualty roll a D6 and add the Hero's remaining Guts points to the score. If the total is 7+ the Hero model remains in play and loses a point of Guts instead.
Rift Mastery
- At the start of the game, place one additional Rift Die with the Hero model for each point of Rift Mastery it has.
- When executing an Order, expend a point of Rift Mastery to allocate one of the Hero's Rift Dice to a Rift unit within 6".
- At any time, the Hero can expend one Rift Mastery point to combine two of their Active Rift Dice, creating one Surging Rift Die.
Luck
- Expend a point of Luck to re-roll a die.
- If a Hero model is to be removed as a casualty, expend one point of Luck from the Hero and leave it in play instead.
Orders Summary
| Order | Summary of Action |
|---|---|
| Fire | Fire at full effect without moving |
| Advance | Move and then fire |
| Run | Move at double speed without firing; also used for assaulting |
| Ambush | May not move or fire, but prepare for opportunity fire or charge |
| Rally | May not move or fire, but lose all Pin Markers |
| Down | May not move or fire, but gain an extra +2 Cover Save modifier |
Officer Bonuses
| Rank | Morale Bonus | Extra Orders | Range |
|---|---|---|---|
| Platoon Commander | +2 | 2 | 6" |
| Company Commander | +4 | 4 | 12" |
Troop Quality and Morale
| Quality | Morale Value |
|---|---|
| Inexperienced | 8 |
| Regular | 9 |
| Veteran | 10 |
Fubar Chart
| D6 Roll | Effect |
|---|---|
| 1–3 | Friendly Fire. The unit does not move and opens fire against a friendly unit, mistaking it for an enemy. Place a Fire order by the unit. The opposing player controls the firing unit as if it were one of their own, except that the chosen target must have an enemy unit within 12" of it. If no such target is available, the unit does not fire and Panics instead, as described immediately below. |
| 4–6 | Panic. If it can see any enemy units, the unit executes a Run order and must move as fast as possible towards the closest table edge. If it moves into contact with the edge, it flees the battle and counts as destroyed. If no enemies are visible, or if the unit can no longer move for any reason, it must instead execute a Down Order. |
Movement
| Unit Type | Advance | Run |
|---|---|---|
| Infantry | 6" | 12" |
| Tracked Vehicle, Half-tracked Vehicle, Heavy Walker, Super Heavy Walker | 9" | 18" |
| Wheeled Vehicle, Light Walker, Medium Walker | 12" | 24" |
Terrain Chart
Infantry
- Rough Ground / Obstacle: Can only cross or move over/through with an Advance Order, unless it is part of an Assault.
- Building / Road: No effect on movement.
Powered Armour Infantry
- Rough Ground / Obstacle / Building: Can only cross or move over/through with an Advance Order, unless it is part of an Assault.
- Road: No effect on movement.
Artillery
- Rough Ground: May deploy within (e.g. 'dug in' units), but cannot otherwise enter, or move within this kind of terrain.
- Obstacle: May not cross or move over/through.
- Building: May deploy within (e.g. 'dug in' units), but cannot otherwise enter, or move within this kind of terrain.
- Road: No effect on movement.
Walkers
- Rough Ground: No effect on movement.
- Obstacle: No effect unless it has been designated as an anti-Tank/Walker Obstacle, or Impassable bocage, (or any equivalent), in which case it is Impassable.
- Building: Cannot enter or move within this kind of terrain. Heavy and Super-heavy Walkers may move through and demolish some Buildings in some situations. See the rules for Buildings (page 138).
- Road: The Unit's Move rate is doubled if it moves entirely along a Road.
Wheeled Vehicles
- Rough Ground / Obstacle / Building: Cannot be deployed within, enter, or move within this kind of terrain.
- Road: The Unit's Move rate is doubled if it moves entirely along a Road.
Tracked and Half-tracked Vehicles
- Rough Ground: Can only cross or move over/through with an Advance Order.
- Obstacle: No effect unless it has been designated as an anti-Tank/Walker Obstacle, or Impassable bocage, (or any equivalent), in which case it is Impassable.
- Building: Cannot enter or move within this kind of terrain. Heavy and Super-heavy Tanks may move through and demolish some Buildings in some situations. See the rules for Buildings (page 138).
- Road: No effect on movement.
Shooting
Shooting Procedure. When a unit shoots, follow the procedure below:
- Declare Target or Targets
- Target Reacts
- Measure Range
- Roll to Hit
- Roll to Damage
- Target takes Cover Saves
- Target takes Casualties
- Target checks Morale
Hit Modifiers Table
| Situation | Modifier |
|---|---|
| Fire on the Move: If the firing unit is executing an Advance Order the unit is focussing on traversing the battlefield as well as operating its weapons, and its fire will be less accurate. | -1 |
| Firer is Pinned: If the firing unit is under fire and has accrued one or more Pin Markers then they will be more concerned about keeping a low profile than aiming carefully at the enemy. | -1 |
| Inexperienced: Inexperienced or poorly trained troops are far less likely to hit anything. | -1 |
| Point-blank Range: If a target is very close it is easier to hit, and it is assumed that at this range troops would be throwing hand grenades as well as firing their weapons. | +2 |
Damage Value Table: Troops & Soft-Skinned Targets
| Target | Result Needed |
|---|---|
| Inexperienced Infantry or Artillery | 3+ |
| Regular Infantry or Artillery | 4+ |
| Veteran Infantry or Artillery | 5+ |
| All Soft-skinned Vehicles | 6+ |
Damage Value Table: Armoured Targets
| Target | Result Needed |
|---|---|
| Armoured Car/Carrier | 7+ |
| Light Tank/Walker | 8+ |
| Medium Tank/Walker | 9+ |
| Heavy Tank/Walker | 10+ |
| Super-heavy Tank/Walker | 11+ |
Cover Saves Table
| Situation | Cover Save |
|---|---|
| Soft cover | 5+ |
| Hard cover | 4+ |
| Down | 5+ (or +2) |
HE Weapons
| HE Diameter | Pen | Pin Markers | Hits vs Targets in Buildings |
|---|---|---|---|
| 1" | +1 | D2 | D3 |
| 2" | +2 | D2 | D6 |
| 3" | +3 | D3 | 2D6 |
| 4" | +4 | D3 | 3D6 |
Close Quarters Procedure
Close Quarters Procedure
- Declare Target
- Measure Move Distance
- Target Reacts
- Move Assaulting Models
- Fight First Round of Close Quarters
- a. Attackers Roll to Damage
- b. Defenders Take Casualties
- c. Defenders Roll to Damage
- d. Attackers Take Casualties
- e. Loser is Destroyed
- Resolve Draws – Further Rounds of Close Quarters
- Winner Regroups
Weapons Charts
Weapons Chart – Small Arms
| Type | Range | Shots | Pen | Special Rules |
|---|---|---|---|---|
| Rifle | 24" | 1 | – | – |
| Pistol | 6" | 1 | – | – |
| Submachine Gun (SMG) | 12" | 2 | – | Assault |
| Automatic Rifle | 30" | 2 | – | – |
| Assault Rifle | 18" | 2 | – | Assault |
* Shots halved if mounted on a Vehicle – see page 114
Weapons Chart – Advanced Small Arms
| Type | Range | Shots | Pen | Special Rules |
|---|---|---|---|---|
| Thompson M1X1/2 – Normal | 12" | 2 | +1 | Assault, Mode |
| Thompson M1X1/2 – E-Slug | 6" | 1 | +2 | Mode |
| Schwarzlicht P 08SzL Luger | 6" | 1 | +1 | Assault |
| Schwarzlicht MP 40SzL Schmeisser | 12" | 2 | +1 | Assault |
| PTRS-46 Pulya-Poykbi – Mode a | 18" | 1 | +2 | Mode |
Weapons Chart – Infantry Anti-Armour Weapons
| Type | Range | Shots | Pen | Special Rules |
|---|---|---|---|---|
| Anti-tank Rifle | 48" | 1 | +2 | Team |
| AT Rifle Grenade | 12" | 1 | +3 | Shaped Charge |
| PIAT (Projector, Infantry, Anti-Tank) | 12" | 1 | +5 | Team, Shaped Charge |
| Bazooka | 24" | 1 | +5 | Team, Shaped Charge |
| Panzerfaust / RPG-1 / ATRD / PRIAM | 12" | 1 | +6 | Anti-tank Launchers, Shaped Charge |
Weapons Chart – HE Weapons
| Type | Range | Shots | Pen | Special Rules |
|---|---|---|---|---|
| Rifle Grenade | 6-18" | 1 | HE | Indirect Fire, HE (1") |
| Light Mortar | 12-36" | 1 | HE | Team, Indirect Fire, HE (1") |
| Medium Mortar | 12-60" | 1 | HE | Team, Fixed, Indirect Fire, HE (2") |
| Heavy Mortar | 12-72" | 1 | HE | Team, Fixed, Indirect Fire, HE (3") |
| Light Howitzer | 48" (30-60") | 1 | HE |
Weapons Chart – Heavy Weapons
| Type | Range | Shots | Pen | Special Rules |
|---|---|---|---|---|
| Medium Machine Gun (MMG) | 36" | 6* | – | Team, Fixed |
| Heavy Machine Gun (HMG) | 48" | 6* | +1 | Team, Fixed |
| Light Automatic Cannon | 48" | 2 | +2 | Team, Fixed, HE (1") |
| Heavy Automatic Cannon | 72" | 2 | +3 | Team, Fixed, HE (1") |
| Light AT Gun | 48" | 1 | +4 | Team, Fixed, Anti-Tank Gun, HE (1") |
* Shots halved if mounted on a Vehicle – see page 114
Weapons Chart – Rift Weapons
| Type | Range | Shots | Pen | Special Rules |
|---|---|---|---|---|
| Heavy Tesla Rifle – Charge mode | 18" | 1 | +1 | Mode, Team, Rift Weapon; Tesla Arc (1) |
| Heavy Tesla Rifle – Pulse mode | 6" | 3 | +1 | Mode, Assault |
| M21 Light Tesla Cannon | 30" | 1 | +1 | Team, Fixed, Rift Weapon; Tesla Arc (3) |
| M17 Tesla Cannon | 36" | 1 | +2 | Team, Fixed, Rift Weapon; Tesla Arc (3) |
| M177 Dual Tesla Cannon | 48" | 2 | +3 |
Rift Weapons Against Buildings
| Type | Pin | Hits vs Targets in Buildings |
|---|---|---|
| Meteor Launcher | D2 | 2D6, Corrosive +D6 |
| Maschinen Schwere | D2 | D6, Gravity Pulse +D6 |
| Schwerefeld Projektor | D3 | D6, Gravity Pulse +2D6 |
| Zvukovoy Proeyektor | D3 | D6, Shockwave +2D6 |
Rift Weapon Abilities Summary
- Corrosive (DX). Fire, Advance, or Ambush Order – exhaust a Rift Die. Increase Pen against targets by the die type indicated.
- Crush. Fire, Advance, or Ambush Order – exhaust a Rift Die. If a Crush weapon hits with all attacks, an additional automatic hit is generated. Against Vehicles total the Pen values of all hits from the Crush weapon and roll for damage once with that modifier.
- Gravity Pulse. Fire, Advance, or Ambush Order – exhaust a Rift Die. Use 3" template and roll to hit each model under it with the number of Shots indicated for the weapon. Against Vehicles total Pen values of all hits from the Gravity Pulse weapon and roll for damage against the Top Armour once with that modifier. Inflicts D2 Pin Markers.
- Overload. Exhaust a Surging Rift Die. Weapon increases Shots value by 1 for this attack. The firing unit suffers D2 Pin Markers.
- Hyper Velocity. Fire, Advance, or Ambush Order – exhaust a Rift Die. Gain +1 to hit and +1 Pen. Hyper Velocity shots ignore Cover Saves. Full Damage scored counts as Massive Damage instead. The shot may strike a second target up to 12" beyond the first target – but this does not benefit from Hyper Velocity bonuses.
- Overload. Exhaust a Surging Rift Die. Instead gains +2 'to hit' and +2 Pen. The firing unit suffers D3 Pin Markers.
- Shockwave. Fire, Advance, or Ambush Order – exhaust a Rift Die to generate a Shockwave. Roll to hit, then total the number of hits to determine HE, Pen, and number of Pin Markers inflicted on the target. Use the relevant template to calculate the actual hits inflicted on the target. Shockwave shots ignore Cover.
- Overload. Exhaust a Surging Rift Die. Gain re-rolls to hit. The firing unit suffers D3 Pin Markers.
Powered Armour
A model with Heavy Powered Armour ignores the Team Weapon special rule for any weapons it carries. A model with Augmented Powered Armour ignores the Team Weapon and Fixed special rules for any weapons it carries.
Powered armour increases the Damage Value of the troops wearing it according to its type, summarised below.
Powered Armour Troops Damage Value Summary
| Infantry Experience Level | Damage Value in Grade 1: Heavy Powered Armour | Damage Value in Grade 2: Augmented Powered Armour |
|---|---|---|
| Inexperienced | 4+ | 5+ |
| Regular | 5+ | 6+ |
| Veteran | 6+ | 7+ |
Damaging Armoured Targets
Damage Value: Armoured Targets
| Target | Result Needed |
|---|---|
| Armoured Car/Carrier | 7+ |
| Light Tank/Walker | 8+ |
| Medium Tank/Walker | 9+ |
| Heavy Tank/Walker | 10+ |
| Super-heavy Tank/Walker | 11+ |
Heavy Weapons v. Armoured Targets
| Situation | Pen Modifier |
|---|---|
| Vehicle's Side / Top Armour | +1 |
| Vehicle's Rear Armour | +2 |
| Long Range | -1 |
| Point-blank Range | +1 |
Superficial Damage Results on Armoured Vehicles
| D6 Roll | Effect |
|---|---|
| 1 | Crew Stunned. Add one additional Pin Marker to the Vehicle. Assign the Vehicle a Down Order (take the Order Die from the Dice Bag if it does not have one) or change its current Order Die to Down. Further Crew Stunned results in the same turn simply add an additional Pin Marker to the Vehicle each time. |
| 2 | Steering Compromised. Add one additional Pin Marker to the Vehicle. For the remainder of the game, the Vehicle can make one less pivot when moving. A second Steering Compromised result (at any time) means the Vehicle cannot pivot at all from that point on. Any further Steering Compromised results count as Immobilised results instead. |
| 3 | Turret or Arm Jammed. Add one additional Pin Marker to the Vehicle. If a Vehicle with multiple turrets or arms suffers this result, first randomly determine which turret or arm is affected and then apply the effect to that turret or arm only. The turret or arm is immediately jammed within the arc in which the closest visible enemy unit lies, or in the Forward arc if no enemy units are visible. Weapons mounted on that turret or arm will only be able to engage targets in that arc for the rest of the game. If the damage is caused by an Assault, the turret or arm is jammed in the arc from which the majority of the assaulting models assaulted from. If this Vehicle has no turret or arms, treat this result as a Steering Compromised result instead. |
| 4 | Engine Damage. Add one additional Pin Marker to the Vehicle. The Vehicle receives the Slow rule for the rest of the game. If the Vehicle had the Fast rule, it loses it instead. If the Vehicle already has the Slow rule, its speed is halved, and any further Engine Damage results count as Immobilised results instead. |
Full Damage Results on Armoured Vehicles
| D6 Roll | Effect |
|---|---|
| 1 | Crew Stunned. Add one additional Pin Marker to the Vehicle. Assign the Vehicle a Down Order (take the Order Die from the Dice Bag if it does not have one) or change its current Order Die to Down. Further Crew Stunned results in the same turn simply add an additional Pin Marker to the Vehicle each time. |
| 2 | Immobilised. Add one additional Pin Marker to the Vehicle. The Vehicle cannot move for the rest of the game. If the Vehicle has already taken an action this turn flip its Order Die to Down. If the Vehicle suffers a further Immobilised result, the crew abandon the Vehicle and it is considered Knocked Out. |
| 3 | On Fire. Add one additional Pin Marker to the Vehicle and then make an immediate Morale Check. If the test is passed the fire has been put out or fizzles out of its own accord. Place a Down Order Die on the Vehicle or change its current Order Die to Down. If the test is failed, the crew abandons the Vehicle and it is considered Knocked Out. |
| 4, 5, or 6 | Knocked Out. The Vehicle is immediately destroyed and becomes a Wreck. The model is not removed, but instead marked in some way to indicate it is wrecked. Vehicle Wrecks count as Impassable Terrain. |