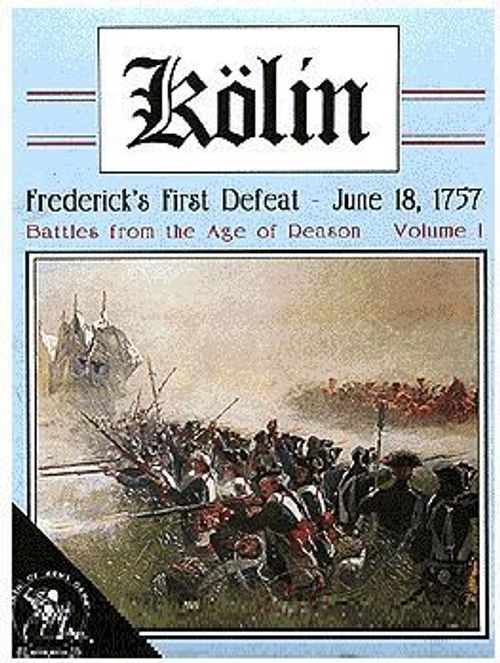
Kolin: Frederick's First Defeat – June 18, 1757
Kolin: Frederick's First Defeat – June 18, 1757 Rulebook
Table of Contents
Table of Contents
Game Information
Unless specified otherwise, all rule references in this booklet are to the BAR Third Edition Series Rules.
Charts and Tables
Loss Charts. Players may record losses to units by using the black and white SP loss markers and placing them under the unit, or by using the army Loss Charts. The loss charts contain all the information found on the counters, so that if the loss charts are used, you need not refer to the back sides of the counters.
To use the loss charts, mark off the highest numbered box by each unit that takes losses. In addition to marking the loss to the unit, for each infantry or cavalry loss sustained, mark off one box on the correct nationality's Army Loss Record. For each artillery loss, mark off two boxes on the Army Loss Record. For any leader losses, mark off a number of boxes equal to the leader's loss value.
If the losses recorded on the Army Loss Record plus the number of currently routed SPs reach one of the loss levels listed in grey, then that army must make an Army Morale roll on the next :00 turn, per Series Rule 23.0. After a player rolls on his army's Current Loss Level table, there is a track on which to make a note of the time rolled and the result. This will help keep track of which Current Loss Level columns have already been used and the effects.
Terrain Effects Chart. The Terrain Effects Chart (TEC) differs from the original chart in that it includes separate columns for costs when in Line or Column formations. It also includes the maximum stacking values for each hex (in parentheses).
Orders of Battle. Revised Orders of Battle (OOB) for each of the armies at Kolin are included with the charts. The coloring on the OOBs only serves to differentiate the Wings and Commands of the armies; it is not related to any coloring on the counters. As an alternative to the standard BAR method of turning over leaders when a Command has completed its move, the OOBs may be used for marking which Commands/Wings are Finished. Place a FINISHED marker in the Wing Leader's box to show that the entire Wing has been activated; place a FINISHED marker in a Command Leader's box to show his Command has been activated. Independent units can be marked as FINISHED on the map or on the OOBs.
Turn Record Track. The Turn Record Track is used to record both the passage of time (Game-Turns) as well as progress along the End Turn track. It has separate spaces for each 20 minute turn, which makes it easy to place wounded leaders or reinforcements so that they arrive on the correct turn. Kolin uses older markers so it does not have the GAME TURN and END TURN markers used with the Third Edition BAR rules. Place Kolin's MINUTES marker on the correct time (in place of the GAME TURN marker) and place Kolin's HOUR marker on the 0 box of the Turn Record Track (in place of the END TURN marker). The Turn Record Track also lists the End Turn Numbers for each of the scenarios.
Special Results Charts. The Special Results charts are different for each side. Take care to use the correct column for Austrians or Prussians. The Special Results charts contain abbreviated information on the results. For full explanations of the Special Results, see the Special Results Notes section of these Kolin rules.
Fire Combat Multiples & Ranges Chart. This chart shows the Fire Multiples for each type of unit for each hex in its range, and also the artillery minimum ranges for Opportunity Fire and for multiple artillery units firing.
Morale and Disorder Check Charts. The Morale Check and Disorder Check charts are found alongside the Special Results charts for Morale and Disorder Checks. The Special Results charts contain general comments about the results.
Formation Change Diagram. The Formation Change Diagrams chart shows the formation change costs for both armies. When using this chart, simply find the proper diagram for the type of unit and the formation change desired. Orient the diagram appropriately to the unit's facing, and use the proper costs for the nationality involved. For cavalry, only the 3 hex diagrams are shown, but directions are given on how to use the diagrams for smaller cavalry formations.
Formation, Fire Arc, ZOC, etc. Diagrams. This chart shows the various formations and their Front, Flank and Rear facings. It also shows Zones of Control and the firing arc for each formation. The arrows on the page show the allowed formation changes between the various formations, so that players can easily discern which changes are permitted. At the bottom of the page is the Single Hex Facing Change Cost diagram which shows facing change costs. This diagram is BAR-generic so it includes information that does not apply to Kolin. The two diagrams on the right of the facing change cost area will be those used most in Kolin. The diagram on the far left is used for units in Attack Column. The diagram on the near left will not be used in Kolin.
General Special Rules
"00" Initiative Rolls
Whenever players roll "00" for their Initiative rolls, instead of ignoring the roll (per the normal BAR rules) it is an Army Morale special result. See Kolin rule 6.2a for details.
Cavalry Capabilities
SCM Costs. The Terrain Effects Chart lists the SCM costs to enter each of the game's terrain types and which of those terrain types require charging cavalry to make a Movement Actions Disorder Check (A) at the end of its charge movement (see 13.3f).
SCM Prohibitions. Special Cavalry Movement (SCM) is prohibited into/across the following terrain types: Marsh hexes, Pond hexes, Walled Church/Farm hexes, and Town hexes. SCM can originate in Marsh hexes and the cavalry can exit Marsh hexes using SCM. The target of a cavalry Charge/Countercharge/Opportunity Charge can be in a Marsh hex. A Countercharge/Op Charge cannot be triggered if it would require the cavalry to enter/cross terrain prohibited to SCM.
Cavalry Types. Cavalry units with a Movement Allowance of 6 are medium or heavy cavalry (aka "Cavalry"). Cavalry units with a Movement Allowance of 7 are Light Cavalry.
Pursuit.
- When a stack composed solely of Light Cavalry units rolls for Pursuit Points, one (+1) is added to the die roll.
- A leader that is stacked with cavalry units that are all subordinate to him (i.e. below him in the chain of command) can be used to affect Pursuit die rolls. A Command Leader adds two (+2), and an Army/Wing Leader adds one (+1) to the Pursuit die roll. If multiple leaders are present only one can be used to modify the Pursuit.
- These die roll bonuses are cumulative and are added before any halving for being Disordered.
- No matter what the cavalry Pursuit modifiers (as listed above) a "0" Pursuit die roll is still treated as a zero and mandates a Pursuit Special Result — roll the die again to determine the exact nature of the Special Result.
Leader Casualties and Replacements
Army, Wing, and Special Leader Replacements. Army and Special Leaders either have assigned replacements or are irreplaceable. Check the Prussian and Austrian Special Rules for details on each of these Leaders. Wing Leaders do not have replacements.
Command Leader Replacements.
- For Command Leaders, players have two options for replacing those lost leaders. The first option is to use the generic Prussian and Austrian leader replacement counters found on the Kolin counter sheet. There are 5 Prussian and 4 Austrian "replacement" leaders. The leaders with a "10" movement allowance are used to replace cavalry Command Leaders and the leaders with an "8" Movement Allowance are used to replace infantry Command Leaders. Randomly pick a replacement counter of the appropriate type and nationality to replace the missing leader and use the replacement counter until the missing leader returns (if ever) per Series Rule 21.5. If players own "Prague: The Empty Triumph", they can also use the Command Leader replacement counters from that game.
- Alternately, players can use the standard BAR black and white leader loss counters (labeled A or B) for lost leaders. (The A and B leader loss counters were not part of the generic counters found in the original Kolin game. They can be pirated from another BAR game or a sheet of the generic black and white BAR counters can be purchased from Clash of Arms Games.) Prussian leaders are replaced with the A counters and Austrian leaders with the B counters. (As a reminder, this information is included on the army Loss Charts.) When the appropriate counter is picked, apply the modifiers listed on that counter to the original leader's values. The EM line modifies the original leader's ER Bonus modifier (this cannot go higher than 0). The IR line modifies the original leader's Initiative rating (this cannot be less than 0). The CM line modifies the original leader's CV Bonus modifier (this cannot be less than 0). Record these modified values wherever convenient and return the leader loss counter to the other counters, or keep the Leader Loss counter with the affected Leader as a reference.
Leader Losses. Every leader has a value which affects Army Morale when that leader is killed. This value is found on the army Loss Charts. Whenever a leader is killed, mark off the appropriate number of boxes on the Army Loss Record track. If a generic replacement leader is killed, use the value of the leader that was being replaced, minus 2, for the army loss result. With this rule, players get proper credit for killing off the replacement leaders.
Austrian Special Rules
Austrian Unit Characteristics
Unit Types. The Austrian army contains the following unit types. (The abbreviations in parentheses are used on the Loss Charts and OOBs.)
- Infantry: Fusiliers (Fus), Grenadiers (Gren), Light Infantry (LI)
- Infantry Skirmishers: Grenzers (Grnz)
- Cavalry: Dragoons (Drag), Elite (ECv), Karabiniers (Krb), Kurassiers (Kur)
- Light Cavalry: Cheveaulegers (Chv), Hussars (Hus)
- Artillery: Howitzers, 3 lb, 6 lb, 12 lb
Infantry. Austrian fusiliers are in 4 ranks for the Infantry Line SP Chart. (Kolin was the last major battle where Austrian infantry operated in 4 rank formations.) Austrian grenadiers are in 3 ranks for the Infantry Line SP Chart unless they are stacked with regular Austrian fusiliers in which case they are 4 ranks (like the fusiliers).
Grenzers.
- Austrian Grenzer units have parent units which may break down and reform (see Series Rule 8.5). The parent units are considered to be Light Infantry (they can retreat before Close Combat per rule 20.1 and they fire as Grenzers) while the breakdown units are Skirmish-only units.
- When in Skirmish mode, Grenzers must be In Command to move adjacent to non-Routed Prussian combat units. They may move adjacent to Routed Prussian units regardless of the Grenzers' command status. In Command Grenzers must still pass the EZOC dice roll requirement to enter a Prussian ZOC but when a Grenzer unit attempts to move into an EZOC hex that is Clear terrain the Grenzer's ER is modified by +10 for the required dice roll (see Series Rule 11.9c). These restrictions also apply to cavalry skirmishers (see Kolin rule for Cavalry Skirmishers, below).
- Skirmishers may Retreat Before Close Combat when attacked by infantry, or by cavalry in Woods or Village.
Cavalry.
- Austrian cavalry have a Charge Range of 3 hexes. They may Retreat Before Close Combat when attacked by infantry. Unless otherwise noted in these rules, all references to "cavalry" also include light cavalry. Hussars (light cavalry) may Retreat Before Close Combat when attacked by any unit other than light cavalry.
- Austrian Light Cavalry Attrition: Nádasdy's cavalry spent most of the night of June 17/18th on the march to the battlefield. The exact number of men and horses with which they arrived is unknown for there were certainly some losses en route. The unit strengths in the game are based on the paper strengths and returns from earlier in the week. To reflect the likely losses from attrition the Austrian player rolls one die (counting '0' as zero) and deducts that many strength points from any of the hussar type cavalry units in Hadik's and Morocz' Commands. No more than 2 SPs can be removed from any one unit. This is done for each scenario before the Austrian player deploys his units. These "losses" are not counted as army losses on the Army Loss Record.
Cavalry Skirmishers.
- The Austrian WAR, KAR, and BNL Grenz Hussar units of Beck's Command are skirmish-capable (see Series Rule 8.4h). When they are deployed as skirmishers, place a SKIRMISH marker on the units as a reminder.
- Cavalry skirmishers are, in all respects, treated like skirmishers (except that they do not use Fire Combat). They are subject to the movement restrictions of the Grenzer skirmish-mode rule above. They are required to make the dice roll to enter an EZOC (11.9c), use Skirmish facing, use Skirmish movement and facing change costs, and use Skirmish target and CV modifiers. They may not initiate Close Combat, Countercharge, Op.Charge, advance after combat or pursue, etc. If involved in a Close Combat, they do potentially get the +1 CV bonus for Light Cavalry. Cavalry skirmishers may Retreat Before Close Combat when being attacked by any unit (20.1).
Artillery. All Austrian artillery may fire and prolonge (FP). The howitzer fire combat rules (12.6d) apply to the Austrian howitzers.
Austrian Command Structure
The Austrian Army has 1 Army Leader, 2 Special Leaders, 5 Wing Leaders, and 13 Command Leaders. Command Leaders that are lost in battle are replaced per Kolin's Command Leader Replacements rule. There are no replacements for Wing or Special Leaders. If the Army Leader is lost, he is replaced per Kolin rule below (FM Daun).
Austrian Army and Special Leaders
FM Daun. Daun is the Austrian Army Leader with a Wing Activation Number of 7 and a Command Rating of +3. If Daun becomes a casualty he is replaced as Army Leader by GFwM Guasco. If Guasco becomes a casualty as the Army Leader, he is replaced as Army Leader by the nearest Wing Leader. Anyone other than Daun who operates as Army Leader has a Command Rating of +1 and a WAN of 9.
GFwM Guasco. GM Guasco is a Special Leader who becomes Army Leader if Daun is killed or wounded.
GFwM Feuerstein.
- Feuerstein is an Austrian artillery Special Leader. He can combine two artillery stacks within his Command Range into one Fire Combat against a single target that is beyond their minimum artillery range. This ability overrides the 12.2i artillery fire restriction. The circled '2' on the reverse side of the Feuerstein update counter is a reminder of the maximum number of stacks that may be combined into one Fire Combat. Artillery units may still make individual attacks if desired.
- Feuerstein is activated per Series Rule 6.6a. He must be In Command to use his Special Artillery ability which can only be used when he is activated and therefore only once per Game Turn. Feuerstein is In Command only when an LOC is traced to him from the Army Leader (either directly or via a Wing Leader's extension), or from an activated Wing Leader who is In Command via Initiative. Command Leaders cannot place Feuerstein In Command. Feuerstein cannot use Leader Initiative (7.4) to place himself In Command because he does not have an Initiative Rating. When Out of Command he moves normally but he cannot use his Special Artillery ability or place artillery units In Command.
- When activated and In Command, Feuerstein can place any number of activated artillery units within his Command Range In Command. The number of artillery units he can place In Command is not limited by the number of artillery stacks to which he can apply his special artillery ability. All standard LOC rules apply to his Command Range except for Regimental Integrity (6.2) and Road hexes (7.3b). He cannot place any non-artillery units In Command even if he is stacked with them. Feuerstein cannot be used to attach (6.4) combat units to a Command. When stacked with a multi-hex formation, the hex Feuerstein occupies must be specified.
- When stacked with Disordered artillery units, Feuerstein can be used for automatic Disorder Recovery (18.6b) but only if the hex contains artillery only.
Prussian Special Rules
Prussian Unit Characteristics
Unit Types. The Prussian army contains the following unit types. (The abbreviations in parentheses are used on the army Loss Charts.)
- Infantry: Fusiliers (Fus), Guard (Grd), Grenadiers (Gren), Musketeers (Mus)
- Cavalry: Dragoons (Drag), Guard (GCv), Karabiniers (Krb), Kurassiers (Kur)
- Light Cavalry: Hussars (Hus)
- Artillery: 6 lb, 12lb, Howitzer, Mortar
Infantry.
- Prussian infantry are in 3 ranks for the Infantry Line SP Chart. The Prussian Leibgarde infantry battalion and all Prussian Grenadier battalions have a special marching ability because of their high drill proficiency. These units may move obliquely without paying the extra MP costs of rule 11.3.
- Manteuffel (MAN) Grenadier Option. This battalion did not take part in the battle because it was assigned to guard the Prussian baggage train which, as it turned out, was never threatened by the Austrians. If both players agree this unit can be added to any Prussian setup which includes grenadiers.
Cavalry. Prussian cavalry have a Charge Range of 4 hexes. They may Retreat Before Close Combat when attacked by infantry. Unless otherwise noted, all references to "cavalry" also include light cavalry. Hussars (light cavalry) may Retreat Before Close Combat when attacked by any unit other than light cavalry.
Artillery. Prussian 6 lb artillery units and the Howitzer unit may fire and prolonge (FP). Prussian 12 lb artillery units may prolonge (P) only. The Mortar unit may not prolonge. The howitzer fire combat rules (12.6d) apply to the Prussian howitzer and mortar units.
Prussian Command Structure
The Prussian Army has 1 Army Leader, 1 Special Leader, 4 Wing Leaders, and 12 Command Leaders. If Command Leaders are lost in battle, they are replaced per Kolin's Command Leader Replacements rule. There are no replacements for Prussian Wing or Special Leaders. If the Prussian Army Leader is lost, he is replaced per Kolin rule below (King Frederick II). The Prussian Order of Battle display shows the relationships between the leaders and their subordinate units.
Prussian Army and Special Leaders
King Frederick II. King Frederick II of Prussia is the Prussian Army Leader. He has a Command Rating of +5 and a Wing Activation Number of 5. If Frederick becomes a casualty, he is replaced by Fürst Moritz. If Moritz becomes a casualty as the Army Leader, he is replaced as Army Leader by the nearest Wing Leader. Anyone other than Frederick who operates as Army Leader has a Command Rating of +1 and a WAN of 9.
Fürst Moritz.
- Fürst Moritz is a Special Leader who can be used by the Prussian player as a de facto Army Leader for the purpose of tracing Army Leader LOC. Moritz may only be used in this way for activations involving Tresckow's and Bevern's Wings and their subordinate Commands and he can use this ability only once per game turn.
- Moritz must not have already been activated this turn and must pass a Leader Initiative dice roll. If he fails the dice roll, there is no effect (return to the initiative determination phase) other than he is considered as Activated for the rest of the turn. If he passes, he is activated and an LOC is traced from him using his Command Range, to the Command or Wing Leader that is being activated just as though Moritz were the Army Leader.
Terrain Notes
General Notes
This section is mostly for reference, but it should be read through at least once as there are some terrain-specific rules detailed here. The Terrain Effects Chart (TEC) shows the costs for each terrain type for different unit types in differing formations. Take care that you use the correct column for a unit's type/formation. Also note that the stacking limits are included in the TEC. The numbers in parentheses show the maximum stacking allowed (in SPs) for each unit type/formation. Other notes listed on the TEC are fully explained in this section.
Hexes
Clear Hexes. Clear terrain is basic, open terrain — grassy fields. Clear terrain does not block Line of Sight and is not affecting terrain for a Disorder Check (A) or for Series Rule 8.7.
Marsh Hexes. Marsh terrain is permanently wet and soggy ground. It adversely affects the Combat Values of attackers attacking out of it or defenders defending in it. Cavalry SCM is not allowed through a marsh hex. Marsh does not affect Line of Sight. It is non-clear terrain for a Disorder Check (A) and for Series Rule 8.7. All marsh CV modifiers are doubled for cavalry.
Pond Hexes. Pond hexes are prohibited for all game activity. They do not block LOS.
Sunken Road Hexes. These are shallow gullied farming tracks that crisscrossed the hillsides on the battlefield. They were a considerable obstruction to maneuver, and other than providing some cover to troops from long range fire, they interfered with the units' abilities to attack and defend in proper formation.
- For a non-skirmish infantry unit to receive the '15' Fire Defense Value, all of the following conditions must be met. (Otherwise, the Fire Defense Value for the other terrain in the hex is used.) 1) the unit must be in Line formation (single or multi-hex); 2) at least one of its flank hexes must be a Sunken Road hex; 3) all enemy fire must come from a non-Sunken Road hex.
- Skirmish units always receive the '15' Fire Defense Value provided all enemy fire comes from a non-Sunken Road hex.
- Cavalry and artillery always use the '10' Fire Defense Value for Clear when in a Sunken Road hex.
- Sunken Road hexes have an adverse -2 CV modifier that applies to a defender defending in Sunken Road or an attacker attacking out of Sunken Road. All Sunken Road CV modifiers are doubled for cavalry.
- For Morale Checks that use a terrain modifier, a non-Skirmish unit in a Sunken Road modifies its ER by -5, a Skirmish unit by -10.
- Sunken Road is non-clear terrain for Movement Disorder Checks (A) and for Series Rule 8.7.
Town Hexes. All of the hexes of Planjan are Town hexes. Planjan was a moderate sized town, not as large as Kolin (which is east of the east map) but was congested enough to interfere with the maneuver of troops. All its hexes are forbidden to artillery and cavalry except when in Road Column and using Road Movement. Its hexes cause infantry to change to General Order formation when not using Road Movement. Skirmish units remain in Skirmish formation in Town hexes. Town hexes block Line of Sight.
Village Hexes. These small farming communities were of light construction; the buildings primarily of wood and thatch, were widely separated from each other. Many of the buildings were just for farm usage and not inhabited. They offered little interference to maneuver and very little defensive benefit. They did tend to slow units down that attempted to pass through them too quickly. The green "cultivated fields" hexes that are found around the Village hexes are only decorative and are treated as Clear terrain for all game purposes. An example of such a hex is E3928. Also, incidental overflow of the building illustrations or individual buildings on the map are not Village hexes. Village hexes block Line of Sight. Village is non-clear terrain for Movement Disorder Checks (A) and for Series Rule 8.7.
Walled Church/Farm Hexes. In Planjan and in some of the surrounding villages there were churches with walled cemeteries that proved to be very defensible positions when properly manned. There was even a farm dwelling or two that was more substantially built than was normally found in the area. These hexes give a +8 CV benefit for defenders unless any of the attackers are in Attack Column in which case the CV benefit is only +4. Artillery and Cavalry may only enter or exit a Walled Church/Farm hex along a road and they must be using Road Movement. They cannot end their move in a Walled Church/Farm hex. Infantry that enters a Walled Church/Farm hex must go to General Order unless using Road Movement. Skirmish units in Walled Church/Farm remain in Skirmish formation. Walled Church/Farm hexes are non-clear terrain and block Line of Sight.
Woods Hexes. Woodland in this area was generally "open" in that it was harvested of brush and trimmed for fire wood. It was not too difficult for units to maneuver in and through them. Woods hexes block Line of Sight and are non-clear terrain for a Disorder Check (A) and for Series Rule 8.7. A hex is a Woods hex only if it is covered "fully" by the tree symbols. Hexes that contain only 1 or 2 tree symbols are not Woods hexes.
Road and Major Road Hexes. The Kolin map has many Roads and one Major Road. The Major Road is the highway from Prague which crosses the battlefield area — the Kaiserstrasse. When following a Road in Road Column (Road Movement), the cost is 1/2 MP per hex for Road and 1/3 MP per hex for Major Road. Except for the reduced MP cost for movement, Major Road is treated just like Road. Roads do not alter the Line of Sight properties of the other terrain in the hex. Note that the bridges drawn on the map are just extensions of the roads and are considered roads. If a unit is not using Road Movement, ignore the road and use the other terrain in the hex.
Hexsides
Note: If fire is traced into a target hex, exactly along a vertex to the hexpoint where a modifying hexside ends, the target still gets the benefit of the modifying hexside.
Slope & Steep Slope Hexsides. Slopes and Steep Slopes run along a hexside and look similar (see the TEC) except that Steep Slopes have more intense coloration. The movement cost for these types of hexsides is the same whether moving up or down the slope. If an attacker is attacking up slope, it faces an adverse -2 (Slope) or -3 (Steep Slope) CV modifier (see the TEC). Steep Slope hexsides (but not Slopes) are affecting terrain for a Disorder Check (A) and for Series Rule 8.7. Slopes will block Line of Sight unless the target is in an adjacent hex, or the firing unit is on a higher elevation than the defender (see Series Rule 12.6). The green lines radiating from the Slope hexsides are decorative only and have no effect on the game.
Stream Hexsides. These smaller water obstacles are a lesser hindrance to movement. They do not block LOS but they are affecting terrain for Movement Actions Disorder Checks and for Series Rule 8.7.
Creek Hexsides. The Beczvarka & Vejroka "streams" are located on the West map and are treated as Creeks. These hexsides are a more serious obstacle to movement. Creeks do not block LOS but they are affecting terrain for Movement Actions Disorder Checks and for Series Rule 8.7.
Swedish Fieldworks. These ancient earthen walls are dubiously attributed to the Swedes. Physically they resemble worn earthen berms and not sophisticated constructions by 17th century engineers. LOS can be traced from a non-adjacent hex to the hex on the other side of the Fieldworks, but not beyond. Adjacent fire (in either direction) does not receive the Fire Combat Modifier penalty of Fieldworks. Fieldworks hexsides are affecting terrain for Movement Actions Disorder Checks and for Series Rule 8.7. All Fieldworks CV modifiers are doubled for cavalry.
Line Of Sight
The Line Of Sight (LOS) restrictions are quite forgiving. Most of the terrain was open ground under cultivation. The hills and ridges south of the Kaiserstrasse were prominent but their slopes were for the most part gentle and glacis-like.
The Kolin map does not have the elevation lines that are found on later BAR maps. The slopes (regular and steep) are used as guidelines for determining if a certain hex is higher than another. Common sense and fair play should be the gentleman's rules for determining slope effects on LOS.
Woods, Village, Walled Church/Farm, and Town hexes block Line of Sight; LOS can be traced into but not through them. Fieldworks hexsides block LOS only when the LOS is traced from a hex that is not adjacent to the fieldworks hexside.
Special Results Notes
This section does not need to be read as "rules." This section is a reference for use when Special Results are rolled. The various Special Results tables contain abbreviated descriptions of the results, but the full explanations of those results are given in this section. Because of this, players should read these notes for each result until such time as they become familiar enough with them to be able to use the abbreviated descriptions.
Initiative Special Results
Army Morale.
- When a "00" Initiative result is rolled, both sides make an Army Morale Check based on their armies' current level of losses, but with an automatic -1 to the roll. An Army Leader can modify this Army Morale Check as any normal Army Morale Check with whatever he has left of his Command Rating (per Series Rule 23.2b), but the points used will be subtracted from his Initiative rolls for the remainder of the hour (until the next :00 turn). He may not apply Command Rating points that have already been used in the current hour.
- This Army Morale Check must be made even if the current level of losses has already been rolled for. If the current level of army losses has not yet been rolled for, then this check is considered to have "used up" that loss level for purposes of rule 23.1c (though further "00" rolls can still be made on the loss column). This event is used in addition to the normal hourly Army Morale Checks but may be applied only once per turn; any further Army Morale results on a given turn are ignored.
- If a player rolls a natural "0" for this Special Result's Morale Check, his Army Morale is reduced by -5; the troops have taken fresh courage. Army Morale cannot be reduced below 0.
Army Leader Lapse. For the rest of the Game Turn, the affected Army Leader may not trace his LOC — even to his own hex. In effect, all leaders will have to roll for Initiative. He may not use his Command Rating to modify the Initiative dice roll or Army Morale rolls (although his WAN is still used for any potential Wing Activations). This result is to be applied only to whoever is the current, acting Army Leader. If the Austrian Army Leader is Daun, add two (+2) to all Leader Initiative dice rolls; a roll of 0 becomes a 2, a roll of 7 becomes a 9, etc.
Command Confusion.
- The player who did not roll this Special Result picks an unactivated Command of the player who did roll this Special Result. The affected player must roll two Leader Initiative rolls for the affected Command Leader. If he fails both rolls, the Command is marked as Finished and may not be activated. If he passes one roll, the Command is activated with 1/2 of its MPs (retain fractions but quarter the MPs for units that are Disordered or Out of Command) but no Rapid March is allowed, nor may it initiate any Close Combats, attach units or activate independents. If he passes both rolls, the Command is activated without penalty.
- If all of the combat units of the chosen Command are outside of the Command Range of their leader, or if the Command does not have a Leader on the map, do not roll for Initiative — they are automatically considered as Finished.
- This Special Result is applicable once the End Turn has been reached, but any movement is subject to the End Turn limitations found in Series Rules 6.7 and 6.8.
Free Combat Segment. Pick one Command and any independent units that are stacked with a unit or leader of the Command for either a Fire Combat or a Close Combat Segment. If the units involved have not yet been activated, they are still not considered so. If there are mixed stacks with units from multiple Commands, only the units of the Command chosen may fire or attack, and only if they are the top units. Feuerstein can be chosen for this Special Result but he can only affect artillery within his Command Range. This event may only be applied once per turn per Command or unit. Mark the affected Command with any convenient counter to show that it has already "used" this event for this turn. Remove all such mnemonic markers during the Rally Segment.
Special Rally. Pick any one Command and perform a Disorder Recovery Phase and then a Rally Phase for all units of the Command that are within the Command Range of their Leader. If units of the Command are stacked with units of other Commands, this event still applies and the whole stack receives the benefit. If the Command has not yet been activated, it is still not considered so. This event may be applied as many times per turn as rolled for any given units.
Leader Initiative.
- Pick one Command, any attached units (per Series Rule 6.4), and any independent units that are stacked with a unit or leader of the Command for a possible free Movement Segment (only).
- All affected units must be within the chosen Command Leader's Command Range, and the leader must make an Initiative roll and pass it. If he does pass, he is In Command and all affected units get a free Movement Segment. If he does not pass the Initiative roll there is no event.
- If the Command (or independents) has not yet been activated, it is still not considered so. If the Command (or independents) has been activated, this is an extra move.
- This event may only be successfully applied once per turn to any given units — failed attempts do not count against this. Mark the affected leader with any convenient counter to show that he has already received this Special Result. Remove all such mnemonic markers during the Rally Segment.
- This result is applicable once the End Turn has been reached, but any movement is subject to the End Turn limitations found in Series Rules 6.7 and 6.8.
Battle Tempo. The player who rolls this result may move the END TURN (or HOUR) marker up or down one space on the End Turn Track. This may cause the End Turn conditions to be triggered. Once the End Turn has been reached, this event is considered as no effect.
Infantry Fire Special Results
This table is used for infantry's regular fire and Opportunity Fire but not for Defensive Fire. For rerolls, retain all originally calculated modifiers and rolls of 00-09 are not Special Results.
- Leader Losses. A dice roll of 00, 02, 04, 06, 08 causes a possible leader casualty check, which is made using the Leader Loss Table before the Special Result is applied.
- Free Fire. Reroll two times. Apply the first roll's result before making the second roll. The firing units are Disordered* after all firing.
- Full Volley. Double the total Fire Strength and reroll.
- Battalion Guns. Reroll and add 1 SP loss to any SP loss or to any 'R' or 'D' result. If the firer is only Skirmishers, do not apply this result but instead reroll the dice.
- High Crops. If the hex of the firer or the target is Clear, reroll the dice and subtract 20 from the result.
- Ammo Low. Halve (round) the Fire Strength and reroll.
- Ammo Exhausted. Fire has "No Effect" and the firing unit is Disordered*.
*An already Disordered unit is marked "Shaken/Disorder."
Artillery Fire Special Results
This table is used for artillery's regular fire and Opportunity Fire but not for Defensive Fire. For rerolls, retain all originally calculated modifiers and rolls of 00-09 are not Special Results.
- Leader Losses. A dice roll of 00, 02, 04, 06, 08 causes a possible leader casualty check, which is made using the Leader Loss Table before the Special Result is applied.
- Rapid Fire. Reroll two times; apply the first roll before making the second.
- Accurate Fire. Shift the odds column one to the right and reroll.
- Wild Fire. A unit or stack, enemy or friendly, adjacent to the original target stack becomes the new target. If there are several adjacent and eligible units or stacks, determine the new target randomly. If there is no adjacent unit or stack, or the new target is outside the range or facing of the firing unit, treat the result as "No Effect." A unit that is out of LOS can be the new target. Use the odds and modifiers originally calculated and reroll the Fire Combat, applying the result to the new target.
- Caisson Explosion. Reroll the combat. Whatever the rerolled result (even a "No Effect" result) if the target hex or any adjacent hex contains an artillery unit, the artillery loses 1 SP. This extra 1 SP artillery loss result is not halved per rule 12.9f. If there are multiple eligible artillery units, randomly determine which one is affected. A Morale Check (A) is made for any stack that loses an artillery SP from this Result even if the rerolled dice roll is not even.
- High Crops. If the hex of the firer or the target is Clear, reroll the dice and subtract 20 from the result.
- Ammo Low. Halve (round) the Fire Strength and reroll.
- Ammo Exhausted. The fire has no effect and the artillery unit limbers. Displace the artillery unit one hex to the rear (or as many hexes as necessary to avoid illegal stacking) in Limbered formation.
Defensive Fire Special Results
For rerolls, retain all originally calculated modifiers and rolls of 00-09 are not Special Results.
- Leader Losses. A dice roll of 00, 02, 04, 06, 08 causes a possible leader casualty check, which is made using the Leader Loss Table before the Special Result is applied.
- Whites Of Their Eyes. Defenders hold their fire until the last possible moment. Shift the calculated odds one column to the right and reroll.
- Battalion Guns. Reroll and add 1 SP loss to any SP loss or 'D' result. If the firer is only Skirmishers, do not apply this result but instead reroll the dice.
- Premature Fire. Impatient defenders fire too soon. Halve (round) the Fire Strength of all firing units and reroll.
- Smoke and Dust. The defender's aim is obscured. Defensive Fire is cancelled.
Leader Loss Special Results
Leader Loss Special Results are applied whenever any even numbered (00, 02, 04, 06, 08) Special Result is rolled for Fire Combat, Defensive Fire, or Artillery Fire. Subtract 1 from any of the rolls in the Lucky Shot, In the Line of Fire, and Braving Enemy Fire results (below) if any of the firing units are: 1) artillery at 1-3 hex range, or 2) skirmishers. Do not apply this -1 bonus to the Fate result nor to the wounded roll. Leader Losses for Close Combat use a different format as found in the Close Combat Special Results.
- Fate. Pick any enemy Leader. Roll one die for that Leader: 0 = Killed, 1 = Wounded, 2-9 = No Result.
- The Lucky Shot. Randomly pick any enemy Leader within range and in Line of Sight of the firing units. ("Randomly" means that the Leaders that can potentially be affected should be identified and then a die rolled to determine which leader is affected.) Roll a die for that Leader: 0-3 = Killed, 4-7 = Wounded, 8-9 = No Result.
- In the Line of Fire. Roll one die separately for each enemy Leader in or adjacent to the target hex: 0-2 = Killed, 3-5 = Wounded, 6-9 = No Result.
- Braving Enemy Fire. Roll one die separately for each enemy Leader in the target hex: 0-2 = Killed, 3-5 = Wounded, 6-9 = No Result.
- Wounded Results. If a "Wounded" result is obtained, roll another die for the duration of the wound. The number of turns that the Leader is lost is equal to half the die roll (rounded). Place the wounded Leader the number of turns indicated forward on the Turn Record Track. A roll of '0' means that the leader's wounds are tended on the field and he does not leave the battle but he is still considered as wounded for Series Rule 21.4c.
Pursuit Special Results
A Pursuit Special Result re-roll of '0' is a roll of 0 PPs.
- No Pursuit. There is no Pursuit but the involved units must still make a Recall Disorder Check (F).
- Blood Lust. Re-roll for Pursuit Points and the routed units suffer 2 SPs lost for each hex of pursuit. Voluntary Recall is allowed.
- Out of Control. Re-roll for Pursuit Points and add 5 to the result. No voluntary Recall is allowed for the length of the pursuit. If the unit is Disordered, halve the total Pursuit Points (rounded). Even if the pursuing cavalry eliminates its opponent, it will still engage in pursuit to its full extent in a straight line from where the last enemy SP was eliminated — the pursuers are bent on vanquishing every enemy soldier.
- Hesitation. Re-roll for Pursuit Points and halve (round down) the result (quarter if unit is Disordered). Voluntary Recall is allowed.
Close Combat Special Results
When a Close Combat Special Result is rolled, consult the Close Combat Special Results table and use the protocol as set forth in Series Rule 14.8.
Morale and Disorder Check Special Results
The Tables. First, identify the check required (Disorder or Morale) and the letter designation (A, B, H, etc.) of the Disorder or Morale Check. Next, cross-index the dice roll with the results listed for that letter designation. Some of the rolls produce a numbered hierarchy of results. When this is the case, always check to see if result #1 applies first. If result #1 does not apply, then use result #2. If result #2 does not apply, use result #3. Whatever modifier is listed for any re-roll, that is the only modifier that is used for the re-roll — ignore all previously calculated modifiers. Note that some Morale results, marked with an asterisk (*), can cause leader losses. This possible leader loss is different from any other leader loss in the game and is explained below the Morale Check Special Results table.
Shaken/Disorder. When a result states that a unit becomes "Shaken/Disordered" its new morale/organizational state is applied to its existing state as follows:
- A Disordered or non-Disordered unit in Good morale becomes "Shaken/Disordered."
- A Disordered or non-Disordered unit with Shaken morale Routs (artillery is eliminated).
- A non-Shaken unit in Skirmish formation is "Shaken."
Scenarios
Introduction to the Scenarios
Overview.
- There are 6 scenarios in Kolin. The first two are primarily learning scenarios that should be played thoroughly before moving on to the larger ones. The third scenario combines the first two. These first three scenarios all use a single map section. The fourth scenario uses only two maps and covers the entire battle from the early afternoon after the Prussians have begun their flanking maneuver. The fifth scenario is the same as the fourth except it uses all three maps. The sixth scenario uses three maps and covers the whole battle from noon — before the Prussian flank march.
- Before beginning any scenario the game pieces should be sorted by side and type (markers, combat units and leaders). Using the Orders of Battle the units of each side should be sorted by Wing/Command or Independent unit type. This will make scenario setup much easier.
Format. The scenarios are presented in the following format: a brief summary of the scenario; Special Rules; Austrian Setup; Prussian Setup; Victory Conditions.
Setup.
- Set up all units according to the setup instructions for the scenario. The specific units are listed, and then their setup hex or setup instructions is listed (in parentheses). The setup hex has a letter (W: West, C: Center, or E: East) indicating which map to set up on, followed by the hex number. A direction to set up units "south of the 37xx hexrow" means that the units can set up south of (but not on) the line of hexes that begins with the number '37', such as 3701, 3702, 3703, etc. Similarly, directions to "set up units east of the xx20 hexrow" means that the units must be set up east of (but not on) the line of hexes that ends in the number '20', such as 1620, 1720, 1820, etc.
- Individual infantry battalions of a regiment are indicated by a number in front of the regiment name. Example: "1/2/3 ARH" shows that the setup includes the 1st, 2nd, and 3rd battalions of the ARH regiment. Individual parts of a cavalry regiment are indicated by a letter after the regiment name. Example: "KAT a/b" shows that the setup includes the 'a' and 'b' units of the KAT regiment. Artillery batteries are indicated by a number after the type of guns. Example: "6 lb #1/#2" shows that the setup includes batteries 1 and 2 of the 6 pound guns. Make sure to set up the correct counter(s) when such are noted. Units may set up in any legal formation with any facing unless otherwise specified.
- Setup parameters for Army Leaders and Special Leaders are indicated in each scenario. Unless otherwise noted, Command Leaders and Wing Leaders are set up within 2 hexes of any unit of their Command or Wing. The counter abbreviation for each leader is indicated in [brackets].
- The Austrian side sets up first in all scenarios. As a general guideline, Austrian troops will mostly be set up facing north and Prussian troops facing south.
- In all scenarios the line of retreat for any units will first of all be locally away from the enemy, but ultimately Austrian units will flee towards the south map edge and Prussian units will flee towards the north map edge.
Scenario 1: The Storming of Krechor
This is an introductory scenario depicting the Prussian attack on Krechor. It is designed as a cavalry-less introduction to the BAR game system. It uses only one map and a small number of units and should take only about an hour to play.
Special Rules.
- Scenario 1 starts at 1:40 and its last turn is the 3:40 turn. End Turn Numbers are not used in this scenario.
- Only the East map is used but with certain boundaries. All hexes north of hexrow E49xx and west of the Exx22 line of hexes are in play. Do not use the rest of the East map.
- Each side makes their normal Initiative die rolls with Army Leader modifiers of +3 for the Austrians and +5 for the Prussians, even though no Army Leaders are present.
- For the Austrians, until FmL Wied arrives, the Grenzer and artillery units are activated as one Command and are considered to be In Command. Once Wied arrives, he is always In Command as long as he can trace a line of hexes free of enemy units and their Zones of Control to any western or southern map edge hex within the scenario playing area. Once Wied is on the map all Grenzer and artillery units are activated when Wied's Command is activated and are then subject to normal Command Control rules.
- The Prussian Command Leader, GM Hülsen, is always In Command provided he can trace a line of hexes free of enemy units and their Zones of Control to any Kaiserstrasse hex. Since his is the only Prussian Command in the scenario, all Prussian grenadier and artillery units are activated when his Command is activated and they trace LOC from Hülsen.
Austrian Setup.
- Independent Units — Banalisten Grenzers: 1a/1b/2a/2b BNL (within 3 hexes of any Krechor village hex). Artillery: 3 lb #1 (within 3 hexes of any Krechor village hex).
- Austrian Reinforcements (2:40) — FmL Wied's Command [WI]: 1/2 SAL, ARB, STA, L-R, PLA, WUR a/b, BIR a/b. Artillery: 6 lb #1/#2. These reinforcements arrive on the 2:40 turn on any east map edge hexes between E40xx and E48xx (inclusive).
Prussian Setup.
- GM Hülsen's Command [H]: 1/2 MUN, 1/2 SCH (within 3 hexes of any Kaiserstrasse hex). Optional Unit: If the players feel comfortable with the cavalry rules the following units can be added to Hülsen's Command: STE a/b.
- Independent Units — Grenadiers: KAH, WAN, MOL (within 3 hexes of any Kaiserstrasse hex). Artillery: 12 lb #1, 6 lb #1 (within 3 hexes of any Kaiserstrasse hex). Prussian Reinforcements (2:00). Independent Grenadiers: NYM, FIN, WAL. These units arrive on the 2:00 PM turn on any west map edge hexes between the E23xx and E33xx hexrows (inclusive) in any formation. If they enter between the E29xx to E33xx hexrows (inclusive) roll one die and halve the result (rounding up) and apply this number as losses to the three units (distributed as evenly as possible). If they enter north of the E29xx hexrow there is no loss. The units cannot be split between these two areas.
Victory Conditions. The Prussians automatically win if, at the end of any Game-Turn, there are only Prussian units in the Oak Wood (even one unit will do) and those units are within Hülsen's (or his replacement's) Command Range. At the conclusion of the 3:40 Game-Turn, the Austrians win if any Krechor village hex is occupied by a non-Skirmish Austrian unit that is within Wied's (or his replacement's) Command Range. Any other result is a draw.
Scenario 2: Clash of the Lights
Scenario 2 recreates the fighting between the Austrian and Prussian hussars as the Prussian army is attempting to outflank the Austrian army. This is an all cavalry scenario and is designed so players can learn the cavalry rules. Even though this is an introductory scenario, due to the nature of cavalry combat it may take up to two hours to play.
Special Rules.
- Scenario 2 starts at 1:40 and its last turn is the 3:40 turn. End Turn Numbers are not used in this scenario.
- Only the East map is used but with certain boundaries. All hexes east and south of a line traced from the stream that runs from E1201/E1301 to E3526/E3626 and thence south along the Exx26 line of hexes (inclusive) are in play.
- Each side makes their normal Initiative die rolls with Army Leader modifiers of +3 for the Austrians and +5 for the Prussians, even though no Army Leaders are present.
- Austrian Command Leaders Hadik and Morocz are always In Command as long as they can trace a line of hexes free of enemy units and their Zones of Control to any western or southern map edge hex within the scenario playing area. GdK Nádasdy functions as a Wing Leader and is always In Command under the same parameters as his two subordinates. The Austrian Player can use him for all Wing Leader purposes including a Wing Activation.
- Prussian Command Leader Katte is always In Command provided he can trace a line of hexes free of enemy units and their ZOCs to any Kaiserstrasse hex. GLt Zieten is not treated as a Wing Leader in this scenario. Rather he is an extra leader who can put any units with which he is stacked In Command.
- Use Kolin rule 3.1d C to determine pre-battle attrition to the troops of Hadik's and Morocz' Commands.
Austrian Setup.
- Nádasdy's Wing — GdK Nádasdy [NAD]. FmL Hadik's Command [H]: SPL, EST, JAZ a/b/c, BAR, HAD, KLN a/b, NAD (anywhere within 2 hexes of any hex of the E37xx hexrow). FmL Morocz' Command [M]: FES a/b, DES, MOR a/b, KAI a/b/c (anywhere within 3 hexes of any hex of the E47xx hexrow). KOM a/b/c (within 2 hexes of E5024). [GFwM Beck's Command is not used in this scenario.]
- Reinforcements (any time): At any time the Austrian Player can use any of the three Saxon Chevauleger regiments of Morocz' Command (PRA, PRK a/b, GRB a/b) as reinforcements. During an activation of Morocz' Command the Austrian Player can select any or all of these units. They arrive on any west edge hex of the playing area on or south of hex E4926 that is not within three hexes of a Prussian unit. The use of these reinforcements will affect victory conditions (see below).
Prussian Setup.
- GLt Zieten [ZIE]. GM Katte's Command [K]: WAR a/b/c, SZE a/b, PUT a/b/c (within 5 hexes of any Kaiserstrasse hex and on or north of the E23xx hexrow).
- Prussian Reinforcements (2:00): The Werner (WER a/b/c) and Seydlitz (SEY a/b) Hussar regiments arrive on the 2:00 turn and enter the playing area in any formation at the line of hexes running from E2417 to E1914 (inclusive).
- Prussian Reinforcements (2:20): The Zieten (ZIE a/b/c) Hussar regiment arrives on the 2:20 turn and enters the playing area in any formation at the line of hexes running from E2417 to E1914 (inclusive).
Victory Conditions. The Prussians automatically win if, at the end of any Game-Turn, they have exited 60 or more SPs off the west edge of the playing area south of and including hex E4926. Each Saxon Chevauleger unit that is brought in as a reinforcement reduces this number by the SP strength of that Saxon unit. If the Prussians do not automatically win, the victor is determined by the side who has inflicted the most SP losses on his opponent. Austrian pre-battle attrition losses are not counted as SP losses for victory conditions.
Scenario 3: The Prussian Turning Move
Scenario 3 combines the action of scenarios 1 and 2. It shows the Prussian turning move against the Austrian right flank and the Austrian response. For those who have played scenarios 1 and 2, this scenario should take 2-3 hours to play.
Special Rules.
- Scenario 3 starts at 1:40 and its last turn is the 3:40 turn. End Turn Numbers are not used in this scenario.
- Only the East map is used and the entire map is in play.
- Each side makes their normal Initiative die rolls with Army Leader modifiers of +3 for the Austrians and +5 for the Prussians, even though no Army Leaders are present.
- Austrian Command Leaders Wied, Hadik, and Morocz are always In Command as long as they can trace a line of hexes free of enemy units and their Zones of Control to any western or southern map edge hex. GdK Nádasdy functions as a Wing Leader for the Commands of Hadik and Morocz and is always In Command under the same parameters as his two subordinates.
- Prussian Command Leaders Katte and Hülsen are always In Command provided they can trace a line of hexes free of enemy units and their Zones of Control to any Kaiserstrasse hex. GLt Zieten functions as a Wing Leader for the Commands of Katte and Hülsen.
- Use Kolin rule 3.1d C to determine pre-battle attrition to the troops of Hadik's and Morocz' Commands.
Austrian Setup.
- Nádasdy's Wing — GdK Nádasdy [NAD]. FmL Hadik's Command [H]: SPL, EST, JAZ a/b/c, BAR, HAD, KLN a/b, NAD (within 2 hexes of any hex of the E37xx hexrow). FmL Morocz' Command [M]: FES a/b, DES, MOR a/b, KAI a/b/c (within 3 hexes of any hex of the E47xx hexrow). KOM a/b/c (within 2 hexes of E5024). [GFwM Beck's Command is not used in this scenario.]
- Independent Units — Banalisten Grenzers: BNL 1a/1b/2a/2b (within 3 hexes of any Krechor village hex). Artillery: 3 lb #1 (within 3 hexes of any Krechor village hex).
- Austrian Reinforcements (any time): At any time the Austrian Player can use any of the three Saxon Chevauleger regiments of Morocz' Command (PRA, PRK a/b, GRB a/b) as reinforcements. During an activation of Morocz' Command the Austrian Player can select any or all of these units. When chosen, they are activated normally and enter the map at E4633 in any formation. The use of these reinforcements will affect victory conditions (see below).
- Austrian Reinforcements (2:40): FmL Wied's Command [WI]: 1/2 SAL, ARB, STA, L-R, PLA, WUR a/b, BIR a/b. Artillery: 6 lb #1/#2. These reinforcements arrive on the 2:40 turn in any formation and on any East map edge hexes that are on or between the E40xx and E48xx hexrows.
Prussian Setup.
- Zieten's Wing — GLt Zieten [ZIE]. GM Katte's Command [K]: WAR a/b/c, SZE a/b, PUT a/b/c (within 5 hexes of any Kaiserstrasse hex and on or north of the E23xx hexrow). SEY a/b (within 3 hexes of E2321). WER a/b/c (within 2 hexes of E2621). ZIE a/b/c (within 2 hexes of E2432). GM Hülsen's Command [H]: 1/2 MUN, 1/2 SCH, STE a/b (on the East map within 3 hexes of any Kaiserstrasse hex).
- Independent Units — Grenadiers: KAH, WAN, MOL (on the East map within 3 hexes of any Kaiserstrasse hex). Artillery: 12 lb #1, 6 lb #1 (on the East map within 3 hexes of any Kaiserstrasse hex).
- Prussian Reinforcements (2:00): Independent Grenadiers: NYM, FIN, WAL. These units arrive on the 2:00 PM turn on any west map edge hexes between the E23xx and E33xx hexrows (inclusive) in any formation. If they enter between the E29xx to E33xx hexrows (inclusive) roll one die and halve the result (rounding up) and apply this number as losses to the three units (distributed as evenly as possible). If they enter north of the E29xx hexrow there is no loss. The units cannot be split between these two areas.
Victory Conditions. At the end of the scenario the Prussians win if they achieve all three of the following goals: 1) No Krechor village hexes are occupied by Austrian units. 2) The Prussians occupy or were the last to pass through hex E4428. 3) There are 50 or more Prussian SPs (of any type) on or west of the minor road that runs from 7031 to 4727 and on or south of hex row 47xx. (If the Austrian player brings on any of the Saxon Chevauleger units, the required Prussian SP amount is reduced by the SP value of those units.) Any other result is an Austrian victory.
Scenario 4: Frederick's Attack
Scenario 4 is the full battle of Kolin starting from a point after the Prussians have launched their flanking attack. This scenario is played on only two maps so it is ideal for the space-challenged. Since this is a full battle scenario it will take many hours to play.
Special Rules.
- Scenario 4 starts at 1:40 and its last turn is the 9:00 turn. The End Turn Number is 11. Only the East and Center maps are used.
- The Austrian player has two types of reinforcements that may enter play in this scenario. The first type (discretionary reinforcements) may enter the battle at any time that the Austrian player wishes. The second type (variable reinforcements) enters via a die roll. All reinforcements enter from the west edge of the Center map, anywhere south of the Kaiserstrasse that is not within 5 hexes of an unrouted Prussian unit. All reinforcing Commands are activated in the normal manner to enter the map and they enter in any formation (including using Road Movement) per BAR rule 22.0. Except when bringing in (or trying to bring in) reinforcements, the Austrian player may not expend activations on off-map Commands.
- The discretionary reinforcements are: Stampach's Cavalry Wing, Castiglione's Cavalry Command, and the PAN Independent cavalry unit. These may enter the map any time they are activated.
- There are three groups of variable reinforcements: the Commands of Puebla, Sincere, and Beck, each with attached units. Their arrival time is determined by a die roll. When the Austrian player has won the Initiative he may at that time select any one of the variable groups that are eligible to enter as reinforcements. He then rolls one die and compares the result to the range listed below for that reinforcing group for the correct Game Turn. If the die result falls within the range listed, the Command (and its attached units) enters the map. If the result is outside the range, the Command fails to enter that turn and is considered as "Finished" — the Austrian player forfeits that Initiative and the players roll for Initiative again. A Command that fails to enter the map may enter on a later Game Turn.
- The variable reinforcement groups are:
- Sincere's Command (SI): 1/2 B-B, 1/2/3 BOT, 1/2 DEU. 3 lb artillery #5/#6. Enters at 2:20 on a die roll of 8 or 9; at 2:40 on a die roll of 6 through 9; at 3:00 on a die roll of 3 through 9; on any turn after 3:00 on a die roll of 1 through 9.
- Puebla's Command (P): 1/2/3 ARH, 1/2 HAR, 1/2/3 LDA, 1/2/3 THU. 3 lb artillery #4, 6 lb artillery #4/#5. This reinforcing group also includes FzM Colloredo (COL). Enters at 3:00 on a die roll of 9; at 3:20 on a die roll of 7 through 9; at 3:40 on a die roll of 5 through 9; at 4:00 on a die roll of 3 through 9; on any turn after 4:00 on a die roll of 1 through 9.
- GFwM Beck's Command (B): BNL, KAR, WAR, KOM, KAI, 1/2 BRO, 1/2 GRD, WKE. This reinforcing group also includes the Saxe-Gotha (S-G) and de Ligne (LIG) Fusilier Battalions from Wied's Command. Enters at 4:20 on a die roll of 9; at 4:40 on a die roll of 8 through 9; at 5:00 on a die roll of 6 through 9; at 5:20 on a die roll of 4 through 9; on any turn after 5:20 on a die roll of 2 through 9.
- The Prussian player has the option to exit cavalry units off the Center map's west edge for the purpose of holding Austrian reinforcements off the map. During their Movement Phase, Prussian cavalry units can exit the map by paying one additional Movement Point plus any hexside terrain crossed. Units that leave the map may not return to the game but do not count as eliminated units for Army Morale purposes. Austrian units and Prussian infantry/artillery cannot voluntarily exit the map and if forced to do so are considered eliminated.
Austrian Setup.
- FM Leopold Daun [DAU], GFwM Guasco [GUA] (on the Center map within 5 hexes of the west edge, south of the C46xx hexrow).
- Nádasdy's Wing — GdK Nádasdy [NAD]. FmL Hadik's Command [H]: BAR, EST, HAD, JAZ a/b/c, KLN a/b, NAD, SPL (within 2 hexes of any hex of the E37xx hexrow). FmL Morocz' Command [M]: DES, FES a/b, KAI a/b/c, MOR a/b (within 3 hexes of any hex of the E47xx hexrow). KOM a/b/c (within 2 hexes of E5024). PRK a/b (within 2 hexes of C5010). PRA (within 2 hexes of C5008). GRB a/b (within 2 hexes of C5005). [GFwM Beck's Command is part of the variable reinforcements.]
- FmL Wied's Command [WI]: WUR a/b (within 1 hex of C4817). BIR a/b (within 1 hex of C4819). L-R (C4822), 1 SAL (C4823), 2 SAL (C4824). PLA (within 1 hex of C4825), STA (within 1 hex of C4827). ARB (C4829), MER (within 1 hex of C4132 — this unit is attached to Andlau's Command). [Note that the S-G and LIG Fusiliers are not part of Wied's setup. They are part of the reinforcing troops.]
- Serbelloni's Cavalry Wing — GdK Serbelloni [SER]. FmL B. Daun's Command [BD]: KAL a/b (within 1 hex of C4113). SAV a/b (within 1 hex of C4115). KOL a/b (within 1 hex of C4117). FmL O'Donell's Command [OD]: SCH a/b (within 1 hex of C4313). LIG a/b (within 1 hex of C4315). PRT a/b (within 1 hex of C4317).
- Marschall's Infantry Wing — FzM Marschall [MAR]. FmL Andlau's Command [A]: 1/2 EKR (within 1 hex of C4120). 1/2/3 MOL (within 2 hexes of C4124). 1/2/3 PUE (within 2 hexes of C4129). FmL Starhemberg's Command [ST]: 1/2/3 NEI (within 1 hex of C4422). 1/2 GAI (within 1 hex of C4426). 1/2 HAL (within 2 hexes of C4430).
- Independent Units — Grenadiers: FIR (within 3 hexes of C4213). SOR (on the Center map within 5 hexes of the west edge, and south of the C46xx hexrow). Grenzers: 1a/1b/2a/2b BNL (within 3 hexes of any Krechor village hex). 1a/1b/2a/2b SZL (within 5 hexes of C3417). Cavalry: BUR (C4333). Artillery: 3 lb #1 (within 3 hexes of any Krechor village hex). 6 lb #1/#2 (any hex within FmL Wied's Command Range). 6 lb #3, Howitzer #1 (within 1 hex of C4213). 12 lb #1, Howitzer #2 (within 1 hex of C4120). 12 lb #2, 3 lb #2 (within 1 hex of C4124). 3 lb #3 (within 1 hex of C4430). Ob Feuerstein [FEU] (on the Center map within 5 hexes of the west edge, and south of the C46xx hexrow).
Prussian Setup.
- King Frederick II of Prussia [KFII] and Gdl Fürst Moritz von Anhalt-Dessau [FRM] (within 5 hexes of C2303).
- Zieten's Wing — GLt Zieten [ZIE]. GM Katte's Command [K]: PUT a/b/c, SZE a/b, WAR a/b/c (on the East map within 5 hexes of any Kaiserstrasse hex and on or north of the E23xx hexrow). SEY a/b (within 3 hexes of E2321). WER a/b/c (within 2 hexes of E2621). ZIE a/b/c (within 2 hexes of E2432). GM Hülsen's Command [H]: 1/2 MUN, 1/2 SCH, STE a/b (on the East map within 3 hexes of any Kaiserstrasse hex).
- Tresckow's Wing — GLt Tresckow [TRE]. GM Braunschweig's Command [B]: 1/2 ABV, 1/2 HUL (within 2 hexes of the line of Kaiserstrasse hexes that runs from C2303 to C2208). GM Ingersleben's Command [I]: 1/2 PRH, 1/2 WIE (within 2 hexes of the line of Kaiserstrasse hexes that runs from C2209 to C2113).
- Bevern's Wing — GLt Bevern [BEV]. GM Pannwitz' Command [PN]: 2/3 ANH, 1/2 BOR (within 2 hexes of the line of Kaiserstrasse hexes that runs from C2114 to C2119). GM Manstein's Command [M]: 1/2 FRM, 1/2 KAL, 1/2 MAN (within 2 hexes of the line of Kaiserstrasse hexes that runs from C2120 to C2029). GM Puttkammer's Command [P]: GEM, 1/2 KRE, LGD (within 2 hexes of the line of Kaiserstrasse hexes that runs from C2123 to C2030).
- Penavaire's Cavalry Wing — (Except for Schönaich's Command, all units of Penavaire's Cavalry Wing set up on or north of the Kaiserstrasse in the area west of the Cxx02 hexes and east of the Cxx21 hexes.) GLt Penavaire [PEN]. GM Krockow's Command [KR]: LKR a/b, LRG a/b/c. GM Meinicke's Command [ME]: KRO a/b, KYA a/b. GM Normann's Command [N]: BLA a/b, KAT a/b. GM Krosigk's Command [KO]: NOR a/b, PVP a/b, ROC a/b. GM Schönaich's Command [S]: DRI a/b/c, GDC, MEI a/b, SHN a/b (within 2 hexes of the line of Kaiserstrasse hexes that runs from C2027 to C2034).
- Independent Units — Grenadiers: KAH, MOL, WAN (on the East map within 3 hexes of any Kaiserstrasse hex). FIN, NYM, WAL (within 2 hexes of C1908). Artillery: 12 lb #1, 6 lb #1 (on the East map within 3 hexes of any Kaiserstrasse hex). 12 lb #2/#3, 6 lb #2, Howitzer (within 2 hexes of the line of Kaiserstrasse hexes that runs from C2303 to C2114). 12 lb #4/#5, 6 lb #3, Mortar (within 2 hexes of the line of Kaiserstrasse hexes that runs from C2115 to C2030).
Victory Conditions. If the game lasts to the final Game-Turn the winner is assessed according to the following conditions (if none of the conditions are met, the battle ends in a draw):
- Prussian Decisive: Austrian Army Morale must be 30 or more and the Prussians must have at least 40 infantry/artillery SPs and 30 cavalry SPs, all in Good Order and Morale, on or west of the Minor Road that runs from hex C7017 to C3922 and south of the C38xx hexrow. Prussian Army Morale cannot be greater than 25.
- Prussian Major: Austrian Army Morale must be at 25 or more and the Prussians must have at least 40 infantry/artillery SPs and 40 cavalry SPs, all in Good Order and Morale, on or west of the Minor Road that runs from hex C7012 to C4207 and south of the C41xx hexrow. Prussian Army Morale cannot be greater than 25.
- Prussian Marginal: The Austrian Army Morale must be at 20 or more and the Prussians must have at least 60 infantry/artillery SPs and 60 cavalry SPs, all in Good Order and Morale, on or west of the Minor Road that runs from hex E7031 to E3728 and south of the C-E36xx hexrow. Prussian Army Morale cannot be greater than 20.
- Austrian Marginal: Prevent any type of any Prussian victory and Austrian Army Morale cannot be greater than 25.
- Austrian Major: Prussian Army Morale must be at 25 or more and there must be fewer than 40 Prussian infantry/artillery and 40 Prussian cavalry SPs, in any condition, on or south of the C-E34xx hexrow. Austrian Army Morale cannot be over 20.
- Austrian Decisive: Prussian Army Morale must be at 25 or more and there must be fewer than 50 Prussian infantry/artillery and 60 Prussian cavalry SPs, in any condition, south of the Kaiserstrasse. Austrian Army Morale cannot be over 20.
- Concession: If one side's Army Morale reaches the point where it becomes impossible for that player to control it, he may concede the victory (without qualification) to his opponent at any time. In the spirit of the period, the winner should graciously accept the concession and return to the defeated player his sword and dice.
Scenario 5: Frederick's Attack (expanded)
Scenario 5 is the full battle of Kolin starting from a point after the Prussians have launched their flanking attack. This scenario is the same as scenario 4 except that it is played on all three maps and does not have any reinforcements. In the original Kolin game this scenario was a footnote to scenario 4; in this revision it is unveiled as a full scenario. Since this is a full battle scenario it will take many hours to play.
Special Rules.
- Scenario 5 starts at 1:40 and its last turn is the 9:00 turn. The End Turn Number is 11. All three maps are used.
- Use Kolin rule 3.1d C to determine pre-battle attrition to the troops of Hadik's and Morocz' Commands.
Austrian Setup.
- FM Leopold Daun [DAU], GFwM Guasco [GUA] (on the West map with any unit of Colloredo's Wing).
- Nádasdy's Wing — GdK Nádasdy [NAD] (with any unit of Hadik's or Morocz' Commands). FmL Hadik's Command [H]: BAR, EST, HAD, JAZ a/b/c, KLN a/b, NAD, SPL (within 2 hexes of any hex of the E37xx hexrow). FmL Morocz' Command [M]: DES, FES a/b, KAI a/b/c, MOR a/b (within 3 hexes of any hex of the E47xx hexrow). KOM a/b/c (within 2 hexes of E5024). PRK a/b (within 2 hexes of C5010). PRA (within 2 hexes of C5008). GRB a/b (within 2 hexes of C5005). GFwM Beck's Command [B]: a WKE (within 1 hex of W3419). b WKE (within 1 hex W4017). KOM Fusiliers (W5025). BNL, KAI, KAR, WAR, 1/2 BRO, 1/2 GRD {BRO and GRD can set up as parent or breakdown units} (on any hexes west of the Beczvarka Stream within three hexes of the creek and south of the W39xx hexrow).
- FmL Wied's Command [WI]: WUR a/b (within 1 hex of C4817). BIR a/b (within 1 hex of C4819). L-R (C4822), 1 SAL (C4823), 2 SAL (C4824). PLA (within 1 hex of C4825), STA (within 1 hex of C4827). ARB (C4829), MER (within 1 hex of C4132 — this unit is attached to Andlau's Command). S-G and LIG Fusiliers (within 1 hex of W4017).
- Serbelloni's Cavalry Wing — GdK Serbelloni [SER]. FmL B. Daun's Command [BD]: KAL a/b (within 1 hex of C4113). SAV a/b (within 1 hex of C4115). KOL a/b (within 1 hex of C4117). FmL O'Donell's Command [OD]: SCH a/b (within 1 hex of C4313). LIG a/b (within 1 hex of C4315). PRT a/b (within 1 hex of C4317).
- Marschall's Infantry Wing — FzM Marschall [MAR]. FmL Andlau's Command [A]: 1/2 EKR (within 1 hex of C4120). 1/2/3 MOL (within 2 hexes of C4124). 1/2/3 PUE (within 2 hexes of C4129). FmL Starhemberg's Command [ST]: 1/2/3 NEI (within 1 hex of C4422). 1/2 GAI (within 1 hex of C4426). 1/2 HAL (within 2 hexes of C4430).
- Stampach's Cavalry Wing — GdK Stampach [STA]. FmL Kolowrat's Command [K]: SER a/b (within 1 hex of W4102). POR (within 1 hex of W4005). H-D a/b (within 1 hex of W3907). FmL Wollwarth's Command [W]: GEL a/b (within 1 hex of W4403). A-M a/b (within 1 hex of W4305). S-G a/b (within 1 hex of W4208).
- GFwM Castiglione's Command [C]: SGD (within 1 hex of W4802). ODO a/b (within 1 hex of W4704). J-M (within 1 hex of W4607).
- Colloredo's Wing — FzM Colloredo [COL]. Puebla's Command [P]: 1/2/3 ARH (within 2 hexes of W3813). 1/2/3 THU (within 2 hexes of W4317). 1/2/3 LDA (within 2 hexes of W4821). 1/2 HAR (within 1 hex of W5222). Sincere's Command [SI]: 1/2 DEU (within 1 hex of W4313). 1/2 B-B (within 1 hex of W4615). 1/2/3 BOT (within 1 hex of W5017).
- Independent Units — Grenadiers: FIR (within 3 hexes of C4213). SOR (within 1 hex of W4816). Grenzers: 1a/1b/2a/2b BNL (within 3 hexes of any Krechor village hex). 1a/1b/2a/2b SZL (within 5 hexes of C3417). Cavalry: BUR (C4333), PAN (W4010). Artillery: 3 lb #1 (within 3 hexes of any Krechor village hex). 6 lb #1/#2 (within FmL Wied's Command Range). 6 lb #3, Howitzer #1 (within 1 hex of C4213). 12 lb #1, Howitzer #2 (within 1 hex of C4120). 12 lb #2, 3 lb #2 (within 1 hex of C4124). 3 lb #3 (within 1 hex of C4430). 3 lb #4, 6 lb #4/#5 (within 2 hexes of W3813). 3 lb #5/#6 (within 3 hexes of W4203). Ob Feuerstein [FEU] (with any unit of Colloredo's Wing).
Prussian Setup. The Prussian setup is the same as for scenario 4.
Victory Conditions. Victory conditions are the same as for scenario 4.
Scenario 6: Die Schlacht bei Kolin
This scenario is the full Battle of Kolin before the Prussians have attempted any flanking maneuver — thus it begins earlier. It allows the Prussian player especially to vary his attack to suit his taste. It uses all three maps and will take many hours to play.
Special Rules.
- Scenario 6 starts at 12:00 and its last turn is the 9:00 turn. The End Turn Number is 11. All three maps are used.
- Use Kolin rule 3.1d C to determine pre-battle attrition to the troops of Hadik's and Morocz' Commands.
Austrian Setup.
- FM Leopold Daun [DAU], GFwM Guasco [GUA] (on the West map with any unit of Colloredo's Wing).
- Nádasdy's Advance Guard — GdK Nádasdy [NAD] (with any unit of Hadik's or Morocz' Commands). FmL Hadik's Command [H] (anywhere on the East map north of the E32xx hexrow). FmL Morocz' Command [M] (anywhere on the East map south of the E32xx hexrow). GFwM Beck's Command [B]: a WKE (within 1 hex of W3419). b WKE (within 1 hex W4017). KOM Fusiliers (W5025). BNL, KAI, KAR, WAR, 1/2 BRO, 1/2 GRD {BRO and GRD can set up as parent or breakdown units} (on any hexes west of the Beczvarka Stream within three hexes of the creek and south of the W39xx hexrow).
- FmL Wied's Command [WI]: WUR a/b (within 1 hex of C4817). BIR a/b (within 1 hex of C4819). L-R (C4822), 1 SAL (C4823), 2 SAL (C4824). PLA (within 1 hex of C4825), STA (within 1 hex of C4827). ARB (C4829), MER (within 1 hex of C4132 — this unit is attached to Andlau's Command). S-G and LIG Fusiliers (within 1 hex of W4017).
- Serbelloni's Cavalry Wing — GdK Serbelloni [SER]. FmL B. Daun's Command [BD]: KAL a/b (within 1 hex of C4113). SAV a/b (within 1 hex of C4115). KOL a/b (within 1 hex of C4117). FmL O'Donell's Command [OD]: SCH a/b (within 1 hex of C4313). LIG a/b (within 1 hex of C4315). PRT a/b (within 1 hex of C4317).
- Marschall's Infantry Wing — FzM Marschall [MAR]. FmL Andlau's Command [A]: 1/2 EKR (within 1 hex of C4120). 1/2/3 MOL (within 2 hexes of C4124). 1/2/3 PUE (within 2 hexes of C4129). FmL Starhemberg's Command [ST]: 1/2/3 NEI (within 1 hex of C4422). 1/2 GAI (within 1 hex of C4426). 1/2 HAL (within 2 hexes of C4430).
- Colloredo's Wing — FzM Colloredo [COL]. Puebla's Command [P]: 1/2/3 ARH (within 2 hexes of W3813). 1/2/3 THU (within 2 hexes of W4317). 1/2/3 LDA (within 2 hexes of W4821). 1/2 HAR (within 1 hex of W5222). Sincere's Command [SI]: 1/2 DEU (within 1 hex of W4313). 1/2 B-B (within 1 hex of W4615). 1/2/3 BOT (within 1 hex of W5017).
- Stampach's Cavalry Wing — GdK Stampach [STA]. FmL Kolowrat's Command [K]: SER a/b (within 1 hex of W4102). POR (within 1 hex of W4005). H-D a/b (within 1 hex of W3907). FmL Wollwarth's Command [W]: GEL a/b (within 1 hex of W4403). A-M a/b (within 1 hex of W4305). S-G a/b (within 1 hex of W4208).
- GFwM Castiglione's Command [C]: SGD (within 1 hex of W4802). ODO a/b (within 1 hex of W4704). J-M (within 1 hex of W4607).
- Independent Units — Grenadiers: FIR (within 1 hex of C4425), SOR (within 1 hex of W4816). Grenzers: 1a/1b/2a/2b BNL (on the East map within 2 hexes of any Krechor and/or Kutlir village hexes).
Prussian Setup. All Prussian units set up on the Center and West maps. All units set up on or north of the Kaiserstrasse within the designated hex boundaries (inclusive).
- King Frederick II of Prussia [KFII], Fürst Moritz von Anhalt-Dessau [FRM], and GLt Penavaire [PEN] (C2026).
- Zieten's Wing (Cxx04 to Cxx13).
- Krosigk's Command, Krockow's Command, and Normann's Command (Cxx14 to Cxx25).
- Tresckow's Wing plus independent grenadier units KAH, MOL, and WAN (Cxx26 to Cxx34).
- Bevern's Wing plus independent grenadier units FIN, NYM, and WAL (Wxx01 to Wxx18).
- Schönaich's Command and Meinicke's Command (Wxx19 to Wxx24).
- All artillery (west of Cxx05 on the Center and West maps).
Victory Conditions. If the game lasts to the final Game-Turn the winner is assessed according to the following conditions (if none of the conditions are met, the battle ends in a draw):
- Prussian Decisive: Austrian Army Morale must be 30 or more. Prussian Army Morale cannot be greater than 25. Prussians must have fewer eliminated SPs than the Austrians.
- Prussian Major: Austrian Army Morale must be at 25 or more. Prussian Army Morale cannot be greater than 25. Prussians must have fewer eliminated SPs than the Austrians.
- Prussian Marginal: The Austrian Army Morale must be at 20 or more. Prussian Army Morale cannot be greater than 20.
- Austrian Marginal: Prevent any type of Prussian victory. Austrian Army Morale cannot be greater than 25.
- Austrian Major: Prussian Army Morale must be at 25 or more. Austrian Army Morale cannot be greater than 20.
- Austrian Decisive: Prussian Army Morale must be at least 25. Austrian Army Morale cannot be greater than 20. Austrians must have fewer eliminated SPs than the Prussians.
- Concession: If one side's Army Morale reaches the point where it becomes impossible for that player to control it, he may concede the victory (without qualification) to his opponent at any time. In the spirit of the period, the winner should graciously accept the concession and return to the defeated player his sword and dice.
Counter and Unit Key
Loss Chart layout. Each Loss Chart entry shows, from left to right: the leader or unit's Command Range (in parentheses), Counter Abbreviation, ER Bonus, CV Bonus, Command Rating or Initiative Rating (as applicable), Replacement Type, full name, and Army Loss Value. For Army Leaders the Wing Activation Number (WAN) is also shown. For combat units the entry shows the counter abbreviation, ER, CV, unit type, and the numbered Loss Boxes (with the 50% loss point shaded grey). For artillery units the entry also shows Prolonge Capability.
Examples from the charts:
- Army Leader Frederick II of Prussia (KFII): a 10 Command Range and an 8 Movement Allowance on the counter front; a -15 ER Bonus, a +1 CV Bonus, and a +5 Command Rating on the counter back, with a WAN of 20.
- Wing Leader Marschall (MAR): a 5 Command Range and an 8 Movement Allowance on the front (the yellow icon denotes a Wing Leader); an Initiative Rating of 4 (shown in yellow), a -6 ER Bonus, and a +0 CV Bonus on the back, with an Army Loss Value of 10.
- Command Leader Starhemberg (MAR/ST): a 4 Command Range and an 8 Movement Allowance on the front, with "MAR" showing he is part of Marschall's Wing; an Initiative Rating of 7 (shown in green), a -11 ER Bonus, and a +1 CV Bonus on the back, with an Army Loss Value of 5.
- Combat Unit, 3rd bn of Neipperg (NEI) Fusiliers: 6 SPs and a Movement Allowance of 4 on the front, with "ST" showing it belongs to Starhemberg's Command; a 31 ER and a +3 Combat Value (CV) on the back.
- Artillery Unit, 1st 12 lb Artillery unit: 2 SPs and a Movement Allowance of 3 on the front; a 21 Effectiveness Rating (ER) and 2 SPs on the back, and it may Prolonge (P) only.
Counter Minutiae. Counter side colors distinguish nationality and arm: Saxon Cavalry; Austrian Infantry, Artillery, and Leaders; Austrian Cavalry and Leaders; Prussian Infantry, Artillery, and Leaders; Prussian Cavalry and Leaders; and Prussian Guard units and King Frederick each have their own distinct coloring. The rough size of a unit is indicated by the dots on the top front of a counter: single dots are companies, two dots are battalions, and three dots are regiments. This has no bearing on game play. Austrian units have a white back to the counter; Prussian units have a blue back to the counter.
Generic Counters. The generic black and white game-play counters are the same style as found in later BAR games. Owners of the original Kolin game will have most of the same counters, just with a different look.
Markers. Order/Morale status is shown by four dedicated markers. Specific formations are shown by four dedicated markers, plus two additional formation markers, one of which is an "extension" arrow used to show an extended formation. Numbered markers show Strength Point losses. Two markers are used in Close Combat. An "F" marker is used to mark units as Finished. An "Out of Command" marker shows which units have that status.
Special Results Quick Reference (Kolin Special Results Charts)
These charts give the die-roll ranges for each Special Result, separately for the Austrian and Prussian columns. See the Special Results Notes section above for the full explanation of each result.
Initiative Special Results (roll of "00" for Initiative unless noted):
- Army Morale Check — Austrian 00, Prussian 00: Make an Army Morale Check (-1) for each army. A natural 0 roll is -5 to Morale.
- Army Leader Lapse — Austrian 1-2, Prussian 1: The Army Leader may not trace his LOC or use his Command Rating.
- Command Confusion — Austrian 3-4, Prussian 2: Other player picks one of your Commands which may be Finished. Initiative required.
- Free Combat Segment — Austrian 5-6, Prussian 3-5: Pick one Command (and possible independents) for a Fire Combat or CC Segment.
- Special Rally — Austrian 7, Prussian 6: Pick a Command and perform a free Disorder Recovery Phase and Rally Phase.
- Leader Initiative — Austrian 8, Prussian 7-8: Pick one Command for a free Movement Segment (only). Initiative required.
- Battle Tempo — Austrian 9, Prussian 9: Move the End Turn marker one box up or down the End Turn Track.
Infantry Fire Special Results (asterisk (*) marks a roll that also checks the Leader Loss Table):
- Free Fire — Austrian 0*, 1, 2*; Prussian 0*, 1: Roll two times and the firing units are Disordered.
- Full Volley — Austrian 3; Prussian 2*, 3, 4*: Double the Fire Strength and reroll.
- Battalion Guns — Austrian 4*, 5; Prussian 5: Reroll and add 1 to SP loss or 'R/D' result. Firing skirmishers reroll.
- High Crops — Austrian 6*, 7; Prussian 6*, 7: If target or firer's hex is a Clear hex, reroll and subtract 20 from the roll.
- Ammo Low — Austrian 8*; Prussian 8*: Halve the Fire Strength and reroll.
- Ammo Exhausted — Austrian 9; Prussian 9: Fire has no effect and firer is Disordered.
Artillery Fire Special Results (asterisk (*) marks a roll that also checks the Leader Loss Table):
- Rapid Fire — Austrian 0*, 1; Prussian 0*: Reroll two times.
- Accurate Fire — Austrian 2*, 3; Prussian 1, 2*: Shift the odds column 1 to the right and reroll.
- Wild Fire — Austrian 4*; Prussian 3: A stack adjacent to the target becomes the new target.
- Caisson Explosion — Austrian 5; Prussian 4*: Reroll and if target or an adjacent hex includes artillery, +1 SP loss to the artillery.
- High Crops — Austrian 6*, 7; Prussian 5, 6*: If target or firer's hex is a Clear hex, reroll and subtract 20 from the roll.
- Ammo Low — Austrian 8*; Prussian 7, 8*: Halve the Fire Strength and reroll.
- Ammo Exhausted — Austrian 9; Prussian 9: Fire has no effect and artillery limbers.
Defensive Fire Special Results (asterisk (*) marks a roll that also checks the Leader Loss Table):
- Whites of Their Eyes — Austrian 0*, 1, 2*; Prussian 0*, 1, 2*, 3: Shift the odds column 1 to the right and reroll.
- Battalion Guns — Austrian 3, 4*; Prussian 4*: Reroll and add 1 to SP loss or 'D' result. Firing skirmishers reroll.
- Premature Fire — Austrian 5, 6*, 7; Prussian 5, 6*, 7: Halve the Fire Strength and reroll.
- Smoke and Dust — Austrian 8*, 9; Prussian 8*, 9: Defensive Fire is cancelled.
Leader Loss Table (checked from any Fire Combat roll of 00, 02, 04, 06, 08):
- Fate (roll of 0): Pick any enemy leader. Roll one die for that leader: 0 = Killed, 1 = Wounded, 2-9 = no effect.
- The Lucky Shot (roll of 1-2): Randomly pick any enemy leader in range and LOS of firing units. Roll: 0-3 = Killed, 4-7 = Wounded, 8-9 = no effect.
- In the Line of Fire (roll of 3-6): Roll for each enemy leader in or adjacent to the target hex: 0-2 = Killed, 3-5 = Wounded, 6-9 = no effect.
- Braving Enemy Fire (roll of 7-9): Roll for each enemy leader in the target hex: 0-2 = Killed, 3-5 = Wounded, 6-9 = no effect.
- Subtract 1 from the leader-loss roll if the firer is Artillery at 1-3 range or Skirmishers. Wounded duration is equal to a single die roll, halved and rounded.
Pursuit Special Results (a re-roll of '0' is a roll of 0 Pursuit Points):
- No Pursuit (roll of 0-1): No Pursuit. Make a Recall Disorder Check (F).
- Blood Lust (roll of 2-4): Reroll. Routed units lose 2 SPs per hex of Pursuit.
- Out of Control (roll of 5-6): Reroll and add +5 to PP. No Recall is possible.
- Hesitation (roll of 7-9): Reroll and halve Pursuit Points (round down).
Close Combat Special Results. When either combatant rolls a natural '0' in Close Combat resolution:
- Apply SP losses.
- Roll for Leader Loss for the leader(s) who gave the CV bonus to the units: 0-3 = KIA, 4-9 = no effect.
- Rank all stacks by ER using Morale Check (G) modifiers.
- Each stack makes a Morale Check (G) in rank order, worst to best.
- If a Morale Check is failed, the failing stack loses 1 SP and routs.
- If units are left to fight on both sides, re-fight the Close Combat. Certain CC modifiers do not apply to refights.