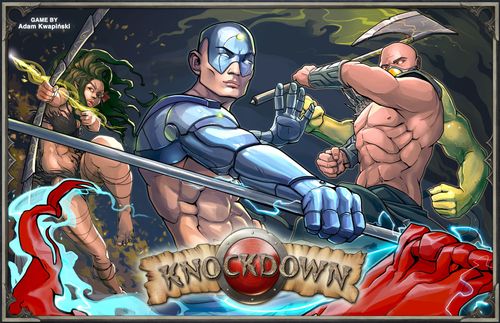
Knockdown
Knockdown Rulebook
Table of Contents
Table of Contents
Goal of the Game
As a skilled combatant, your goal is to defeat your opponent by inflicting wounds and executing the final K.O. to end the round. Or you can deplete the Attack Deck, at which point the fighter with the fewest wounds is declared the winner of the round. Either way, victory goes to the first fighter to win two rounds!
Box Content (Tainted Grail)
- 3 Fighter miniatures
- 3 Fighter Sheets
- 3 Fighter Help cards
- 2 Player Help cards
- 5 Randomizer tokens
- 1 Curse token
- 1 Stun token
- 3 Victory tokens
- Game Arena (the box)
- 36 Attack cards
- 4 Candle cards
- 12 Skill cards
- 2 Candle tokens
- 2 Poison tokens
- 3 Mist tokens
- 3 Potion tokens
- 3 dice
- 25 Heavy Wound cubes
- 25 Light Wound cubes
Card Anatomy
Fighter Sheet
- Fighter's Name
- Fighter's Class
- K.O. Effect
- Illustration
- Wound Pool
- Special Attack Name
- Range
- Special Attack Cost
- Special Attack Type (Strike, Ability, Reaction)
- Special Attack Effect
Example Special Attacks (Mistbearer, class Wyle): Doom (Strike) - Remove the Curse token from your opponent's Fighter Sheet. Chain Pull (Strike) - Blink your opponent to a space within a given range from Mistbearer. Vengeance (Strike) - If your opponent has the Curse token, you can discard 1 wound from your Fighter Sheet and place it on their Fighter Sheet. Curse (Ability) - Place the Curse token on your opponent's Fighter Sheet.
Attack Card
- Card Symbol
- Attack Name
- Wound Pool - Shows the number and type of wounds inflicted by this Attack.
- K.O. Effect - Attacks with this effect may be used to finish an opponent.
- Range.
- Attack Type (Strike, Ability, Reaction)
- Attack Effect
Attack Types. Remember to always check the type of Attacks and Special Attacks. The difference between them is that it is not possible to Block Abilities and Reactions, while Strikes can be Blocked (more on Blocking - see Blocking). Range rules can be found under Additional Rules.
Example cards: Wyrdness (Ability) - After taking this card, suffer 1 light wound. High Punch (Strike).
Skill Card
- Skill Name
- Skill Effects
- Initiative Value - Determines the first player at the beginning of the first round.
Example: Hardened Knees - Your High Kick and Low Kick are given an additional symbol (see card). Initiative 7.
About Skill Cards. Skill cards represent abilities that make each fighter more unique. During a match you will have at least 1 active Skill card (face up). Bonuses granted by active Skill cards can be triggered throughout the entire match, provided the conditions and timing for the Skill card are met.
Icons Chart
- Heavy Wound
- Light Wound
- Range X
- Range X-Y
- Range Projectile
- Block
- Dash
- Wild
Setup
- Each player selects one fighter and takes their fighter's corresponding mini, Fighter Sheet, tokens (if any), and Fighter Help Card. Hand each player a Player Help Card. (Tainted Grail fighters: Mistbearer, Maggot, Lost Knight.)
- Set up the Game Arena as shown. Make sure both players can easily see it.
- Place each fighter miniature on one of the two starting spaces (see Game Arena Rules under Additional Rules).
- Shuffle all Skill cards and deal three cards to each player. Both players choose one Skill card to keep and then pass the remaining two cards to their opponent. Both players choose one card to keep from the two they received and remove the other one from the game. Then, players put one of their Skill cards face up and the other one face down in their play area. NOTE: Only face up Skill cards are active during a match.
- Shuffle the Attack card deck and deal four cards in a row face up, visible to both players. This is the Attack Row.
- The player with the higher Initiative value on their active (face up) Skill card is the first player. This player chooses one Attack card from the Attack Row and adds it to their hand. Then, the second player chooses two cards, and the first player takes the last card so that each player starts the match with two Attack cards in their hand. Refill the Attack Row with four new cards.
- Shuffle 4 Candle cards into the Attack card deck.
- Put the wound cubes and tokens near the Game Arena. You are now ready to start the match!
Game Turn
Starting with the first player, players take alternating turns. At the start of your turn, refill the Attack Row so that it contains four face up Attack cards. Then, perform two actions choosing from: MOVE, ATTACK and COMBO. You may perform the same action twice; and you cannot perform only a single action.
Actions
I. Move
Move your fighter to an adjacent Arena space. You cannot push an opponent's fighter out of its current space. You cannot end your movement in a space containing another fighter. You cannot move through a space containing another fighter. You cannot move your fighter off the Arena.
II. Attack
- Choose an Attack card from the Attack Row.
- If your opponent is within range of the Attack, resolve the attack effects according to the Attack Sequence (see Attack Sequence).
- Add the chosen Attack card to your hand. NOTE: You must add the Attack card to your hand even if you could not resolve its attack effects.
- If you have more than six Attack cards in your hand, you must discard a card immediately.
III. Combo
A Combo allows your fighter to perform the Special Attacks listed on their Fighter Sheet and Dash around the Arena. You can Dash and perform Special Attacks in any desired order. When you resolve a Special Attack or a Dash, you may immediately perform another one as long as you are able to pay for it; or you may choose to end the Combo. If you already played all your Special Attacks and Dashes, you cannot pay for a Special Attack or when you decide you are done, the Combo ends.
How to perform a Special Attack
- Discard Attack cards from your hand with symbols matching those shown in the Special Attack Cost. The cost specified with the Wild symbol can be replaced by any other symbol.
- Resolve the Special Attack, according to the Attack Sequence (see Attack Sequence).
- You cannot perform any of your Special Attacks more than once during a single Combo action.
How to Dash
During a Combo action, you may discard any number of Attack cards with the Dash symbol to move your fighter using the same Move action rules above. You can perform a Dash once for each discarded Dash symbol.
Keep in mind that once you got an Attack Card in your hand, it cannot be used to trigger the Attack Sequence anymore. The only way you can use cards from your hand is through their symbols.
Attack Sequence
- Inflict wounds shown in the attack's Wound Pool. The number of wounds might be affected by special Arena rules, blocking (see Blocking), active Skill cards, and fighter abilities. Use wound cubes to track wounds.
- Resolve the attack effect, if any. This may include dealing additional wounds, moving, discarding a card and much more. Effects of Strike type attacks can be blocked (see Blocking).
- Resolve K.O. effect. If the attack contains a K.O. effect, the attacking player may initiate a Knockdown Test (see Knockdown Test).
NOTE: Your opponent must be within range of the specific attack in order to resolve the Attack Sequence!
Important Rules
Hand Limit
Players cannot have more than six Attack cards in their hand at any time. When a player draws a 7th card, they must immediately discard one of their cards.
Running Out of Wound Cubes
If there are no wound cubes left in the supply, players may use anything else to count wounds.
Golden Rule
If at any time the text on a card or Fighter Sheet contradicts a game rule, the card/Fighter Sheet text always takes precedence.
Blocking
When targeted by a Strike, player may discard an Attack Card with the Block symbol to reduce incoming Wounds or cancel the Attack's Effect.
When reducing Wounds, player may ignore 1 heavy wound for each 2 cards in their hand (rounded down, discarded Block card does not count) or 1 light wound for each card in their hand. These effects can be combined.
When cancelling the Strike's Effect, simply ignore its text and Wounds in the Effect's frame. No additional requirements are needed.
Please note that you can discard 2 cards with the Block symbol to ignore both Wounds and Effect of an Attack.
Only Attacks of Strike type can be Blocked this way. Players can never Block Abilities, Reactions, K.O. effects and any other Wound sources in any way!
Knockdown Test
Set a timer to 10 seconds. Get ready. Let your opponent start the timer and countdown to 0 loud. You must build a tower from all your wound cubes when your opponent is counting. The tower must be built in a way that only one cube touches the table surface and no cube touches more than two other cubes. If the tower is ready and able to stand on its own - test ends and the game progresses. However you discard half of your light wounds, rounded down. If the timer hits 0 and the tower is still not ready - your opponent wins this round by KO!
Knockdown Test - Dice Variant
If you do not want to play with the dexterity-based Knockdown test, or if it becomes impossible to perform the test with cubes, you may use this luck-based variant instead:
Roll three dice and sum up their values. If the sum is greater than, or equal to, the total number of your fighter's wounds, you passed. Discard half of your fighter's light wounds, rounded down, and the match continues. If the sum is lower than the total number of your fighter's wounds, you failed, and your opponent wins this round by K.O.!
End of the Round
The round ends whenever a Knockdown Test fails, or when the Attack Row cannot be filled because the Attack deck runs out of cards.
Failed Knockdown Test
The player who fails their Knockdown Test is the loser and the player who dealt the final blow is the winner of the round.
No Cards in the Attack Deck
- The player with the fewest heavy wounds is the winner of this round.
- If there is a tie, the player with the fewest light wounds is the winner of this round.
- If there is still a tie, the player who is starting their turn is the winner of this round.
If the winner of this round already has a Victory Token, this player wins the match! Otherwise, this player takes one Victory Token, and the match continues to the next round. The loser of the round reveals the other Skill card they selected at the beginning of the game. This means players may have more than one active Skill card in play at the same time.
Next Round
- Both players discard their wound cubes and any Attack cards remaining in their hand.
- Reset fighter miniatures on the Arena starting spaces.
- Shuffle all Attack cards to create a new Attack deck. Then, refill the Attack Row.
- The player who lost the previous round is the first player and reveals their second Skill card.
Additional Rules
Range Types
- Range 2 - Fixed range of 2 spaces.
- Range 1-3 - Range of up to 3 spaces.
- Range Projectile - Projectile range. Unlimited, but spaces must be in a continuous straight line starting from your fighter's space.
Attacks with no range type specified have unlimited range.
Blink - A type of movement that allows a fighter to move through an opponent's space. For example, "Blink 2 spaces" makes it possible to "jump" behind your opponent.
Backward - Moves an opponent directly away from your fighter.
Forward - Moves your fighter directly towards your opponent.
Starting Spaces - Arena spaces marked in red. During setup, each player places their miniature on one of those available spaces.
Two-symbol cards - Cards containing 2 symbols may only be used to pay for a single Special Attack. You cannot use one symbol to pay for 1 Special Attack and the other symbol to pay for a different Special Attack.
Fading Menhir - Beside the Tainted Grail Arena is a Menhir, whose magical powers are rapidly dwindling. During setup, 4 special Candle cards were shuffled into the Attack deck. When you draw the first Candle card, discard it immediately and draw the next Attack card to fill the Attack Row. Then, place 1 Candle token in each of the circular slots under the Arena's outer edge spaces. Each time you draw an extra Candle card, discard it and move both Candle tokens 1 space towards the center of the Arena. When a fighter ends their turn on a space above a Candle token, or on a space that is further from the center of the Arena than a Candle token, that fighter suffers 1 heavy wound.
Merging Knockdown Boxes
Each Box of Knockdown has a set of tokens, representing particular fighters, skill sets and arenas: Fighter tokens, Skill set token, Arena token.
These tokens help to randomize games in case of owning more than 1 box of Knockdown. If you want to mix content of different Knockdown boxes during a single game, shuffle appropriate tokens face down and pick fighters, a skill set and an Arena randomly.
Keep in mind that the Tainted Grail Arena must be played according to the Setup in this manual, with Tainted Grail Attack card deck, 4 Candle cards and 2 Candle tokens.
Nemesis Box: Differences
The Nemesis box rulebook is otherwise identical to the rules above. Box-specific differences:
- Fighters: James, Puppy, Katie (classes such as Captain). Fighter Sheets use Ammo tokens (for example, Suppressive Fire: you may discard any number of Ammo tokens to move 1 space for each discarded token; Reload: gain 1 Ammo token, and you may discard any number of cards with the Dash symbol to gain 1 additional Ammo token for each discarded; Order: move your opponent by 1 space, then they reveal 2 Attack cards from their hand and you discard 1 of them).
- Box content: 3 Fighter miniatures, 3 Fighter Sheets, Fighter Help and Player Help cards, 36 Attack cards, 3 Contamination cards, 12 Skill cards, 1 Flame token, 6 Ammo tokens, 5 Randomizer tokens, 3 Victory tokens, 3 dice, 25 Heavy and 25 Light Wound cubes, Game Arena (the box).
- Setup: do not shuffle Candle cards into the Attack deck (there are none); the Setup is otherwise the same. Starting spaces are marked in green.
- Technical Corridors (replaces Fading Menhir): In the Nemesis Arena, red spaces are spaces with Technical Corridor entrances. All of these spaces are connected to each other. While it is possible to move between them, there is a high price to do so! Whenever a fighter moves from one space to another one, using Technical Corridors, they suffer the wound shown next to the space they move to: 1 light wound for moving to the center space and 1 heavy wound for moving to one of the outer edge spaces. NOTE: Movement through Technical Corridors is not an action! A fighter may use Technical Corridors freely during their turn, but not:
- before resolving effects "at the beginning of your turn"
- during resolving an Action (i.e. in between Special Attacks during Combo)
- after resolving their second action.
- Merging boxes: the Nemesis Arena must be played according to the Setup in the Nemesis manual, and with the Nemesis Attack card deck.
Siege Storm Box: Differences
The Siege Storm box rulebook is otherwise identical to the rules above. Box-specific differences:
- Fighters: Veroth, Xin'Go, Driana. Example (Veroth, Berserk): Fists of Fury (Strike); Berserk Strike (Strike) - inflict 1 wound for each symbol you have, or inflict 1 for every other symbol you have; Grasp of Fury (Reaction) - when your opponent moves (as an action or Dash), cancel this movement; Double Block (Reaction) - after your opponent attacks you, ignore the entire Attack Sequence (Wound Pool and Attack Effect, including Ability type attacks).
- Box content: 3 Fighter miniatures, 3 Fighter Sheets, Fighter Help and Player Help cards, 36 Attack cards, 12 Skill cards, 4 Trap tokens, 5 Randomizer tokens, 3 Victory tokens, 3 dice, 25 Heavy and 25 Light Wound cubes, Game Arena (the box).
- Setup: no Candle cards; the Setup is otherwise the same. Starting spaces are marked in orange.
- Special cost symbol: a Special Attack cost marked with the special icon may be paid by spending a card with one symbol or a card with another symbol (an alternative-payment icon shown in the Additional Rules; the two symbols are printed icons).
- Dangerous Edges (replaces Fading Menhir): If a fighter standing on a Dangerous Edge space is attacked by a fighter in an adjacent space, add one heavy wound to the attack's Wound Pool when resolving the Attack Sequence.
- Merging boxes: the Siege Storm Arena must be played according to the Setup in the Siege Storm manual, and with the Siege Storm Attack card deck.