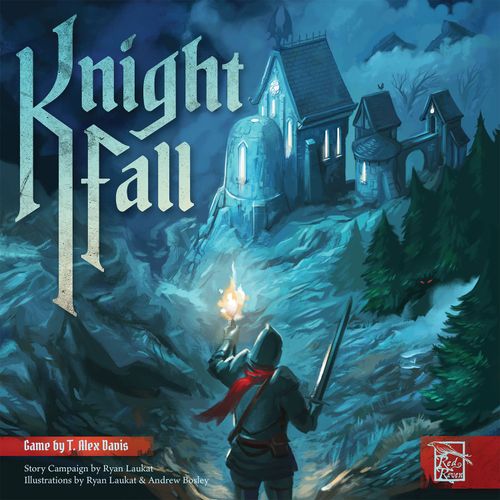
Knight Fall
Knight Fall Rulebook
Table of Contents
Table of Contents
- Ways to Play
- Components
- Setup
- Overview
- Playing the Game
- Actions
- Knight, Demon Powers & Magic Abilities
- Engagement
- Terms
- Minions and Minor Actions
- Elders
- Death
- Defense
- End of Round and Game End
- Scoring
- Location Tiles
- Player Count Clarifications
- Cooperative Mode
- Campaign Mode
- Variants
- Strategy Tips
- Quick Reference
Ways to Play
There are three ways to play Knight Fall: Standard, Cooperative, or Campaign.
Standard: 2 to 6 players face each other in a team vs. team battle for the abbey. One team controls the demons, eager to destroy the elders that have the power to close the portal and banish the demons to their dark plane of existence. The other team controls the knights, desperate to defeat the demons and protect the elders. Game time: 45-60 minutes.
Cooperative: 1-3 players work together to protect the abbey from invading demons. This mode works exactly like standard mode except that the players only control the knights, while the demons are controlled by a deck of cards. In addition to reading the standard game rules, you must read the cooperative mode rules. Game time: 45-60 minutes.
Campaign: 1-2 players work together to explore a map and read stories in a short campaign, collecting relics and rescuing villagers in small skirmishes before the final battle against the demons. This mode uses the cooperative mode rules with some slight changes. The storybook for this mode is in the last part of the rulebook. In addition to reading the standard rules, you must read the cooperative rules and the campaign rules. Written and designed by Ryan Laukat. Game time: 3-4 hours.
Components
Character Standees
- 9 Knights
- 10 Demons
- 4 Imps
- 4 Stone Golems
- 4 Bone Crawlers
- 8 Elders
- 2 Slag Golems
- 2 Ice Golems
Wooden Tokens
- 6 Heart Tokens
- 3 Defense Tokens
- 1 Ice Token
- 1 Demon Victory Point Marker (purple), 1 Knight Victory Point Marker (white)
Plastic
- 44 Stands
- 8 Elder Health Trackers
Cards
- 58 Knight Power
- 62 Demon Power
- 6 Basic Action
- 24 Cooperative
- 9 Villager
- 8 Relic
- 12 Player Aid Cards
- 9 Knight Character
- 10 Demon Character
- 1 Victory Point Track Card
Cardboard Tokens
- 2 Fire Halos, 3 Portals, 1 End of Round token
- 9 Location Tiles
Campaign
- Pad of Campaign Maps
Setup
This is setup for the standard and cooperative modes. If setting up a game for campaign mode, see the Campaign Mode section.
- Randomly arrange the 9 location tiles into a 3x3 grid with the seal location tile in the center. Put all character and minion standees in plastic stands and place them nearby.
- Place the victory point track card near the board. Place each team's scoring marker on the indicated space on the path: demons on the demon symbol on the first space of the path; knights one space ahead on the knight symbol.
- Place 1 elder in each location tile except the seal tile. Place a health tracker on the 6 heart of each elder standee, indicating that the elder starts with 6 health.
- Shuffle the knight and demon power card decks separately and place them, face down, in reach of all players. Shuffle the knight and demon character card decks separately and place them, face down, in reach of all players. Give each player 1 basic action card. Place the player aid cards nearby for easy reference during the game.
- Divide the players into 2 equal or near-equal teams (1 vs 1, 2 vs 1, 2 vs 2, etc., but never 3 vs 1, 4 vs 2, etc.). One team plays the knights and the other team plays the demons.
- Choose characters as follows:
- 2 players: Each player draws 3 random character cards from their team deck and chooses 2 of them. Each player controls 2 characters throughout the game.
- 3 players: For the team with 2 players, each player draws 2 random character cards from their team deck and chooses 1. For the team of 1, the single player must control 2 characters, so they draw 3 character cards from their team and choose 2 (this player controls 2 characters throughout the game).
- 4 and 6 players: Each draws 2 random character boards from their team deck and chooses 1.
- 5 players: The team of 3 must play demons. Each player (knight and demon) draws 2 random character cards from their team deck and chooses 1. Note: to make these teams balanced, during the game, the knight team gains 4 stone golems at the end of each round instead of the normal 1 golem.
- After players have chosen their knight or demon, shuffle the remaining unchosen knight/demon cards back into their respective decks.
Overview
Game Objective
The first team to get their scoring marker to the monastery door space at the end of the victory point track wins the game.
Knights get 1 point each time they kill a demon and 1 point at the end of each round. Once their marker reaches the door, they have survived the night and are saved by the rising of the sun.
Demons get 2 points each time they kill an elder and 1 point each time they kill a knight. Once their marker reaches the door space, the seal breaks, and their demon armies can flood into the world.
The demons need 10 victory points to win, while the knights need 9 victory points to win.
"Fear No Evil" Variant: Once all players are very familiar with the game, the knight scoring marker should start on the same space as the demons.
Game Structure
Starting with the first character (a demon always goes first), each character takes a turn in alternating turn order: demon, knight, demon, knight, etc. Even if a player controls 2 characters, they take each character's turn in the correct, alternating turn order. Once each character has taken 1 turn, teams resolve the end-of-round phase. Then they start a new round. Character turn order does not change. Each character gets only 1 turn each round. Play continues until one team's scoring marker reaches the monastery door space on the victory point track, at which time that team immediately wins the game.
Playing the Game
Game Turns
On your turn, play or discard each of the cards in your hand in any order, including the basic action card. At the end of your turn, pick up the basic action card and draw 3 new cards from your team's power deck so that you have 4 cards in hand (always 3 from the deck and your basic action card). Play then passes to the left. On your turn, you play 3 power cards and your basic action card.
Playing Your Cards
Each power card can be played in one of three ways:
- Play the card to use the primary ability written in the text at the bottom of the card,
- Play the card to use the secondary ability displayed in symbols on the top half of the card, or
- Play the card as a minor action. This means discarding the card and taking any 1 of the six actions displayed on the back of the card.
The basic action card is more limited; it can only be played for 1 move action, 1 heal action, or 1 magic.
Whenever you play a power card, you must decide whether to use its primary ability (bottom of the card), its secondary ability (top of the card), or a minor action (1 action from the back of the card).
Primary Abilities
Primary abilities are written in the text at the bottom of the card. Follow any instructions written, then discard the card. If you choose to play a card for its primary ability, you must resolve it before playing another card. There are two types of primary abilities that require a little more clarification:
Seal/Mark: If an ability is labeled seal or mark, then you play it by placing it face up in front of your character, granting them the ongoing benefit described on the card. Each character may only have one seal/mark in play at a time. To play another, you must first discard the current seal/mark card. When a character dies, discard any seal/mark they have. Any seals/marks currently in play do not count towards your hand size.
For more primary ability clarifications, see the Terms section.
Secondary Abilities
To play a card for its secondary ability, take one or both of the actions shown on the top of the card, then discard the card.
You may resolve the actions together or separately. For example: if you play a card with two heal symbols, you may use both to heal your character 2, or you may use 1 to heal your character and 1 to heal an ally.
You may not play another card in the middle of the two actions (they must be resolved before playing another card). For example: you may not play a card with two move and another card with two melee to move your character once, deal two melee damage, then move again.
Note: You must play or discard all of your cards each turn.
Minor Actions
To play a card as a minor action, discard it to take any 1 of the actions shown on the back of the card. Available minor actions are slightly different for knights and demons. You may combine minor actions from multiple cards. For example: you may play two cards as minor magic actions to use your character's magic ability once.
Basic Action Card
Your basic action card cannot be played as a minor action. You may simply play it as 1 move action, 1 heal action, or 1 magic. If you play it as magic, you must combine it with another minor action to activate your magic ability (activating a magic ability always requires 2 magic). At the end of your turn, this card always returns to your hand.
Card Rule Conflicts
Many cards and abilities break the regular rules. In case of a conflict, the card/ability that is most specific takes precedent.
Reshuffle
If a card deck runs out, shuffle the discard pile to make a new draw deck.
Actions
Each of the following symbols represents an action. If you play a card with multiple symbols, then you take a number of actions equal to the number of symbols, with one exception: Magic abilities require 2 magic symbols to activate.
- Melee: Deal 1 damage to 1 close enemy.
- Ranged: Deal 1 damage to 1 adjacent enemy.
- Move: Move your character to an adjacent location tile.
- Heal: Heal 1 to yourself or a close ally.
- Magic: For every 2 magic symbols played, use your character's magic ability once. A single magic symbol has no effect by itself.
- Defend: Gain 1 defense (move up 1 on your defense track). These can be used later to defend against attacks. (This action is only available to the knight team. See the Defense section.)
- Command: Command 1 close or adjacent imp to either move 1 or melee 1. When using more than 1 command symbol, you may use each symbol on a different action and/or on a different imp. For example: if you play 3 command symbols, you may move 1 imp, then move and melee with another imp. You may also use 2 command to place a new imp on the seal room (regardless of your location). (This action is only available to the demon team.)
Knight, Demon Powers & Magic Abilities
Each knight or demon has a magic ability unique to them. To use it, you must play 1 or more cards with a total of 2 magic symbols. If you have the cards to do so, you may use this ability more than once per round.
Each knight or demon also has an ongoing power which is unique to them. This power applies as long as that character is in play.
For character magic ability and power clarifications, see the Terms section.
Slow
When a character is slowed, randomly choose 1 card (not the basic action card) from the player who controls that character. They must place the card face down and may only use it as a minor action on their next turn. Each player may have a maximum of 1 slowed card. Players cannot slow minions or elders. If an elder is attacked with a slow effect and a knight takes or blocks the damage, the knight takes the slow effect.
Cooperative Mode: If a demon is slowed in cooperative mode, they instead take 1 extra damage.
Additional character clarifications
- Blood Shade: Start with 6 health.
- Flame Knight: The halo of fire is removed from the board at the beginning of your next turn.
- Frozen Lurker: You may discard a card on your turn to gain 2 more ice (not on another player's turn).
- Imp Lord: When you activate Shackled Souls, any excess damage dealt to the imp is lost.
- Phase Knight: When the phase knight is killed, any portals on the board remain.
- Wrath Knight: When activating retribution, you may deal 2 damage to a close or adjacent enemy. If this kills the current active player, that player immediately spawns a new demon and plays their remaining action cards.
Engagement
Whenever you are close to (in the same location tile as) an enemy and you move to a new tile, you must take damage to "disengage". Each time you move, take 1 damage per enemy on the tile you're moving from. (Exception: elders deal no disengagement damage.) You may pay defense to block this damage. Engagement only applies when it is your turn. It never applies when an ability used by another character moves your character or when you use defense on another player's turn to move.
Cooperative Mode: Engagement does apply to demons when they move because they're instructed to by a cooperative card.
Terms
Enemy: Any unit on the opposing team.
Ally: Any unit on your team, including demons/imps/bone crawlers (for demons), and knights/golems/elders (for knights). A character doesn't count as their own ally.
Minion: Minions only include imps, bone crawlers, and golems. They do not include elders, knights, or demons.
Positioning is vital to each action. Use the following terms to determine the position of location tiles and units.
Adjacent: On any location tile which shares an edge with your location tile. Adjacent does NOT include close units.
Diagonal: On a location tile that shares a corner with your location tile and which does NOT share an edge.
Close: On the same location tile.
Minions and Minor Actions
Imps, bone crawlers, and all types of golems count as minions. Elders do not count as minions. Minions are controlled by their team unless the minion is spawned and/or controlled by a specific character.
Minion supplies are intentionally limited. Once the standees of one type run out, that minion is no longer available.
All minions have 2 health, except bone crawlers, which have 1. If a minion takes 1 damage, lay them down to show they have 1 health left (it can still take actions). When a minion takes a total of 2 damage, remove it from the board. When a bone crawler takes 1 damage, remove it from the board.
Minions are limited to minor actions, which are: move, heal, and melee. Minions may only heal themselves.
Teams score no points for killing minions.
Imps and Stone Golems: Imps and stone golems take 2 minor actions during the end-of-round phase. If wounded, they must heal themselves first before taking any other actions. Their controlling team decides together which actions they use.
Ice and Slag Golems: Ice and slag golems take 2 minor actions at the beginning of the Ice Knight or Earth Knight's turn respectively. Even if the Ice Knight or Earth Knight is killed, ice and slag golems stay in play until defeated and continue to take 2 minor actions at the beginning of the player's turn who initially placed them on the board.
Bone Crawlers: Bone crawlers take 1 minor action at the beginning of the Bone Crusher's turn. When the Bone Crusher is killed, all bone crawlers are killed immediately.
Elders
Elders each have 6 health. When an elder's health is reduced to 0, they have been killed and are removed from the board. Demons score 2 points each time an elder is killed.
Elders take no actions or turns, they do not engage, and they do not take engagement damage. However, elders can be moved by card and character abilities.
Important: Elders close to (on the same location tile as) a knight are 'guarded' and cannot be the target of an attack as long as the knight remains close (on the same location tile). This means any damage dealt by the demon team on that location tile must be taken by the knight if possible. However, guarded elders can still take damage from attacks that damage "all enemies" on a location tile.
Death
When your knight or demon takes damage equal to their health, your character has been killed and the following happens:
The opposing team scores 1 point.
Discard any mark/seal from the character. Remove the standee and character card from the game. Draw a new character card at random from your team's stack and mark their starting health (the light number). Keep your hand of cards (including any slowed cards). If you are playing a knight, start with 1 defense.
Your new character goes into the turn order in the same place as the character that was killed. On that character's next turn, place the new character standee on the board. If it's a demon, place it on the seal location tile. If it's a knight, place it on any corner location tile (even if it is occupied). Then, take your turn as normal.
If a player controls 2 characters, they may not rearrange the turn order when one is killed. Turn order remains the same throughout the game.
Minions/Token Effects when a character dies:
- Imp Lord: Imps remain on the board after the Imp Lord is killed.
- Ice Knight: Ice golems remain until defeated.
- Bone Crusher: Bone crawlers are immediately killed when the Bone Crusher is killed.
- Phase Knight: Portals remain after the Phase Knight is killed.
- Earth Knight: Slag golems remain until defeated.
- Flame Knight: Fire tokens remain until a new character is placed on the board to replace the Flame Knight.
Defense
Knights use defense to block damage from attacks to themselves or their close or adjacent allies.
If a knight has 1 or more defense and is the target of an attack, they can use any number of defense to block 1 damage per defense spent.
Defending Allies
If a knight has 1 or more defense and a close or adjacent ally is about to take damage (on the knight's tile or an adjacent tile), they can choose to defend as a reaction.
To defend an attack against an ally, declare that you are defending the attack, then move into the target's location tile (if you are not already there). Only 1 defense is necessary to defend an attack, but you can use as much as you have available on your defense track. You take any damage that was aimed at the ally, minus any defense you use. Each defense you use reduces the damage by 1. For each defense you use, indicate the amount on your defense track.
Example: The Flame Knight chooses to defend an adjacent elder against an attack with "Disintegrate" which deals 4 ranged damage. First, the Flame Knight moves to the elder's location. The Flame Knight only has 2 defense and uses them both so he blocks 2 damage and takes 2 damage. The elder takes none.
Example 2: The Storm Fiend uses lightning blast, dealing 1 damage to an elder and 1 damage to the Seer Knight on his tile and 1 damage to 2 elders on an adjacent tile. The Seer Knight has 4 defense, but since she can only defend allies on a single tile she moves to the adjacent tile and spends 3 defense blocking the damage to her and the 2 elders. The elder close to the storm fiend takes 1 damage.
Important: Elders close to (in the same location tile as) a knight are 'guarded' and cannot be the target of an attack as long as the knight remains close. This means any damage dealt by the demon team in that location tile must be taken by a knight if possible. A knight does not need to use defense to take damage for an elder (the knight simply loses health in place of the elder's health). If there are multiple knights, the knight players decide which knight takes the damage for each attack.
Exception: Elders can still take damage from attacks that damage "all enemies" in a location tile even if a knight is present. If a card is played to attack all enemies, knights and elders and minions on the same location tile each take their own damage. Keep in mind that a knight can use defense in this case to reduce damage to 1 or more elders (the knight uses 1 defense per damage), as long as the elders are on the same tile. Note: This type of damage is first dealt to knights, then elders. This means if a knight starts in the affected tile, they take their own damage first, then take damage for others. If a knight starts outside of the affected tile(s) and spends a defense to move in, they take damage for the elder but don't take their own damage.
End of Round and Game End
End of Round Token
This token sits between the last and first characters/players, reminding the group to resolve the end-of-round phase before starting another round of play.
The end of round phase occurs immediately after the last character's turn and before the first character's turn in each round.
Turn order stays the same for the entire game.
End of Round Phase
- Knights gain 1 point.
- Stone golems (if any) take 2 actions.
- Imps (if any) take 2 actions.
- The knight team places a new stone golem (if available) on any corner location tile.
- The demon team places a new imp (if available) on the seal location tile.
Game End
The game ends immediately when one team's victory point marker reaches the end of the track (the door).
Scoring
Knight Victory Points
The knights score 1 point each time a demon player is killed.
The knights score 1 point during each end-of-round phase.
If the knights' scoring marker reaches the monastery door first, this means the knights have lasted until morning and win the game!
Demon Victory Points
The demons score 2 points each time an elder is killed.
The demons score 1 point each time a knight is killed.
If the demons' scoring marker reaches the monastery door first, this means they have broken the seal and win the game!
Location Tiles
There are 9 location tiles that form the board. Use the abbey side of the tiles for the standard game. The outside (forest) tiles are used in the campaign (these are indicated with an "r" after the letter in the corner).
The seal location tile is always placed in the center, the other 8 are chosen at random.
Movement between location tiles is orthogonal only and not diagonal unless a card or ability specifies.
Advanced Location Effects: For your first few games, do not play with any location tile effects (ignore them on the tiles). For future games, you may decide whether or not to use the location bonuses when setting up the game.
Sewer Location Tile Effect: Continue to treat this tile generally as if it were 1 location (for ranged attacks and abilities, for example). However, when you are on this tile, you must treat it as two spaces. You may only use melee attacks against enemies on your same side, and you must use 1 movement to cross the water. You may attack enemies on the other side of the water with ranged attacks. Ranged attacks from adjacent tiles can target any enemy in the tile. Disengagement damage applies when moving across the water. If an enemy uses an ability to move you out of this tile, ignore the water border. If playing cooperative mode, enemies ignore the water when moving.
Shadowy Nook Tile Effect: When you enter this tile, if at least 1 enemy is there, you take 1 damage.
Magic Orb Tile Effect: This allows you to discard 1 card to gain 2 magic. You can only activate this once per turn. You can discard your basic action card.
Player Count Clarifications
1-Player Game
1 player plays 2 knights. There are 2 demons controlled by the cooperative cards. 1 demon takes a turn at the start of the first knight's turn, and the other demon takes a turn at the start of the second knight's turn.
2-Player Game
1 player plays knights and 1 player plays demons. Each player controls 2 different characters from the same team.
Each player has a single hand of cards to use. Draw a new hand for each character's turn.
Play rotates between players and characters in alternating order: demon, knight, demon, knight. A demon always goes first. Players must decide turn order for each specific character and that order remains through the entire game. For example: first turn, Bone Crusher; second turn, Holy Knight; third turn, Feral Reaver; last turn, Seer Knight; end-of-round phase; first turn of next round, Bone Crusher; and so on.
3-Player Game
Divide into 1 team of 2 players and 1 team of 1 player. Decide which team will play knights and which will play demons. Each player on the 2-player team draws 2 character cards at the beginning of the game and chooses 1. The player on the team of 1 draws 3 character boards and chooses 2.
Play rotates between players and characters in alternating order: demon, knight, demon, knight. A demon always goes first. Players must decide turn order for each specific character and that order remains through the entire game. For example: first turn, Bone Crusher; second turn, Holy Knight; third turn, Feral Reaver; last turn, Seer Knight; end-of-round phase; first turn of next round, Bone Crusher; and so on. The player who controls 2 characters will only hold a single hand of cards at a time, even though they control 2 characters. Draw a new hand for each character's turn.
5-Player Game
In a 5-player game, divide into one team of 3 and one team of 2. The 3-player team must play demons. The 2-player team must play knights. Each player draws 2 character cards from their team and chooses 1.
Play rotates between players and characters in alternating order: demon, knight, demon, knight. A demon always goes first. Players choose turn order for each character and that order remains through the entire game. For example: Bone Crusher first; Holy Knight second; Feral Reaver third; Seer Knight fourth; Blood Shade fifth; end-of-round phase; Bone Crusher first; and so on.
During the end-of-round phase, the knights gain 4 stone golems instead of 1.
Cooperative Mode
When playing cooperative mode, 1-3 players play as knights against a team of AI-controlled demons. The demons' actions are dictated by cards drawn from the cooperative deck. All rules are the same as standard mode, with these changes:
-
Setup: Each player chooses 1 knight from 2 drawn (for 2-3 players) or 2 knights from 3 drawn (if playing solo). Then, each player draws 1 demon card and places it to the left of their knight card (if playing solo, place a demon to the left of each knight). Do not use demon power cards, but keep track of demon health. Choose where to place the imps as if you were a demon player. Place the end of round token after the last player's knight. Play with the "Fear No Evil" variant.
-
When it's your turn, the demon to the left of your knight takes a turn first. Each cooperative card has a primary action at the top and a secondary action at the bottom (upside down). Draw one card and place it so the primary action is at the top, then draw another card and place it so the secondary action is at the top. Perform the first card's primary action, then perform the next card's secondary action (ignore the upside-down text on both cards). When the text says "you" it means the demon. After completing the demon's actions, take your normal turn with your knight.
-
When a demon is killed, draw a new demon immediately. At the start of the next player's turn, place the new demon on the portal tile.
-
Target Hierarchy: When the cooperative cards instruct you to move or attack with a demon, the demon moves towards or attacks the closest enemy (elder, golem, or knight). If there are two enemies at the same distance, the demon moves toward/attacks the enemy that is highest on the target hierarchy: 1st) Undefended Elder, 2nd) Defended Elder, 3rd) Knight with less than 3 combined health/defense, 4th) Golem, 5th) Knight. This means that if the demon is instructed to attack or move, and there is an elder and a knight at the same distance, the demon attacks/moves toward the elder. If you're instructed to move, you MUST move (unless otherwise stated), even if you're already on a tile with an undefended elder. Follow the target hierarchy for each movement point. Do not return to tiles you've already moved to in the same turn if possible. If tied on the hierarchy, choose the target with the lowest health. If still tied, choose the target with the fewest close/adjacent allies. If still tied, the players choose.
Clockwise Movement: Many cooperative cards instruct you to move a figure clockwise or counterclockwise. If you're in the center of the board, first move out of the center based on the target hierarchy. Then move in a clockwise (or counterclockwise) direction, ignoring target hierarchy. Follow the outer edge of the location tiles. Campaign Mode: if there is a dead end, move to it, then return to the previous space (if you have multiple movement).
Desperate Variant: 4 of the elders start with only 5 health (you choose). Knights start with no golem, and demons start with 1 extra imp.
Cooperative Mode Clarifications
- Imps: At the end of each round, Imps perform their 2 actions following the target hierarchy.
- Frozen Lurker: Always blocks with ice if able.
- Imp Lord: Always activates Shackled Souls if able.
- Bone Crusher: Activates shatter when killed.
- Dread Mistress: Activates Petrifying Gaze after moving (players choose whether to slow a close knight or deal damage to a golem).
- Horned Demoness: Activates her Malevolence at the end of her turn.
- Molten Scion: Deals 1 damage to all enemies and loses 1 health each time it moves to a new tile.
- Soulstealer: After taking the actions described on the cooperative mode cards, it takes 1 extra move action. It should move based on target hierarchy, and players choose if there's a tie.
- Storm Fiend: His passive ability does not function in cooperative mode.
- Blood Shade: If the cooperative mode cards move the Blood Shade, the Blood Shade takes 1 extra move action at the end of her turn. She should move based on target hierarchy, and players choose if there's a tie.
- Feral Reaver: At the end of the turn, heal 1. If at full health, move 1.
- Coop Card "Respawn": When instructed to spawn a new demon, draw a new card from the demon character deck. Replace the active demon with the newly drawn demon, matching the current health of the active demon (unless the active demon's current health is higher than the new demon's max health, in which case the new demon should start at their max health).
Campaign Mode
Explore the countryside and read from a storybook as you endeavor to rescue villagers before the final battle in the abbey.
To set up campaign mode, follow the standard setup instructions, with these changes:
- Place the location tiles in a pile nearby.
- Shuffle the cooperative card deck and place it nearby.
- Retrieve a page from the campaign map pad. You'll need a pen, pencil, or marker. Write the players' names and the date on the back.
- Return these components to the box: victory point track card, demon power cards, demon/knight victory point markers.
- Write your chosen difficulty and starting elixirs: Easy (7 elixirs), Medium (4 elixirs), or Hard (1 elixir).
How to Play
First, read the introduction from the storybook. After that, players take turns exploring the map and reading from the storybook. On your turn, you may move 0-2 squares and then explore (read a storybook number). You may choose not to explore and move 1 extra square. After moving and exploring, cross off 1 time box on the side of the map.
If a story instructs you to cross off a number on the map, you may not visit it again on a future turn. You can, however, explore a circled number that has not been crossed off.
When the storybook instructs you to gain a keyword, write it on your keyword list. Make sure to follow the correct instructions if you have a specific keyword.
Resources: As you explore, you gain keys, coins, scrolls, and elixirs. Write these on your sheet. When you lose a resource, write the new total on your sheet. Also, at any time, you may purchase a scroll for 5 coins.
Relics: At any time outside of battle or reading from the storybook, you may pay scrolls and/or coins to buy relics. When you buy a relic, mark it on the sheet and retrieve the appropriate card from the relic deck. Relics can each be used once per battle.
Villagers: As you explore, you may find villagers. When you do, mark the appropriate villager on your sheet and retrieve their card from the villager deck. Villagers give passive bonuses that apply as soon as you gain them.
Elixirs: During battle, on your turn, you may lose 1 elixir to restore the health of your knight completely. This is a free action on your turn, but you cannot do it during anyone else's turn.
Defeat: If all of your knights are defeated, you lose the campaign. Add up your final score, according to the scoring instructions below.
Battles
When the storybook tells you there is a battle, you must set up the board and defeat a group of demons. These battles work like cooperative mode, except for a few changes. There are no victory points. To win, you simply must defeat all demons (but not their minions).
When you defeat a demon, only replace it with a new one if there is a "looming" demon (see below).
For each battle, set up the board as indicated in the storybook. If a tile letter has an "r" after it, it means the reverse side of the tile.
When you have defeated each demon, the battle ends, and you keep reading in the storybook. If a knight dies during the battle, write their name under "Fallen Knights" on your campaign sheet and place their character card in the box. You can no longer use them in the current campaign. Draw a new knight to take their place and place the knight on the "starting space" at the beginning of your turn, with 6 health and 1 defense as normal. While defeated knights cannot be used again in the current campaign, defeated demons can be used in other battles in the campaign (they simply retreat, regenerating quickly to fight again).
At the end of each battle: Mark any saved elders on your campaign sheet, discard any equipped seal cards, and reset your active knights' health to 6 and their block to 1.
Campaign Battle Rule Changes
- Imp Spawning: If an ability spawns an imp, place the imp at the demon's location instead of the seal.
- End of Round: Also, the only end-of-round steps you follow are: stone golems take 2 actions, then imps take 2 actions. Ignore all of the other normal end-of-round steps.
- Looming Demons: There should never be more than 2 demons on the board at once. Some battles have "looming" demons, which appear when an active demon is defeated (place the demon on the same tile where the previous one was defeated). If there are no more looming demons, do not spawn another one, simply skip their turn each round.
- Coop Card "Respawn": When instructed to spawn a new demon, shuffle the unused demon cards and draw a new card from the stack. Replace the active demon with the newly drawn demon.
Final Battle
After all time boxes have been marked, you must immediately read the storybook entry for the final battle. The final battle at the abbey begins. Set up the board according to the instructions in the storybook. This time, you draw 7 random demon character cards and must defeat 6 of them to win.
If you win the battle, read the finale and write your final score as indicated in the storybook. Mark any saved elders on your campaign sheet.
If you lose this final battle, your campaign is a failure and the demons conquer the land. When adding up your final score, you lose 30 points.
Final Score
- 2 points per knight still alive.
- 6 points per relic you own.
- 6 points per rescued villager.
- 3 points per rescued elder.
- 1 point per unspent scroll or key.
- 1 point per unused elixir.
- 10 points if playing normal mode.
- 20 points if playing hard mode.
- -30 points if you failed the campaign (the storybook's finale text gives an alternate value of -25 points in one printing).
Score Result
- Less than 50: "Back to the training yard."
- 50+: "A sour victory."
- 75+: "Praiseworthy effort."
- 100+: "Legendary performance."
Variants
Fear No Evil Variant: Once all players are very familiar with the game, the knight scoring marker should start on the same space as the demons.
Desperate Variant: 4 of the elders start with only 5 health (you choose). Knights start with no golem, and demons start with 1 extra imp.
5-Card Variant: Play with this variant if you want to have a little more control over the cards you play. At the start of the game, draw 4 cards from your power deck instead of 3. Including the basic action card, you now have 5 cards in hand. You may only play your basic action card and 3 of your power cards on your turn, keeping 1 power card in hand. At the end of your turn, draw 3 power cards and pick up your basic action cards so you have 5 total cards in hand.
Strategy Tips
Killing minions before they get to take their actions is very important. Do not let the board be overrun by minions as their actions add up quickly.
Demons: Killing elders is more important than killing the other characters.
Knights: Defending elders is vital. It may be tempting to be aggressive and kill demons as quickly as possible, but don't leave the elders undefended!
Quick Reference
Basics
- Turn Order is Demon, Knight, Demon, Knight, etc.
- Demons always start.
- After each character has taken 1 turn, resolve End of Round phase.
Co-op Mode Target Hierarchy
1st) Undefended Elder 2nd) Defended Elder 3rd) Knight with less than 3 combined health/defense 4th) Golem 5th) Knight
If tied, choose the target with the lowest health. If still tied, choose the target with the fewest close/adjacent allies. If still tied, the players choose. When in doubt, choose what would be most beneficial for the demons.
Useful Sections
- Setup
- Overview
- Cards
- Powers & Abilities
- Engagement/Terms
- Minions
- Elders
- Death
- Defense
- End of Round
- End of Game
- Tiles
- Player Count
- Coop Mode
- Campaign Mode